
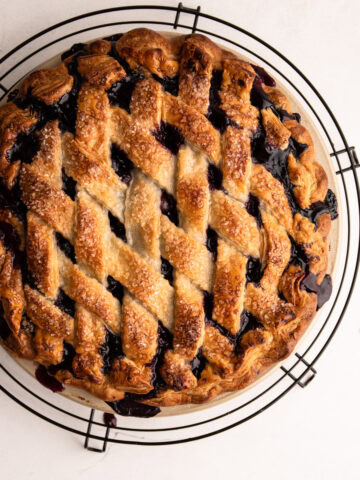
Learn How to Make a Lattice Pie Crust with this easy step-by-step tutorial with expert tips and a video!
Want to save this recipe?
Enter your email & I'll send it to your inbox. Plus, get weekly updates from me!
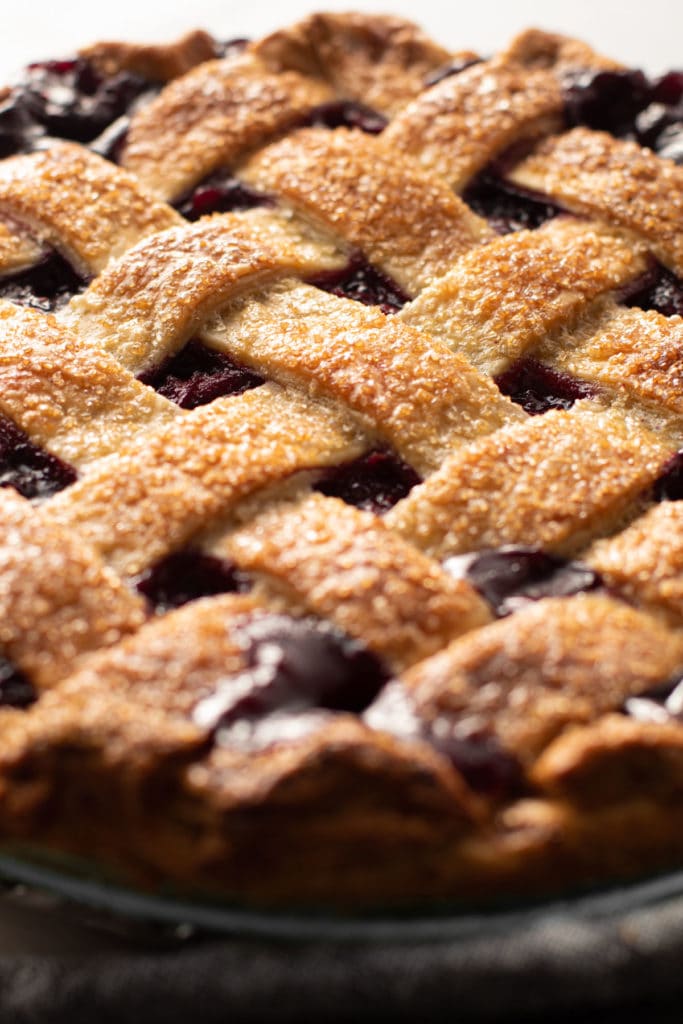
If you want that quintessential, classic Americana finish for your perfect pie, mastering the art of weaving a lattice crust is crucial. While the process might seem daunting at first, it's surprisingly straightforward if you follow a few easy tips and tricks.
Aside from being extremely beautiful, a lattice actually serves a purpose! Some pies, especially fruit pies, need to have a means for the built-up steam from baking to escape. A lattice pie is essentially built-in ventilation!
This lattice tutorial will tell you everything you need to know for success!
So, let's get to making it, shall we? The article below is jam-packed full of useful information. You can jump around using the menu below.
Jump to:
What You Need
There aren't a ton of absolutely essential tools you need to make a lattice that you already won't have if you are planning to make a pie, but there are a few tools that make it an easier task.
- you'll need pie crust (more on this below)
- a ruler (for even lattice strips)
- a pastry wheel (to make it easier to cut the lattice strips)
- a pastry brush (to brush on egg wash for that pretty shine)
Best Pie Dough for a Lattice
Maybe the most important aspect of making a lattice pie crust is starting with a well-made, homemade pie crust! While you can certainly make a lattice with a store-bought crust, you may find it a bit tricky depending on the brand, quality and how thin it is rolled.
If you attempt to make a lattice with poorly made pie crust, it might end up being a losing battle. Your homemade pie crust should be properly hydrated. If it has dry spots, the lattice pieces could easily break apart.
It should be chilled and rested. I recommend resting it overnight for the best outcome.
You can use any of these pie crust recipes to make a lattice:
- Butter Pie Crust made by hand, in a food processor, or a stand mixer
- Sour Cream Pie Crust (this is super tender)
- Flaky Pie Crust
- Pâte Brisée (Shortcrust Pastry)
- Cream Cheese Pie Crust
- Spelt Pie Crust
- Whole Wheat Pie Crust
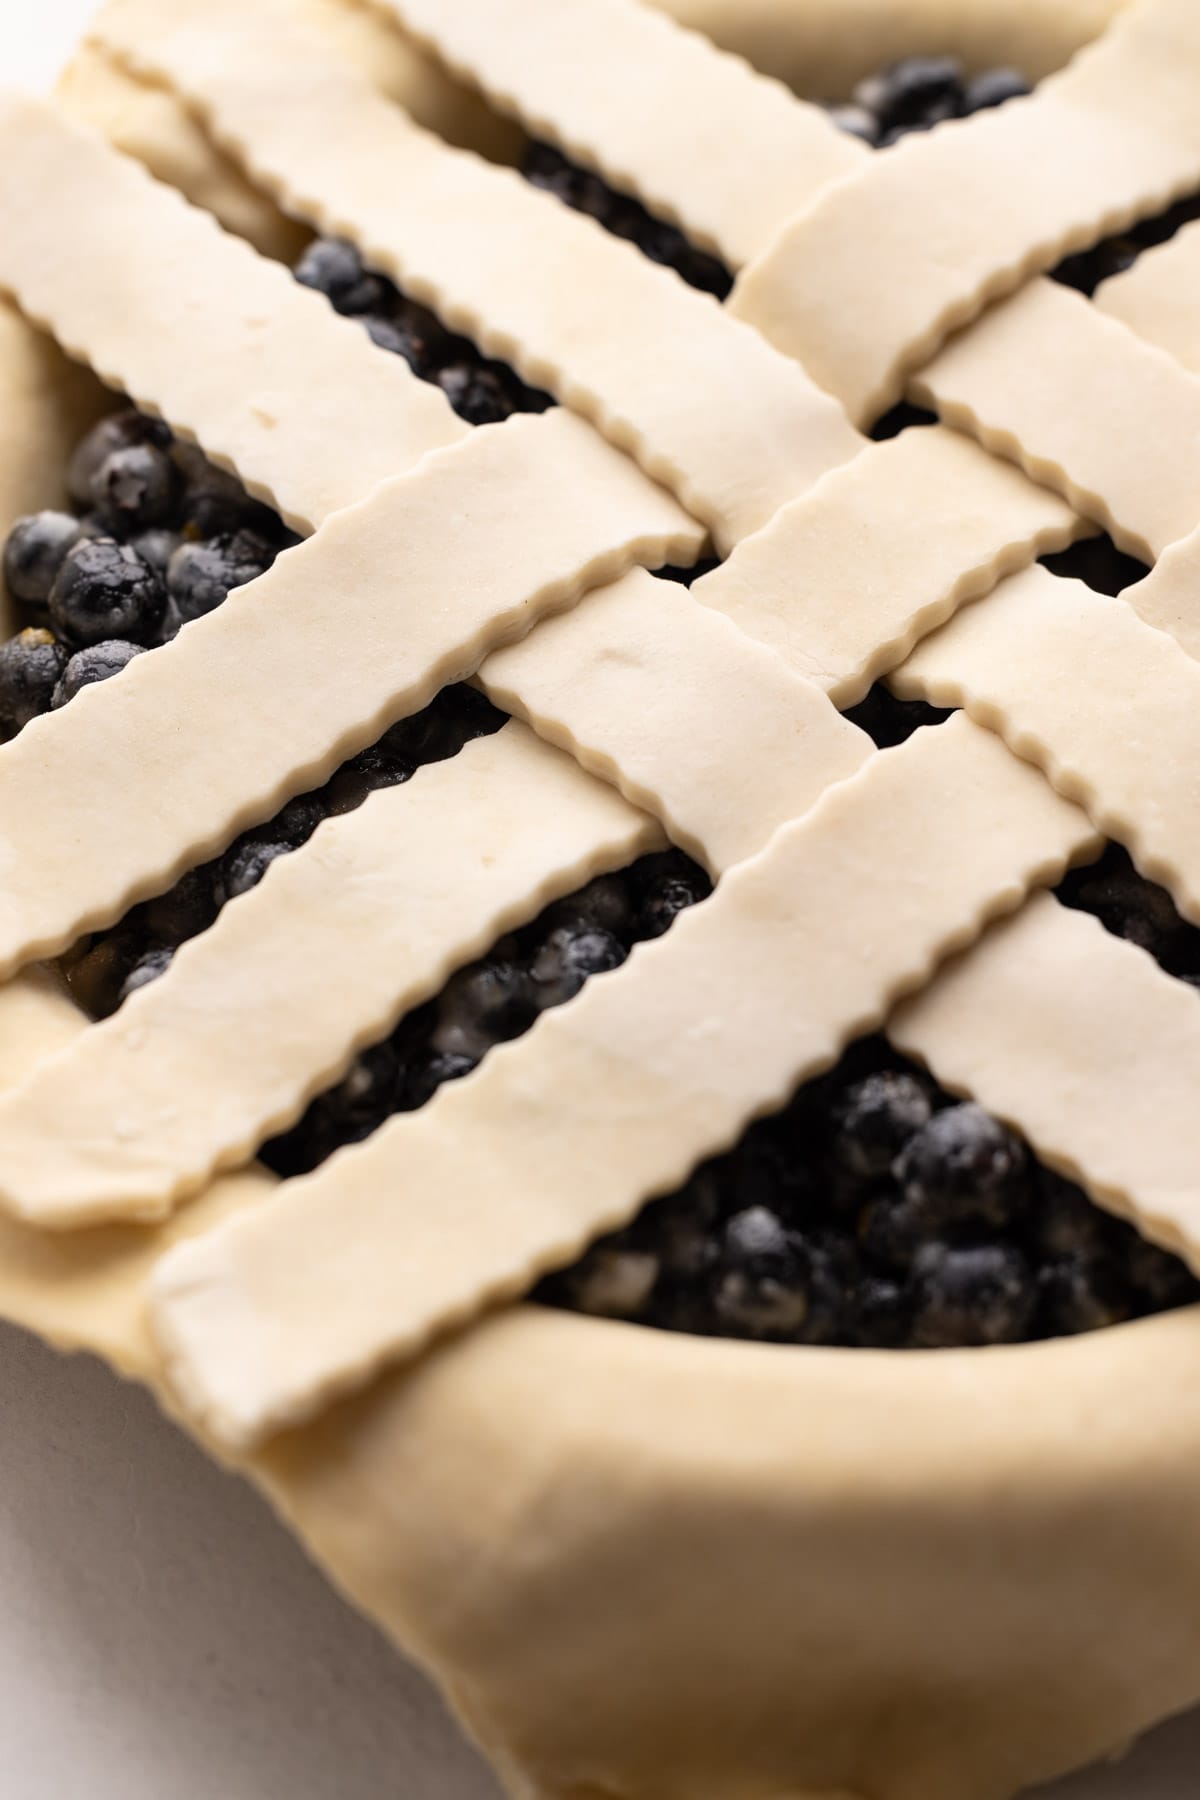
Steps for Weaving a Pie Lattice
Every baker is going to have their own way of making a lattice pie. I didn't realize that my way of making a lattice pie is somewhat unique; a few years ago, somebody saw me making it and told me that they had never seen it done this way before! Of course, I think this is the easiest method to weave a lattice, but do know there are other methods out there.
I like to think of making a lattice this way as building it from the center and out.
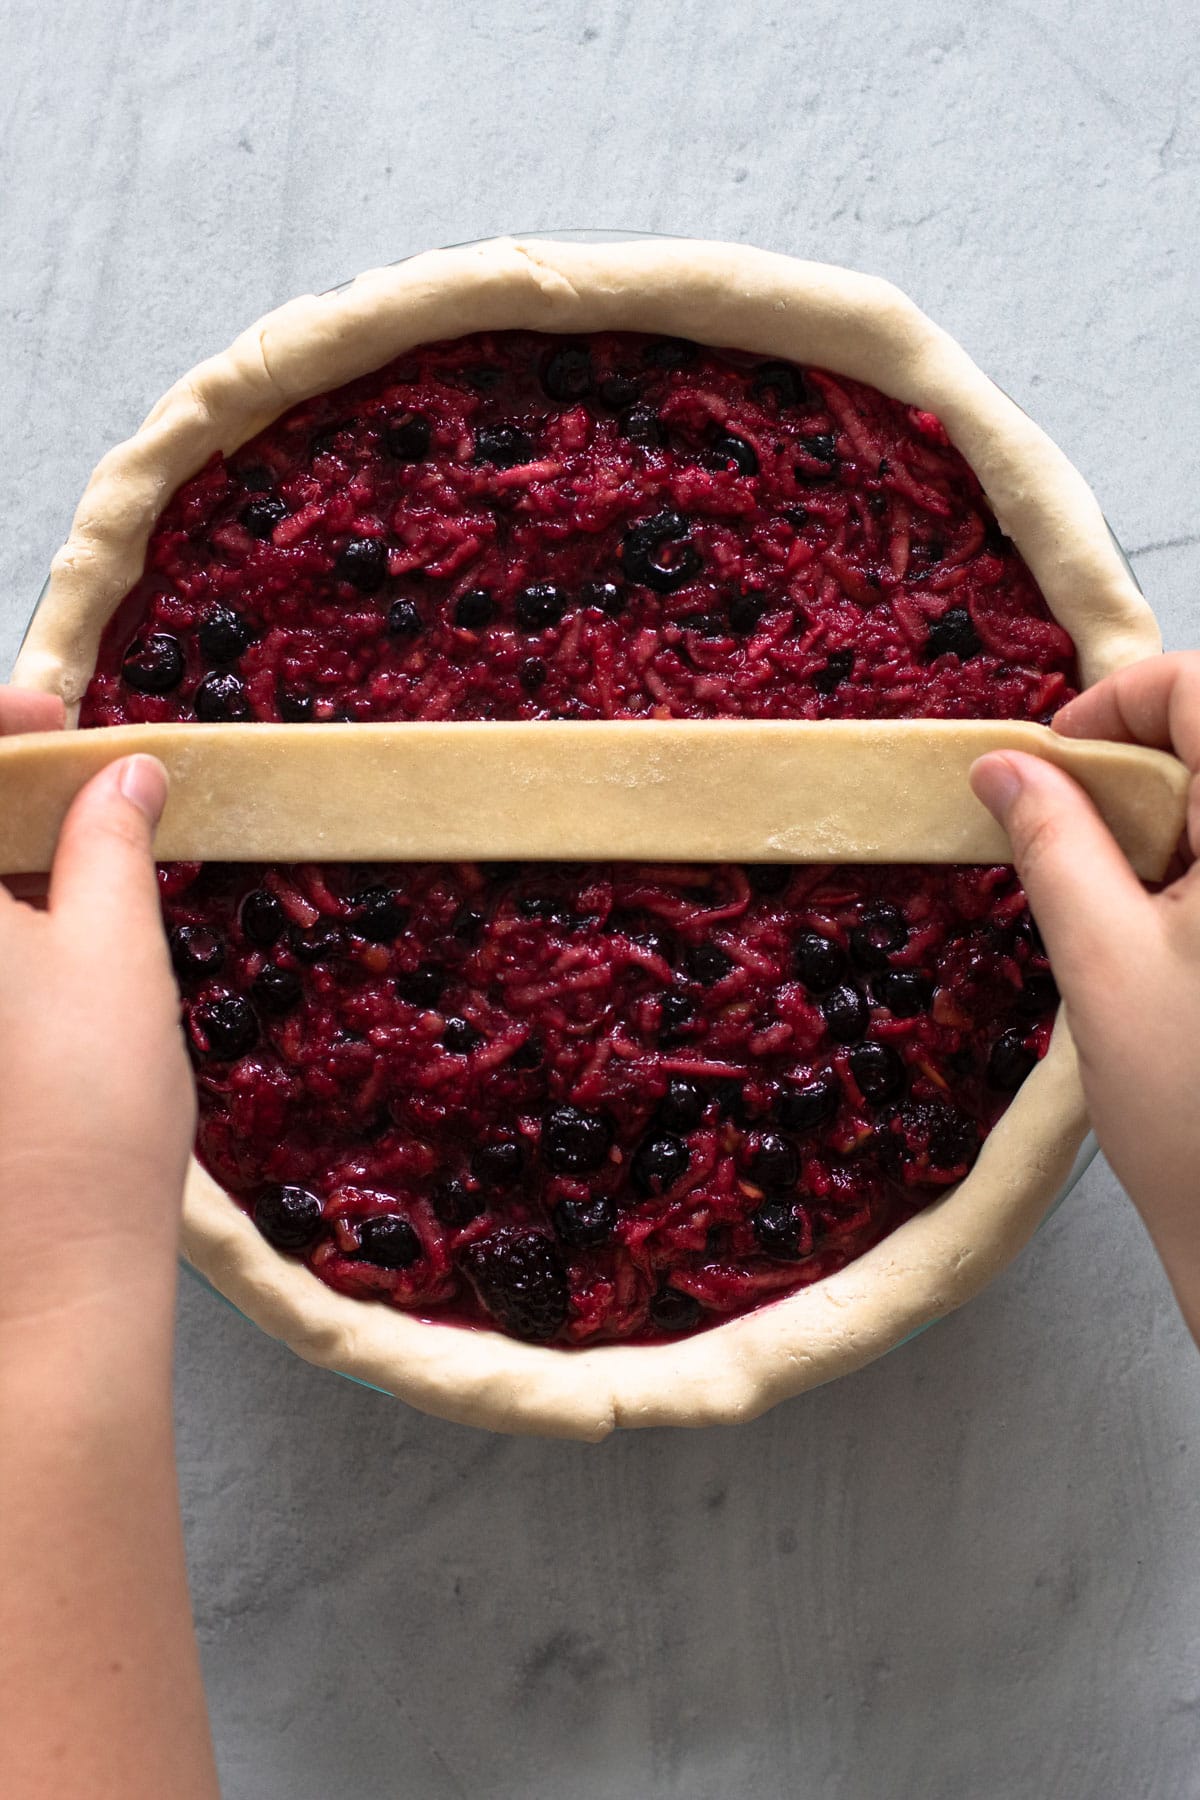
Step 1: Place a horizontal piece of dough in the middle of your pie.
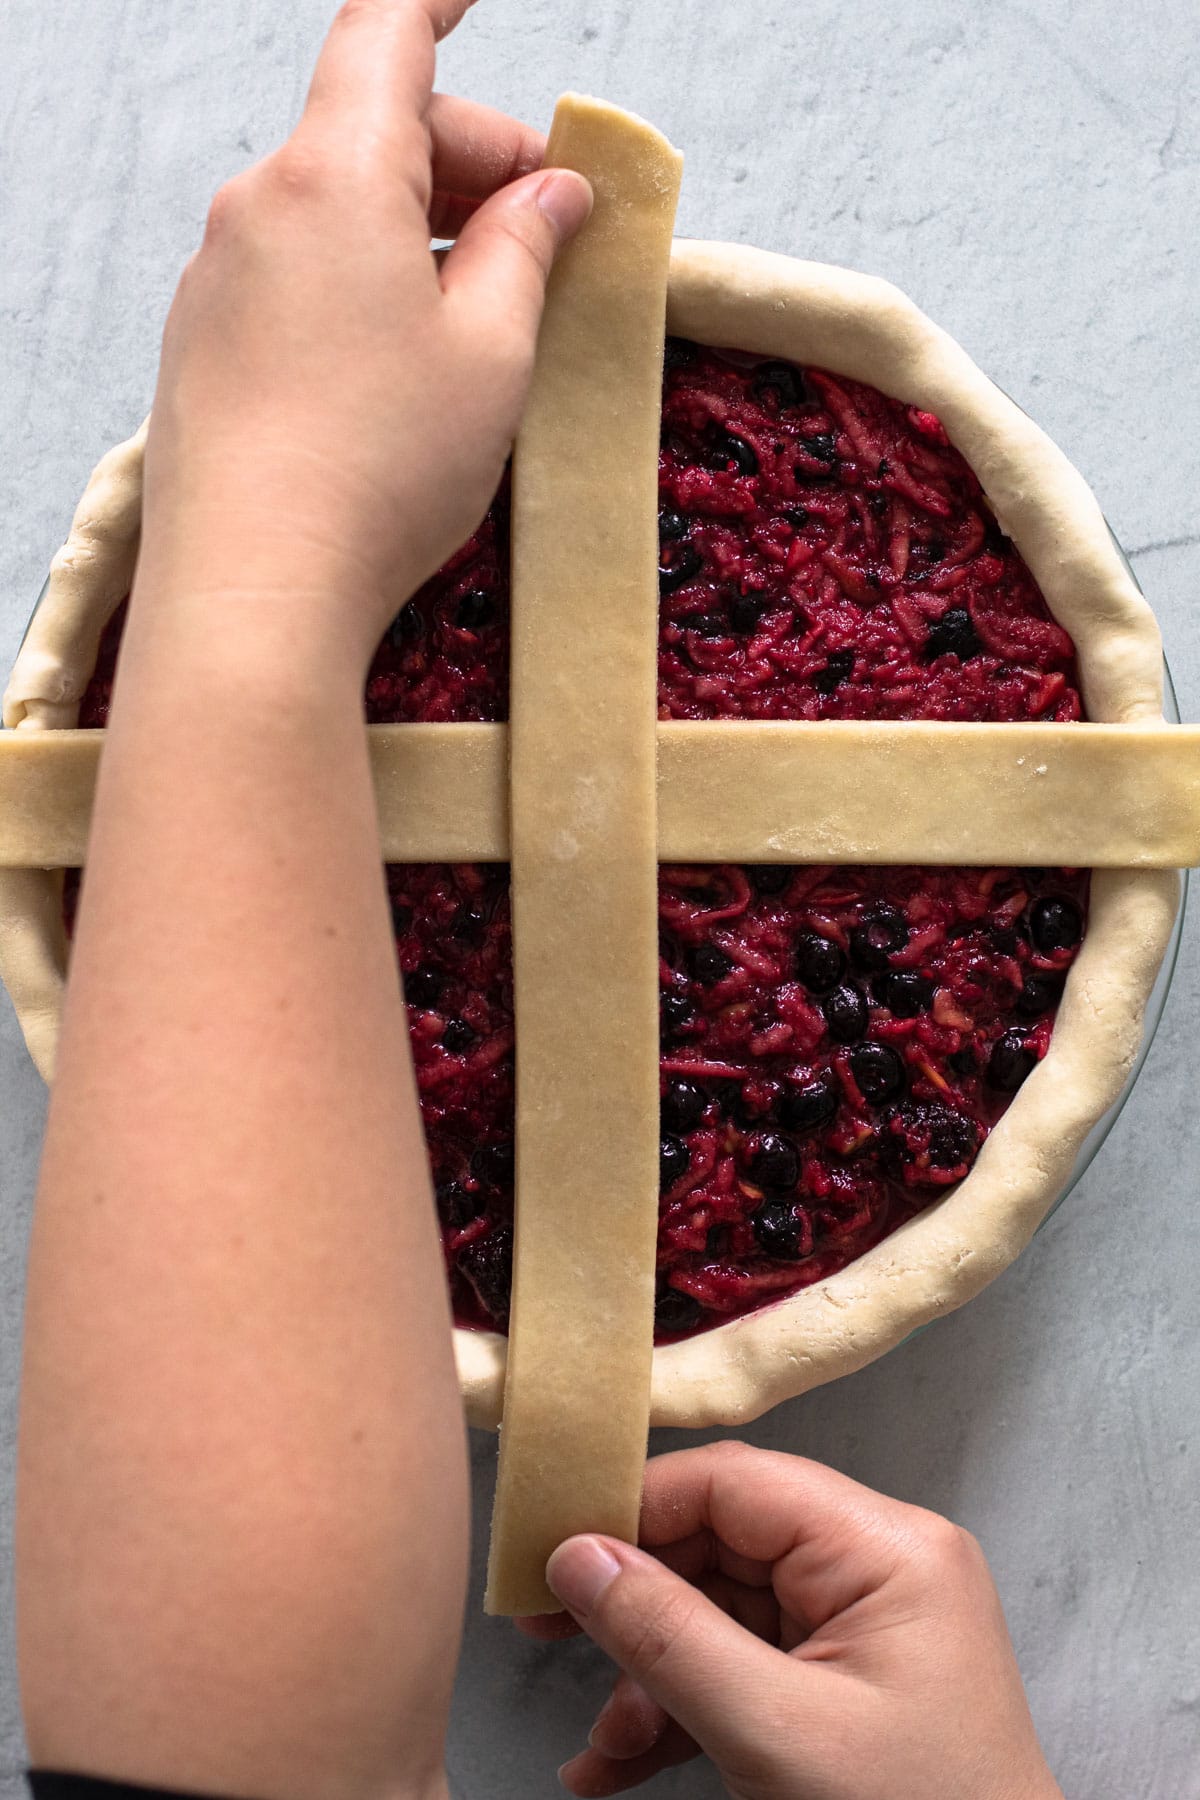
Step 2: Place a vertical strip of dough in the middle of the horizontal strip.
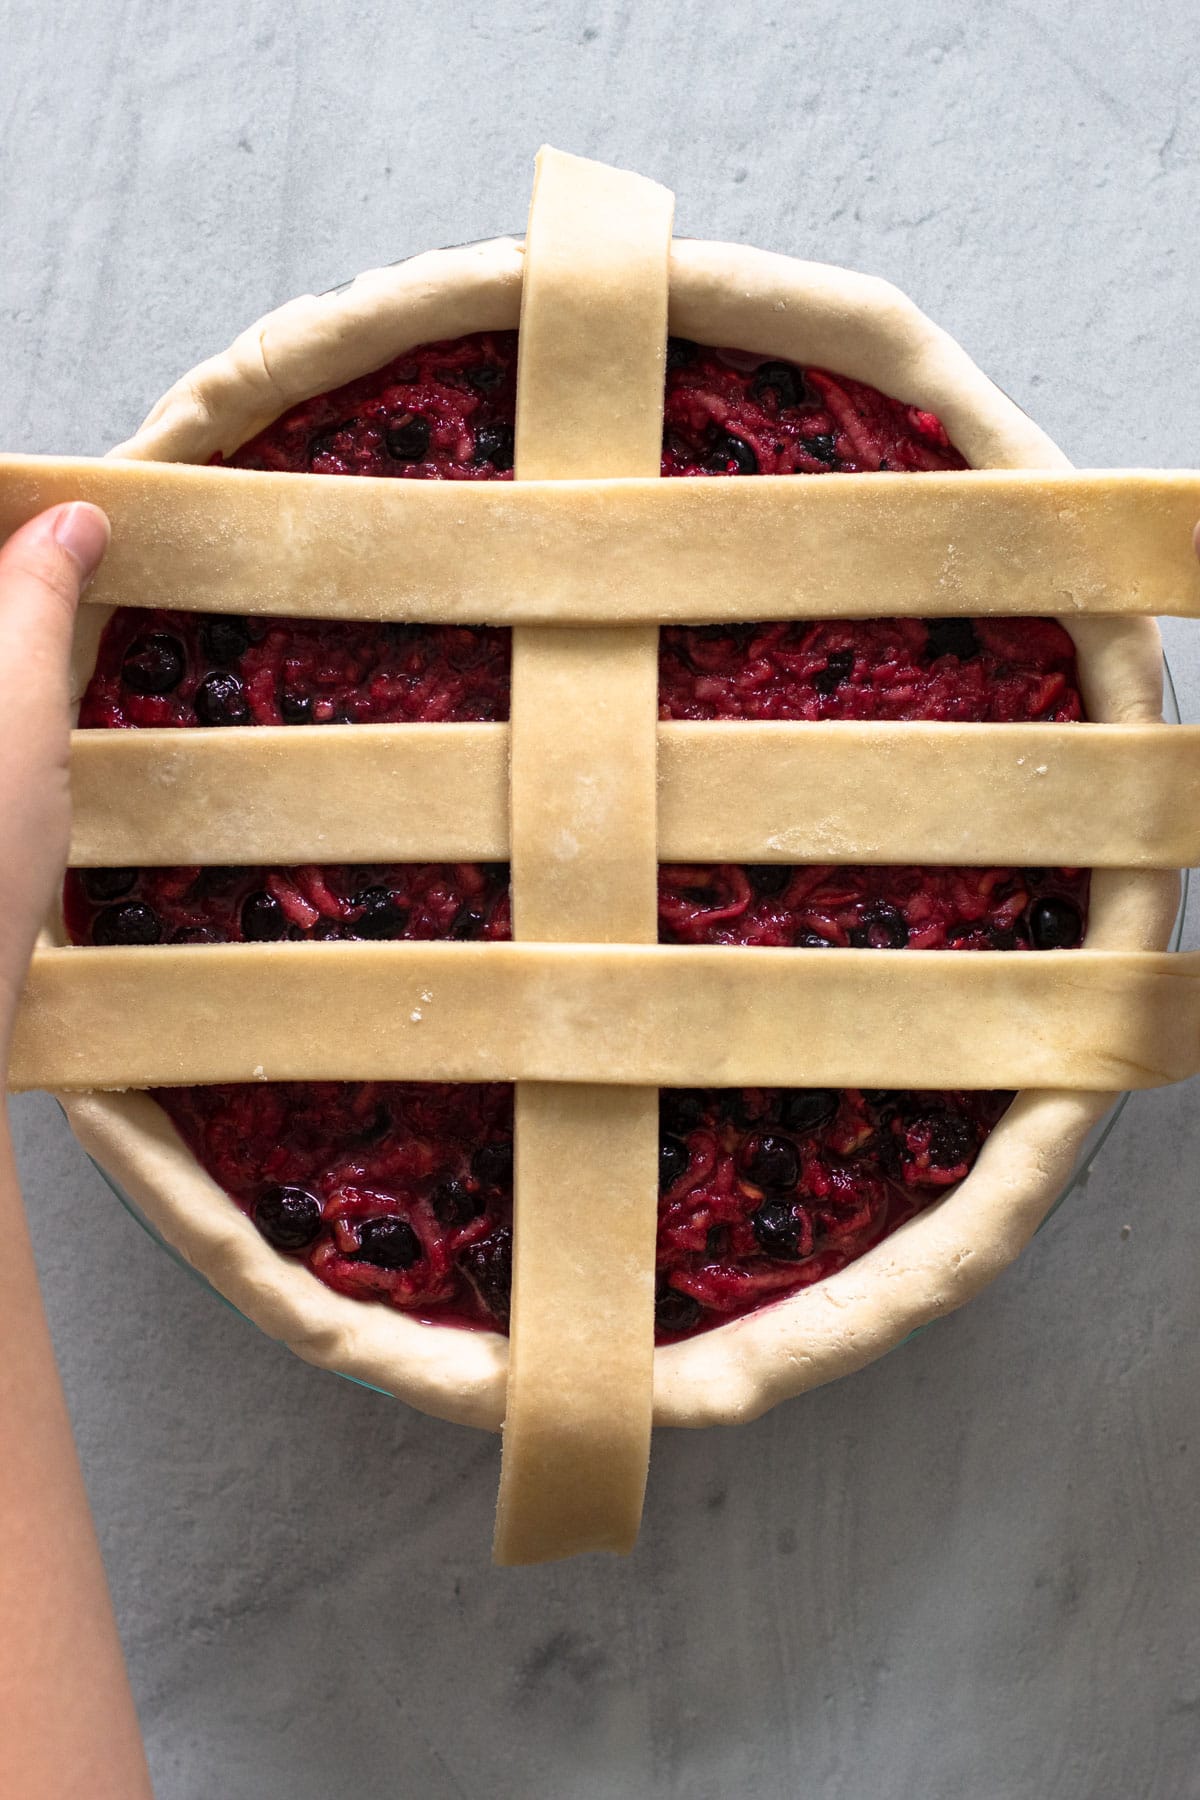
Step 3: Place one horizontal strip above and one below the first horizontal strip. You should now have 3 horizontal dough strips.
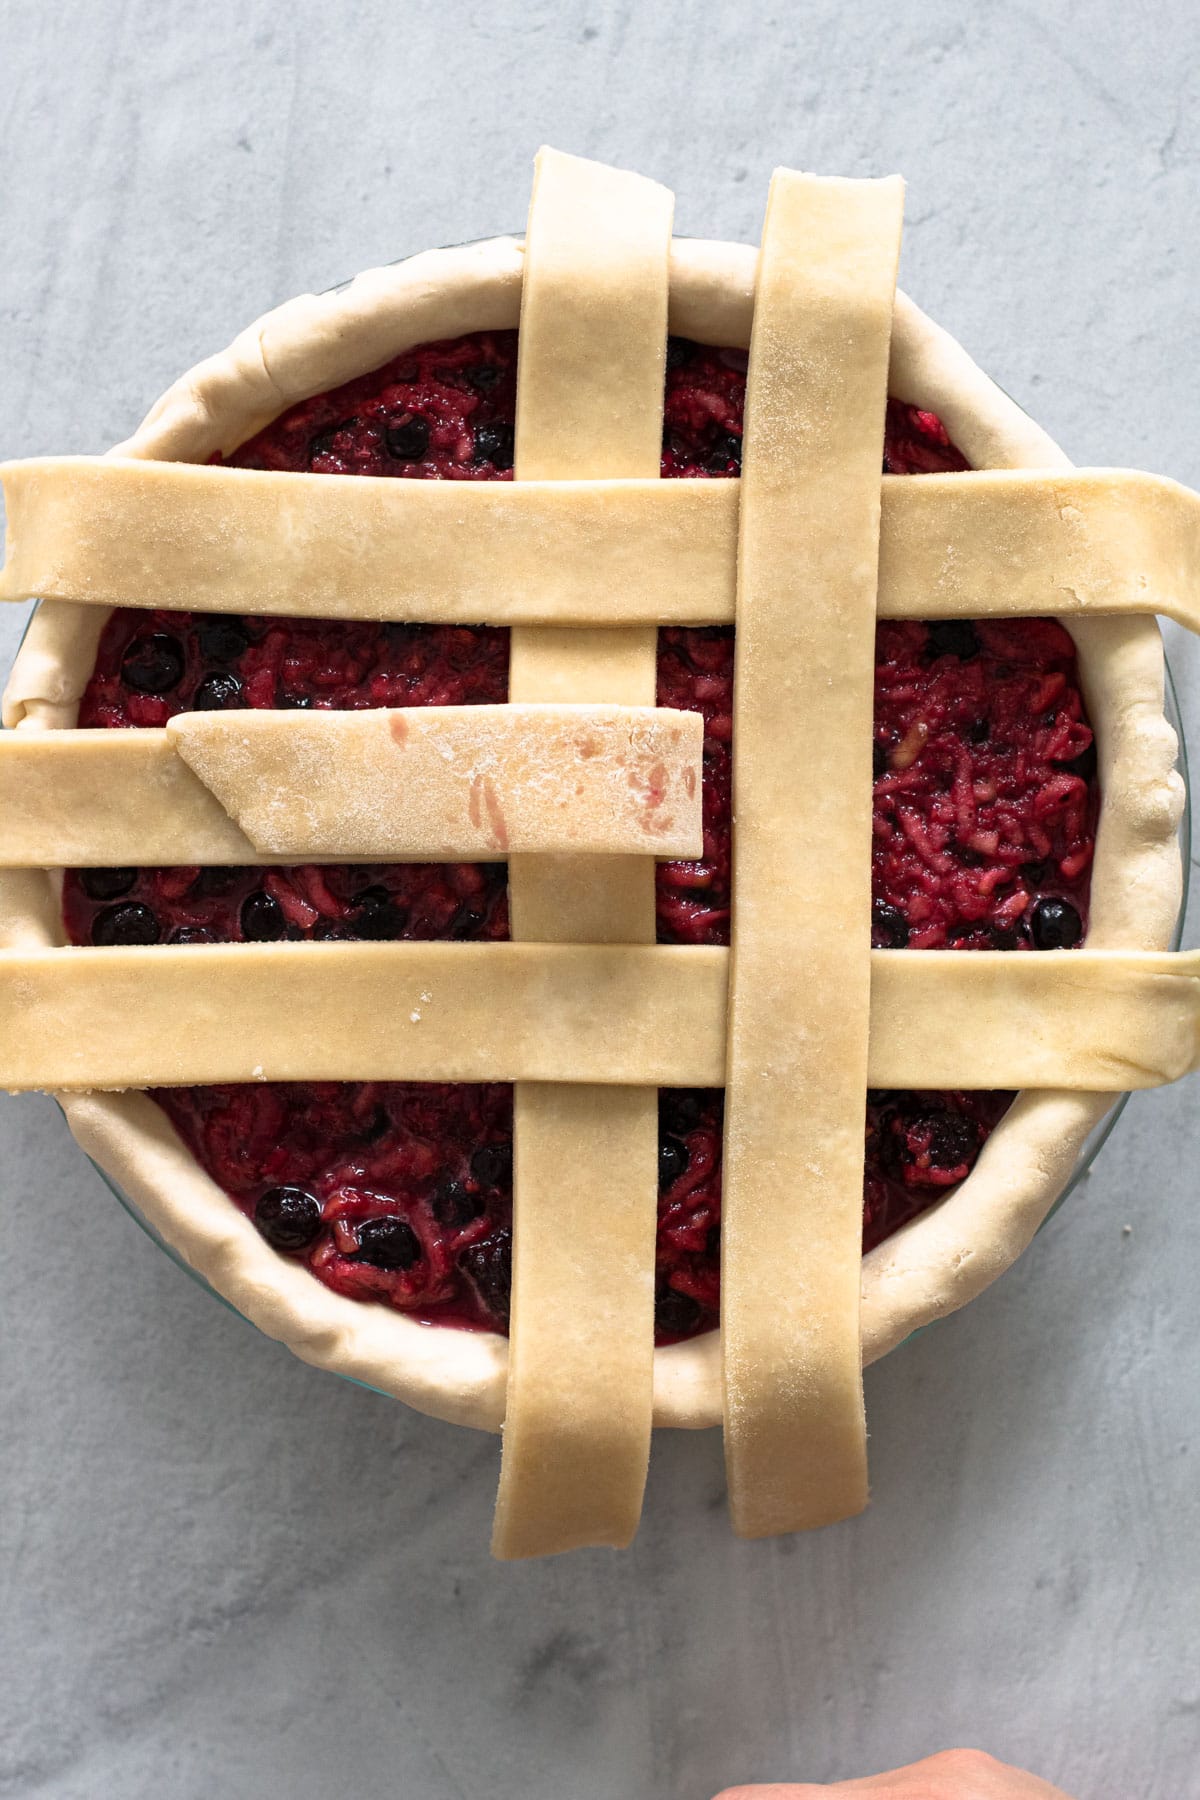
Step 4: Take the right end of the middle horizontal strip and flip it over itself. Place a vertical strip next to the first vertical strip, then fold it back.
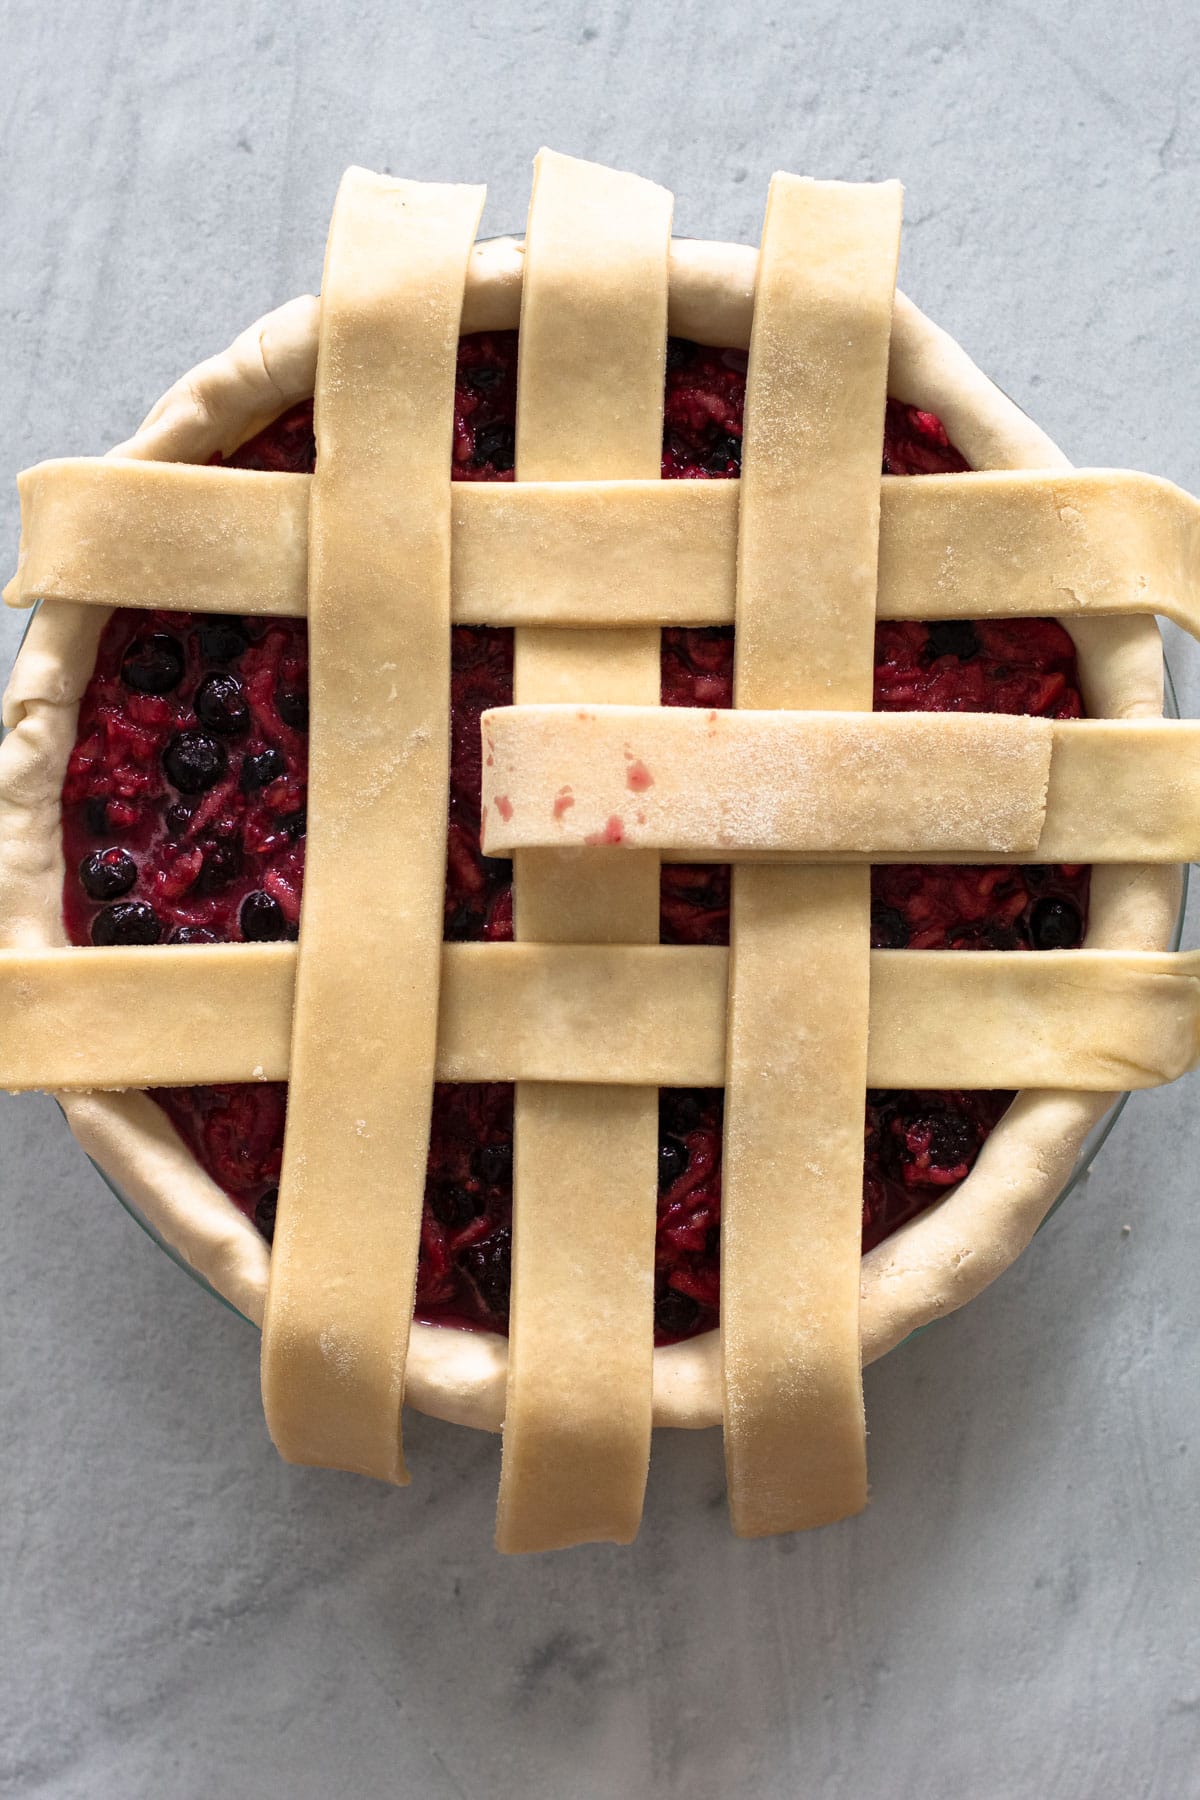
Step 5: Repeat these steps with the left end of the middle horizontal strip. You should at this point now have weaved in 6 lattice pieces.

Step 6: Take the bottom end of the middle vertical strip and flip it over. Place a horizontal strip and place it below the last one. Flip the vertical strip back over the horizontal one.
Step 7: Repeat this with the top end of the middle vertical strip.
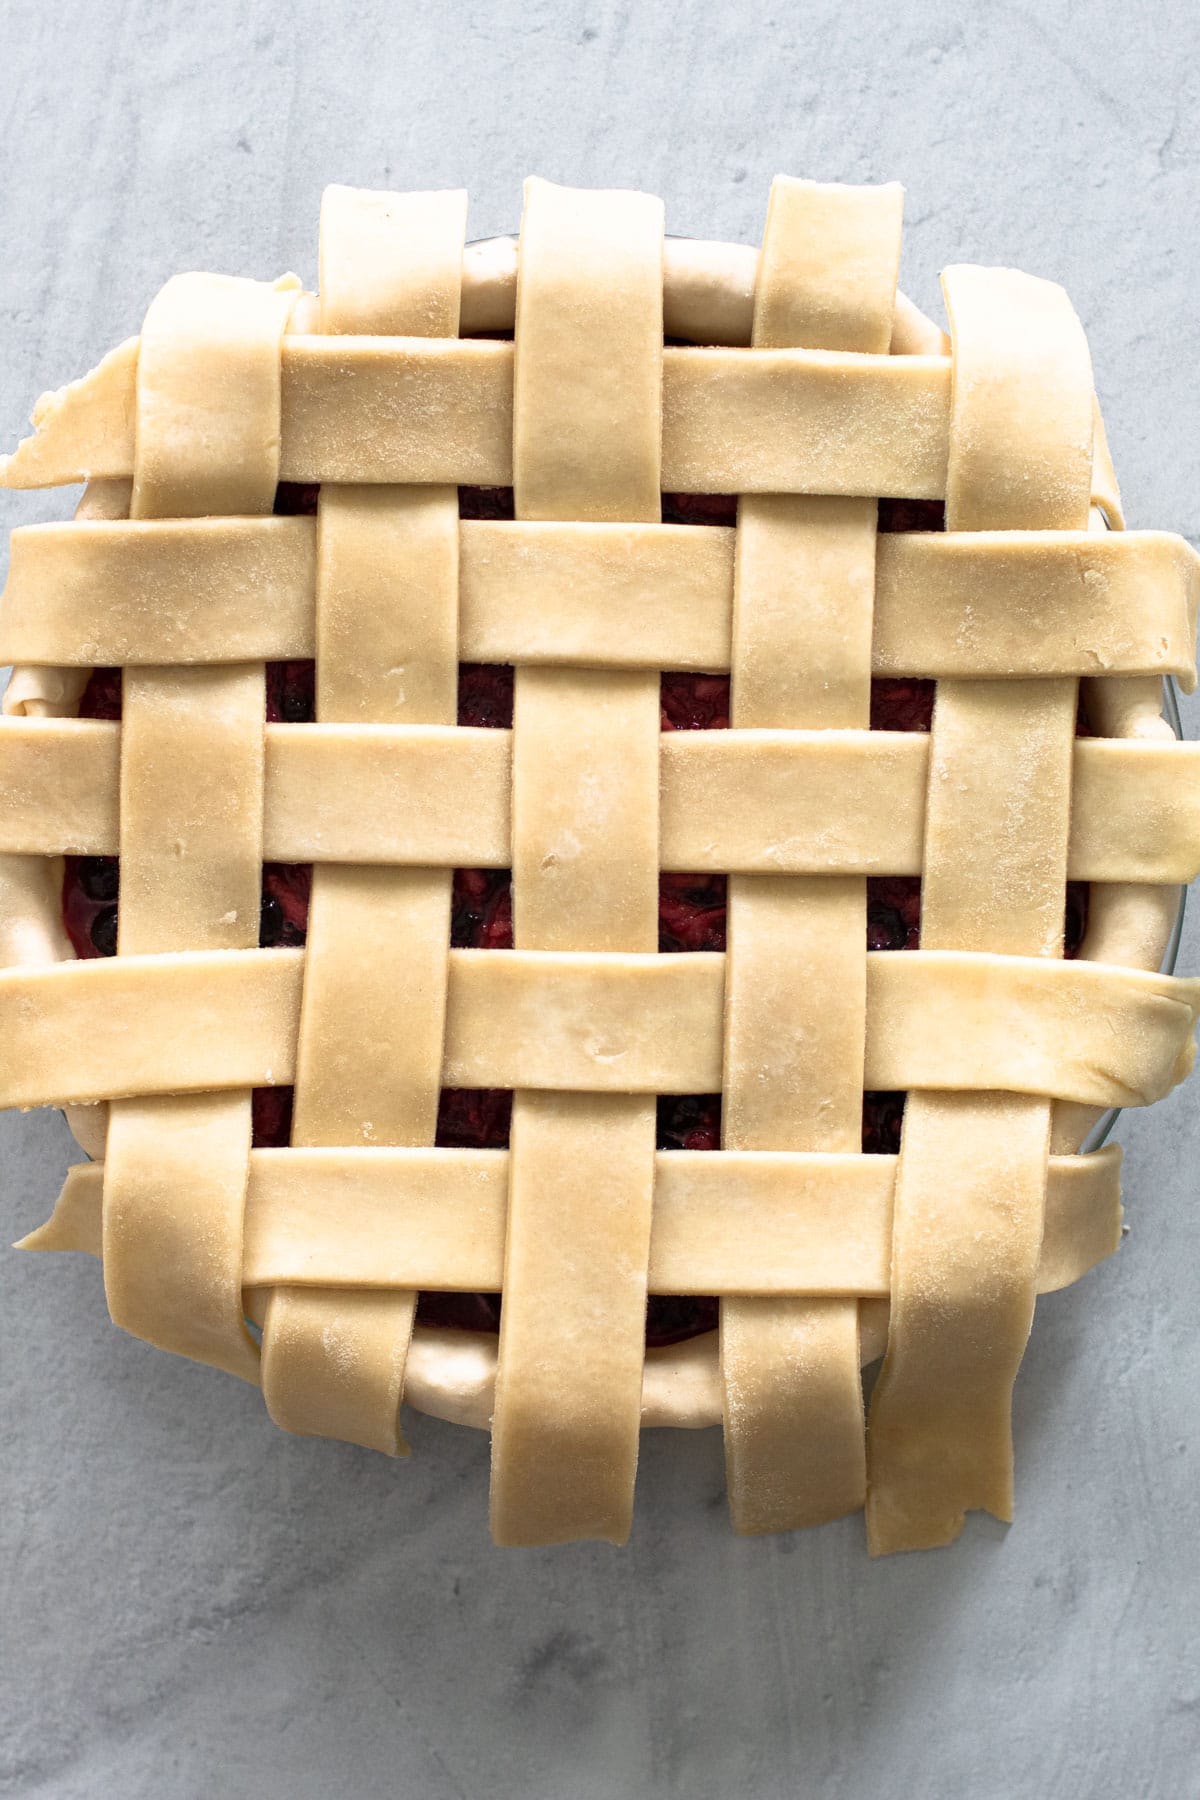
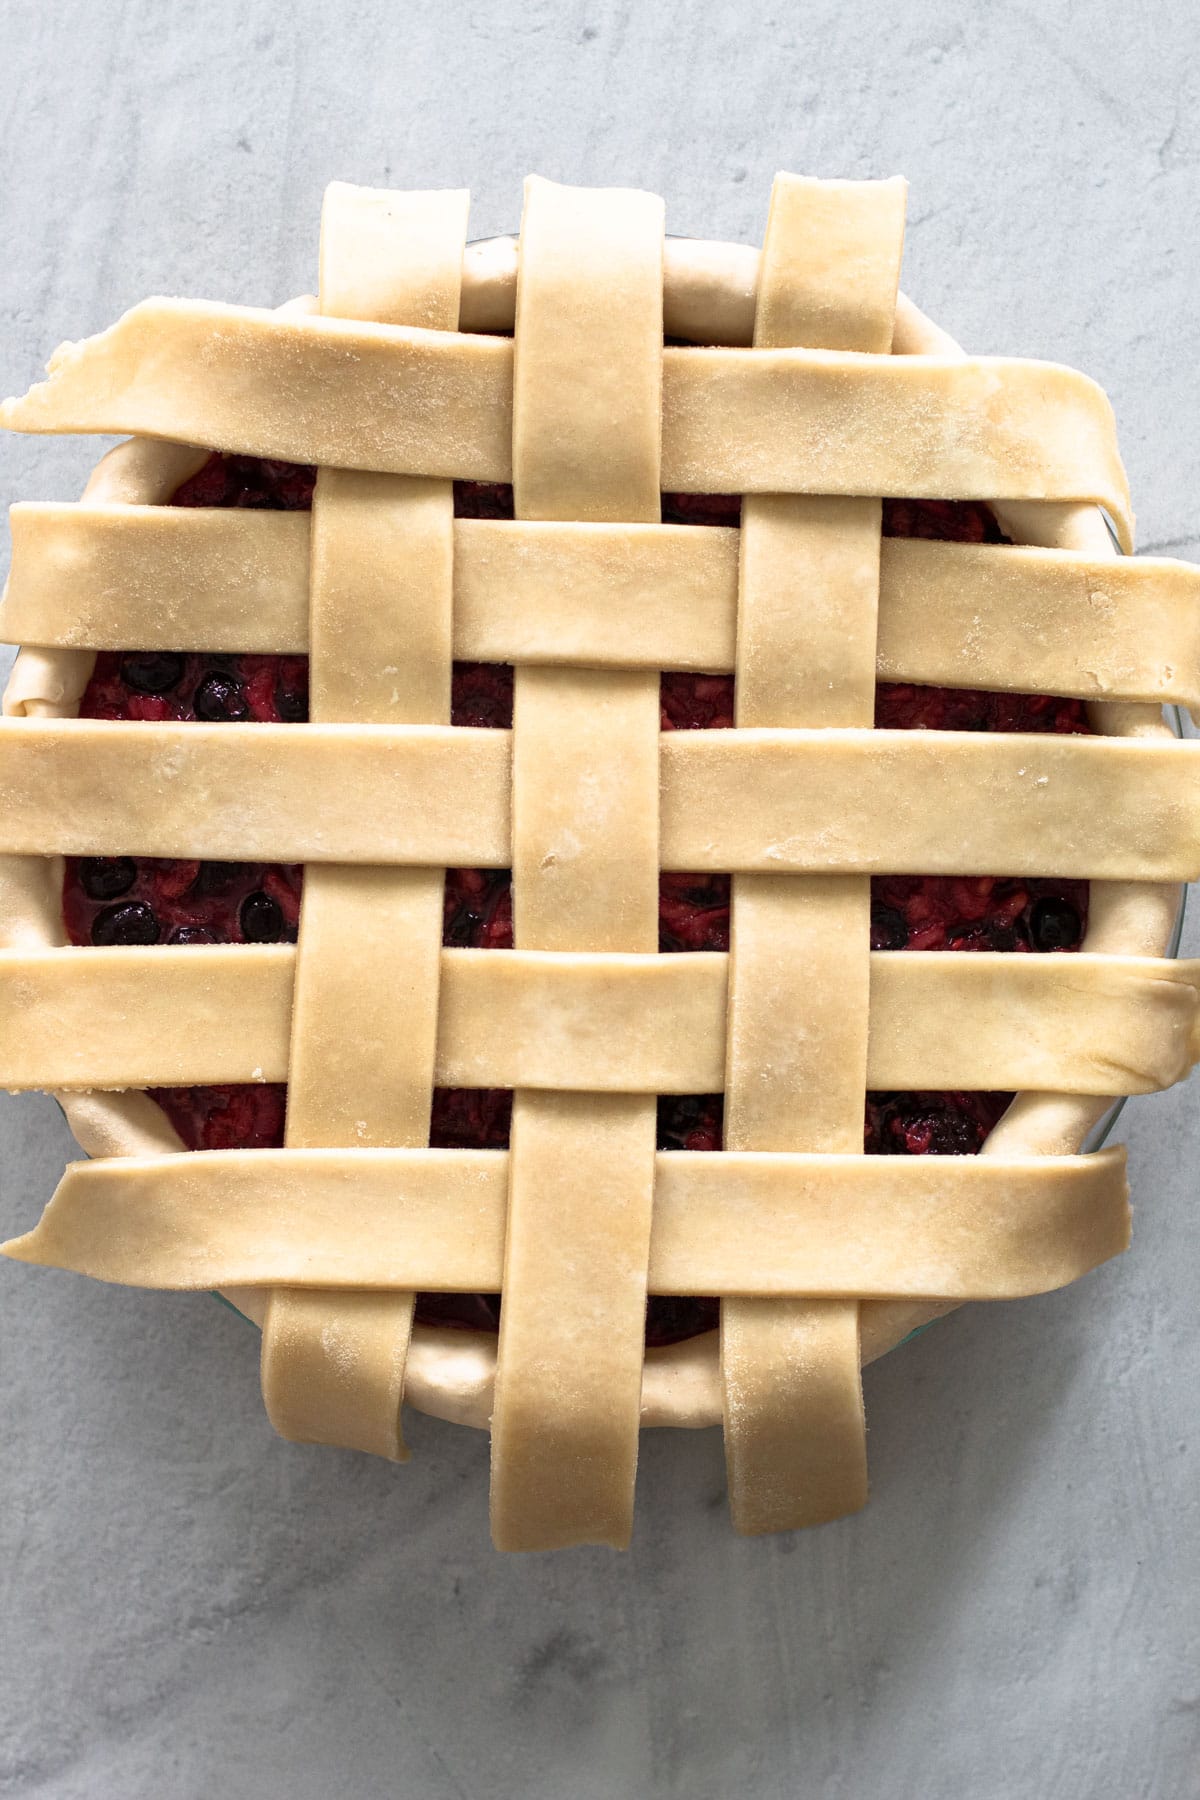
Step 8: Repeat this pattern until the pie is covered to the edges.
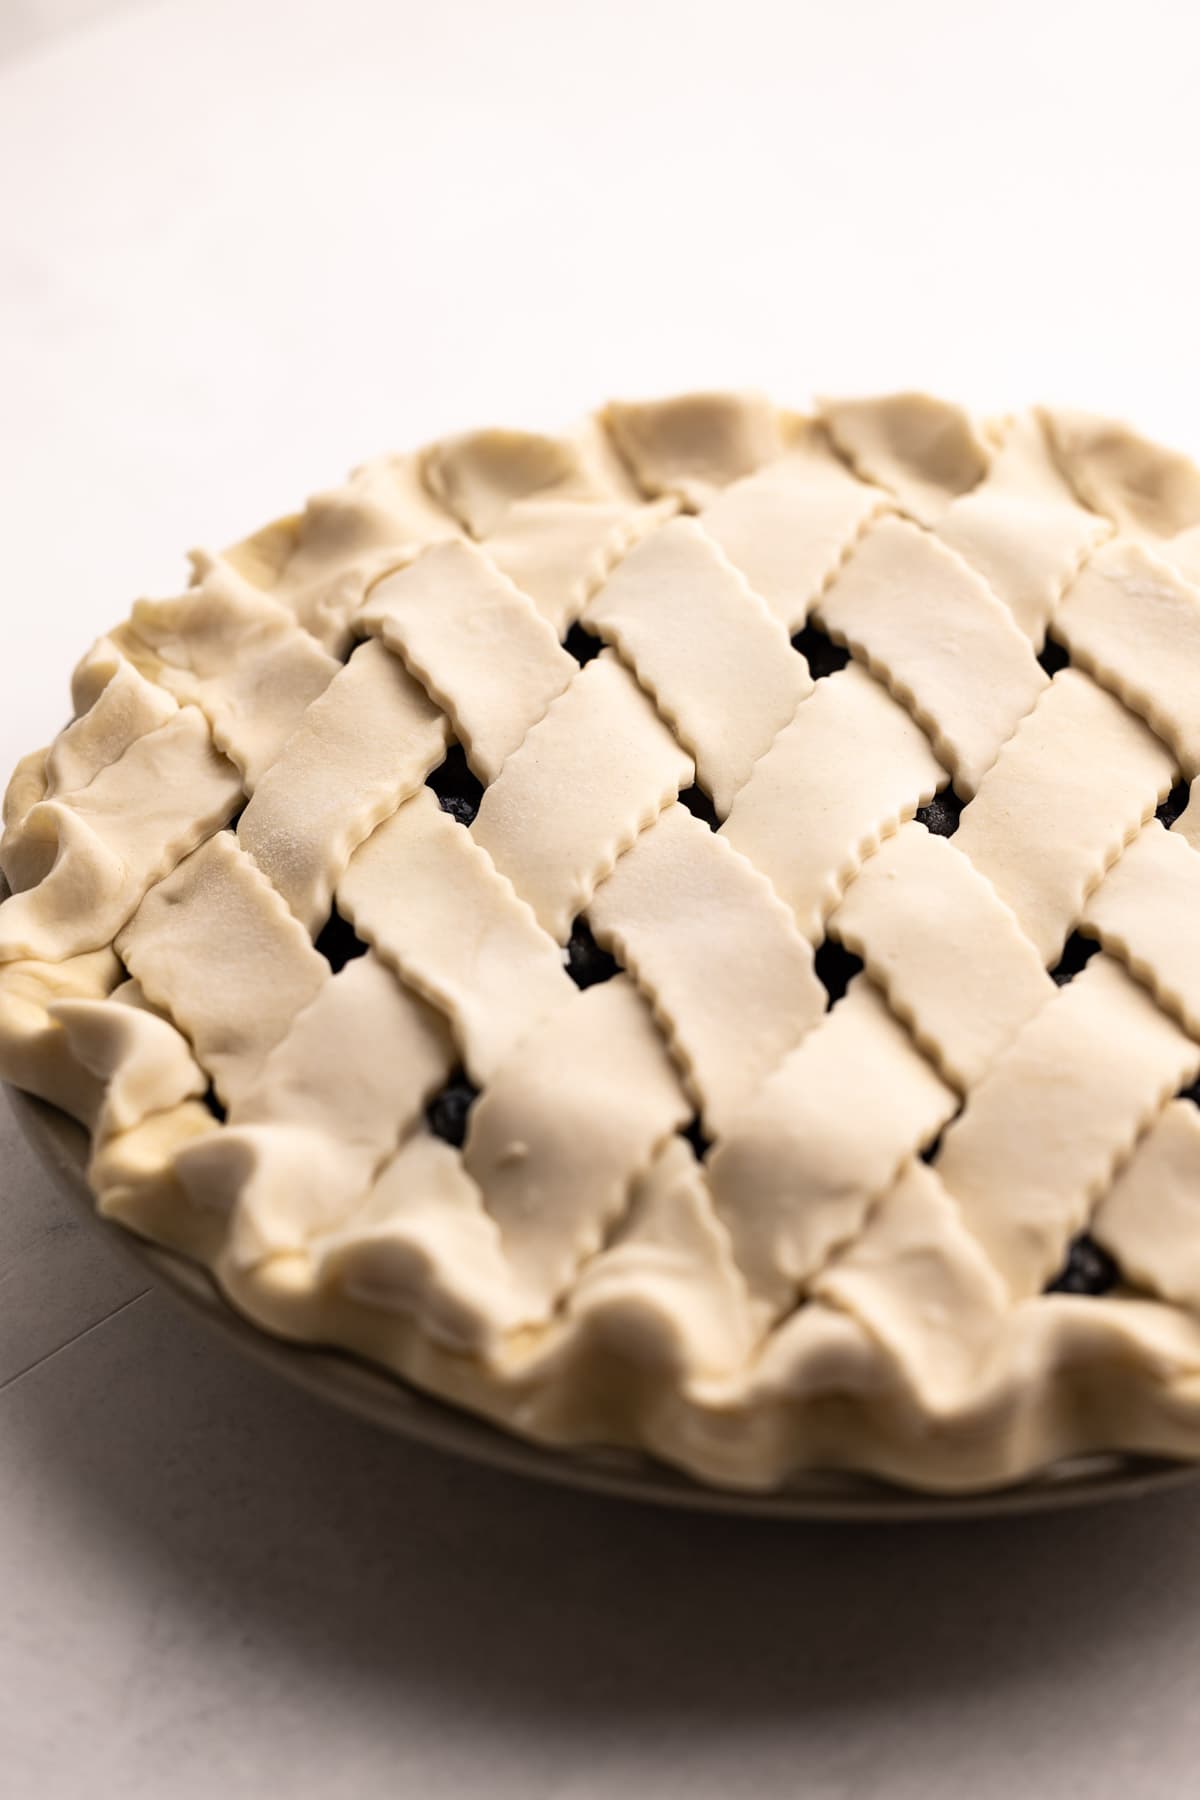
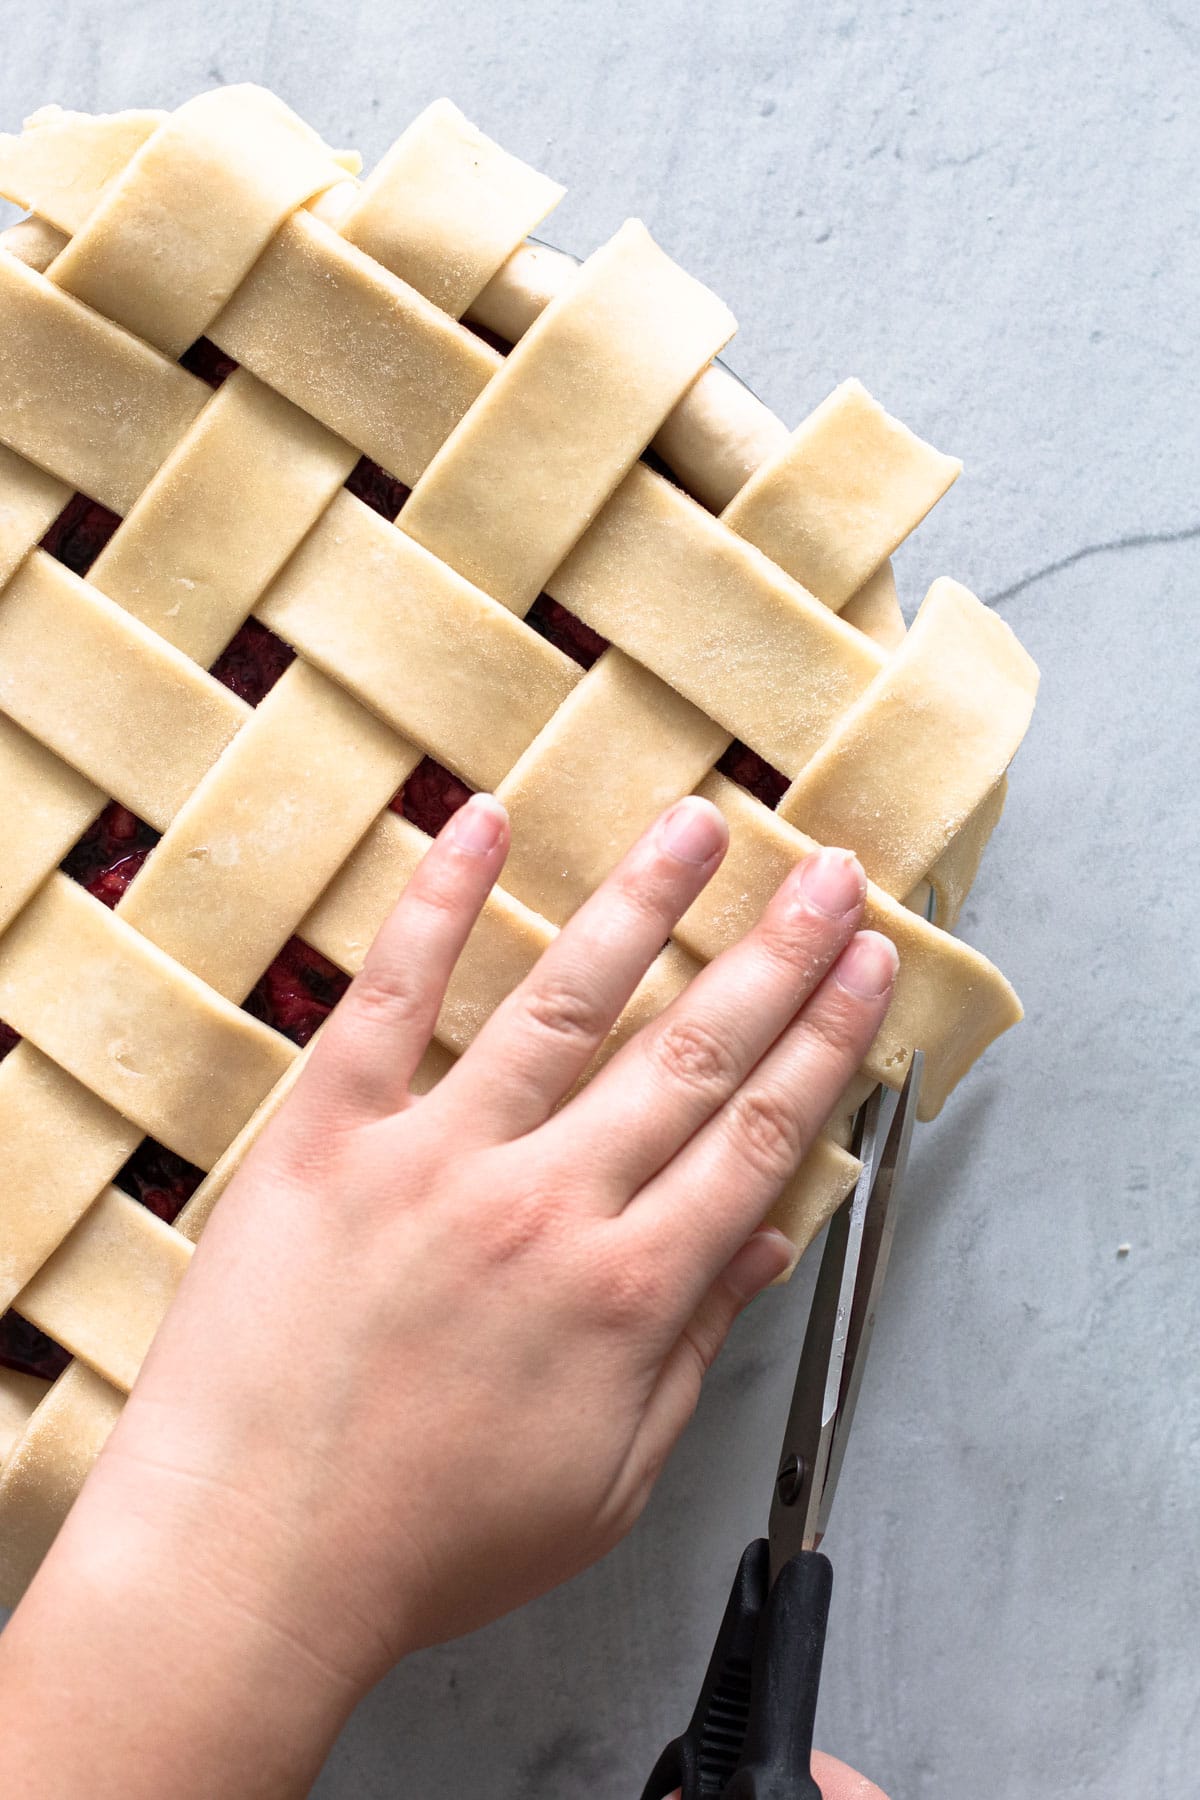
Once the lattice is done, it's time to turn your attention to the crust. There are two choices, the lattice strips can be cut off and pressed into the crust, or they can be folded underneath the edge of the crust. Both work! Then crimp the edge of the pie, if desired.
Variations
Using this basic formula you can produce many different creative lattices.
- Weave a larger lattice using smaller strips of dough, or a smaller lattice consisting of larger pieces of dough, or any variation.
- Slightly tilt the lattice strips for another unique variation
- Weave in a braided lattice strip
- Use a pastry wheel to cut a fluted edge
Tips for Success
As with nearly any skill you learn, the more you do it, the more you pick up tips and tricks along the way. Here are my tips I've learned after making lattices for the last decade:
- You must start with a high-quality homemade pie crust. By high-quality, that means that it should be properly made and properly hydrated. A poorly hydrated pie will crack if you try to make a lattice.
- You might want to make extra pie dough! Depending on the type of lattice you want to make, in terms of the number of pleats and the width of it, you might need extra dough. I have always found that using only one pie dough disk for a lattice requires it to be rolled rather thin, which can make the weaving process a little more difficult. I prefer to plan on using 3 pie doughs to make the lattice exactly how I'd like it to look. You really only need about 2-½, so you can plan to save the other half of the dough for future use for your next lattice.
- Use a ruler for an even looking lattice. A ruler is good for two reasons. The first is that it gives you a straight line to cut the pieces of dough. And the second is that you can use the ruler to figure out where the strips of pie dough need to go to be even. I don't worry as much about the latter, as I usually just eyeball it. However, if you are concerned about having a very neat lattice, a ruler is the way to go.
- Keep your lattice strips cold! If your pie dough gets too warm, you could risk breaking it. If I have time, I roll out my bottom pie crust, and my lattice strips ahead of time. I find this helpful so the gluten can relax (which makes for a prettier lattice), and so that is thoroughly cold when I'm weaving the lattice. If at any point the dough gets too warm, place it on a sheet tray in the refrigerator to chill.
- Make different sized lattice strips for a unique design. You can also incorporate braids or other unique elements into your lattice. Get creative!
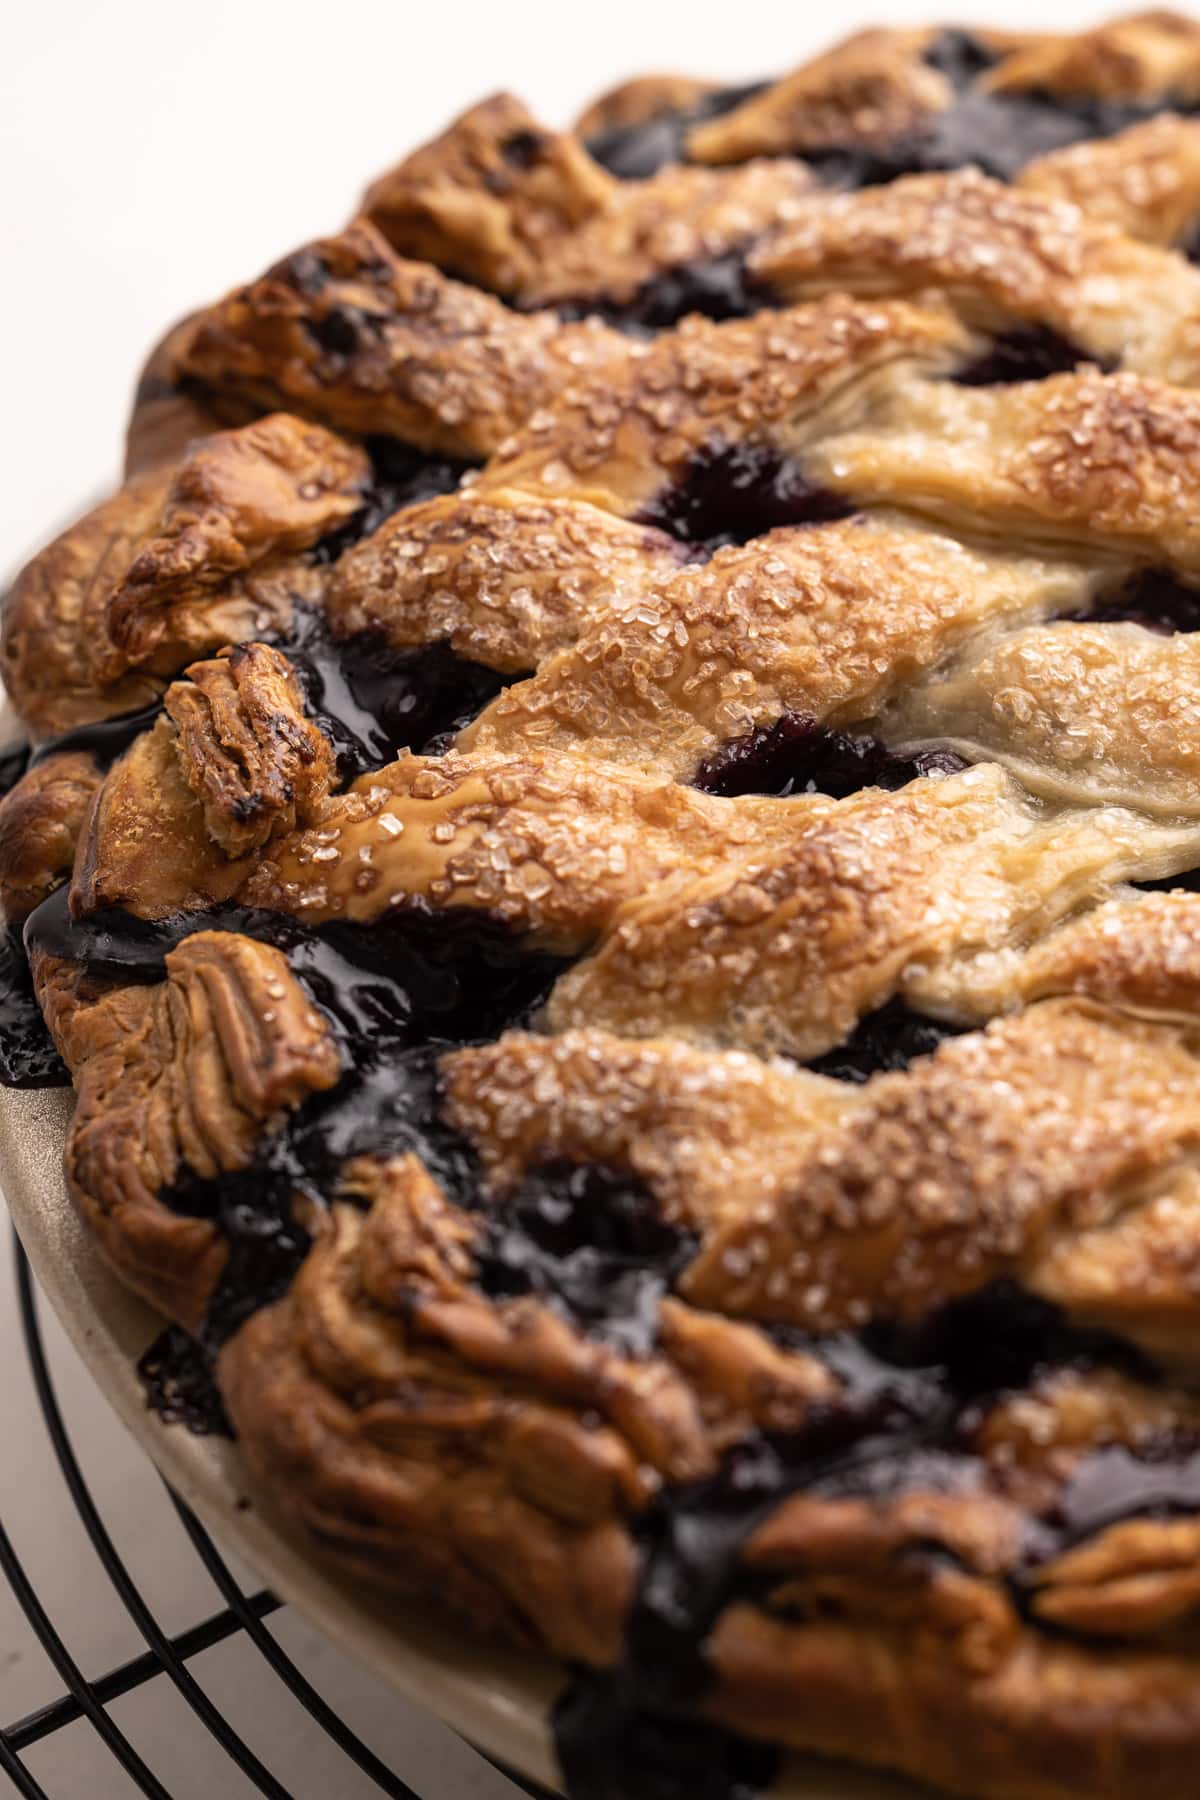
Baking a Pie with a Lattice
Baking a lattice pie is no different than baking a pie with a regular top crust. The basic rule for baking a beautiful pie is to put a very cold pie in a very hot oven! This ensures the pastry is able to set, will not sag or melt, and will build up plenty of steam for the pastry to create a beautiful flaky crust.
Because the pie pastry has likely been warmed while it was weaved into a lattice, it is always a safe bet to stick the unbaked pie in the freezer for 10-20 minutes prior to baking, to ensure it is fully chilled.
After the pie has been chilled, the pastry should be brushed with an egg wash, and if desired, sprinkled with sugar.
A lattice, like most pies with butter pie crust, should be baked on the lowest rack at 425ºF. However, it is best to consult the recipe for the pie that you are making to confirm that is the suggested temperature.
Pie Recipes That Use a Lattice
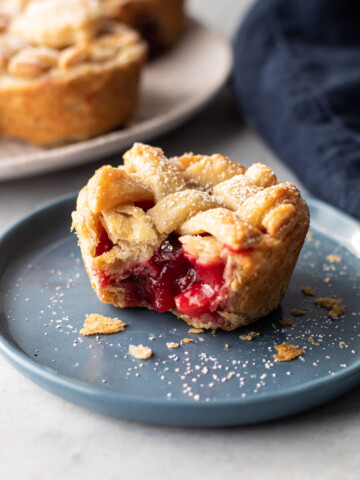
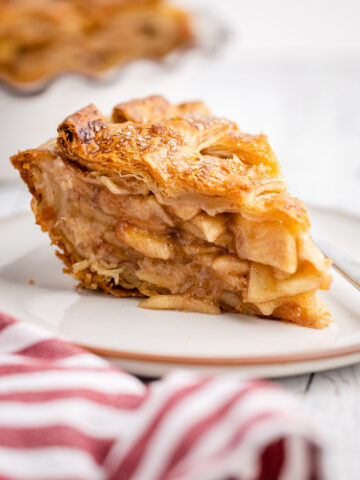
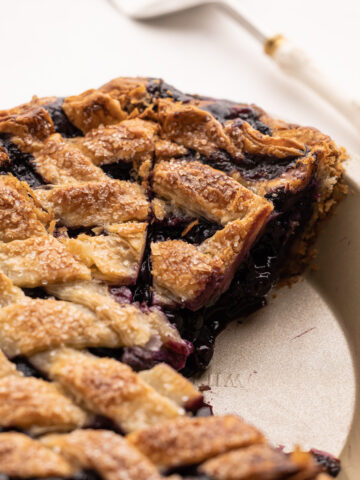
Fruit pies tend to be the best pies for baking with a lattice top. However, one thing to note is that if your pie filling uses quick-cooking tapioca, you will have to make a tightly weaved lattice. The reason for this is because quick-cooking tapioca can harden when it is baked without a top crust, and a wide lattice can trigger this to happen.
Here are some recipes to make to practice your lattice weaving skills:

Video
More Pie Basics

I am so honored when you make a recipe from my site! If you use this Lattice Pie Crust Tutorial, please leave a star ⭐️⭐️⭐️⭐️⭐️ rating with your experience! If you have any questions about this recipe, feel free to comment here, and tag me on instagram!
Full Recipe
How to Make a Lattice Pie Crust

Learning how to make a lattice is an essential skill to master for the art of making pies. It may seem intimidating, but it’s quite easy to do! Following these simple directions, you can become an expert in no time!
- Prep Time: 00:15
- Total Time: 15 minutes
- Yield: 1 Lattice Pie
- Category: Pie Crust
- Cuisine: American
Ingredients
- Homemade pie crust
- All-purpose flour, for rolling
- Egg wash
Tools Needed:
- Rolling Pin
- Ruler
- Pastry Wheel or knife
- Pie Dish
- Kitchen schears (to cut off excess lattice)
Instructions
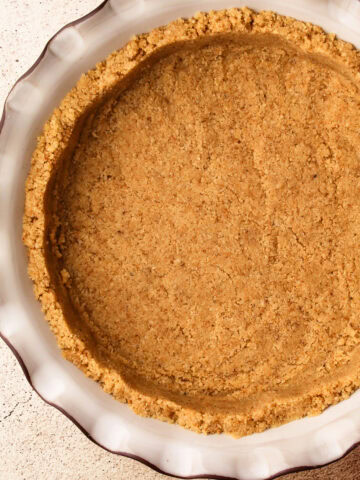
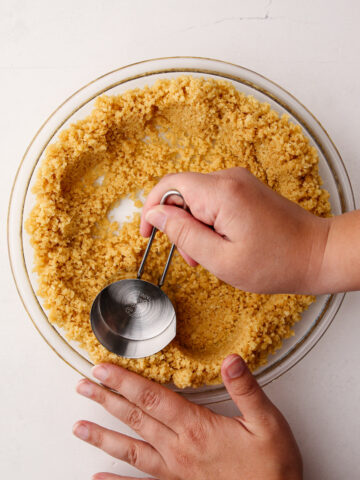
- Roll out one pie dough to a 12-inch circle. Fit pastry in a 9” pie plate, making sure to press the pastry into the sides and the bottom, tucking in and to form an edge, and crimping if desired. Fill the pie with the desired filling.
- Roll out the second pie dough into a 12-inch circle. Using a ruler and a pastry wheel, cut out 10 1-inch strips, or your desired width and number. (See note about additional lattice options)
- Now it’s time to start the lattice: Place a horizontal piece of dough in the middle of your pie. Place a vertical strip of dough in the middle of the horizontal strip. A ruler will help guide you to the precise middle point.
- Place one horizontal strip above and one below the first horizontal strip. You should now have 3 horizontal dough strips.
- Take the right end of the middle horizontal strip and flip it over itself. Place a vertical strip next to the first vertical strip. Fold the horizontal strip back and over the vertical one. Repeat these steps with the left end of the middle horizontal strip. You should at this point now have weaved in 6 lattice pieces.
- Take the bottom end of the middle vertical strip and flip it over. Place a horizontal strip and place it below the last one. Flip the vertical strip back over the horizontal one. Repeat this with the top end of the middle vertical strip.
- Flip back the left end of the 2nd and 4th horizontal strips. Place the last vertical strip on the left end. Flip over the horizontal strips.
- Repeat these steps with the right end of the 2nd and 4th horizontal strips. You should now have a weaved 10 strips of dough to form your lattice.
- Using this basic formula, you could weave a larger lattice using smaller strips of dough, or even a smaller lattice consisting of 6 larger pieces of dough.
- You can tuck the edges of the lattice underneath the pie if desired. Or drape them over the edge and cut off any excess, and crimp the crust.
- Freeze the lattice pie for 10-20 minutes before baking.
- Bake the pie as directed in the filling recipe.
Notes
Leave your chilled pie dough at room temperature for 5-10 minutes to allow it to soften for ease of rolling.
I prefer to have an extra pie dough on hand to have additional lattice strips or to have the freedom to make any designs I’d like. That means making a double batch of the linked pie dough (which will make enough for 4 bottom crusts) and saving any leftover pie dough for another day.
Some of the links on this page may be affiliate links. Everyday Pie is a participant in the Amazon Associates Program. As an Amazon Associate I earn from qualifying purchases, at no extra cost to you.
Sandra
Simple, clear instructions that lead to a beautiful lattice crust - even for a beginner. The step-by-step photos are a fantastic aid too, providing an extra layer of clarity
Sandy
Adding a lattice crust was a breeze with these instructions. I managed to get the full lattice top using the All-Butter flaky dough recipe (without doubling it) but it was a close call. I would make extra dough next time to ensure I had enough.
If you keep the scraps to add to your lattice dough, do you gently knead it into your new dough before rolling it out? Do you need to let it rest again if you do that?
Kelli Avila
I wouldn't say knead as much as I would say I'd piled them on top of one another (in a manner that I wouldn't have to roll it out as much), and then gently squeeze them to adhere. You can roll them out one more time. However, as you pointed out, resting them in the fridge will make that process easier.
Jacqueline A. Steuer
I made my first lattice pie crust today. This recipe was easy to follow. I appreciated the details on how to place the lattice strips. It was easy and my apple pie - using your recipe - was delicious!
Kelli Avila
So happy!!!! Happy Pi Day!