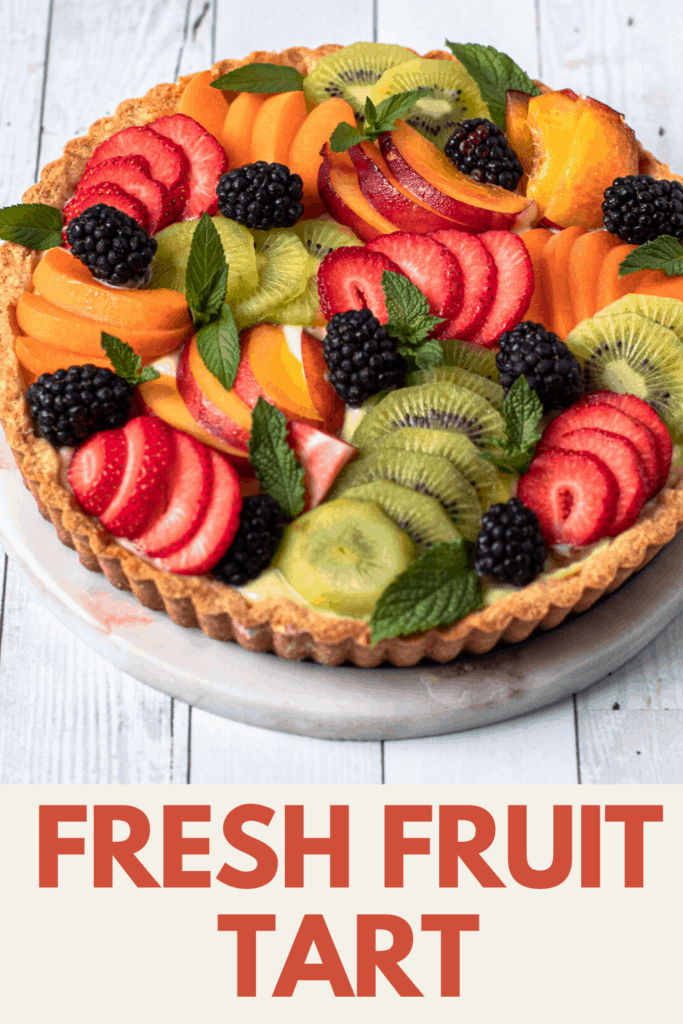
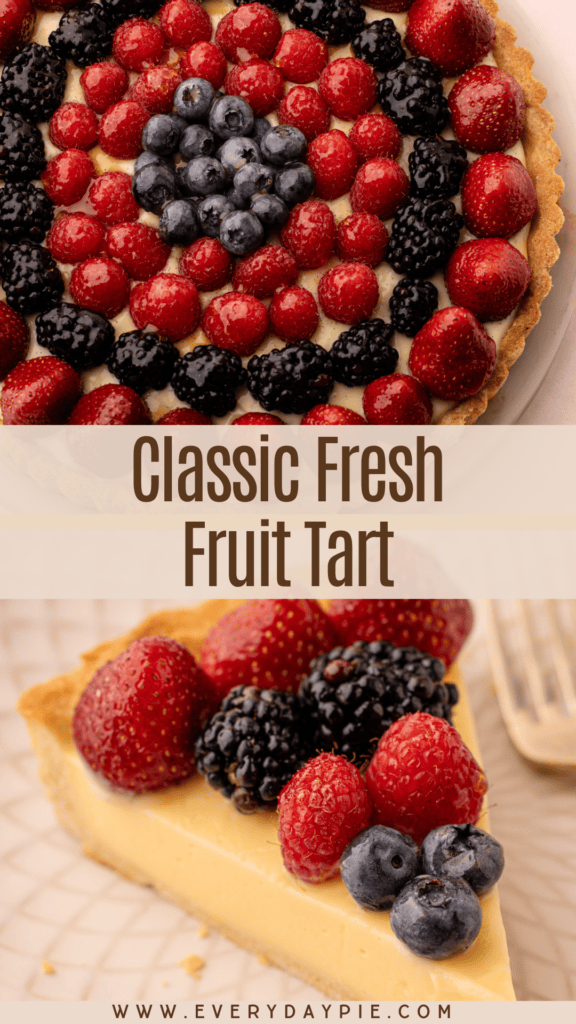
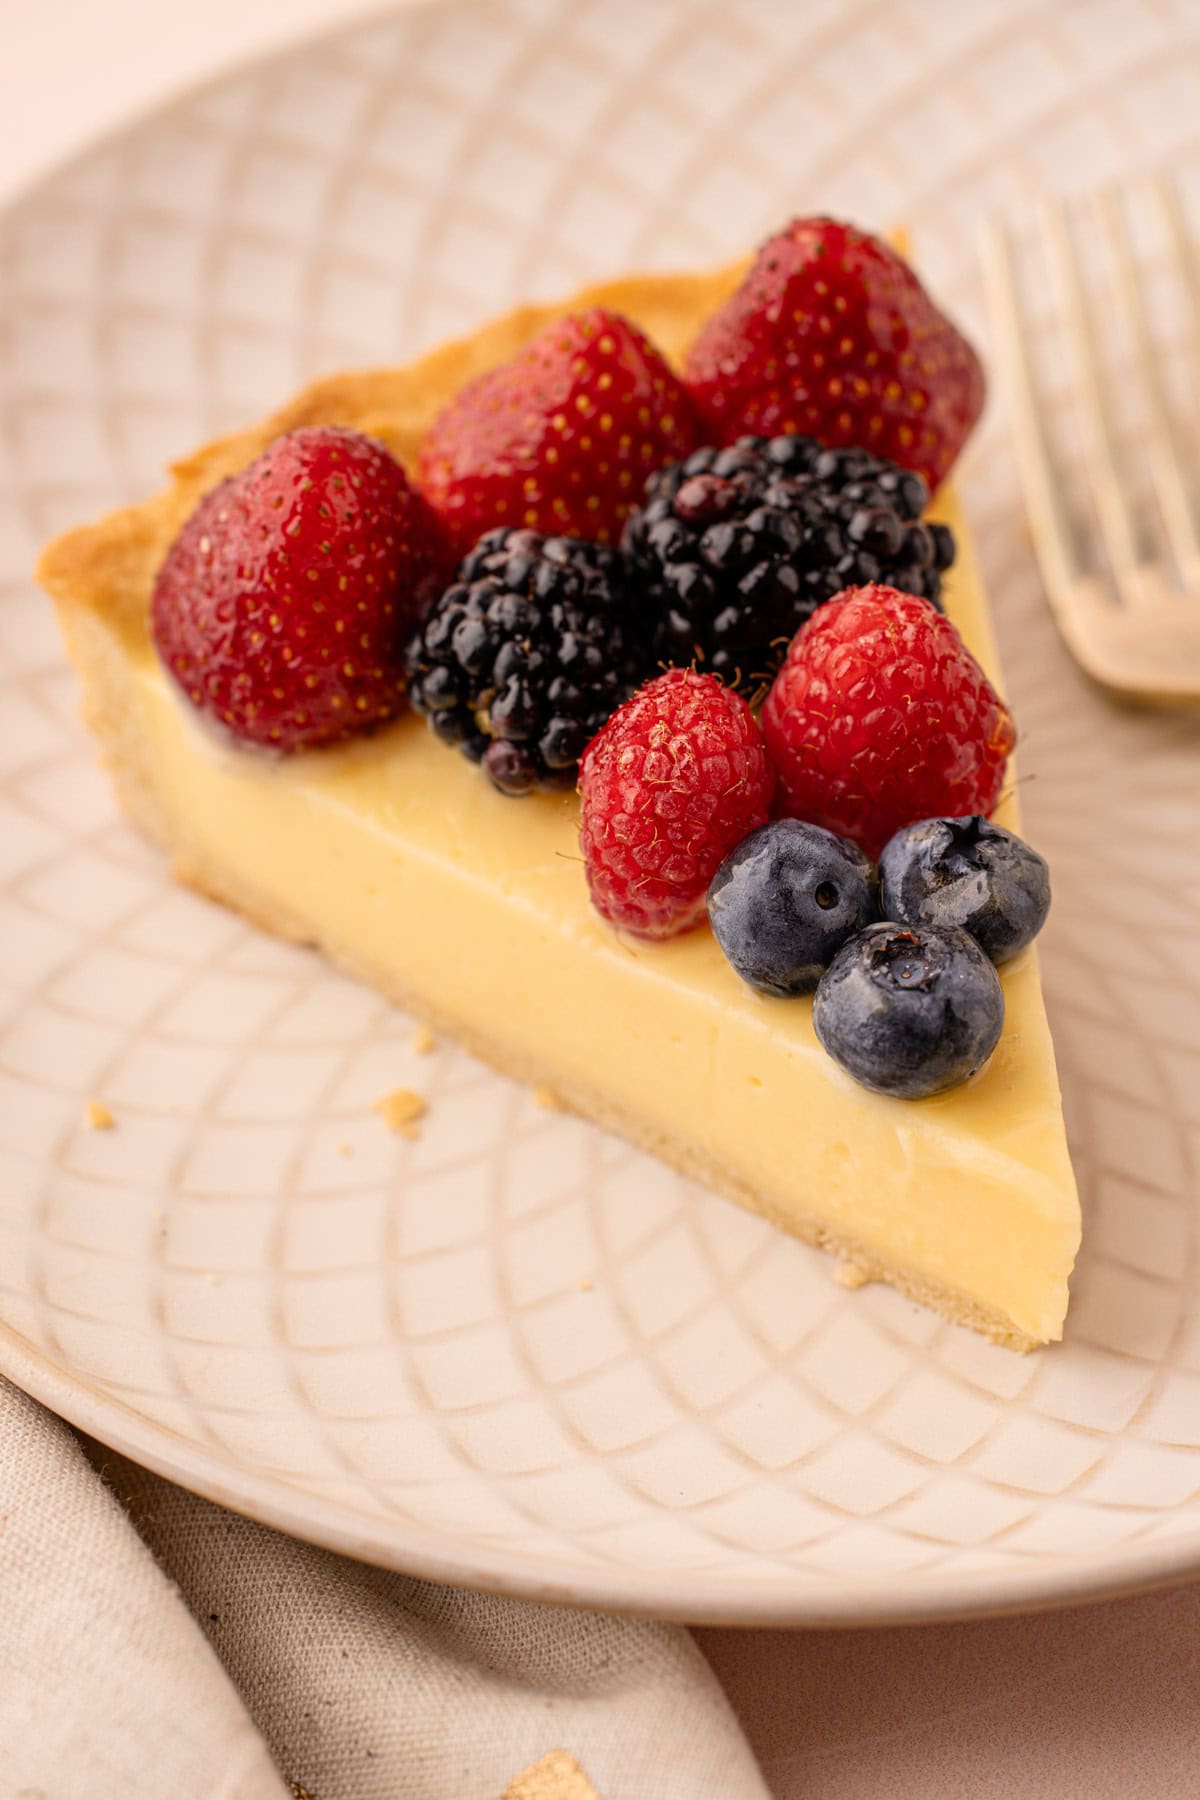
This classic Fresh Fruit Tart recipe features a crisp pastry shell, smooth vanilla pastry cream, and a stunning fruit array, that is both deceptively easy to make yet such an impressive dessert.
Want to save this recipe?
Enter your email & I'll send it to your inbox. Plus, get weekly updates from me!
It’s easy to underestimate just how amazing a well-made fruit tart is until you take a bit. In a world filled with trendy, show-stopping desserts, one bite of a homemade fresh fruit tart will quickly remind you why it's a beloved classic. It's crunchy (thanks to that crisp pastry shell) and rich and creamy (thanks to that silky pastry cream), and that fresh fruit on top is the perfect counterbalance to it all.
While it looks impressive, this tart is surprisingly easy to make. You can glaze it for a polished finish or leave the fruit bare for a more rustic look. Classic berries work beautifully, or a mix of whatever fruit is in season can make it even more spectacular. It's a perfect dessert for any occasion.
So, let's get to making it, shall we? The article below details all the information you need to know to make these successfully, concluding with the recipe at the end. You can jump around using the menu below, or skip to the end of the article for the full recipe.
What Makes Up a Fruit Tart?
Like any good classic pastry, there are a few components needed to be made, and then assembled. A fruit tart consists of:
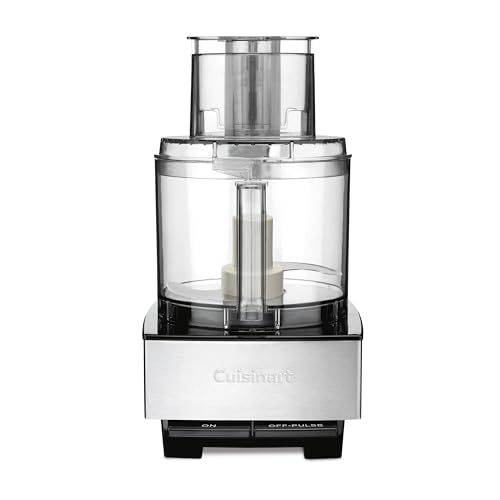
- The pastry is a sweet tart dough, known as Pâte Sablée. It is sturdy so it holds up to the heavy tart filling, but delicate enough to have a light buttery crispness to it. It’s made in a food processor and comes together quickly. It does have nuts in it, though, so if allergies are concerned, it can be swapped with this nut-free similar Pâte Sucrée recipe.
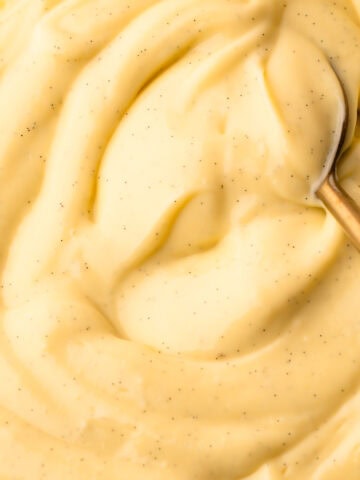
- The pastry shell is filled with a classic vanilla pastry cream. This is just a simple stovetop custard made on the stove flavored with vanilla extract (or a fresh vanilla bean if you want).
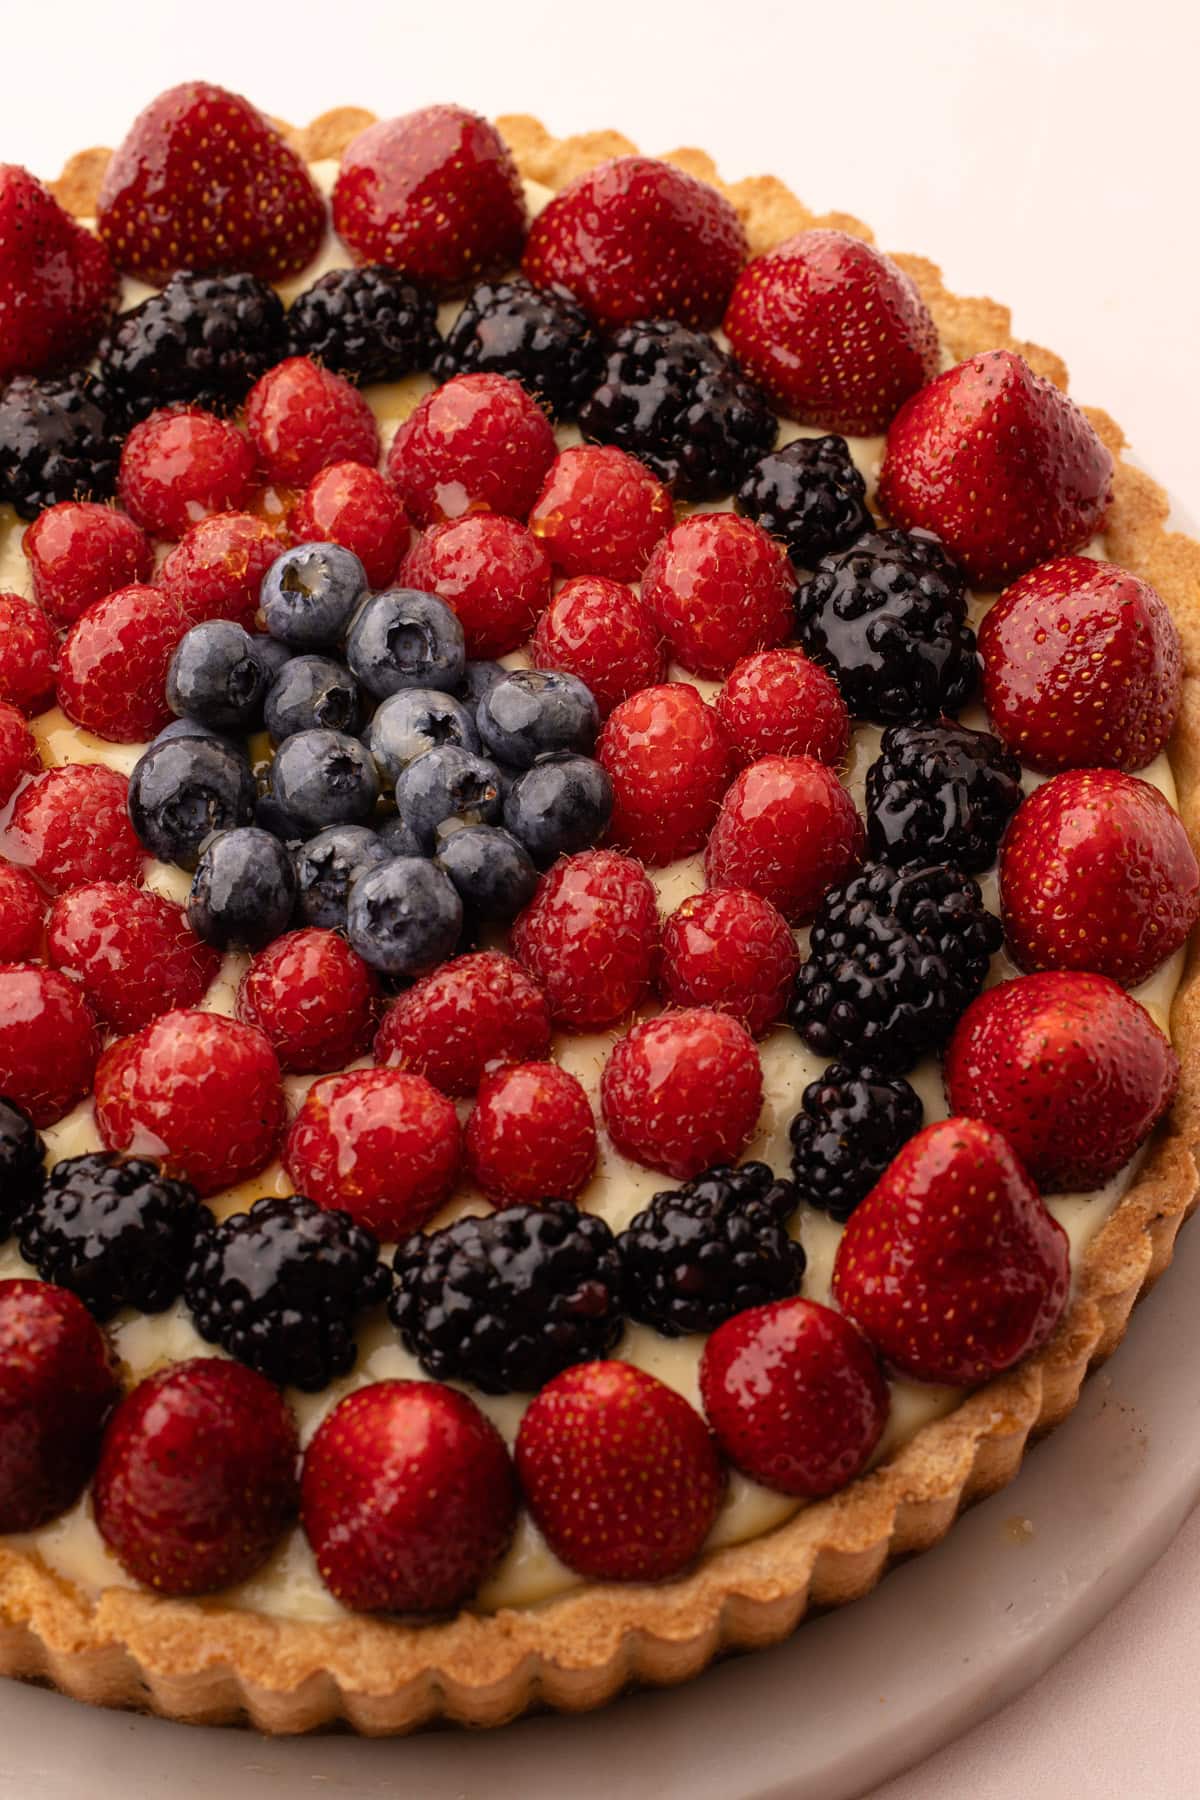
- The fruit is the star of the show. You can get as creative or as classic as you want. Berries are an easy choice and don't involve as much prep. But really, the fruit options for this tart are absolutely endless. Aside from berries, some other common choices are kiwi, pineapple, cherries, mango, peaches, or other stone fruit.
- And finally, an optional fruit glaze can be brushed on. It adds a pretty shine and keeps the fruit fresher longer, but is not absolutely necessary by any means!
While a lot of these components are interchangeable with so many other classic desserts, so there are separate articles with more in-depth details if you want to check those out that are linked. But this fruit tart tutorial will walk you through anything you need to know to successfully make this recipe!
Step-By-Step Recipe Overview
Here is a visual overview of the steps needed to make this recipe. This is not the actual recipe, which is located at the end of this article and has much greater details to ensure success.
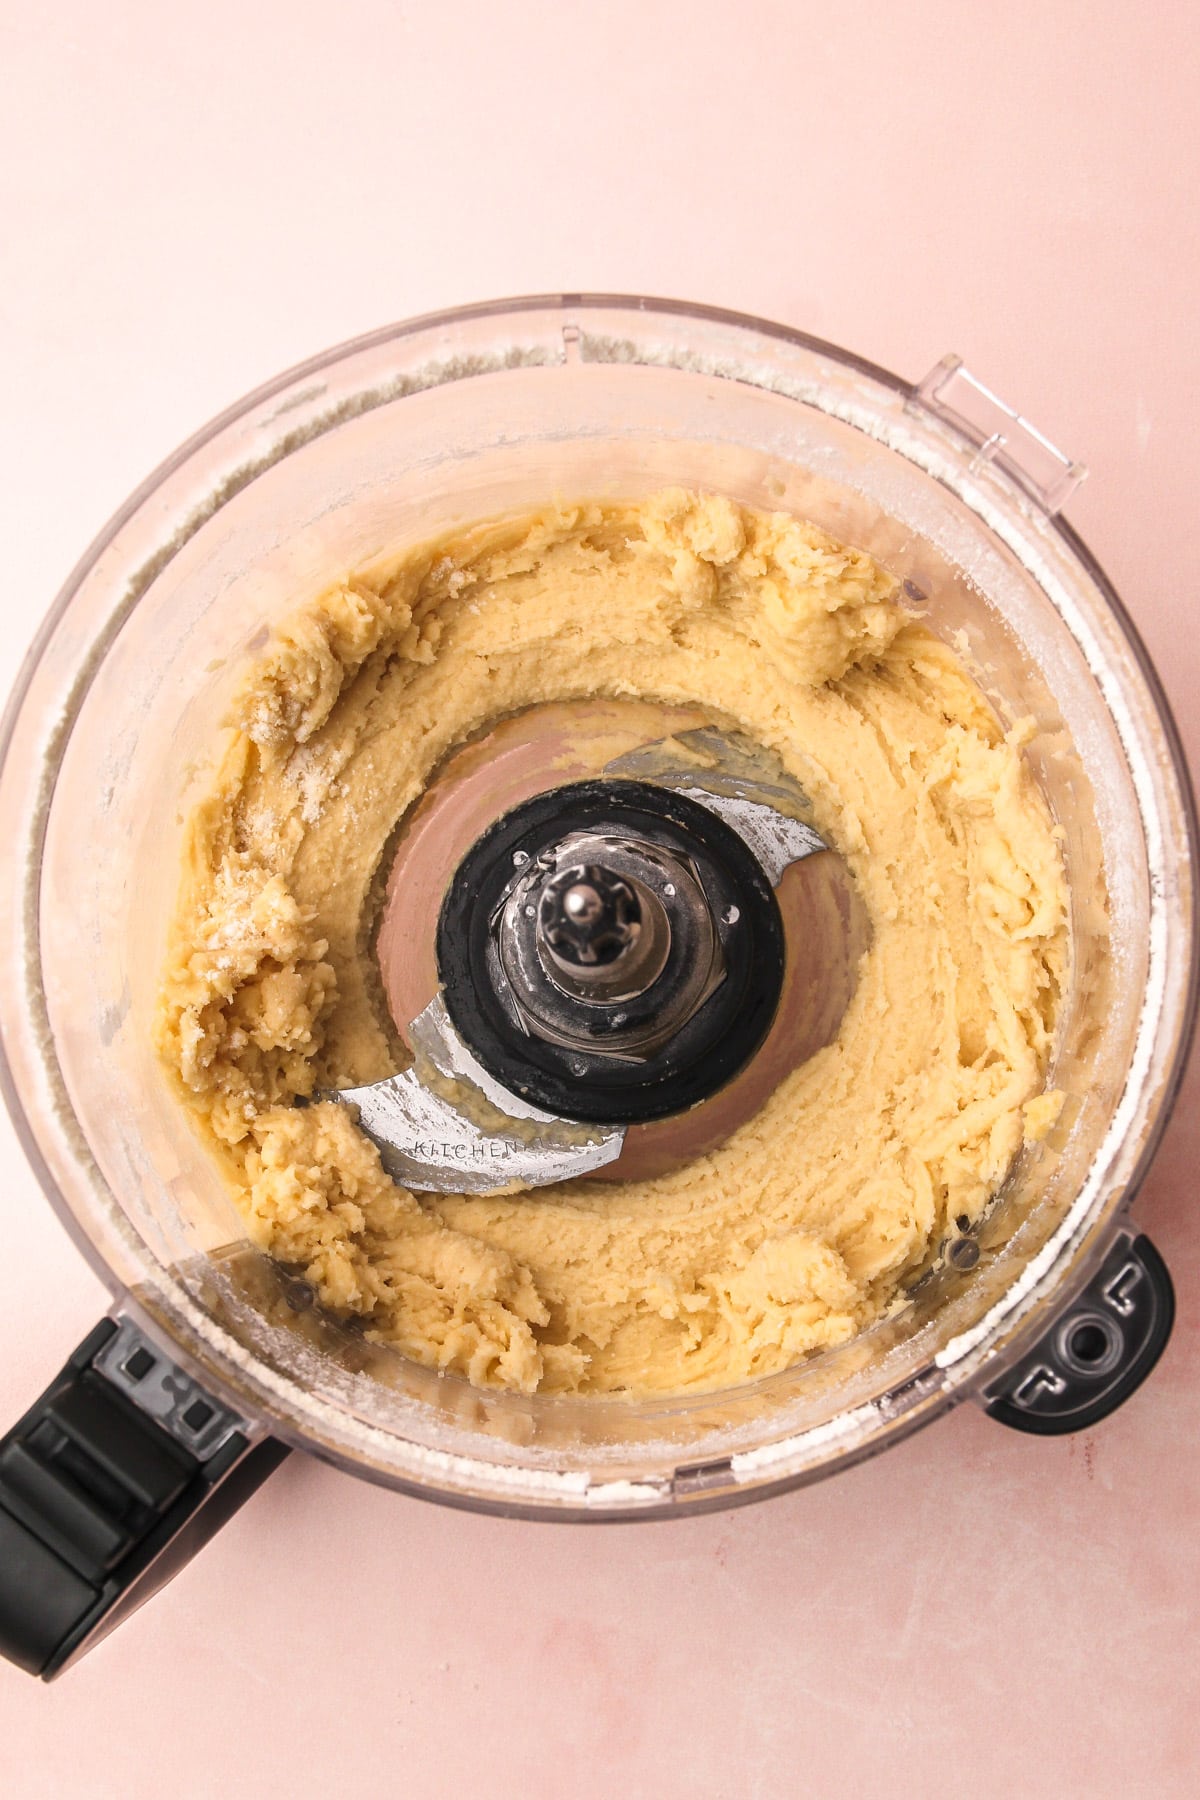
Step 1: Assembly the Pâte Sablée in a food processor. Chill for at least 30 minutes.
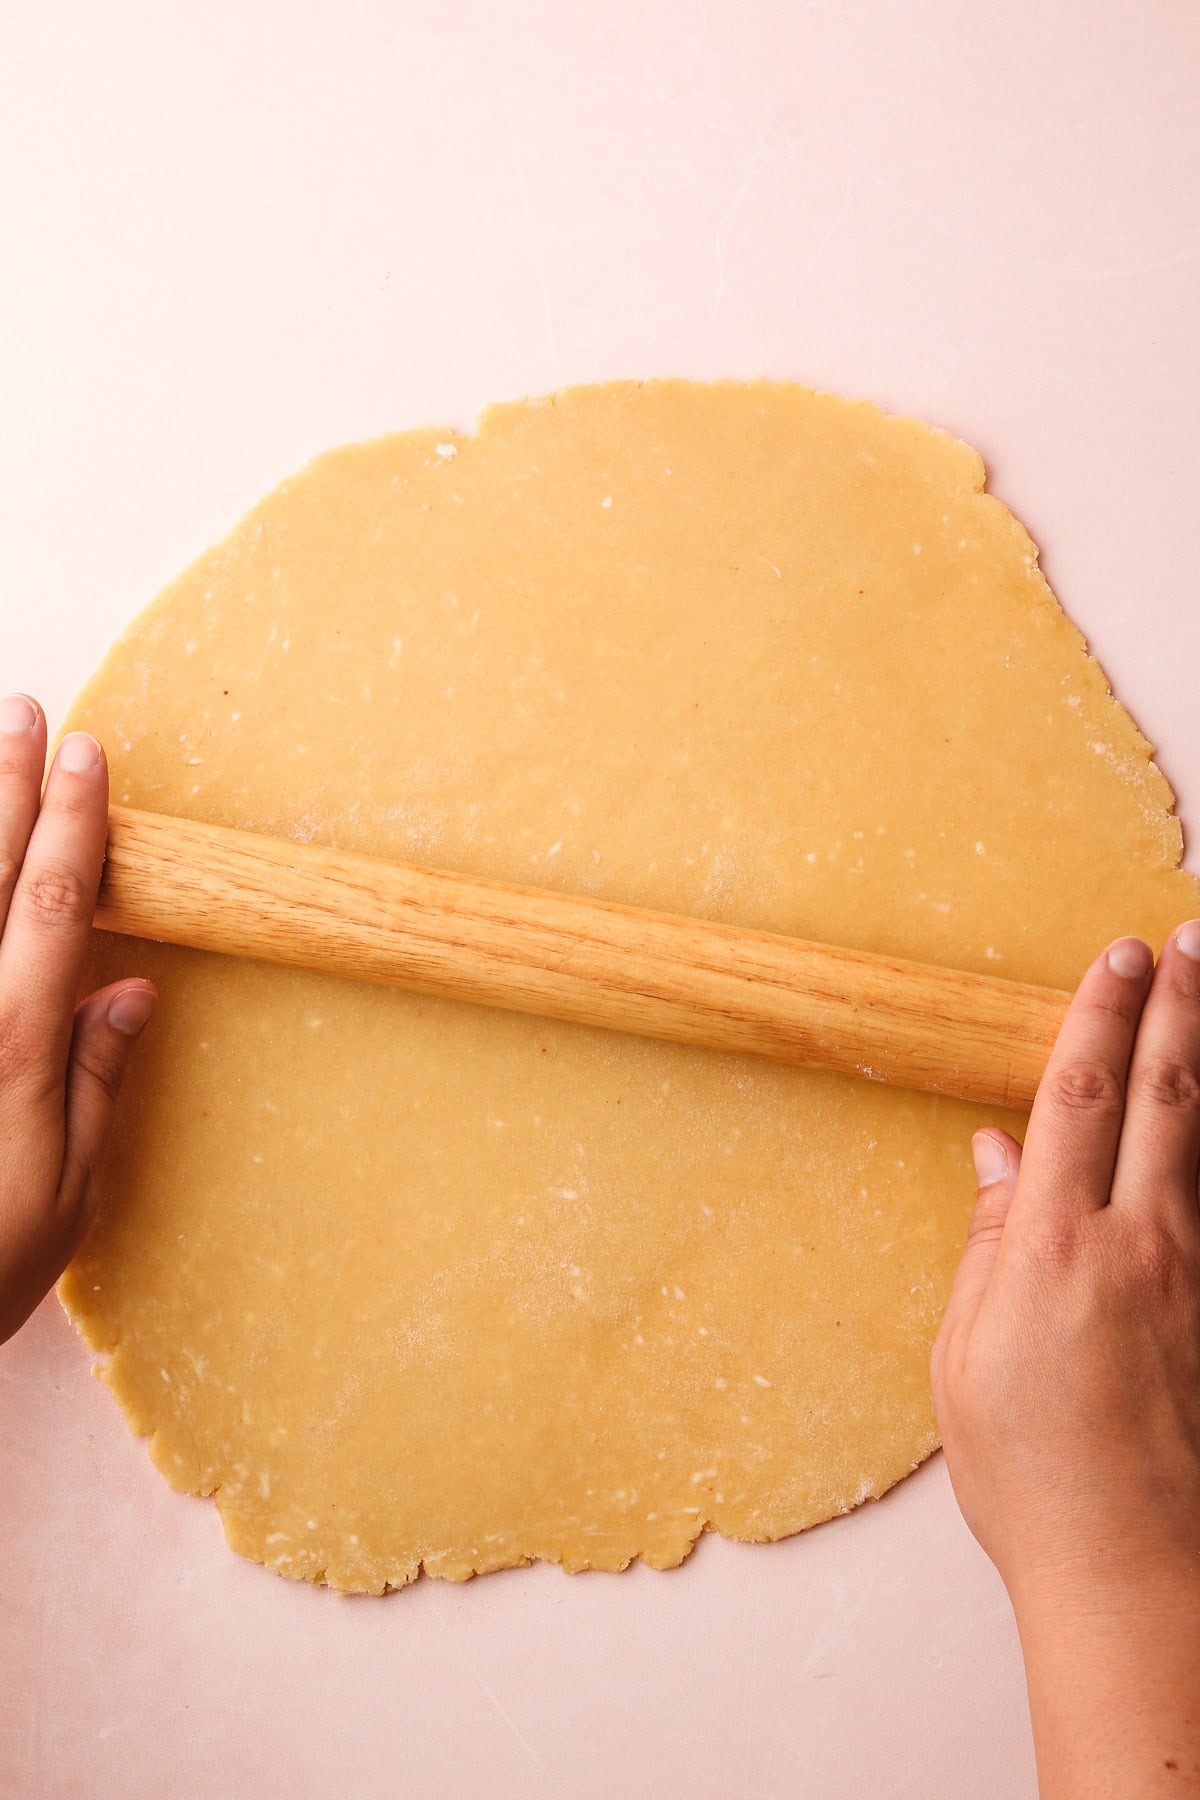
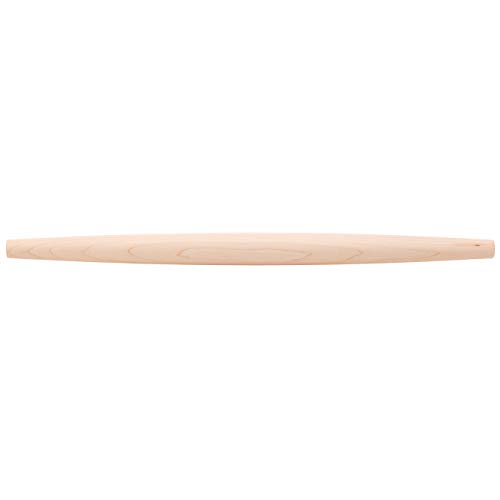
Step 2: Roll the chilled pastry on a floured surface to an 11-inch circle, and fit it into a 9-inch tart pan.
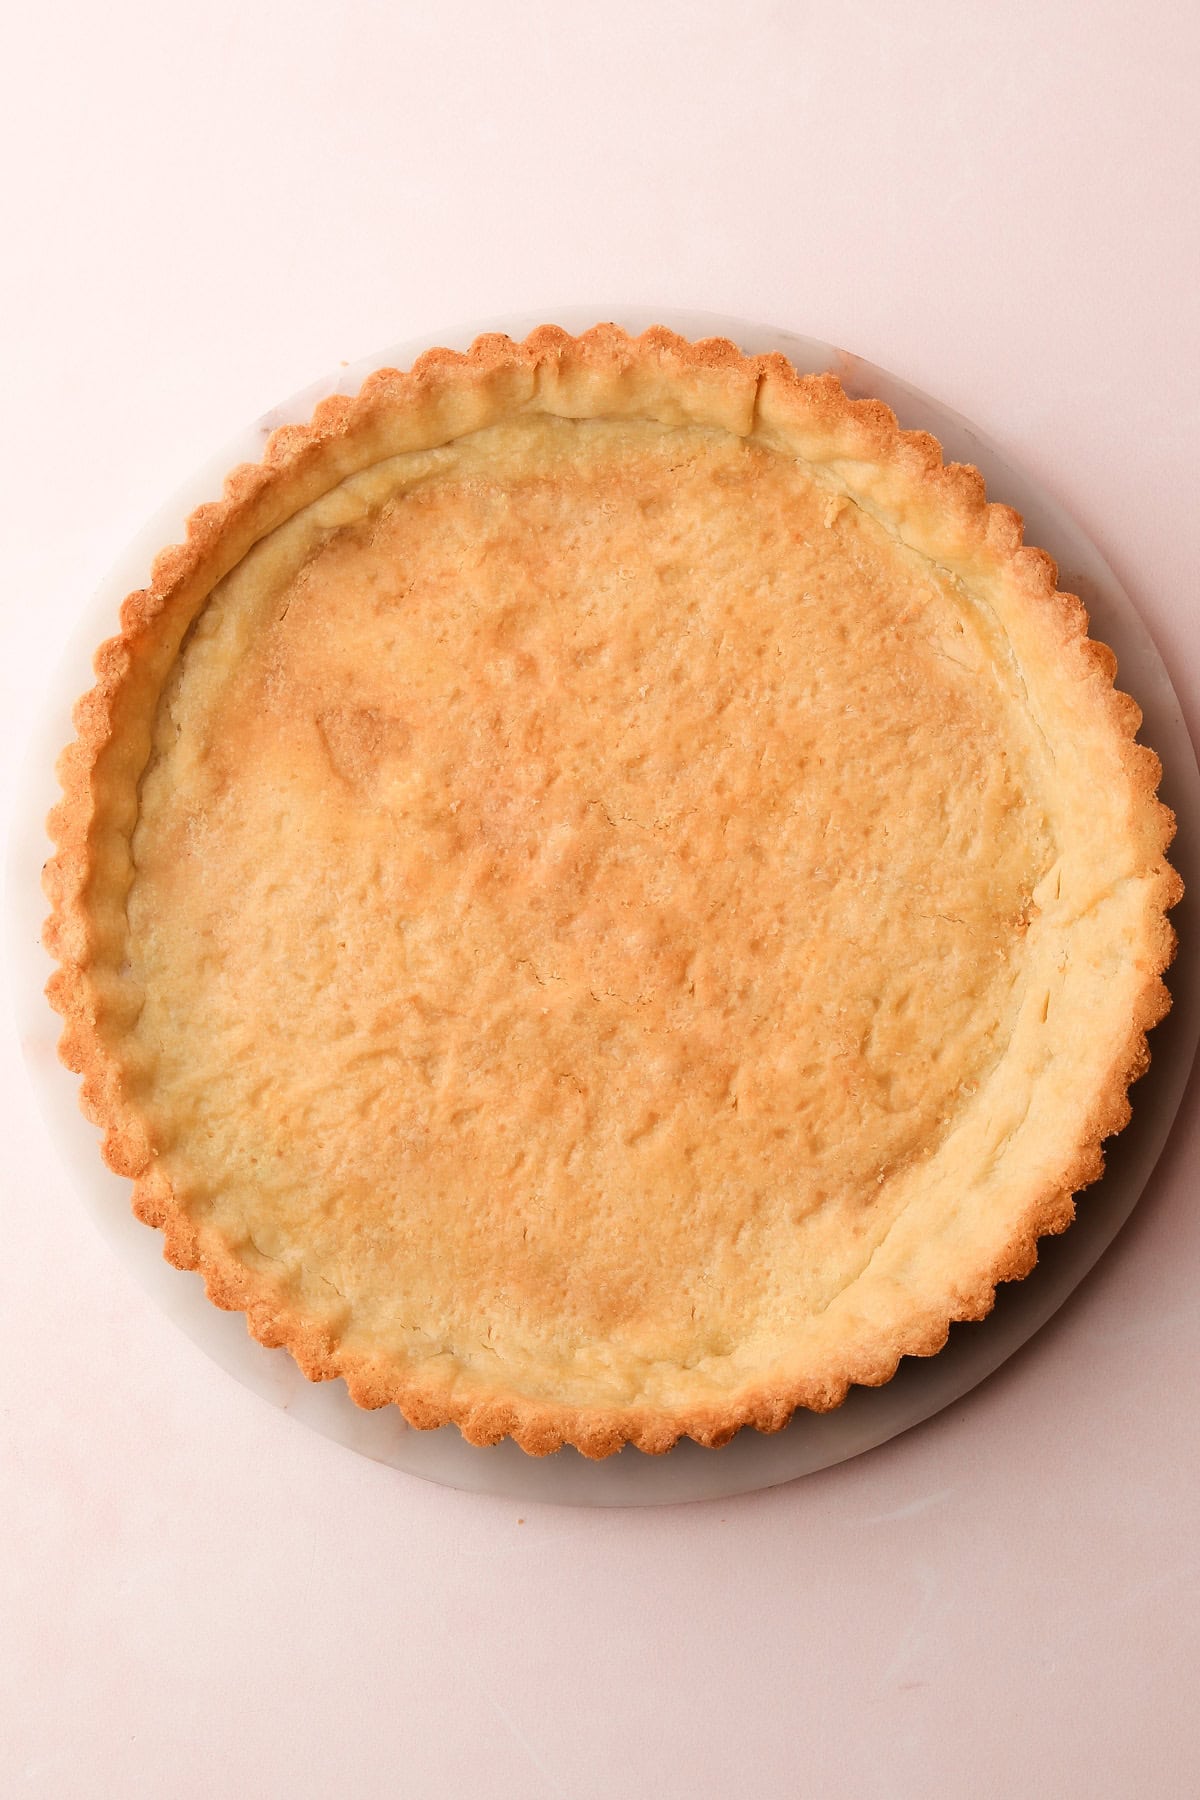
Step 3: Blind bake the tart shell completely.
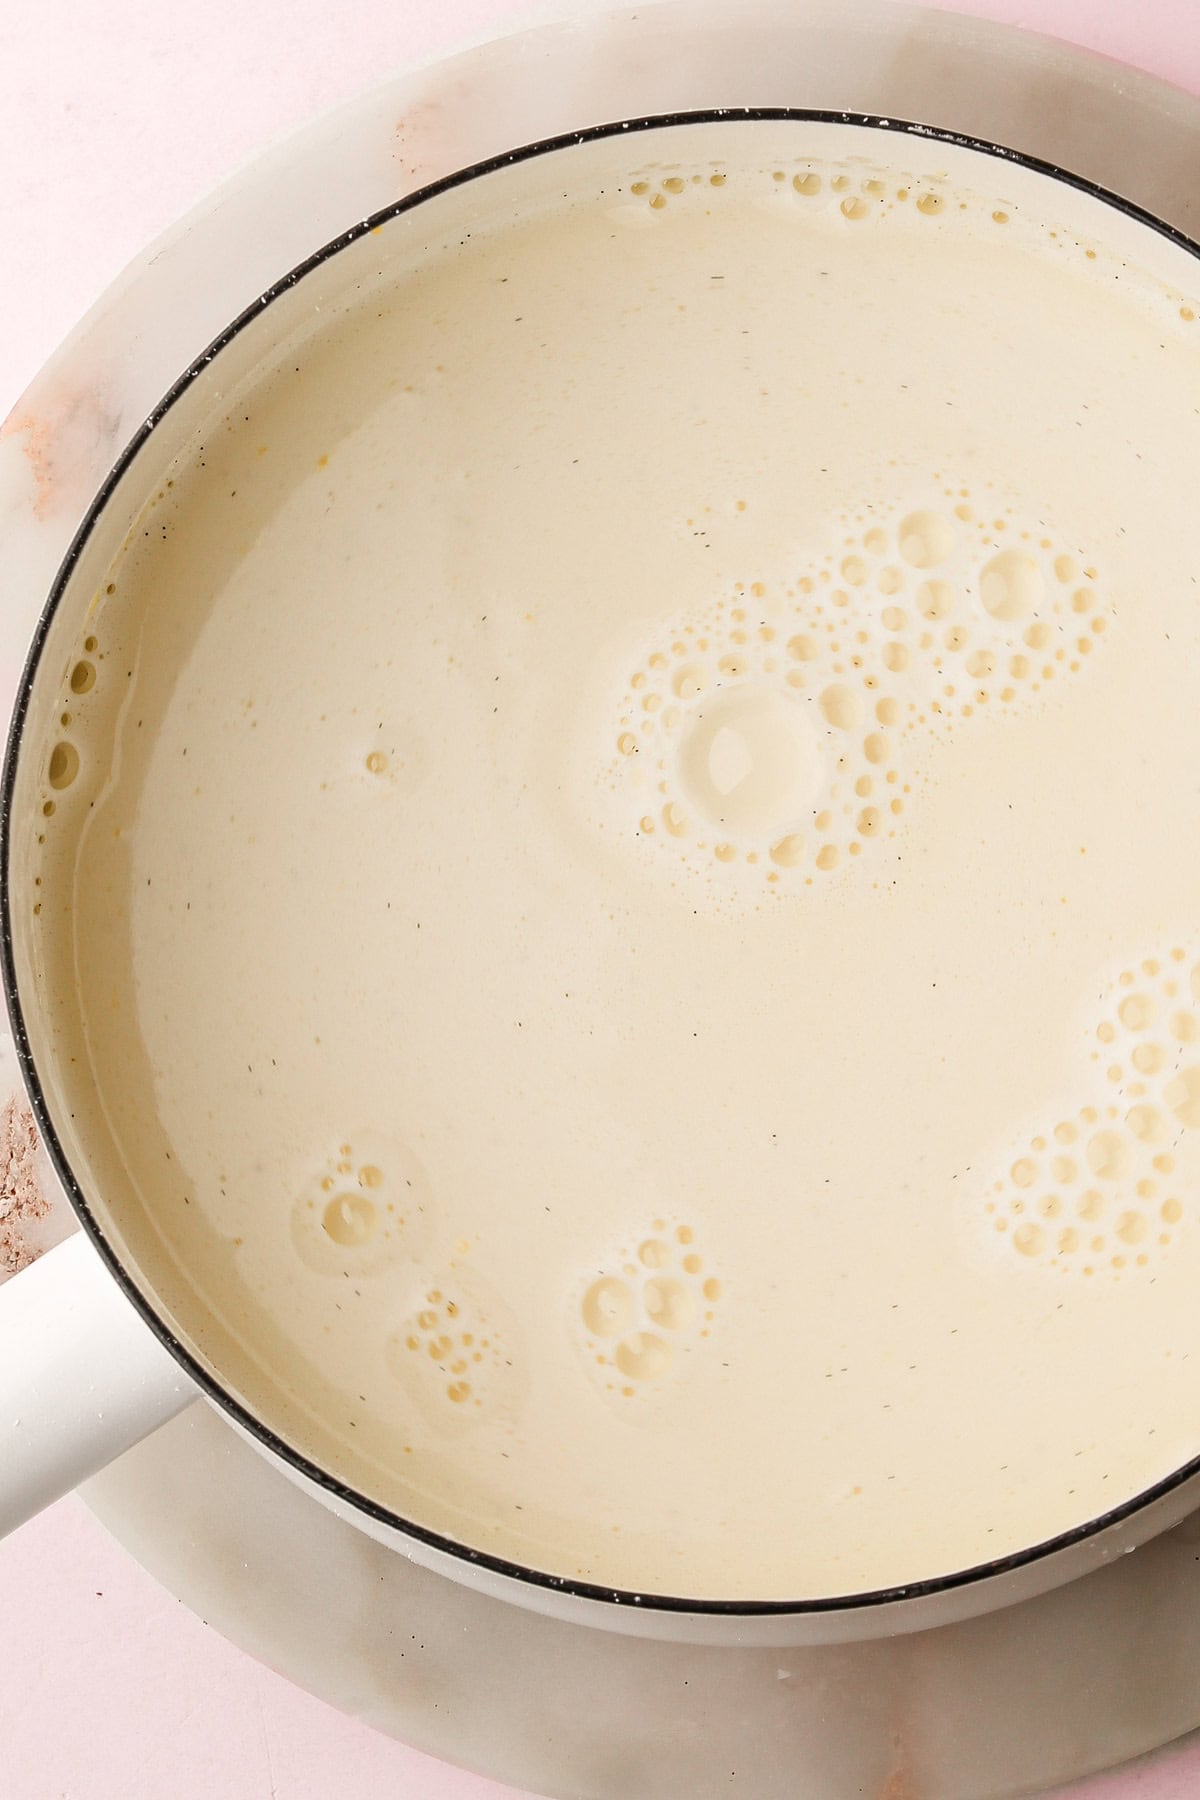
Step 4: Whisk together the pastry cream ingredients in a pot.
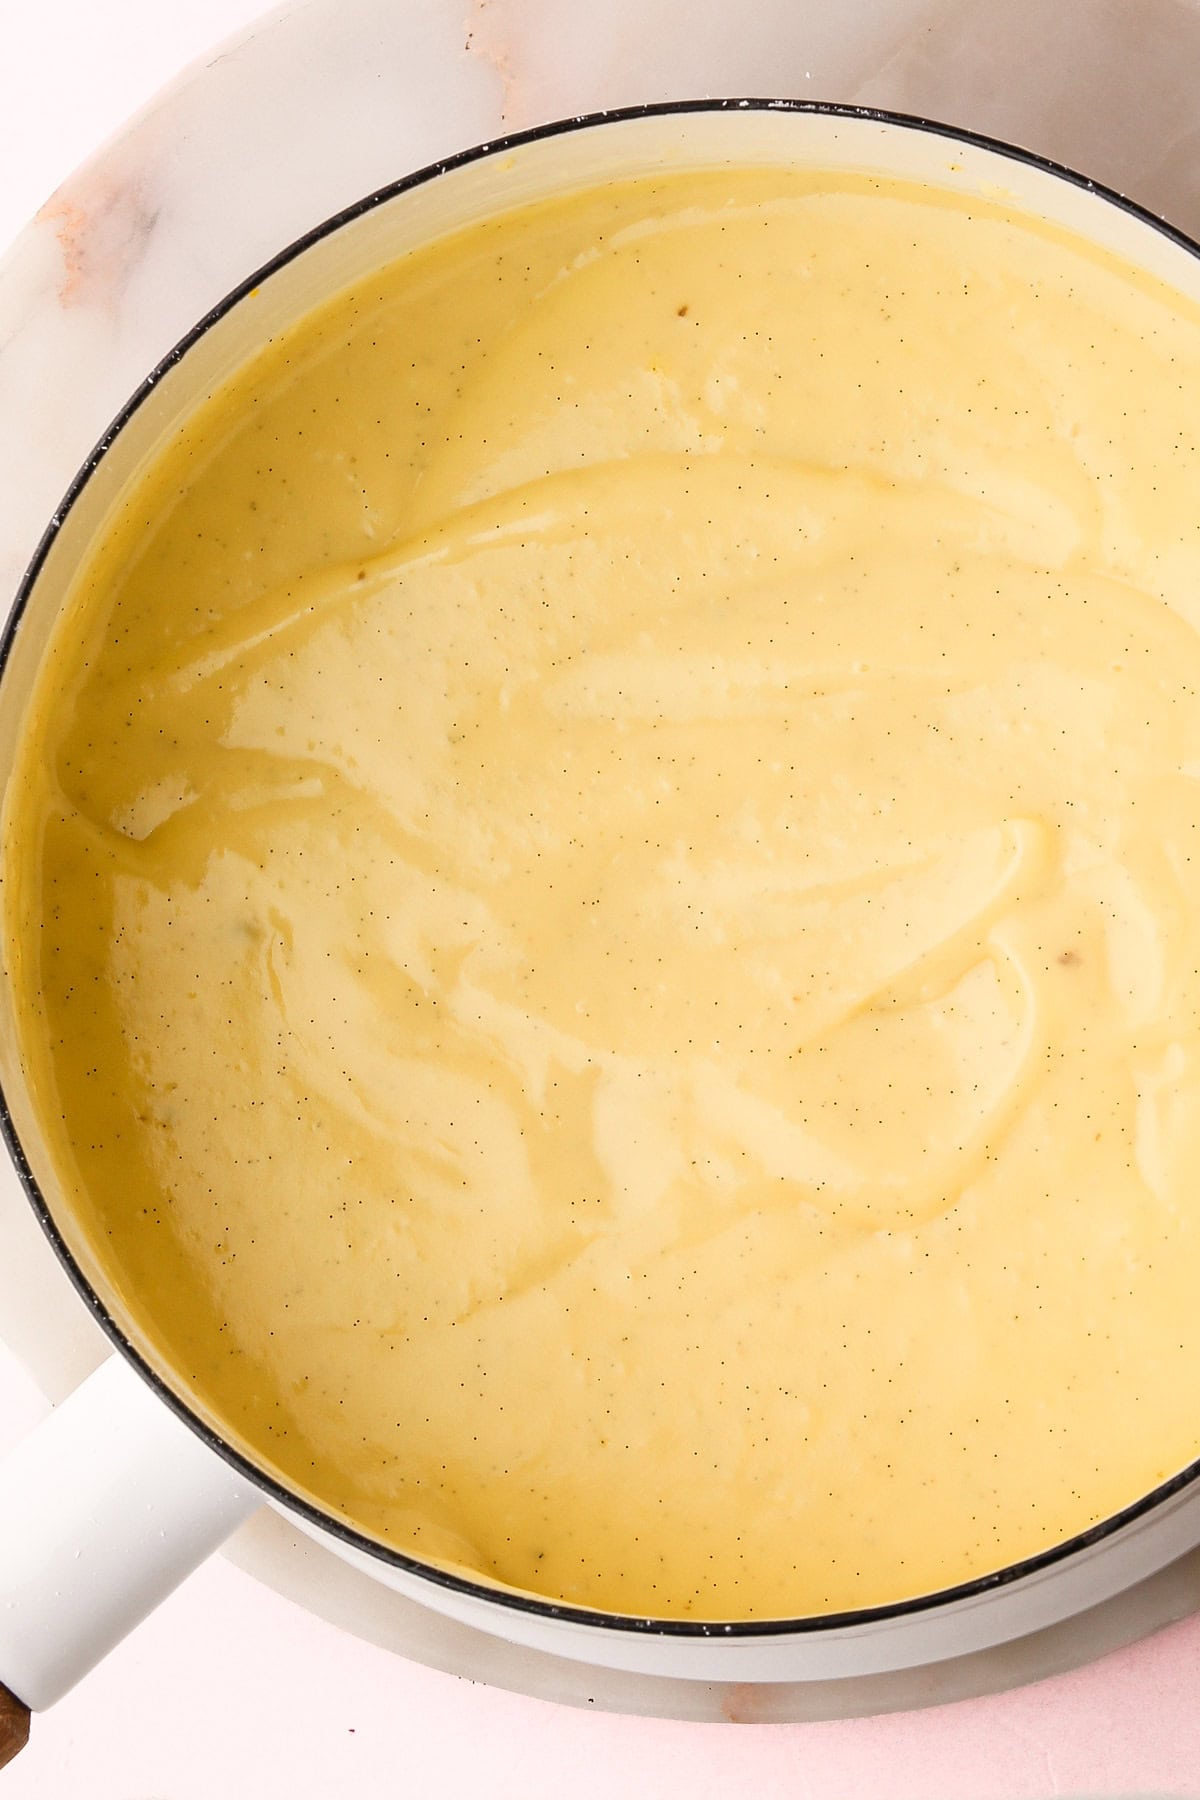
Step 5: Cook over medium heat, whisking constantly and scraping the edges, until the custard thickens and large bubbles form, about 8 minutes.
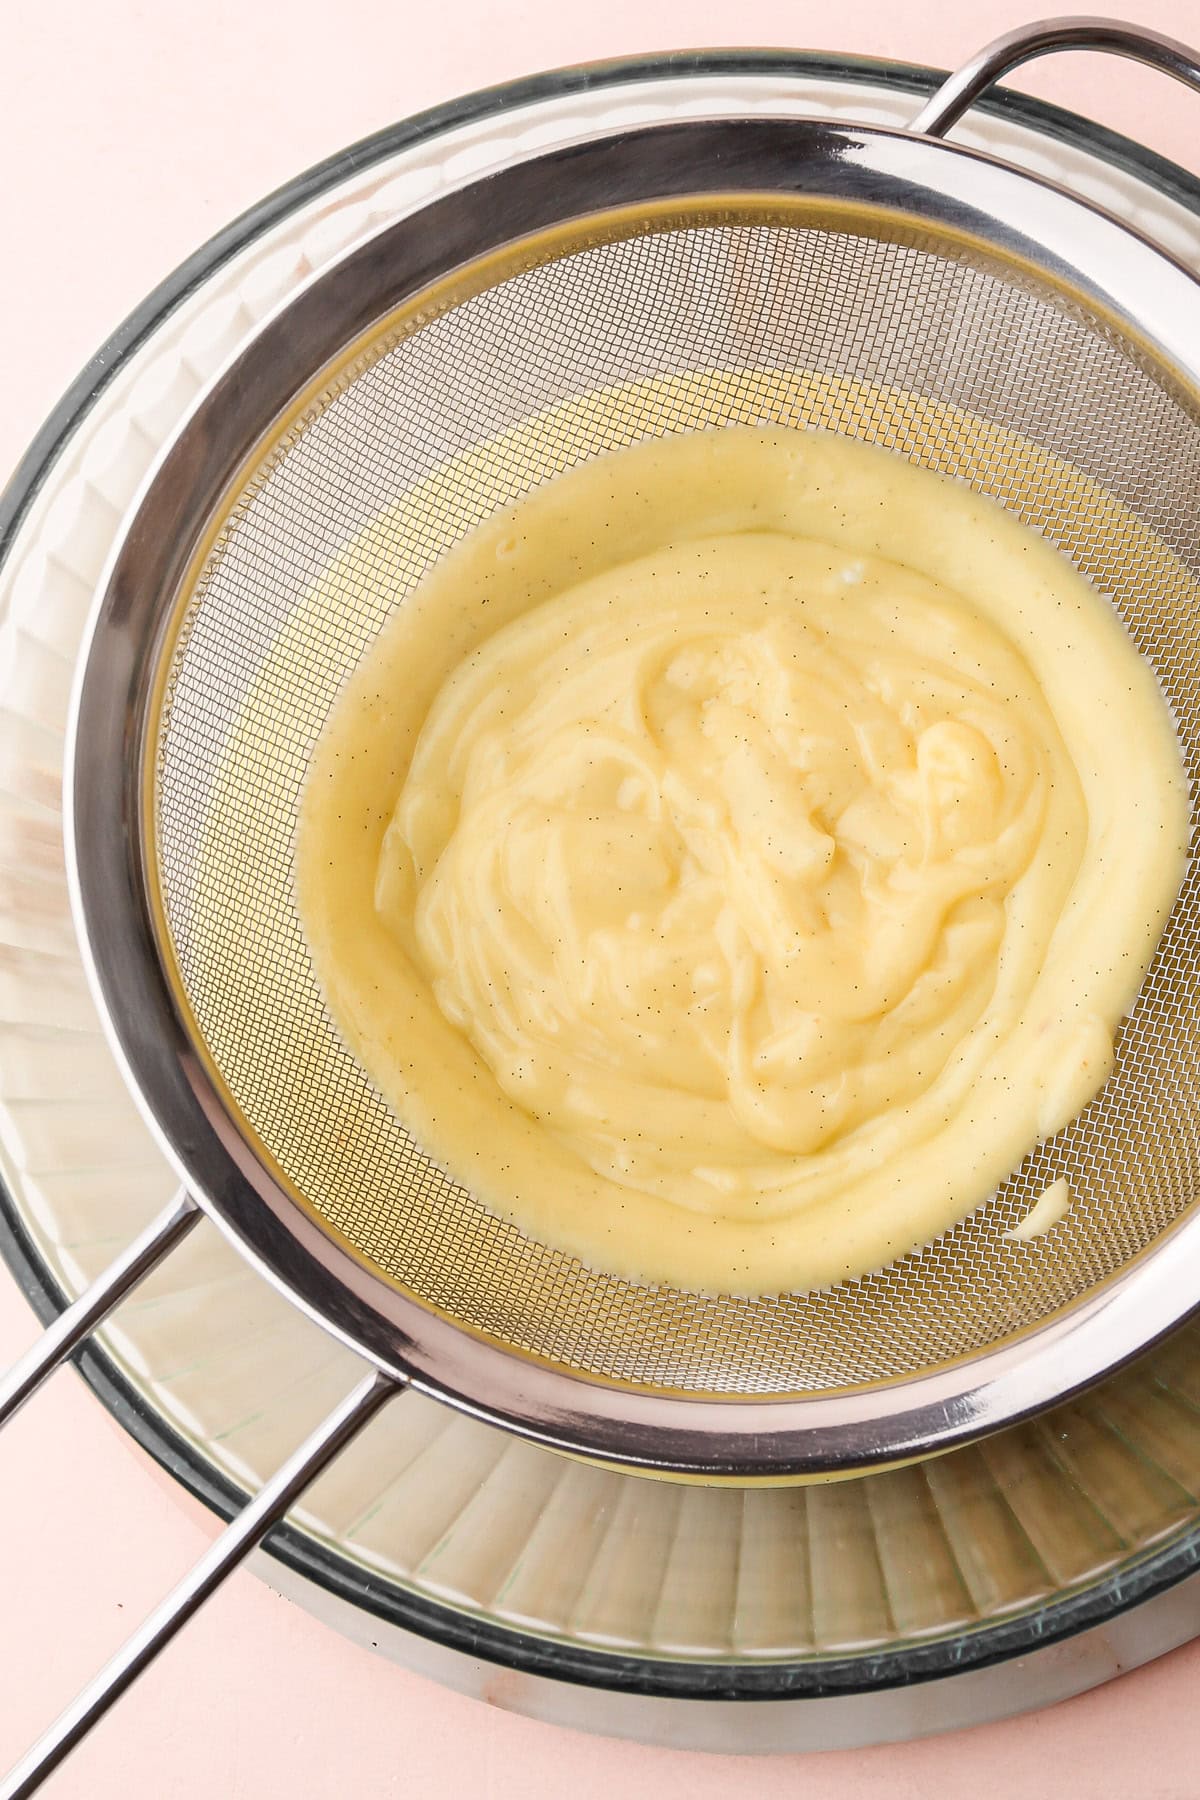
Step 6: Remove from heat and pour the pastry cream through a fine-mesh strainer into a bowl. Whisk in the butter and vanilla extract until fully combined.

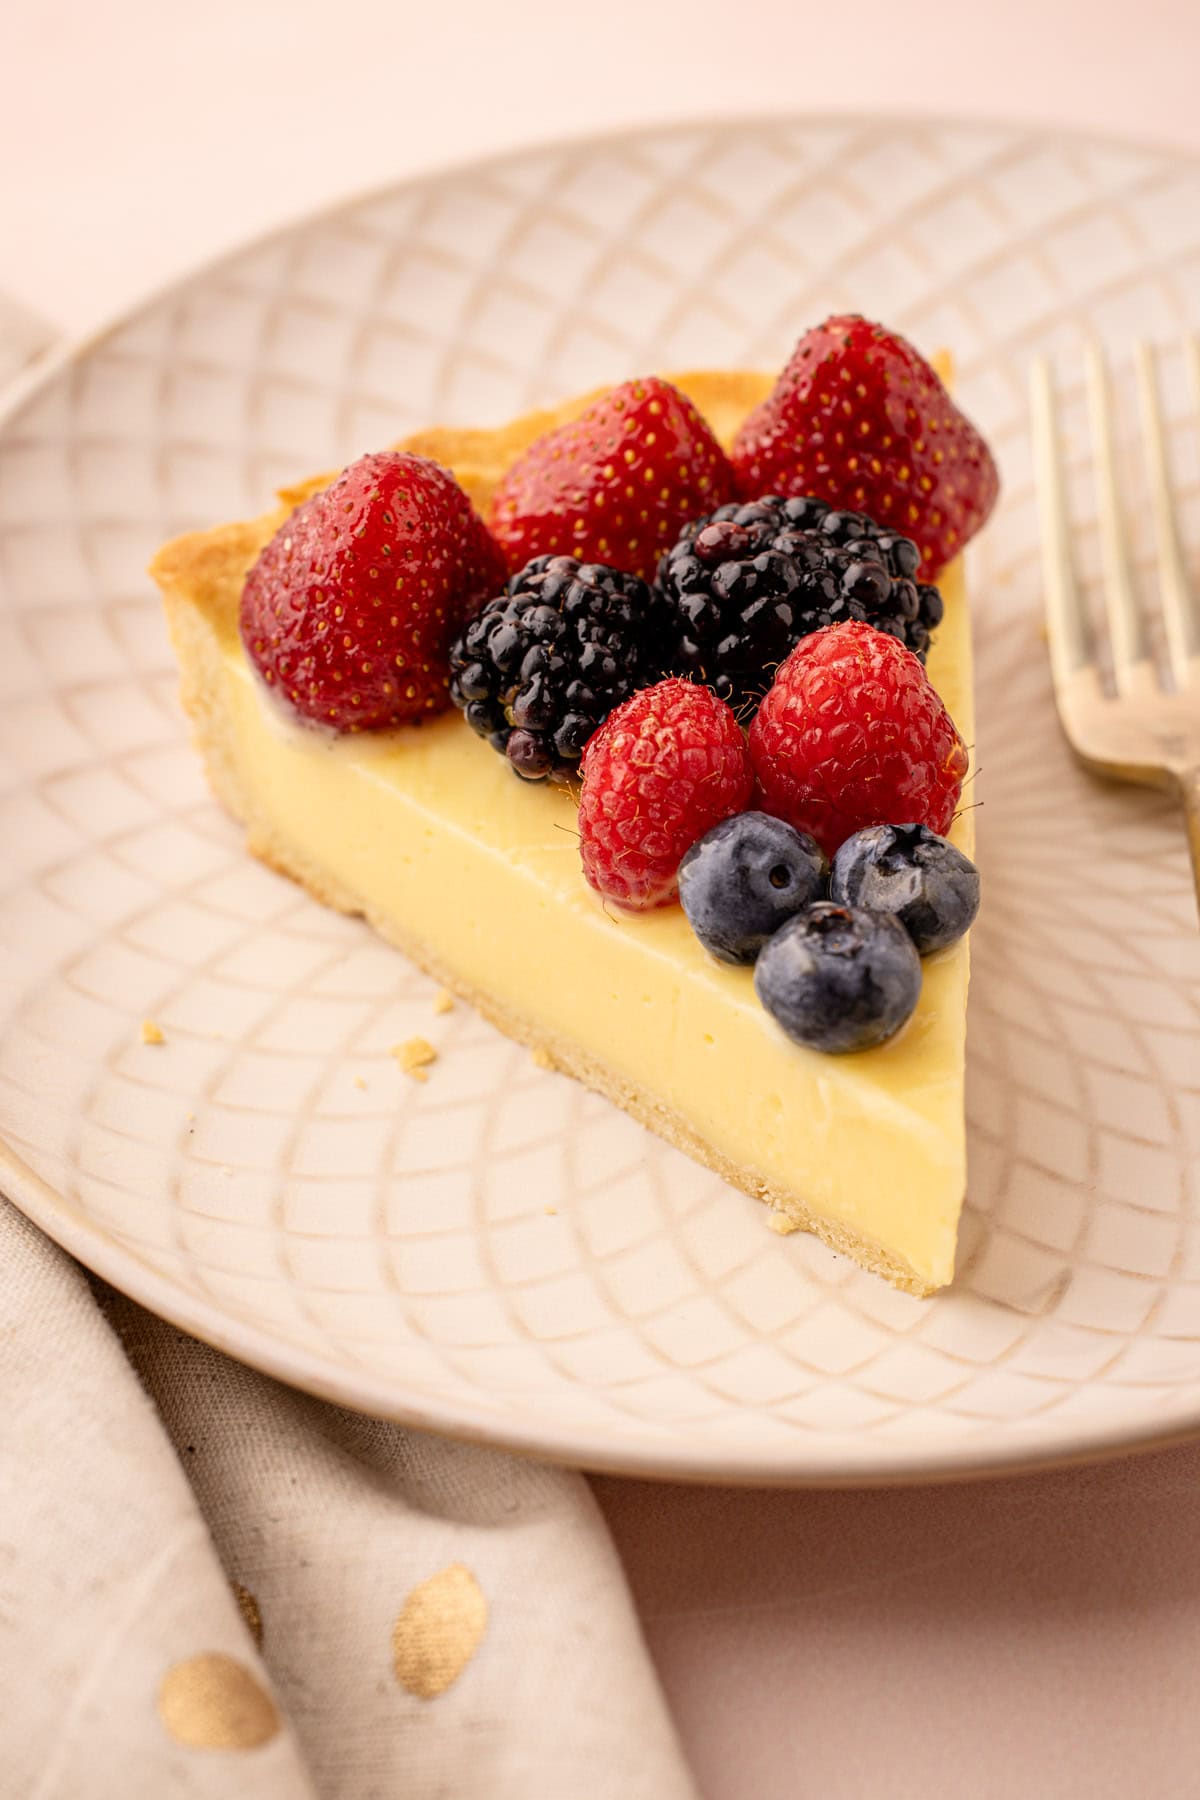
Step 7: Let the pastry cream cool slightly until it's no longer steaming hot, then transfer to the blind baked pastry shell. Cool to room temperature than let chill and set up in the refrigerator for 4-24 hours.
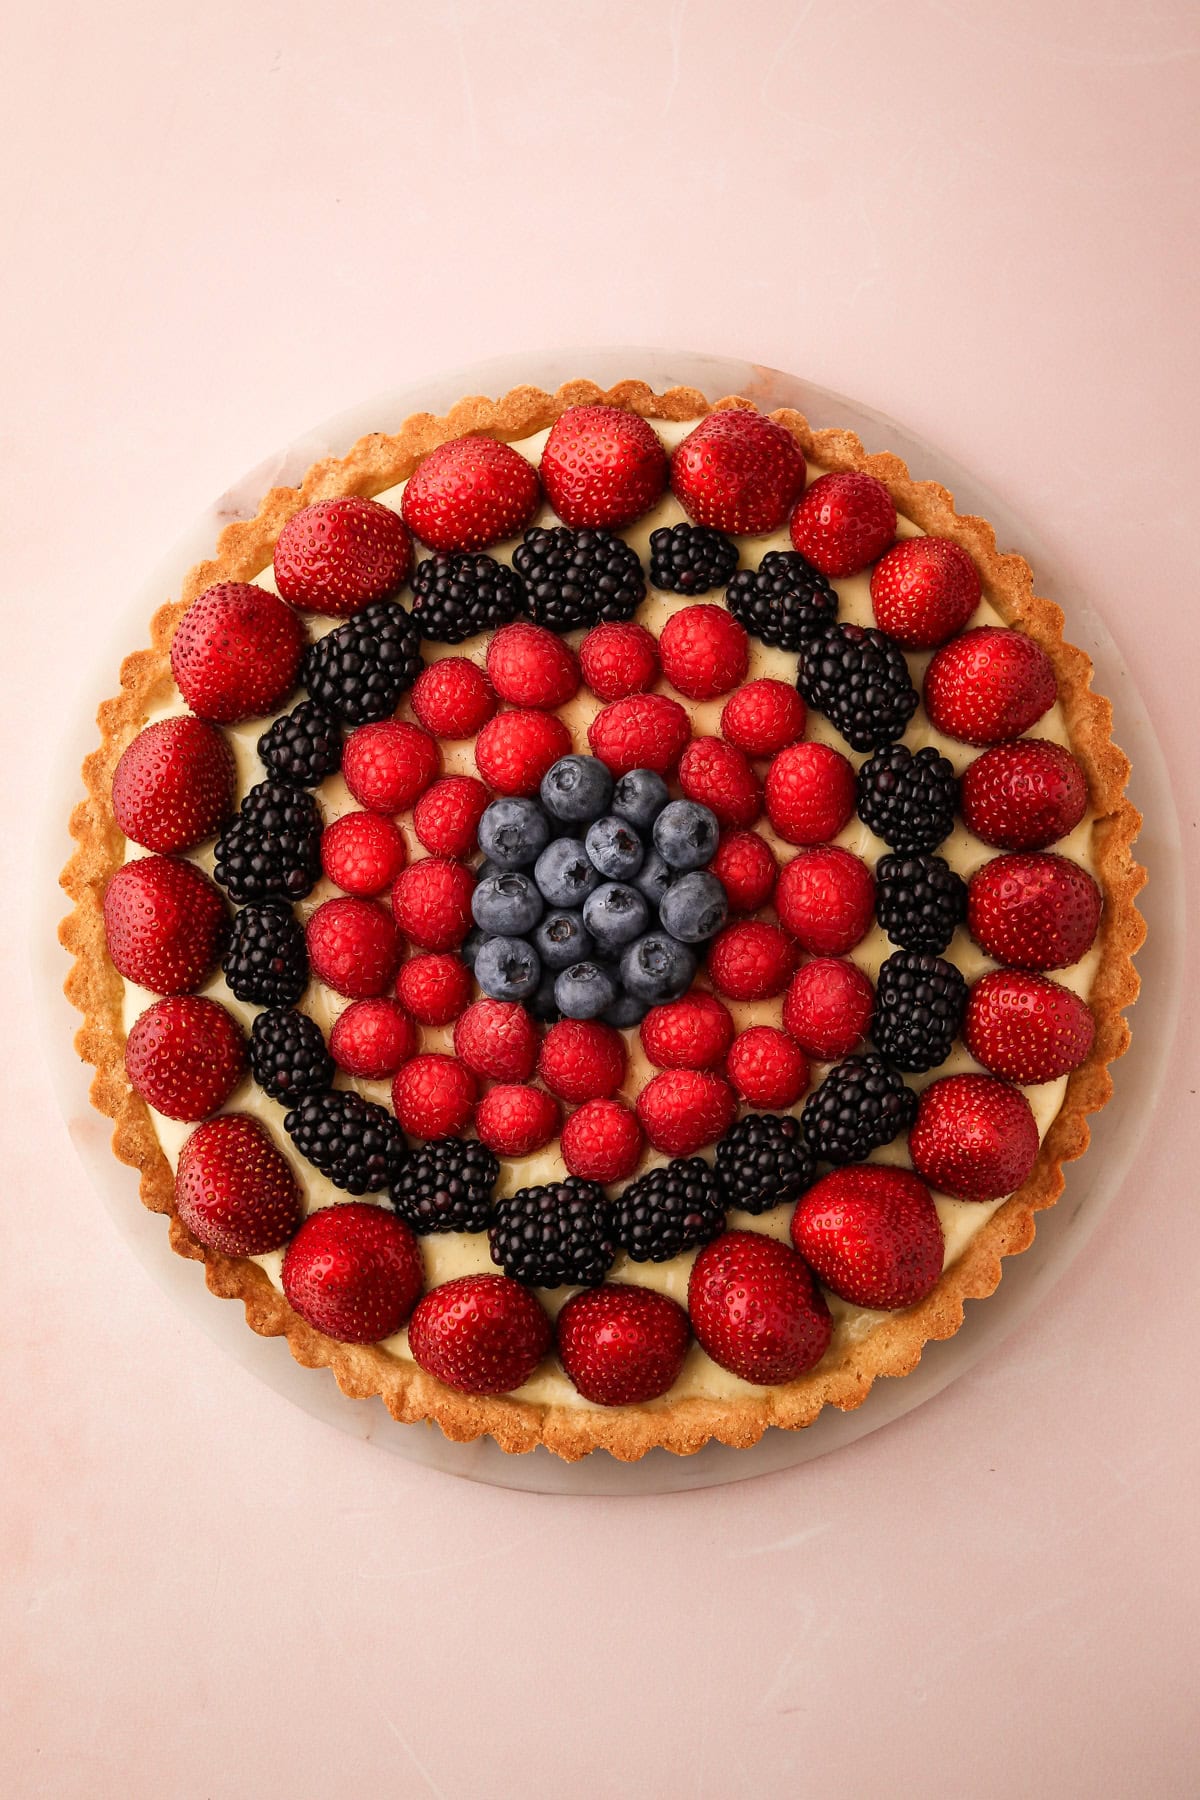
Step 8: Arrange the fruit. You can get as creative or as classic as you want. The fruit options for this tart are absolutely endless and you can truly choose what you like to eat.
To Glaze or Not to Glaze
Whether or not you want to glaze your fresh fruit tart is a serious question! Some are adamantly anti-glaze. But others feel in order to be a classic fruit tart, you must add that shiny glaze atop the fruit.
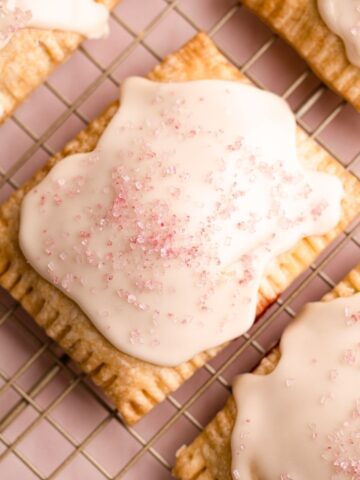
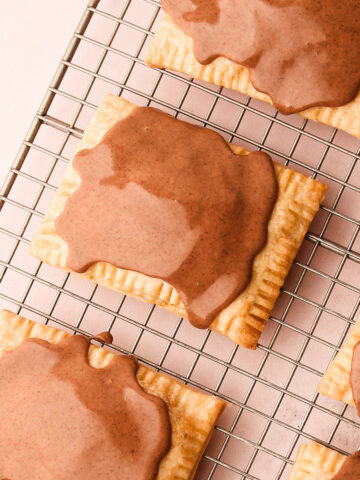
The glaze is helpful to keep the fruit fresher longer and gives it a nice clean finish that makes the fruit tart a professional appearance.
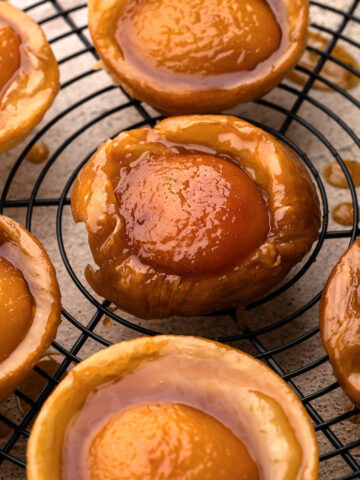
The glaze is simple. It's made from heated and strained apricot preserves, that have a bit of water added to it to make it possible to brush it onto the fruit.
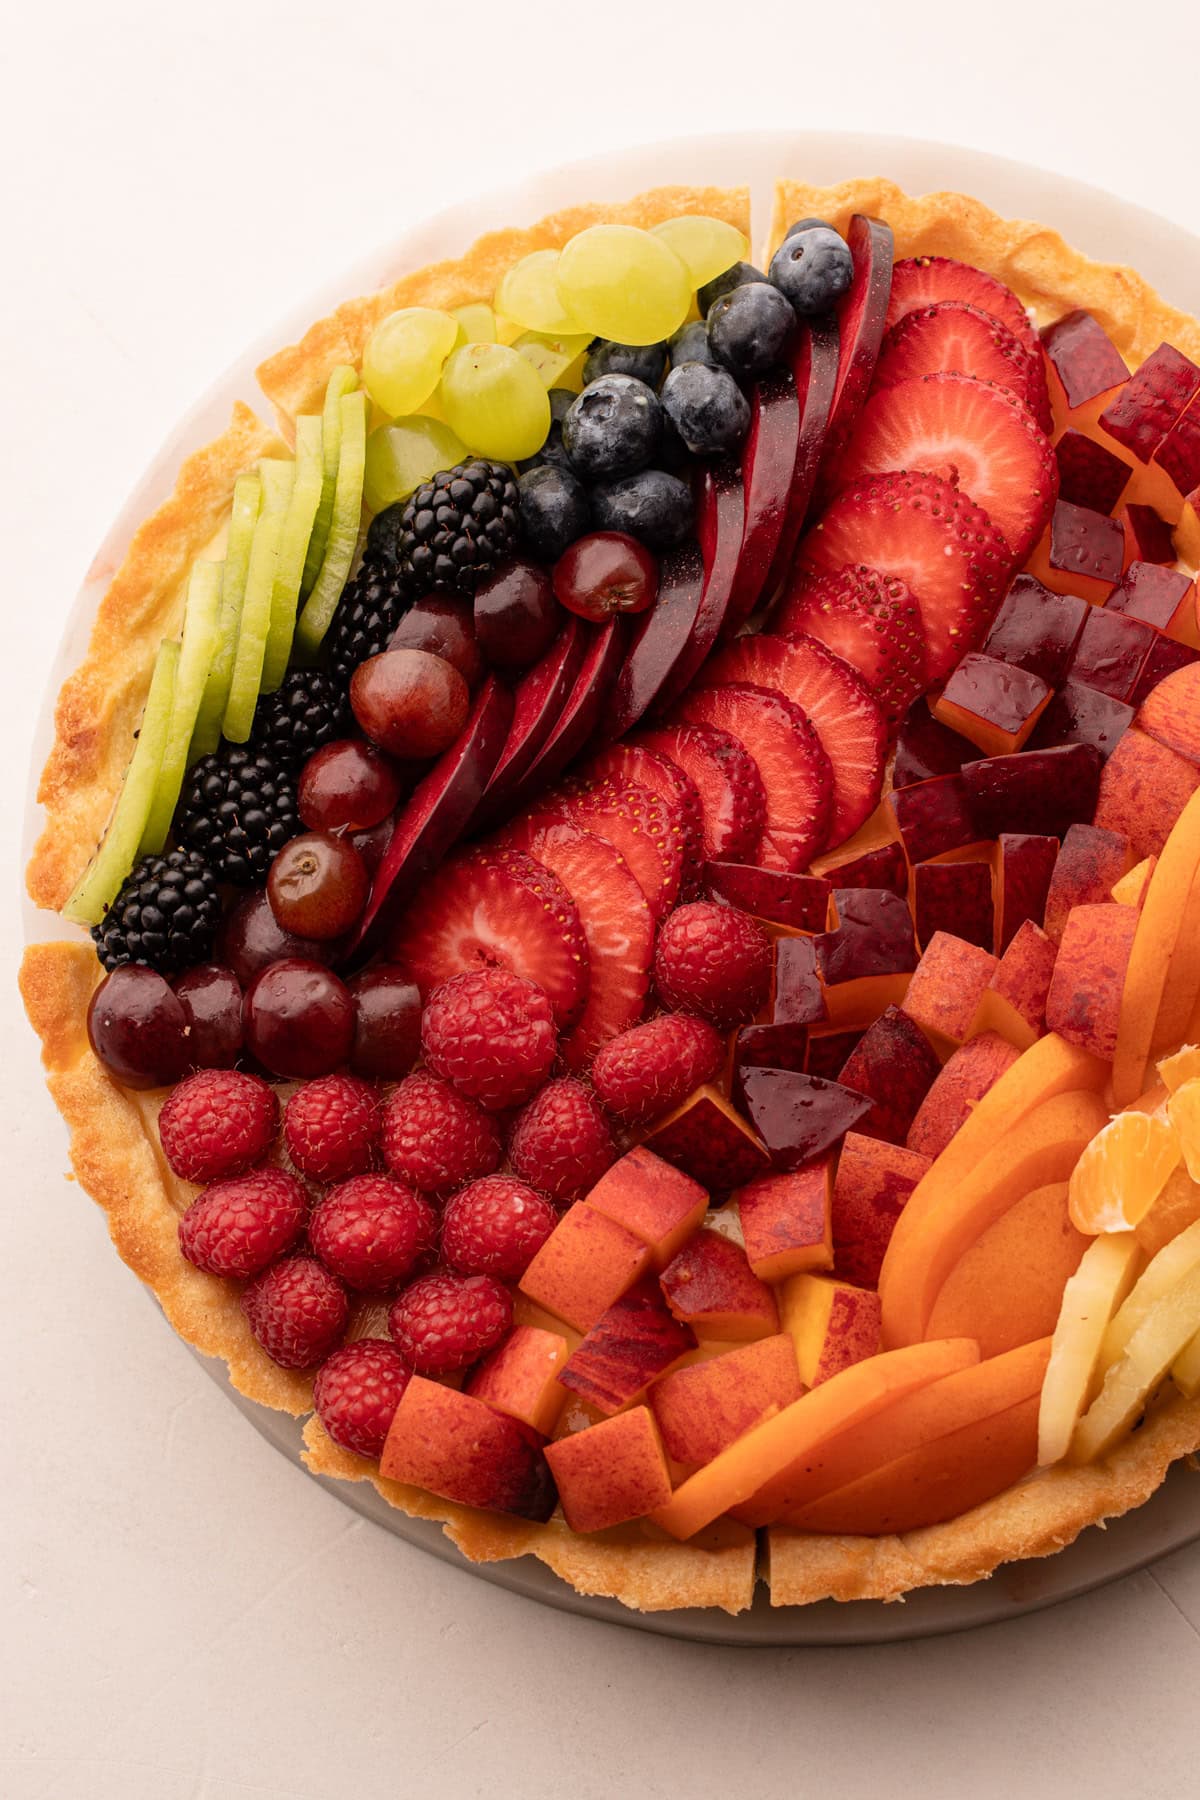
A fruit tart made with an assortment of stone fruit, berries grapes and tropical fruit. It does not have a glaze.
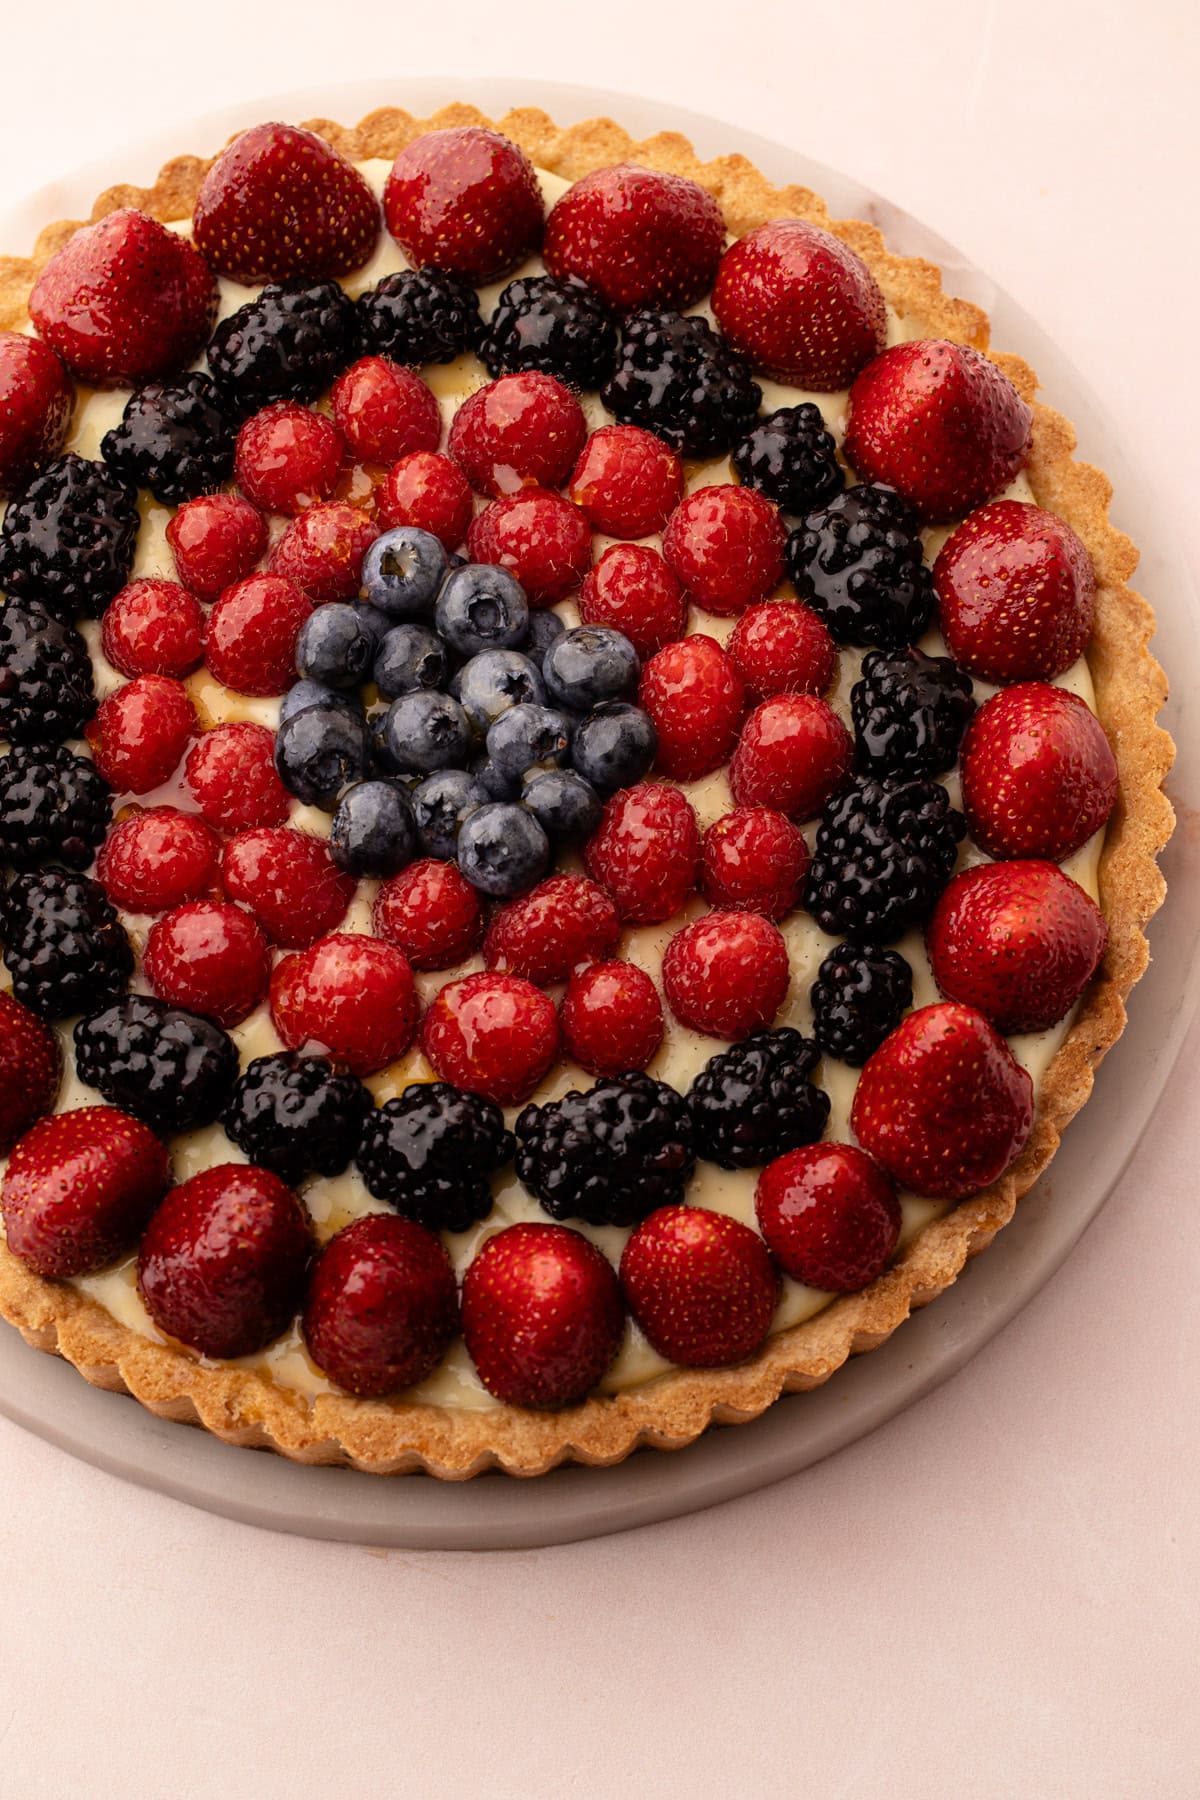
A fruit tart made with berries in a circle pattern that is glazed.
How Long Can a Fruit Tart Last?
A fruit tart is best enjoyed fresh. If you’re taking the time to make this delicate pastry, it's worth serving it at its peak. Even with a glaze to extend its freshness, it's still best on the day it's made.
Fortunately, you can prep the components ahead of time. The pastry can be made up to 2 days in advance, and the pastry cream a day ahead. Arrange the fresh fruit and serve the tart within 12-24 hours for the best results.
Kelli's Best Tips
- Use plenty of flour when rolling out the Pate Sablee. Pastry that contains sugar tends to be a bit more sticky. Brush off any excess flour with a dry pastry brush.
- There is some variability when blind-baking the pastry based on preference. Some prefer a crisp, well-done darker pastry, while others like a lighter bake. Use your senses to determine doneness. A crisper pastry will be darker and have a more pronounced aroma when ready.
- When making the pastry cream, have a rubber spatula and whisk ready to ensure the mixture cooks evenly. Swap between them to scrape the pot's crevices and whisk for consistency. Stay by the pot while cooking; it takes about 10 minutes. Stir constantly at the beginning to prevent the egg yolks from scrambling.
- You can slice the tart before adding the fruit, especially for intricate designs. Once the fruit is in place, the cuts won't be noticeable, and it will make serving much easier.
- Ensure the fruit is clean and as dry as possible, especially if using cut fruit with exposed moist parts. Excess moisture can compromise the pastry cream's integrity.
More Fruit Recipes
- Best Fruit Pie Recipes
- Cherry and Strawberry Slab Pie
- Strawberry Rhubarb Crisp
- Blueberry Icebox Cake
- Very Cherry Ice Cream
More Pastry Recipes
I am so honored when you make a recipe from my site! If you make this Fruit Tart recipe, please leave a star ⭐️⭐️⭐️⭐️⭐️ rating with your experience! If you have any questions about this recipe, feel free to comment here, and tag me on Instagram!
Full Recipe
Classic Fruit Tart

There is nothing more classic than a fresh Fruit Tart. While impressive looking, this tart is actually quite easy to put together. It starts with a crisp and sweet pastry shell, that is then filled with smooth vanilla pastry cream and topped with an assortment of fresh fruit. It can be glazed for the final finishing touch or left as is. Either way, this is a show-stopping dessert welcome at any dinner or gathering.
- Prep Time: 00:25
- Cook Time: 00:35
- Total Time: 1 hour
- Yield: 8 servings
- Category: Dessert
Ingredients
For Pastry:
- 1 cup (120 grams) all-purpose flour, more for work surface
- ½ cup (50 grams) almond flour
- ⅓ cup (40 grams) powdered sugar
- ½ teaspoon coarse kosher salt
- 8 tablespoons (110 grams) unsalted butter, softened
- 1 large egg, beaten
For Pastry Cream:
- ⅓ cup (65 grams) granulated sugar
- ¼ cup (28 grams) cornstarch
- Pinch coarse kosher salt
- 4 large egg yolks
- 2 cups (454 grams) whole milk
- 2 tablespoons unsalted butter
- 2 teaspoons vanilla extract
To Assemble:
- ¼ cup apricot preserves
- 1-2 tablespoons water
- Assorted fresh fruit, washed, completely dried, and sliced if desired
Instructions
Make and Bake the Tart Pastry:
- Add the flour, almond flour, powdered sugar, and salt to the bowl of a food processor and pulse until combined. Add in the softened butter and pulse 5 to 7 times, or until the butter is broken down into tiny pebbles.
- With the motor running, add in the egg and let the dough process until it forms a cohesive ball around the blade, about 1 minute.
- Remove the tart pastry from the processor and shape it into a disk. Wrap it in plastic wrap, then chill for 30 minutes.
- Preheat the oven to 400ºF and place an oven rack in the lower part of the oven.
- Place the chilled tart pastry on a flour-dusted work surface. Roll out the pastry dough to an 11-inch circle and fit it into a 9-inch tart pan.
- Line the tart shell with a round piece of parchment paper, then add pie weights (I recommend dry rice or beans or lentils), making sure to push the pie weights to the edges.
- Bake for 15 minutes, then remove from the oven and carefully remove the parchment and pie weights. Use a fork to dock the crust so steam can escape while it finishes baking. Return to the oven and bake until the pastry is fully cooked through about 10 minutes. Set aside until ready to use.
Make the Pastry Cream:
- In a heavy-bottomed medium pot, combine the sugar, cornstarch, and salt. Add in the egg yolks and whisk vigorously for one minute until the mixture is lightened.
- Whisk in the milk until combined.
- Turn on the heat to medium. Cook the mixture, whisking constantly and occasionally using a rubber spatula to scrape up any thickened custard from the edges of the pan, until the custard has thickened and large bubbles are forming throughout, about 8 minutes.
- Remove from the heat and immediately pour the pastry cream through a fine-mesh strainer into a bowl, using the spatula to push all of it through the strainer.
- Whisk the butter and the vanilla extract into the pastry cream until the butter is melted and fully combined.
- Place a piece of plastic wrap directly on the surface of the pastry cream and let it cool until it’s no longer steaming, about 15 minutes. Transfer the slightly warm pastry cream to the inside of the baked tart pastry shell. Let cool to room temperature before covering and transferring to the refrigerator to cool completely, at least 4 hours or overnight.
Assemble the Tart:
- Place the fresh fruit on top of the pastry cream, arranging as desired.
- In a small pot, combine the apricot preserves and 1 tablespoon water. Cook over low heat until melted, about 2-3 minutes. Strain the mixture through a clean fine-mesh strainer into a small bowl. Set aside any preserves left in the strainer for another use. If the mixture is very thick, add additional water, 1 tablespoon at a time, until it reaches the viscosity of heavy cream.
- Using a pastry brush, brush a light coating of the apricot glaze onto the fruit.
- Refrigerate the tart until ready to serve. Serve within 1 day.


Notes
This recipe was tested using Diamond Crystal coarse kosher salt. If you use Morton's kosher salt or fine salt, decrease the volume by half.
When you glaze your fruit, the glaze should be slightly warm. If it cools down, gently heat it up again. If it gets too thick, add more water.
Use only the best-quality berries and fruit that are just ripe for this tart. Avoid overly ripe fruit.
Make sure your fruit is as dry as possible! It's important to wash fruit, of course. But make sure to drain and then dry the fruit on paper towels to absorb any excess liquid. Introducing excess liquid will compromise the structure of the tart.
Make ahead tips: The pastry and the pastry cream can be made up to 2 days in advance. The fruit tart should be served the same day it is assembled together.
Originally published in 2020, this recipe has been regularly re-tested and updated as needed to ensure it remains perfect.
Some of the links on this page may be affiliate links. Everyday Pie is a participant in the Amazon Associates Program. As an Amazon Associate I earn from qualifying purchases, at no extra cost to you.
KC
I made this yesterday never having made a fruit tart before even though I love eating them. I thought it was a straightforward and easy to follow recipe. I did the crust by hand and it came together very easily and was very forgiving when I needed to re-roll it after rolling it too thin the first time. I made cookies for decorations with the scraps. It is such a delightful, simple shortbread texture and flavor.
I found that the pastry cream came together quickly (I much prefer recipes like this where everything goes into the pot at once and no tempering of the eggs is required), and that it set up very well. I was able to get clean slices.
Finally, I will add, that the whole point of a fruit tart is for the flavors of the fruit to shine through. I used freshly picked strawberries and they paired so well with the pastry cream and crust - the apricot jelly glaze was perfect.
Thank you for this recipe - it is wonderful!
Isabel Thompson
10/10 for fruit design! It turned out Instagramable but taste was 1/10. Both my husband and I tried to make sure we were following the recipe correctly but the instructions just didn’t have enough detail. We made the crust twice because it didn’t look right compared to the one picture shown but both doughs seemed wrong even though we used a scale. The filling also was bland, i was hoping it compared to Kneaders fruit tarts but it was way too thin and when we cut it up the fruit slide all over because the pudding didn’t hold. I feel like we followed as closely as we could but again the directions were not direct enough.
Kelli Avila
Hi Isabel, I'm so sorry this didn't turn out how you expected. Would love to help you troubleshoot what went wrong. What didn't look right about the dough? How did yours look? Also sounds like your pastry cream didn't set---it should be quite thick! Did you cook it until it was bubbling?