
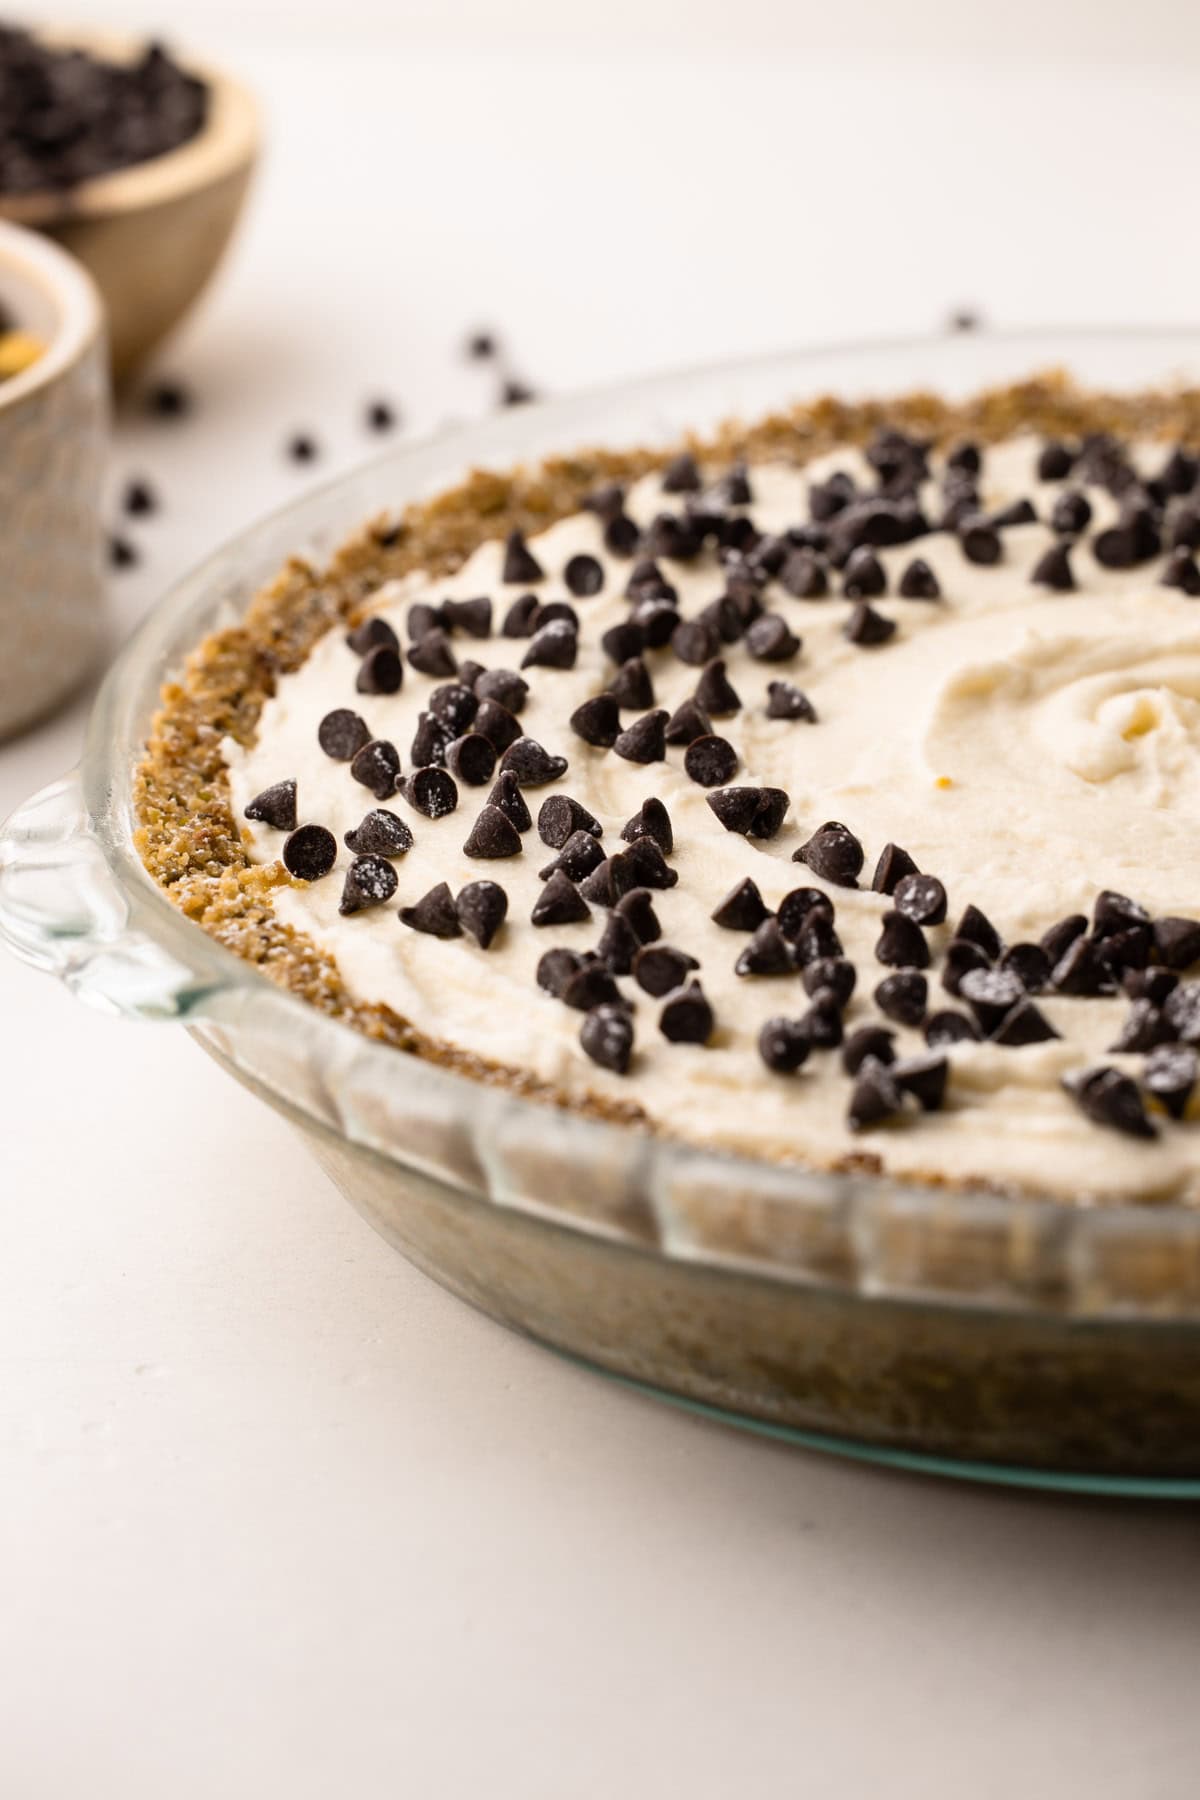
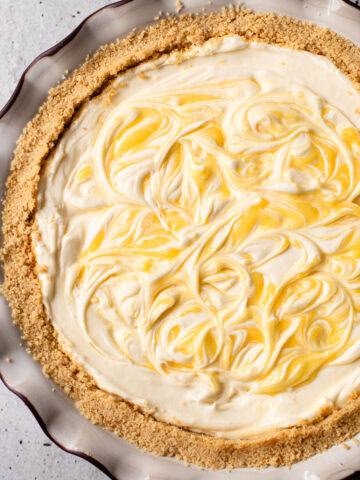
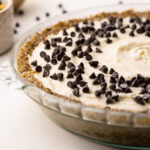
This No-Bake Cannoli Pie delivers classic Italian flavors without the fuss, with a mascarpone and ricotta filling in a vanilla cookie and pistachio crust, topped with mini chocolate chips for the perfect finish!
Want to save this recipe?
Enter your email & I'll send it to your inbox. Plus, get weekly updates from me!
Who loves cannoli but doesn't have all the time and equipment to make them from scratch at home? This No-Bake Cannoli Pie is the perfect solution for wanting all that classic flavor of a cannoli with actually needing to go through the hassle of making them! This pie is sort of a cross between a no-bake cheesecake and a cannoli that’s easy to make and super delicious.
The crust combines vanilla wafers and pistachios to mimic the taste of a cannoli shell, while the filling features a classic blend of mascarpone, ricotta, powdered sugar, and a hint of orange zest. This no-bake pie is an easy, make-ahead dessert that everyone will love!

Making the Crumb Crust
To replicate the feeling of having a cannoli shell, this recipe uses crushed vanilla wafers for the base, along with some pistachios to give it that classic cannoli flavor. It takes less than 5 minutes to put together but tastes so delicious.
The consistency of vanilla wafer cookies can vary widely between brands. So, while making a crumb crust is pretty straightforward, the amount of butter you'll need can vary. Start with 6 tablespoons, then add more, 1 tablespoon at a time, as needed. Alternatively, if your mixture is too wet and hard to work with, add more crumbs until the mixture is a bit drier, but still moist enough for the crumbs to stick together easily. The consistency should be like wet sand, and when you squeeze the mixture, it should hold its shape but not be soggy.
Once formed, a crumb crust can be either blind-baked or frozen before filling. I prefer blind-baking because it results in a sturdier crust, but sometimes turning on the oven for just 10 minutes isn't practical, especially with a no-bake pie such as this. Choose the method that works best for you, though the instructions in the recipe are for the no-bake method.

Step 1: Add all the ingredients for the crumb crust, except the butter, into a food processor.
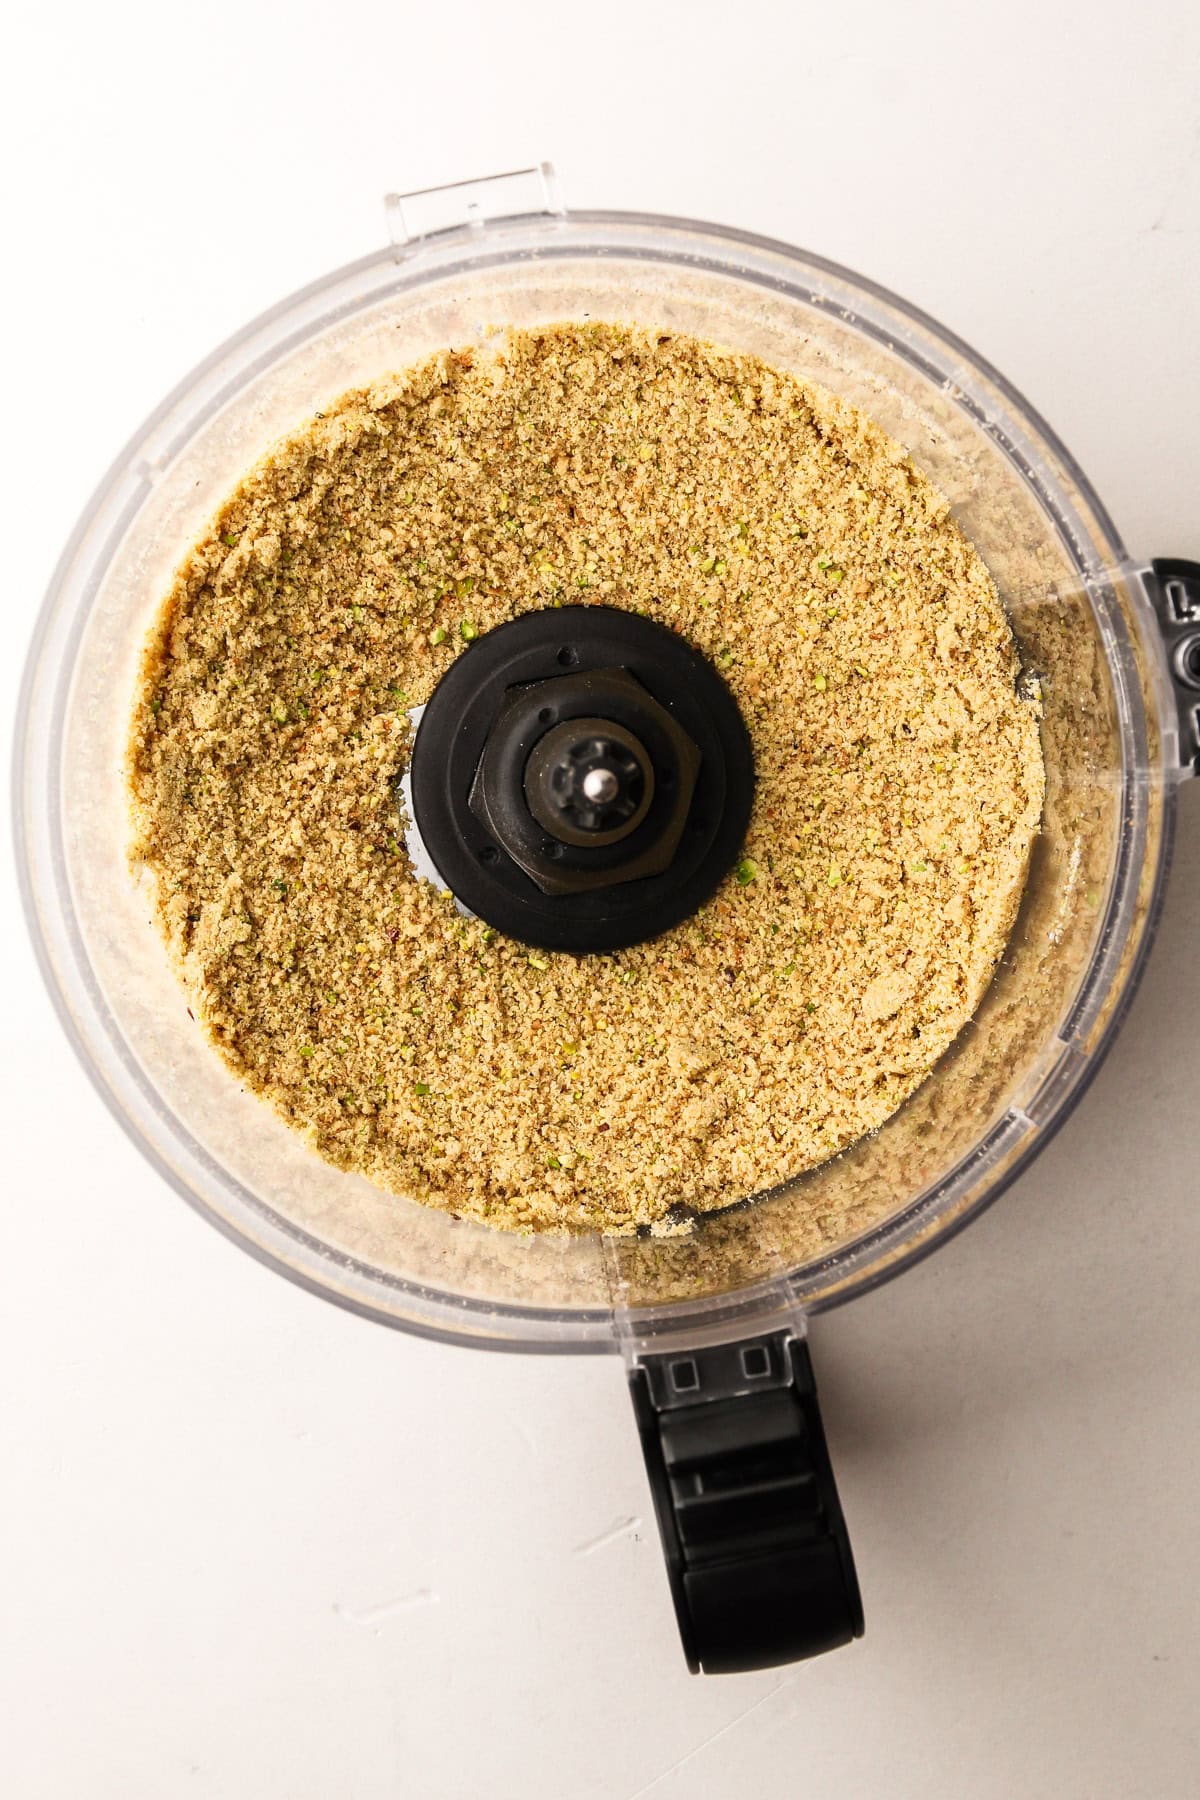
Step 2: Process until it's the consistency of sand.
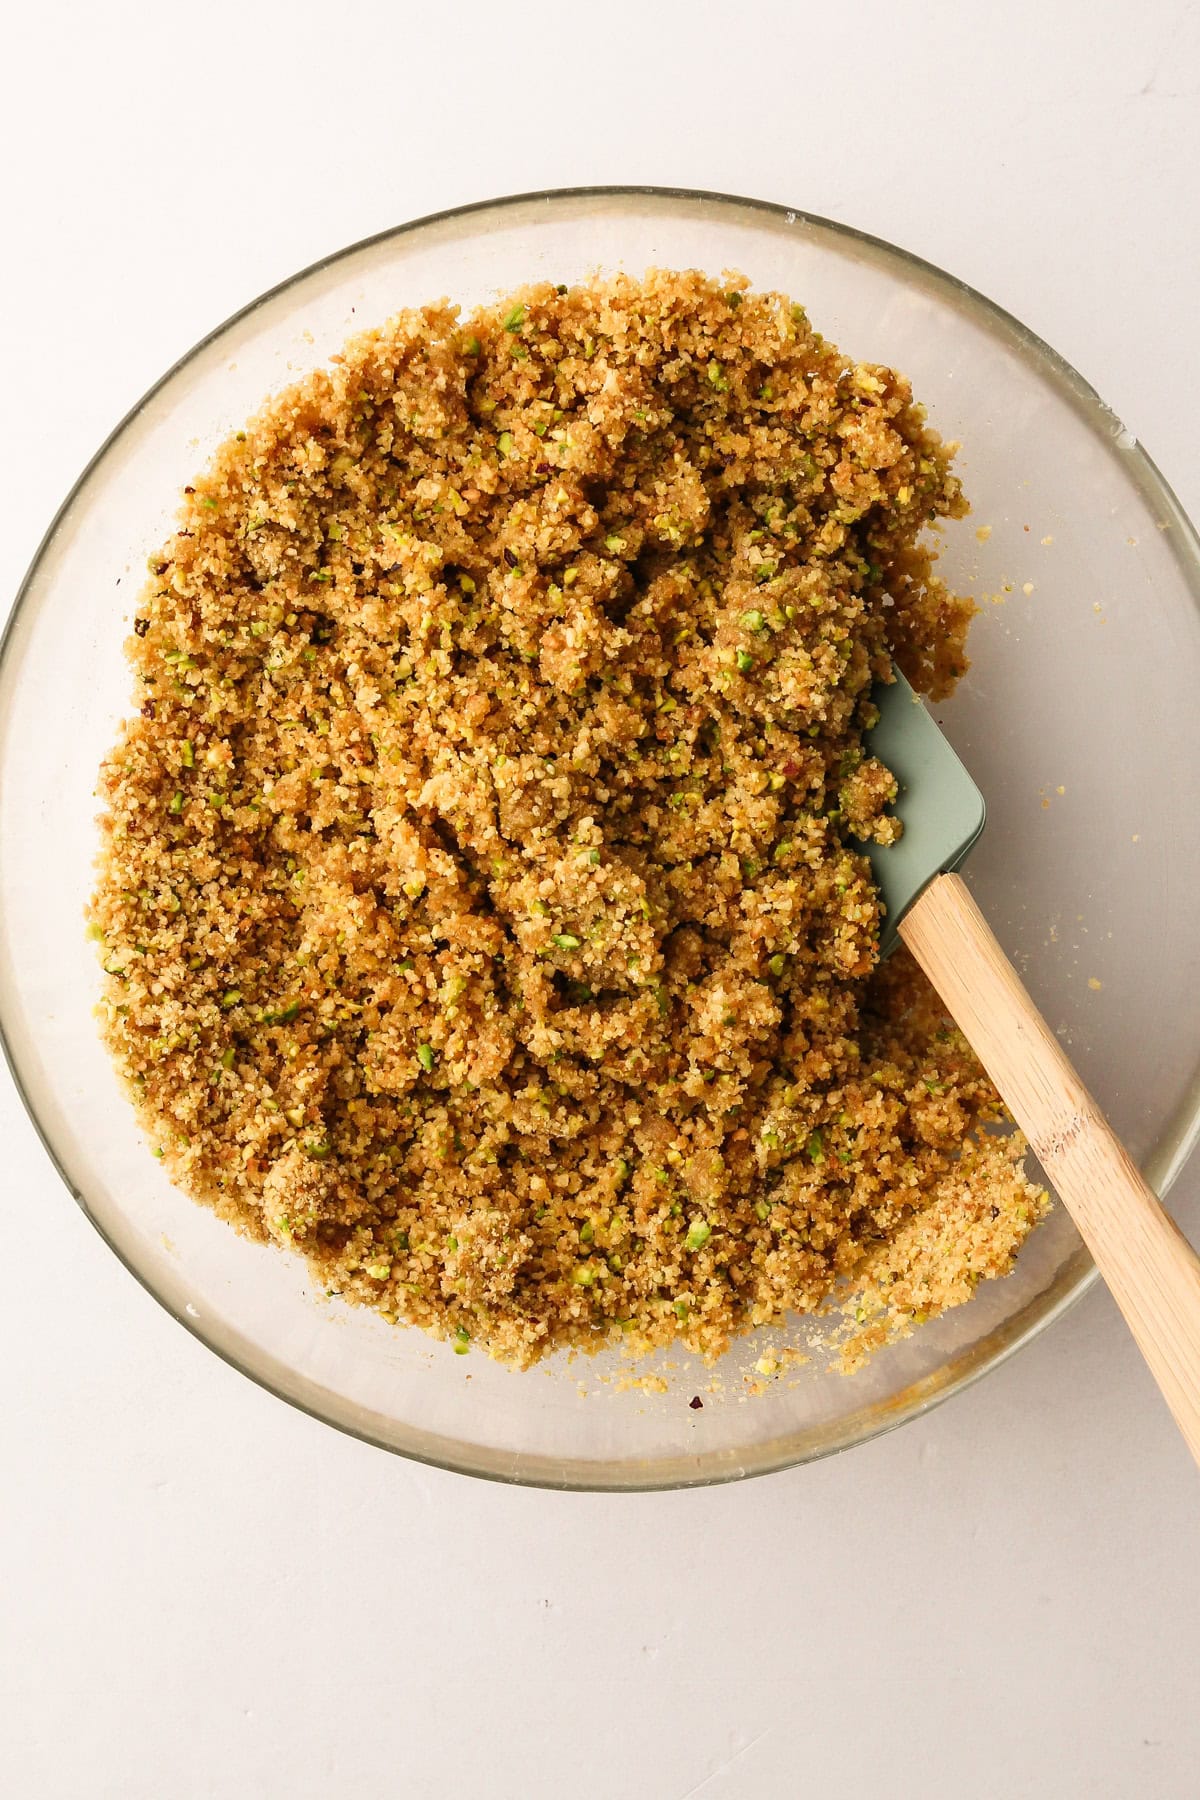
Step 3: Add the butter.
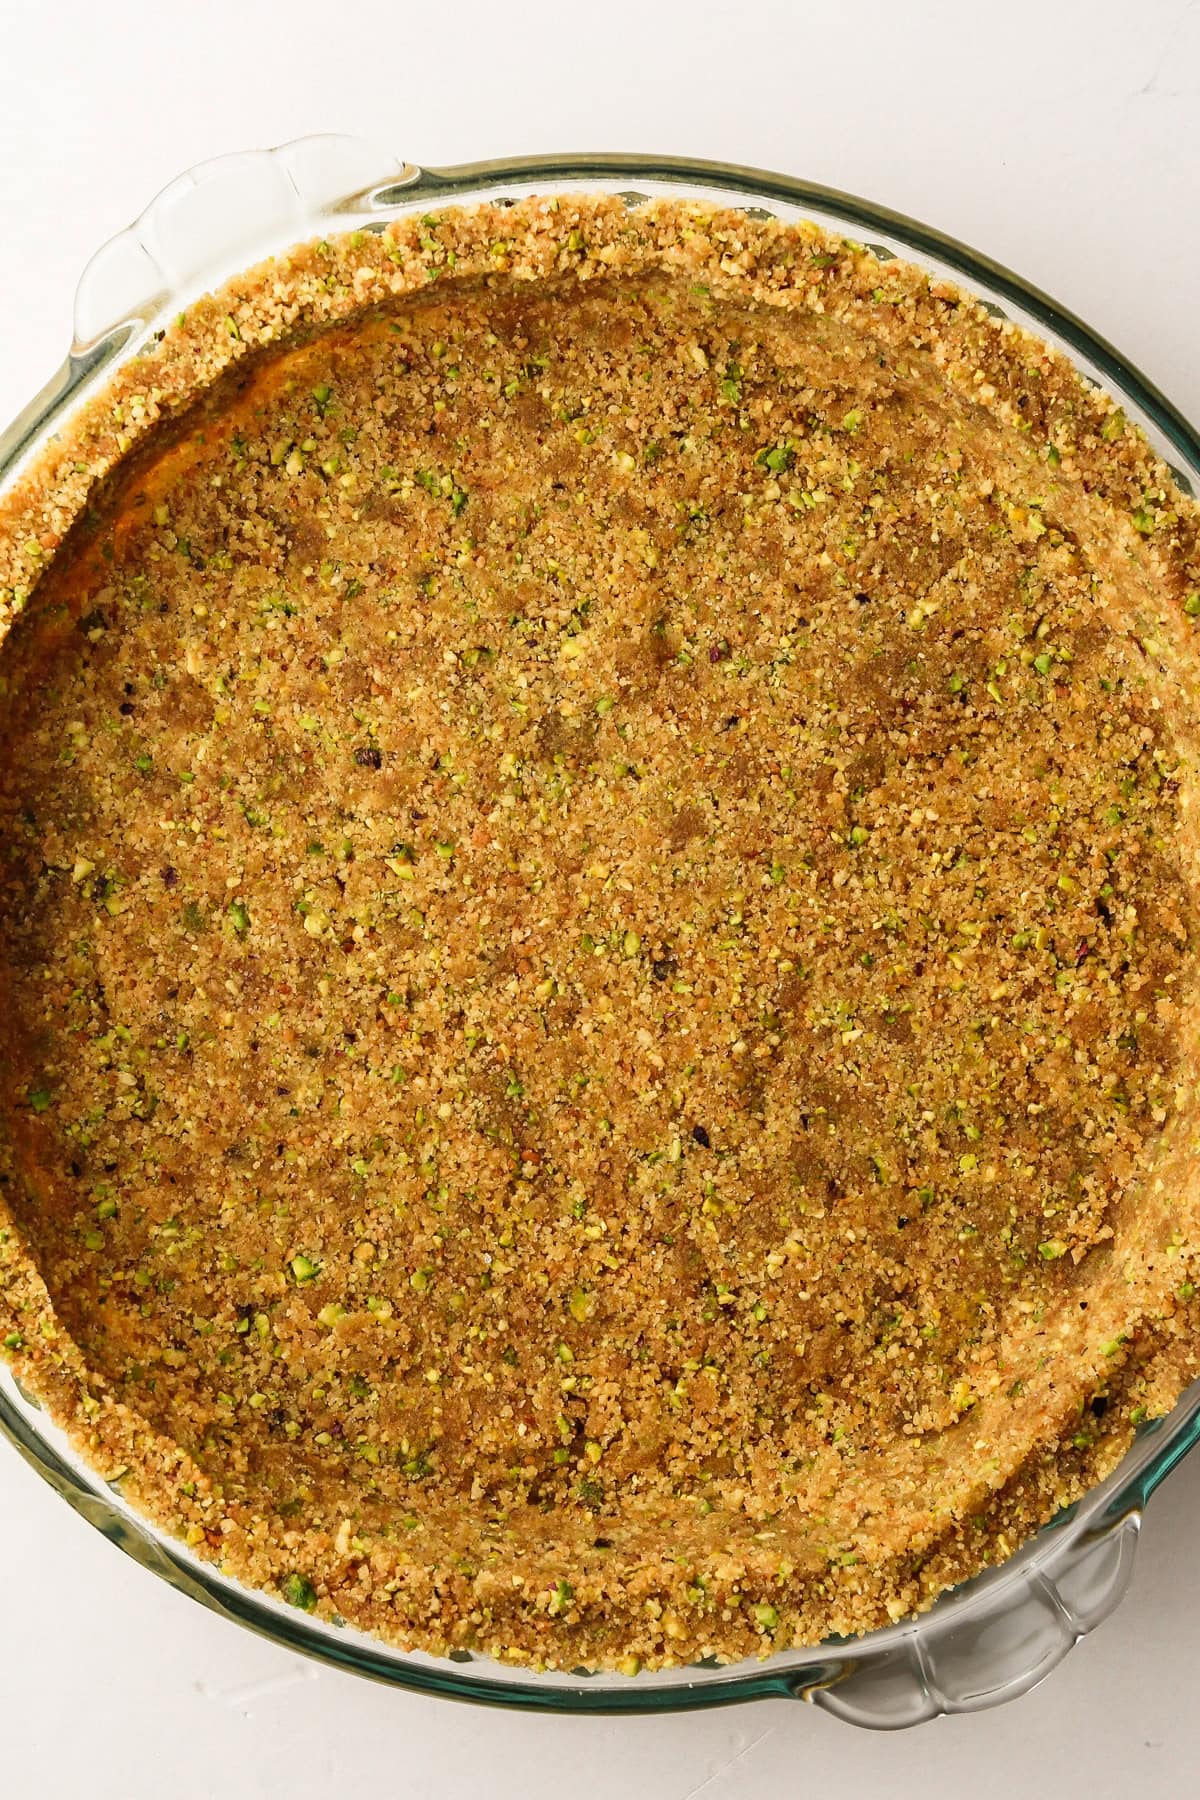
Step 4: Press the mixture into a 9" pie plate.
Making the Filling
This filling is super easy to put together. While many no-bake pie recipes use gelatin or egg whites as stabilizers, this one relies on cream whipped to stiff peaks. This method not only simplifies the process but also results in a perfect texture and flavor, making it my preferred approach for no-bake pies.
Here is an overview of how to make it (with the full recipe written below this article in the recipe card):
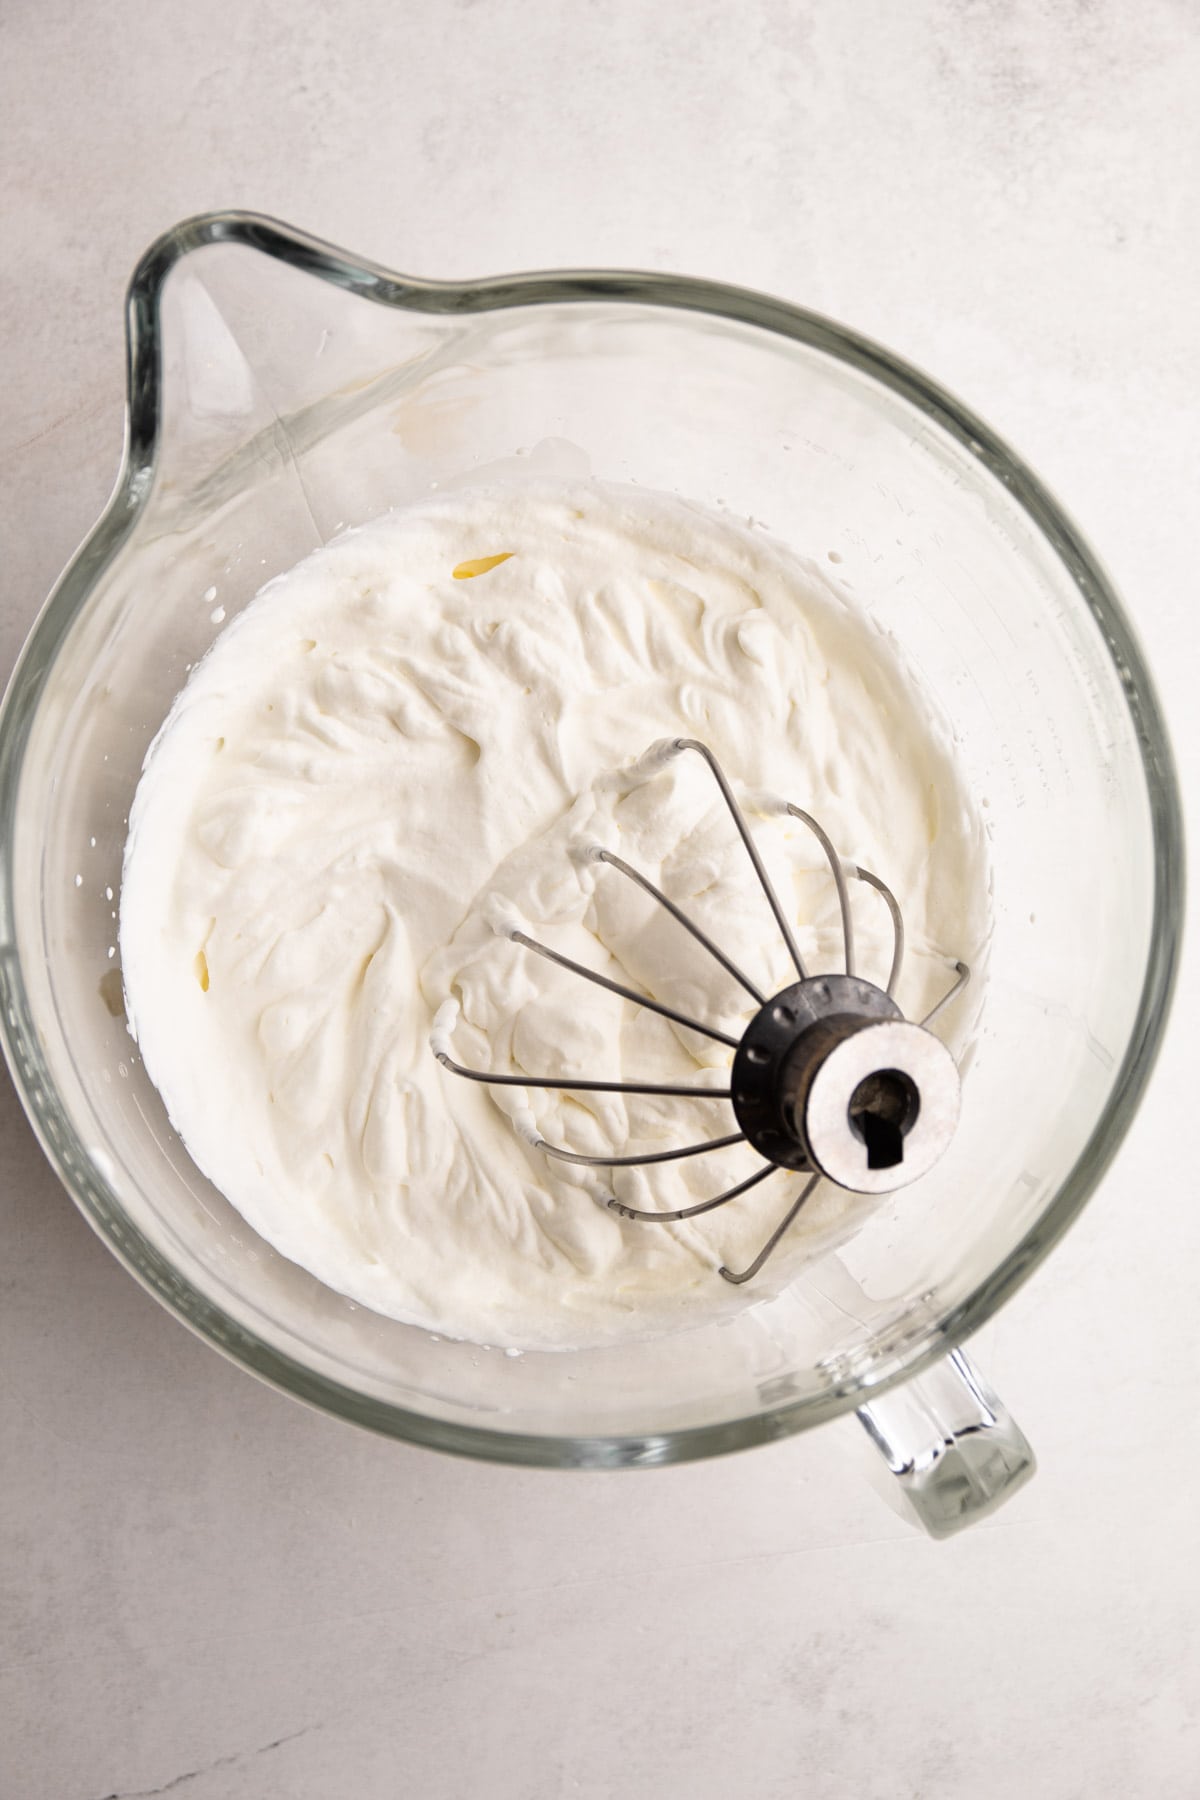
Step 1: Whip the cream until stiff peaks form, where the cream holds its shape without moving. Once done, remove the whipped cream from the bowl and set it aside.
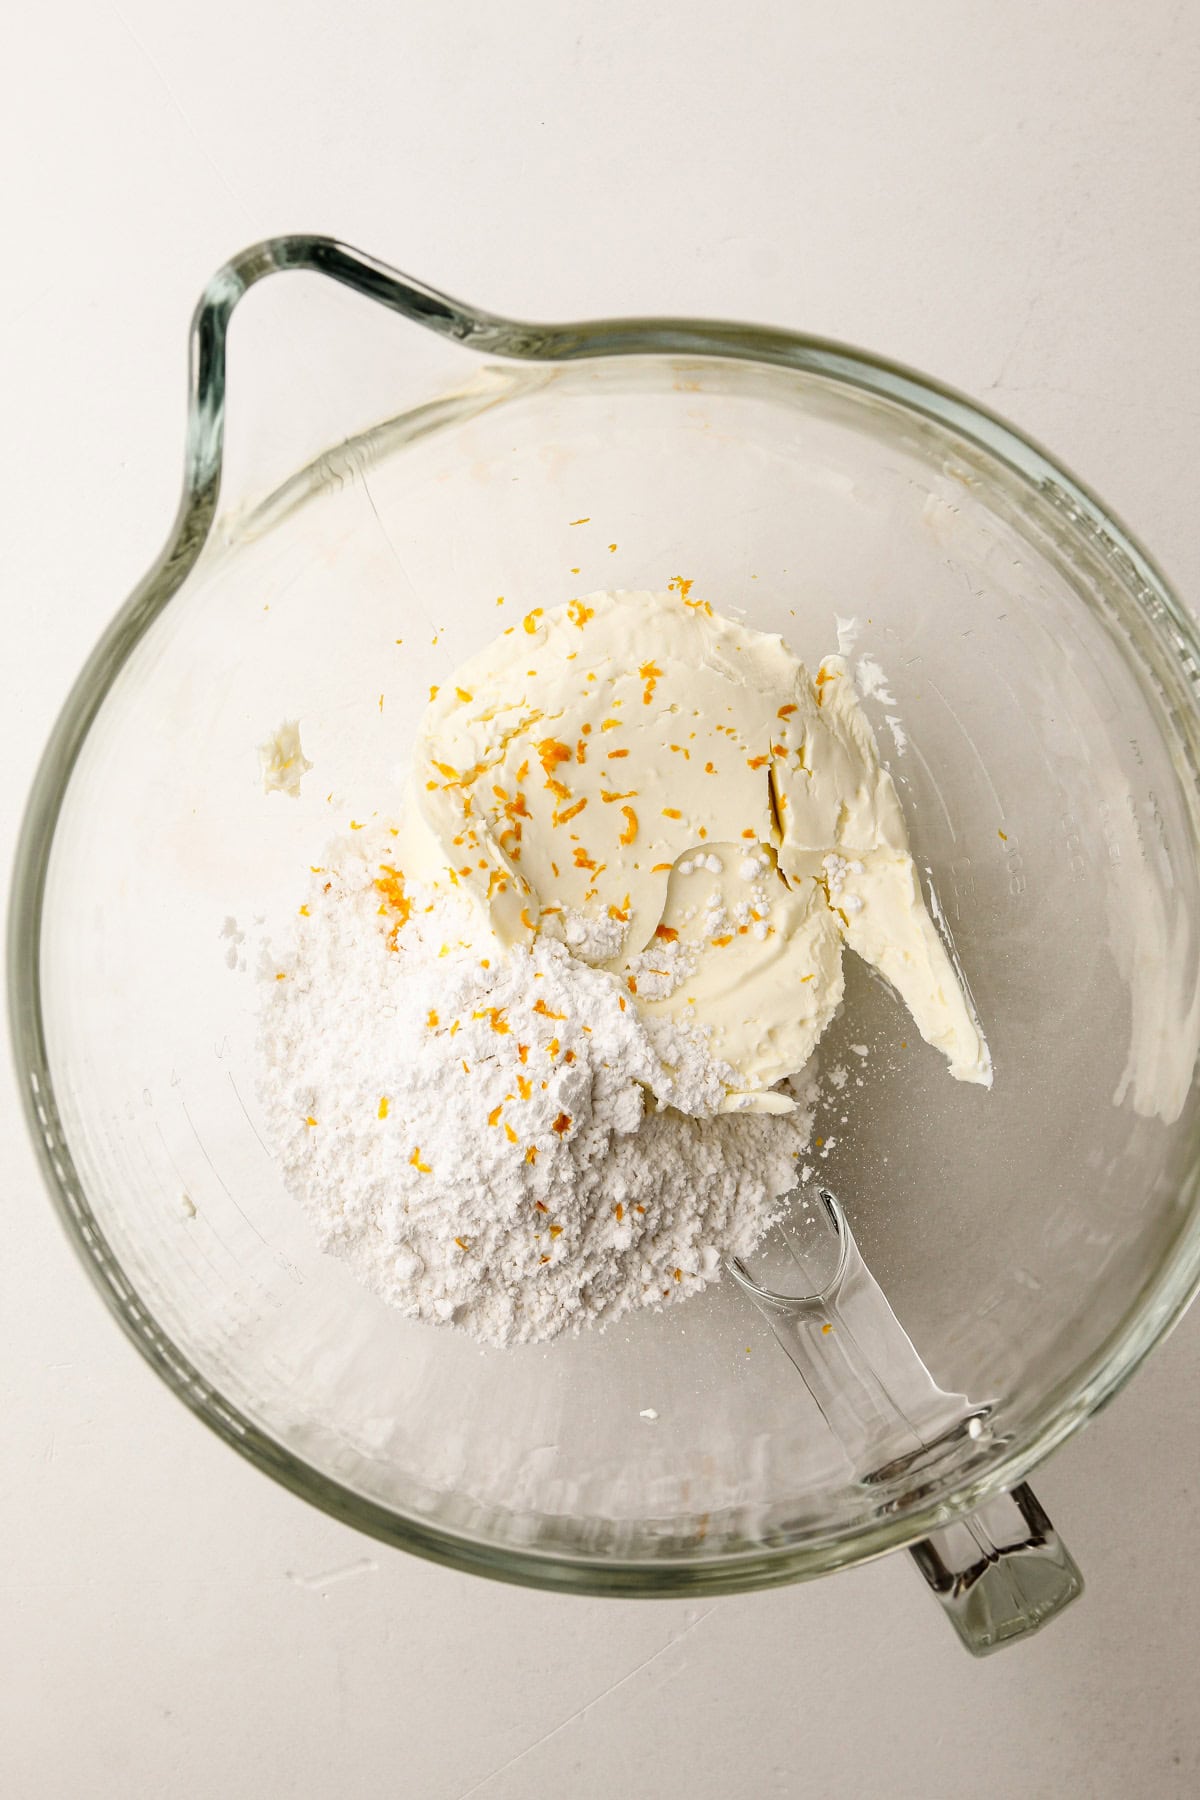
Step 2: Mix the mascarpone, powdered sugar and orange zest until it’s light and fluffy.
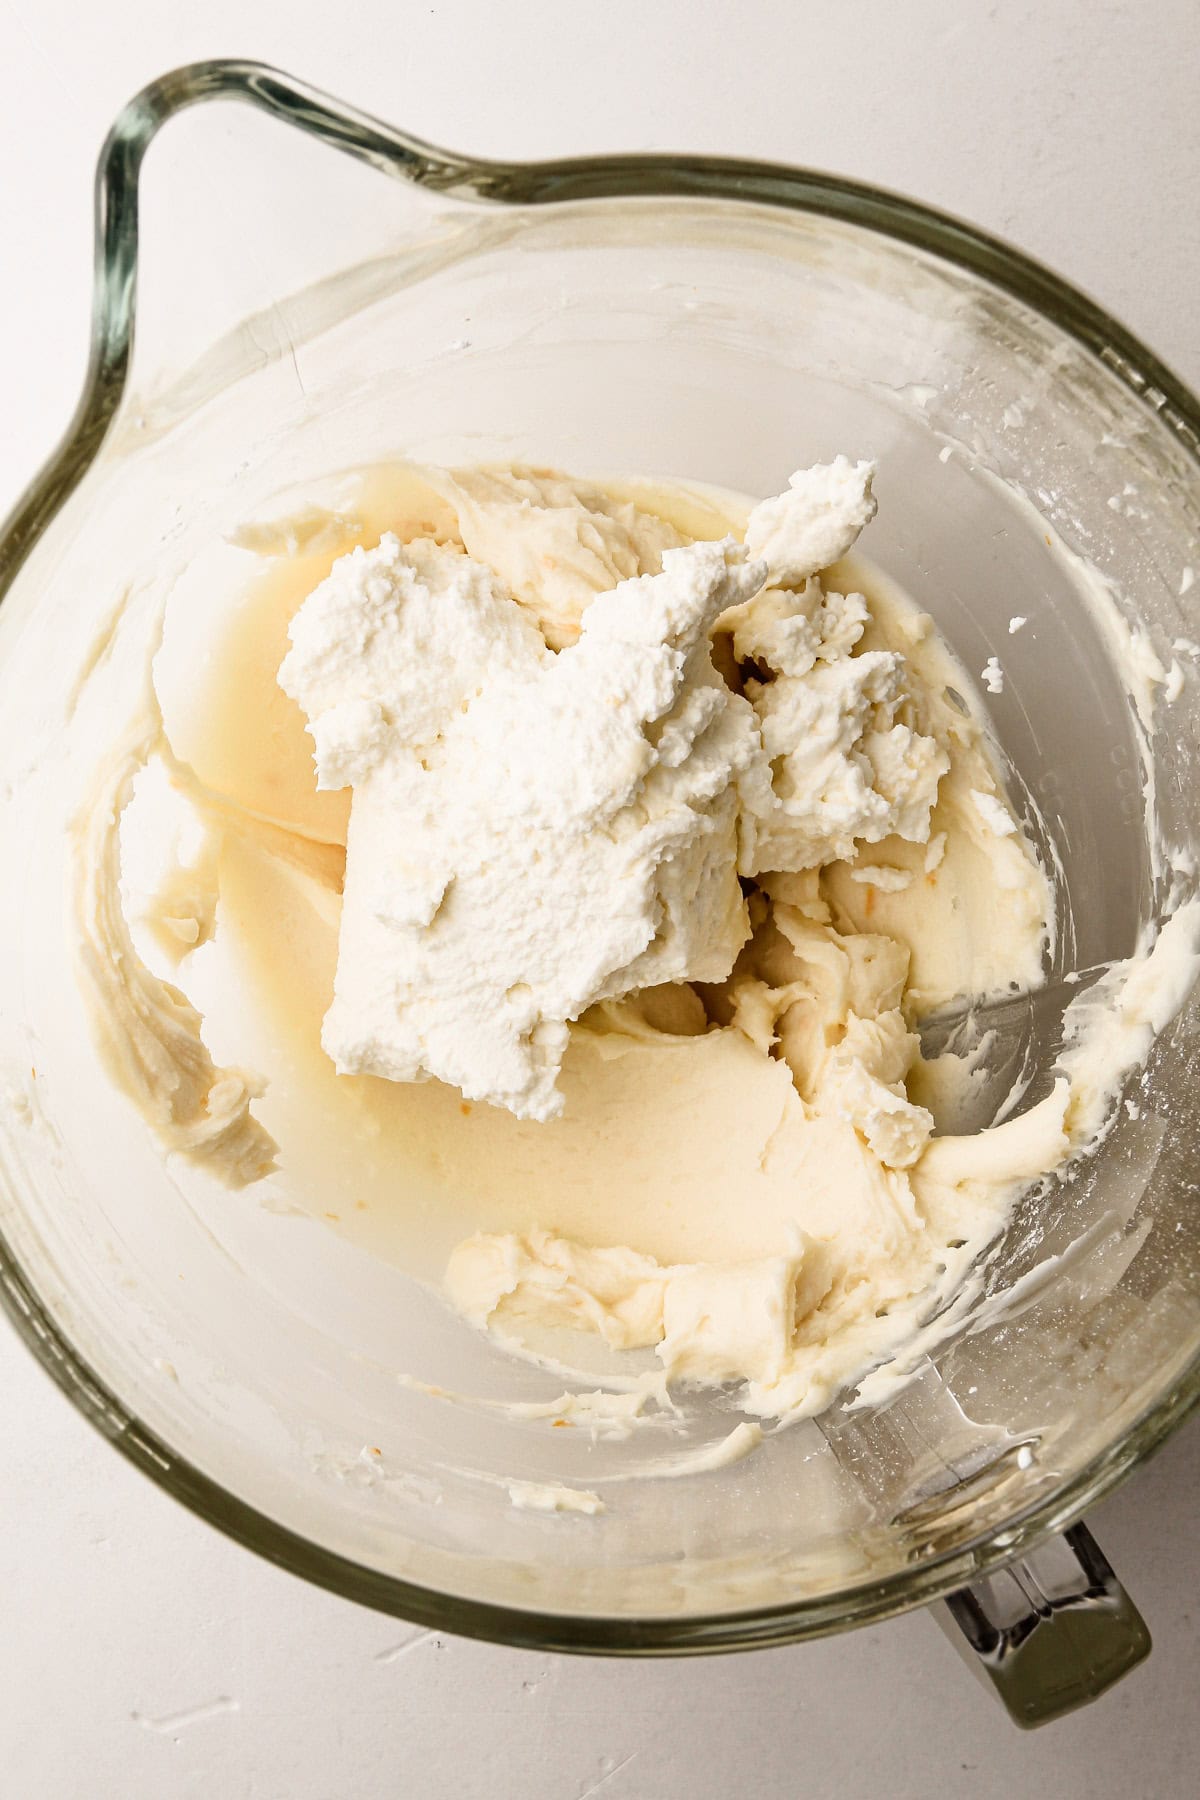
Step 3: Mix in the ricotta.
Step 4: Add in some of the whipped cream to lighten the mixture.

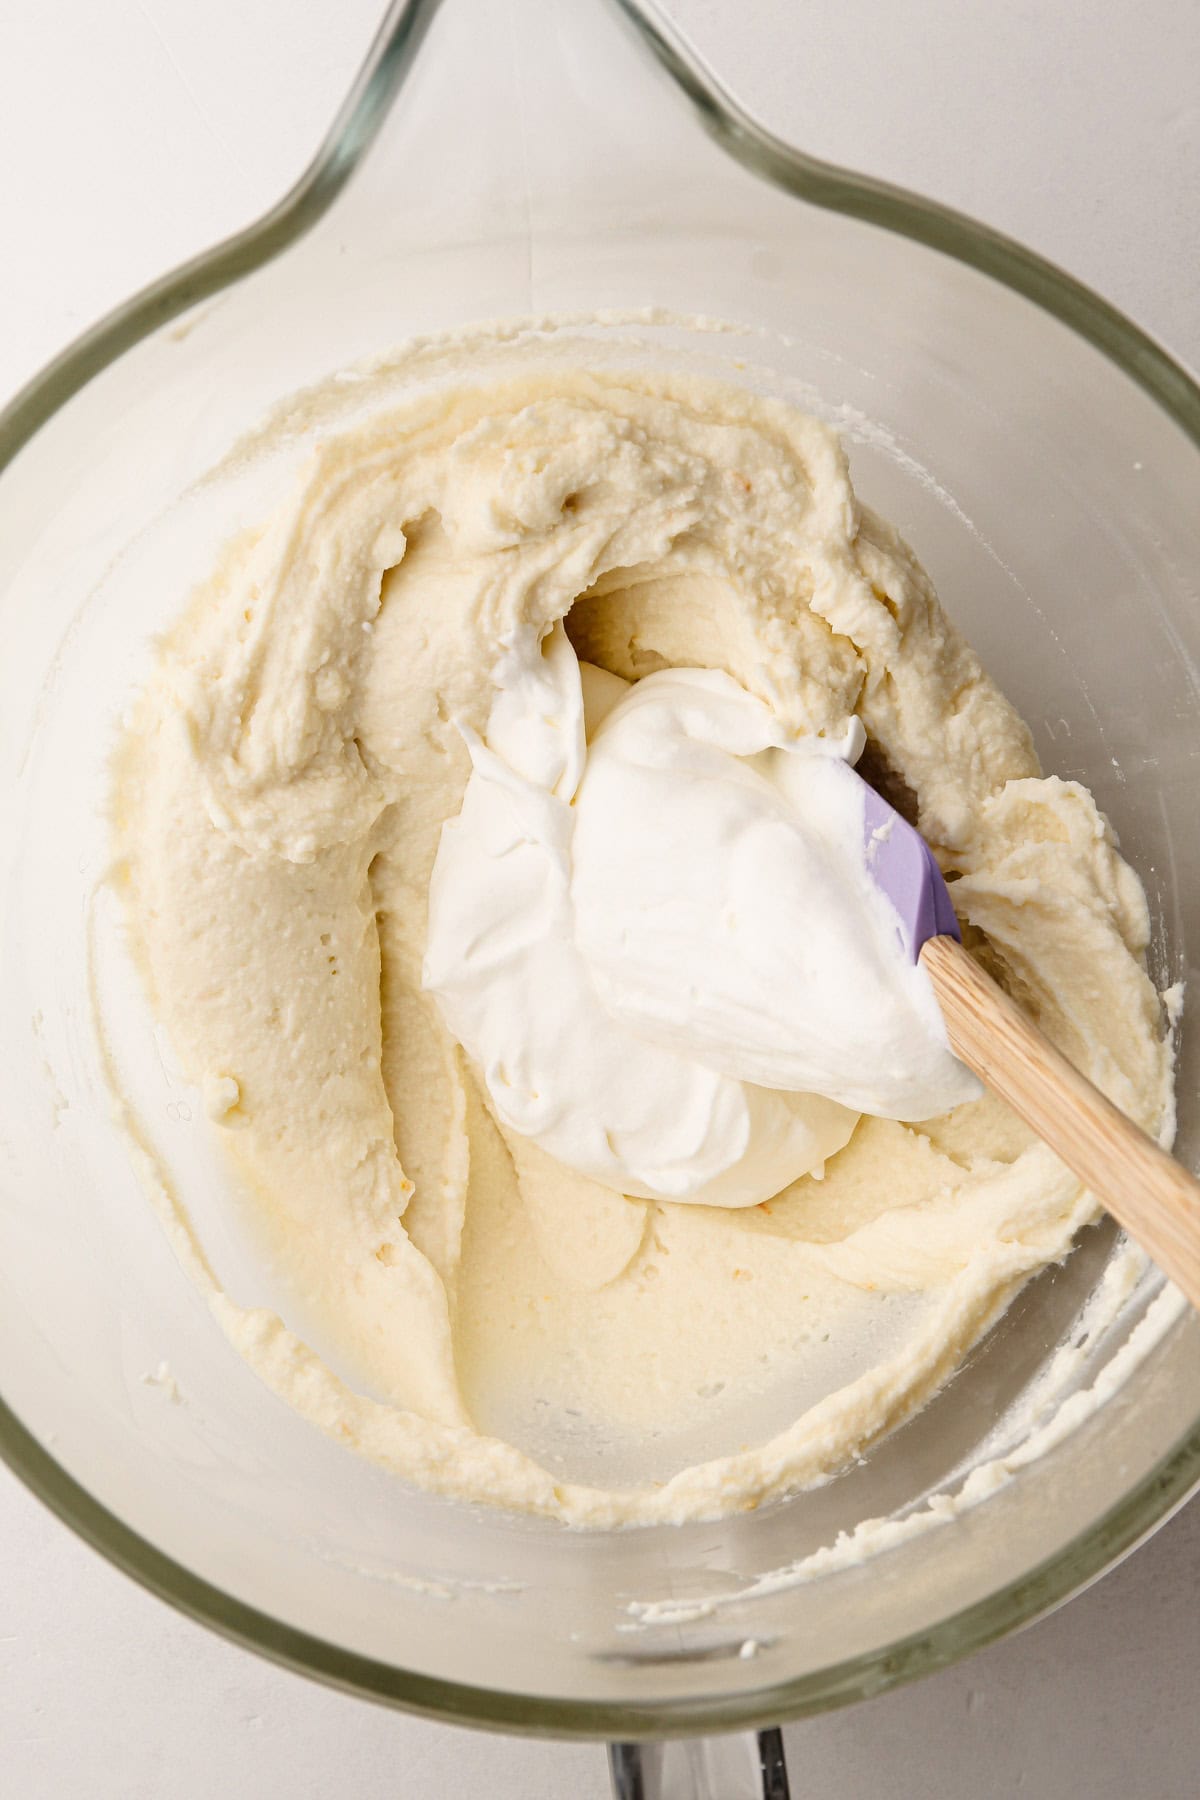
Step 5: Fold in the remaining whipped cream to the bowl, being careful not to overmix.
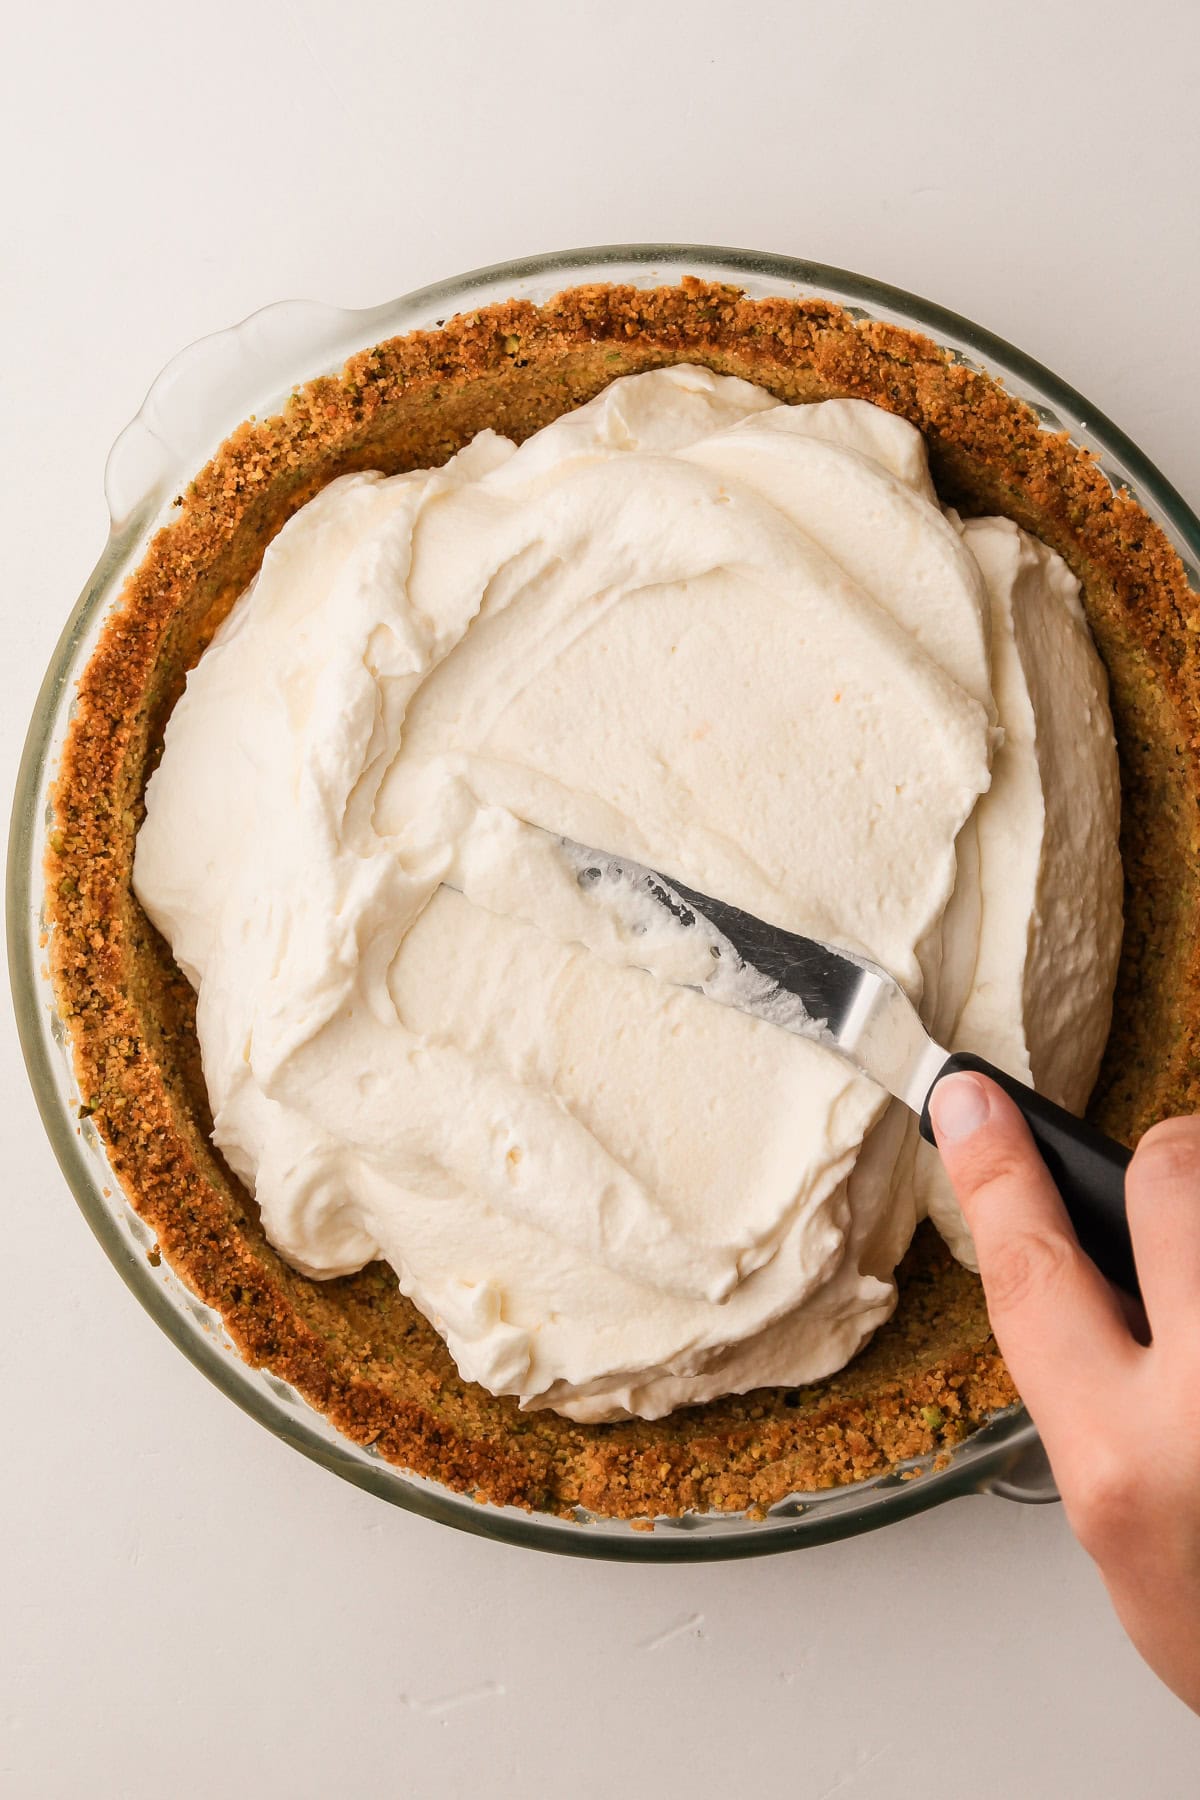
Step 6: Transfer the cannoli filling to the prepared pie crust and smooth over the top.

Step 7: Chill in the refrigerator or freezer for at least 4 hours to set, though overnight is best.
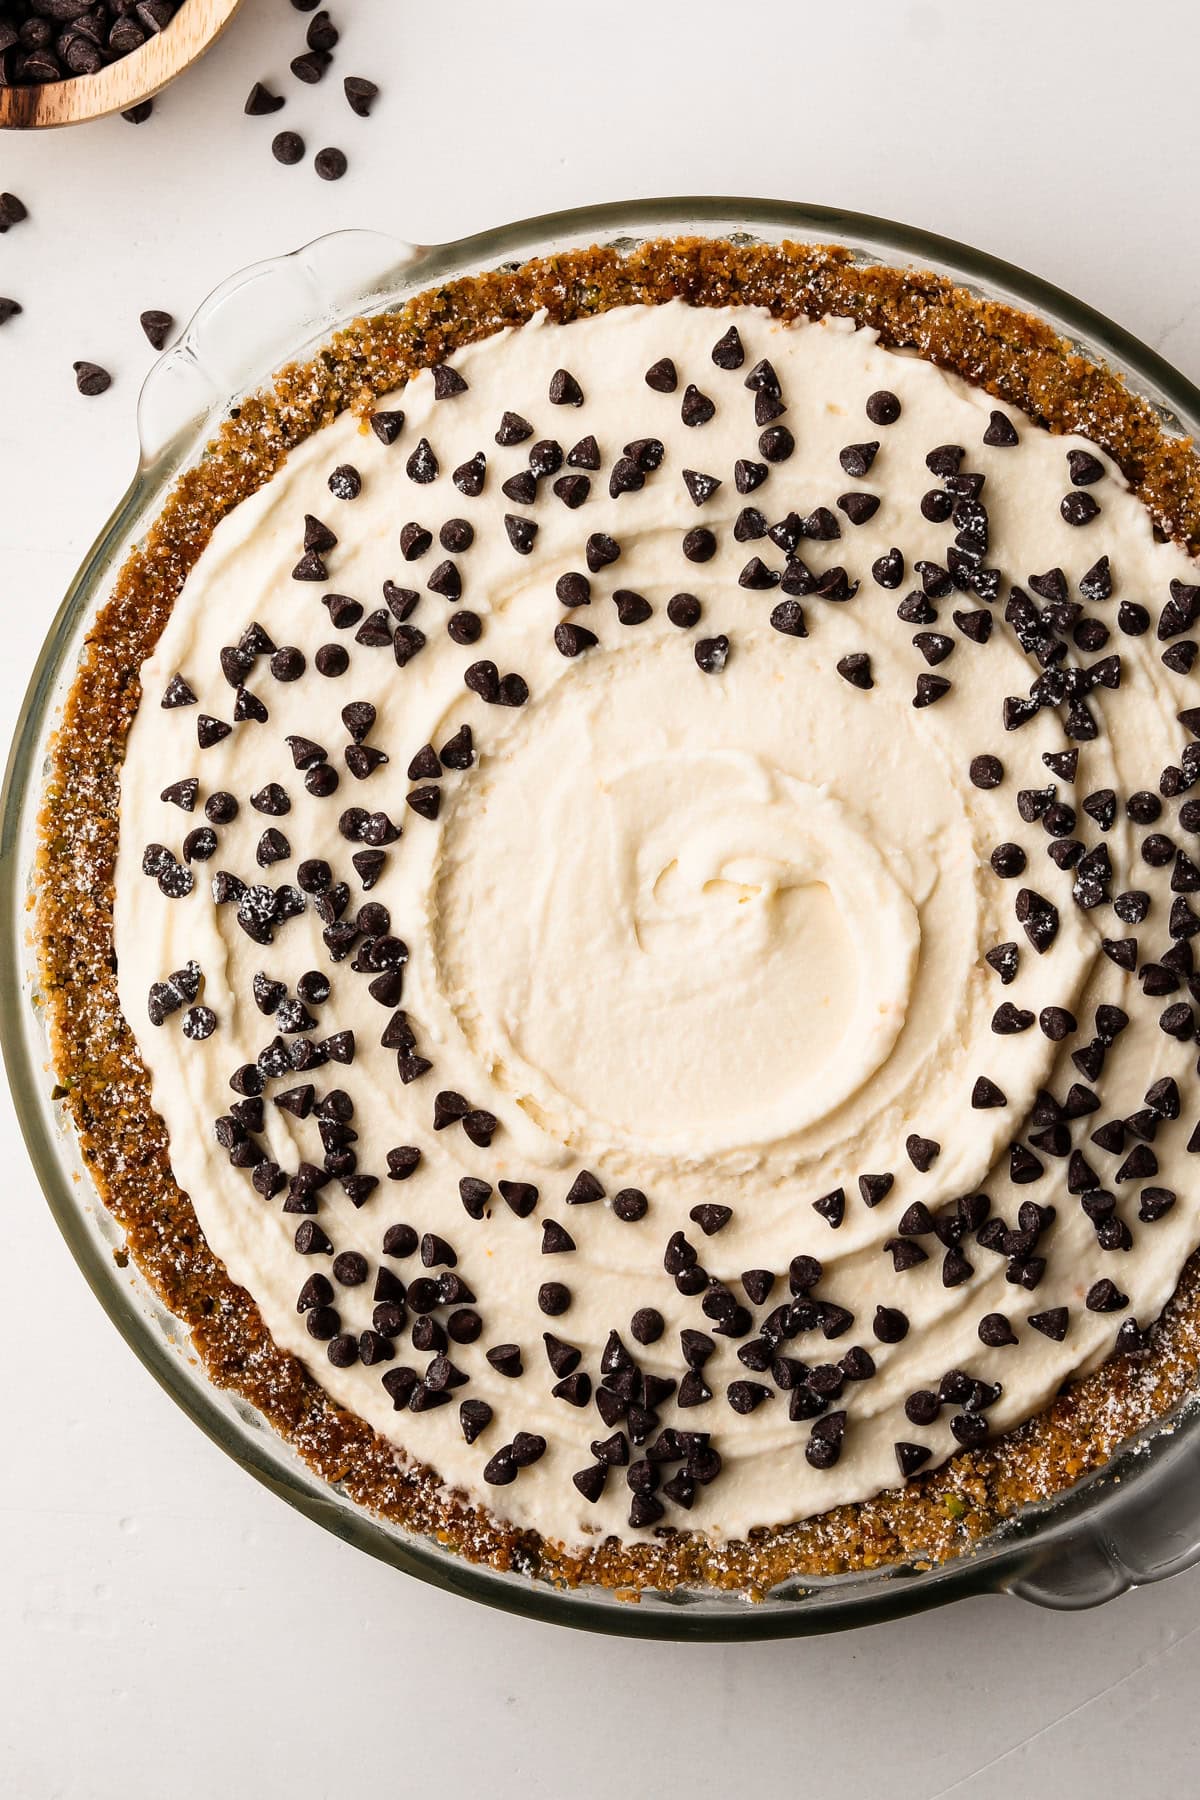
Step 8: When ready to serve, garnish with mini chocolate chips and a dusting of powdered sugar.
How to Serve It
This pie should be served very chilled. It can be made up to 2 days ahead of time if stored in the refrigerator, or up to 1 month if frozen. Do not top it with the garnishes until ready to serve.
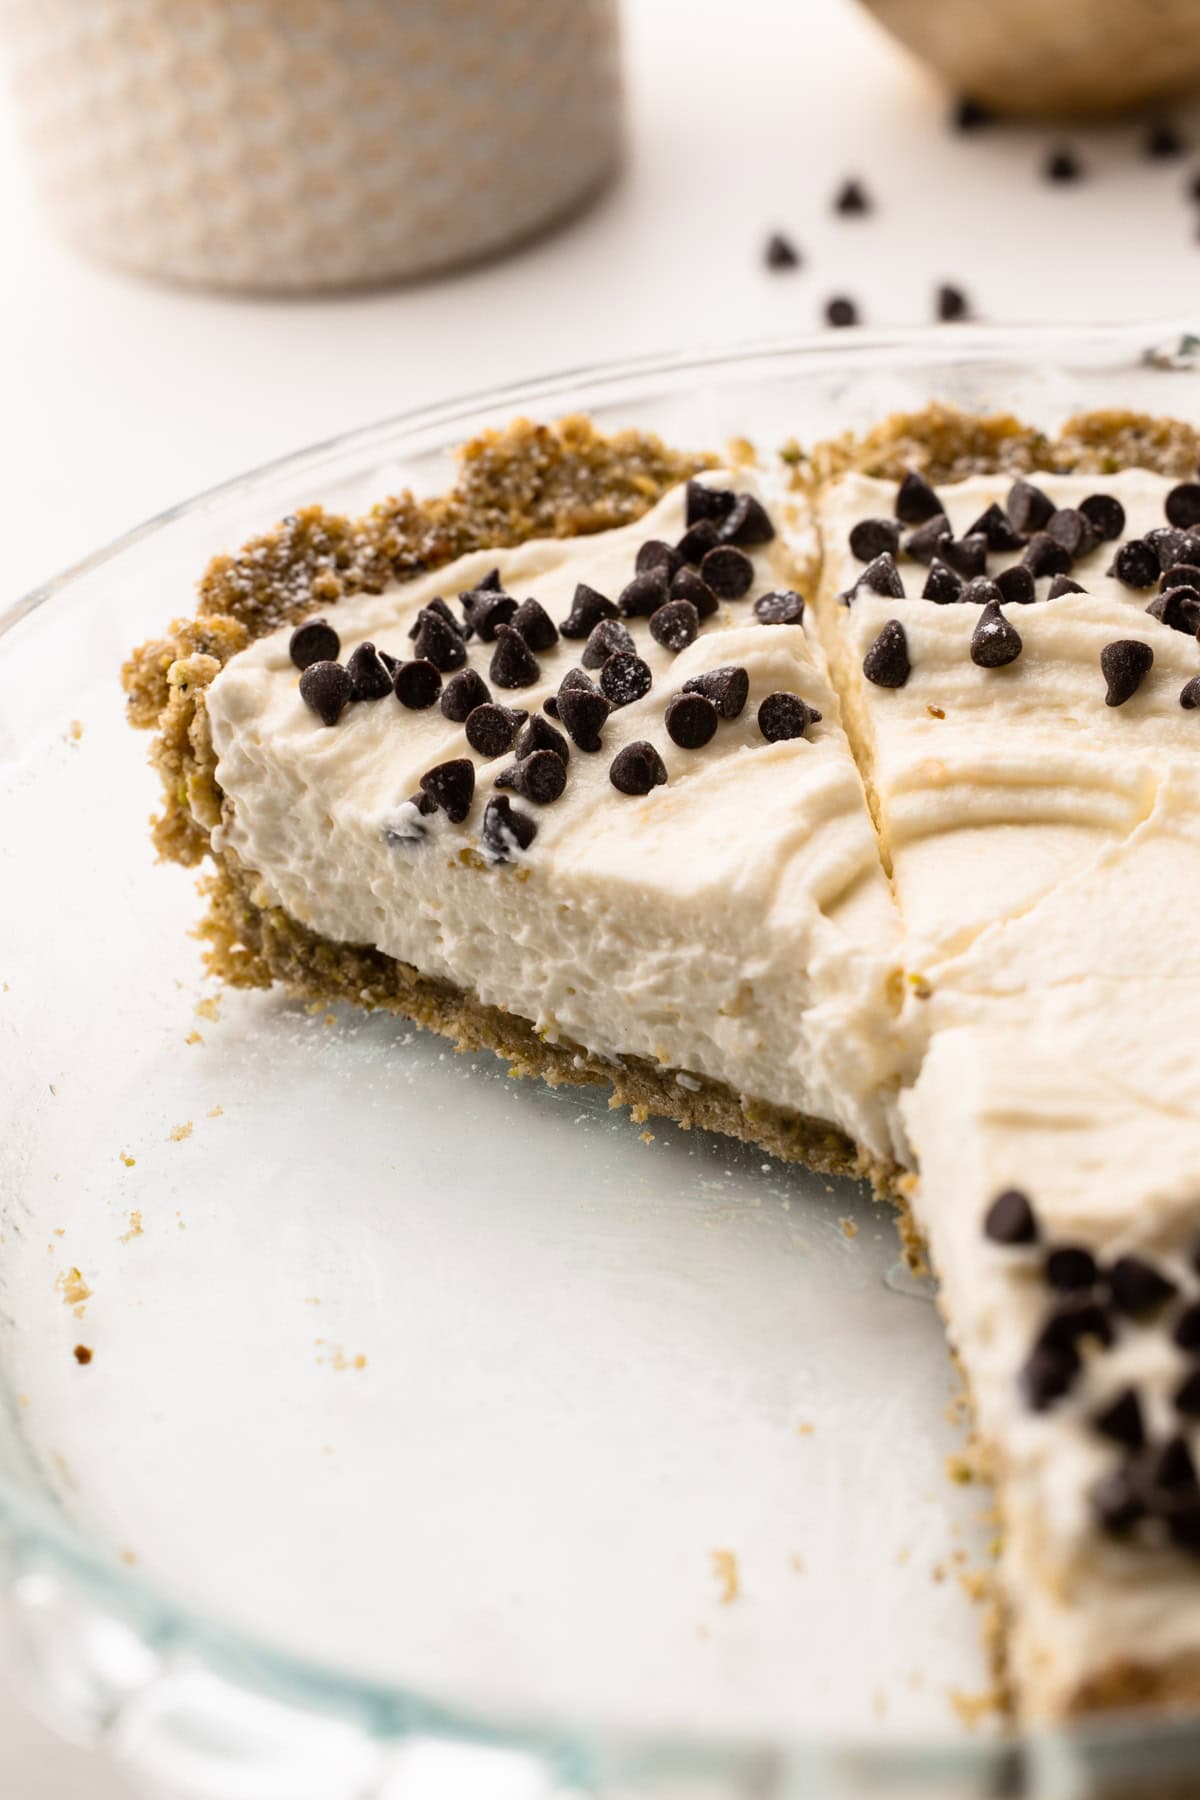
If serving from the refrigerator, I recommend placing the pie in the freezer for 30–60 minutes before serving. While not essential, this step helps achieve clean, neat slices like the ones shown in the photos.
If serving the pie from completely frozen, let it sit at room temperature for 15–30 minutes, depending on the warmth of your kitchen, until it's easy to cut into.
More Italian Recipes
More No Bake Pies
I am so honored when you make a recipe from my site! If you make this Cannoli Pie recipe, please leave a star ⭐️⭐️⭐️⭐️⭐️ rating with your experience! If you have any questions about this recipe, feel free to comment here, and tag me on Instagram!
Full Recipe
No-Bake Cannoli Pie
This No-Bake Cannoli Pie comes together super quick and is flavored with all the notes of the classic Italian dessert, minus all of the hard work of actually making it! The filling has mascarpone and ricotta and it is made in a simple vanilla cookie and pistachio crust. Top it with a few mini chocolate chips for cannoli pie perfection!
- Prep Time: 00:25
- Total Time: 25 minutes
- Yield: Serves 8-10
- Category: Sweet Pie
- Method: No-Bake
Ingredients
For the Crust:
- 6 ounces vanilla wafers (roughly 40 cookies or about 5-½ cups), more as needed
- ½ cup (50 grams) shelled, unsalted pistachios
- ¼ cup (50 grams) granulated sugar
- 6 tablespoons (85 grams) unsalted butter, melted, more as needed
For the Filling:
- ¾ cup (170 grams) heavy cream, cold
- 1 cup (227 grams) mascarpone or cream cheese
- ¾ cup (90 grams) powdered sugar, plus more for garnish
- ½ teaspoon grated orange zest
- Pinch coarse kosher salt
- 1 cup (227 grams) ricotta cheese
- Mini chocolate chips (for garnish)
Instructions
Prepare Pie Crust:
- In a food processor, combine the vanilla wafers, pistachios, and sugar. Process until the mixture resembles sand. Transfer the crumb mixture to a bowl, add the melted butter, and mix to combine. The mixture should be damp, like wet sand, and will hold together when squeezed. If it is too dry, add more melted butter, a tablespoon at a time. If it’s too wet, add a tablespoon more vanilla wafer crumbs until it’s the correct consistency.
- Pour the crumbs into a 9-inch pie plate and start pressing them up the sides of the pie plate to form the edges first. Once the edges are formed, work the crumbs down to evenly distribute them into the bottom of the pie plate. Then, pack them down into an even layer using a flat-bottomed cup or measuring cup.
- Place the pie crust in the freezer while preparing the filling.
Make the Filling:
- With a hand mixer or a stand mixer fitted with a whisk attachment, whip the cream until stiff peaks form. Set aside in a separate bowl.
- To the now-empty bowl, add the mascarpone, powdered sugar, orange zest and salt. Switch to the paddle attachment if using a stand mixer. Beat on medium speed until completely smooth, about 2 minutes. Scrape down the sides of the bowl with a rubber spatula and add the ricotta cheese. Beat on low speed until well combined, about 1 minute.
- Add ⅓ of the whipped cream to the cream cheese mixture and fold it in with a rubber spatula by hand until it is completely combined.
- Add the remaining whipped cream to the bowl and gently fold it in, being careful not to deflate the whipped cream.
- Transfer the filling to the prepared pie crust and smooth over the top. Place the pie in the refrigerator to set up. It needs at least 4 hours of chilling time, but preferably at least 12 hours or overnight.
- Right before serving, garnish with chocolate chips and powdered sugar.


Notes
The consistency of vanilla wafer cookies varies by brand, so start with 6 tablespoons of butter for the crumb crust, adding more or extra crumbs as needed until the mixture resembles wet sand and holds its shape when squeezed without being soggy. See this post about Making a Crumb Crust for troubleshooting tips.
Serve this pie well-chilled. It can be made 2 days ahead in the fridge or frozen for up to a month. Add the garnishes just before serving. For neat slices, freeze the pie for 30-60 minutes before serving from the fridge, though it's not essential. If serving from frozen, let it sit at room temperature for 15-30 minutes before cutting.
Originally published in 2020, this recipe has been regularly re-tested and updated to ensure it remains perfect.
Some of the links on this page may be affiliate links. Everyday Pie is a participant in the Amazon Associates Program. As an Amazon Associate I earn from qualifying purchases, at no extra cost to you.
Ana
This was a lovely creamy pie! I went full graham cracker crust as I made the pie for an office party and it tasted great! Thanks for the recipe!
Beulah Feagan
Delicious - dinner guest ask for recipe
Matt
Excellent recipe, very quick and easy to make. We loved how light it was with the added whipped cream, but that it still tastes just like a cannoli.
Liz
Hi, the ingredient list calls for a pinch of coarse salt but it's not listed within the recipe where to utilize it.
Janette
I would like to make this in a 9x13 pan, for a party, what would my measurements be?
Kathy
I absolutely love the flavors in this pie. It is delicious. I deducted a star because I am not crazy about the texture. I have made it three times and I followed the recipe exactly. Is the texture intended to be grainy like the ricotta or should I beat it more with the hope of making it smoother? Any help will be greatly appreciated.
Kimberly Davenport
Hi I don’t have a good scale but measured 5 1/2 C of vanilla wafers (whole). It almost completely filled my 9 inch pie pan. Did I use too much? Was I suppose to process and then measure? Thank you
Carol
Am I reading the recipe right that you need 2 different mixers?
Jessica
I just made this pie and it is delicious! Thank you for the recipe!
Laura Stoks
I just made this pie and used a bought graham cracker crust. The pie is delicious and easy to make. I think next time I will used crushed waffle cones for the pie crust to see if it will taste more like a cannoli.
Gail
Does the ricotta cheese have to be strained of moisture before using?
Kelli Avila
I never have for this pie, but I do always make sure to use a high-quality ricotta that isn't watery. If you find your ricotta very watery you can strain it if you want.
Terry
Yes I made this recipe. The filling is Amazing. I used a Chocolate ready made pie crust and covered pie with Chocolate Ganache
Kris
Made this for Thanksgiving last year and it was such a hit, it was requested for this year as well. Easy to make with gluten free vanilla wafers.
Charlie
Kell: I'm getting warnings of danger for your website from Bitdefender.
You might want to run some checks.
Kelli Avila
Hi Charlie! I had my tech guys check it over and everything is fine with my site! Thanks for the heads up. Happy baking!
Amber
I loved this recipe last year for Thanksgiving and am making it again. How many days ahead of time do you think I could make it? Would 2 days ahead be ok?
Kelli Avila
Two is fine! Enjoy!
Ce
"No-bake pie". Also, "Step 1. Preheat oven."
Jane
Could this possibly work in an 8x8 square pan or is this insufficient amounts for crust and fillilg?
Kelli Avila
It might be a little thinner, but I think it could work ok!
Angela Llorente
Hello! Im doing a pie contest and I am wondering, which pie would you make, this one or the canolli pie? (I live in Bosont, so they love canollis here hahaha)
Kelli Avila
I think cannoli pie will kill it for a contest! Do it!
Angela Llorente
Hi! How many inches should my pie plate be?
Kelli Avila
9"
David
My friend asked me to bake cannoli for a get-together. I didn't have the equipment or patience to make them, but I found this recipe and it was a big success. I had extra whipping cream left over, so I made some sweetened whipped cream that I put on top, then I sprinkled it with dutch cocoa powder. (I actually don't recommend adding extra whipped cream because it took away from the rich filling. I think next time I'll save the extra whipping cream to make another pie.)
The crust was perfect for this pie. I was worried I burnt it because when I par-baked it, it had a strong roasted smell, but that completely disappeared when it was filled and chilled, and the pistachio-vanilla flavor was a perfect match with the orange zest of the pie.
I will be using this recipe again! Thank you!
Susan
Can you use a blender for the crust if you don’t have a food processor?
Kelli Avila
Maybe! Probably depends on your blender, but I can't see why not!
Lauren
This pie is SO good! Perfect if you don’t like super sweet desserts. She has a highlight on her Instagram that I also followed while making this. Super simple, not a million ingredients. I think it’s better served from the fridge than the freezer. My new go-to dessert when I need to bring something to a dinner party!
Wanda
This pie is terrific!!! Made it for thanksgiving and was enjoyed by all. Definitely recommend for any cannoli lovers out there !!
Kelli Avila
I'm so glad you enjoyed! Thanks for sharing -Kelli
Jessica
We won first place with this recipe in our family’s pie contest this Thanksgiving!!!
Everyone loved the light flavors of the ricotta filling and they said the crust was the thing that brought I way over the top!
Thank you for making us look good!
Kelli Avila
Jessica, thank you for sharing! Hope you had a great holiday!
Ruthann Young
Can you us light cream. I bought it by accident
Kelli Avila
Hi Ruthann. Unfortunately, I don't think light cream will work in this instance, only heavy cream or whipping cream. Light cream doesn't whip up quite as well, and I think it will change the texture. Sorry!
Brad
I followed the recipe with two exceptions; I used 4 oz. mascarpone and 4 oz. cream cheese and I used a third of the amount of orange zest that it called for because I was using fresh zest. And I am glad I did. This pie is wonderful and delicious and I would definitely make this again. However, as one baker pointed out, it was very orangy and this would be better called a Dreamsicle pie or orange dream pie. I read that sometimes nutmeg or orange zest is added but I have never had it this way. I grew up in an Italian neighborhood and never never never have I ever tasted a cannoli like this. Again, nothing wrong with this pie. We all loved it. However, if you are trying to make something that tastes like a traditional, Italian cannoli, I would try something different. It was fun to try and I enjoyed licking off the whisk at the end.
Fran
I am glad you mentioned it does not taste like a cannoli since cannoli is my favorite. I come from an Italian family and Cannoli cake was my favorite so that was always my Birthday cake and of course no problem finding Cannolis in Chicago.
Sophie
That is a fine pie! I served it on Thanksgiving and it was well received by all. Thank you for sharing it.
Kristie Avery
Made it tonight for our family’s Christmas dinner. Super easy to make. I did fudge on the crust: used a premise shortbread cookie crust. My filling wasn’t as smooth as I hoped it would be. But after liking the spoon it’s divine!
Kristie Avery
Should have said after licking the spoon it tastes divine! ???? Not overly sweet and not too much orange flavor- just enough.
Kelli Avila
Thanks for sharing, Kristie! I'm glad you enjoyed!
Lorajean
I made the pie for today Christmas, the crust was good I didn’t use all that it made because it was So Thick! Still good but I’ll never put orange zest in it again, and I didn’t put as much as the recipe said to because it just taste like orange zest pie.???? it was so Disappointing. I never heard of using that in an cannoli pie but I thought oh what the heck! NOPE NEVER AGAIN!
Oh well live and learn!!
Kelli Avila
Hi Lorajean! Sorry this pie wasn't for you! Thanks for stopping by and sharing!
JM French
Which do you think tastes better in the pie, the mascarpone or the cream cheese?
Kelli Avila
The mascarpone is my first choice!
LindaK
Ricotta can be watery. Do you drain in a cheesecloth lined strainer? Other canolli cream recipes do strain ricotta?
Kelli Avila
Hi Linda. This recipe doesn't call for that!
Brad
1 cup (227 grams) ricotta cheese? Linda and I are confused
Kelli Avila
Hi Brad---what's the confusion here?
Brad
You said it doesn't call for ricotta but it does.
Kelli Avila
Where does it say it doesn't call for ricotta?
Emily Zabaleta
My second time making - super good! Thank you!
Lisa Jenkins
I was wondering about using chocolate wafer cookies for the crust and no nuts, would that work? I like the orange/chocolate combination.
Lisa
Kelli Avila
Yes! That sounds delicious. Let me know how it comes out!
Allison W
This was too easy to be this good!! So, so yummy, not too sweet, and that crust. Whoa. Just.....whoa.
Kelli Avila
Hi Allison! So glad you loved it! And thanks for stopping by and sharing your experience 🙂
Amanda
Can you just leave the pistachios out of the crust do you think? I have littles with nut allergies.
Kelli Avila
Absolutely they can be left out. Add in a few more vanilla wafers to make up for the nuts and it should be fine. Enjoy 🙂
Jennifer
Hey. This sounds (& looks) delicious! How do you think it would turn out if I substituted the pistachios for pecans? My BiL is allergic to most nuts but pecans are safe. Thinking of making the next time there’s a family dinner. Thanks!
Kelli Avila
Hi Jennifer! I think that'd be fine! Hope you get a chance to make it 🙂
Peggy
This didn't taste anything like a connoli. 🙁
Beth
Oh my goodness! Cannoli is a family favorite, this looks so, so good!
Kelli Avila
I hope you get a chance to make and enjoy this with your family, Beth!
Lorraine Strickland
What kind of vanilla wafers should be used?
Kelli Avila
Any brand is fine! I've tried it with Nilla Wafers, and the store brands from Trader Joe's and Whole Foods!