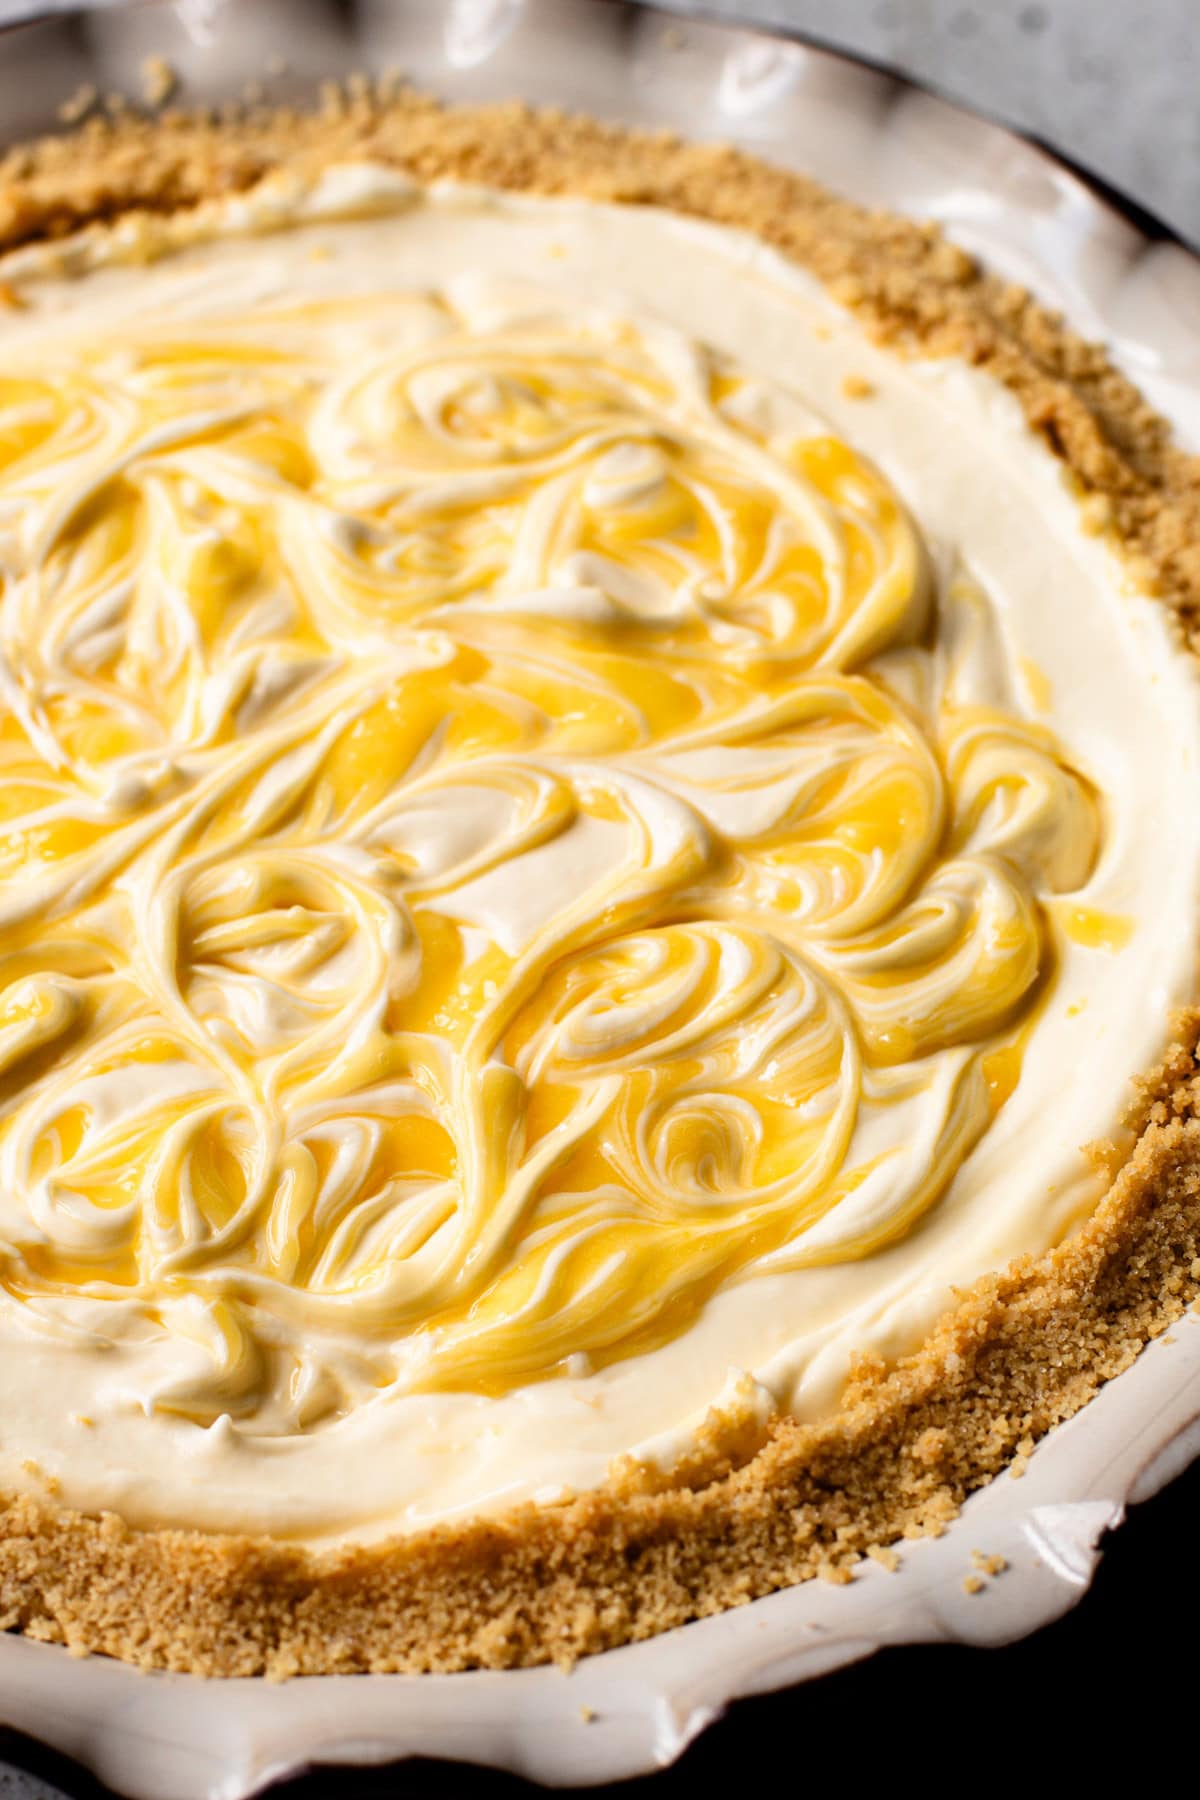
This No Bake Lemon Pie is a creamy, icebox-style dessert with lemon curd swirled into a cream cheese filling, all nestled inside a vanilla crumb crust.
Want to save this recipe?
Enter your email & I'll send it to your inbox. Plus, get weekly updates from me!
No-bake pies are the perfect go-to dessert for when you want something sweet but simple to make. This No Bake Lemon Pie is refreshing, with light, creamy lemon flavor that’s perfectly balanced between sweet and tart. The pie comes together quickly by combining whipped cream, cream cheese, lemon curd, lemon zest, and vanilla extract. It's set into a simple frozen Vanilla Wafer Crust, making it a true no-bake dessert.
Like many of my other no-bake pie recipes (such as Easy Chocolate Pie , Orange Creamsicle Pie and Nutella Pie with Potato Chip Crust), this dessert is perfect for making ahead and keeping in the freezer until you’re ready to serve.
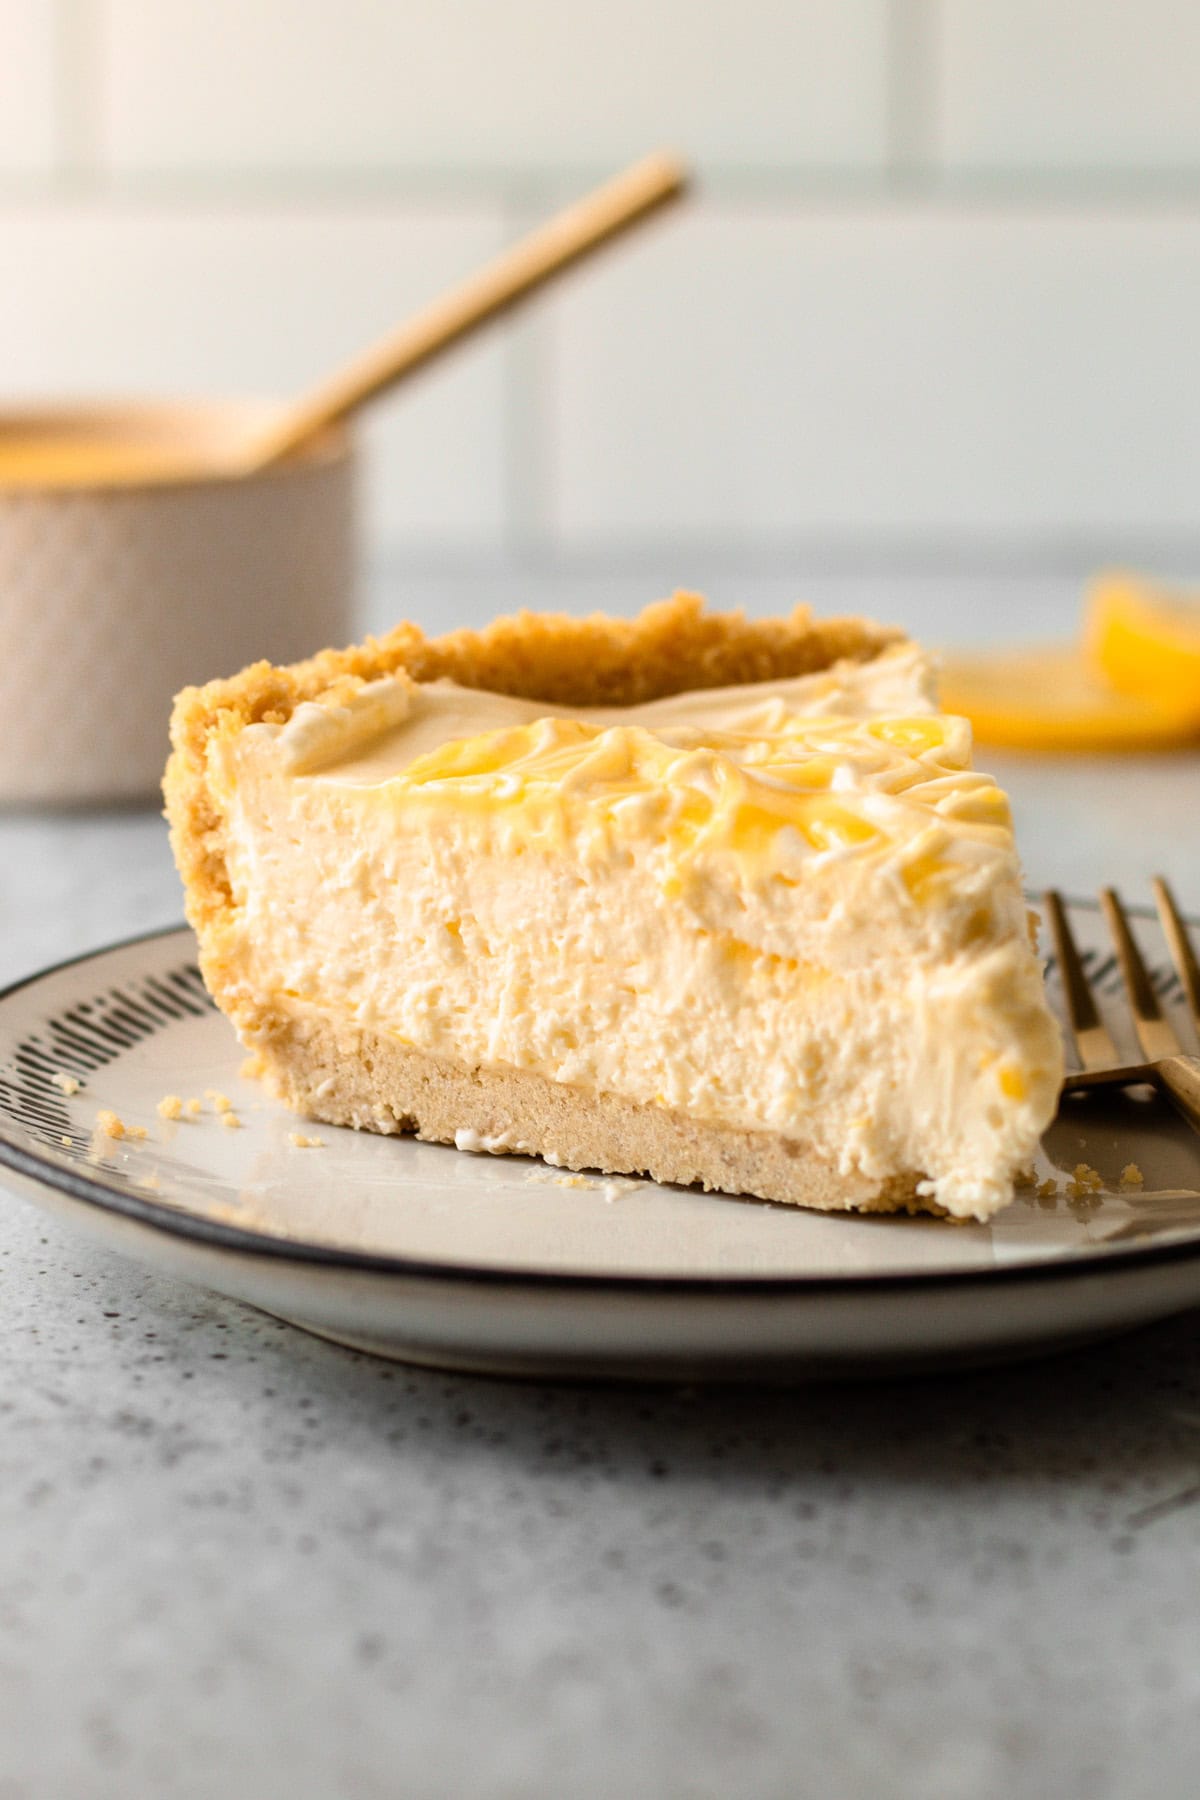
Making the Filling and Crust
The filling for this pie is super easy to put together. While many no-bake pie recipes use gelatin or egg whites as stabilizers, this one relies on heavy cream whipped to stiff peaks instead. This method not only simplifies the process but also results in excellent texture and flavor, making it my preferred approach for no-bake pies.
For the crust, vanilla wafer cookies can vary in fat content, so the amount of butter you'll need for the crumb crust may differ. Start with 6 tablespoons, adding more as needed. If the mixture is too wet, add more crumbs until it resembles wet sand and holds its shape when squeezed. For a sturdier crust, you can blind-bake it, but freezing works well too, especially for no-bake pies. The recipe provides instructions for the no-bake method. For more guidance on how to build and shape a perfect crumb crust, check out my How to Make a Crumb Crust tutorial.
Here is an overview of how to make this No Bake Lemon Pie (with the full recipe written below this article in the recipe card):
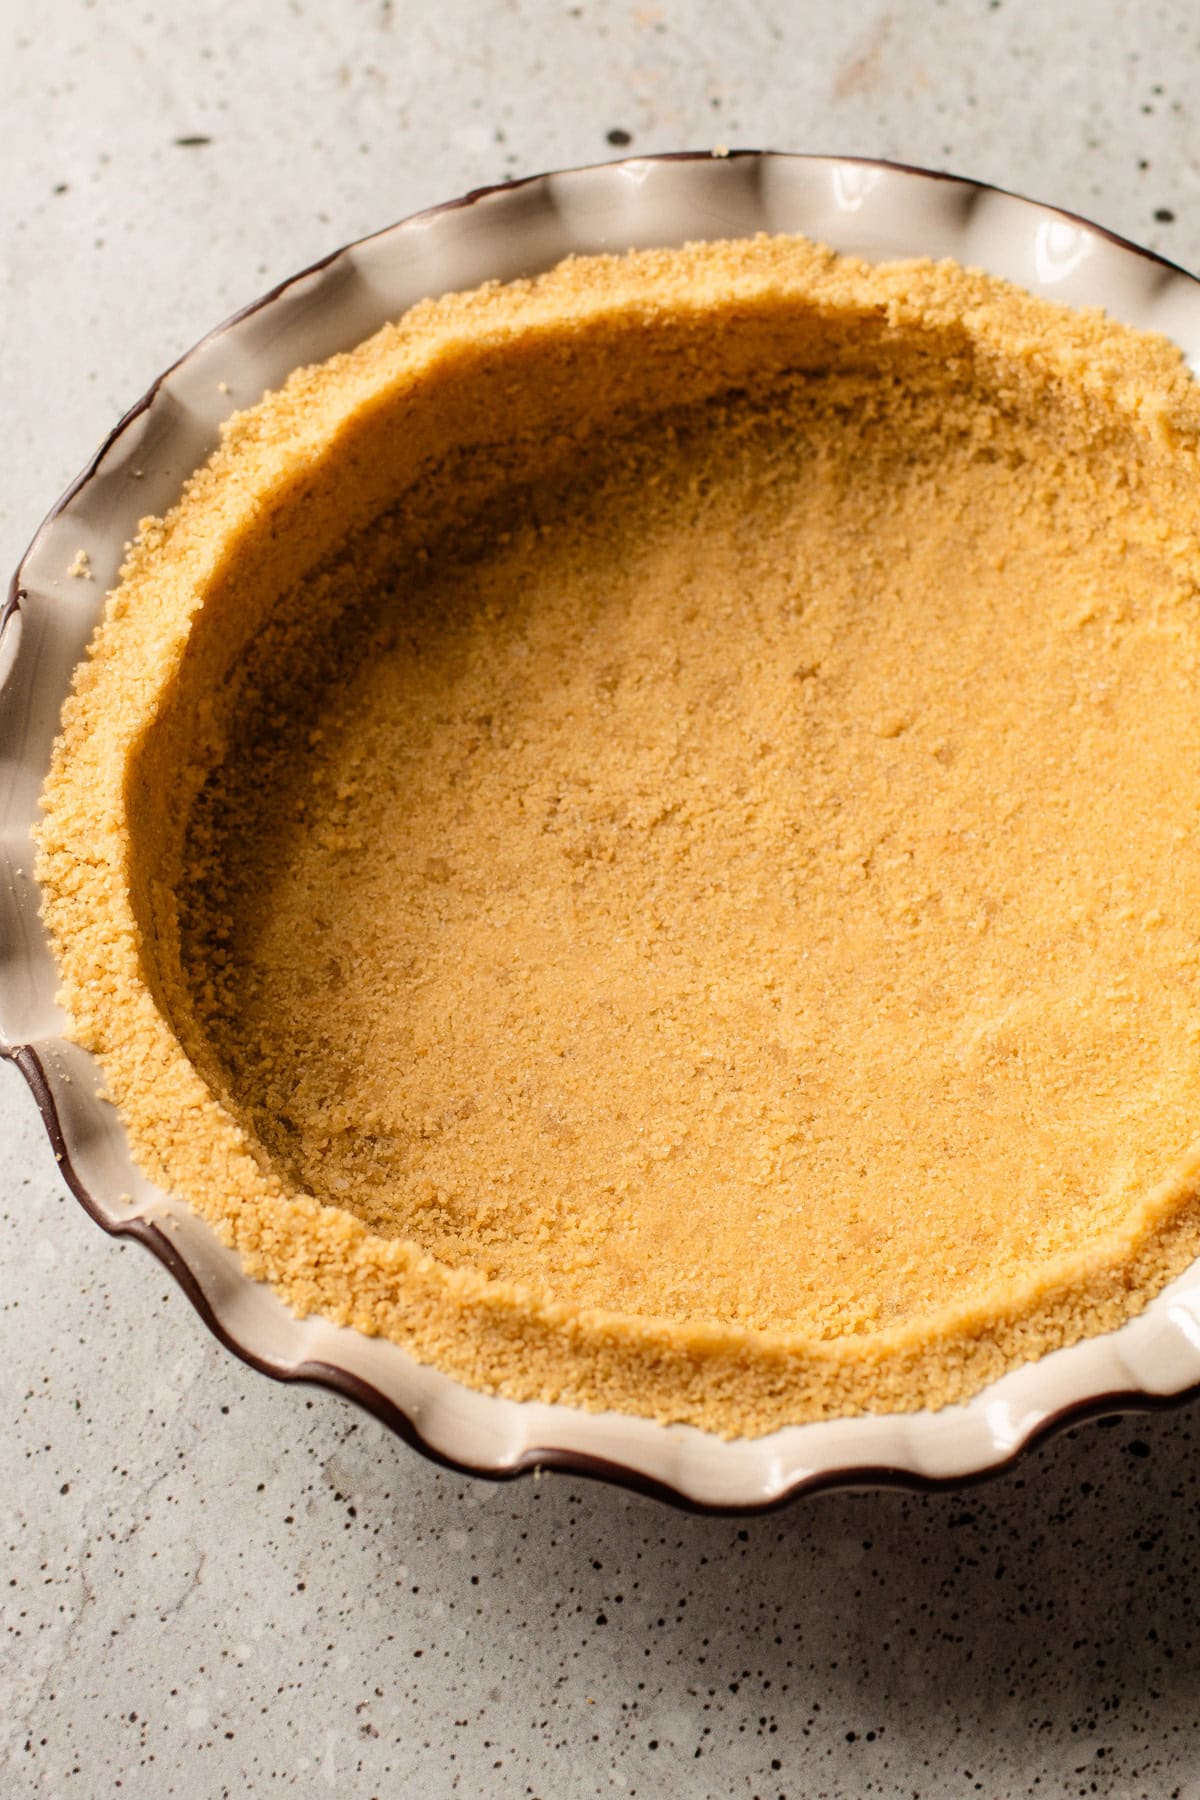
Step 1: Assemble and shape the pie crust and set it in the freezer while preparing the no-bake filling.
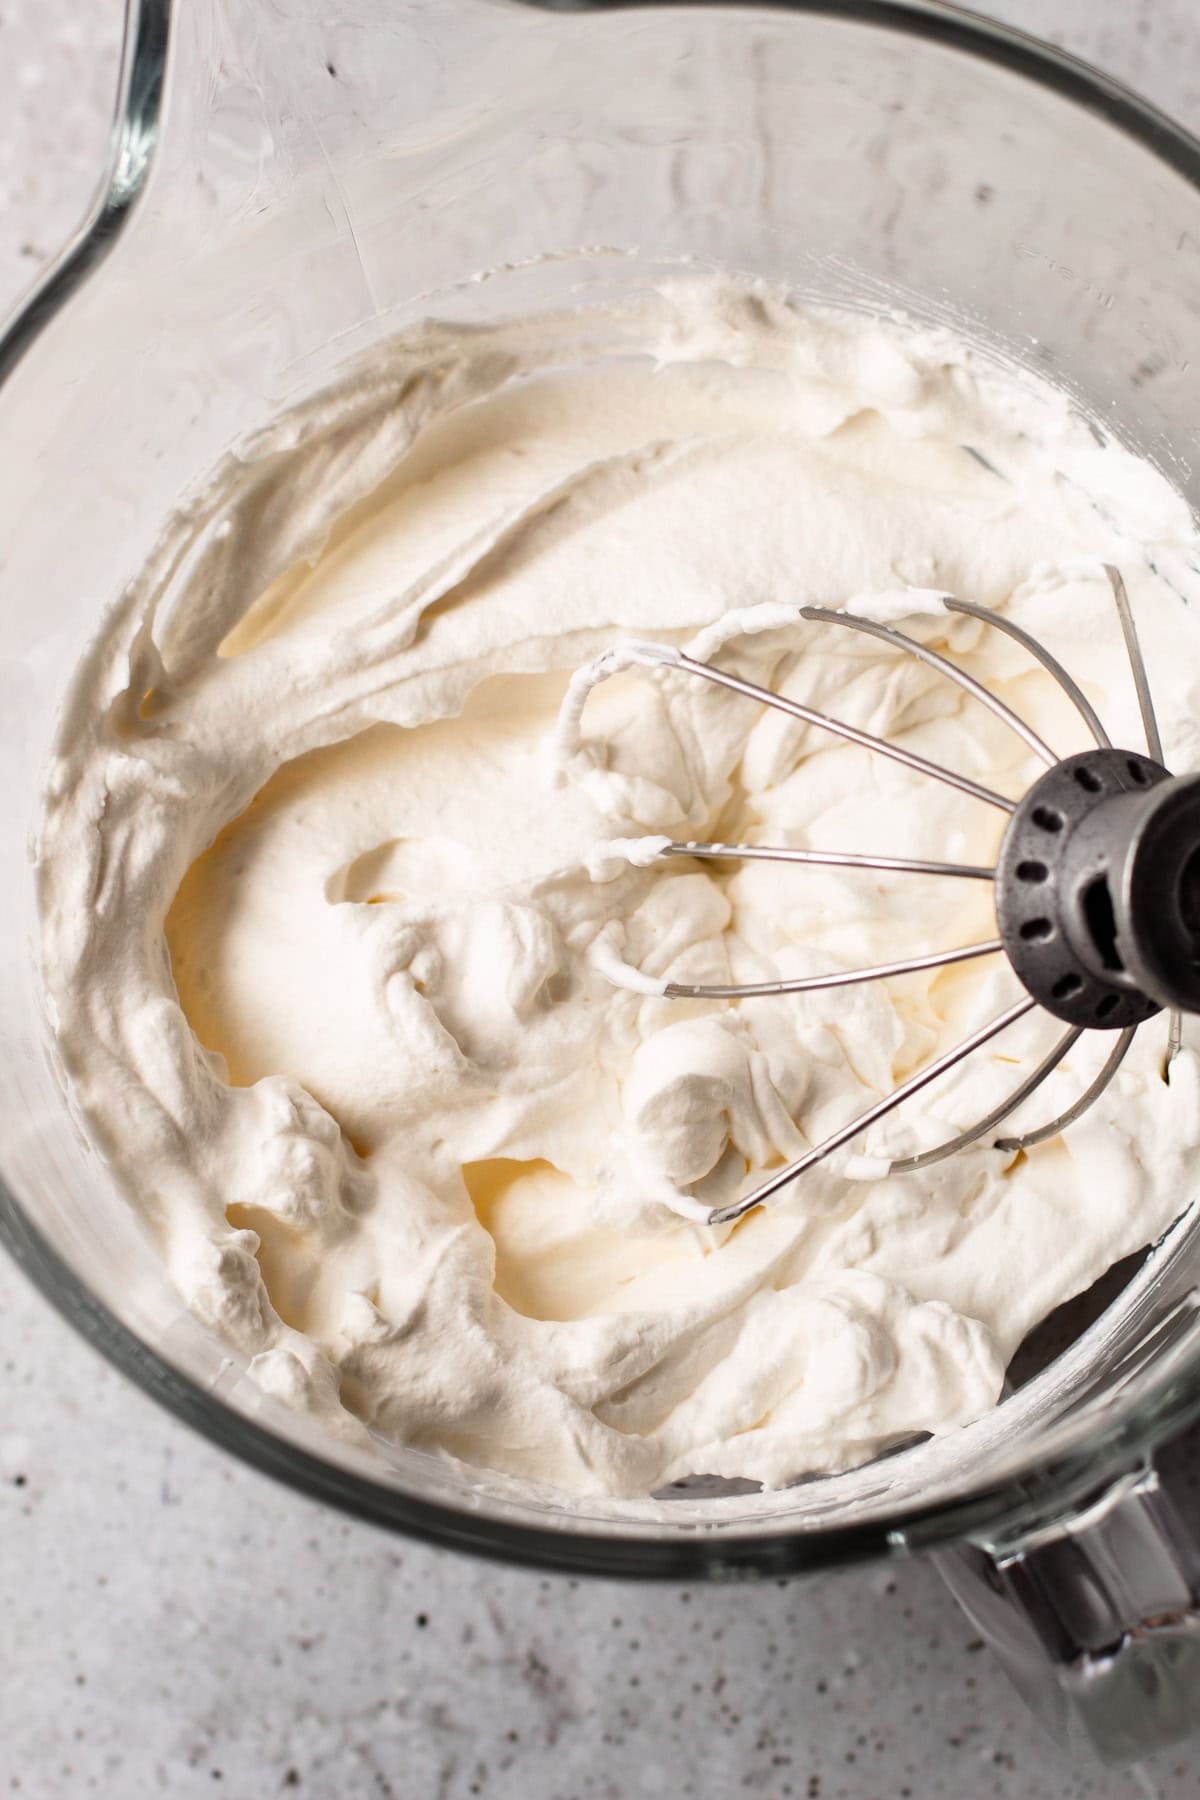
Step 2: Whip the cream until stiff peaks form, then remove the whipped cream from the bowl and set it aside.
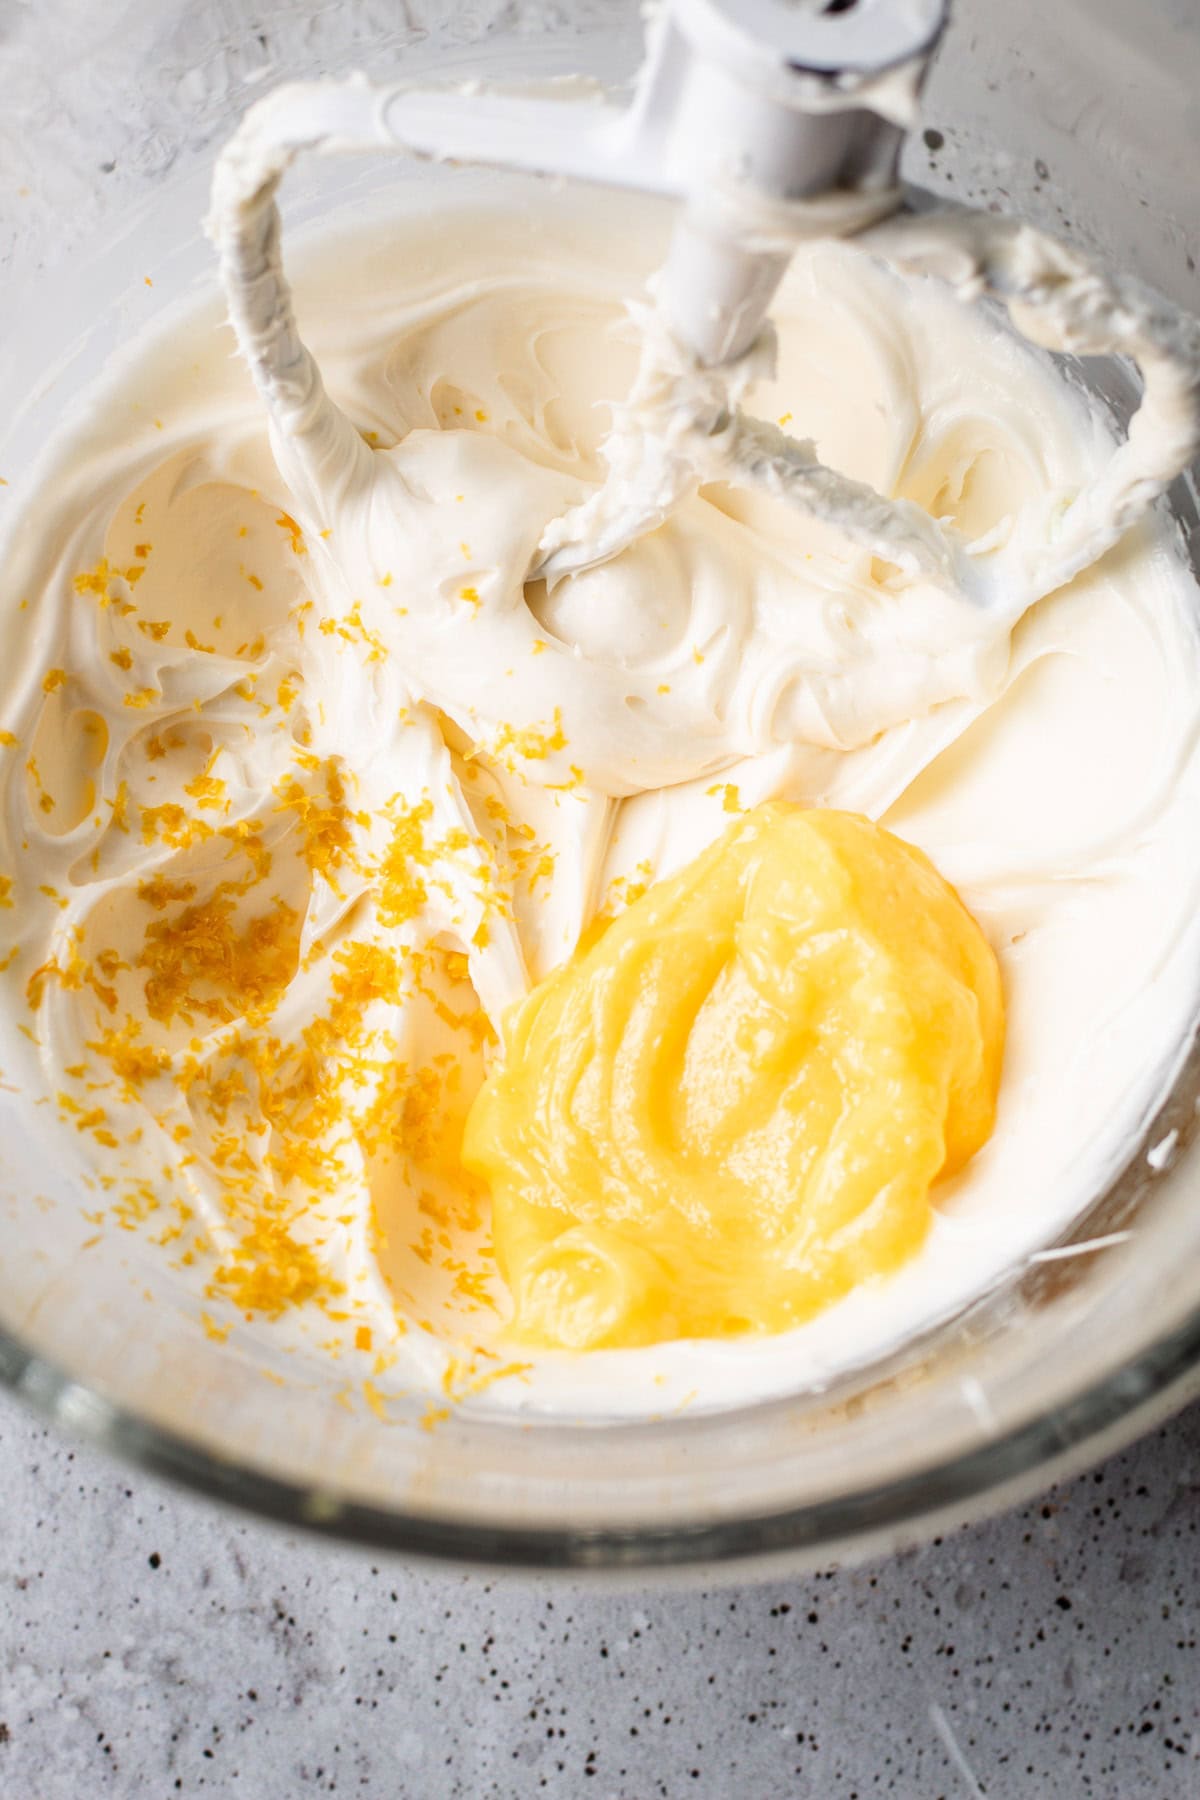
Step 3: Beat together the cream cheese, sugar, and vanilla until smooth. Add the lemon zest and ½ cup lemon curd, then beat for another minute until fully combined.
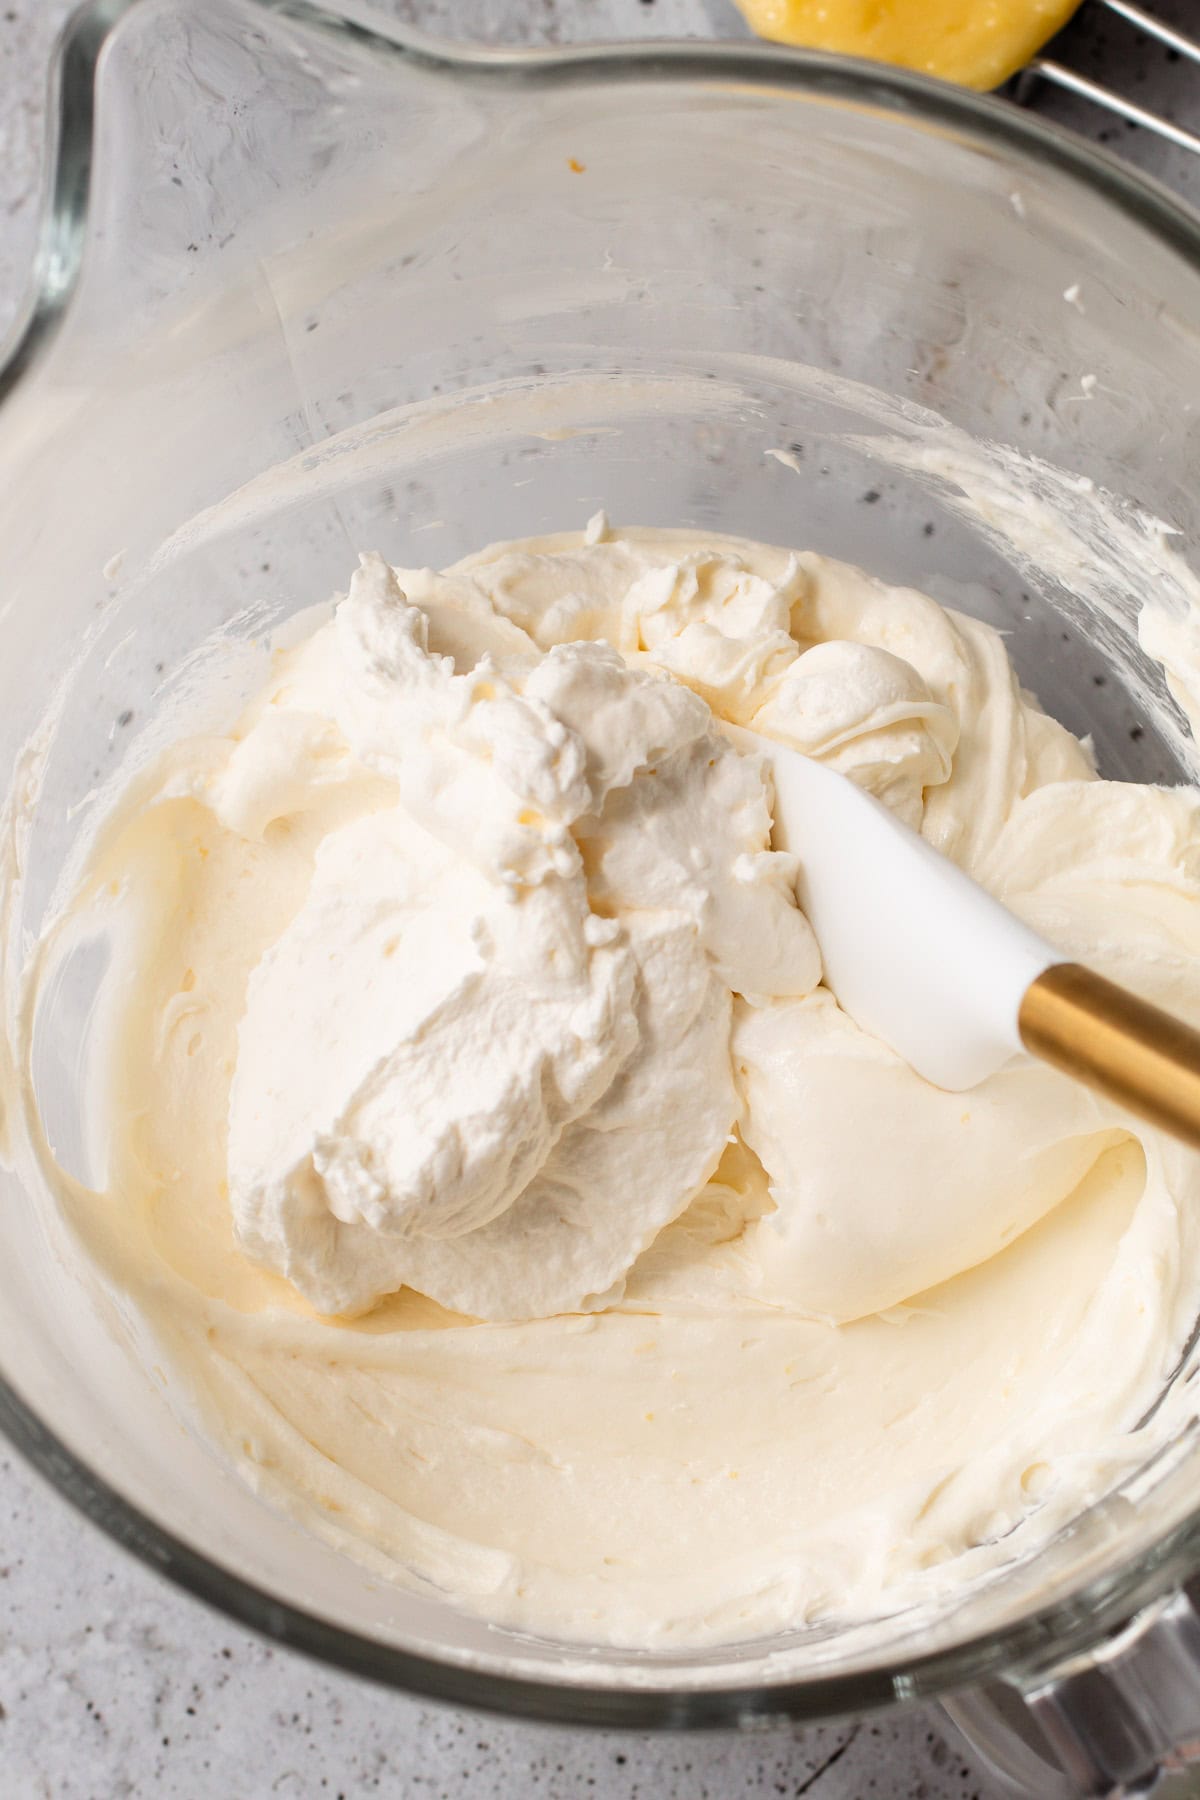
Step 4: Add in some of the whipped cream to lighten the mixture, then fold in the remaining whipped cream.
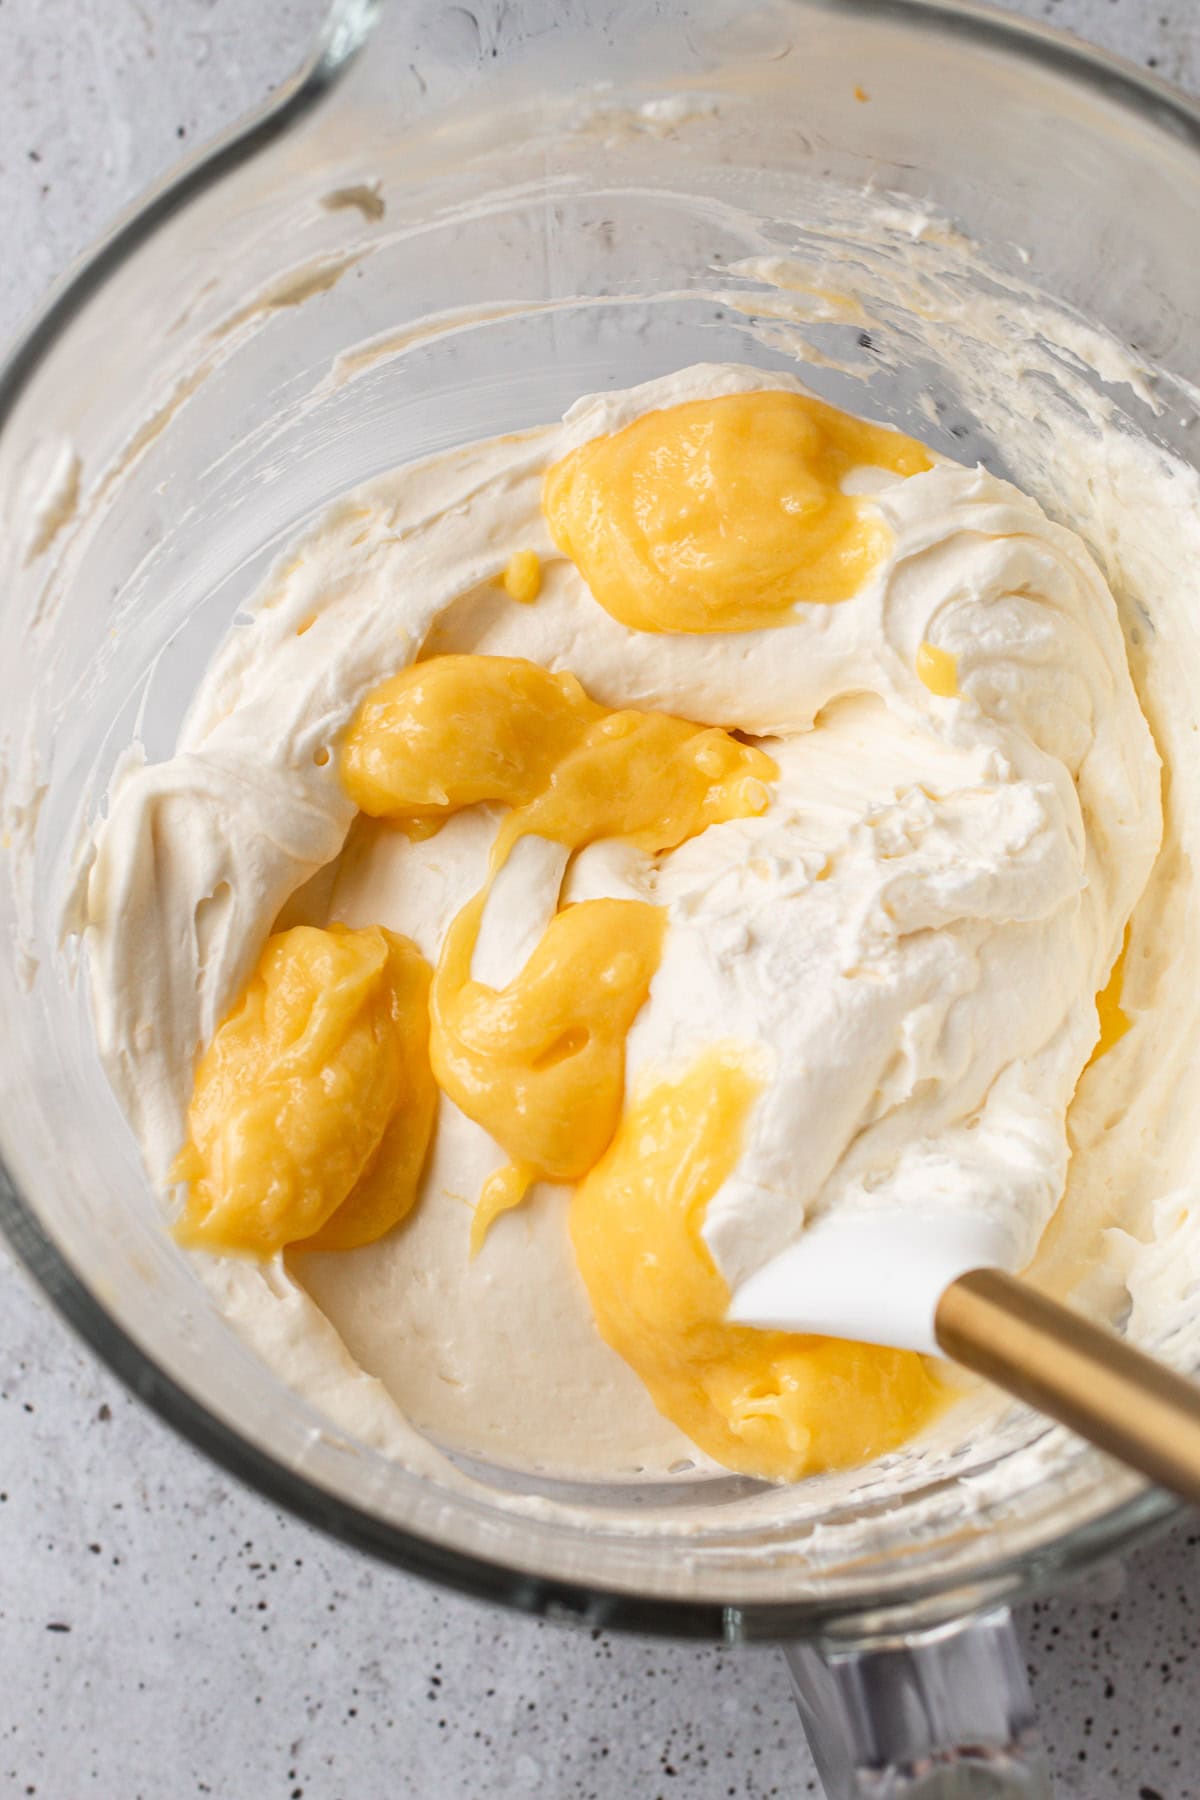
Step 5: Add the remaining ½ cup lemon curd and give it 2 to 3 folds.
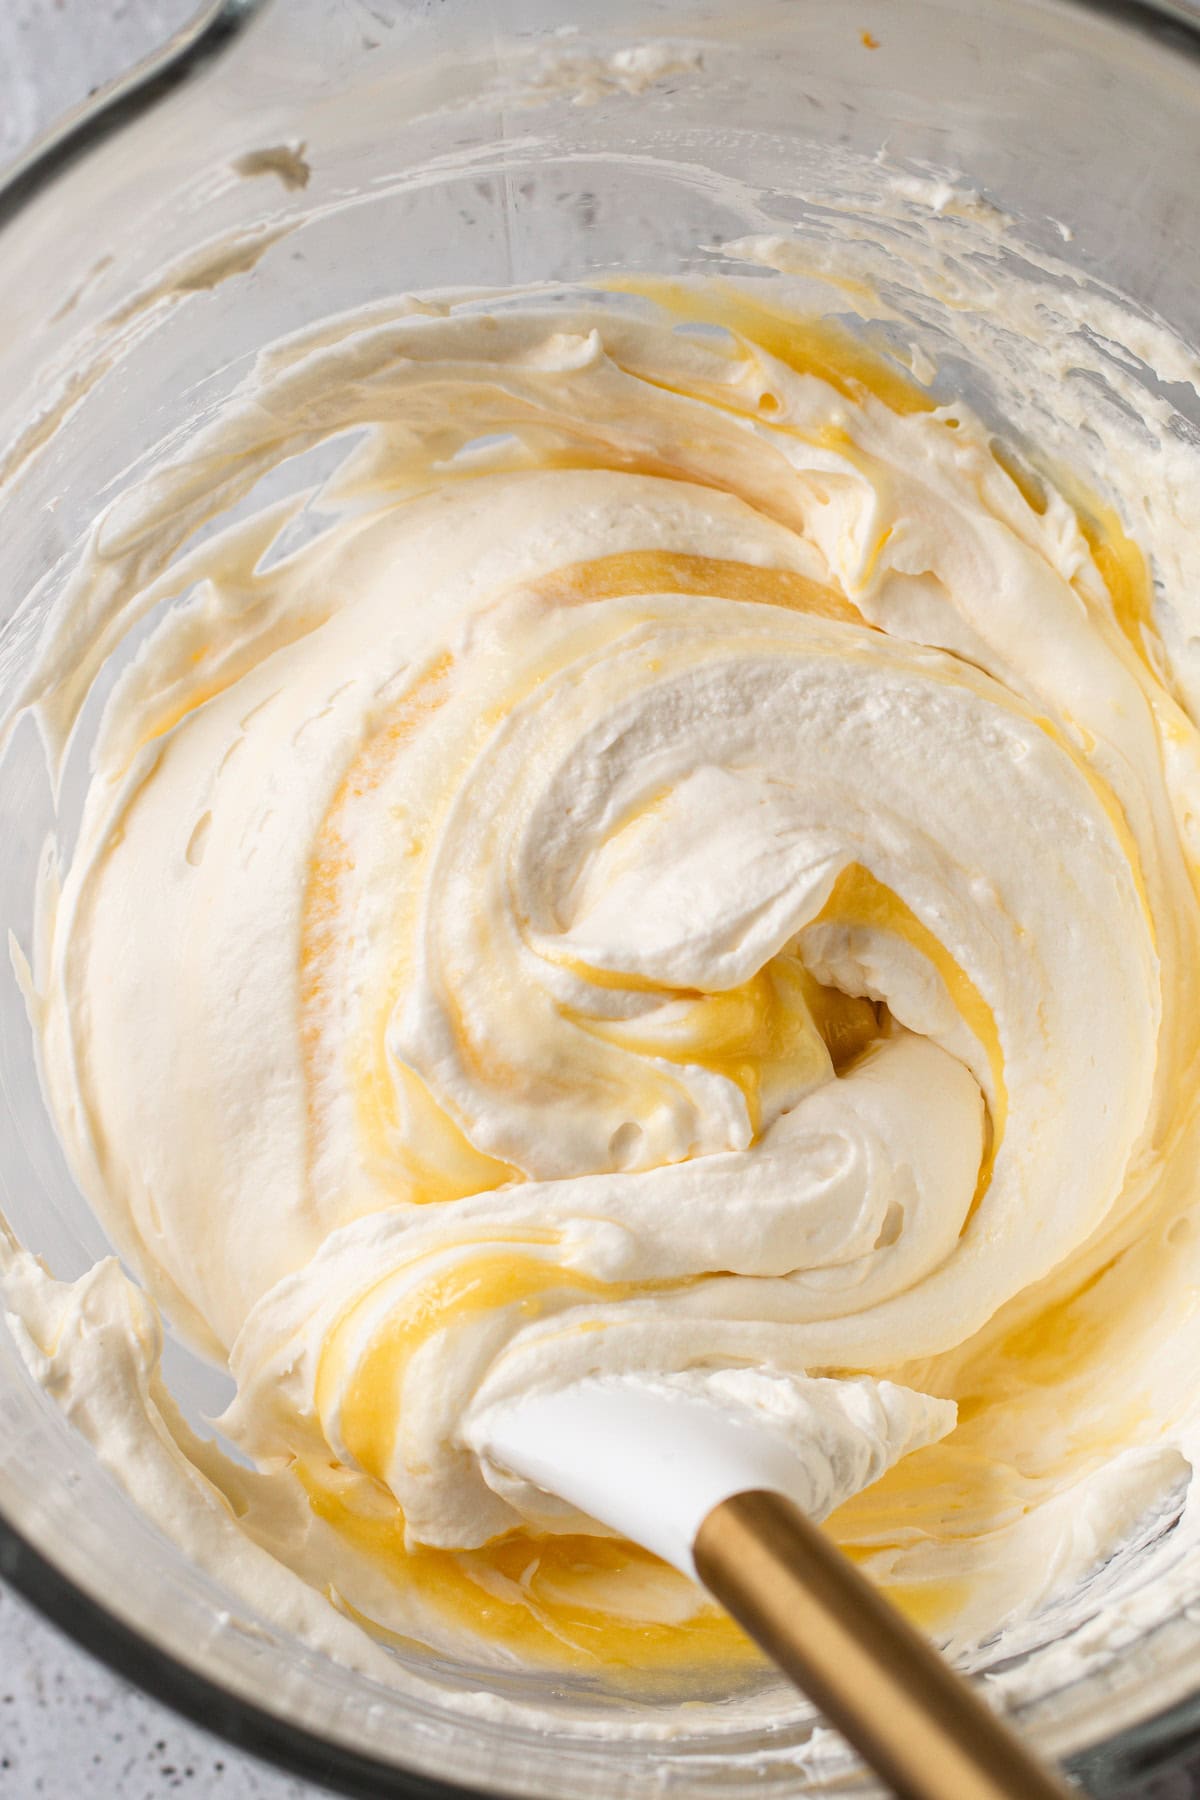
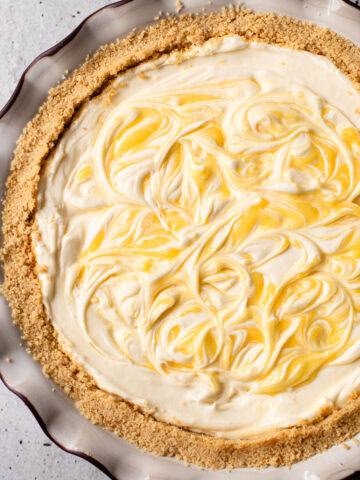
Step 6: It should not be blended in at all, but swirled in the filling
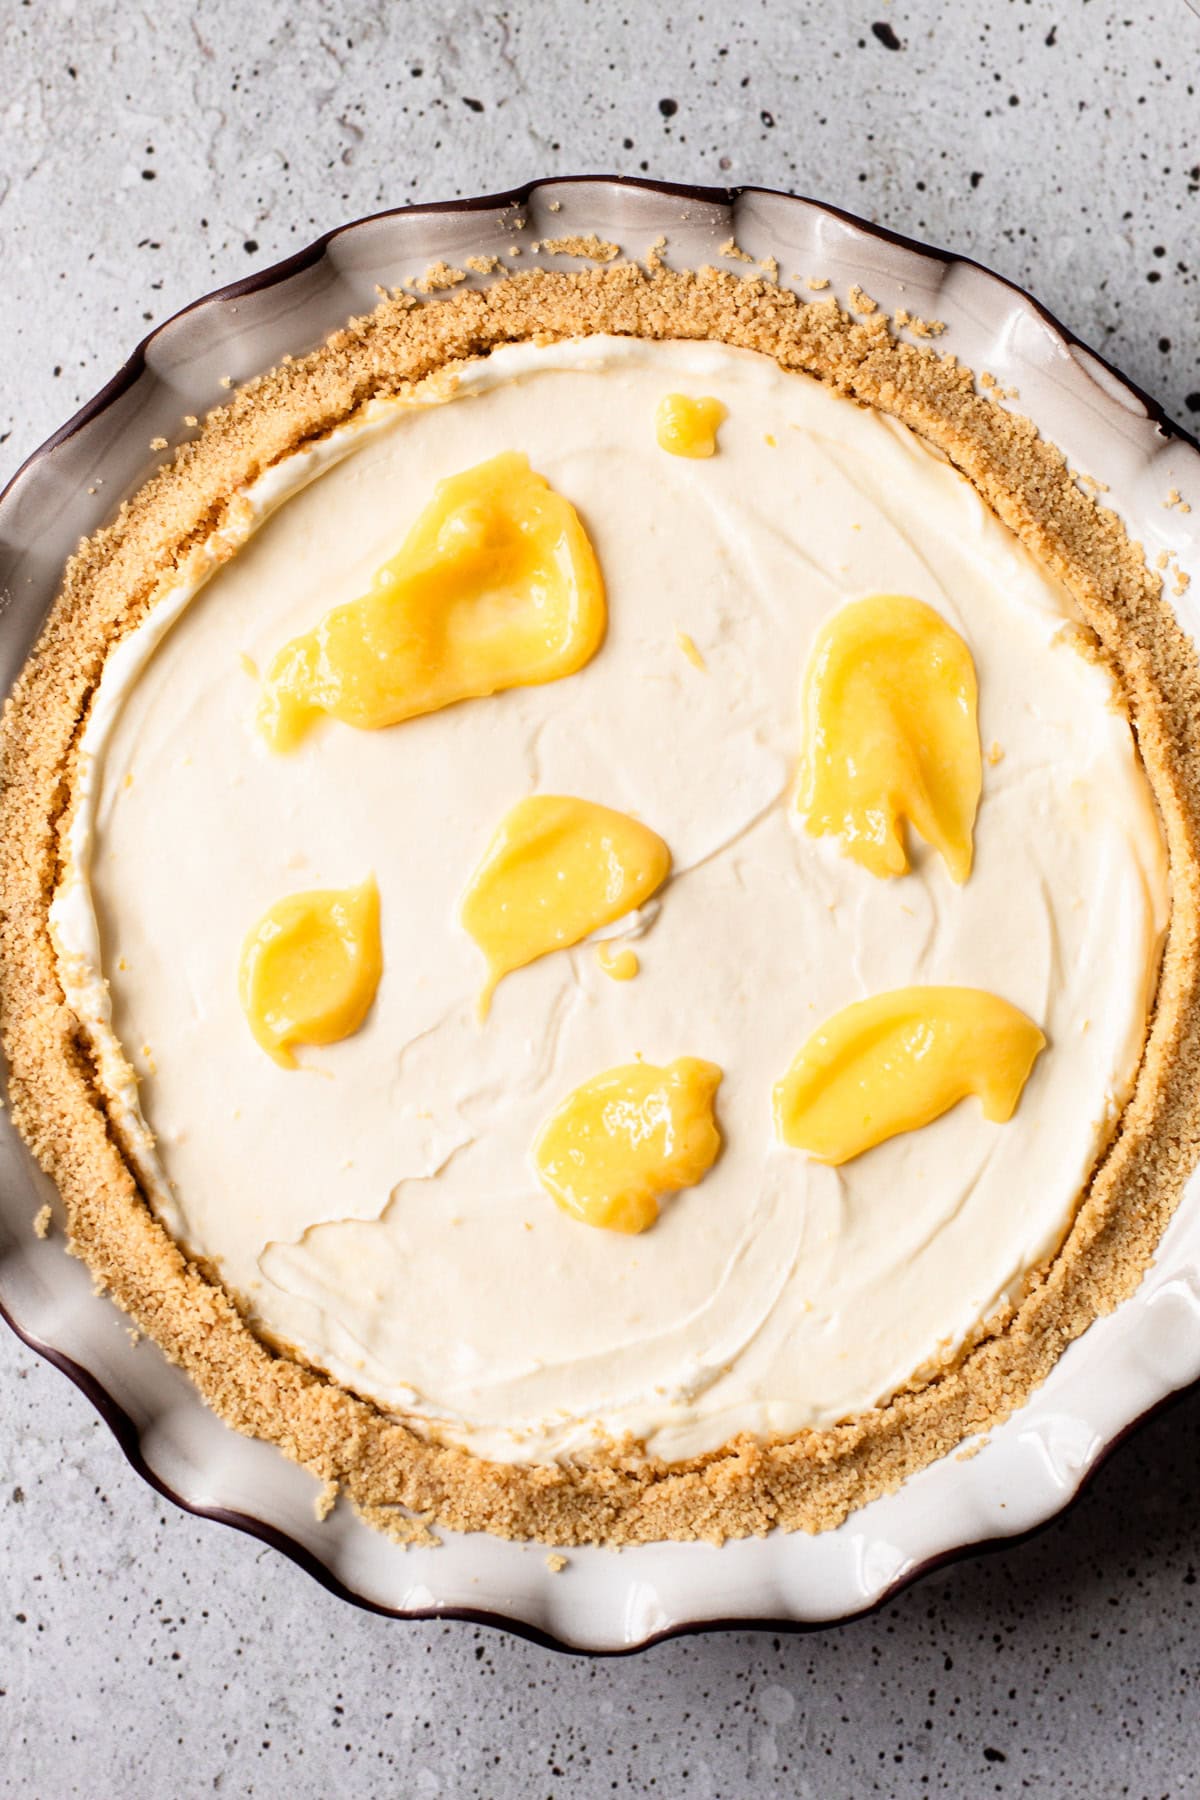
Step 7: Transfer the filling to the pie shell and smooth over the top. Dollop additional lemon curd on the top.
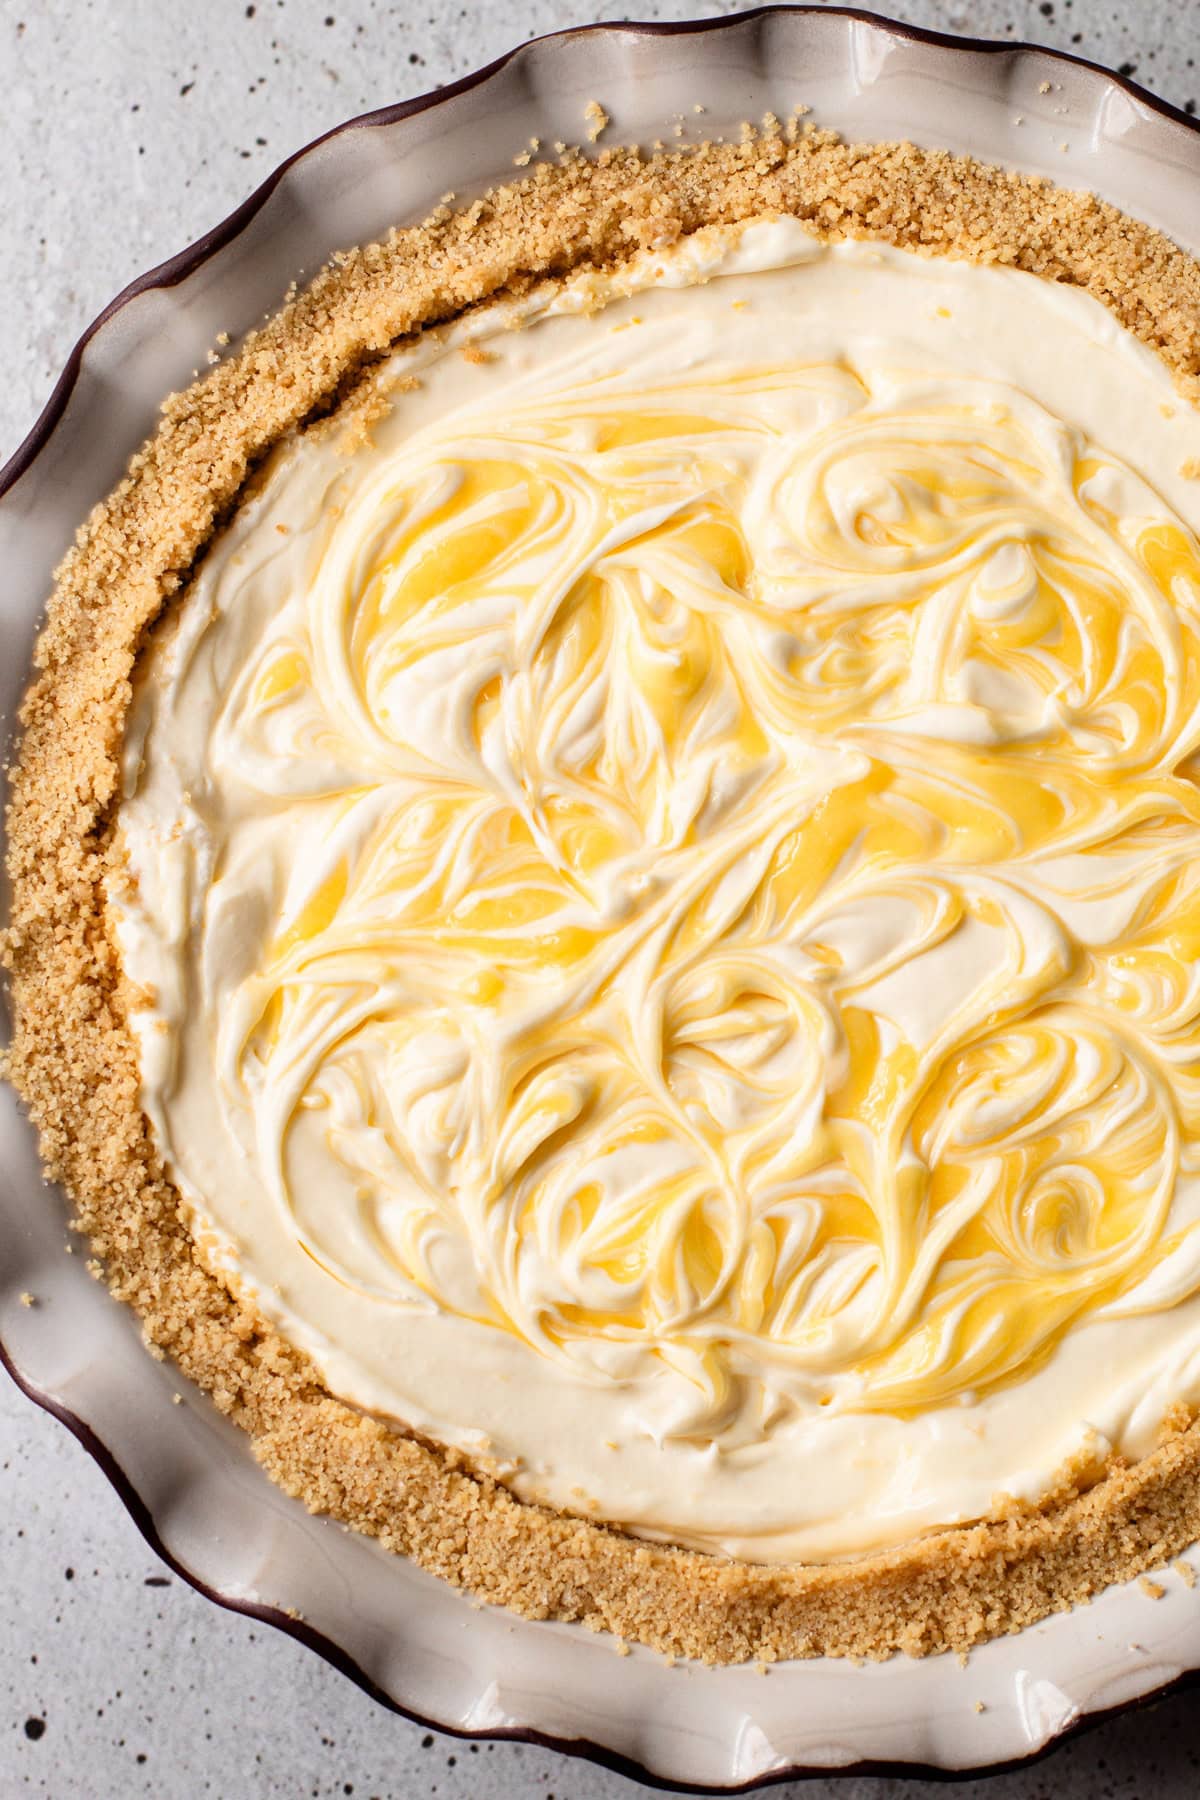
Step 8: Using a toothpick or sharp knife, swirl it all around. Chill the pie to finish setting up.
Serving This No-Bake Pie
This pie should be served well-chilled. It can be made up to 2 days ahead of time if stored in the refrigerator, or up to 1 month if frozen.
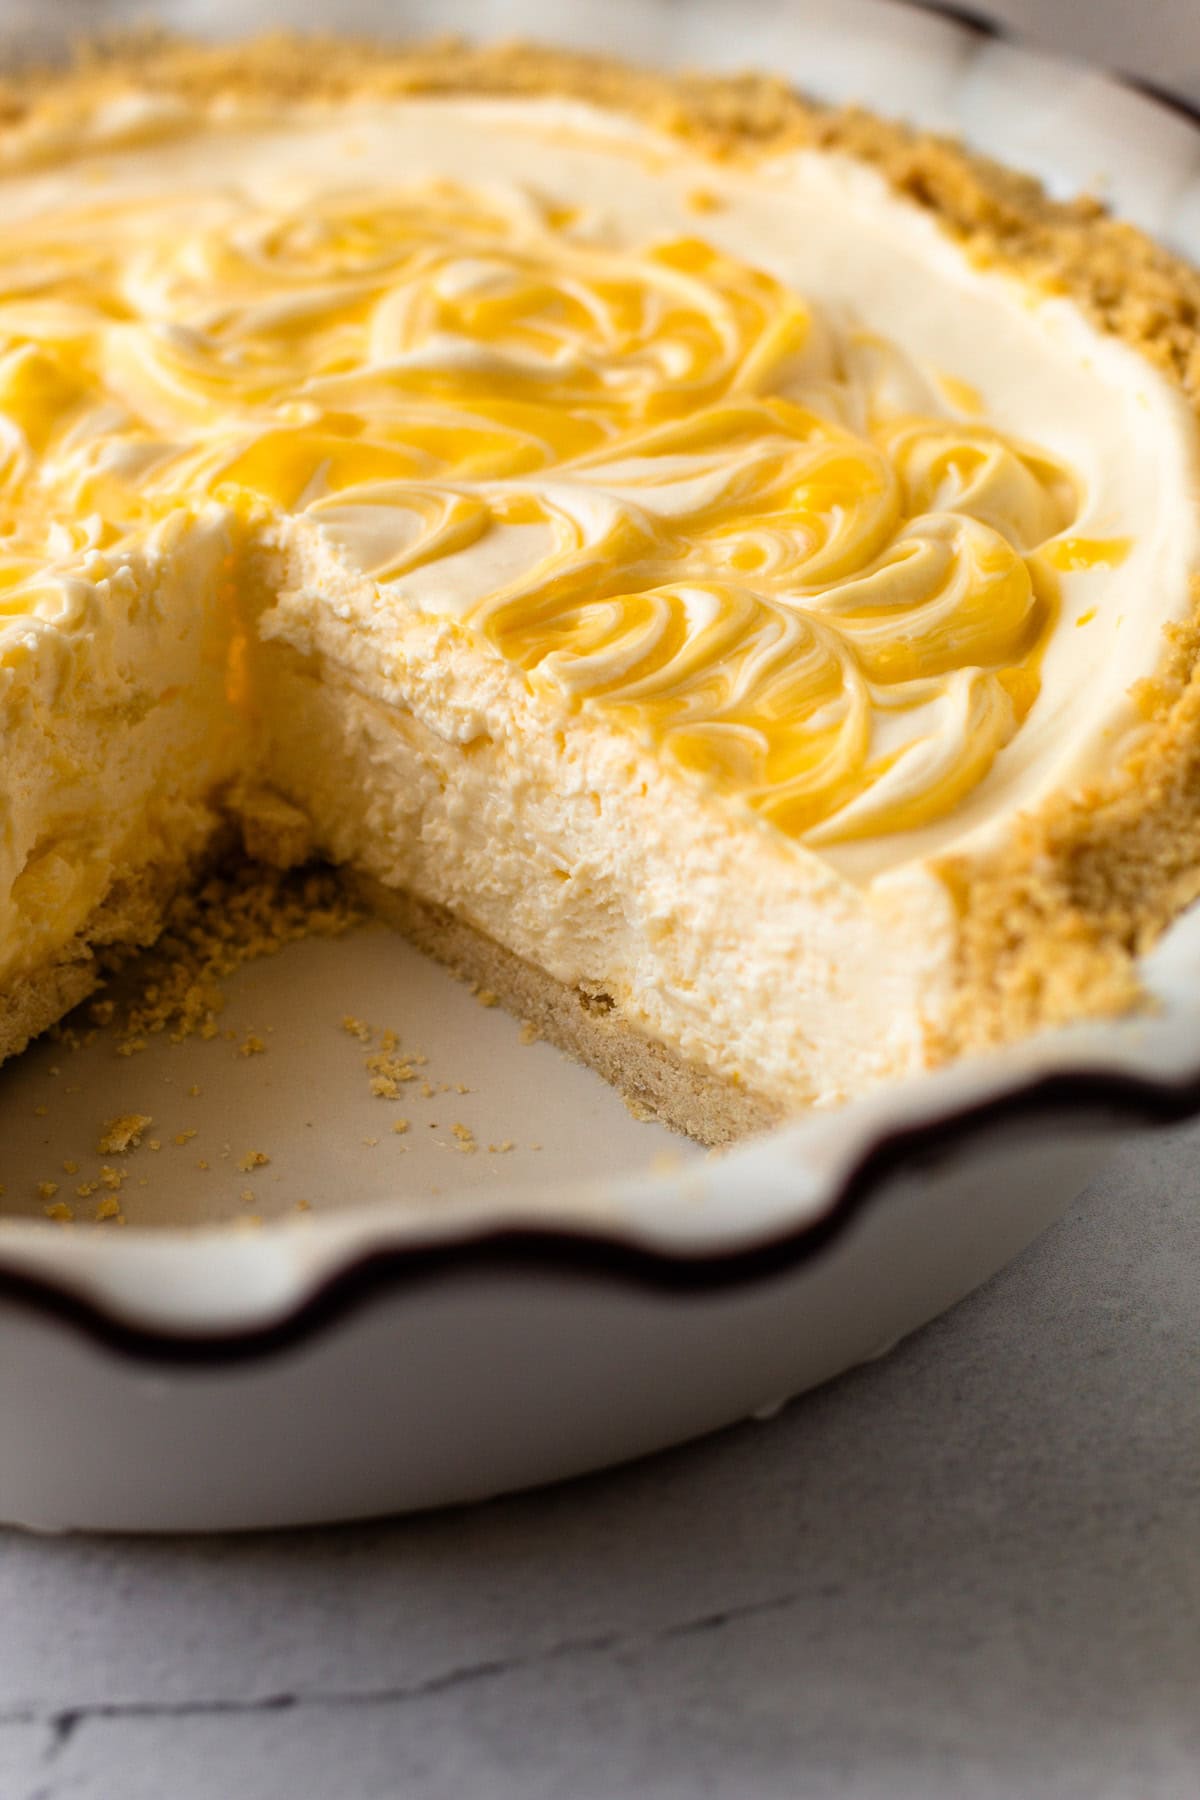
If serving from the refrigerator, I recommend placing the pie in the freezer for 30–60 minutes before serving. While not essential, this step helps achieve clean, neat slices like the ones shown in the photos.
If serving the pie from completely frozen, let it sit at room temperature for 15–30 minutes, depending on the warmth of your kitchen, until it's easy to cut into.
More Lemon Recipes
More No Bake Pies
I am so honored when you make a recipe from my site! If you make this No Bake Lemon Pie, please leave a star ⭐️⭐️⭐️⭐️⭐️ rating with your experience! If you have any questions about this recipe, feel free to comment here, and tag me on Instagram!
PrintFull Recipe
Creamy No-Bake Lemon Pie
When those hot and humid days of summer make it impossible to turn on the oven, this no-bake Lemon Icebox Pie is what you need to make. It is packed with a bright creamy lemon flavor and comes together quickly to satisfy that need for a sweet, cool treat without heating up the kitchen.
- Prep Time: 00:20
- Total Time: 00:20 plus chilling time
- Yield: Serves 8
- Category: Sweet Pie
- Method: No-Bake
Ingredients
For Crust:
- 2 cups (8 ounces) vanilla wafer crumbs, more as needed
- 6 tablespoons (85 grams) unsalted butter, melted, more as needed
- ¼ cup (50 grams) granulated sugar
For No Bake Filling:
- 1 cup (227 grams) heavy cream
- 8 ounces (227 grams) cream cheese, softened
- ½ cup (100 grams) granulated sugar
- 1 teaspoon vanilla extract
- 2 teaspoons lemon zest
- 1 cup (227 grams) lemon curd (homemade or store-bought), divided, plus more for garnish
Instructions
Make the Crust:
- In a bowl, mix together the vanilla wafer crumbs, melted butter, and sugar. The mixture should be damp, like wet sand, and will hold together when squeezed. If it is too dry, add more melted butter, a tablespoon at a time. If it’s too wet, add a tablespoon more vanilla wafer crumbs until it’s the correct consistency.
- Pour the vanilla wafer crumbs into a 9-inch pie plate and start pressing them up the sides of the pie plate to form the edges first. Once the edges are formed, work the crumbs down to evenly distribute them into the bottom of the pie plate. Then, pack them down into an even layer using a flat-bottomed cup or measuring cup.
- If baking: Bake in a preheated 350ºF oven for 10 minutes. If freezing: freeze for 30 minutes for a no-bake pie option.
Make the Filling and Assemble:
- With a hand mixer or a stand mixer fitted with a whisk attachment, whip the heavy cream until stiff peaks form. Set aside in a separate bowl.
- To the now-empty bowl, add the cream cheese, sugar, and vanilla. Beat on medium speed until completely smooth, about 2 minutes. Scrape down the sides of the bowl and add the zest and ½ cup lemon curd. Beat for an additional minute until fully combined.
- Add ⅓ of the whipped cream to the cream cheese mixture and fold it in with a rubber spatula by hand until it is completely combined.
- Add the remaining whipped cream to the bowl and gently fold it in, being careful not to deflate the whipped cream.
- Add the remaining ½ cup lemon curd and give it 2 to 3 folds. It should not be blended in at all, but swirled in the filling. Transfer the filling to the pie shell and smooth over the top. If desired, dollop additional lemon curd on the top of the pie, and, using a toothpick or sharp knife, swirl it all around. It won’t be completely smooth and that’s ok!
- Place the pie in the refrigerator to set up. It needs at least 4 hours of chilling time, but preferably overnight or 12 hours.
Notes
The consistency of vanilla wafer cookies varies by brand, so start with 6 tablespoons of butter for the crumb crust, adding more or extra crumbs as needed until the mixture resembles wet sand and holds its shape when squeezed without being soggy. See this post about Making a Crumb Crust for troubleshooting tips.
Serve this pie well-chilled. It can be made 2 days ahead in the fridge or frozen for up to a month. Add the garnishes just before serving. For neat slices, freeze the pie for 30-60 minutes before serving from the fridge, though it's not essential. If serving from frozen, let it sit at room temperature for 15-30 minutes before cutting.
Originally published in 2020, this recipe has been regularly re-tested and updated to ensure it remains perfect.
Some of the links on this page may be affiliate links. Everyday Pie is a participant in the Amazon Associates Program. As an Amazon Associate I earn from qualifying purchases, at no extra cost to you.



Leave a Reply