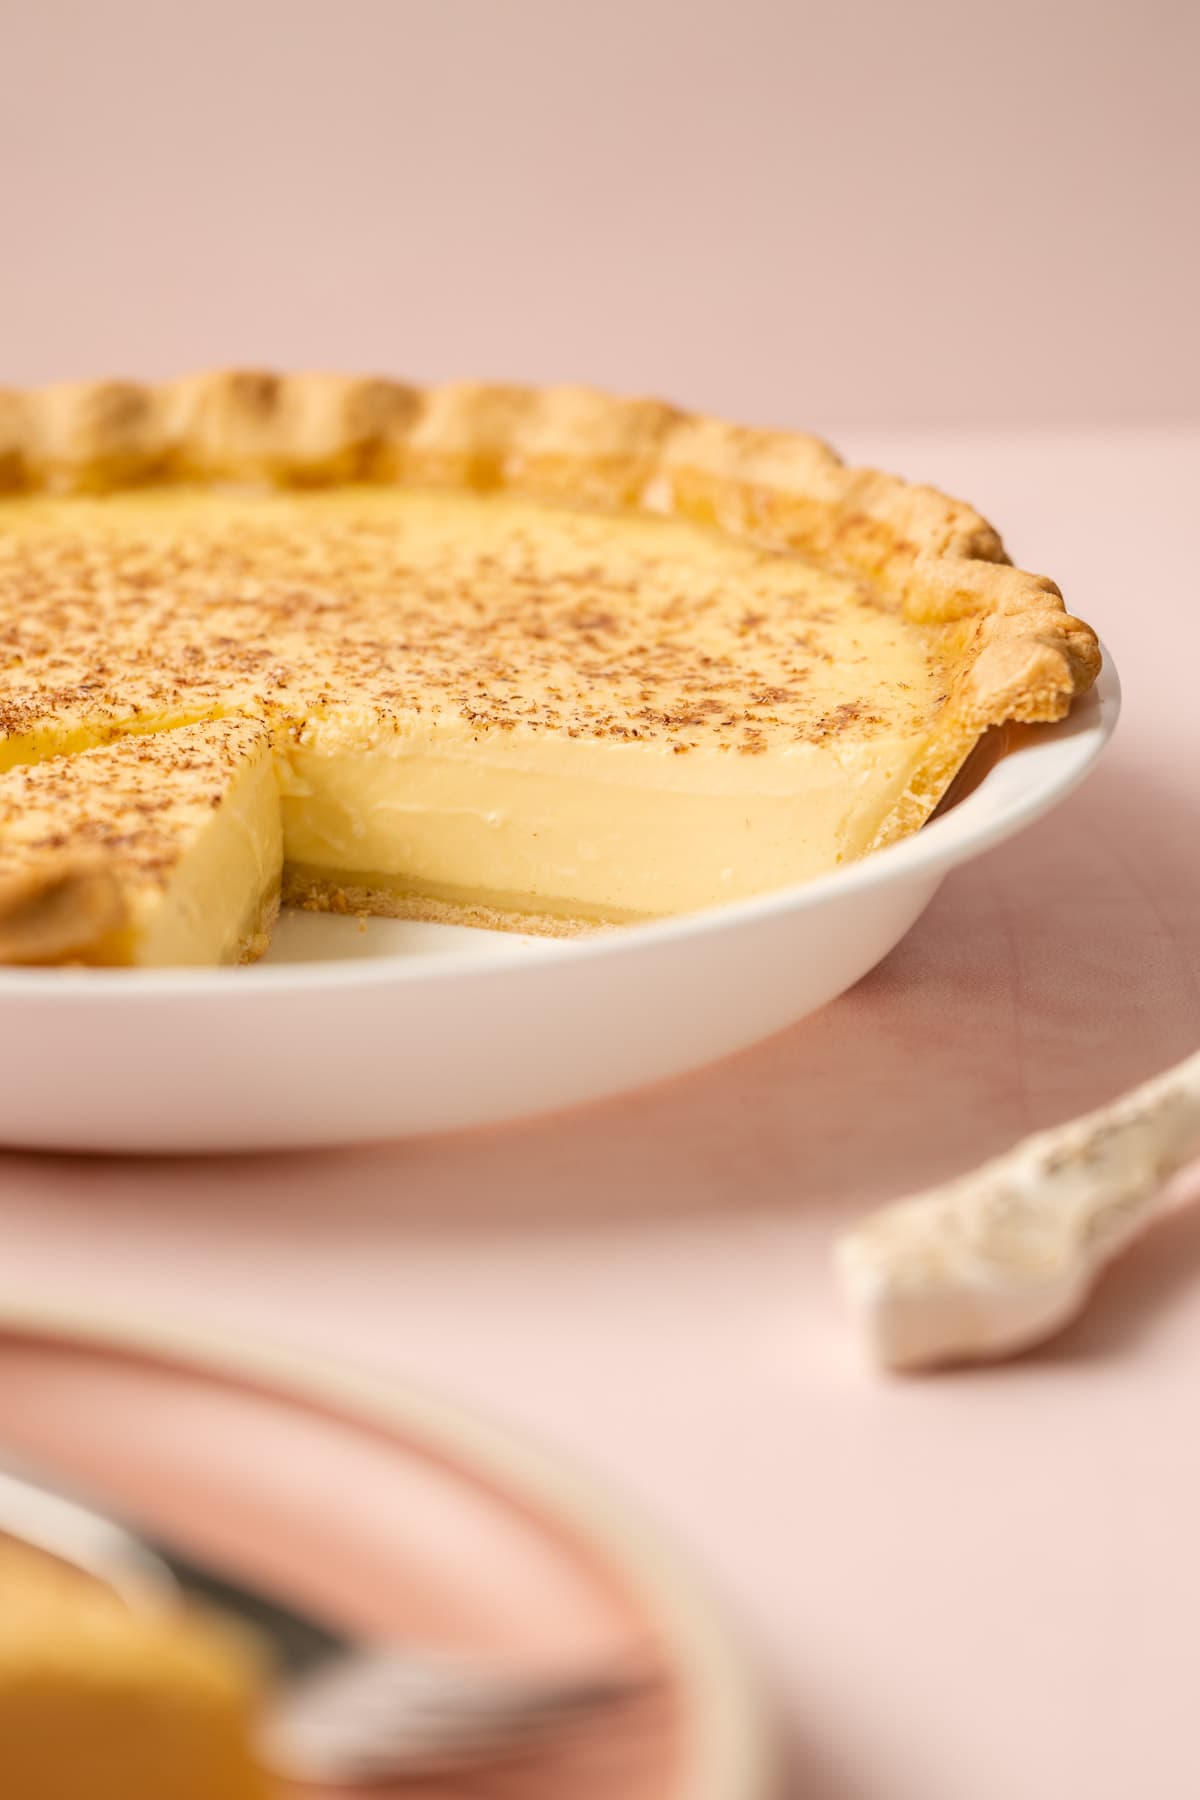
An absolute classic, this Custard Pie has a silky smooth egg custard filling simply made with eggs, milk, and cream, and lastly, baked up in a buttery sweet crumbly pie crust.
Want to save this recipe?
Enter your email & I'll send it to your inbox. Plus, get weekly updates from me!
Egg Custard Pie
Don't tell any of the other pies on my website, but Classic Custard Pie might just be my favorite. It's such a simple pie, made with common ingredients nearly everyone likely has in their home right now. It's just so good, especially when made properly. And that's what this recipe is all about.
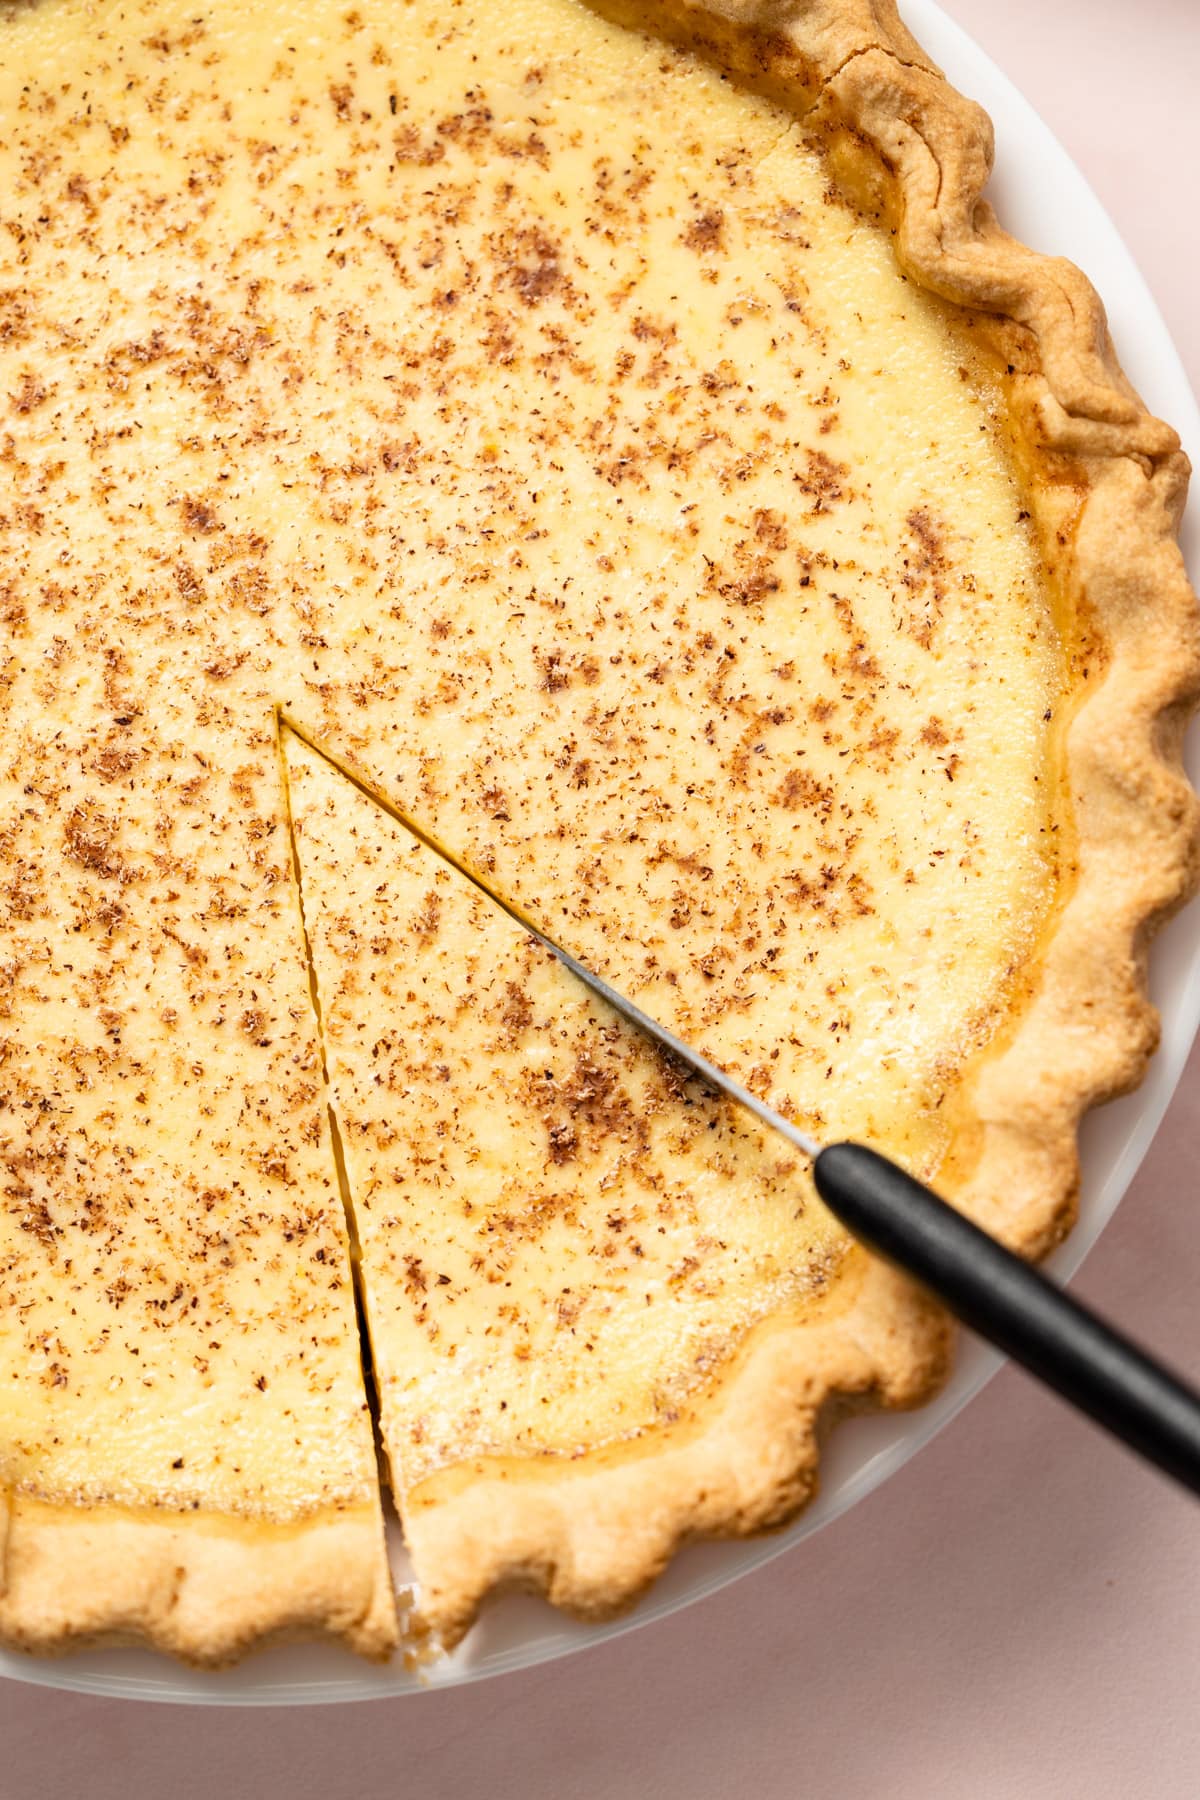
A good custard pie should have a buttery sweet pastry that is properly cooked (no soggy bottoms, please) and a smooth rich egg-based filling that has not been overbaked. Don't forget that grating of fresh nutmeg on top of the pie; it makes all the difference in the world in terms of flavor.
So, let's get to making it, shall we? The text below offers tons of tips and helpful notes, or you can scroll to the bottom to grab the recipe and get started!
Want a visual idea of how this custard pie is made? Check out the video below.
Custard Pie Ingredients
Here is an overview of the ingredients needed for this recipe. The full recipe is listed below in greater detail.
- milk
- cream
- sugar
- vanilla extract (use the best quality you can here)
- eggs
- freshly grated nutmeg (again, use whole nutmeg if you can, it makes a difference)
- flour
- butter
- salt
Tools to Use
Here is a list of some of the primary tools I use in this recipe. You won't necessarily choose to use them all, but they are exactly what I used. Any links may contain affiliate links.
- food processor (to make the pie dough)
- pie plate
- dried rice and beans / pie weights (for blind baking)
- rolling pin
- fine-mesh strainer
- kitchen essentials: baking scale, bowls, measuring cups and measuring spoons
Making the Pie Crust
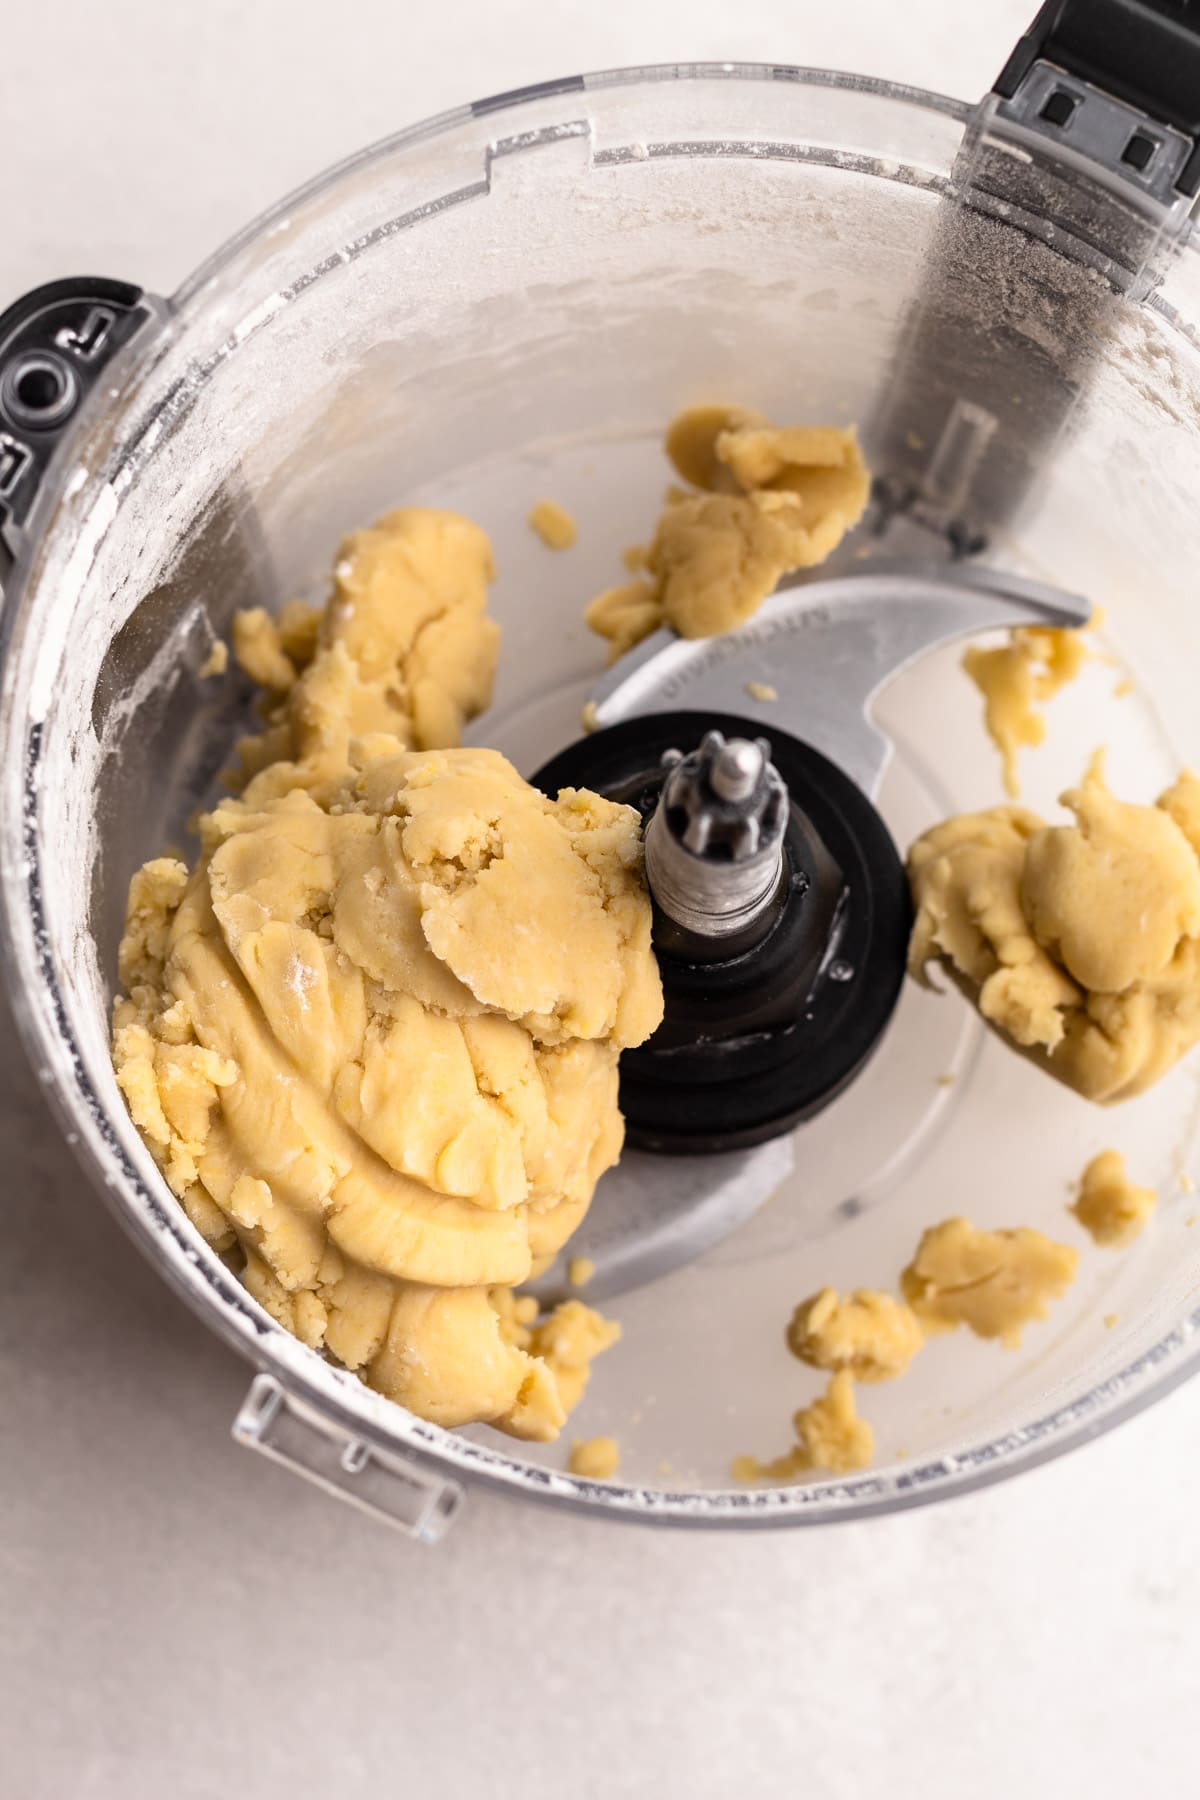
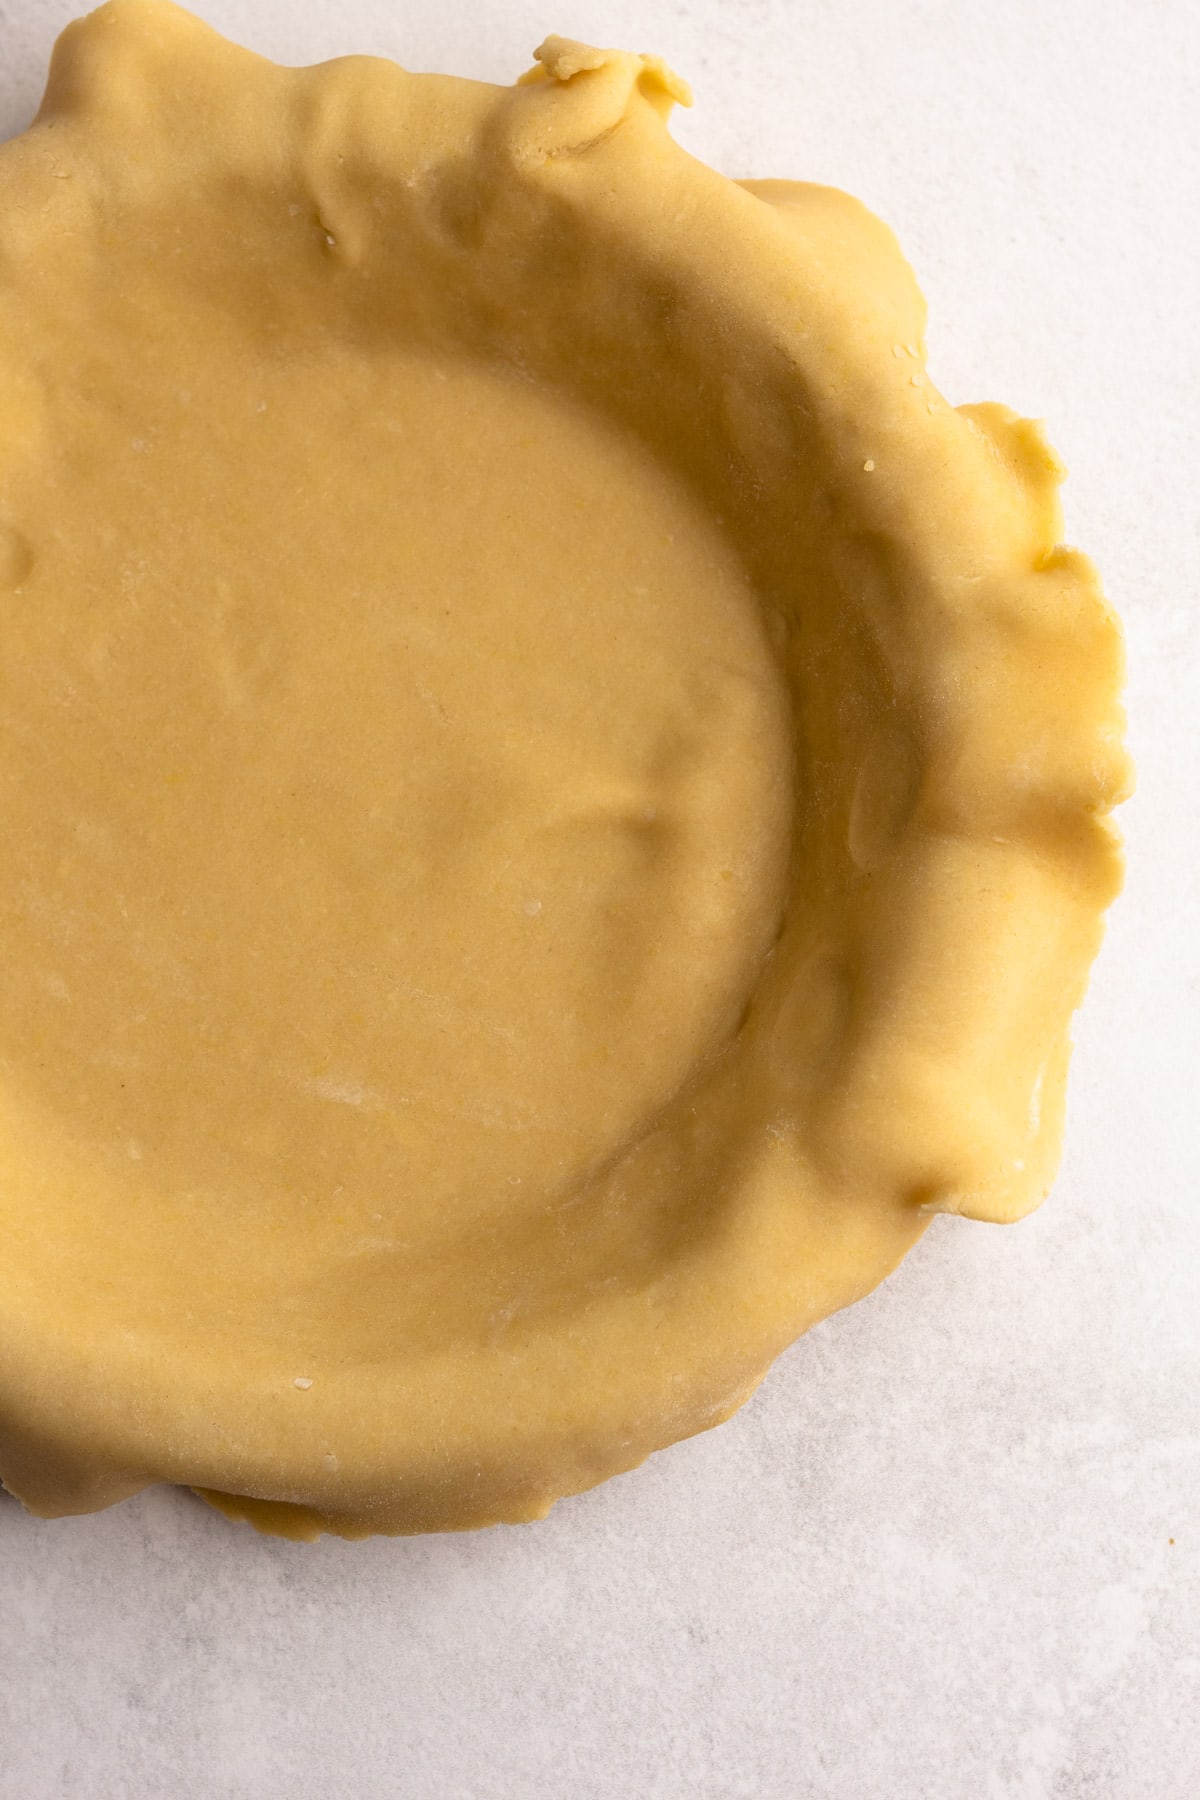
This custard pie teams up with a crumbly sweet pie crust that compliments the creamy custard very nicely. It's easily made in the food processor and the best news of all is that it can be rolled out right away! The consistency will be that of play dough, and if you are gentle with it, it should be easy to roll out.
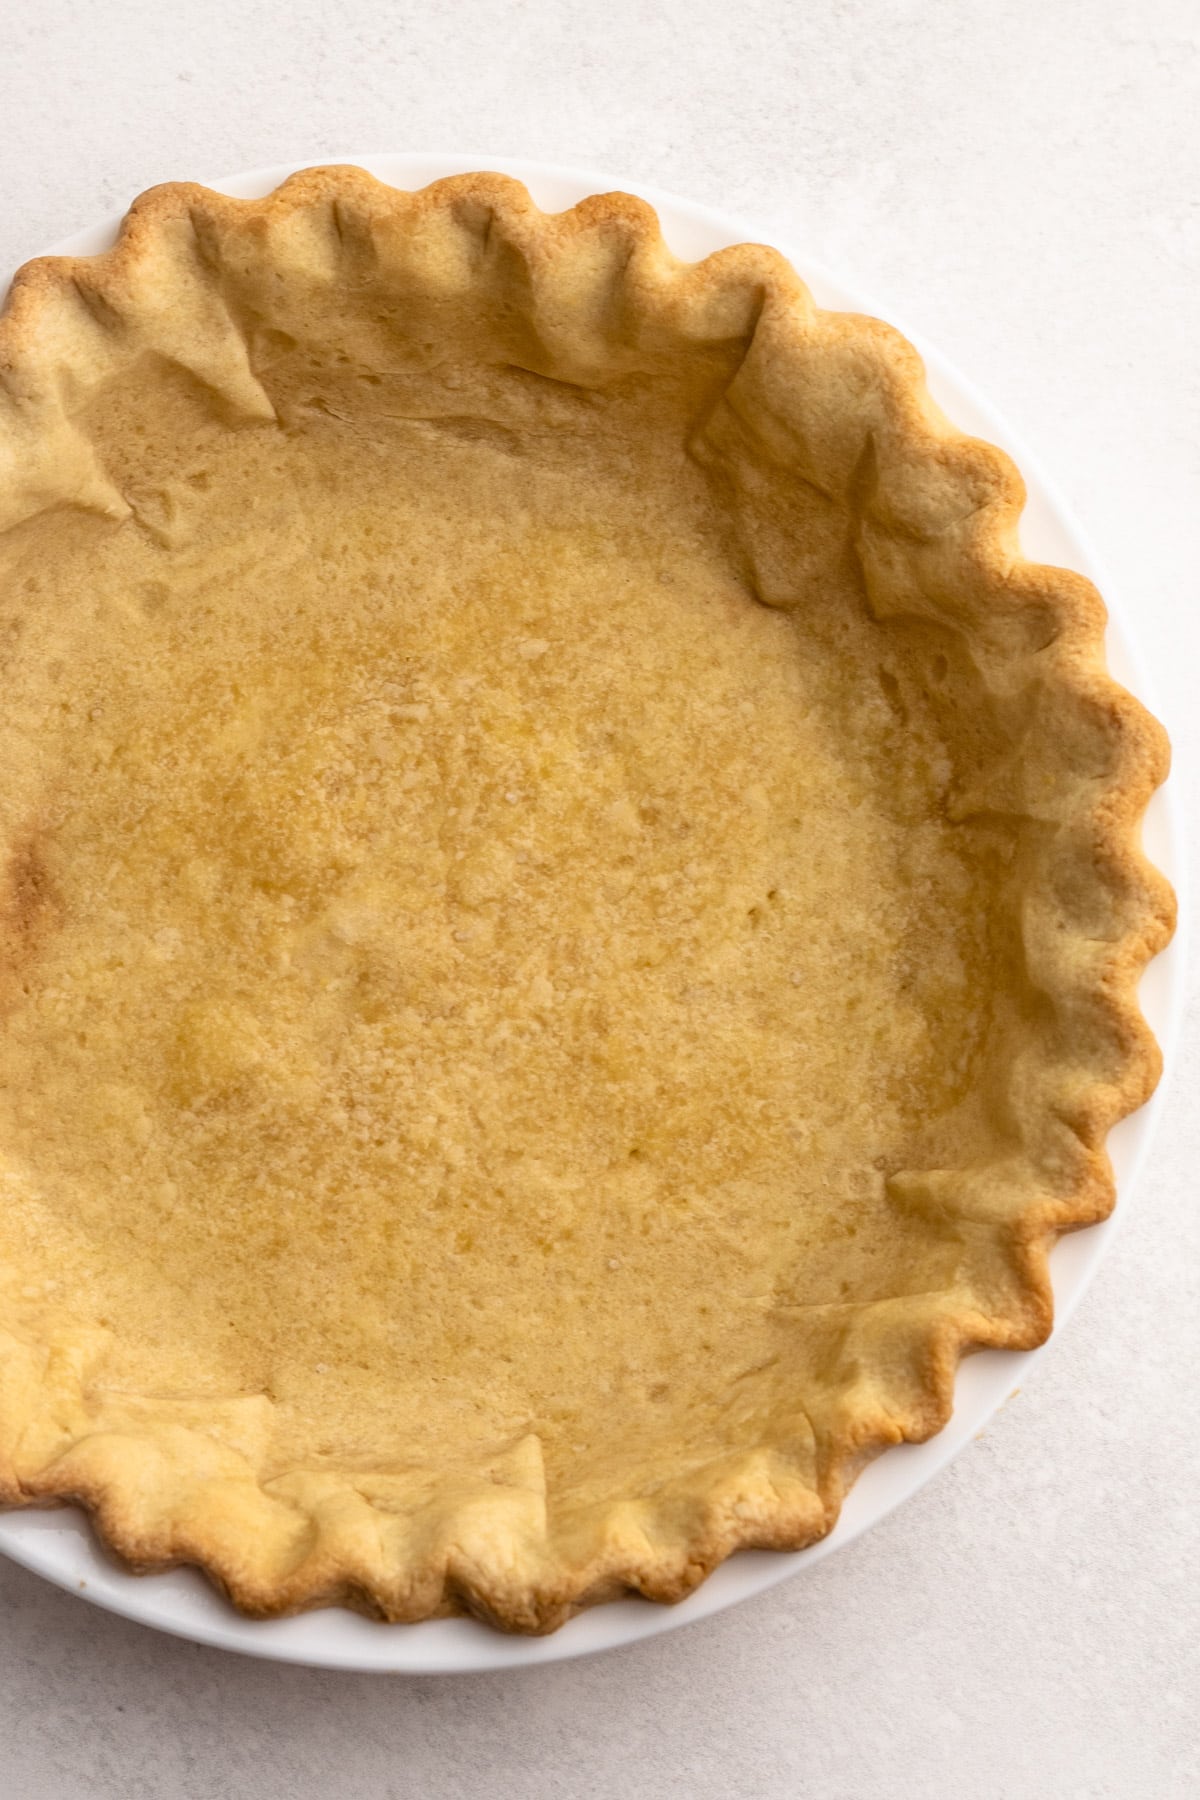
However, it does need to be blind-baked. This recipe calls for the custard to bake at 325ºF. There is no way for the crust to bake at that temperature, so you absolutely need to fully blind bake your pastry beforehand. New to blind baking? Check out this Blind Baking tutorial, though the recipe below gives you all the details you need to know.
Please note, the recipe does not call for you to dock the pie crust. This custard pie filling is too liquidy, and if the crust has holes in it, it surely runs the risk of the filling leaking through. Similarly, make sure your pie crust is rolled out to an even thickness with no cracks in it.
How to Make a Classic Custard Pie
I am sorry to be the one to tell you, but there is a little bit more to baking a custard pie than simply mixing the ingredients and baking. But, that doesn’t mean it’s hard; it just means you have to follow a few simple rules.
Included below is an overview of the steps for the recipe, followed by a few tips for you so you can have success with this recipe.
Overview of Steps:
- make, roll out and blind bake pie crust.
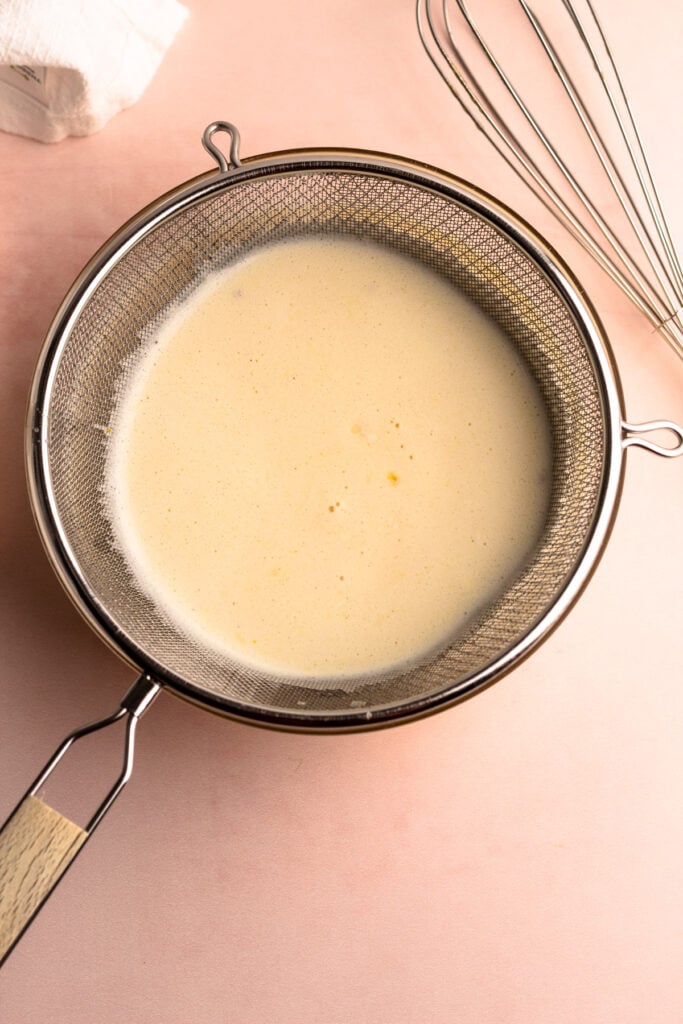
- whisk together the filling and strain it.
- pour the filling into the fully baked pie crust, and bake.
- let the baked pie chill to fully set up.
There is one step missing from the above directions, and that is to scald the milk. Many classic custard pie recipes include the direction to heat the milk to "scald" it, and then slowly add it into the eggs. When I first started making custard pie, I followed this tradition of doing it. But after a while, I wondered if it was truly necessary. When developing this recipe, I experimented to see if skipping this step took away from the creamy filling at all. I'm happy to report it's really not necessary to scald the milk. Though, the instructions do call for straining the whisked filling twice. This gets rid of any coagulated egg yolks (which can happen when they come into contact with the sugar) and it will help to get rid of some of the air bubbles.
Tips for Making Custard Pie
- Bake the pie pastry well: It’s crucial to bake the pastry fully before pouring in the filling. Custards start off with a very wet filling, and if you pour the custard into an unbaked crust, you run the risk of breaking the dough and having it surface in the pie filling. In addition, custards are baked at a low temperature so it would be impossible for the crust to actually bake with the filling inside.
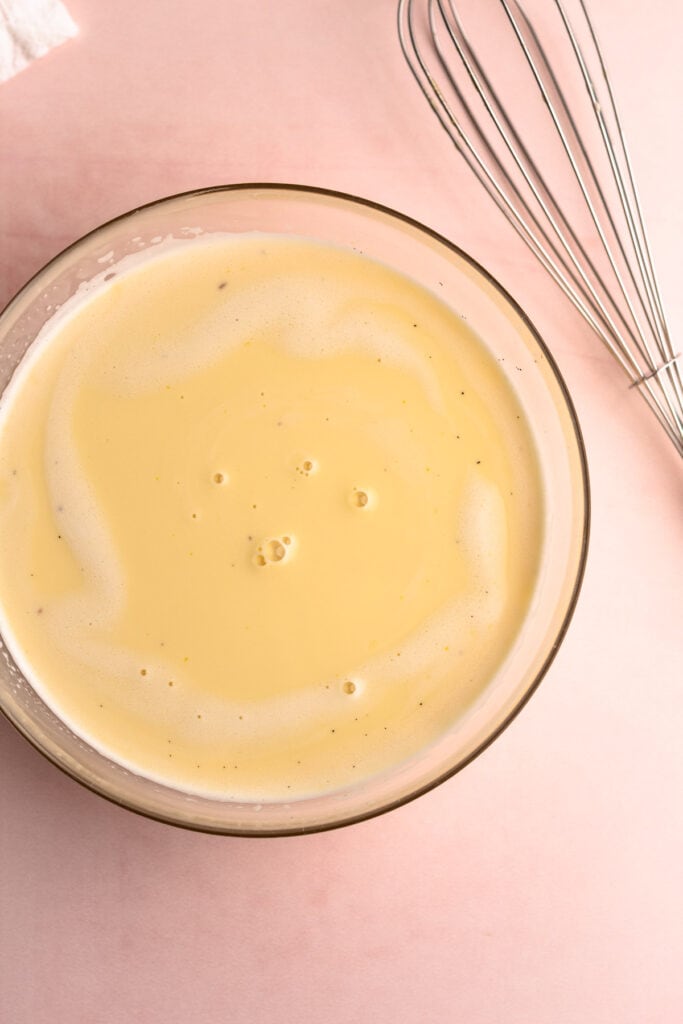
- Don’t over whisk anything: I found that when you whisked the eggs too much it caused a lot of aeration and air bubbles. These air bubbles then appeared and burst during baking. While this won’t do anything in terms of the taste of the pie, it’s rather unpleasant to look at. So, gently whisk the filling ingredients together in an effort to prevent this.
- Don't let the eggs and sugar sit too long together: Sugar can coagulated egg yolks. Straining it twice helps get rid of any in case this does happen.
- Don’t overcook it: Be sure to read the section on cooking a custard properly and on using a thermometer and observing the "barely set" appearance of a fully baked custard.
- Let it cool before slicing: Custard pies finish setting and firming while they cool. Go hands-off and let the refrigerator work for you. If you try to cut it before it has completely chilled, you’ll end up with custard soup.

How to Avoid Spilling Your Custard
This may seem like a small deal, but if you’ve ever tried to move an unbaked pie with a liquid filling into the oven without spilling it, you know it isn’t easy! While some bakers opt to place their pastry into the oven first and then pour the filling inside, I prefer not to. I’ve found that with the heat of the oven, I’m more likely to spill it or burn myself when I do it that way.
Instead, I’ll offer you one tip for a successful transfer of an unbaked custard pie into the oven: never take your eye off the filling. Before attempting to transfer the pie, open the oven and make sure your oven rack is in the right spot (which would be the middle). Then, pick up your pie and keep your eye on the liquid filling the entire time. It’s when you take your eye off the wobbly filling that you are at risk for spilling.

How to Properly Cook Custard Pie
If there was only one pie secret I could share with anyone, it would be this: don’t over-bake your custard pie! And by that, I am referring to not only custard pies but any pie that contains dairy and eggs together.
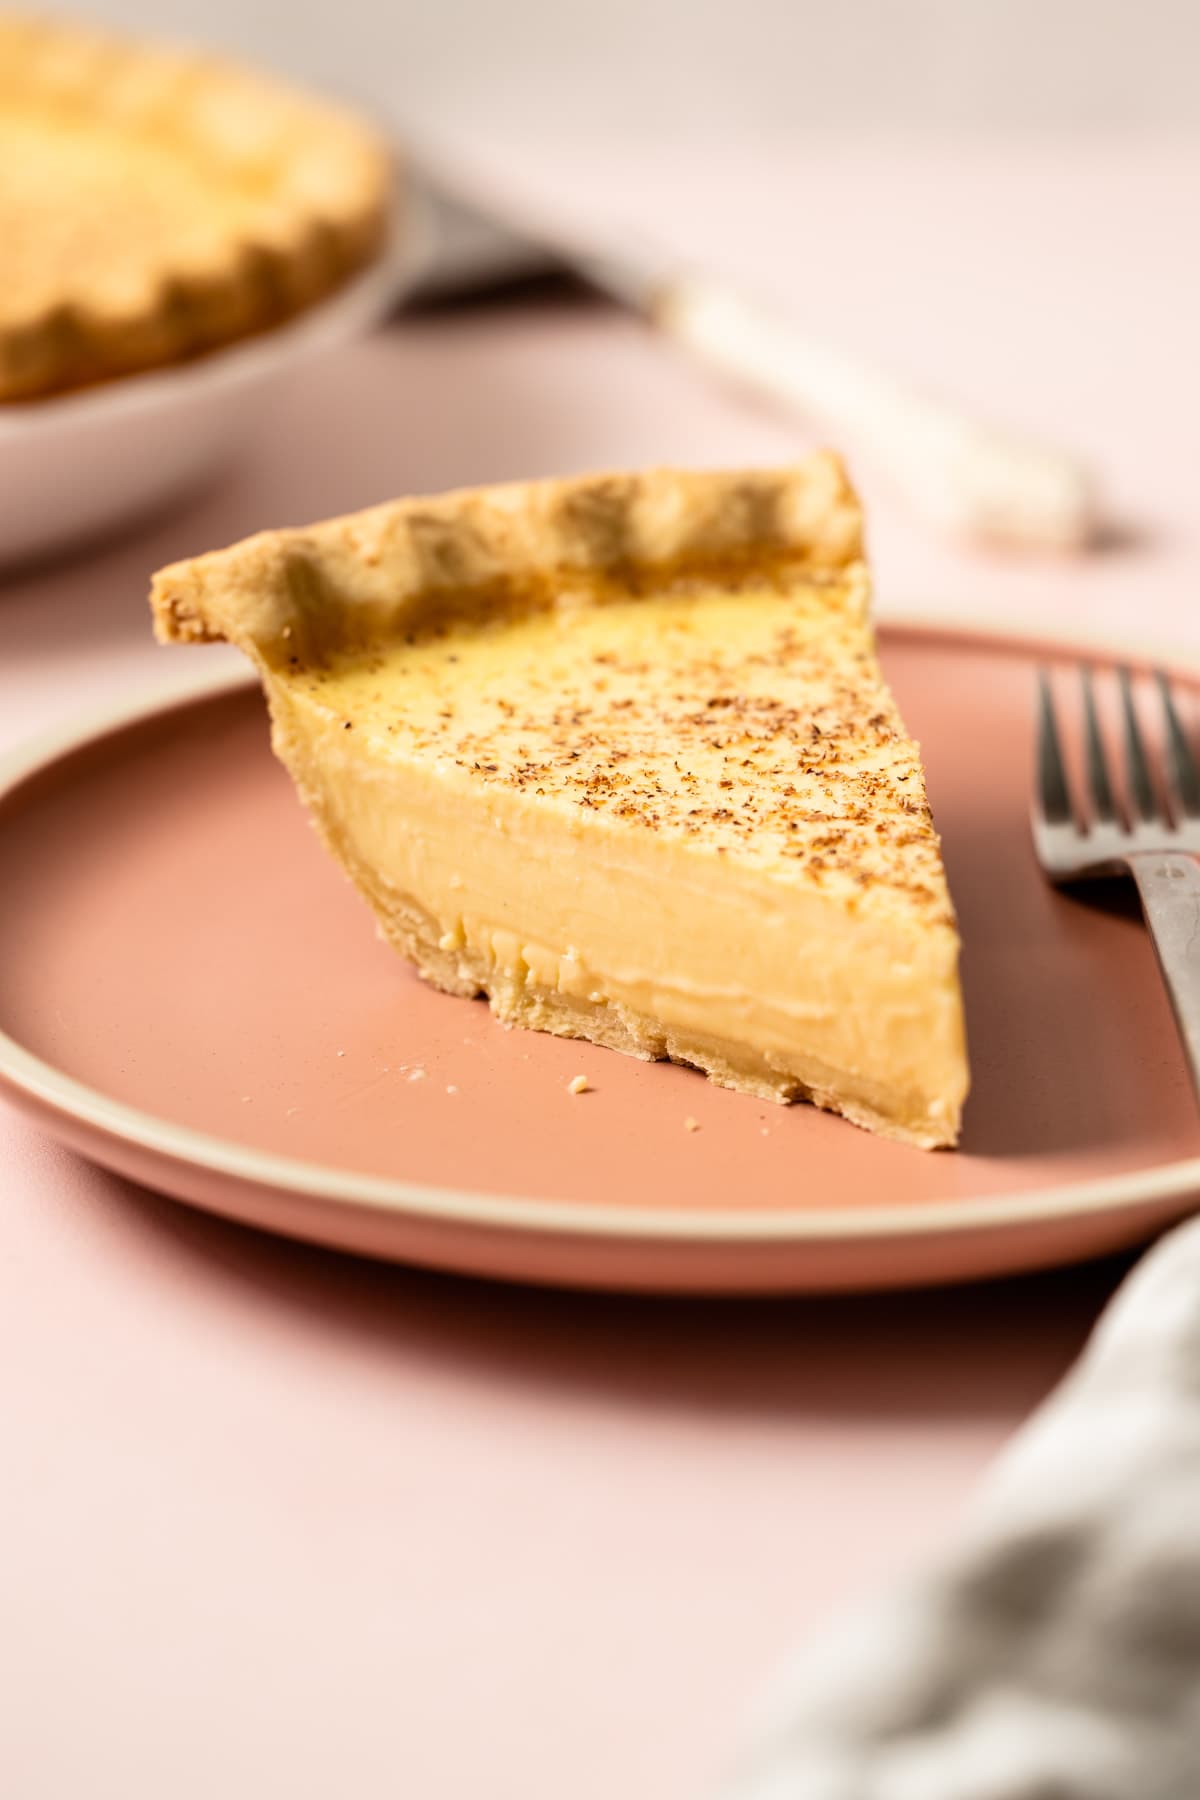
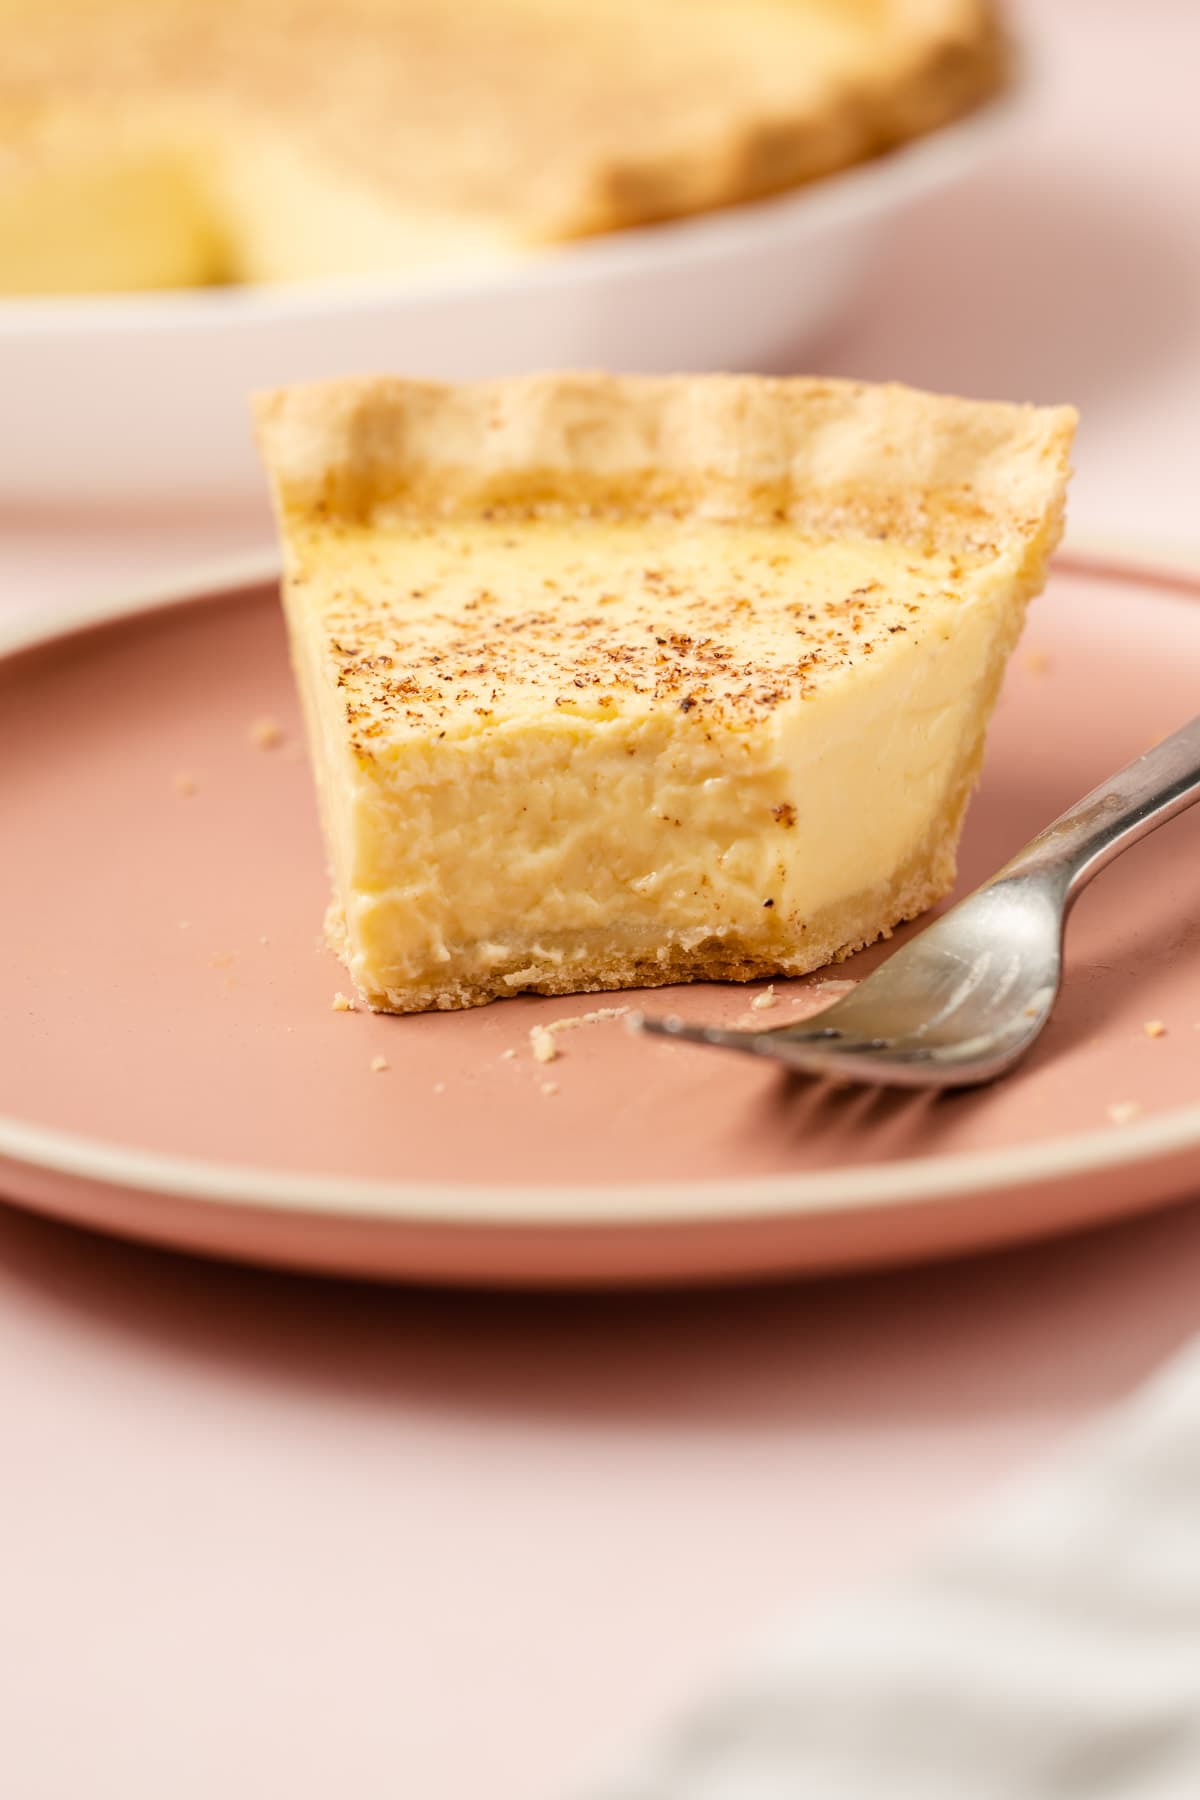
When a custard-style pie is properly baked, it should be just barely set. If you overcook it, you are essentially “boiling” the eggs. In some cases, that can lead to a taste of overcooked eggs, especially in a classic custard pie. It can also make the pie feel tough, or spongy. More commonly, it leads to cracked or separated pies. A properly cooked custard is set (and safe to eat) between 170º – 200º. Each custard recipe will vary a bit in terms of the exact temperature needed to set it. For this pie, baking it to 170ºF-180ºF is perfect.
Another clue that a pie is done is by looking at the outer edges and seeing if they appear to be set. The outer edges of the pie should be set, but the middle of the pie should be a bit wobbly. Just make sure it doesn't look like the middle is still very liquidy. That would mean it isn't cooked enough.
It is during the cooling process that the pie will be fully set up. Let it cool to room temperature on a cooling rack, and then move it to the refrigerator to chill for at least 4 hours.
Custard Pie FAQ
Read below for some troubleshooting tips and frequently asked questions.
It’s pieces of cooked egg. Make sure to strain it in case you cooked any bits of egg.
This is correct! The pie is finished cooking even when the center is still a bit jiggly. Look for the edges to be set at least 2″ in but the center to still wobble. The wobbly filling shouldn't look like it's liquid, but rather thickened liquid that still has movement to it, a bit like jello. It will continue to set up once it comes out of the oven.
You have either overcooked the pie, whisked the filling too much, or possibly had some filling leak underneath the pie crust. As long as the filling isn’t extremely overcooked, the pie will still taste fine. Cover the pie with whipped cream and nobody will know the difference!
The pie was undercooked, unfortunately.
How to Serve It
Serve this pie cold as is, or with whipped cream and additional fresh grated nutmeg! This pie can be made up to 1 day ahead of time. Store the pie in the refrigerator.
Custard Pie Video Tutorial
More Custard Pie Recipes:
I am so honored when you make a recipe from my site! If you make this Classic Custard Pie, please leave a comment and a star rating with your experience! If you have any questions about this recipe, feel free to comment here, too!
Full Recipe
Classic Custard Pie

An absolute classic, this Custard Pie has a silky smooth egg custard filling made from eggs, milk, and cream that is baked up in a buttery sweet crumbly pie crust.
- Prep Time: 00:20
- Cook Time: 01:10
- Total Time: 1 hour 30 minutes
- Yield: Serves 8
- Category: Sweet Pie
Ingredients
For Pie Crust:
- 1-½ cups (180 grams) all-purpose flour
- ¼ cup (30 grams) powdered sugar
- ½ teaspoon salt
- ½ cup (113 grams) unsalted butter
- 1 large egg
For Custard Filling:
- ¾ cup (150 grams) granulated sugar
- ¼ teaspoon salt
- 2 large eggs
- 2 large egg yolks
- 1-½ cups (340 grams) whole milk
- 1 cup (227 grams ) heavy cream
- 2 teaspoons vanilla extract
- Freshly grated nutmeg
Instructions
- Add the flour, powdered sugar, and salt to the bowl of a food processor, and pulse until well combined. Add in the butter and pulse 5-7 times, or until the butter is broken down into tiny pebbles.
- With the motor running, add in the egg and let the dough process until it forms together into a cohesive ball around the blade, about 1 minute.
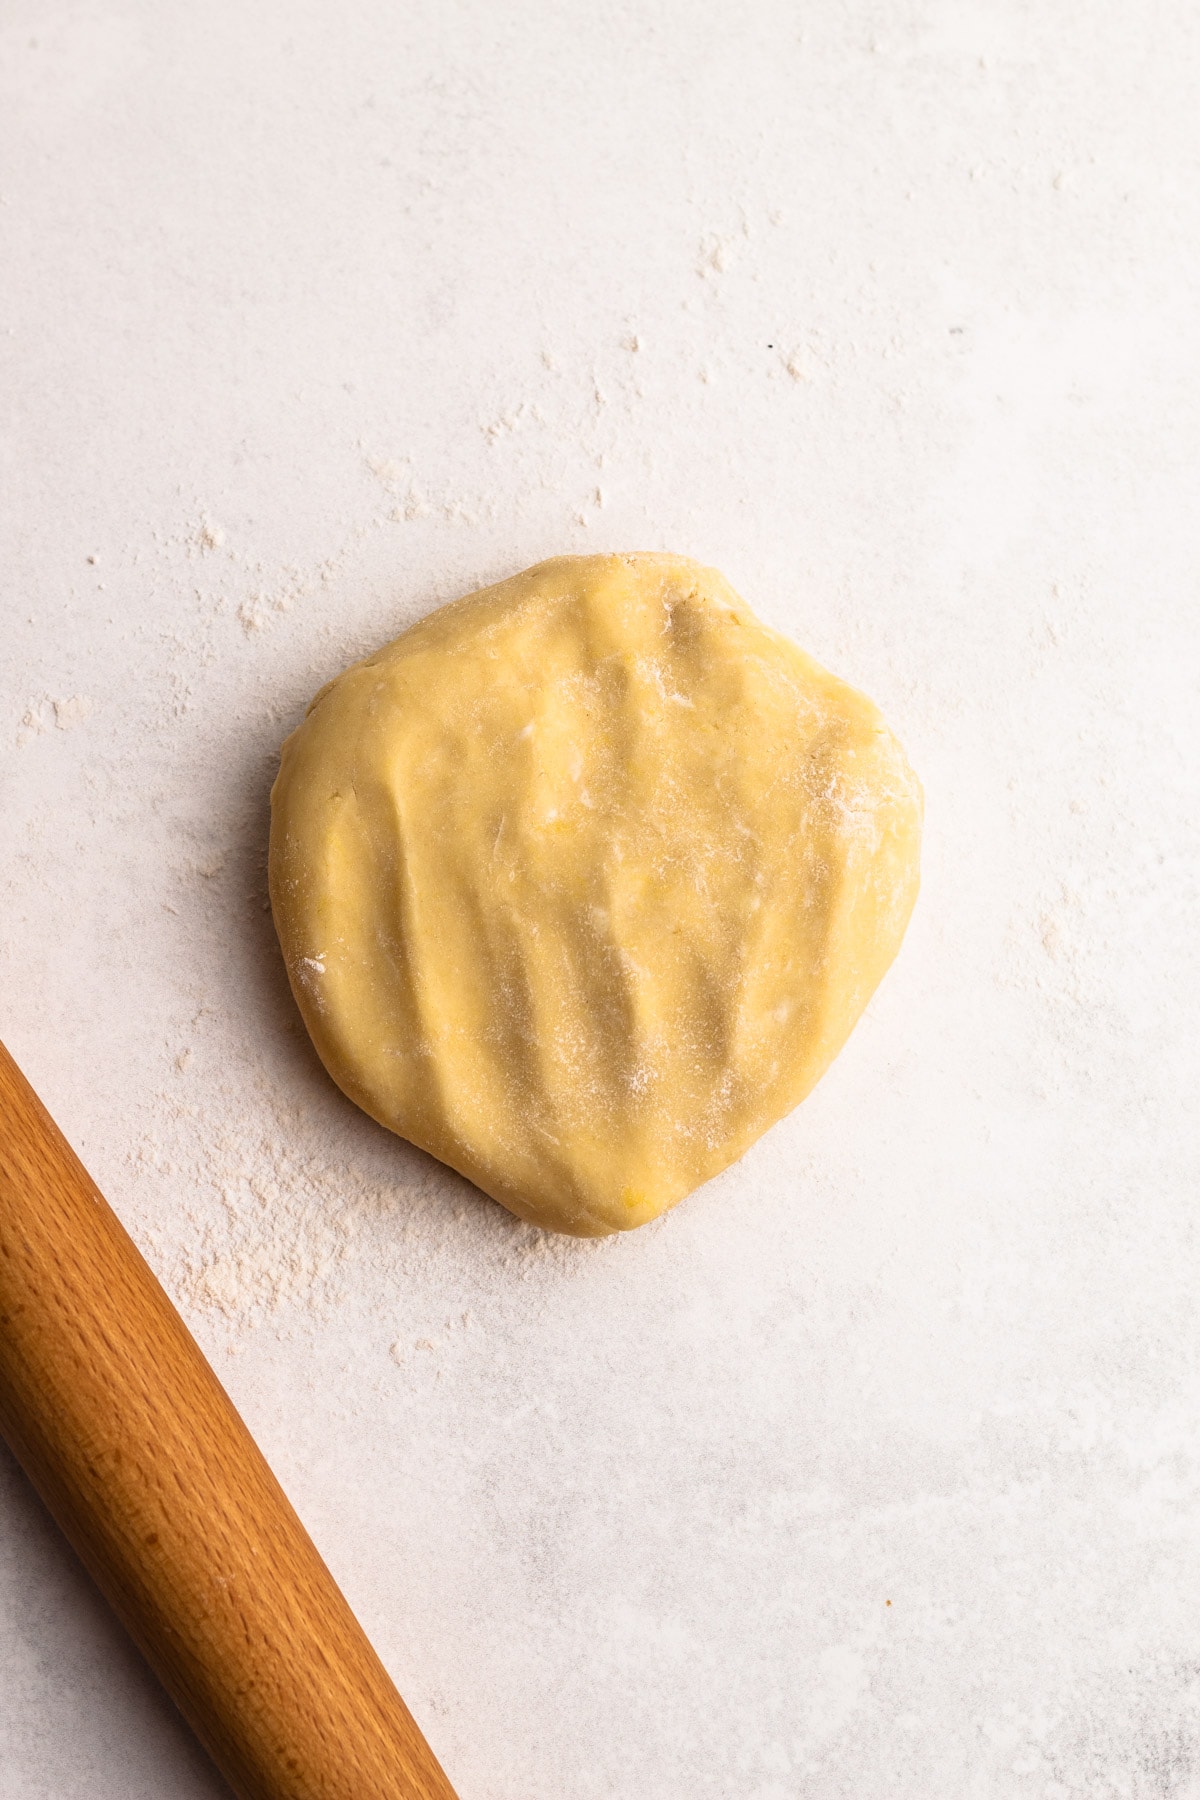
- Transfer the dough to a work surface dusted with flour.
- Roll out the pie dough to an 11″ circle and line a 9” pie plate, crimp the edges as desired.
- Transfer the dough to the freezer to chill while you preheat the oven.
- Preheat the oven to 375 and place a rack on the lower and a rack in the middle part of the oven.
- Line the pie dough with a parchment round piece of paper and then add pie weights (or dry rice or beans or lentils), making sure to push pie weights to the edges. Bake for 25 minutes on the lower rack, then remove the parchment and pie weights and bake for an additional 5 minutes, or until the bottom of the pie crust looks dry. Set aside until ready to use.
- Lower the heat to 325º.
- Whisk together the sugar, salt, eggs and yolks. Add in the milk, cream and vanilla and whisk to combine.
- Strain the mixture twice through a fine-mesh strainer, removing any coagulated bits of egg.
- Carefully pour the filling into the baked pie shell. Grate about ½ teaspoon nutmeg over the top of the pie.
- Bake on the middle rack for 40-45 minutes, or until the custard has set nearly all the way through, with a slight wobble in the middle. The pie should have a temperature of 180ºF.
- Remove the pie from the oven, and place it on a rack to cool. When it's completely cool, refrigerate until you're ready to serve.
- The pie can be baked up to 1 day ahead of time.
Notes
Have a question or looking for tips? The text written above the recipe is always a great first place to start! There are always loads of explanations, tips and technical advice shared before the recipe.
Weighing your flour is the most accurate way to measure. If you aren't going to weigh it, make sure to spoon it into the cup, and then level it off. If you scoop the flour out with the measuring cup and then level, it could change the outcome of the final product.
Recipe adapted from King Arthur Flour
Some of the links on this page may be affiliate links. Everyday Pie is a participant in the Amazon Associates Program. As an Amazon Associate I earn from qualifying purchases, at no extra cost to you.
Carol Anne
I just came across your website today and I just LOVE your detailed recipes and tips on making sure the recipes you post are PERFECT!! Where have you been that I have not found this sooner? I love the chocolate pie crust recipe, this recipe, hot cocoa pie recipe, now I cannot decide whether to look further and make the decision harder about what to try first! I will be, of course subscribing. I have a long passion to make pies, I absolutely adore making each and every type that I can,and would eat pie for each meal every day if I could. Thank you for the lovely inspirations!
Eve
This was delicious, my pie base shrunk quite a bit though which cause the custard to leak. I guess i'll work on my thickness next time.
Teresa
This custard filling is phenomenal. I used a pre-baked Marie Callendar deep dish crust and baked it according to instructions.
Chris
I just made this pie and am going to serve it for dessert. It looks delicious. My question is when it was finished cooking and the edges were set and it was jiggly, but not liquidy, I took it out of the oven. I cooked it for 40 minutes. When I took it out of the oven, there were white spots throughout the pie. Why did it do that and what is it? Did I do something wrong?
Kelli Avila
Hi Chris! I got your email and I am going to reply to you there. But for reference to anybody reading these comments, I think you might have undermixed the custard. It appeared you have bits of eggs that floated to the top.
Michelle
We always had family holidays at the same place growing up and the local bakery made pies just like this one. I made this today and it’s the closest I’ve ever come to replicating them! Thank you so much
Anonymous
Sharon Haynes
Perfect x2. His favorite pie. He's says it's the best he's ever had!
Wanda
My grandmother and my husband's mother both made a rice custard pie in a pie shell. Could I add a cup or 2 cups of white rice to this recipe?
Kelli Avila
Maybe? But you'd have to bake it in a bigger dish, as this recipe yields just the amount for a 9" pie plate and adding anything to it would make it overflow. You'll have to experiment! Let me know how it goes!
Liz
This custard pie is perfect and I wish I had made two. The pie crust is simple, easy to roll out and does not detract from the star of the show, the custard. Using quality ingredients (organic milk and cream, vanilla bean paste, and high-quality eggs) makes the custard both super flavorful and at the same time, crazy delicious and not too sweet. I didn't have any issues with doneness as Kelli's clear instructions for visual doneness (she has some great videos of this on socials, too) and for temperature got me to that perfect spot.
All in all, I think this is a pie worth making and not one usually seen on Thanksgiving tables. All of our guests loved it, and I'm even kinda sad we gave some to them to take home. I think I'll be making another one sooner than next Thanksgiving!
Idonna m Coultrup
The custard was good. Had to add 10 minutes to the 45 minute baking time. My issue was the crust, the recipe needs to be reduced. The crust was about 1/4 inch thick. Way to thick for pie crust.
Kelli Avila
Hi Idonna. Sorry to hear this recipe wasn't to your liking.
Jameson
Very disappointing. The pie did not set up. Needs more egg and heat.
Kelli Avila
Hi Jameson. It's so disappointing when the recipe doesn't come out as expected. All of my recipes are thoroughly tested and I always hope they are repeatable. The recipe works as is, but clearly something went amiss with your pie, and I'm happy to help troubleshoot what might have went wrong for you, with my first instict being that your pie needed to bake for longer. I always give not only timing clues, but also visual cues to make sure the recipe comes out. For this custard pie, it should cook in about 40-45 minutes, but it's always best to consult the visual cue as well, which indicates the pie should be set around the edges with a slight wooble like jello in the middle. If your pie wasn't cooked in that time frame, it defintely needed to stay in the oven and cook for longer. I hope that helps.
Susan M
Also I believe everyone should have an oven thermometer to make sure that each individuals oven is at the correct temperature.
LarryC
I too found my custard under cooked and runny so cooked for another half an hour and got adequate results. Wondering if my Convection Oven setting was the issue. By default it drops the cooking temperature by about 25 degrees. Any thoughts?
Kim
Simplicity and quality ingredients = the perfect pie.
Thank you for reviving this classic and for the perfect instruction.
Hailey
Hello, I really liked this pie, I added some whipped cream to it and it tasted amazing! 😀
jody
Pie was good. Straining was a great idea, IF.....
Heres the if. I used rice to weigh the pie, as suggested, and that was the huge mistake. The rice was hard to get out of the crust and in doing so the warm crust broke on the sides. The rice then slid in under the crust and i couldnt get to it to get it out. Long story short, I had hard pieces of rice cooked into the crust underneath and because the crust broke, the custard was under the crust too resulting in a big fat awful mess. Soggy, crunchy...trash. Bakers error really. But do not suggest rice.
Kelli Avila
Hi Jody----did you put the rice directly into the pastry? As in, without a piece of parchment or aluminum foil between the pastry and the rice? There should always be a barrier between the pie weight (in this case rice) and the pastry. Please review this article if you made this error: https://everydaypie.com/how-to-blind-bake-pie-crust/
Marcelina
Oh By the Way I Forgot The 5 🌟🌟
Marcelina
Hi Kelii I'm a home Cook and Baker I'm From Hawaii made your recipe and My Family was Looking For more it was so "ONO" how we say Delicious 😋 anyways wanted To Say Mahalo!!! Ty in Local Style...
Kelli Avila
Mahalo!!! So glad you enjoyed!
Alexis Bird
This pie was easy and I’m sure everyone will love it tomorrow! Custard pie is my dads favorite but I have to admit my grandmas recipe was a little lack luster so I went out searching for a better version and stumbled upon this one. They should really call this eggnog pie because that’s what it resembles. I did temper my eggs with warm but not scalded milk my pie did end up a little bumpy on top but I think it’s because I didn’t have a mesh strainer to get the bubbles out. Either way this looks and smells delicious and I can’t wait to make it again next year.
Jemima
Such a lovely recipe. As usual, the instructions were really clear and precise. The base was crazy easy and the custard was the perfect blend of not too sweet and not too eggy. The nutmeg is a must! Perfect top note flavour. My oven was a touch hot for the tart but dropping the temp by 10 degrees C fixed that issue easily enough.
I’m in Australia so found our pie tins too small so mine was a square pie to fit it all in. It’s so delicious I’m looking up pie dishes so I can make it again and again. We call this a custard tart here but whatever you call it you HAVE to make this recipe!
Kelli Avila
Thanks for sharing your experience! I'm glad you enjoyed it!
Bernice
Hi Kelli I give you 5stars even though I’m having a tough time with baking this pie, idk if it’s because of the new oven I’m using or I’m just failing at my first custard pie attempt but it’s still liquid in the perfect crust after an hour baking at 325 degrees F. I give you kudos girl your recipes are awesome and I’ve learned so much from your tips 100% great teacher thank you
Kelli Avila
Hi Bernice! In my recipes, I (usually) put two indications for doneness--one is the time and the other is a visual descriptor. This is because time alone is not an indication of when anything is done. There are just too many variables when it comes to cooking and baking in each person's home (and ingredients) to reliable know that after the described amount of time in a recipe lapses that the thing you are cooking is done. This goes for everyone's recipes, not just mine. All this said, if your pie isn't done in the time I describe--keeping cooking it. Also note, the more you open up your oven to check, the longer it is going to take to bake because everytime you open the oven, heat escapes. And since you mentioned you have a new oven, I definitely recommend getting an over thermometer to check your actual oven temperature. Hope you kept baking it and look for the pie to be nearly fully set with a slight jiggle in the middle!
Jeanie Czapinski-Butler
Is there a substitute for heavy cream?
Maybe canned sweetened condensed milk
Kelli Avila
Not without drastically changing the texture. If I had to choose a substitute, I would say omit the heavy cream and use all milk. But it will be a bit lighter. You could also try coconut cream, though it will have a coconut taste. I would not suggest sweetened condensed milk.
Scott
How long should the pie cool in the refridgerator?
Kelli Avila
About 4 hours or overnight. Just a reminder--don't put it in the fridge until it's come down close to room temperature!
Rebecca
This was my first time ever making a real pie. I've done no-bake type stuff a few times before. I had to do the crust by hand, as we don't have a food processor aside from our mixer, which is currently broken. But fortunately the crust turned out great, although it took a lot more time and effort! And the custard filling took longer to bake, I was afraid I'd ruined it somehow, but it eventually got set properly and ended up super delicious, with a lovely texture.
One note, the recipe doesn't say when to add the milk so I just added it at the same time as the cream and vanilla.
Mackenzie
Kind of disappointed! I made this recipe, I’ve made tons of custard pies using the KAF recipe with 0 fails, have always temped my pies at 170-175 and had great success. I made this recipe, and temped my pie at 180, which I thought was over cooked. Turns out it was undercooked. My pie is extremely wobbly and loose. Still raw. I can’t understand it and I’m disappointed that I used the ingredients and it’s ruined. I’m not sure why! 😫
Kelli Avila
Hi Mackenzie. Sorry it didn't turn out for you, and it's hard to know why. You are sure you followed the ingredients exactly? And did you let it chill in the refrigerator? Would love to help you figure out what went wrong.
Mackenzie
Yes I’m sure, I normally use the KAF recipe which tempers the eggs first so I thought that might be the issue! I’m really not sure though. It chilled in the fridge for quite a while. So confusing!
Christine
Hi Kelli! Mackenzie's problem...I believe the starting temperature of your ingredients is critical and recipes are most successful if the tester/writer of the recipe defines the temp THEY used & says why even!
If you think about it....
With ingredients temps before baking at these examples:
~32°F Fridge
~78°F Room temp (46°F diff)
~180°F Scalded and tempered. (100°F diff)
Total from coldest to warmest could be as much as 150°F!!!!!
Close to the 170-180°F
you stop cooking!!
These are rough numbers just gives you an idea of how huge an impact that one part of a recipe can come into play. To top it off, some start with a cold uncooked ready-made pie crust!!(not yours)
I wanted to share the probable reasons people have 'issues' when making custard pies using the same exact recipe! 😉
I was looking for inged. ratios so didn't make it. But I didn't want to mess up your ratings so 5 stars 😃
Kelli Avila
Hi Christine! I totally agree, recipes should mention the temperature of the ingredients WHEN they matter. For this recipe, I do not believe they are critical or play any factor in the ultimate success which is why the temps are not mentioned. I've made this pie dozens of times with both room temperature ingredients and straight cold from the fridge ingredients. Speaking from experience, usually when someone makes a recipe and it really fails (and the recipe is in fact tried and true like mine is), the large percentage of the time it is user error, such as forgetting an ingredient or step. But there are also a number of other factors possibly at play here...however I don't think temperature is one of them unless the thermometer the user has isn't accurate. Hope the ratio you found was helpful!
Christine
Mackenzie-see my reply below about ingredient temperatures & how that's the most likely culprit!
😃
Berenice
I’m having the same problem with this pie recipe. It’s been in the oven at 325 F for 55 minutes and still liquid, not setting at all. The temperature hasn’t even reached 150 F. Just upped the oven temp to 350 F looks like it’s starting to set.
Rebecca
Can I use lactose free milk. Instead of cream and whole milk?
Kelli Avila
Hi! Yes you can. It just won't be as rich. Use lactose free milk if you can!
Melony
Hi Kelli,
I, too, was confuddled by the term "no bake custard" so I did a bit of research. Jello used to make a cook and serve box mix called Americana Egg Custard. Maybe that's what Carrie is thinking of from when she was growing up?
Carrie, a helpful tip: If the custard recipe is too sweet or has too much vanilla you can always decrease those ingredients, and there are low sugar and sugar free custard recipes out there. 🙂
Carrie
Isn’t there any really good NO BAKE custard pies out there? Yes I will prebake crust…. I grew up on Jello custard pie- with extra egg yolks add, of course. Consistency was huge part of the pleasure! I KNEW what I was getting. EVERY PIE SINCE THEN - too much vanilla- too much sugar- just WRONG. More mishaps when you have to bake custard!
Kelli Avila
Hi Carrie---I've not heard of a no-bake custard pie. At least not made from scratch ingredients. Have you ever had one? -Kelli