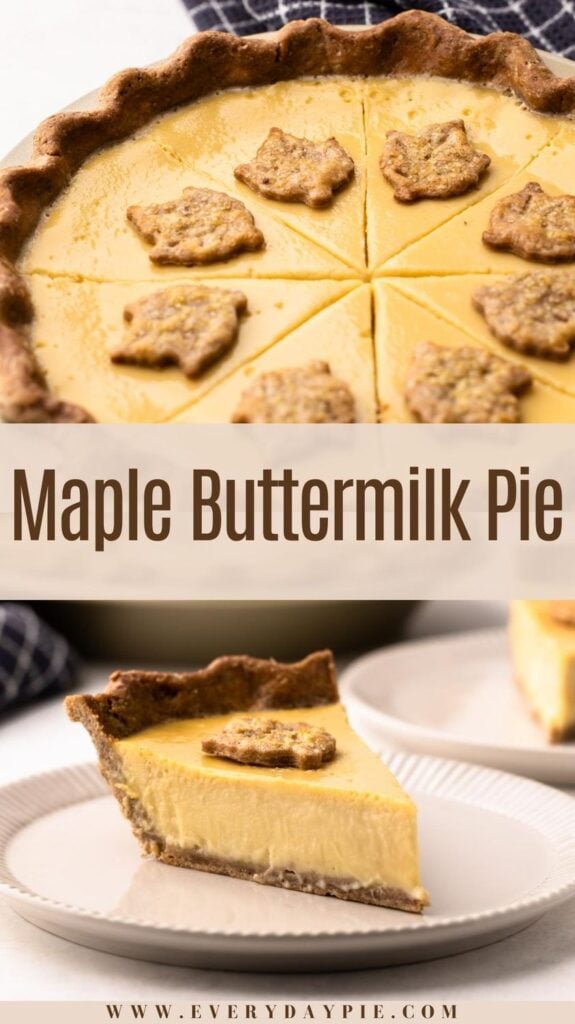
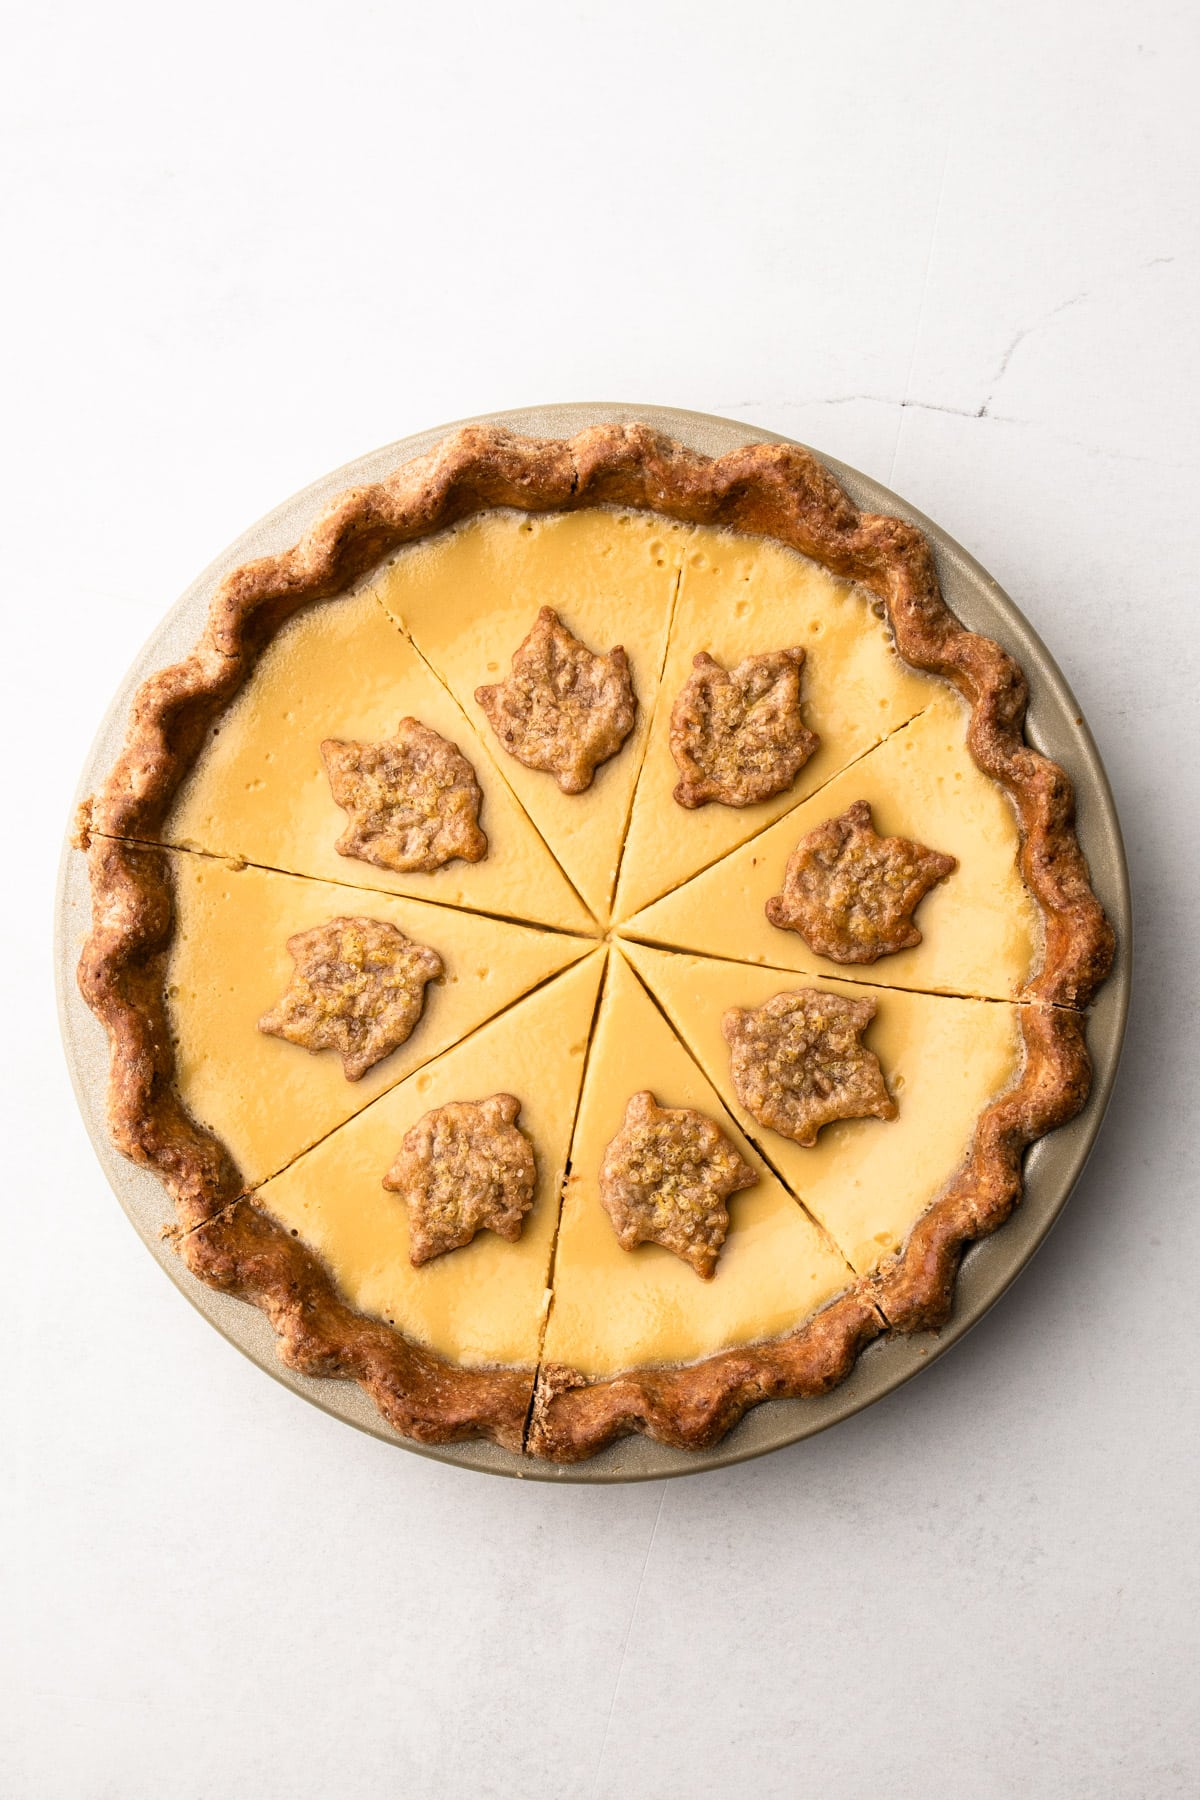
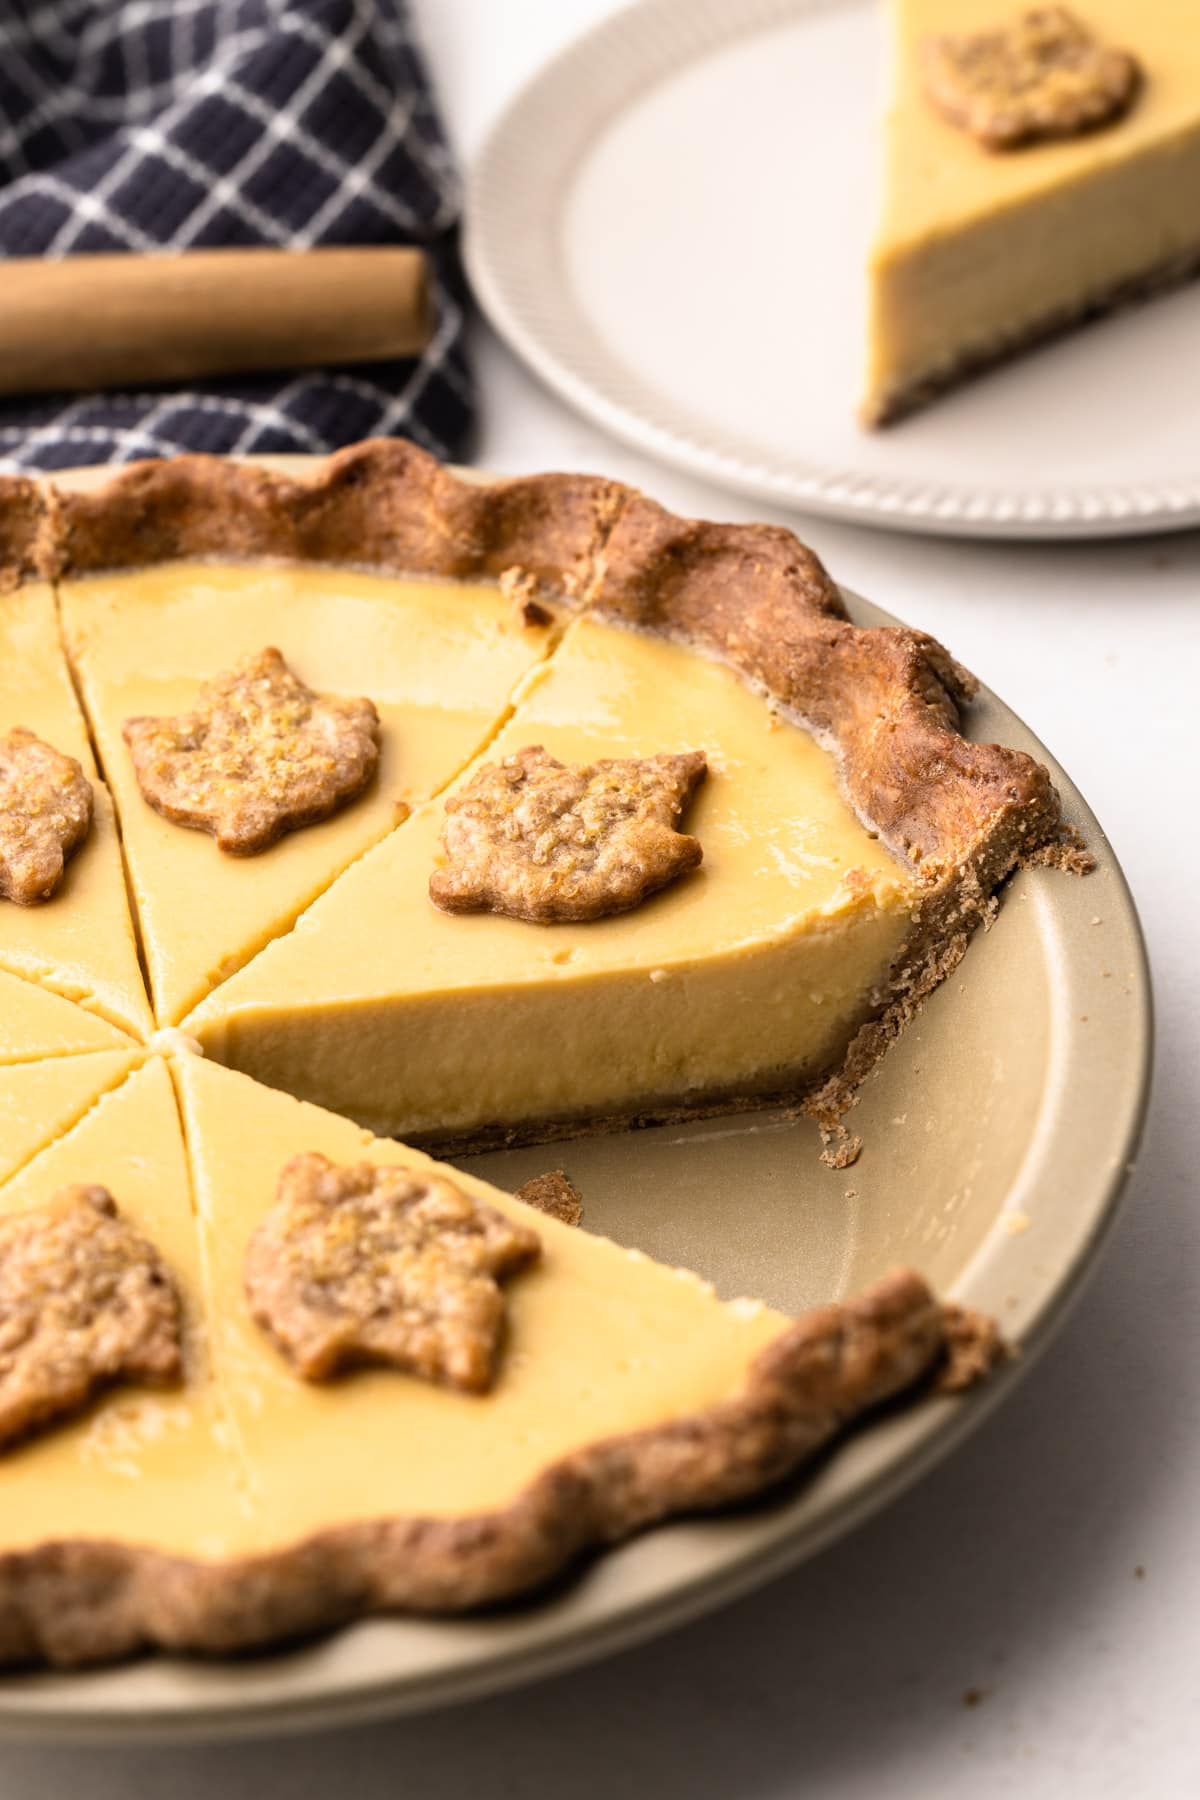
This Maple Buttermilk Custard Pie has a creamy, smooth filling that is the perfect combination of tangy and sweet. Bake it up in a hearty Spelt Pie Crust with decorative maple leaves for a festive look.
Want to save this recipe?
Enter your email & I'll send it to your inbox. Plus, get weekly updates from me!
Maple Buttermilk Custard Pie
This pie is an OG here on EP. It's one of the first recipes I put on this website, as it's been a family favorite for us for years. In fact, it's the pie everyone asks for if they know I'm bringing to a holiday. I recently updated the photos and experimented with the recipe just slightly to make for an even creamier filling. It meant calling for an extra step of pre-cooking the custard filling, but one that is definitely worth the extra effort.
This Maple Buttermilk Pie delivers as both sweet and tangy, thanks to the amber maple syrup mixing with the buttermilk. This magical combination is perfect in a a wholegrain spelt flour pie crust. Though, it's totally fine to make it in a more traditional sweet pie crust (aka Pâte Sucrée ).
This custard pie feels seasonally appropriate in early spring in celebration of the days warming and the sap flowing from maple trees here in the Northeast, but also as the weather cools off in the fall and we all crave warmth and comfort. Basically what I'm saying is, there is always room for Maple Buttermilk Pie at the family table.
So, let's get to making it, shall we? The text below offers tons of tips and helpful notes, or you can scroll to the bottom to grab the recipe and get started!
Maple Buttermilk Custard Ingredients
Here is an overview of the ingredients needed for this recipe. The full recipe is listed below in greater detail.
- Spelt Pie Crust (This is my preferred pie crust to use with this pie. A great alternative would be to use a sweet Pâte Sucrée. Or, you can just go ahead and use your favorite pie crust for custard pies)
- maple syrup (The darker the color, the more flavor the maple syrup has. Try to buy grade B if it's available)
- maple sugar (this is a fun and delicious addition to this pie. However, it's not make-or-break, so if you don't already have maple sugar or have a cheap easy source to get it, it can be skipped in place of light brown sugar)
- natural maple extract/flavor (if you can find this extract, grab it! You won't regret it. Just make sure it's the natural kind, and not the imitation)
- buttermilk: Don't forget to shake this well before use. Either the full-fat or the low-fat version works here.
- eggs
- heavy cream: This is used to give the pie an extra richness that keeps the filling feeling smooth and creamy.
- cornstarch: This pie needs a boost to help thicken it up because of the liquid nature of the maple syrup, so cornstarch (or alternatively, flour) is used to get the correct texture.
- vanilla extract

Let's Talk about the Spelt Crust
Spelt flour makes an amazing pie crust! This whole-grain flour is not only very easy to work with, but it also has a hearty and well-rounded flavor perfect for adding a little something extra to any pie. Plus, there is no chilling time needed for this dough which is always a good thing. However, it does have an undeniable whole grain taste, so if that's not for you, I recommend choosing an alternative pie crust.
If not spelt, I'd recommend a Pâte Sucrée (Sweet Pie Crust) which is made with all-purpose flour and more of a neutral base for pies.
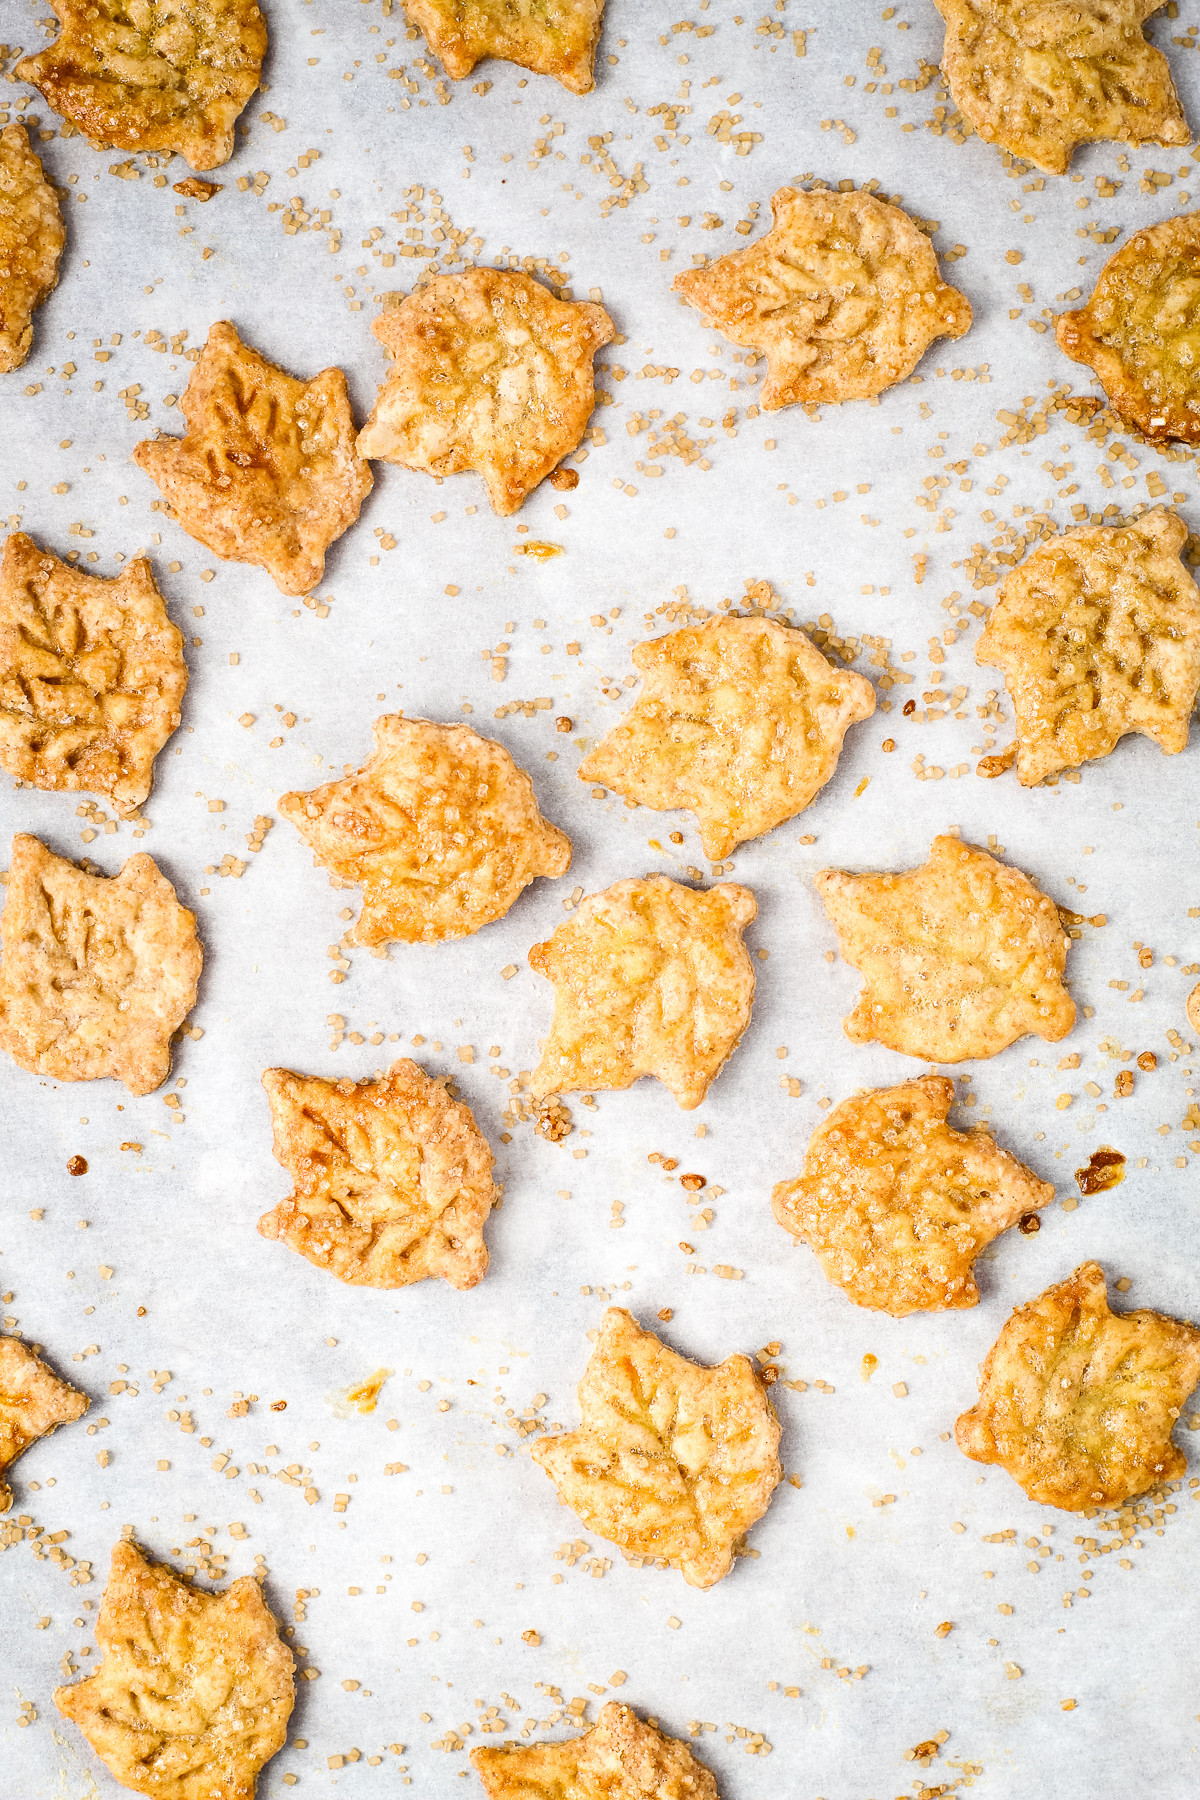
Decorative Pie Crust Tips
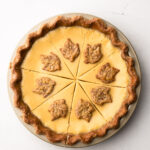
Given that this is a Maple Buttermilk Pie, it makes sense to garnish the pie with decorative maple leaf pie crust cut-outs. These little pie cookies can't be baked along with the pie though, as they'd sink right into the filling, so they're baked separately. In fact, whenever I make decorative pie crust cut-outs, I often bake them separately because they come out so much prettier than when they are baked directly on the pie. It's definitely worth the extra step.
The spelt pie crust recipe yields a large enough batch for you to cut off about ⅕th of the dough and roll it out for the crust cut-outs. How many decorative pie crust cut-outs you yield will completely depend on what cutter you are using, and how thin you roll your dough.
To bake these decorative pieces, place them on a rimmed baking sheet lined with parchment. Brush with egg wash and raw sugar for a glossy and sparkly finished look. To be efficient with your time, you can also bake them with the pie crust when you blind bake, but for a shorter amount of time. Bake for 15 minutes at 375ºF.

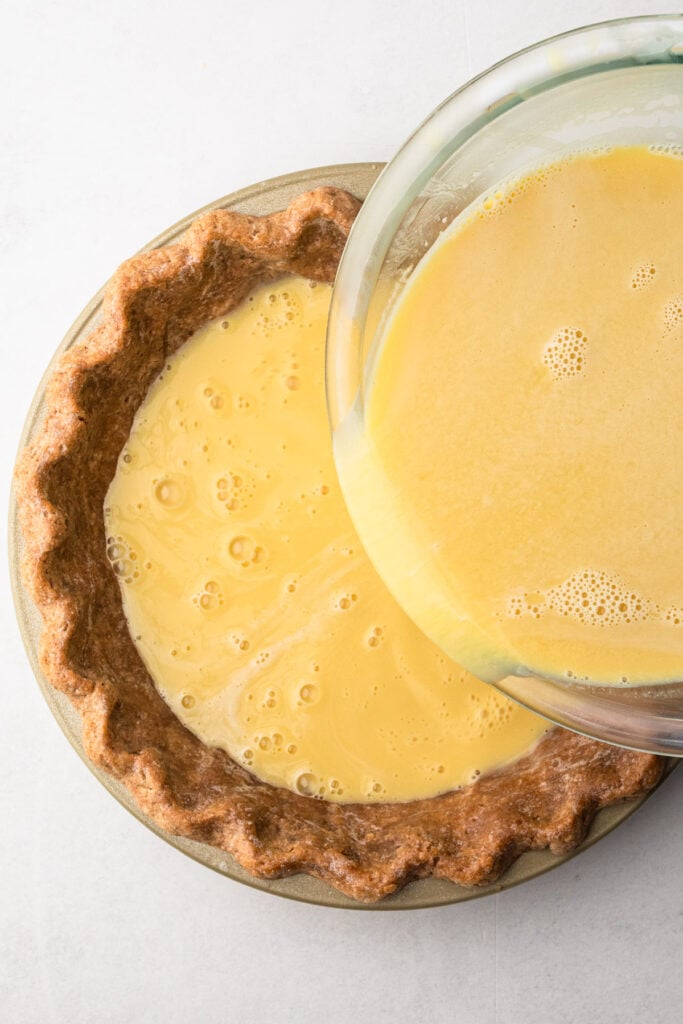
How to Not Spill the Filling When Placing it in the Oven
This may not seem like an important tip, but if you’ve ever tried to move an unbaked pie with an almost-liquid filling into the oven--without spilling it--you know it isn’t easy! While some bakers opt to place their pastry into the oven first and then pour the filling inside, I prefer the opposite. I’ve found that with the oven's heat, I’m more likely to spill it or burn myself when I do it that way.
Instead, I’ll offer you one tip for successfully transferring an unbaked custard pie into the oven: never take your eye off the filling. Before picking up the pie, open the oven and make sure your oven rack is in the right spot (which should be right in the middle). Then, pick up your pie and keep your eye on the filling the entire time. It’s only when you take your eye off the wobbly filling that you are at risk for spilling. Eye on the custard prize!

How to Tell if a Custard Pie is Done
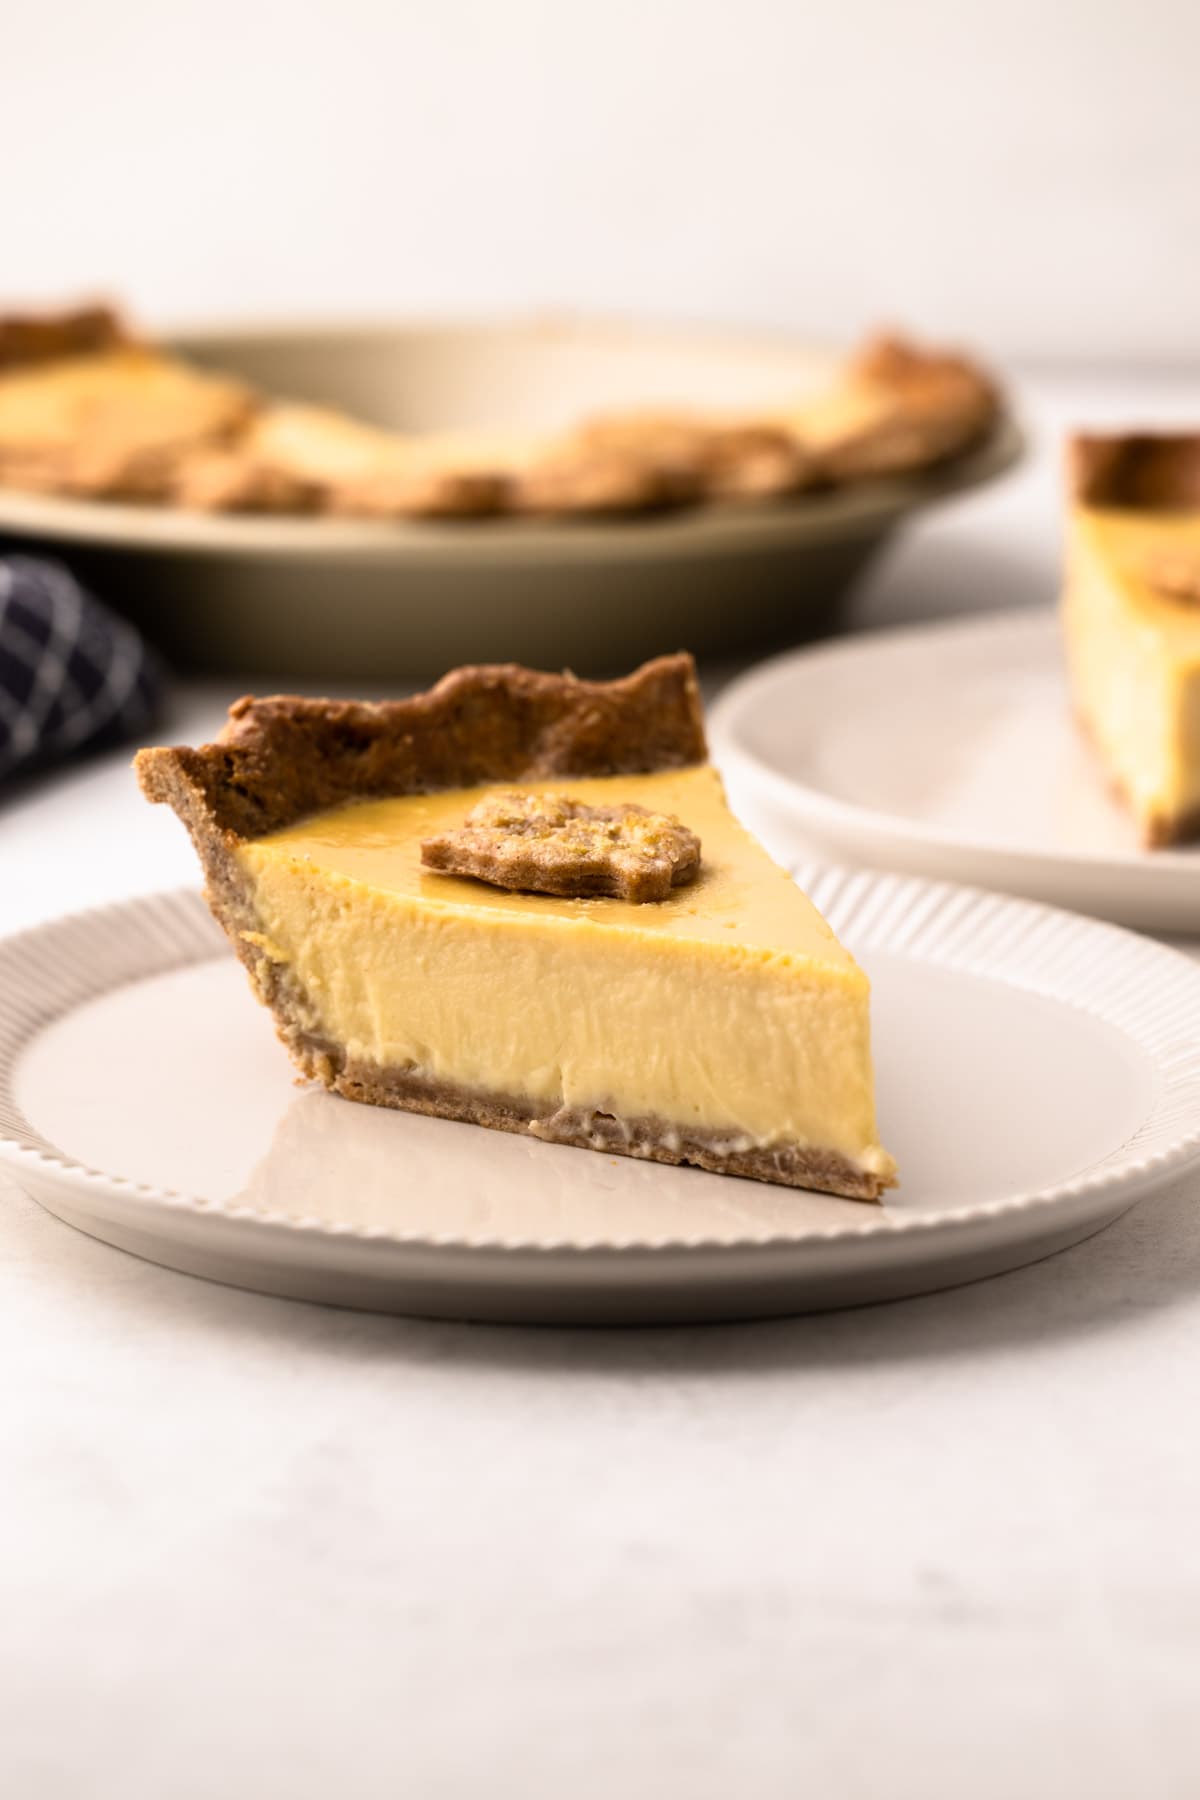
When a custard style pie is properly baked, it should be just barely set. If you overcook it, you are essentially “boiling” or curdling the eggs. This can, in some cases, lead to a taste of overcooked eggs. It can also make the pie feel tough, or spongy, and more commonly, leads to cracked or separated pies. A properly cooked custard is set (and safe to eat) between 170º – 180º. I often use a thermometer to check the temperature of the pie, to be sure. Though of course, this can leave a small hole in the middle of your pretty pie, so it's good to check for these other signs that the custard is done if you prefer the surface to be completely blemish-free.
Look at the outer edges and see if they have begun to “soufflé”, or puff up. Look for the soufflé effect to go in about 2″ from the outer edge, and for the center of the pie to still be a bit wobbly. It should not be watery looking though. It should have a soft wooble to it, but not feel like complete liquid. Once it's set on the outside softly set in the middle, take your pie out of the oven, and place it at room temperature to cool.
Once it’s fully cool, move it to the refrigerator to cool for at least 6 hours, or until it is fully set.
Tips for Making It
- Bake the pie pastry well: It’s crucial to bake the pastry fully before pouring in the filling, and to brush it with a whisked egg white while it is still hot. Custards are baked at a low temperature, so it would be impossible for the crust to actually bake with the filling inside. The brushed on egg white helps create a barrier between the filling and the crust. This helps keep the pie crust crisp after the custard has been baked. However, your crust can still take on a bit of moisture, depending on how long the baked custard sits, since this is a wet filling.
- Strain the filling: Sometimes, some of the bits of eggs don't thoroughly get whisked together with the ingredients (such as the chalazae), and they can surface on the custard as separate bits of cooked eggs. To prevent this, strain your filling. In the strainer you'll see anything left behind that didn't get fully whisked together.
- Add the buttermilk last: This is a strange one, but I've found that the buttermilk filling can break when the buttermilk is added too early in the whisking process. Adding the buttermilk at the very end (after the custard has been strained), right before putting it in the oven has prevented that from happening.
- Pre-cook the custard: This custard needs to be quickly warmed up together on the stovetop to ensure it doesn't "break". This is an update on this recipe, as I found the recipe could be inconsistent with how smooth the custard bakes up. I've added this step to ensure it always turns out as a smooth custard pie.
- Don’t overcook it: Be sure to read the above text on using a thermometer and checking for doneness.
- Let it cool before slicing: Custard pies finish setting and firming while they cool. If you try to cut it before it has completely set up, you’ll end up with custard soup. To check if it's set up, give the pie a wiggle, and you'll be able to see!

How to Serve this Pie
Serve this pie with optional pie crust cookie garnish, at room temperature or chilled, as is or with whipped cream. This pie can be made up to 1 day ahead of time. Store the pie in the refrigerator.
More Custard Pies
I am so honored when you make a recipe from my site! If you make this Maple Buttermilk Pie, please leave a comment and a star rating with your experience! If you have any questions about this recipe, feel free to comment here, too!
Full Recipe
Maple Buttermilk Pie
This Maple Buttermilk Pie has a creamy, smooth filling that is the perfect combination of tangy and sweet. Bake it up in a hearty Spelt Pie Crust with decorative maple leaves for a festive look. It’s crucial to bake the pastry fully before pouring in the filling, and to brush it with a whisked egg white while it is still hot. Custards are baked at a low temperature so it would be impossible for the crust to actually bake with the filling inside, so be sure to follow the instructions for blind baking the crust. The brushed on egg white helps create a barrier between the filling and the crust. This helps keep the pie crust crisp after the custard has been baked.
- Prep Time: 00:20
- Cook Time: 01:05
- Total Time: 1 hour 25 minutes
- Yield: 8-12 servings
- Category: Custard
- Method: Oven
- Cuisine: Sweet Pie
Ingredients
For Pastry:
- 1 prepared Spelt Pie Crust, or 1 prepared Pâte Sucrée
- 1 egg white (egg yolk reserved for filling)
- 1 teaspoon water
For Maple Buttermilk Custard:
- ⅓ cup (52 grams) maple sugar or light brown sugar (see note)
- 2 tablespoons (15 grams) cornstarch (or 3 tablespoons flour)
- ½ teaspoon kosher salt
- 4 eggs, (plus 1 egg yolk reserved from crust)
- ½ cup (115 grams) heavy cream
- ½ cup (156 grams) pure maple syrup
- ½ teaspoon maple extract
- 1 teaspoons vanilla extract
- 1-½ cups (340 grams) buttermilk
Instructions
- Preheat oven to 375ºF and place one oven rack in the second to lowest spot and one in the middle.
- Prepare pastry: Roll out the pie dough to an 11″ circle and line a 9” pie plate, crimp the edges as desired. Place in the freezer to firm up for 10-20 minutes.
- Whisk together the egg white and water and set aside.
- Line the pie dough with a parchment round piece of paper and then add pie weights to fill (dry rice/ beans/lentils work great), pushing pie weights to the edges. Bake for 20 minutes on the lower rack, then remove from oven and remove the parchment and pie weights. Return to oven and bake for an additional 5-10 minutes until the pastry is fully baked through.
- Brush the whisked egg white on the hot pie crust. The residual heat should set the egg white. If it does not, place it back into the oven for a minute at a time until the egg white is cooked through. Set aside the prepared crust until ready to use.
- Lower the heat to 350º.
- To make the filling: Whisk together the maple sugar (or brown sugar), cornstarch and salt in a bowl. Add in the 4 eggs and leftover egg yolk (leftover from egg white used to brush the crust), cream, maple syrup, and extracts. Strain the mixture twice. Then, whisk in the buttermilk at the very end to prevent any curdling.
- Next, pre-cook the custard mixture: Pour the buttermilk custard into a medium pot and turn the heat to medium-low. Cook the mixture for 5-7 minutes, stirring with a rubber spatula constantly, until the mixture has just slighty thickened, about 160ºF. To double-check the custard has formed, take a wooden spoon and coat it with the custard. Draw a horizontal line on the back of the spoon with your finger. If the line “holds” then your custard is set. If the line collapses right away, the custard needs another minute or so. Do not bring the mixture to a boil, this will overcook the custard.
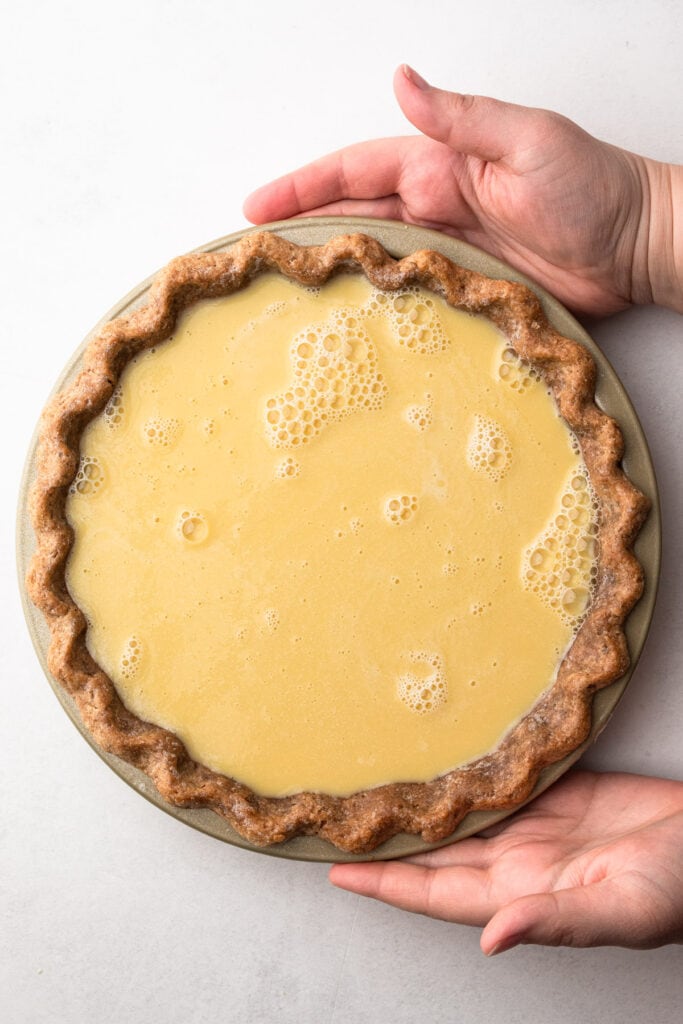
- Slowly pour the thickened filling into the baked crust.
- Place the pie onto your oven’s middle rack and bake it for 40-45 minutes, or until the custard has puffed about 2” from the edge but still slightly wobbly (not watery) in the middle. The pie should have a temperature of 180º.
- Remove the pie from the oven, and place it on a rack to cool. When it’s completely cool, if needed, refrigerate until you’re ready to serve, up to 1 day ahead of time.
- Decorate as desired with whipped cream or baked crust cookies (see section titled "Decorative Pie Crust Tips" for instructions).
Notes
See post for more information for how to make decorative cut-out pie pieces.
Granulated Maple Sugar is a fun and delicious addition to this pie. However, it's not make-or-break, so if you don't already have maple sugar or have a cheap easy source to get it, it can be skipped in place of light brown sugar.
Maple extract or Maple flavor is common enough in grocery stores and really helps amp up the maple flavor in this pie, so unlike the maple sugar, I do recommend including this in the recipe. I've purchased it at Whole Foods, Shaws, Stop and Shop and on Amazon. Just be sure to be all natural, and not imitation maple extract.
Recipe inspired by one from Gourmet Magazine (April 2002)
Some of the links on this page may be affiliate links. Everyday Pie is a participant in the Amazon Associates Program. As an Amazon Associate I earn from qualifying purchases, at no extra cost to you.
Shannon
I’m living in tropical country, it’s my first attempt to baked a successful pie! Thank you so much for sharing your recipe. I’m using sweet pie crust recipe but I can’t do the French technique over here cause the temperature is melting the butter when I try to do that. Nevertheless, it still tastes great!
Sheila
A light, creamy buttermilk pancake flavour. It was easy and tasty.
Niki
The custard part of this pie was fairly easy to make and the spelt pie dough was easy to make and roll out. However, overall the pie was just ok to me. I did everything as directed and changed nothing, it just wasn’t to my liking. The crust tastes hearty but doesn’t have that yum factor I wanted. I’m not a huge custard fan but liked the thought of maple and buttermilk but I was underwhelmed. Points for creativity and being different but I won’t make this again.
Kelli Avila
Hi Niki! Sorry you were disappointed! -Kelli
Averie
Making this pie for thanksgiving. Have you ever put a sugar crust on it like a cream brûlée?
Kelli Avila
I haven't. But that sounds intriguing! Let me know if you try it and how it goes!
Jenna
Hi! My pie is not coming out smooth and custardy on top? Am I over mixing the filling? Very confused, I’ve tried twice now!
Kelli Avila
Hi Jenna! I'd like to help you figure this out. Can you explain more about what the top of your pie looks like? And also is the filling below the top smooth? I have a suspicion your filling might be "breaking." But I'd need more detail to help you figure this out.
Jenna
Hi!
The top is getting really brown and crusty halfway through baking and looks absolutely nothing like your photos. I own a bakery and I’m using a professional oven, so I even tried different temps and fan settings. I tried many different, too. Also I noticed the filling wasn’t setting completely either, even though I temped it right to 180 degrees.
Kelli Avila
Hi Jenna! Sorry you are having issues. You cannot use ANY fan when making a custard pie...as in you cannot use a convection setting or convection oven. It sounds like you are a professional, so I might be telling you things you already know, but custard fillings need to be baked in a still oven. That would account for the crusty / browned top. Also, the filling will still be a bit woobly when it's ready to come out...but it shouldn't be liquidy. Hopefully your pie still turns out delicious despite the set back.
Corina Chang
I made this last night and it is now one of my favorite pies. Thank you so much!!!
Kelli Avila
Corina thanks for stopping by and sharing! So happy you enjoyed it!
Vanessa
Thanks for sharing! Does it keep long?
Kelli Avila
Custard pies are best served within a day or two.
Suzanne
This looks so good! These flavors are so unique! The leaves are adorable too!
Kelli Avila
Thank you!