
Pâte Sucrée is one of the three basic French pastry dough recipes. It's sweet, crisp, and a bit flaky and used for a variety of sweet pie fillings. It's a sturdy pie crust perfect that holds up well.
Want to save this recipe?
Enter your email & I'll send it to your inbox. Plus, get weekly updates from me!
Pate Sucree Recipe
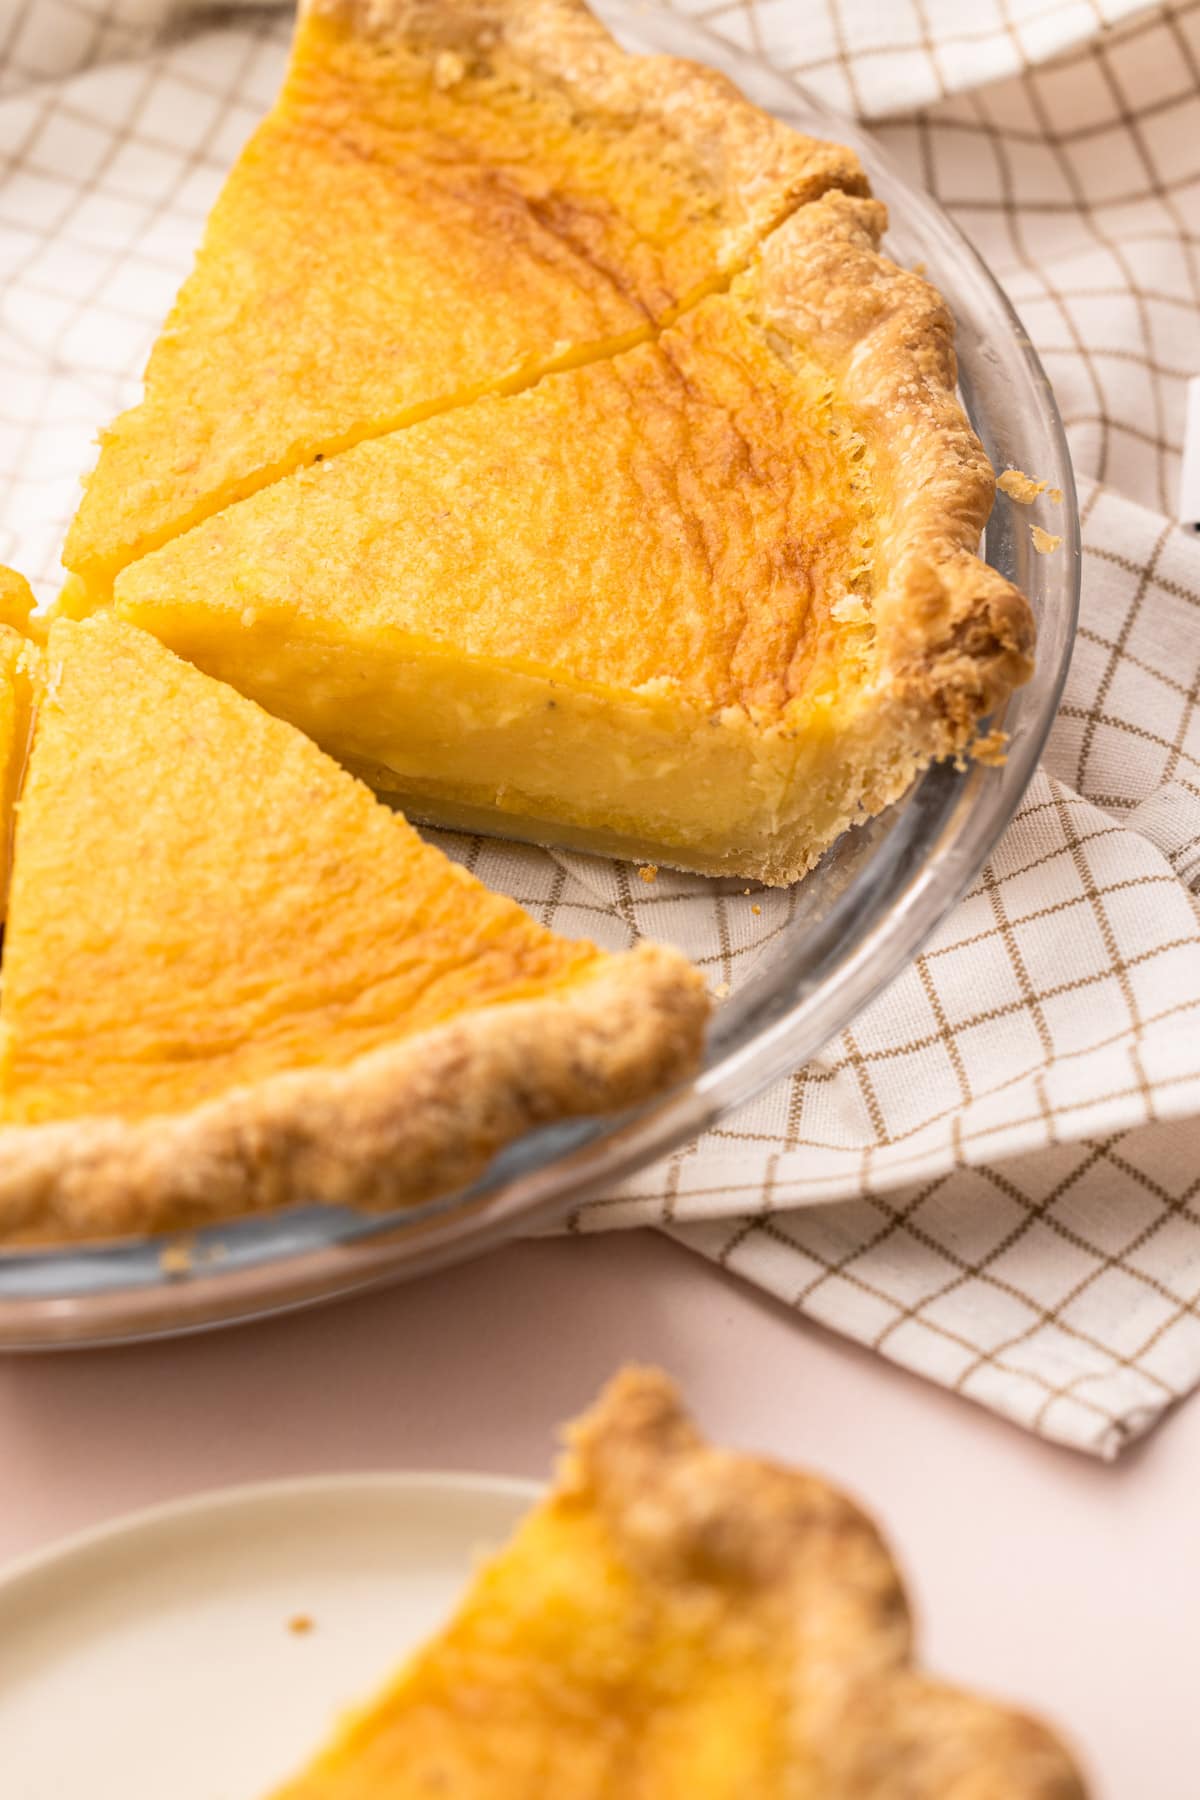
The name itself may be intimidating, but Pâte Sucrée (pronounced pat sue-KRAY) simply put, is sweet flaky pie dough. It is similar to Pate Brisee, or basic flaky pie dough, but with the addition of sugar. It is sturdy so it holds up to a heavier pie filling, such as cream pie or a chiffon pie.
During my baking career, I've searched for one definitive answers as to what the difference is between pate sucree and pate sablee, and I've never able to find one collective answer. Every book, chef and website has a slight variation or reasoning behind their list of ingredients and methodology.
My version is made in a food processor, and then finished by hand using a french technique called fraisage. It is possible to make it all by hand though, and I give instructions on that variation in the text below.
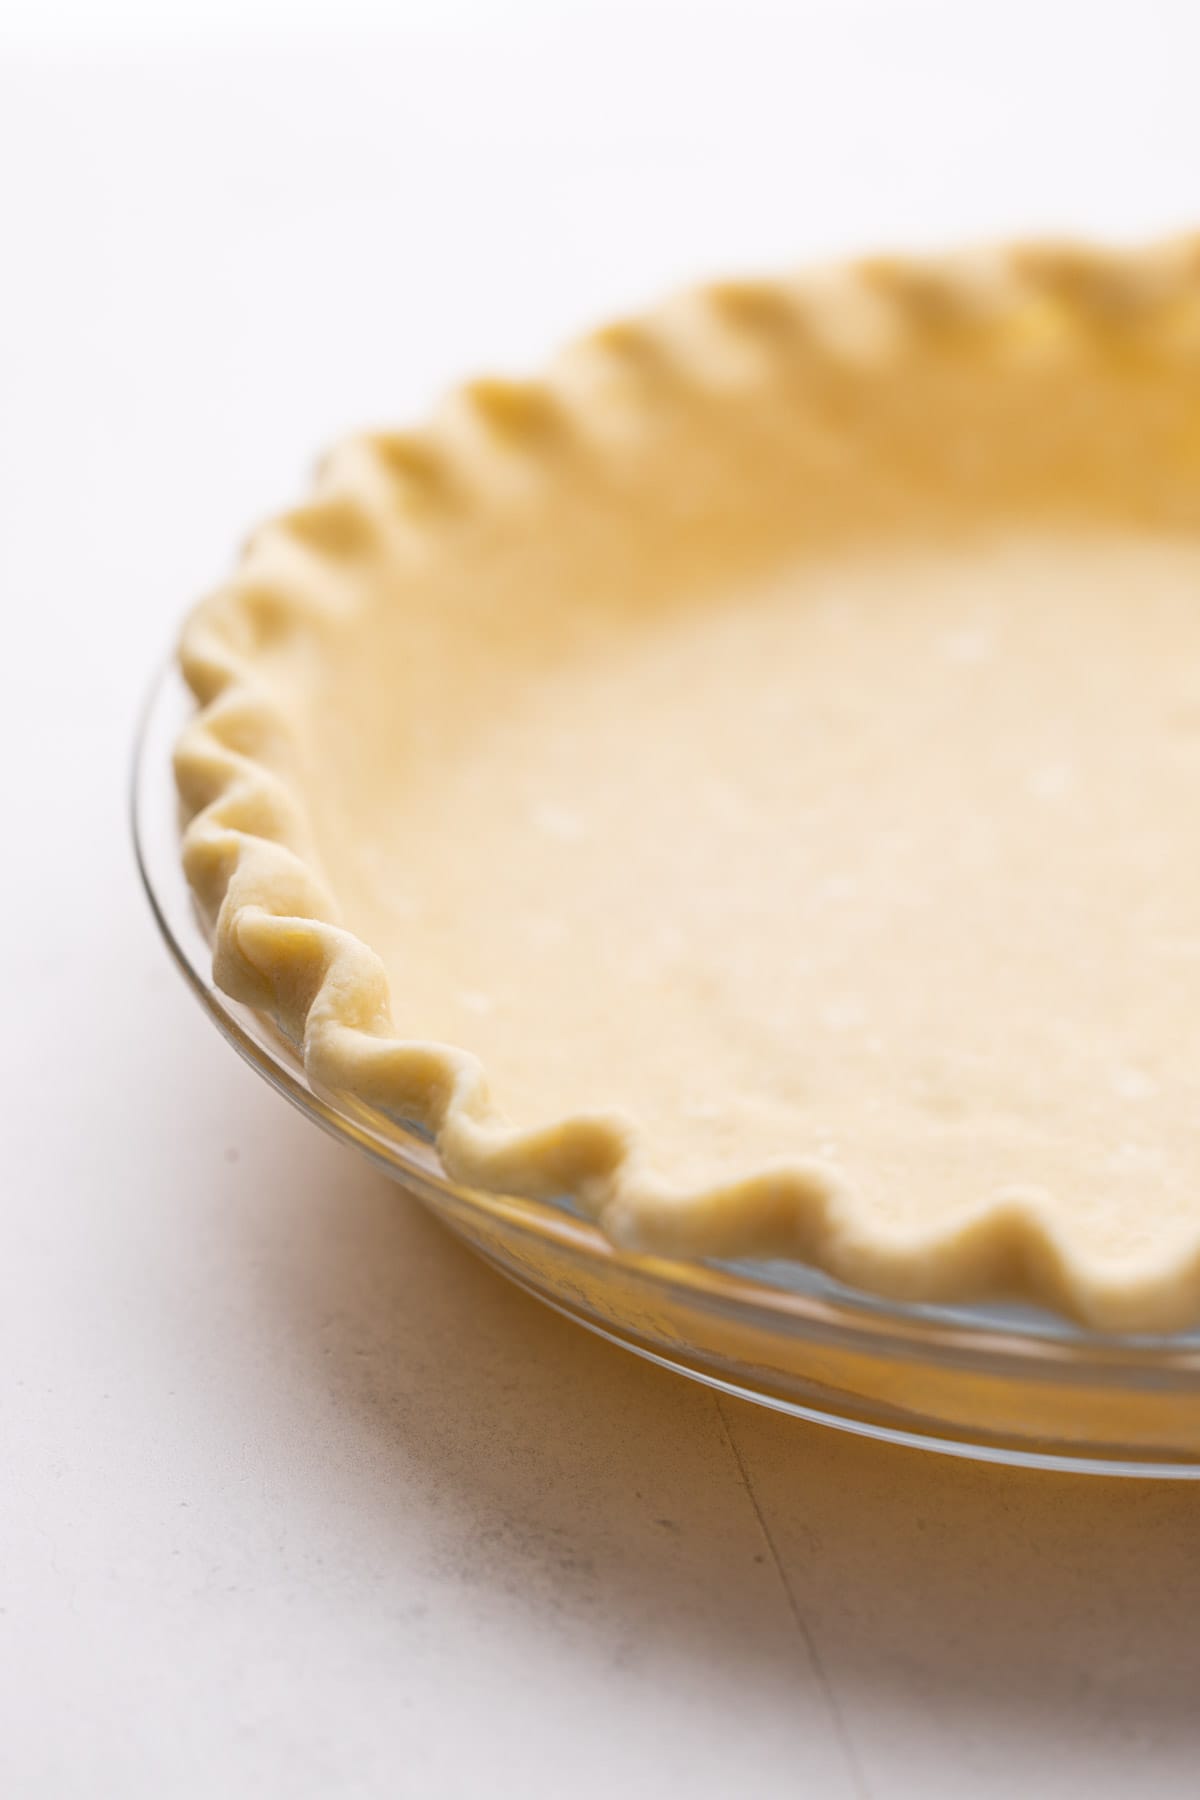
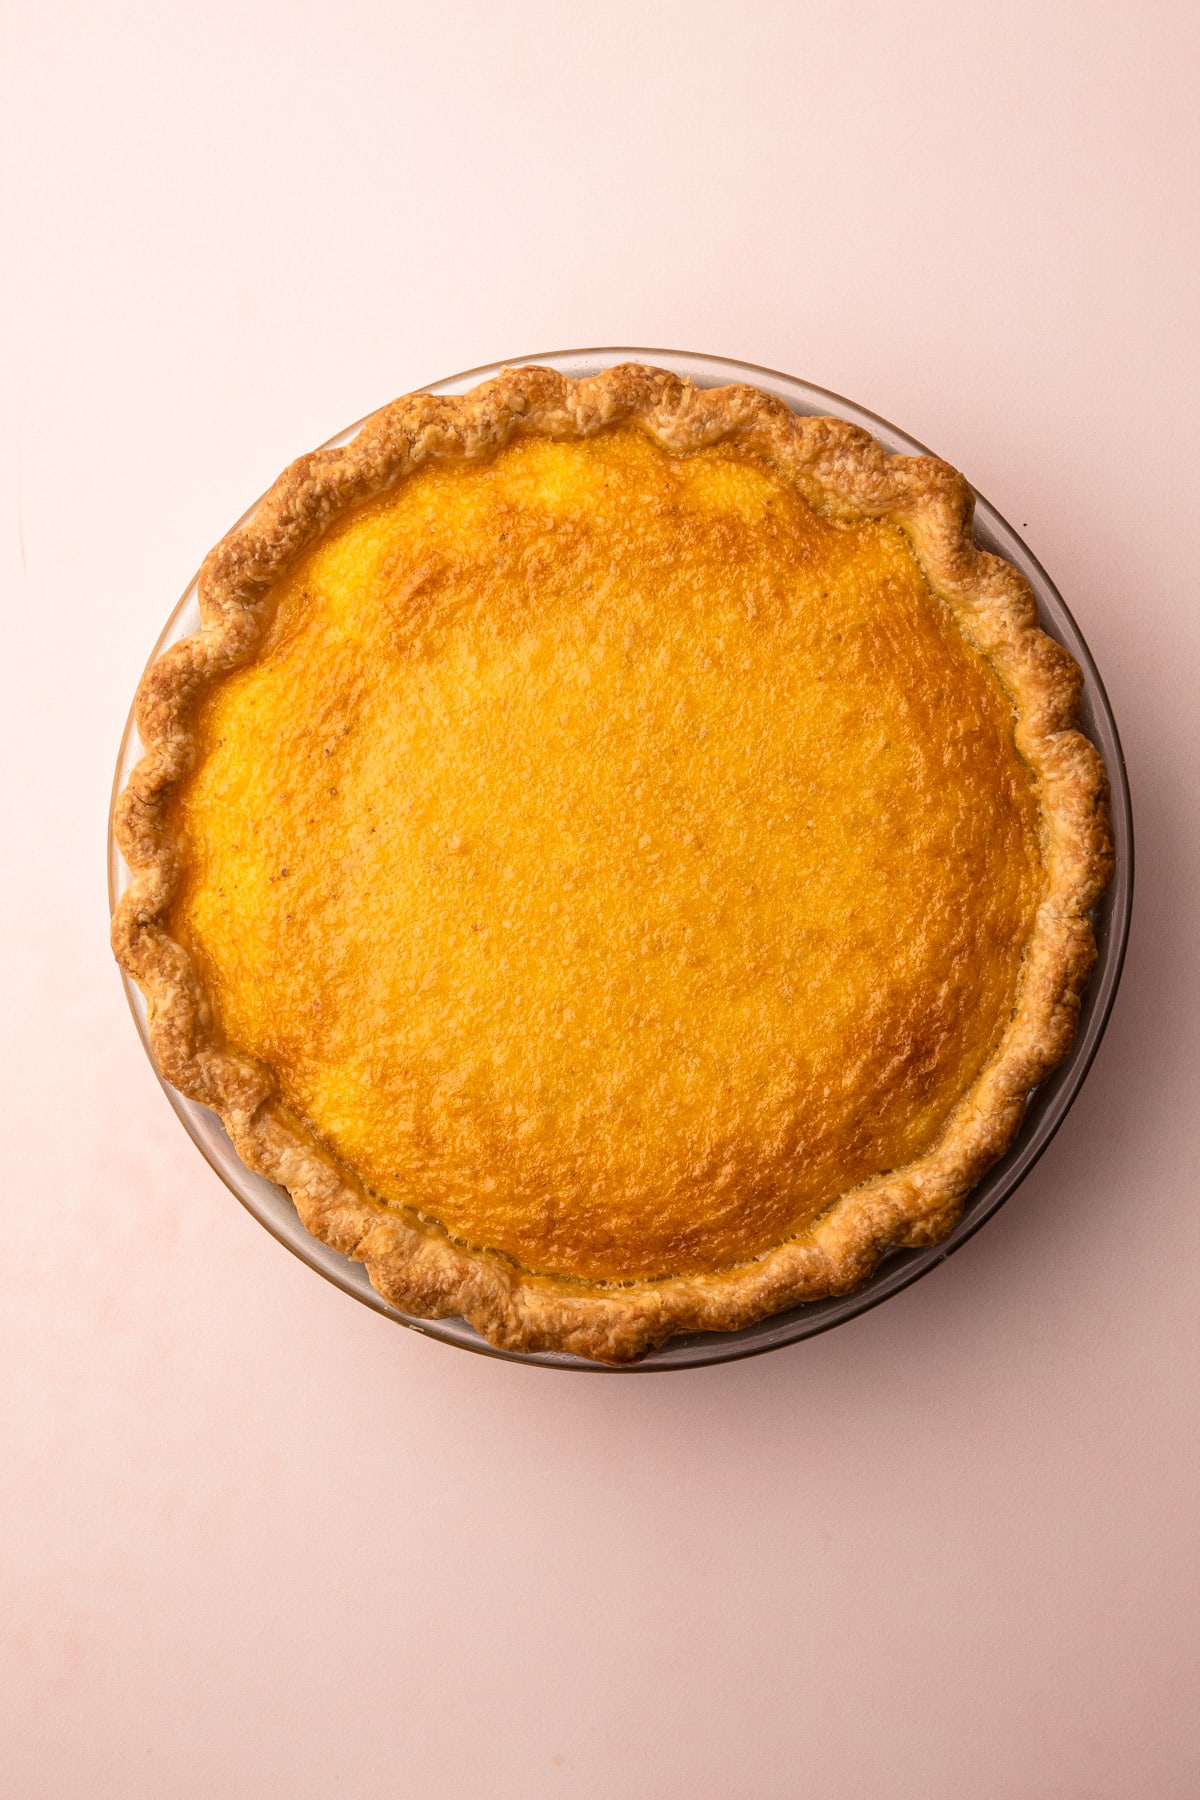
The baked pastry crust is a little bit sweet and tends to brown more easily (which means: a bit more flavor), with a nice crispness to it and a bit of flakiness.
So, let's get to making it, shall we? The text below offers tons of tips and helpful notes, or you can scroll to the bottom to grab the recipe and get started!
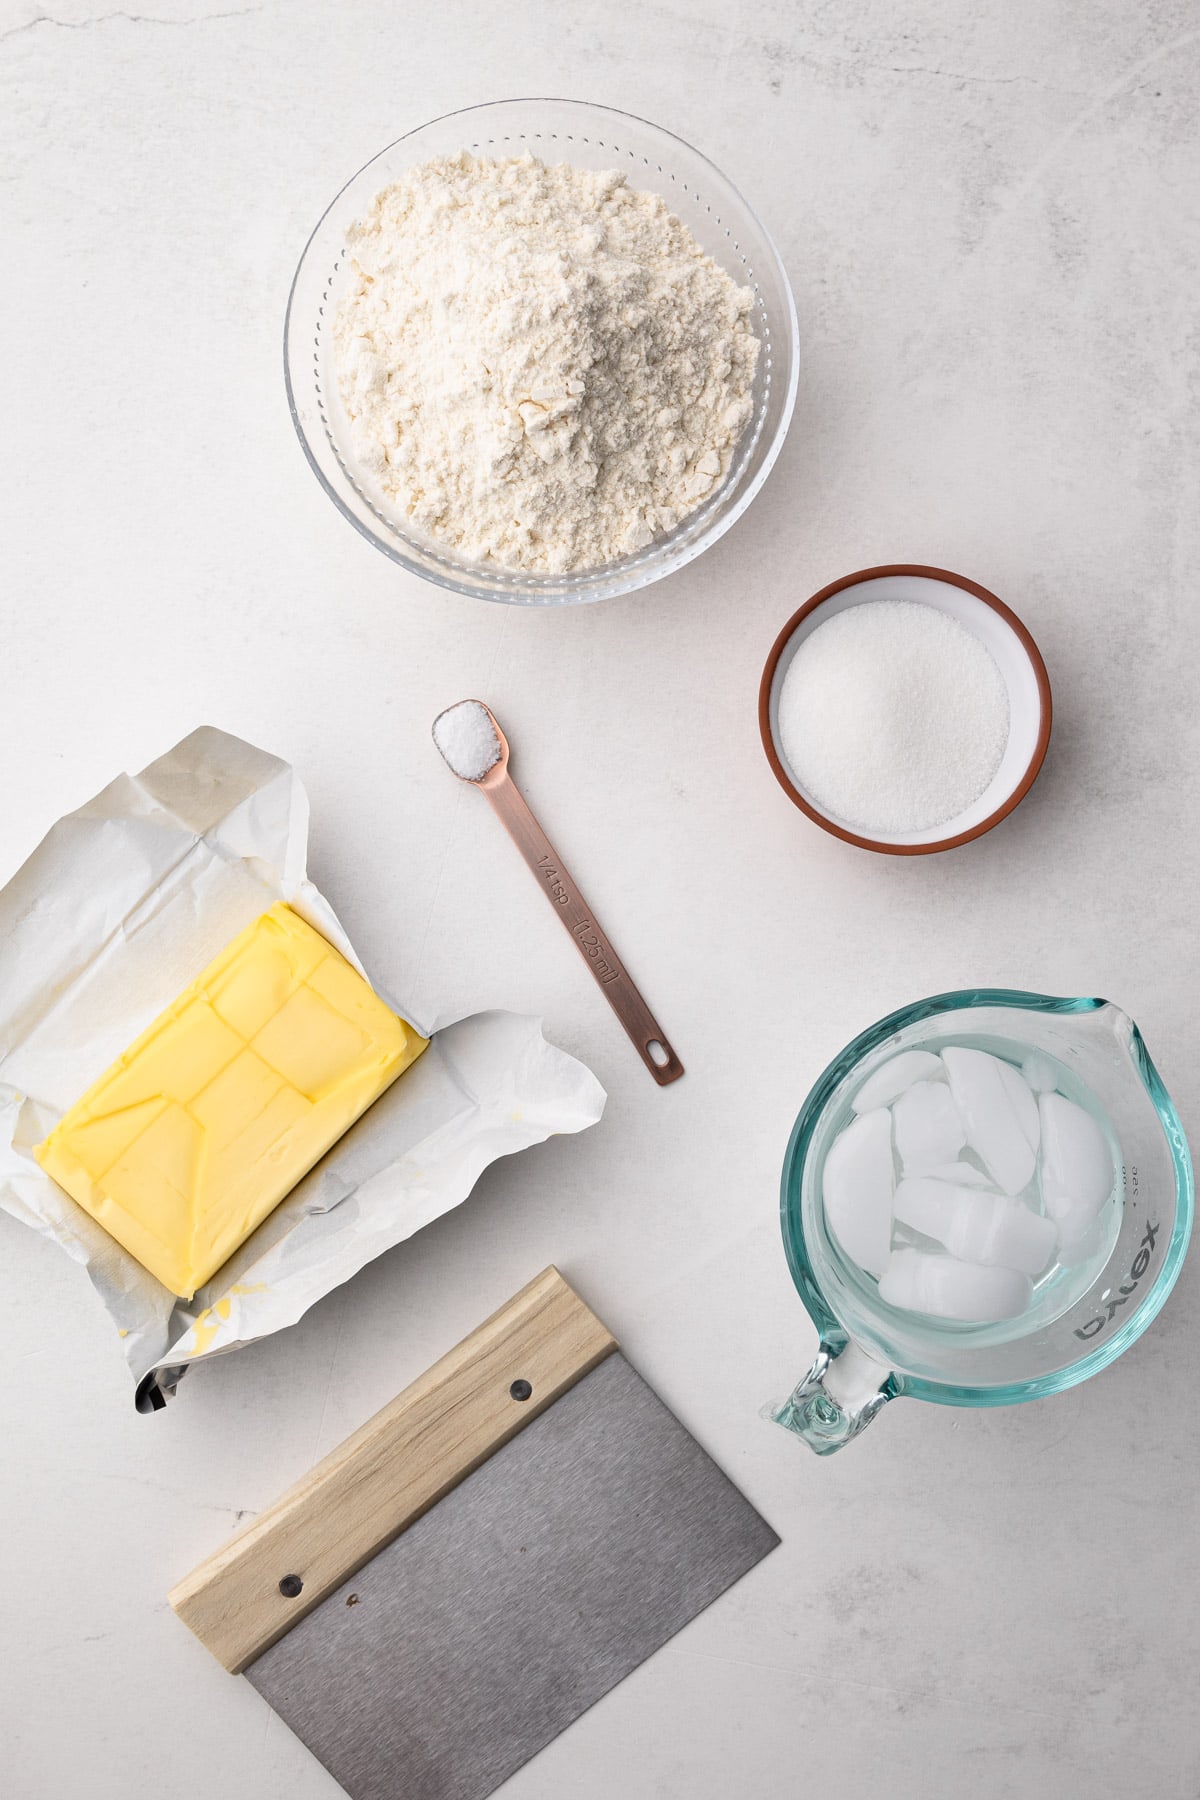
Ingredients Needed
- All-Purpose Flour
- Unsalted Butter
- Granulated Sugar
- Salt
- Ice Water
Useful Tools to Make This Recipe
Here is a list of some of the primary tools I use in this recipe. You won't necessarily choose to use them all, but they are exactly what I used. Any links may contain affiliate links.
- Kitchen scale (read here for why it's useful)
- Food Processor
- Bench scraper
- Rolling Pin
- Plastic Wrap or reusable food wrap
What is the difference between a sweet pie crust and a flaky pie crust?
A pâte sucrée pastry uses similar ingredients to a flaky pie crust (also known as a Pâte Brisée), with one big exception: granulated sugar. The added sugar not only makes the pie dough sweet, but it also makes it more brown, crisp and tender because the granulated sugar cuts through the gluten formation.
Pâte sucrée pastry is mildly flaky. In order to attain those short flaky layers while still building up the necessary strength in the dough, the recipe calls for an extra step known as fraisage (more details are written about this below). This step, done by hand, blends the butter and sugar into the flour so the dough comes together while still maintaining shards of whole butter.
If this step was skipped, the pastry would be too tender because of the addition of sugar, and it would be hard to roll out. And if it was fully blended in the food processor, then there would be no flaky layers left. By performing the fraisage after the butter has been worked into the flour, it builds up just enough strength for the dough to come together while also maintaining those short flaky layers in the final pastry.

Recipe Overview
These are the essential steps to making this sweet pie dough:
- Pulse together the dry ingredients and sugar very well. You want to break down the sugar to a fine grain.
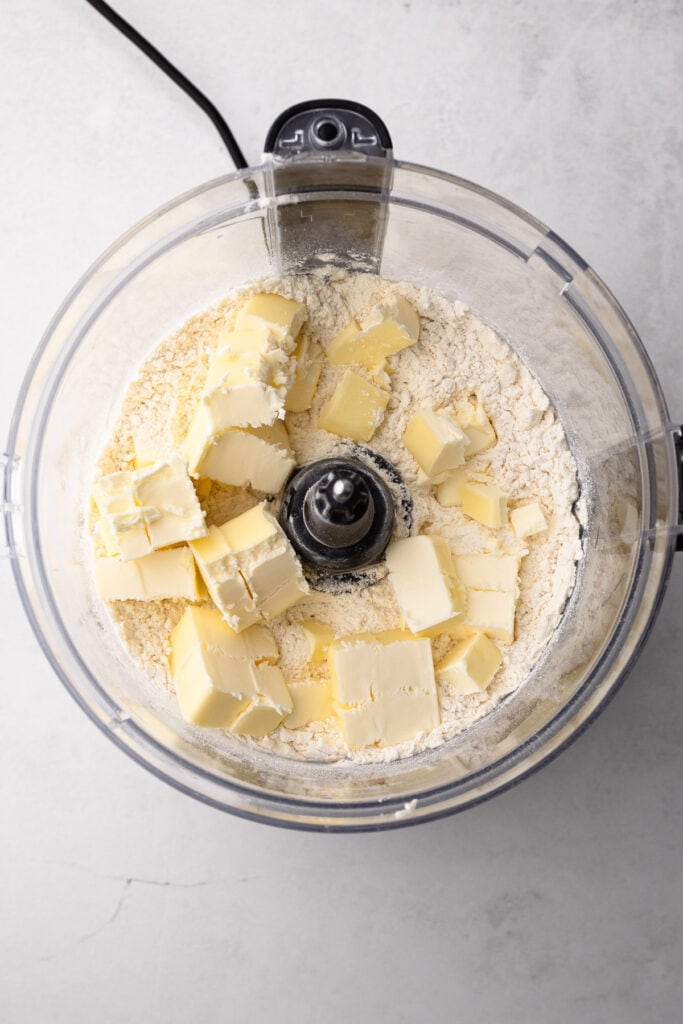
- Add in the butter pieces and pulse until they are about the size of a pea.
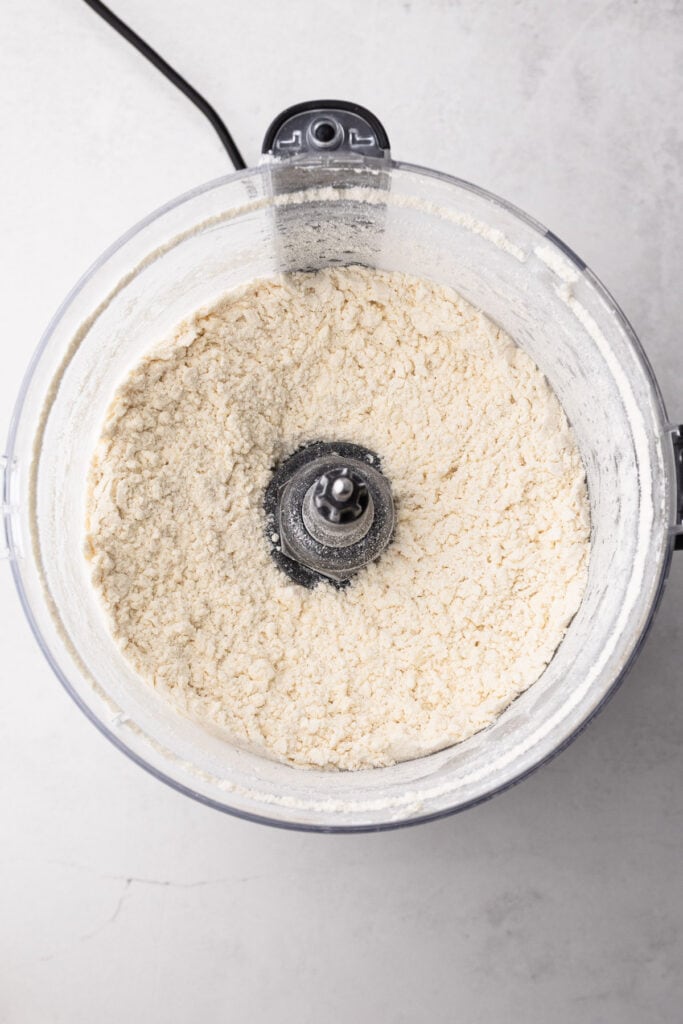
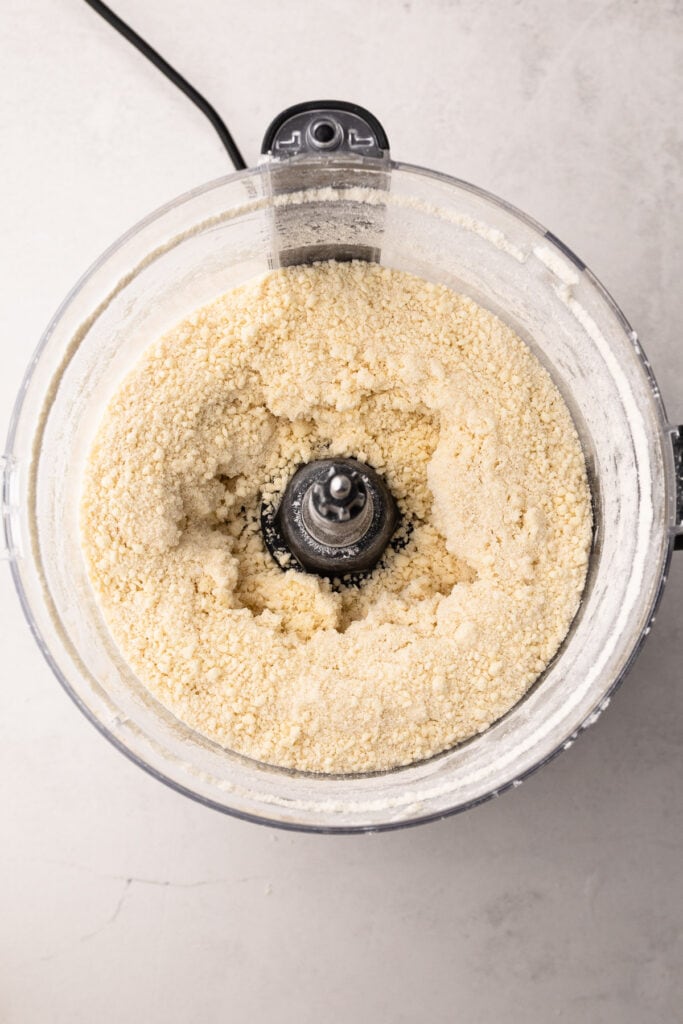
- Pulse in the water. The dough should be crumbly, but not cohesive. Please see the photo for what it should look like.
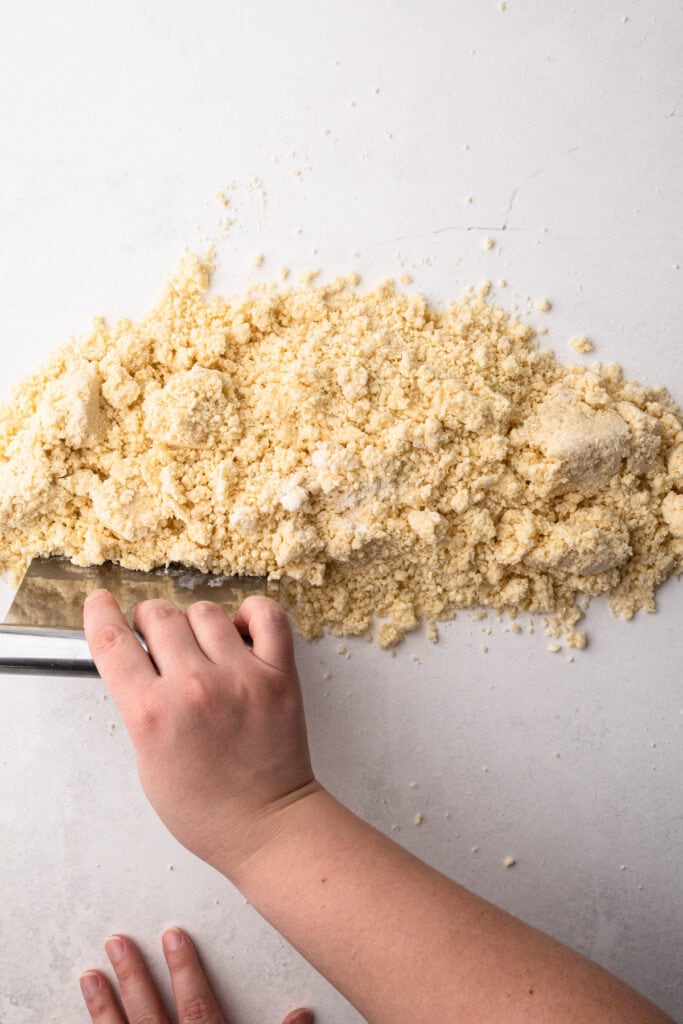
- Pour the crumbly dough onto a work surface and fraisage the dough until it comes together (see more about this process below).
- Divide the dough in half and wrap tightly in plastic.
- Roll out the dough while it is in the plastic wrap to help to create an airtight seal and then let rest at least 2 hours, or better overnight.
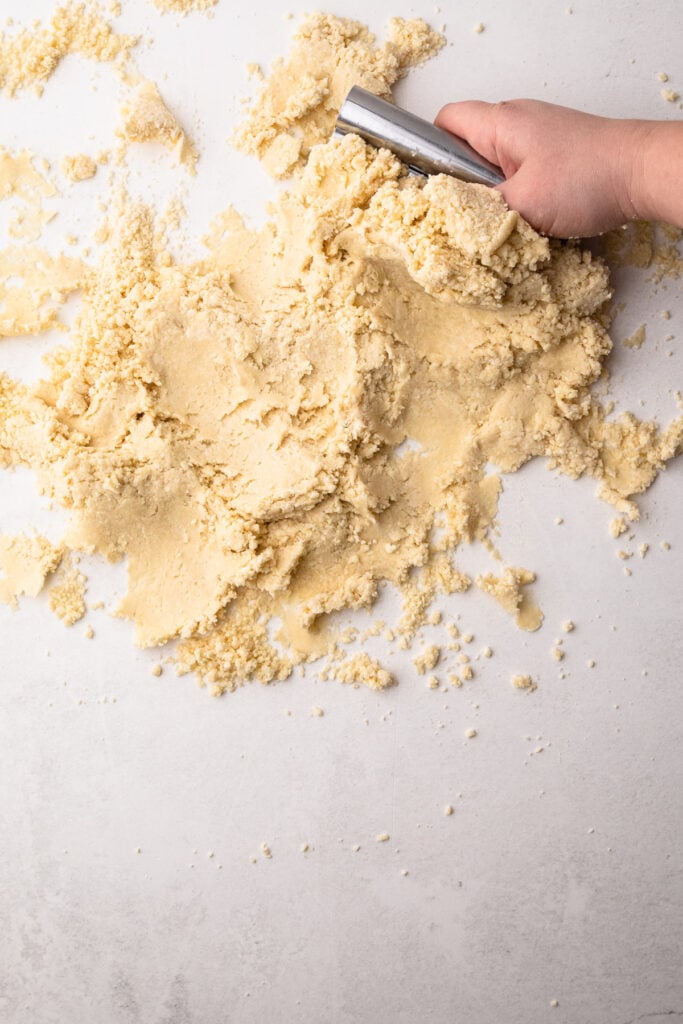
What is Fraisage?
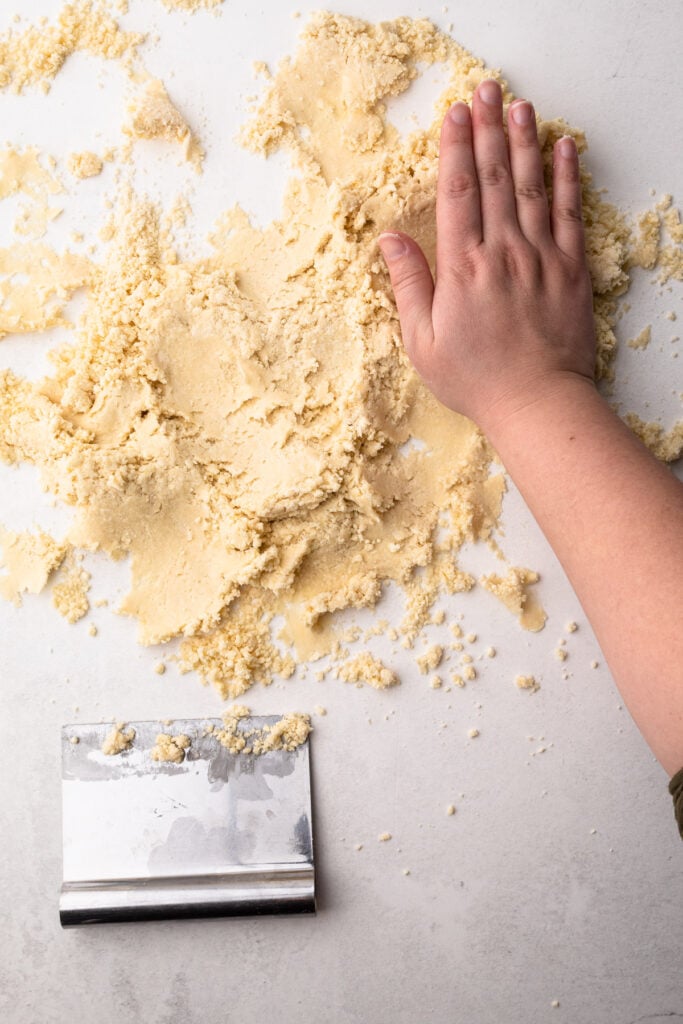
Fraisage is a French technique of blending the fat into the flour. You use the heel of your hand to spread the fat into the flour to create long, thin streaks of butter. When these butter streaks melt during baking, they produce steam that lifts the pastry up, creating flaky layers.
To fraisage, you want to make sure you start out with properly made dough. The dough should not be fully blended (that would mean you have overworked the dough) but instead it should be crumbly.
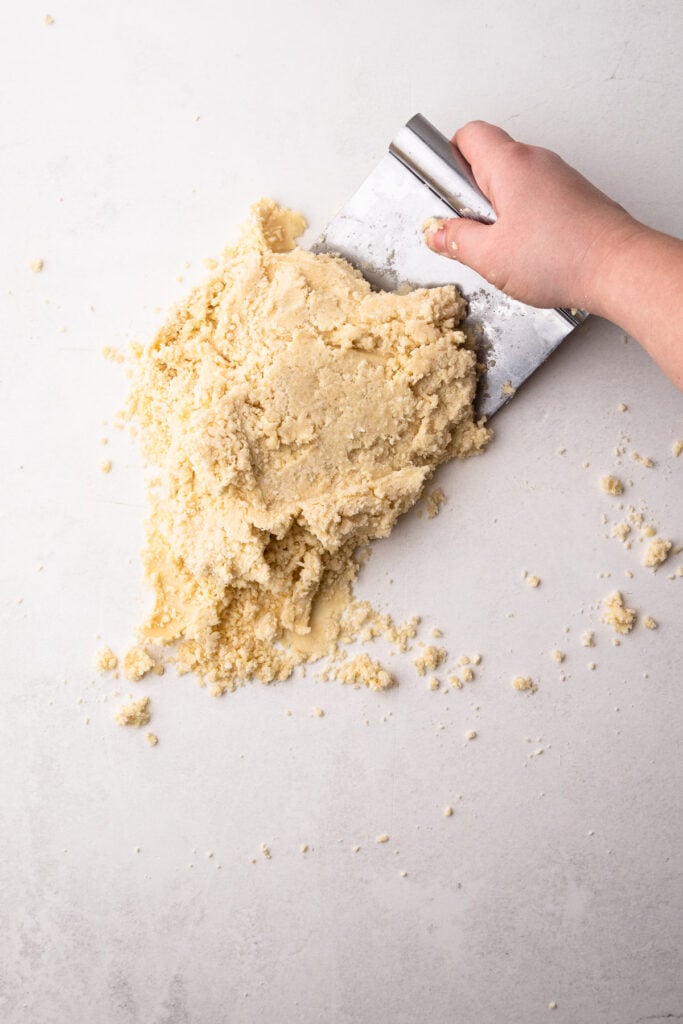
Using the heel of your hand, quickly press down on a small pile of dough and press your heel forward to smear the butter. I like to create a line of crumbly pie dough and fraisage my way down the line. Once you have worked most of the dough, quickly use a bench scraper to gather up all the dough. Keep as many of the streaks of butter intact as you can by scraping up the layers with the bend scraper, and then piling them on top of one another to create a dough disk. The more layers of butter you create, the flakier your pie will be.


Tips for Working with a Pâte Sucrée
- Let the dough rest. I never advise making a flaky type pie dough the same day you plan to bake it. It’s essential for the dough to hydrate properly and so the dough should rest at least overnight. If you absolutely need to, you can make the dough and bake it all in the same day, but you must let it rest at least 2 hours before you roll it out. Dough that is made the same day it’s rolled out and baked can be more difficult to handle and possibly deform in the oven because the butter hasn’t chilled enough and the gluten hasn’t had time to relax. Try to plan accordingly.
- Weigh your ingredients! An electronic kitchen scale is not a huge investment. You can get one for around $25. I can't recommend enough that if you want to get good at baking, get a scale.
- Use better quality butter and flour. Both of these ingredients can wildly vary in quality. Poor quality butter will have a higher water content and less fat. Lower quality flour can vary in the protein structure and that will effect your final pie crust. In the end, I'd still choose a homemade pie crust made with cheap butter and flour over anything store-bought. However, with that said, if you are looking for a really amazing pie crust buying quality ingredients will make a difference.
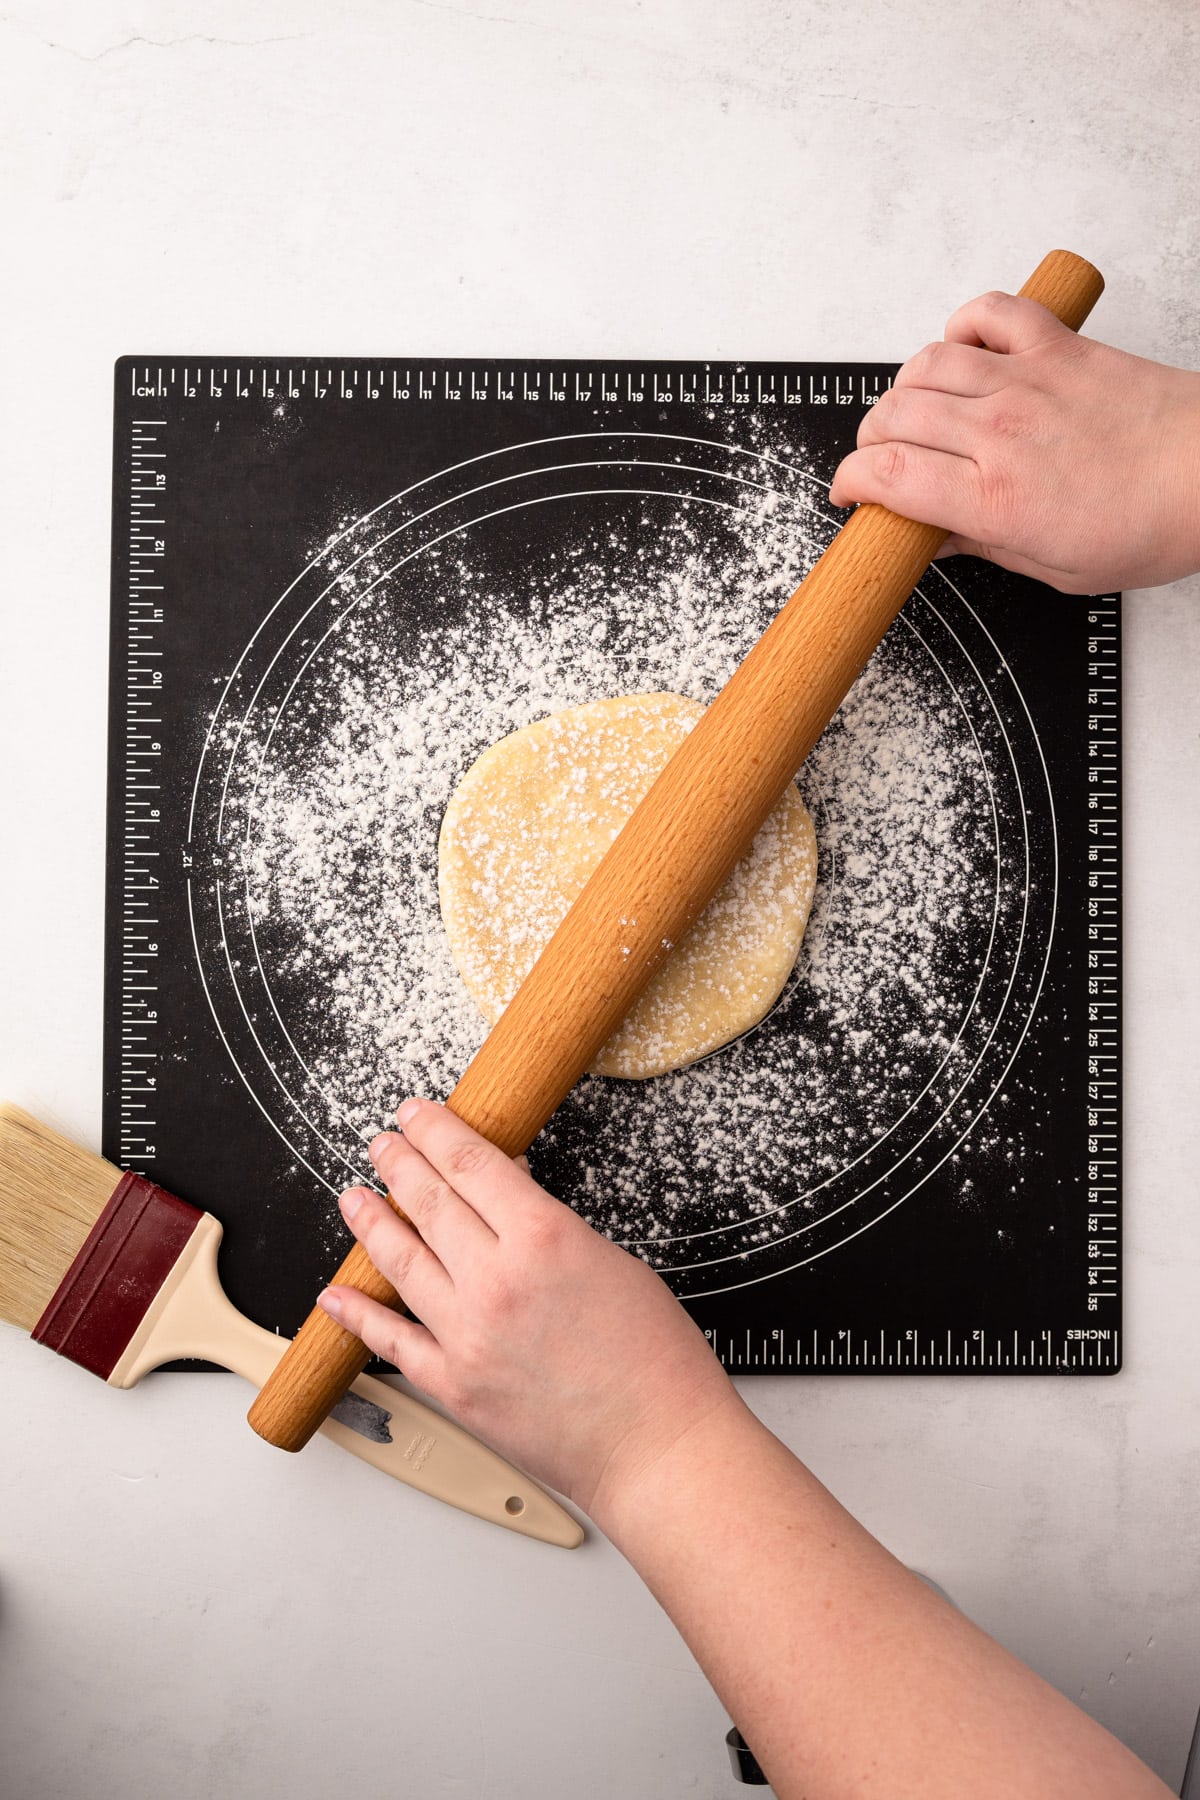
- This dough is stickier because of the granulated sugar. You might even notice some moisture on the dough when you take it out of the refrigerator to roll it. You'll need to use more flour than you typically would so it doesn't stick. If there is a lot of excess flour on your dough after it has been rolled out, you can brush some of it off with a dry pastry brush. However, I find it useful to leave some of the flour on the pastry that will be touching the surface of the pie plate as it helps it release easier when the pie is baked.
- Bake this crust at a lower temperature. This pastry has a high sugar content, so I recommend to bake it at 400º to ensure it doesn't burn. If you want to use this crust with a pie recipe that requires high temperature for a long time, it probably isn't the best choice. However, it can be used in a recipe that calls for a high temperature in the beginning, but then lowers it. Cover the edges if they're are browning too quickly.
How to Blind Bake this Sweet Pie Dough
Blind baking means baking the pie crust empty, without any filling in it. There are a few reasons you would need to blind-bake a crust, but the main one is that the pie has a no-bake filling! In that case, you'll need to fully bake the pie crust before adding in the filling.
If you are new to blind baking, check out this Tutorial for more in-depth information. Below is a quick overview.
To achieve the blind bake, start with rolling out the pie dough and placing it in the pie dish. Most of the time you should pierce the bottom of the pie crust with a fork to allow the steam to escape when baking, but not always. If the filling recipe does not call for this step, skip it.
Place the dough in the freezer for 10-30 minutes, while the oven preheats to 400ºF. Line the pie dough with a round piece of parchment paper and then add pie weights to fill (I use dry rice / beans / lentils), making sure to push pie weights to the edges. Bake for 20 minutes on the lower rack, then remove from oven and remove the parchment and pie weights. Return to oven and bake for an additional 5 minutes for a partial blind bake or about 10 minutes for a full blind bake. If the edges start to brown at any point cover them with pieces of aluminum foil or a pie shield.

Recipes to Make with Pâte Sucrée:
- Chess Pie
- Chocolate Cream Pie
- Strawberry Cream Pie
- Brownie Pecan Pie
- Bourbon Pecan Pie
- Honey Walnut Pie
I am so honored when you make a recipe from my site! If you make this Pâte Sucrée, please leave a comment and a star rating with your experience! If you have any questions about this recipe, feel free to comment here, too!
Full Recipe
Pâte Sucrée (Sweet Pie Crust)

Pate Sucree is one of the three basic French pastry dough recipes. It's sweet and used for a variety of sweet pie fillings. It's perfect for cream based pies that have a lot of moisture.
- Prep Time: 00:10
- Total Time: 10 minutes
- Yield: 2-9" pie crust
- Category: Pie Crust
- Method: Food Processor
- Cuisine: Sweet Pies
Ingredients
- 3 cups (360 grams) all-purpose flour
- ¼ cup (50 grams) granulated sugar
- ½ teaspoon salt
- 18 tablespoons (235 grams) cold butter, cut into ¼” pieces
- ½ cup (115 grams) cold water
Instructions
- Add the flour, sugar and salt to the bowl of a food processor.
- Process for 30 seconds to combine and pulverize the sugar.
- Add in the butter and pulse 5 times.
- With the motor running pour pour in the cold water in a steady stream into the flour mixture. The dough should be crumbly and it should hold together when squeezed. If the dough is too dry drop in more water until it holds together.
- Empty the flour mixture onto a work surface and spread the mixture out into a rough horizontal line in front of you. Fraisage the dough by taking the heel of your hand smear a small pile of dough into a thin line. Repeat this process until most of your dough has been worked (see note) and the dough is cohesive.
- Using a bench scraper, scrape up the dough in chunks and stack it into two piles.
- Place each in a piece of plastic wrap and wrap tightly.
- Using a rolling pin, roll the dough out until until it stretches to the corner of the plastic wrap.
- Refrigerate for at least 2 hours, but preferably overnight
Notes
Weighing your flour is the most accurate way to measure. If you aren't going to weigh it, make sure to spoon it into the cup, and then level it off. If you scoop the flour out with the measuring cup and then level, it could change the outcome of the final product.
Dough can be made up to 2 days ahead of time. Or frozen for up to 3 months. Let thaw in the refrigerator overnight before ready to use.
Let the dough sit at room temperature for 5-10 minutes for rolling.
See the section on "Fraisage" for more information and photos about this french technique.
Have a question or looking for tips? The text written above the recipe is always a great first place to start! This Pate Sucree recipe was developed with love, and I always include loads of explanations, tips, step-by-step photos and technical advice shared before the recipe.
Some of the links on this page may be affiliate links. Everyday Pie is a participant in the Amazon Associates Program. As an Amazon Associate I earn from qualifying purchases, at no extra cost to you.
Ed
Hi can I make this by hand?
Kelli Avila
Yes, just make sure to really work the butter into the flour! -Kelli
JKK
I made & this was best tasting pie shell I ever had. Wasn't difficult & steps easy to follow. 100% better than store bought pie shell & nice & sweet.
Kelli Avila
So glad you liked it! Nothing beats homemade pastry! -Kelli
Chelsea
Will this type of crust keep well for a pie that will be stored in the fridge? I know you don’t recommend pate brisee for fridge pies.
Kelli Avila
It is. Also recommend the crust I have for the chocolate cream pie
Liz
Hello! I am about to make this crust for a pie I'm planning to serve at my wedding! Does this recipe make enough for a bottom pie crust and a crust to go over the top? Or do I need to double it?
Renee
I used this recipe today to make a traditional pumpkin pie and of course I couldn’t wait to try your crust and it was fabulous and quite possibly the best crust I’ve ever eaten. Also made your gluten free crust for some family members and I’m sure that will be great at well. Thanks to you and your recipes this thanksgiving!
Sheila
Hi I live on a farm area were I get my cream directly from every week, and make my own butter, do you think the fat content will be to high for my crust?
Kelli Avila
Hi Sheila! How awesome! I think for the pate sucree a high fat butter will be totally fine! With a flaky pie crust you might have a little more trouble, but because the pate sucree is a "short" crust, I think you'll be fine!
Lauri
Hi,
Can I freeze this after I've blind baked it?
Thanks!
Kelli Avila
Yes!
Chino
Can this be used as a top crust as well. An apple pie for example?
Kelli Avila
Yes!
Adryan
This should say pie crust* 🙂
Adryan
I made this pie for my husband's birthday and he loved it.
Robin
Hi Kelli. I’m going to make your lemon cream pie for my very pregnant daughter. I noticed that this recipe for the pate succeeds crust doesn’t include egg yolk and all others if seen do. Is that correct? I’m going to follow your recipe anyway but will cut it in half for one crust. Wish me luck ????????
Kelli Avila
Hi Robin. I'm sure your daughter will love this! When you search the internet, it seems everyone's pate sucree recipe sometimes is interchangeable to pate sablee. From my understanding, pate sucree is simple a sweetened version of pate brisee, and so my recipe does not include eggs. If you were looking for an egg enriched pie crust, that would be my Pâte Sablée (Sweet Tart Dough)!
Bailey
Hi, do you prebake this before adding the filling? What temp and time do you usually bake this crust on?
Kelli Avila
Hi Bailey, the filling recipe will dictate whether or not you need to blind bake. As for time and temperature, please reference the article about the recipe as I cover this topic and all the information you need is there.
L
is it possible to do this by hand or is a food processor nescessary? Otherwise, what about a hand blender?
Emily Harrington
I used half of this crust recipe to make the Pumpkin Mascarpone pie and it is delicious!!!! Thank you for the amazing and easy recipes!
caroline
I used the regular non-dough blade on my food processor and ended up with a ball of muck with no pea-sized balls? Can this "dough" be saved?
Kelli Avila
Hi Caroline. I use a regular blade too. Did you make any substitutions and are positive you've measured correctly? If yes to these questions, then it is either a case that your overworked the dough (meaning you processed it too much), or that your home was too hot. Either way, a good chill in the refrigerator overnight will work just find, and you should be able to use the dough. Keep in mind you'll need a bit more flour to roll this out because of the sugar. Let me know how it goes!
Annie
Thanks for all of this awesome pie info! When you say high quality butter and flour, do you have specific brand recommendations or things to look for when choosing these ingredients? I usually use Gold Medal flour or King Arthur flour but there are specific instances I use each because I’ve noticed such a difference between the two, likely due to the different protein content. Your recommendations would be helpful!
Kelli Avila
Hi Annie! I use both King Arthur Flour and Bob's Red Mill. It isn't make or break, but in general I do recommend using high quality if you can and I find both of those brands to be very consistent in their quality.
Kelli Avila
Oh and for butter I love Cabot. I don't actually recommend using super high quality like a European style (Plugra) or Kerrygold because their butter is soft (due to the higher fat content) and it can make the dough a tougher consistency to work with. So a middle of the road butter is my go-to!