

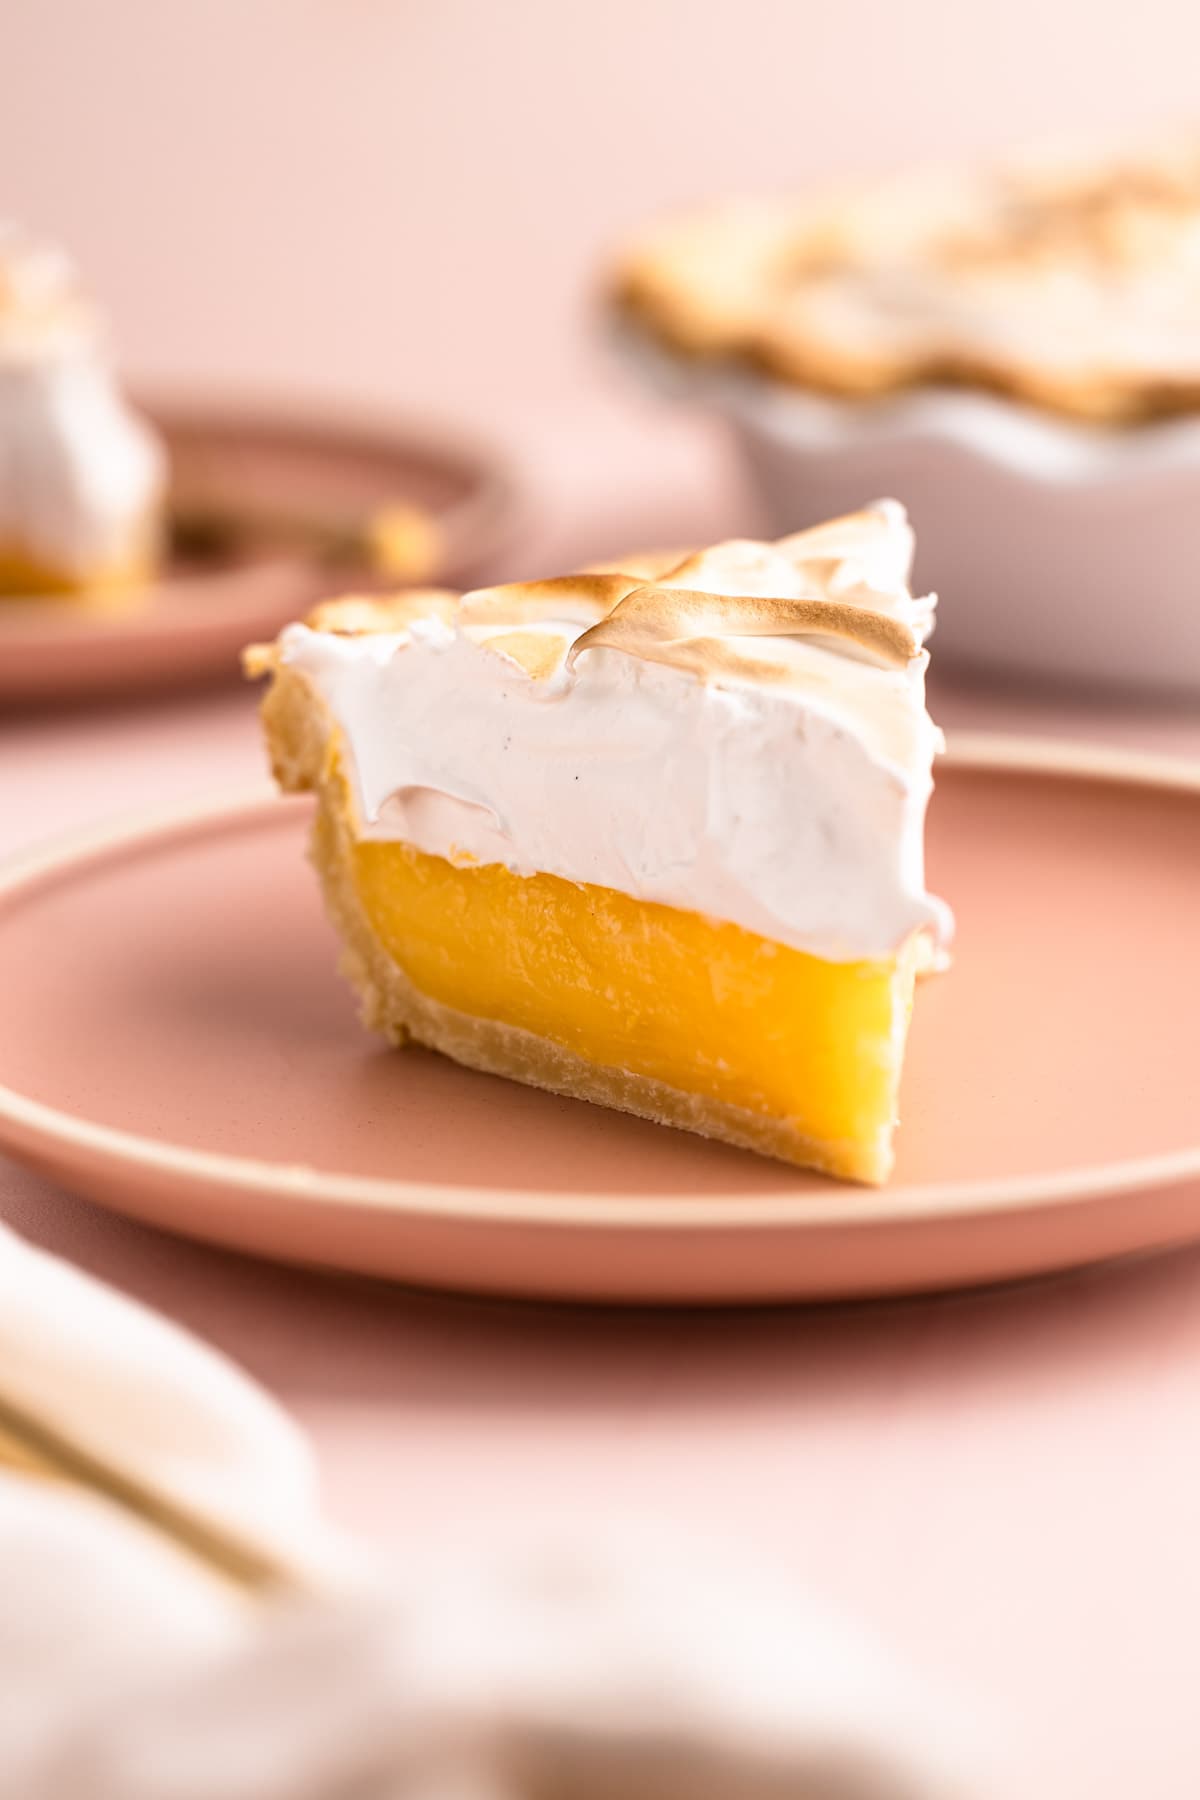
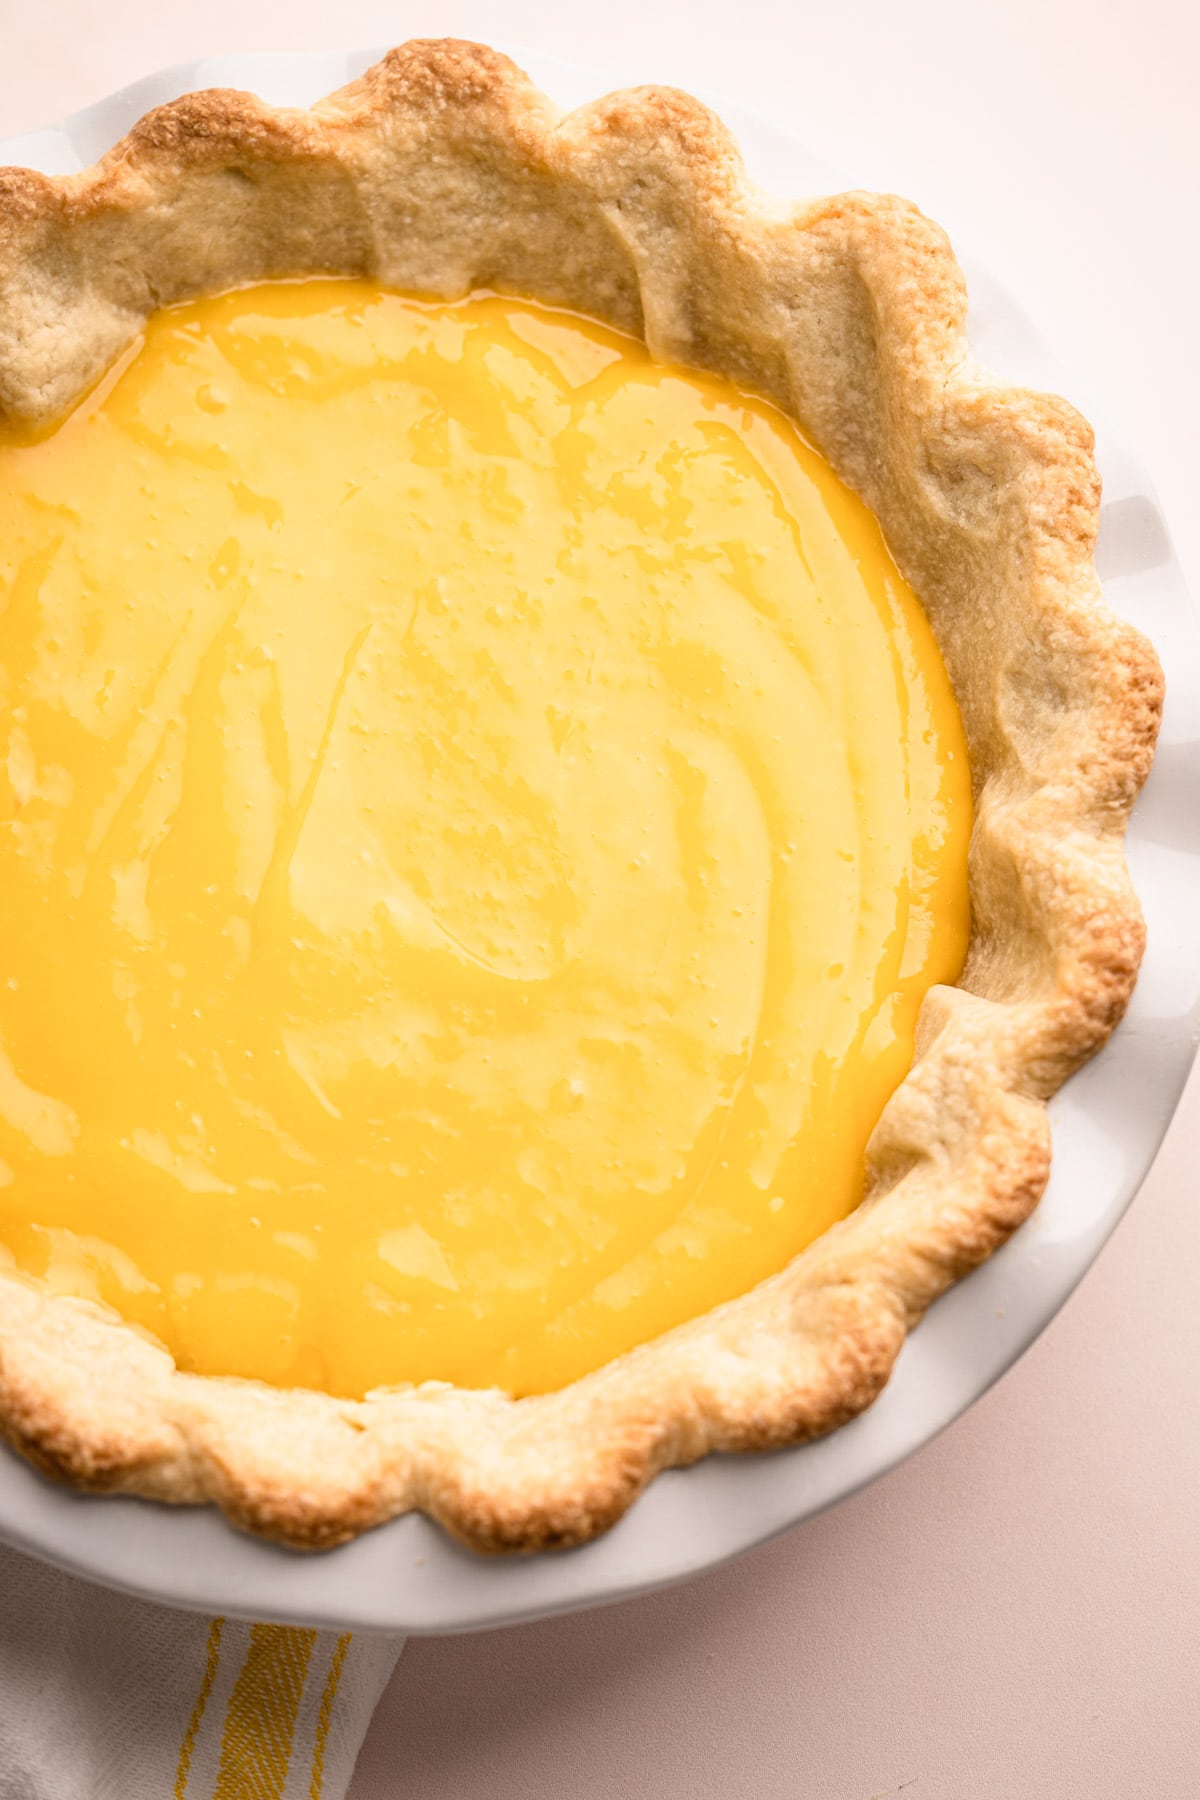
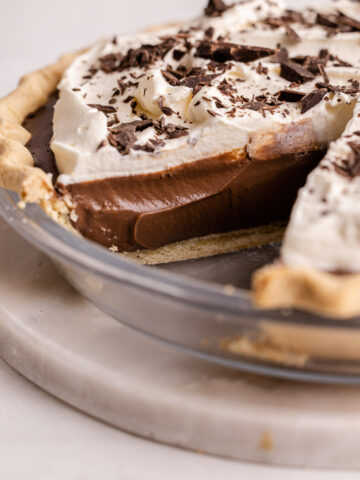
This is the best Lemon Meringue Pie recipe, with a lemon shortbread crust, a perfectly balanced, bright and vibrant lemon filling, and fluffy Swiss meringue swirled on top and lightly toasted.
Want to save this recipe?
Enter your email & I'll send it to your inbox. Plus, get weekly updates from me!
This Lemon Meringue Pie recipe is not your standard recipe. While the taste is classic, I have thrown out all the typical rules to ensure the very best flavor and texture.
And that's because I have a secret to share: before I developed this recipe, I didn't like Lemon Meringue Pie. Sure, I love lemon recipes (see: Lemon Pie Bars, Lemon Drop Cookies, Creamy No-Bake Lemon Pie and Lemon Custard Pie) but this super-popular pie that everybody seems to love never appealed to me.
All the versions I had sampled before had bland pastry, a dull, somewhat metallic lemon filling that was too gloopy, and a flavorless meringue with a weird texture. Plus, most recipes tell you to add the meringue on top of the hot lemon filling and then let the pie cool before serving, which means the meringue isn't fresh and silky anymore. That never made sense to me, since meringue is best served fresh. I just knew I had to find a better way. Finally, after countless experiments, I have fallen in love with this Lemon Meringue Pie and believe I have found the perfect recipe.
Jump to:
Why This Is the Best Lemon Meringue Pie Recipe
Whenever I see a recipe called “the best,” I always wonder: why? What makes it the best? Everyone’s version is different, so let me explain why I think this one earns the title of the best Lemon Meringue Pie Recipe
Let's start with the crust. My version has a thick, lemony shortbread pastry. It's thick so that it can hold up that hefty lemon filling and a big pile of meringue. It's buttery and crisp and super tasty.
Then, the filling. Taking a page from this Lemon Curd recipe, the lemon filling uses the zest of fresh lemons (always) and is perfectly balanced between sweet and tart. Below, I share tips on how to avoid any metallic taste in the lemon filling. In addition, my recipe has absolutely no need to temper any eggs! I'll explain more below if you want to find out why. This recipe is very different from most in that the lemon filling is made and chilled first before adding the meringue topping. This allows you to use less thickener since the lemon filling has time to firm up and chill. This also means the pie can be served right away after the meringue is put on top (which means an overall better pie).
Finally, that fluffy, silky meringue. This recipe uses a Swiss Meringue topping. To make it, you'll cook egg whites and sugar to a certain temperature before whipping them in a stand mixer. This means that it's completely safe to eat the meringue with no concern about eating raw eggs. Also, a Swiss meringue is more stable, so you don't have to worry about it weeping. We'll get into that more below.
Ingredients Needed
Here is an overview of the ingredients needed for this recipe. The full recipe is listed below in greater detail.
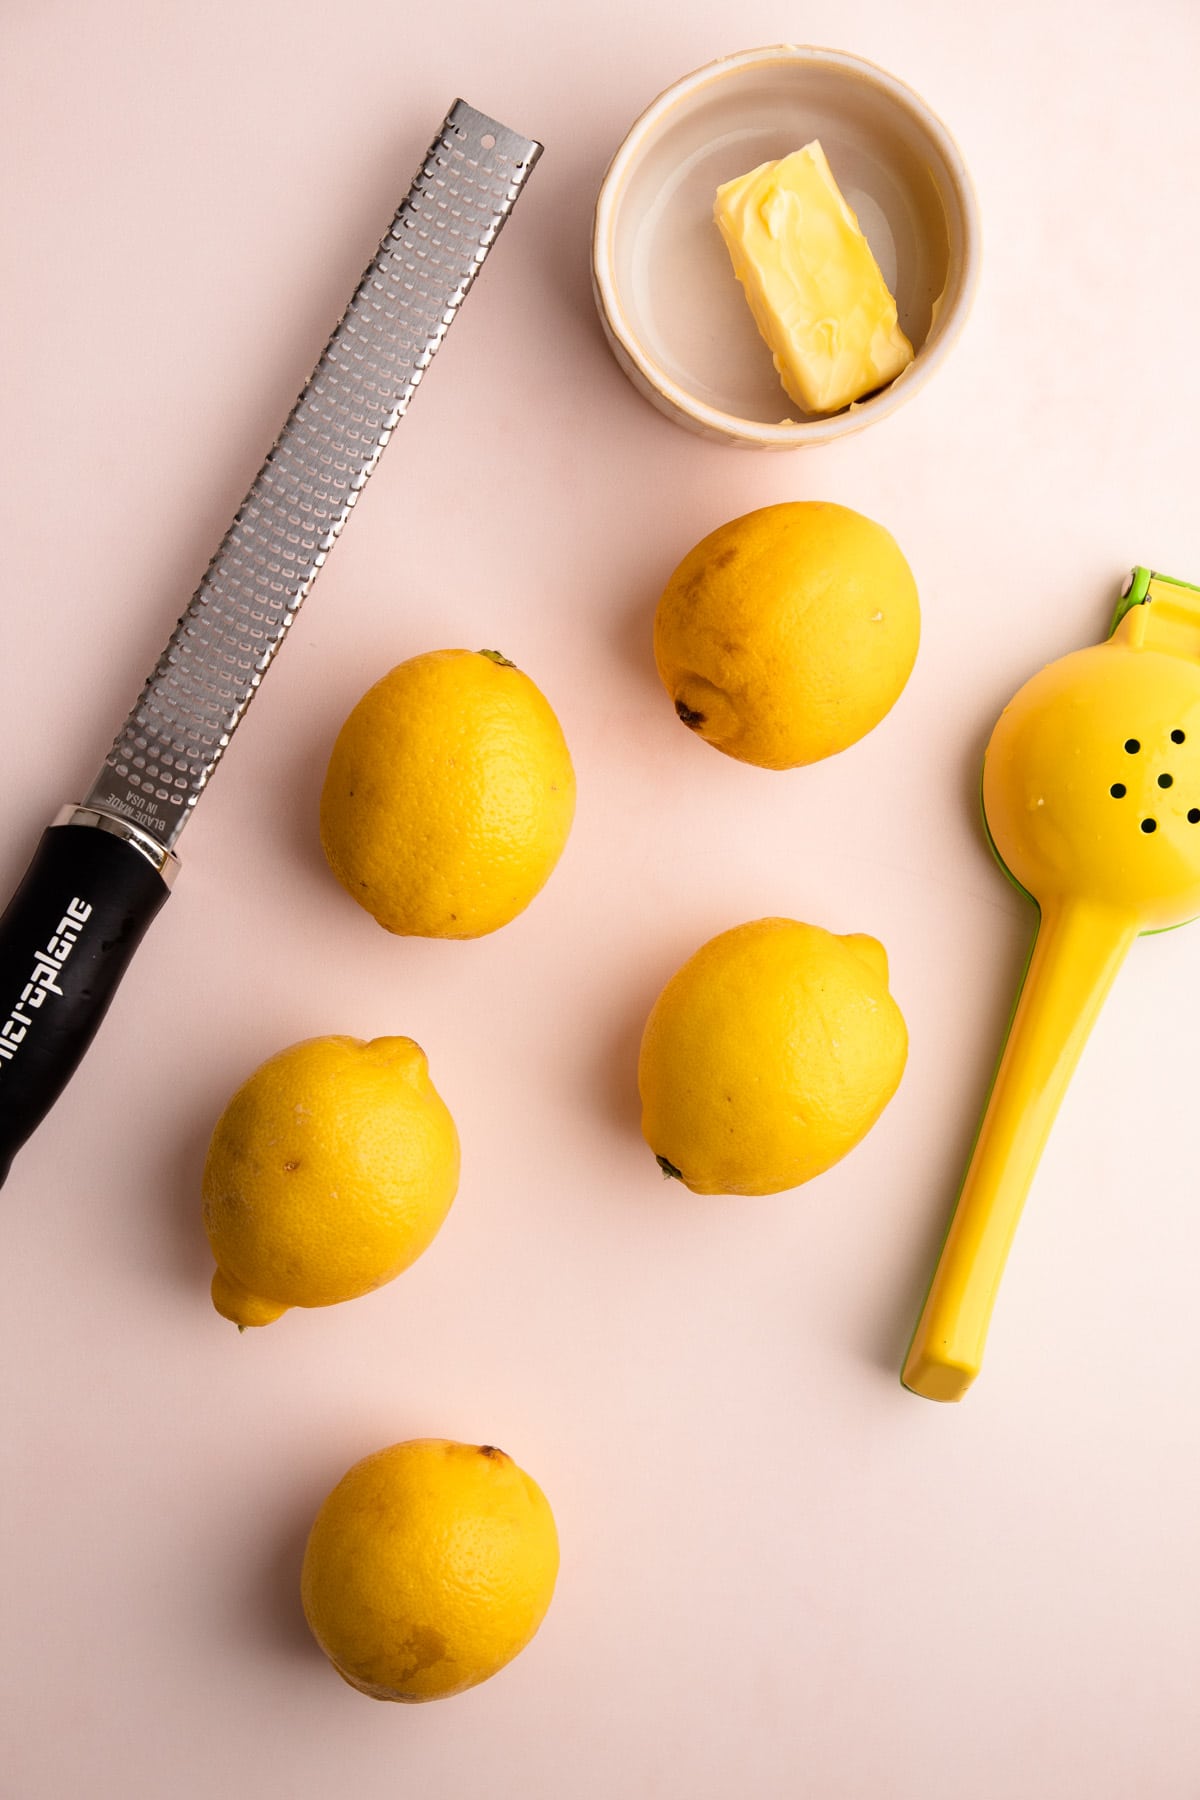
- lemons (use organic if possible since the recipe calls for the use of zest, and make sure to wash and dry them well)
- granulated sugar
- eggs
- all-purpose flour
- unsalted butter
- cream cheese (this is added to the pie crust, but can be swapped with additional butter)
- cornstarch
- cream of tartar (this is optional, but recommended especially if you've had trouble whipping up meringue in the past as it helps stabilize the egg whites)
- vanilla paste or vanilla extract
Making the Lemon Pie Crust
This pie is heavy, so it needs a sturdy crust that can support the weight of the lemon filling and the meringue. The pastry is a bit thicker than a typical pie crust; for that reason, it's a shortbread crust that has a great buttery flavor. Lemon zest is added to boost the overall lemon taste.
It's easily made in a food processor and can be prepared up to 2 days in advance. The crust does need to be fully blind-baked before the pie is filled. New to blind-baking? Check out this Blind-Baking tutorial, though the recipe below gives you all the details you need.
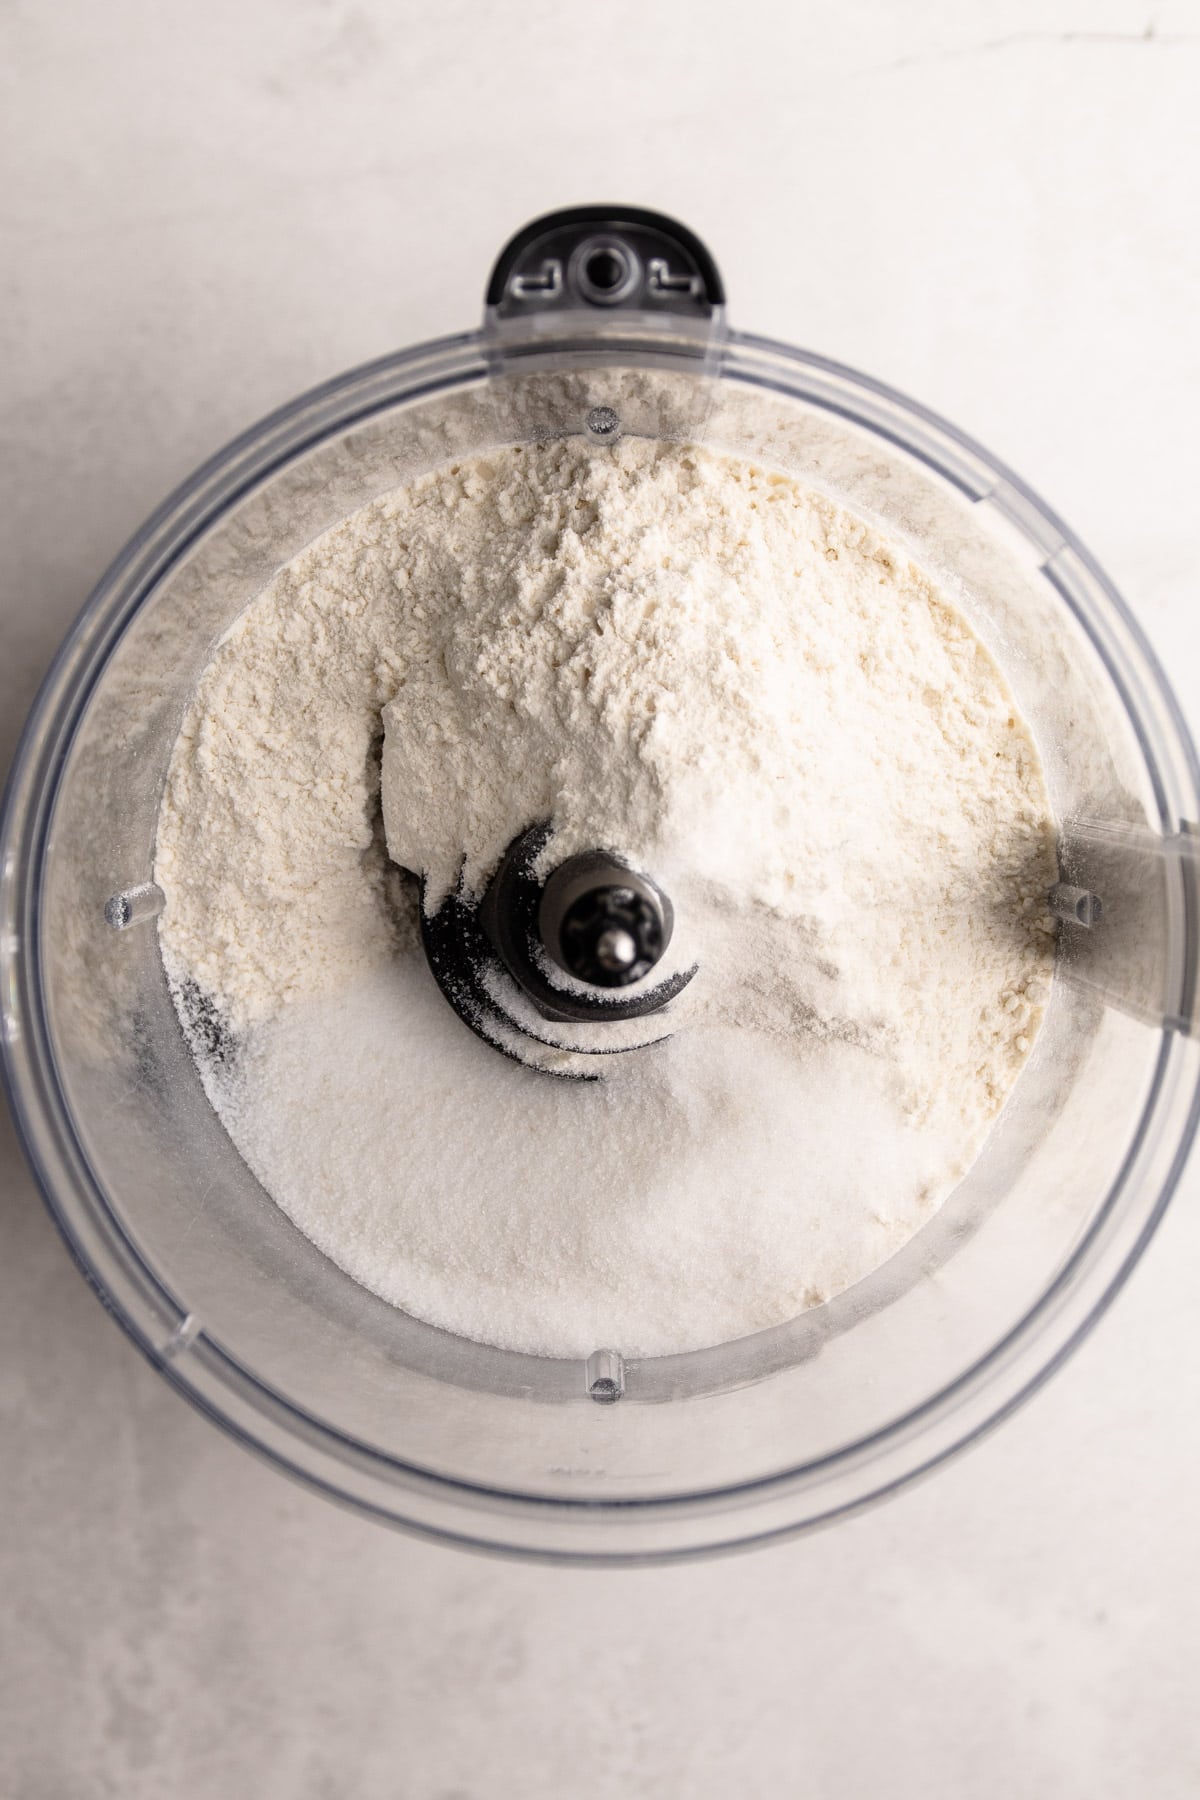
Step 1: Pulse the dry ingredients and lemon zest in a food processor.
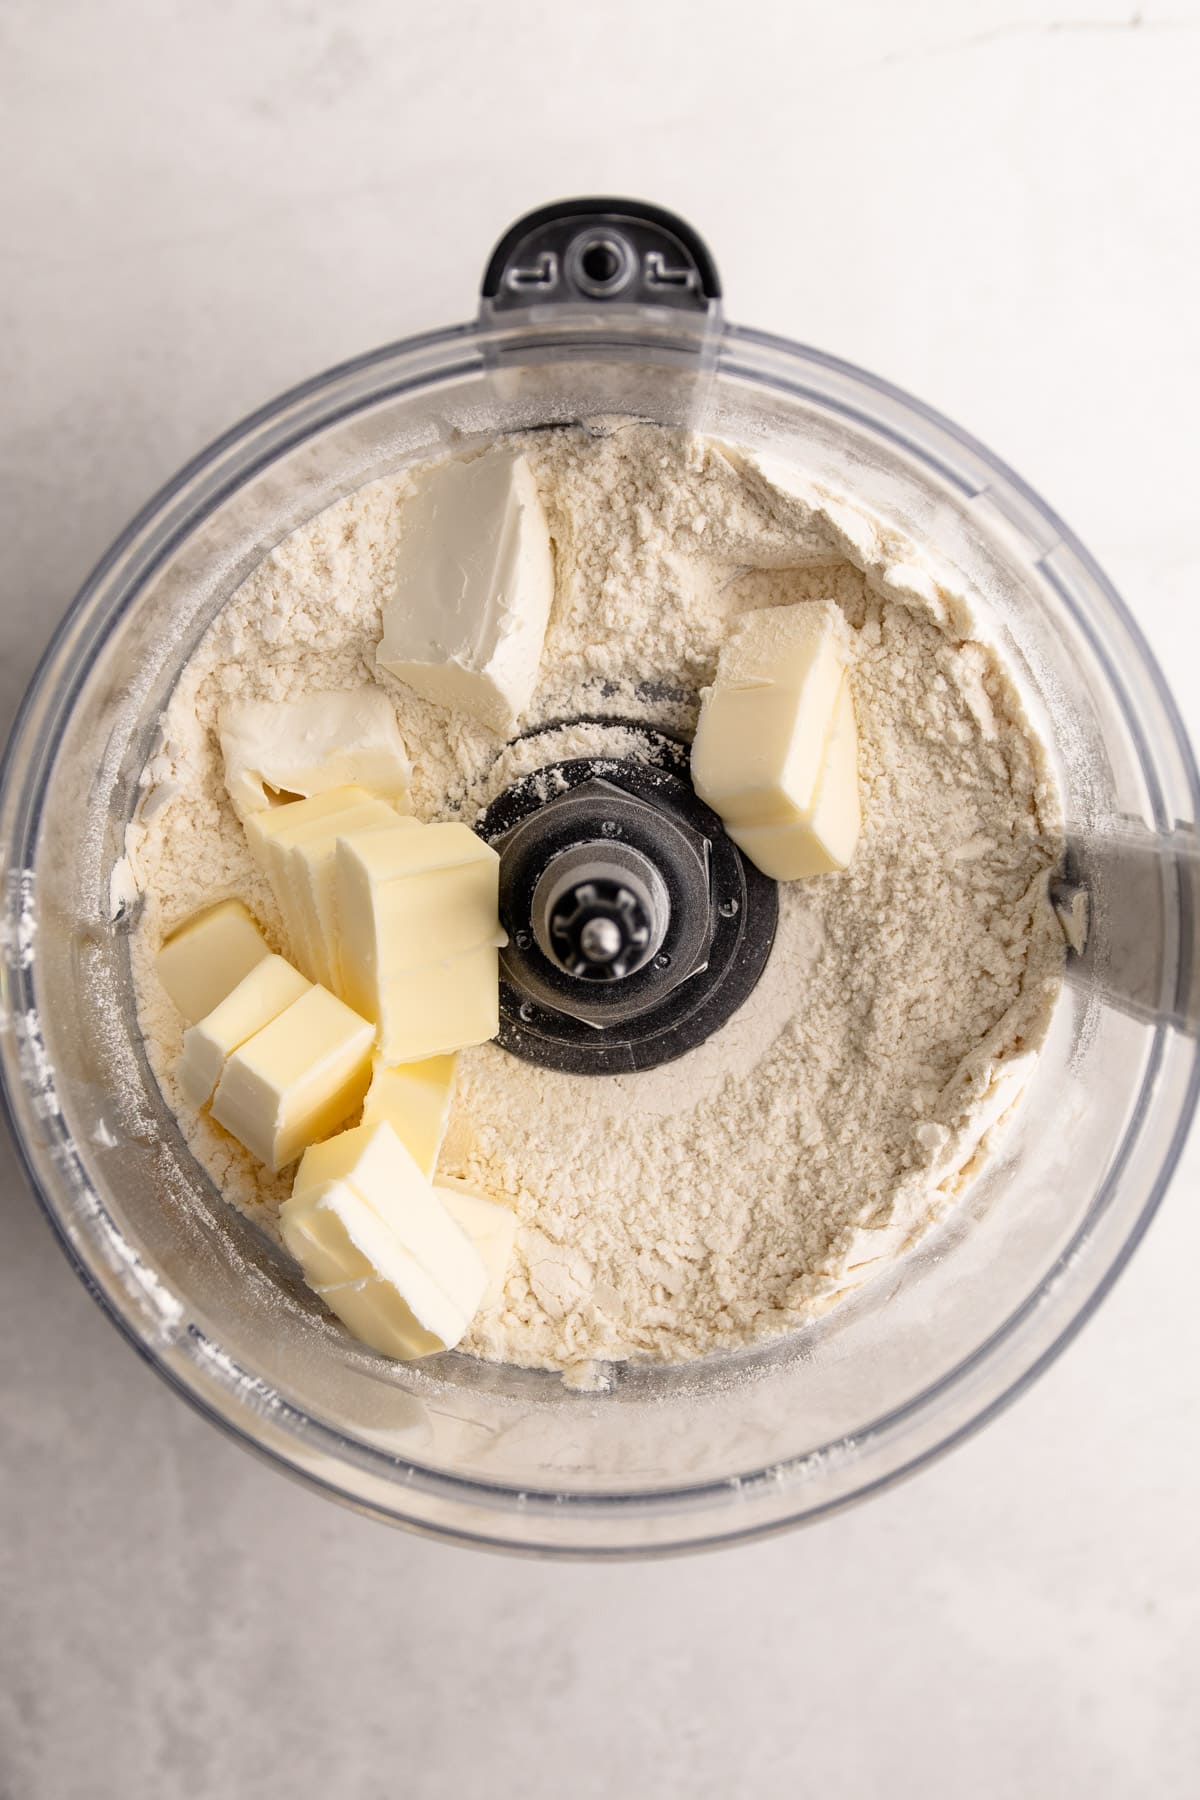
Step 2: Add in the cream cheese and butter.

Step 3: Pulse the butter into the flour until it is mostly worked in.

Step 4: Add in the water and pulse until the dough comes together around the blade, then stop.

Step 5: Chill the pie crust for 30 minutes, then roll out and shape it into a pie shell in a 9-inch pie plate.
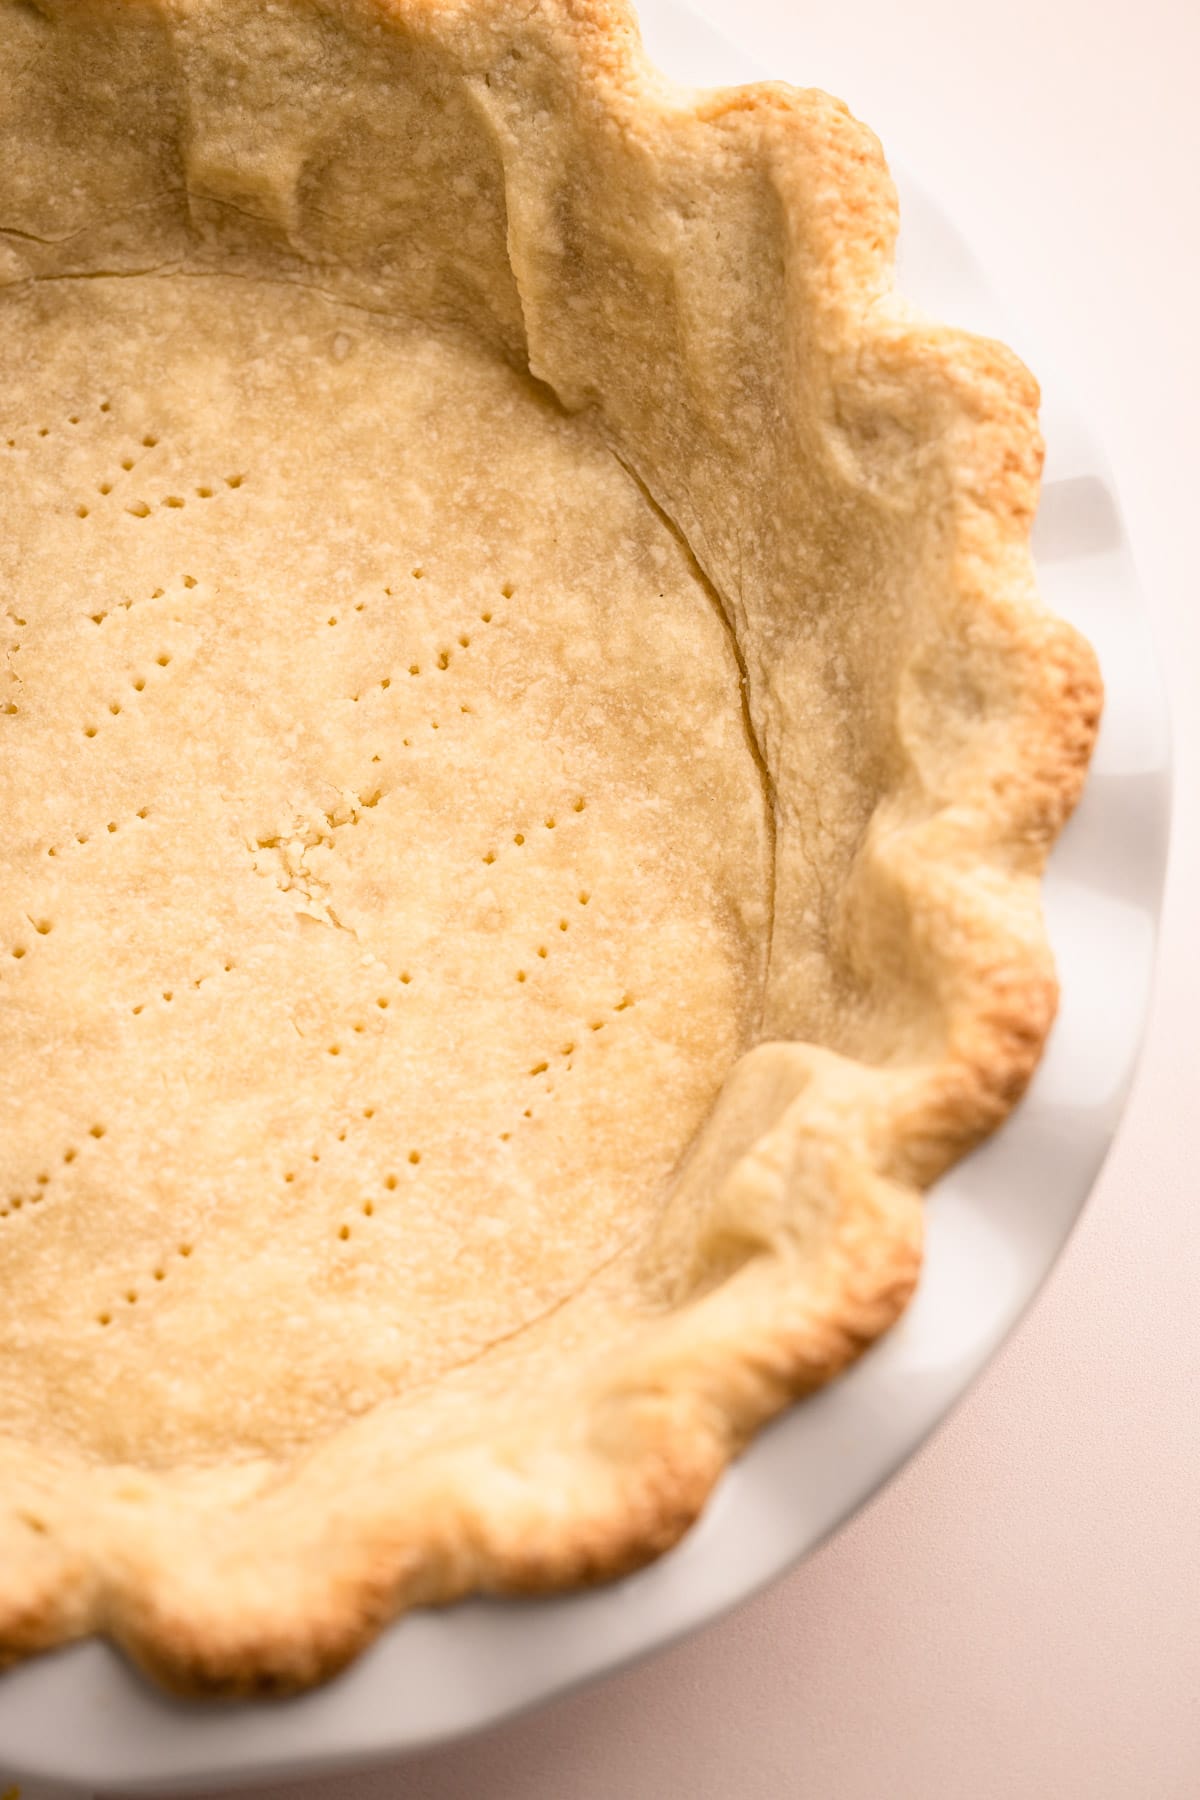
Step 6: Blind-bake it until fully cooked through.
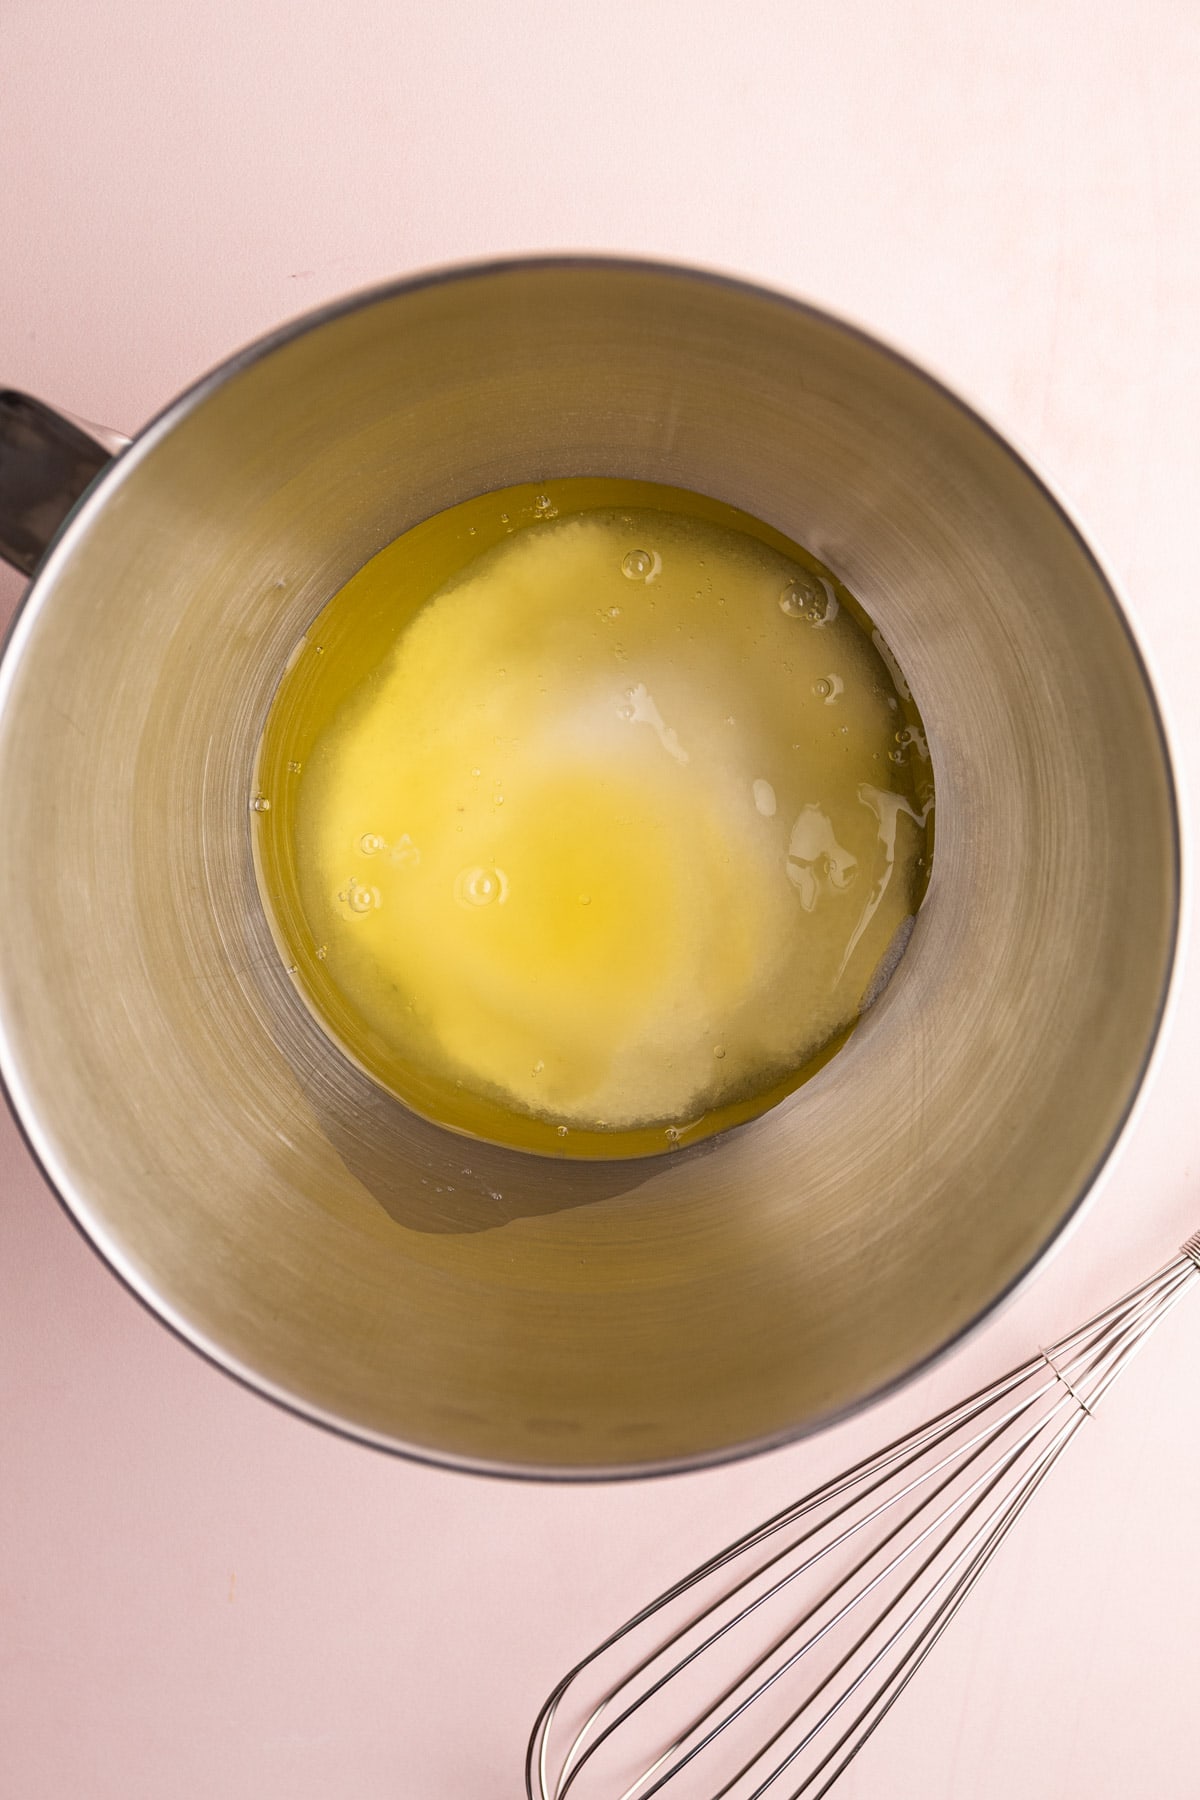
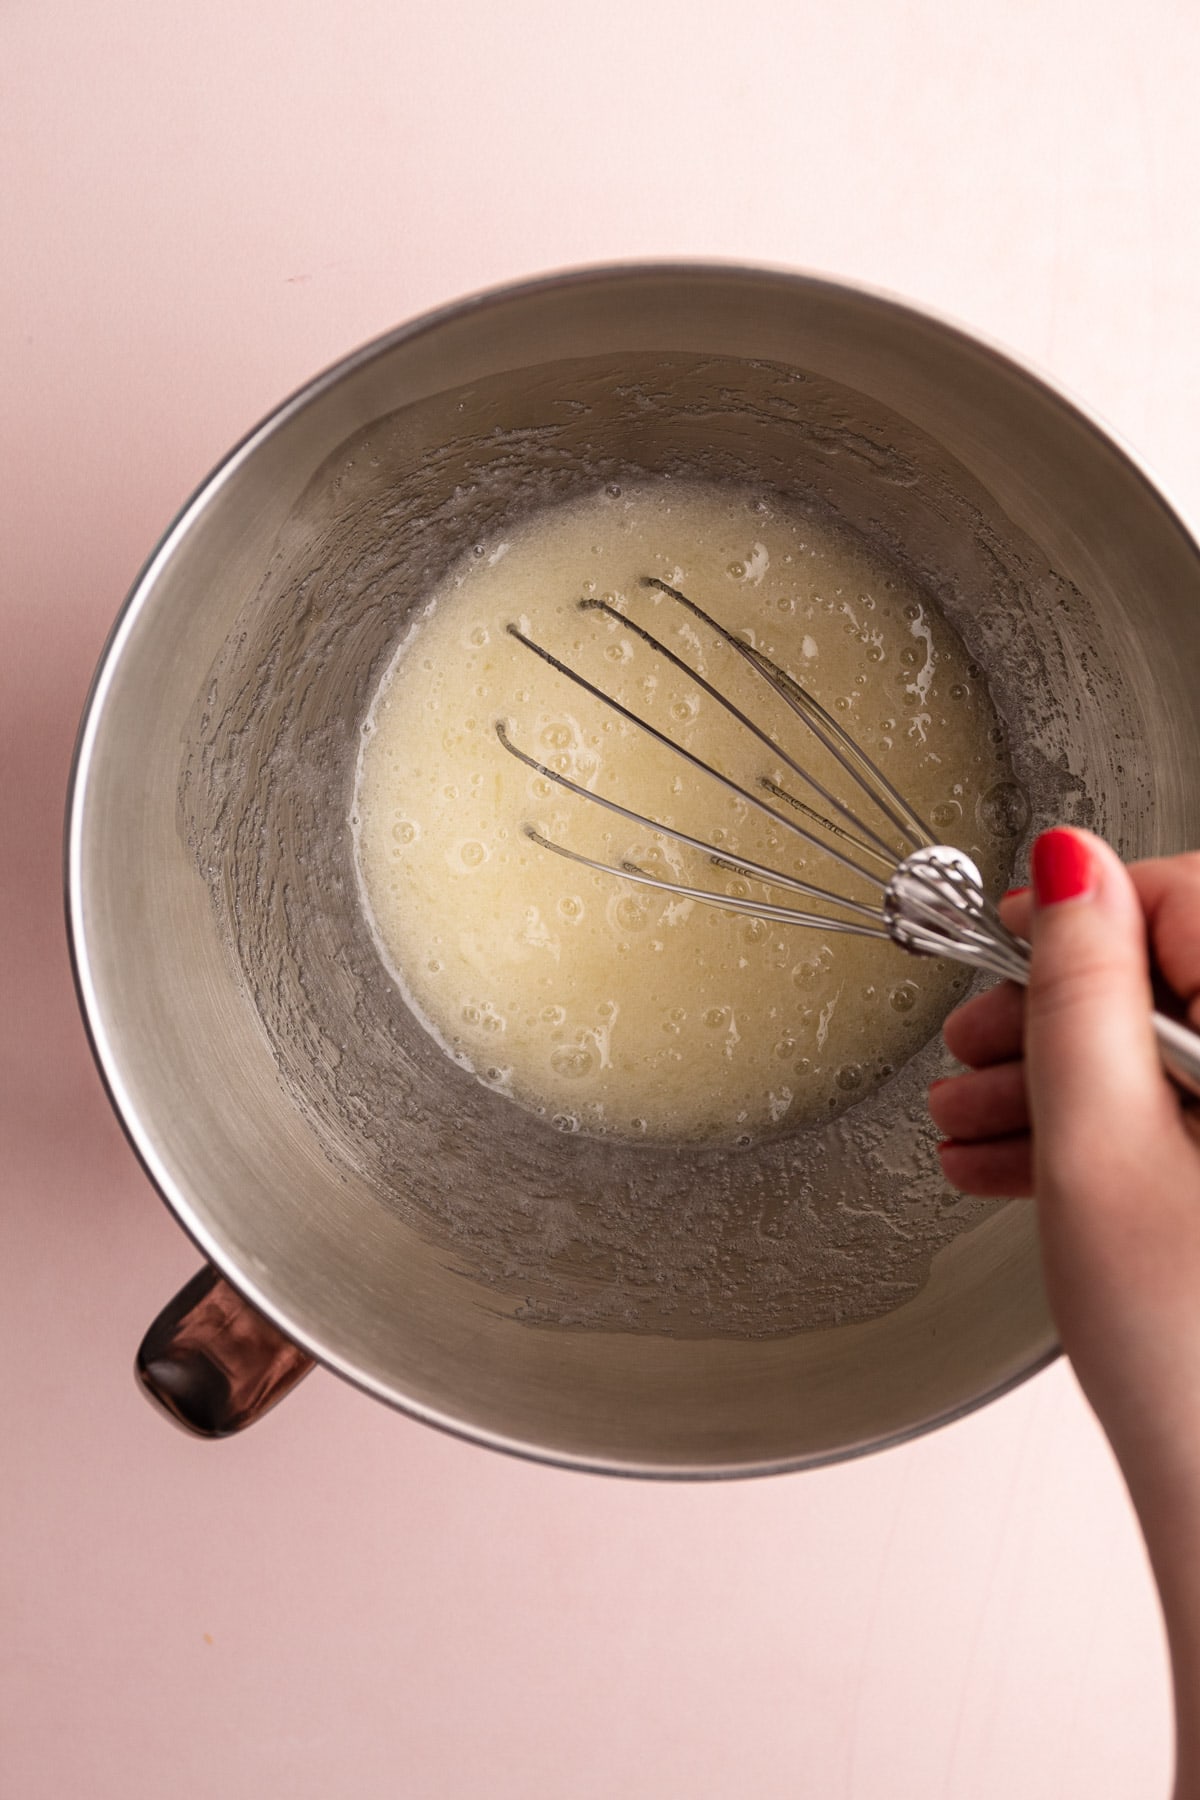
Making the Lemon Filling
The filling is essentially lemon pudding. My pudding recipes almost always skip the unnecessary and annoying step of tempering the eggs. However, I do call for straining the cooked lemon filling, which removes any bits of egg whites that tend to hang onto the egg yolks (these are protein strands called chalazae).
Here is an overview of the process:

Step 1: Separate the eggs, ensuring no yolks get in the whites.
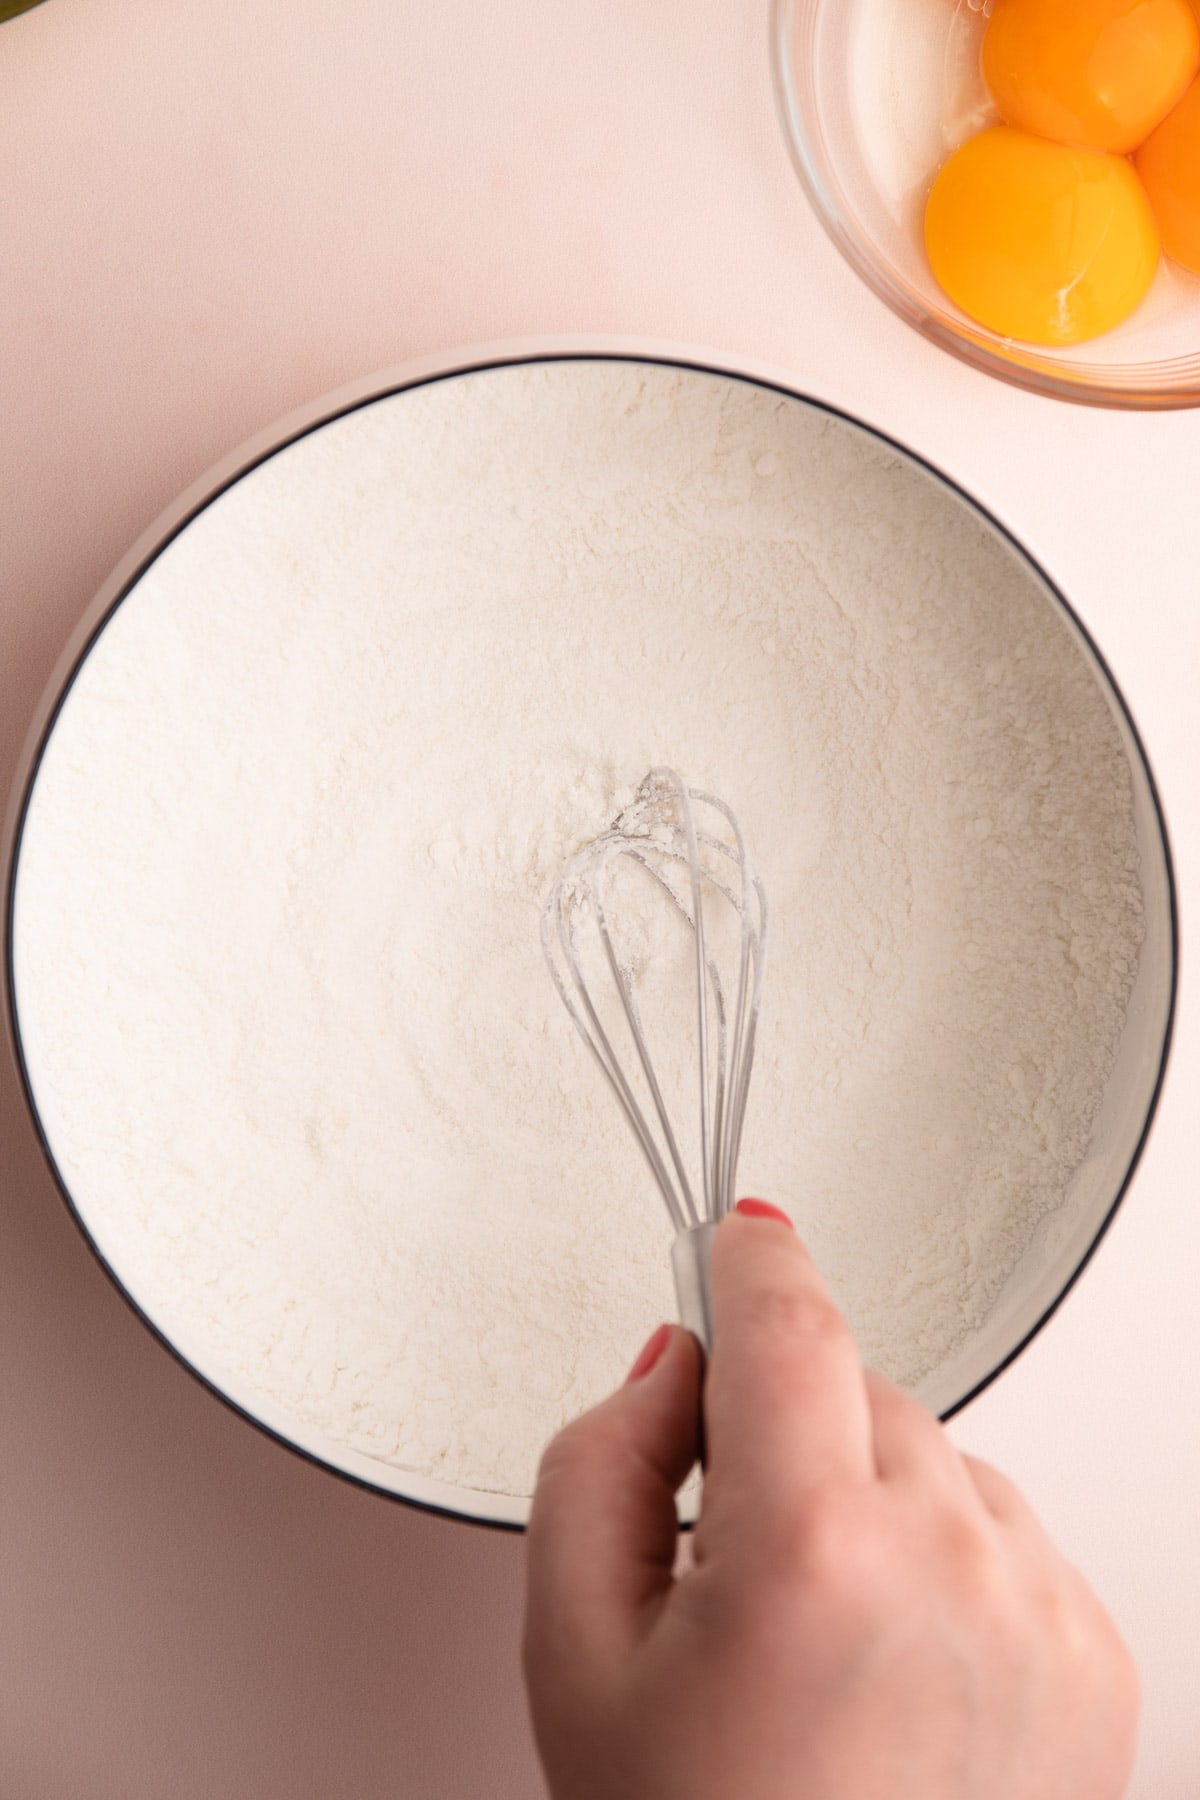
Step 2: Whisk together the dry ingredients.

Step 3: Add in the egg yolks to combine.

Step 4: Then whisk in the remaining liquid ingredients.
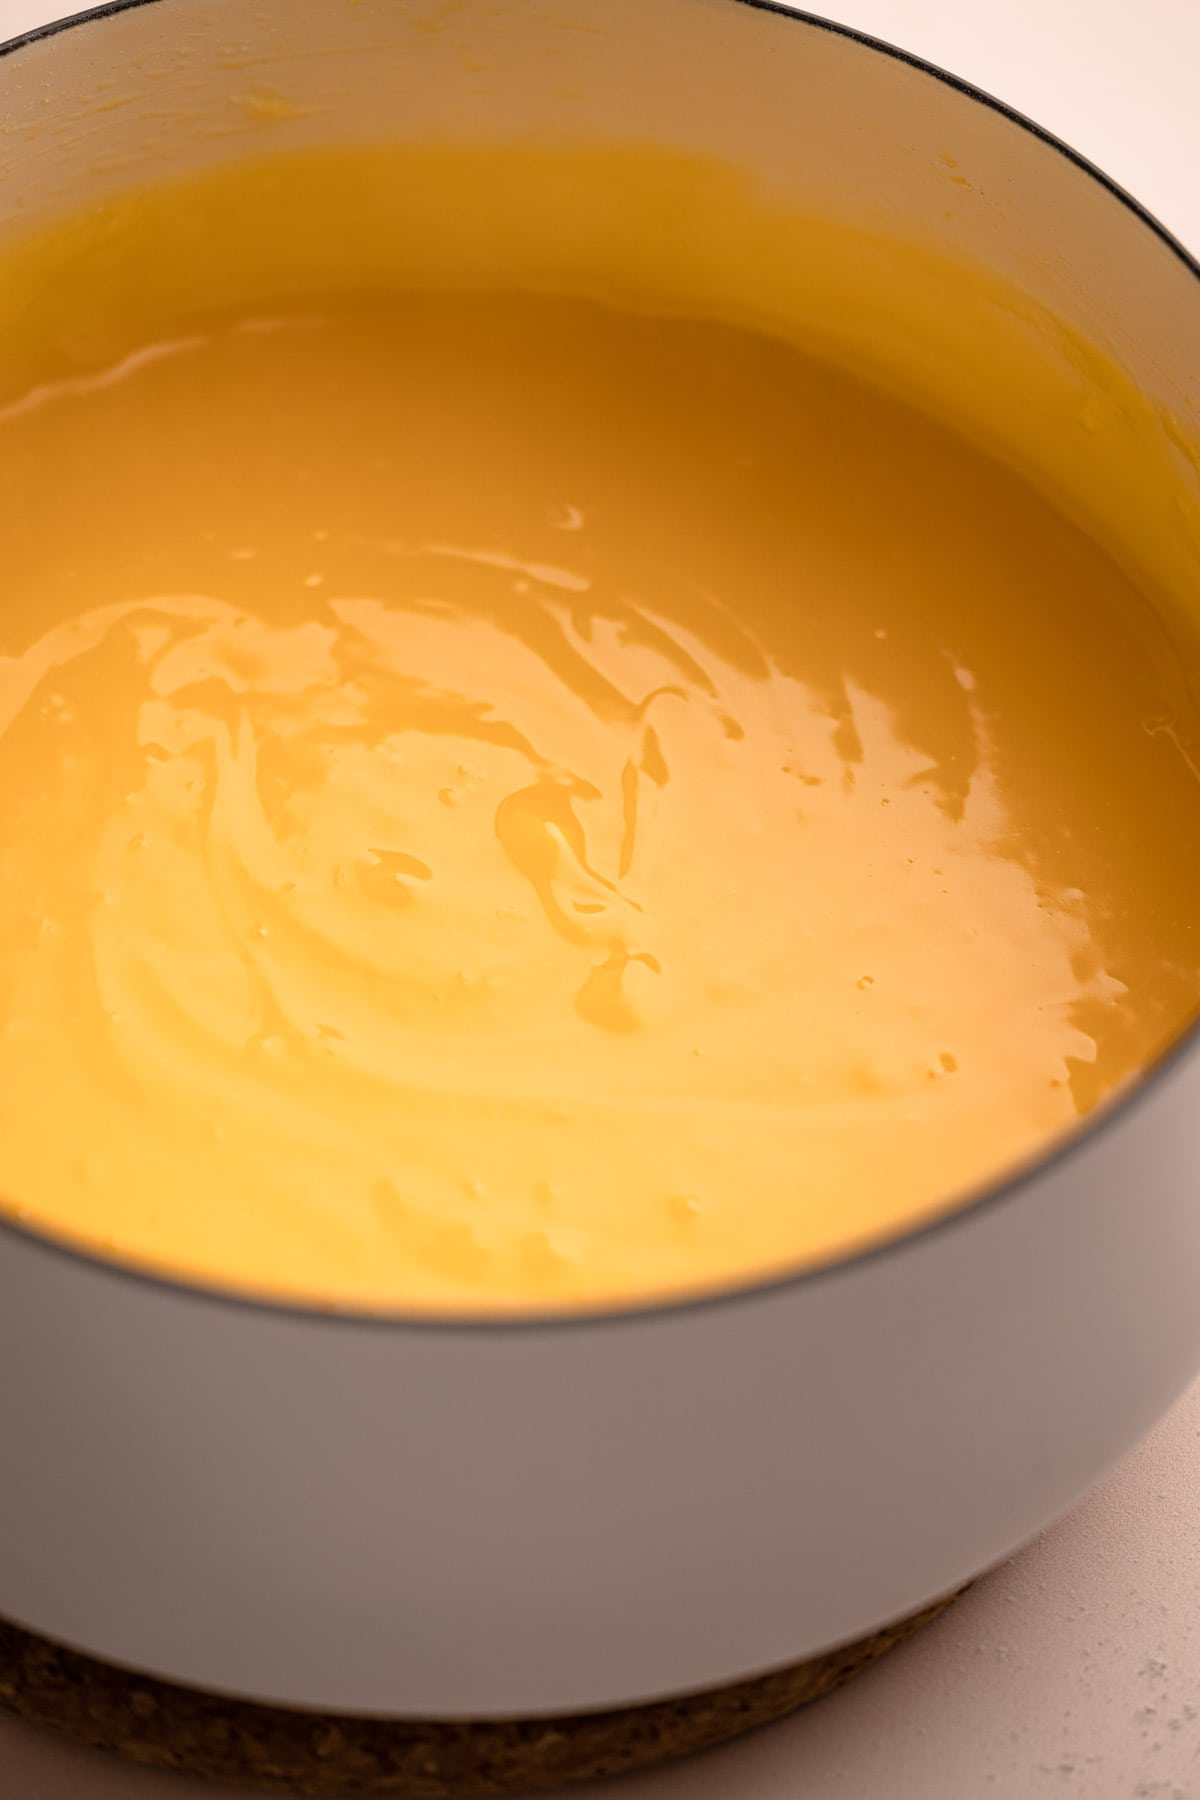
Step 3: Cook over medium heat until the lemon filling is bubbling. Strain, then whisk in the butter and zest.
Step 4: Transfer the lemon filling to the prepared pie crust to set up.
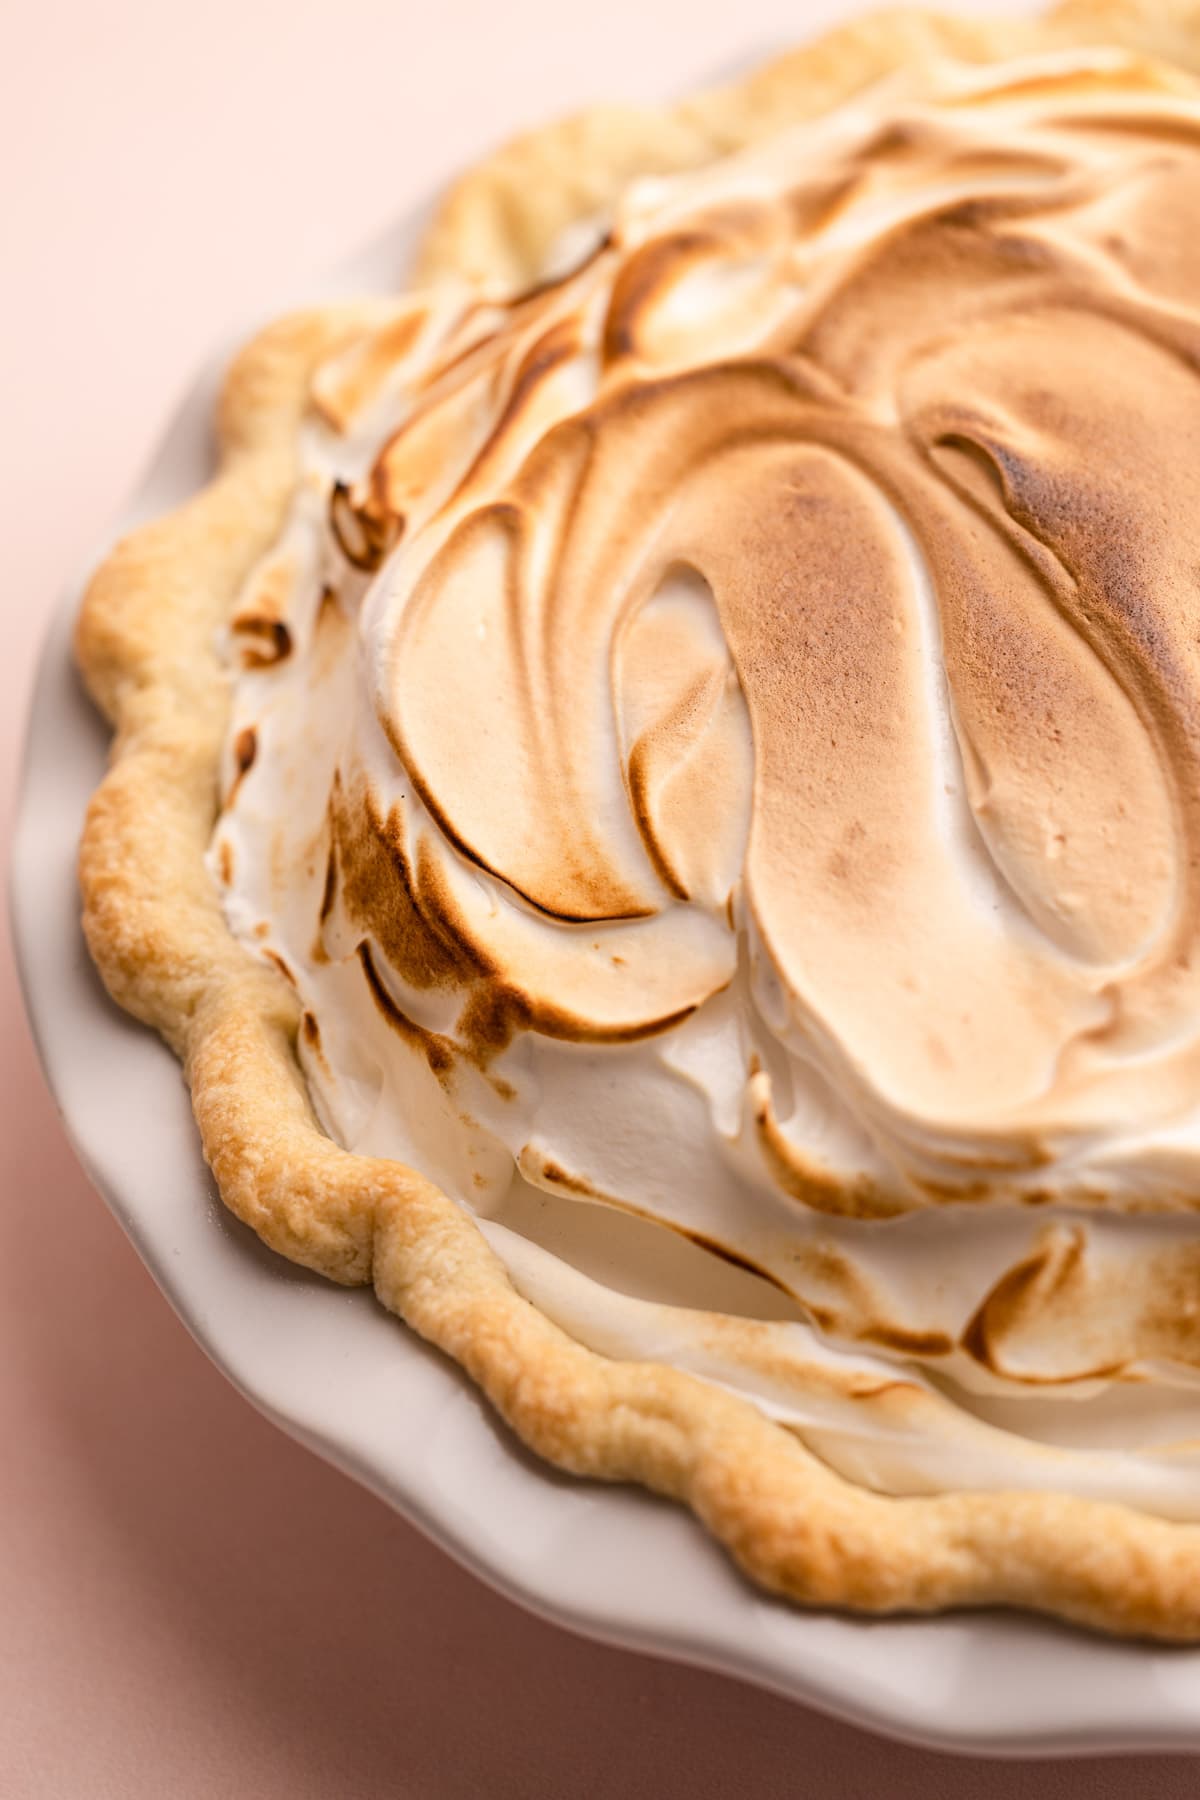
Let's Talk About the Meringue
One of the biggest problems people have when making the meringue in a Lemon Meringue Pie is that it weeps, or doesn't keep its silky texture. This tends to happen because most recipes call for a French-style meringue (made with raw egg whites) that is placed on top of a hot filling and then broiled or baked in the oven. Yet, those recipes also instruct you to wait for the lemon filling to chill and set up before serving the pie. This means the meringue isn't served fresh (when it's at its absolute best).
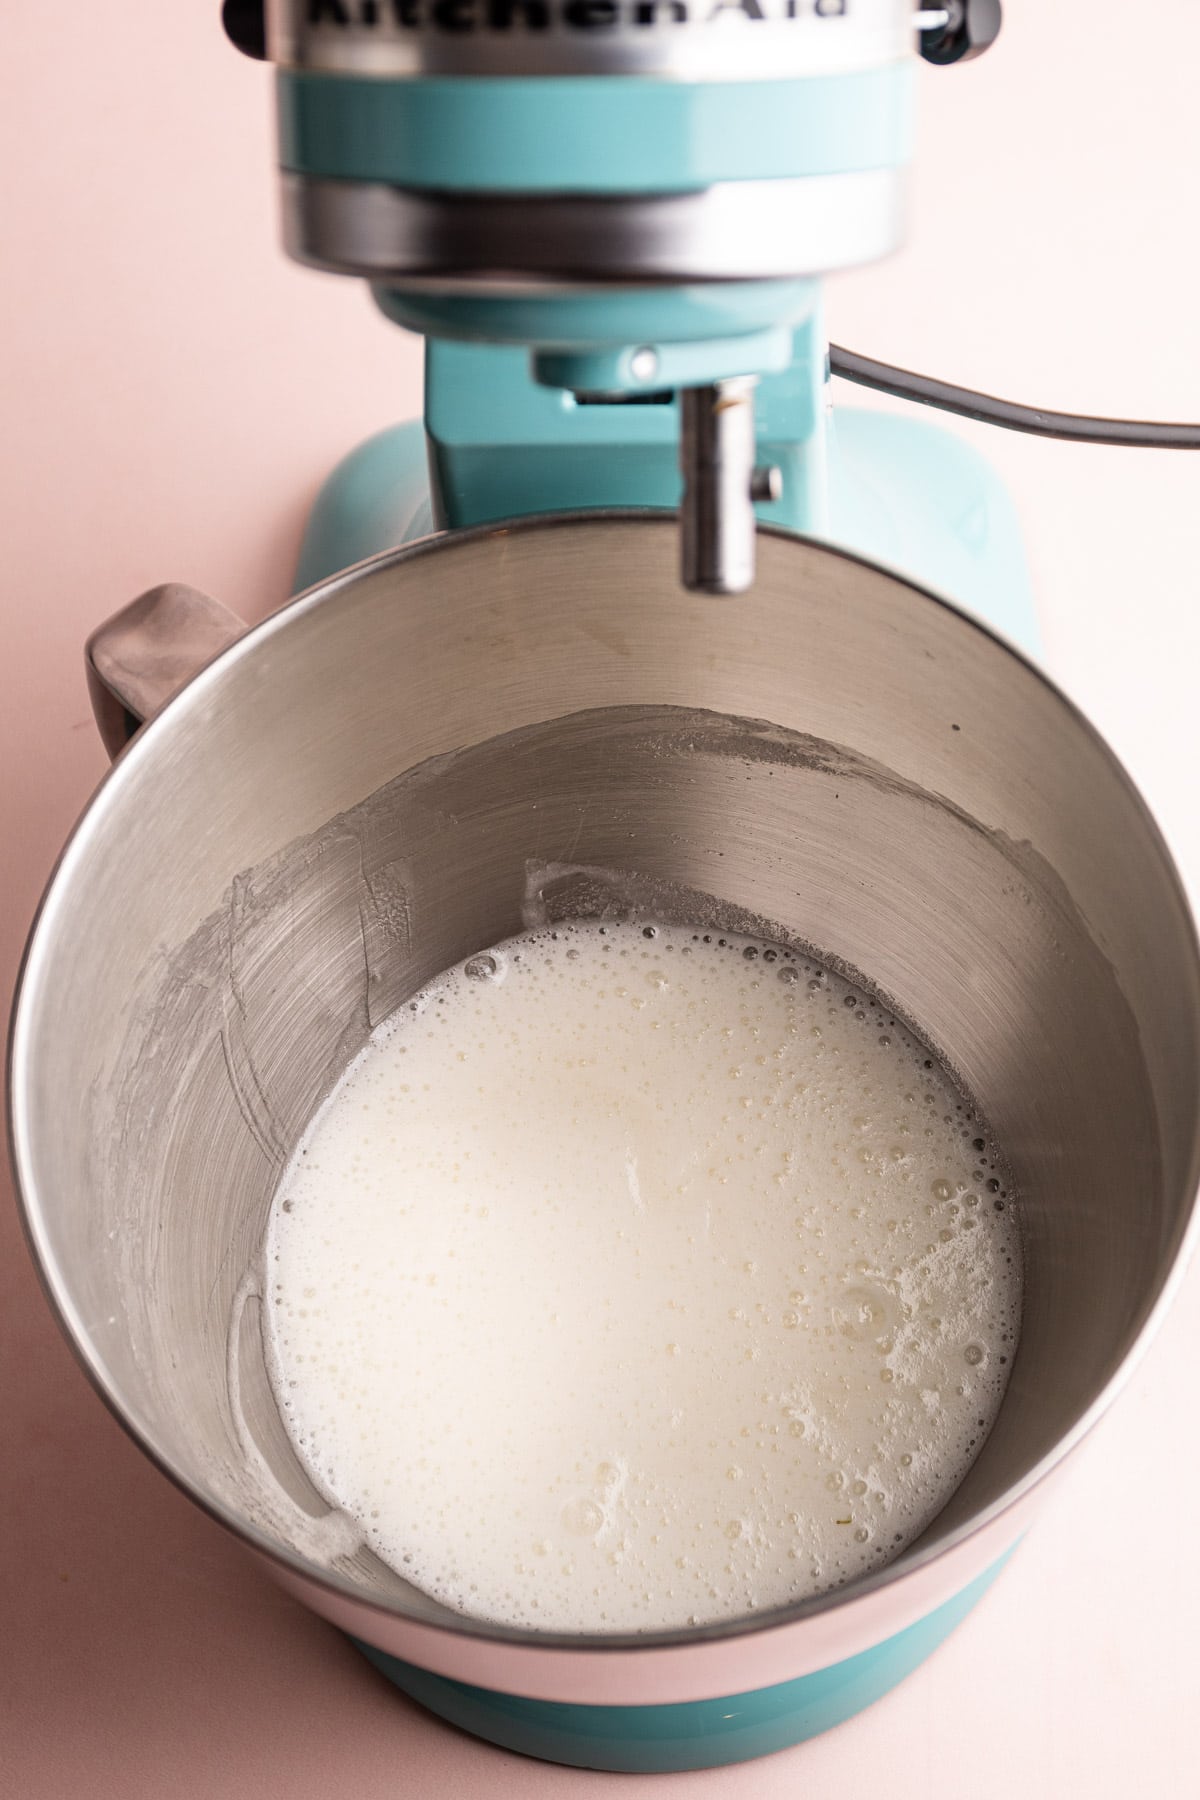
Well, I'm flipping the script completely by switching up the meringue method and the assembly instructions. This recipe uses cooked Swiss Meringue instead of French for a more delicious, more stable, and safer meringue.
The Swiss method is made by cooking egg whites and sugar together over a double boiler until the mixture reaches 160ºF, or until it has thickened and all the sugar has dissolved. Then, the mixture is beaten with an electric mixer until light and fluffy. The egg whites are cooked through and safe to consume as-is, and the resulting meringue has a thick, glossy texture that is completely unmatched.
To cook the egg whites, you will need to set up a double boiler. This involves filling a pot with water to create a steam bath that will gently cook the egg whites in a bowl set on top of the pot. For this, I use the bowl for my stand mixer and place it on top of a small pot. A small pot is the best option, as it heats only the bottom of the bowl rather than the sides, which helps prevent the sugar from crystallizing.
Step 1: Add the egg whites and sugar to a double boiler.
Step 2: Cook the egg whites, whisking constantly, until they reach 160ºF.
Step 3: Remove the egg whites from the heat and set the bowl into an electric mixer.
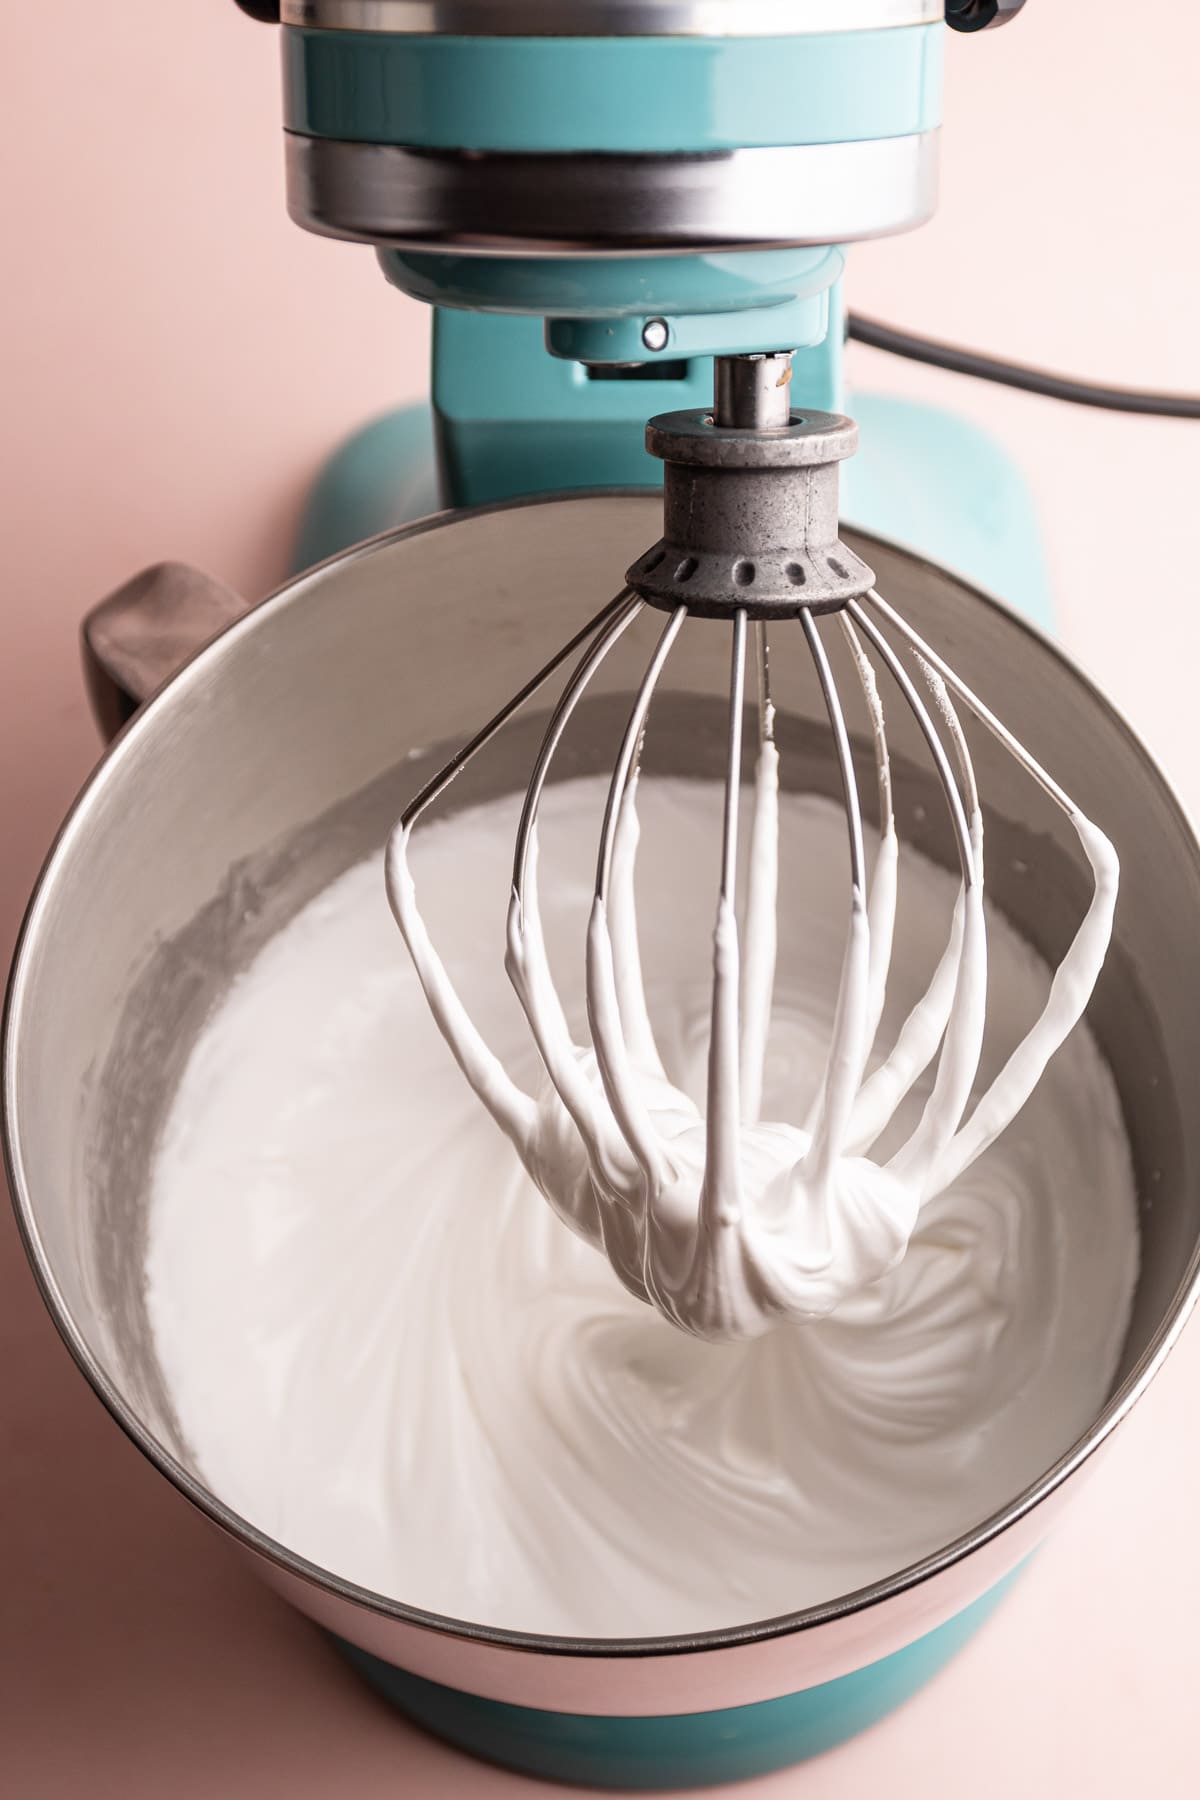
Step 4: Add in the cream of tartar as the egg whites are slowly whipped up until stiff and glossy.
Want more in-depth knowledge about Swiss meringue? Head to my extensive Guide to Making Swiss Meringue.
Once your meringue is made, it's time to add it to the completely cooled lemon pie.
Serving Lemon Meringue Pie
This pie is best served on the same day that the meringue is made. However, the lemon filling can be poured into the baked pie crust and refrigerated up to one day ahead. It can last a little longer than that, but it's best to let it sit for no more than a day.
You can toast the meringue under the broiler (just make sure to watch it closely) or with a kitchen torch. This recipe uses Swiss meringue, which, if properly made, will stay stable for at least a few hours. The longest I've had a Lemon Meringue pie in my refrigerator was about three days before it started to weep. So, leftovers can be kept for a few days.

Kelli's Top Tips
- Use your hands to separate the eggs: it's not only the easiest way to separate the eggs, but also the best way to ensure no traces of egg yolk get into the egg whites. Egg yolk streaks in the egg whites can prevent them from whipping up.
- Clean your mixing bowl and whisk attachment well: Whenever making a meringue, I always rewash my bowl and whisk with hot, soapy water by hand. I dry it and then wipe it down with a thin coating of white vinegar. This ensures there are no leftover spots of fat lingering, which can prevent the meringue from whipping up properly.
- Use an instant read thermometer: The egg whites need to be cooked to a temperature of about 160ºF to ensure the egg whites are safe to eat. This temperature also makes the meringue more stable. An instant-read thermometer reads the temperature quickly and accurately.
- Don't let the egg yolks and sugar sit together for too long: Sugar can coagulate egg yolks. If this happens accidentally, straining them at the end can help fix it, but it's better to avoid it altogether.
- Don’t walk away from the lemon filling. It takes no more than 10 minutes to cook. Also, it’s incredibly important to stir almost constantly to ensure that no egg yolks stick to the bottom of the pot and scramble.
More Classic Pie Recipes

Did you make the recipe?
I am so honored when you make a recipe from Everyday Pie! If you make this Lemon Meringue Pie recipe, please leave a star ⭐️⭐️⭐️⭐️⭐️ rating with your experience! If you have any questions about this recipe outside of what is covered in the article, please comment below and I'll respond as soon as I'm able.
Full Recipe
Lemon Meringue Pie

This Lemon Meringue Pie has a lemon-scented shortbread pastry, a balanced and bright lemon filling and the fluffiest swiss meringue top. Make this once, and you'll find your forever Lemon Meringue Pie recipe.
- Prep Time: 00:25
- Cook Time: 00:50
- Total Time: 1 hour 15 minutes
- Yield: 8 servings
- Category: Sweet Pie
Ingredients
For Pie Crust:
- 1-¾ cups (210 grams) all-purpose flour, plus extra for work surface
- 2 tablespoons (24 grams) granulated sugar
- 1 tablespoon grated lemon zest (see note)
- Pinch coarse kosher salt
- 8 tablespoons (115 grams) cold unsalted butter, diced
- 2 tablespoons (25 grams) cream cheese, cold
- ⅓ cup (75 grams) cold water
For Lemon Pie Filling:
- 1 cup (200 grams) granulated sugar (see notes)
- ¼ cup (28 grams) cornstarch
- Pinch coarse kosher salt
- 5 large egg yolks
- 1-¼ cups (280 grams) water
- ¾ cup (170 grams) fresh-squeezed lemon juice ( 5-6 lemons)
- 4 tablespoons (65 grams) unsalted butter, cold, diced into pieces
- 1 tablespoon grated lemon zest
For Meringue:
- 5 large egg whites
- 1 cup (200 grams) granulated sugar
- Pinch coarse kosher salt
- ¼ teaspoon cream of tartar
- ½ teaspoon vanilla bean paste or 1 teaspoon vanilla extract
Instructions
Prepare the Pie Crust:
- Add the flour, sugar, lemon zest, and salt to the bowl of a food processor. Pulse until well combined. Add in the butter and cream cheese and pulse 5 to 7 times, or until the butter is broken down into tiny pebbles.
- With the processor running, add in the water and let the dough process until it forms a cohesive ball around the blade, about 1 minute.
- Remove the dough from the processor. You can roll it out now or roll it out later, just chill it in the refrigerator for at least 30 minutes and up to 2 days.
- On a well-floured work surface, roll out the pie dough to an 11-inch circle. Fit the pastry into a 9-inch pie plate, making sure to press the pastry into the sides and the bottom. Crimp the edges as desired.. Prick the bottom of the dough all over with a fork. Place the pie shell in the freezer while the oven preheats, at least 15 minutes.
- Preheat the oven to 375ºF.
- Once chilled, line the pie shell with a round piece of parchment paper, then add pie weights (I recommend dry rice, beans, or lentils), pushing the pie weights to the edges.
- Bake the crust for 20 minutes, then remove it from the oven and carefully remove the parchment and pie weights. Return the empty pie shell back to the oven to continue to bake for an additional 10 to 12 minutes, or until the pastry is fully cooked through. Set aside until ready to use.
Make the Lemon Filling:
- In a medium enameled or stainless steel pot, whisk together the sugar, cornstarch, and salt. Whisk in the egg yolks, water, and lemon juice until fully combined. Turn on the heat to medium and cook, whisking constantly and occasionally using a rubber spatula to scrape up any thickened lemon filling from the edges of the pot, until the filling has completely thickened and large bubbles are forming and popping, about 8 minutes.
- Remove from the heat and immediately pour through a fine-mesh nylon or stainless steel strainer into a bowl, using the spatula to push all the filling through the strainer while leaving behind any bits of cooked egg. Whisk in the butter and lemon zest until fully combined.
- Pour the filling into the prepared pie crust and smooth over the top. Let cool to room temperature before chilling in the refrigerator for at least 3 hours or overnight.
Make the Meringue:
- Fill a small, sturdy pot with at least 1 ½ inches of water and turn on the heat to medium-high. This is the bottom of your makeshift double boiler.
- In a heatproof bowl (the metal bowl from your electric mixer is perfect here), combine the egg whites, sugar, salt, and cream of tartar. Whisk together until fully combined.
- Set the bowl over the pot of steaming water. Alternate between whisking the mixture and scraping down the sides of the bowl with a rubber spatula until the egg whites reach a temperature at 160°F and all the sugar has dissolved, roughly between 8 and 10 minutes (see note for troubleshooting). .
- Remove the mixture from the heat and attach the bowl to an electric stand mixer fitted with the whisk attachment. Turn the mixer on at the lowest speed, then gradually increase the speed until it reaches medium-high. With the mixer running, add in the vanilla.
- Whip until the meringue is glossy and begins to pull away from the sides of the bowl, about 8 minutes. It should have stiff peaks and should be cooled down significantly.
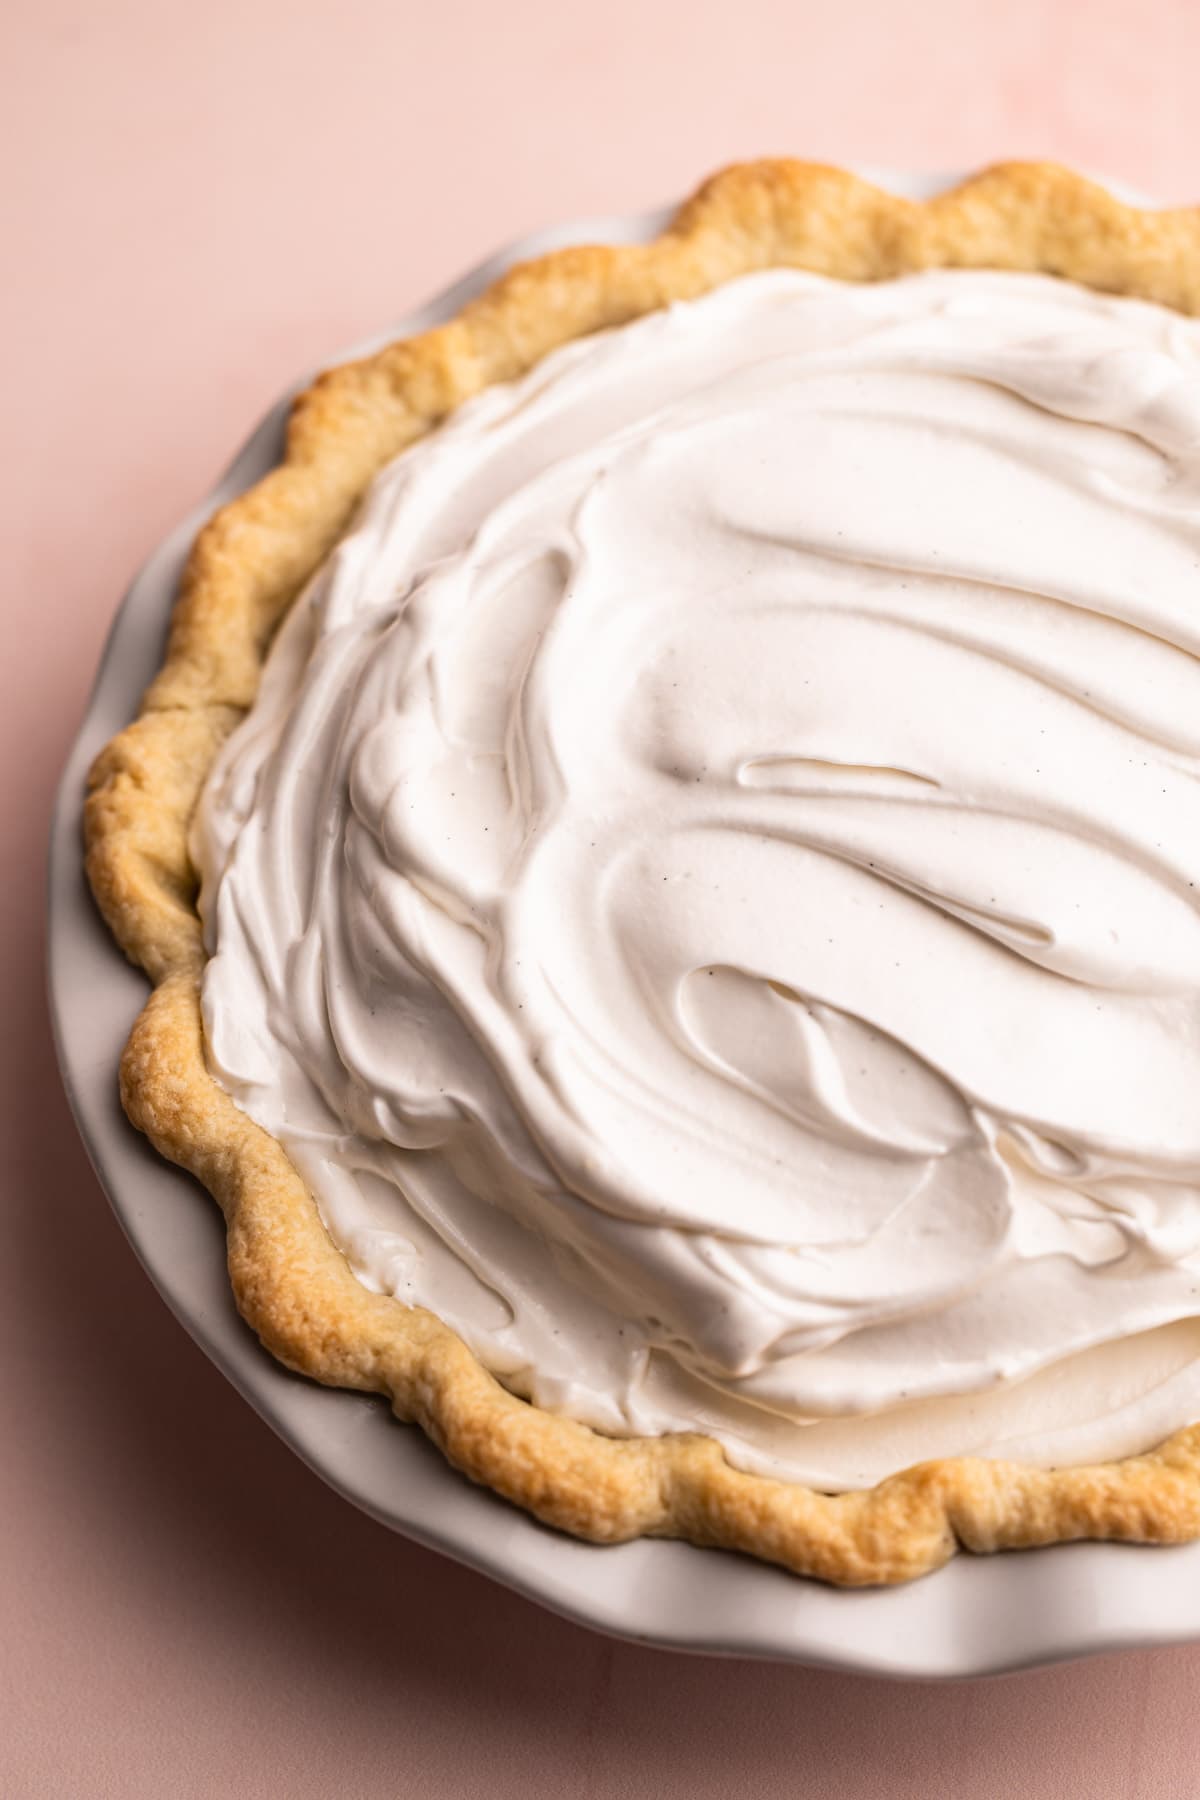
- Transfer half of the meringue to the top of the pie. Using an offset spatula, spread it evenly over the lemon filling. Dollop the remaining meringue on top and swoosh around with a spoon.
- To caramelize the top of the meringue, use a kitchen torch or place the pie under the broiler for 2 to 4 minutes, watching closely so it does not burn.
- Serve within 4 hours, keeping chilled until ready to serve.
Notes
Helpful tip: zest your lemons before you squeeze them.
Don’t want to use cream cheese? You can replace it with additional butter.
This lemon filling is well balanced between sour and sweet. If you want it to be more sour, you can reduce the sugar to ¾ cup, which will make the amount of lemon juice and sugar equal.
For the meringue, alternating between a whisk and a spatula is useful during the cooking stage because it helps to ensure all of the sugar melts. Generally speaking, the egg whites should be whisked constantly while they're being heated, with breaks to occasionally scrape down the sides of the bowl with a spatula to make sure the sugar granules that naturally go up the sides are pushed down to melt. If any sugar granules get stuck to the side of the bowl, they could crystalize and create hard granules in your finished meringue.
The longest I've had this Lemon Meringue pie in my refrigerator was about three days before it started to weep a little bit. So leftovers can be kept for a few days.
Common Lemon Meringue Pie Problems: Solved
Lemon Meringue Pie can be super tricky to make, and many of the components can trip people up. Below, I share some of the most common problems people typically run into, and some tips for how to avoid them. I'll also address how this recipe differs from most to avoid these common problems.
Make sure to fully blind-bake the crust, especially for this recipe. This recipe uses an extra-thick pastry to withstand the heavy lemon and meringue filling, and it will need extra time to bake through. You'll know it's done with the pastry is no longer shiny and has begun to puff up in areas.
This recipe has a well-balanced lemon filling, with more than ¾ cup of fresh-squeezed lemon juice and lemon zest. With each bite, you can taste the pucker of the lemon, but it's not so sour that it's overwhelming. If you want your lemon filling to lean more toward the sour side, reduce the sugar to ¾ cup, which will make the lemon juice and added sugar equal.
This recipe flips the script on the traditional way to make lemon meringue pie by making the lemon filling first, then chilling it fully to set before adding the meringue. This means less thickener can be used, since the lemon filling has time to firm up before the meringue is put on, and that the pie can be served right away once the meringue is added on top. That solves two problems at once!
This is by far the most common problem people complain about when it comes to this pie. And truly, switching up the type of meringue is the easiest solution to a weepy pie. First, a Swiss meringue is much more stable than a French meringue. Second, the meringue is added after the lemon filling is cooled, so it can be served right away. Meringues start to weep after sitting for a long period of time. Since the filling is chilled before the meringue is added, the hot filling won't destabilize the meringue. One thing to note is that when spreading the meringue on top of the lemon filling, it's best to avoid any pockets of air, which will prevent any premature weeping.
There is a lot of acid in this pie, thanks to the lemon juice. To avoid a metallic taste, use only stainless steel tools or pans when making the filling. When lemon juice comes into contact with a non-stainless steel metal surface, its corrosive properties react with the metal, and it can take on a metallic taste. It's best to use glass bowls, nylon strainers, and stainless steel pots when making the lemon filling. Also, don't let the lemon juice sit in a non-glass bowl, even a stainless steel one, for any period of time.
Some of the links on this page may be affiliate links. Everyday Pie is a participant in the Amazon Associates Program. As an Amazon Associate I earn from qualifying purchases, at no extra cost to you.
Megan Woolgar
I’m still making it kinda but my lemon sauce thing isn’t thick I’ve let it set overnight and still hasn’t set but it does taste good🤷🏻♀️
Jo
Just made this for a friend for her Birthday and can honestly say I even impressed myself lol… fantastic instructions in the recipe and will definitely be making again 🤤😁
Christina
My son really wanted to make a lemon meringue pie. I was so intimidated to make one as I am a novice baker, at best. Kelli explained every step and made it so easy to understand. The pie turned out great and my son was super proud of himself!
Zoë
Hi!
I would love to make this pie it looks amazing, but is there a way I can make it without food processor?
Thank you 🙂
Vickie Hurst
Wow!!! Can’t thank you enough for all the details & delicious work you put into this pie recipe from start to finish! FIVE STARS ALL THE WAY!!!! I learned so much. My first foray into Swiss Meringue & it was a smashing success. Delicious pie……my favorite & this recipe did not disappoint!!! Will most definitely make this again & again!!!
Kelli Avila
I'm so glad you gave it a try! Thanks for sharing!
Jennie D
I made this pie at Thanksgiving and everybody loved it so much I was asked to make it again for Christmas!
Iris
I loved this recipe!
I cut down the sugar to 3/4 cups and it still tasted amazing.
I did not have a blow torch so instead broiled it in the oven but honestly I think you could do without the browning effect. The meringue itself is so tasty!
The lemon filling turned out so good too.
This pie may look daunting but as a beginner, i could do it, so I recommend anyone out there to try this!
Kelly
Best recipe I have had the pleasure of making! My dads favorite pie and for over a decade I have had massive amounts of failed recipes as I wanted a true made-from-scratch pie. This one is a showstopper!!
Melissa Hefner
Can you make this pie crust ahead of time and freeze on disks for a week or two?
Kelli Avila
Yes!
Sara
Thank you Kelli for this informative post and recipe. I’ve struggled with lemon meringues in the past, particularly with getting the lemon portion to set well.
I made this yesterday for a Thanksgiving get together and it was a crowd favorite. Great balance of flavors and textures.
I can’t believe I actually made something that good. Thanks again
Wendy
I am making this right now! I just took the crust out of the food processor and its very moist, is that right? I added some extra flour because I'm thinking it shouldn't be this wet. I used your gram measurements because when I bake I find them much more accurate!! I just wanted to come here to find out if the crust is supposed to come out of the food processor very moist or if I need to start over!!
Kelli Avila
Hi Wendy! There are photos in the blog post of what the crust should look like when it's in the food processor. Please reference those. But no, it shouldn't be "wet". I'd say let your dough chill and see how it is when it is cold. I double-checked over my recipe / gram measurements just to be extra safe and they are all correct. Let me know how it goes? -Kelli
Wendy
Thanks so much Kelli! I did add a little extra flour and then after chilling it seemed a lot better. So far it is looking amazing and I tasted the filling and its perfect!! Excited to make the meringue soon! Had to go out and buy a kitchen torch!!! LOL. I've wanted one forever and this was my reason to finally get it. I will tell you that I think the lemon juice measurement is off. 112 grams of lemon juice was only about a 1/2 cup of juice. I went ahead and squeezed enough to get to 3/4 cup as the recipe states and it weight about 178 grams. 🙂
Kelli Avila
Hi Wendy--glad it worked out. And thanks for that catch with the gram quantities for the lemon juice. Originally I had used 1/2 cup lemon juice in early testing, but then increased it, and looks like I neglected to increase it on the grams. It's all fixed! Hope you enjoyed! -Kelli
Wendy
Kelli, the pie was fantastic. I definitely need to tweak the crust as mine was too bland and flour-y since I had to add so much extra to make up for the wet dough I had. But the lemon custard and the meringue were the best ever!!! I'm tempted to make another today just to redeem myself with the crust! LOL. Do you think since I live in a very humid climate that maybe I don't need as much liquid in the dough? I'm going to pour the water in slower this time and really watch the dough come together so I don't over water it. I'll let you know.
Kelli Avila
Hi! It's hard to tell what might have gone wrong in terms of the crust. Humidity won't make a difference. Double-check that you are including everything and the measurements are correct! Hope you have success this time around!
Alyssa
I made this pie for Mother’s Day and it turned out wonderful. It was my first lemon meringue pie and my first Swiss meringue and I was so happy it was incredibly easy. As usual this is my go to page for pies and this one didn’t disappoint. The top was marshmallow deliciousness and the filling wasn’t too sour or tinny. I made it the same day we ate it and it still sliced up very nicely.
Kelli Avila
Alyssa, I'm so glad you and your family enjoyed! -Kelli
Katie
My first lemon meringue pie and it was an Easter crowd favorite! I love baking but do not have a lot of experience with pies. I've never even blind baked a pie shell before. The directions were easy to follow, very straight forward, not overwhelming and in general the writing style is very approachable (for this and all the posts I've read). The crust is ::chef's kiss::. Great recipe. I also really liked that it called for equal amounts of egg yolks for the filling to egg whites for the meringue so I didn't have any left over. Definitely recommend!
Kelli Avila
So glad you and your whole family enjoyed! And GO YOU mastering one of the hardest pies out there! -Kelli