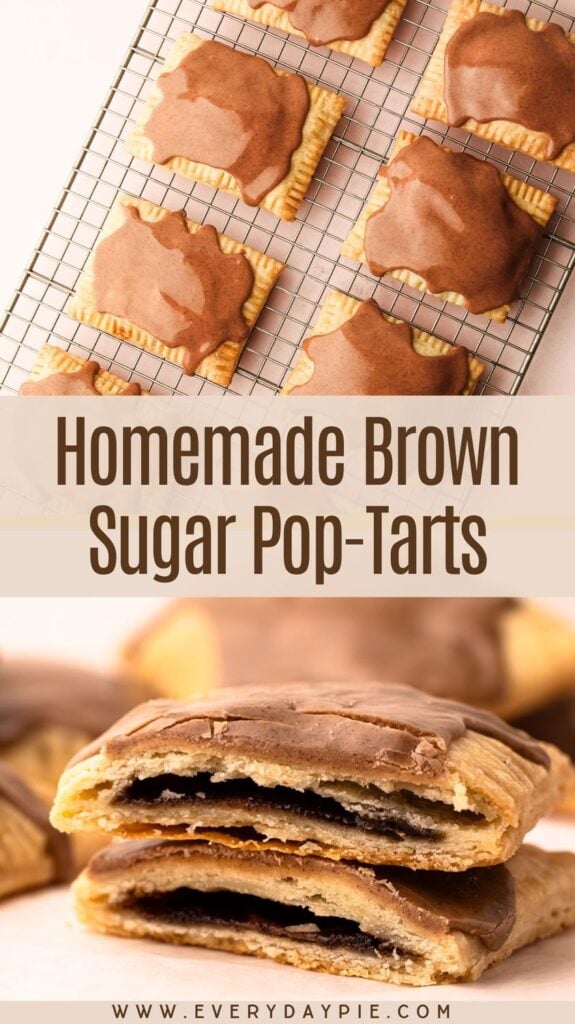
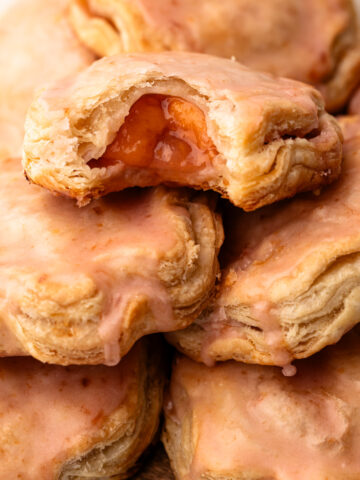
Create the most amazing Homemade Brown Sugar and Cinnamon Pop Tarts with a simple pop tart pastry dough filled with rich buttery brown sugar, expertly baked, and finished with a heavenly cinnamon frosting!
Want to save this recipe?
Enter your email & I'll send it to your inbox. Plus, get weekly updates from me!
Featured Review
⭐️⭐️⭐️⭐️⭐️
Words cannot describe how well these turned out. In all my years of baking, I’ve never braved homemade pastry dough or pie crust. This recipe was easy to follow and made the most delicious, flaky crust. The filling and icing also turned out amazingly. 10/10 would recommend!!
- reader Guin
If you ask anyone about their favorite pop tart flavor, you'll quickly encounter strong opinions. Those who love Brown Sugar Cinnamon Pop Tarts seem the most vociferous and determined to convince you that they are indeed the best flavor. Even if you're partial to Strawberry Pop Tart or even a Chocolate Fudge Pop Tart fan, one taste of my version and the brown sugar cinnamon advocates just might convince you they are right.
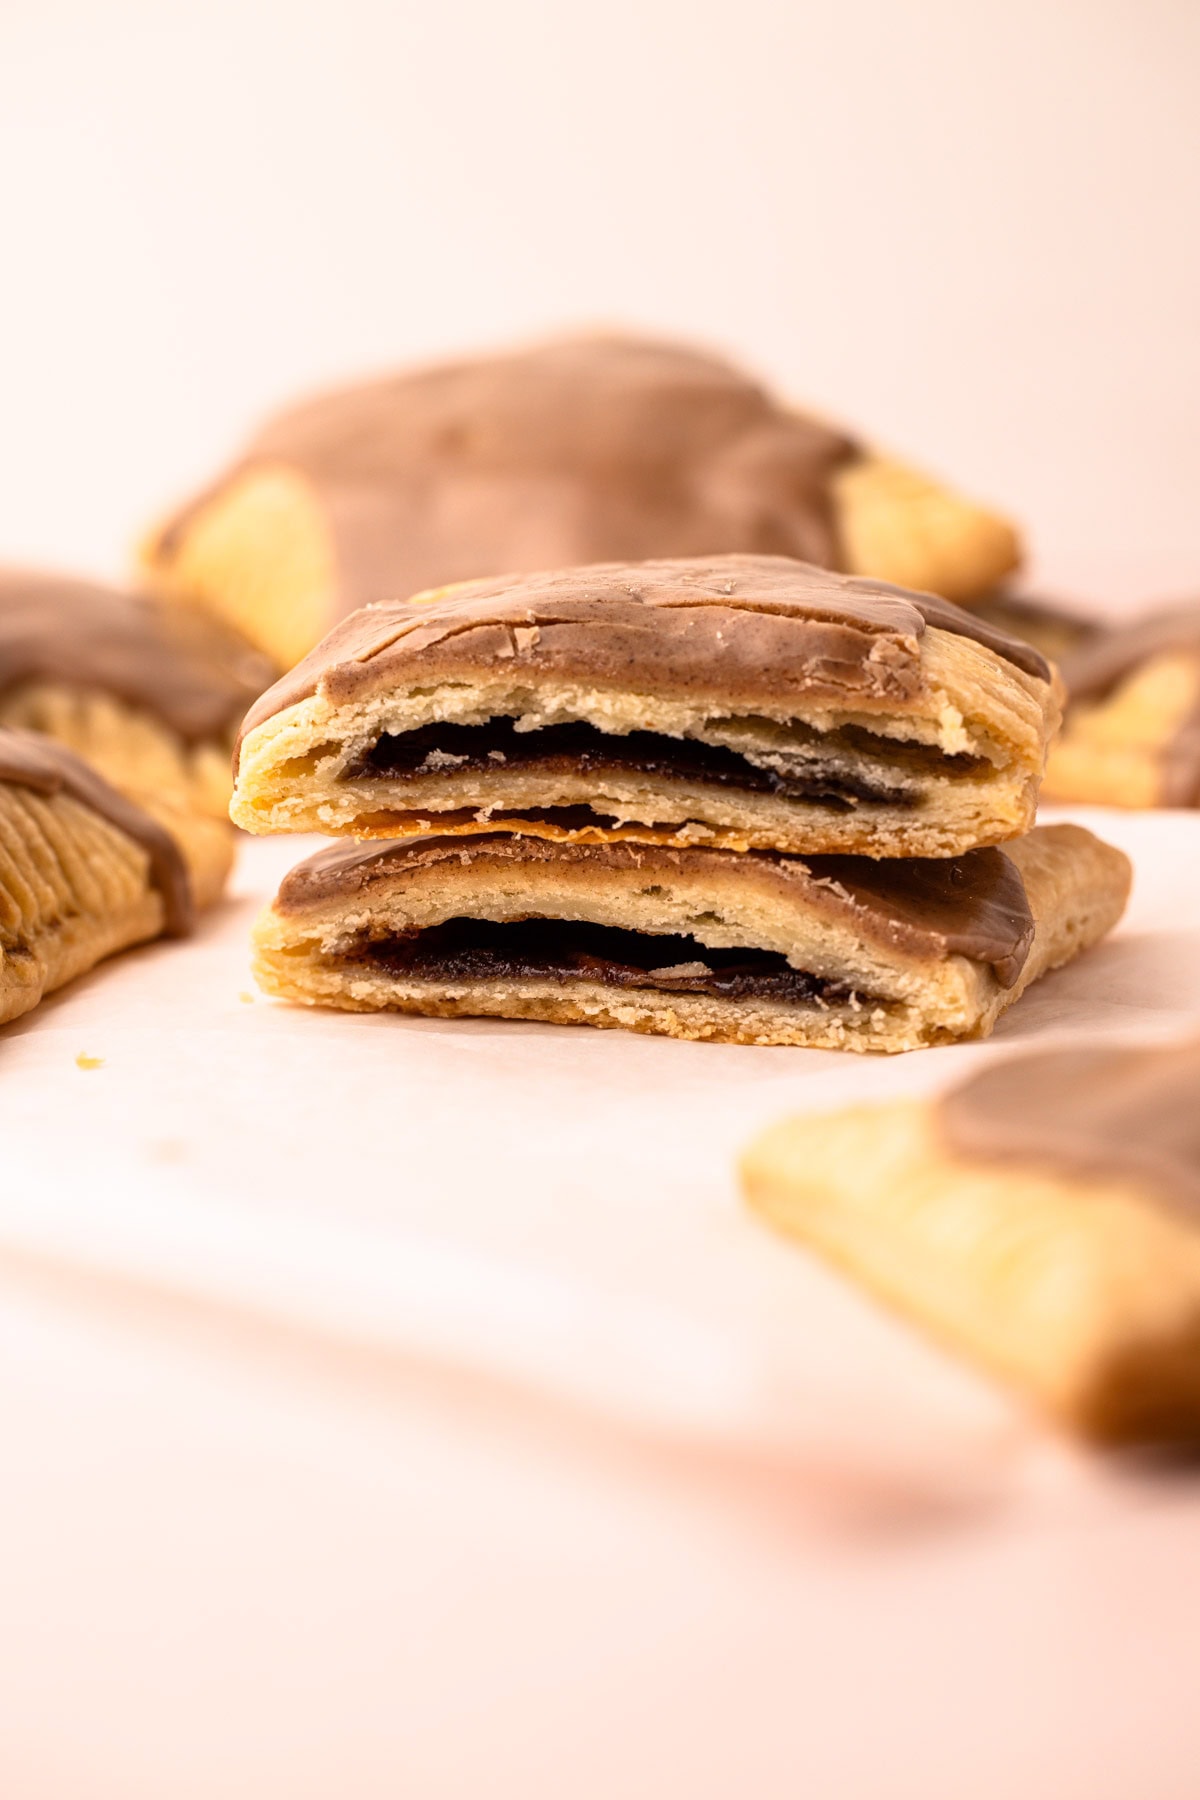
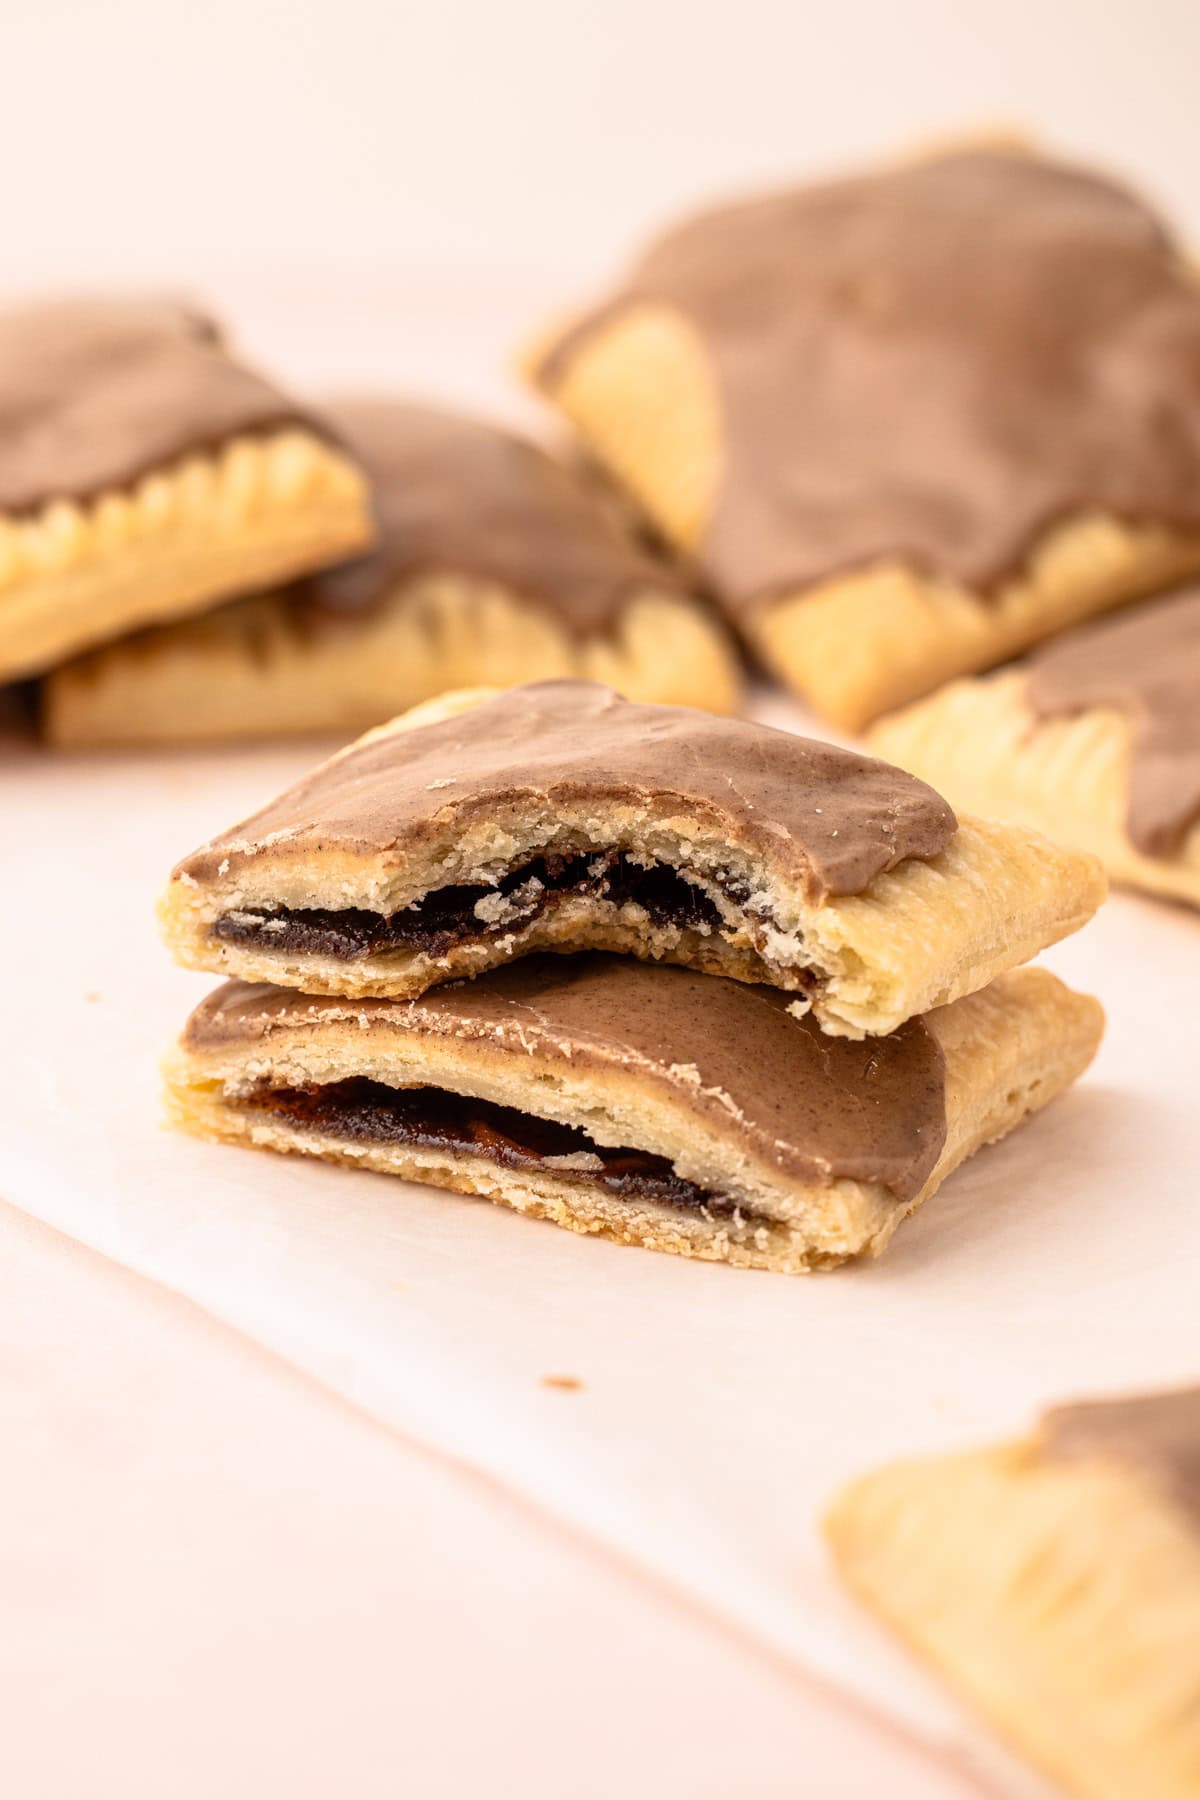
The star of this pop tart is the buttery brown sugar and cinnamon filling, which is encased in a pop tart pastry that is both light and crumbly and then topped with the most perfect cinnamon glaze. They are the perfect treat to bake up, and they freeze well, so you can have homemade pop-tarts any day of the week!
So, let's get to making it, shall we? The article below is jam packed full of useful information. You can jump around using the menu below, or skip to the end of the article for the full recipe.
Jump to:
Ingredients Needed
Here is an overview of the ingredients needed for this recipe. The full recipe is listed below in greater detail.
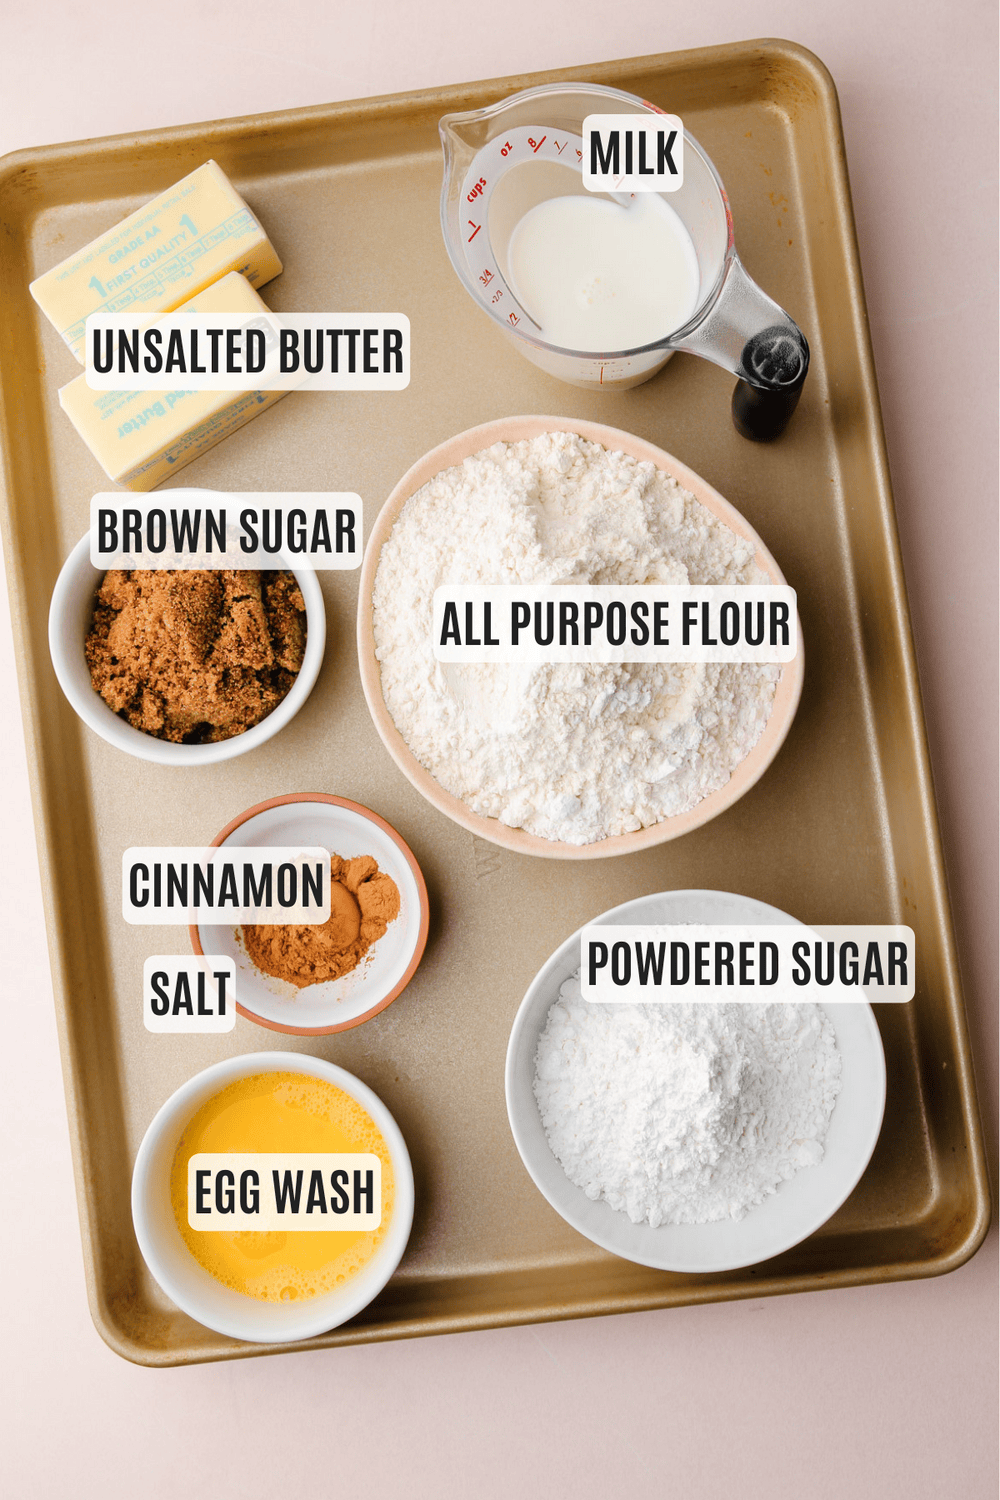
- all-purpose flour
- powdered sugar
- unsalted butter
- whole milk
- dark brown sugar (you could also use light brown sugar, but why when dark brown sugar has so much more flavor?)
- ground cinnamon (this is my favorite spice but I have strong preferences for the kind of cinnamon I like, check out this Cinnamon Ice Cream recipe for more info about that)
- egg wash
- vanilla extract
- coarse kosher salt (this recipe was tested using Diamond Crystal coarse kosher salt. If you use Morton's kosher salt or fine salt, decrease the volume by half.)
Preparing the Pop-Tart Dough
The pastry in this recipe is not traditional flaky pie dough. In fact, making a flaky pastry is the opposite of what you would want for a pop tart. Otherwise, you’d be making hand pies, right? This pop tart dough is tender and crumbly (a little bit like shortbread biscuits). A touch of sugar is added to the dough, as well as a bit of milk, to make the pastry more flavorful and tender.
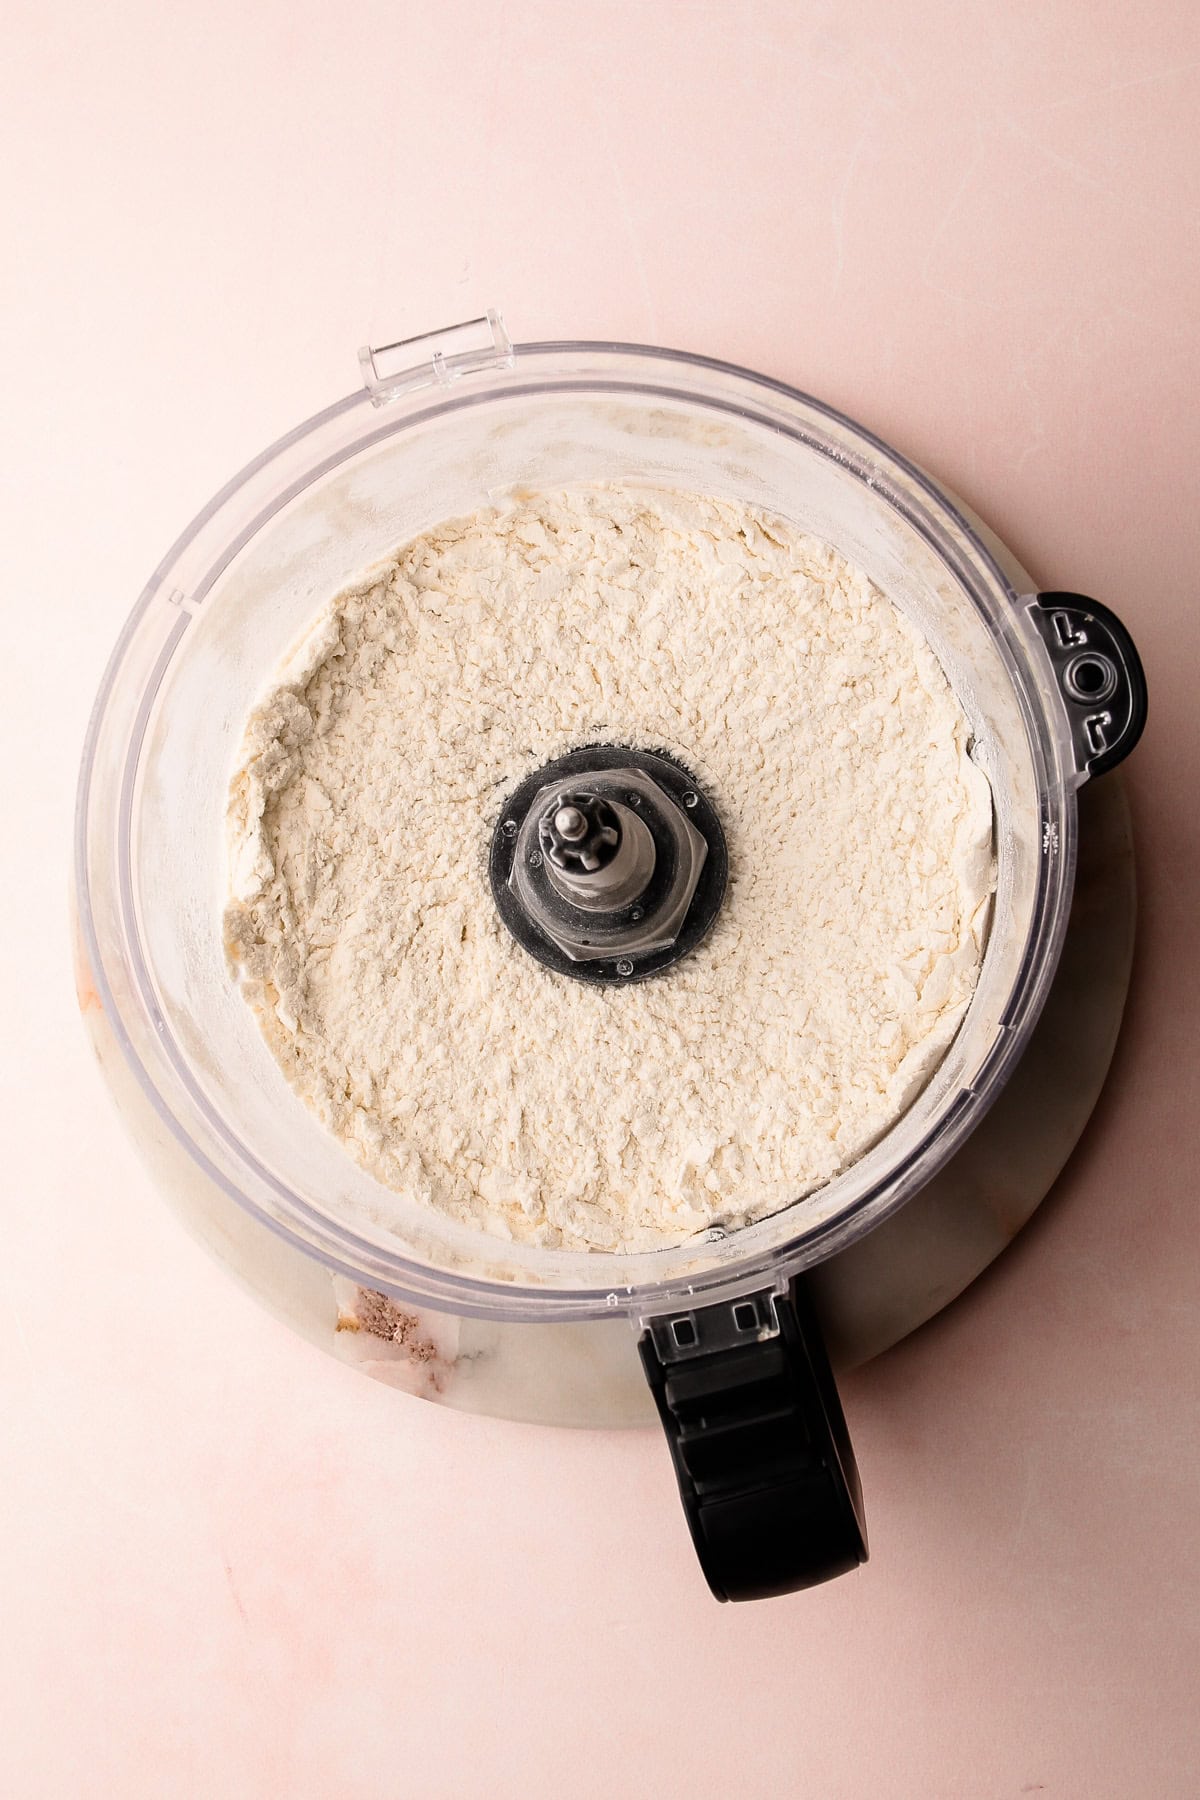
Step 1: Pulse the dry ingredients together in a food processor.
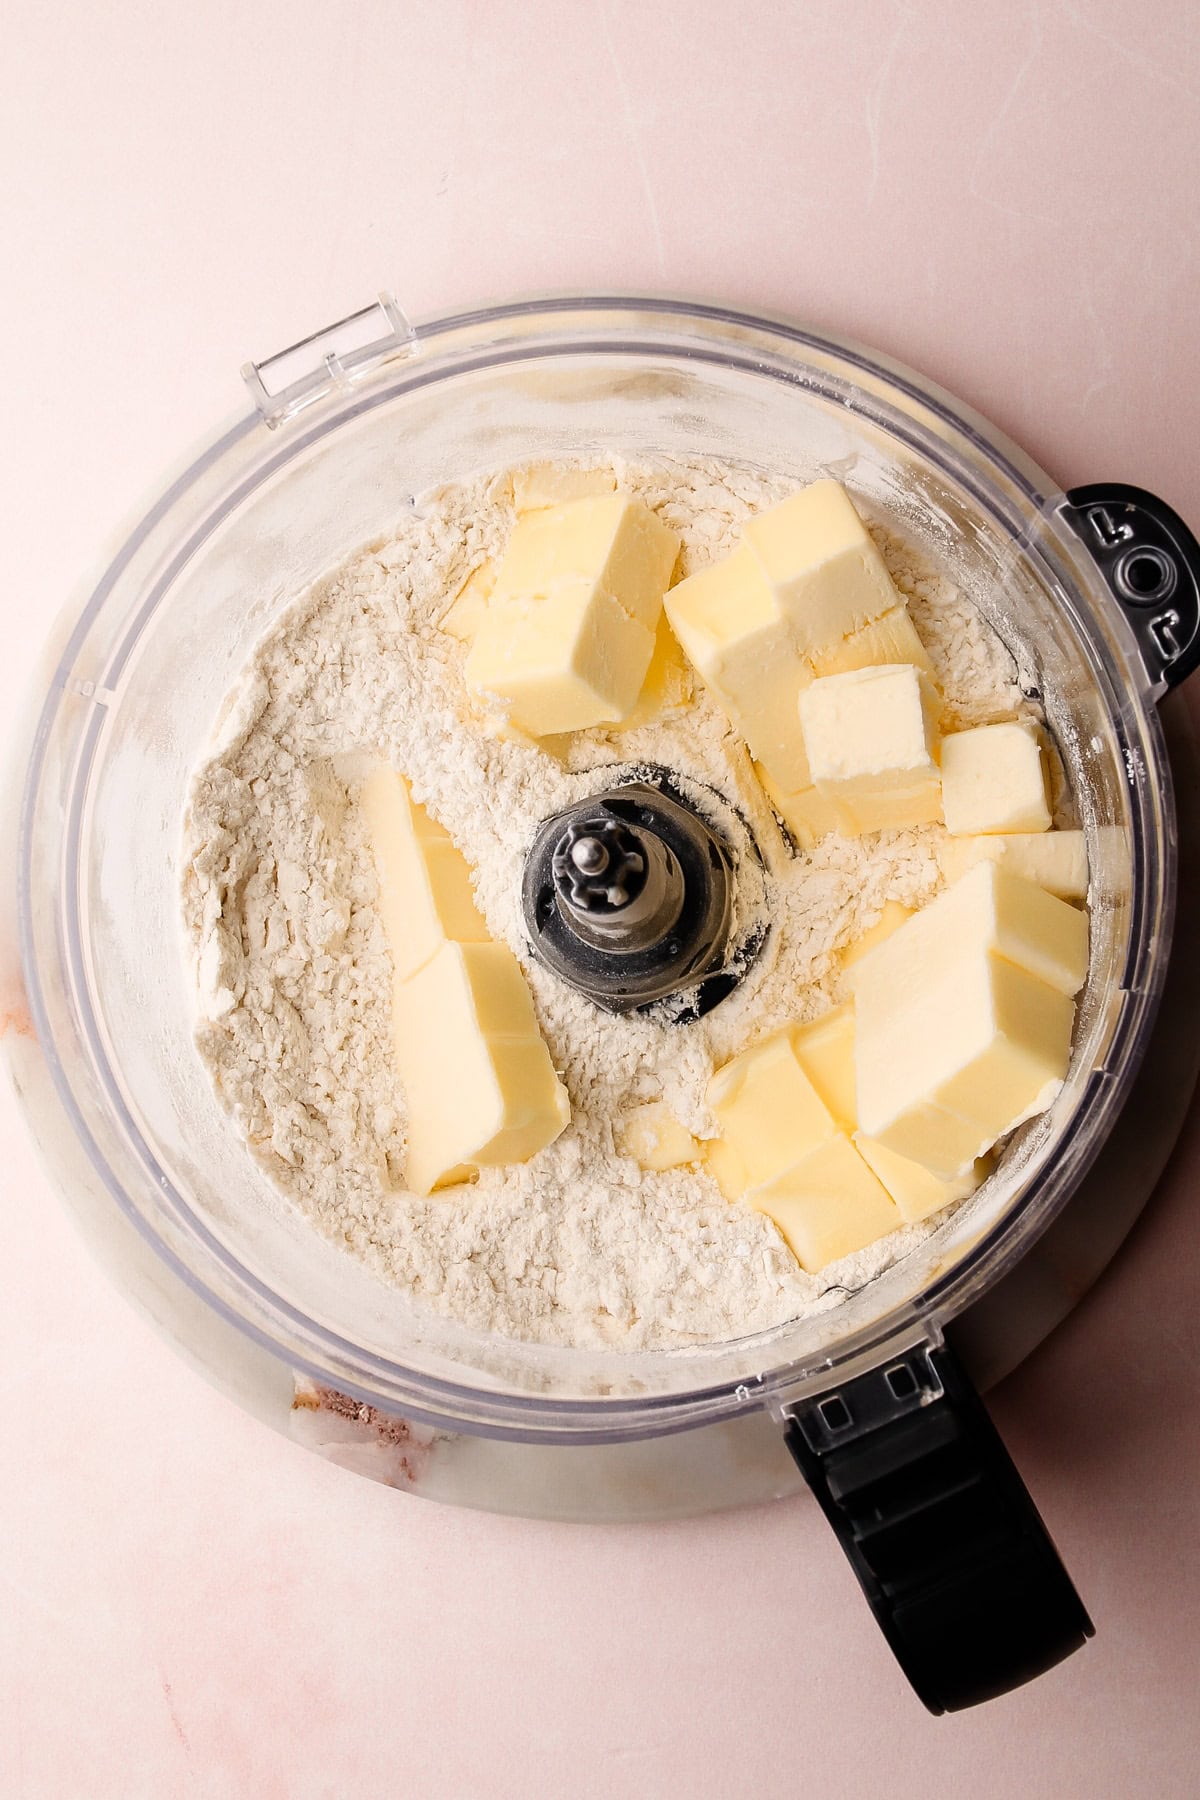
Step 2: Add in the cold butter and pulse the butter into the flour until it is mostly worked in.
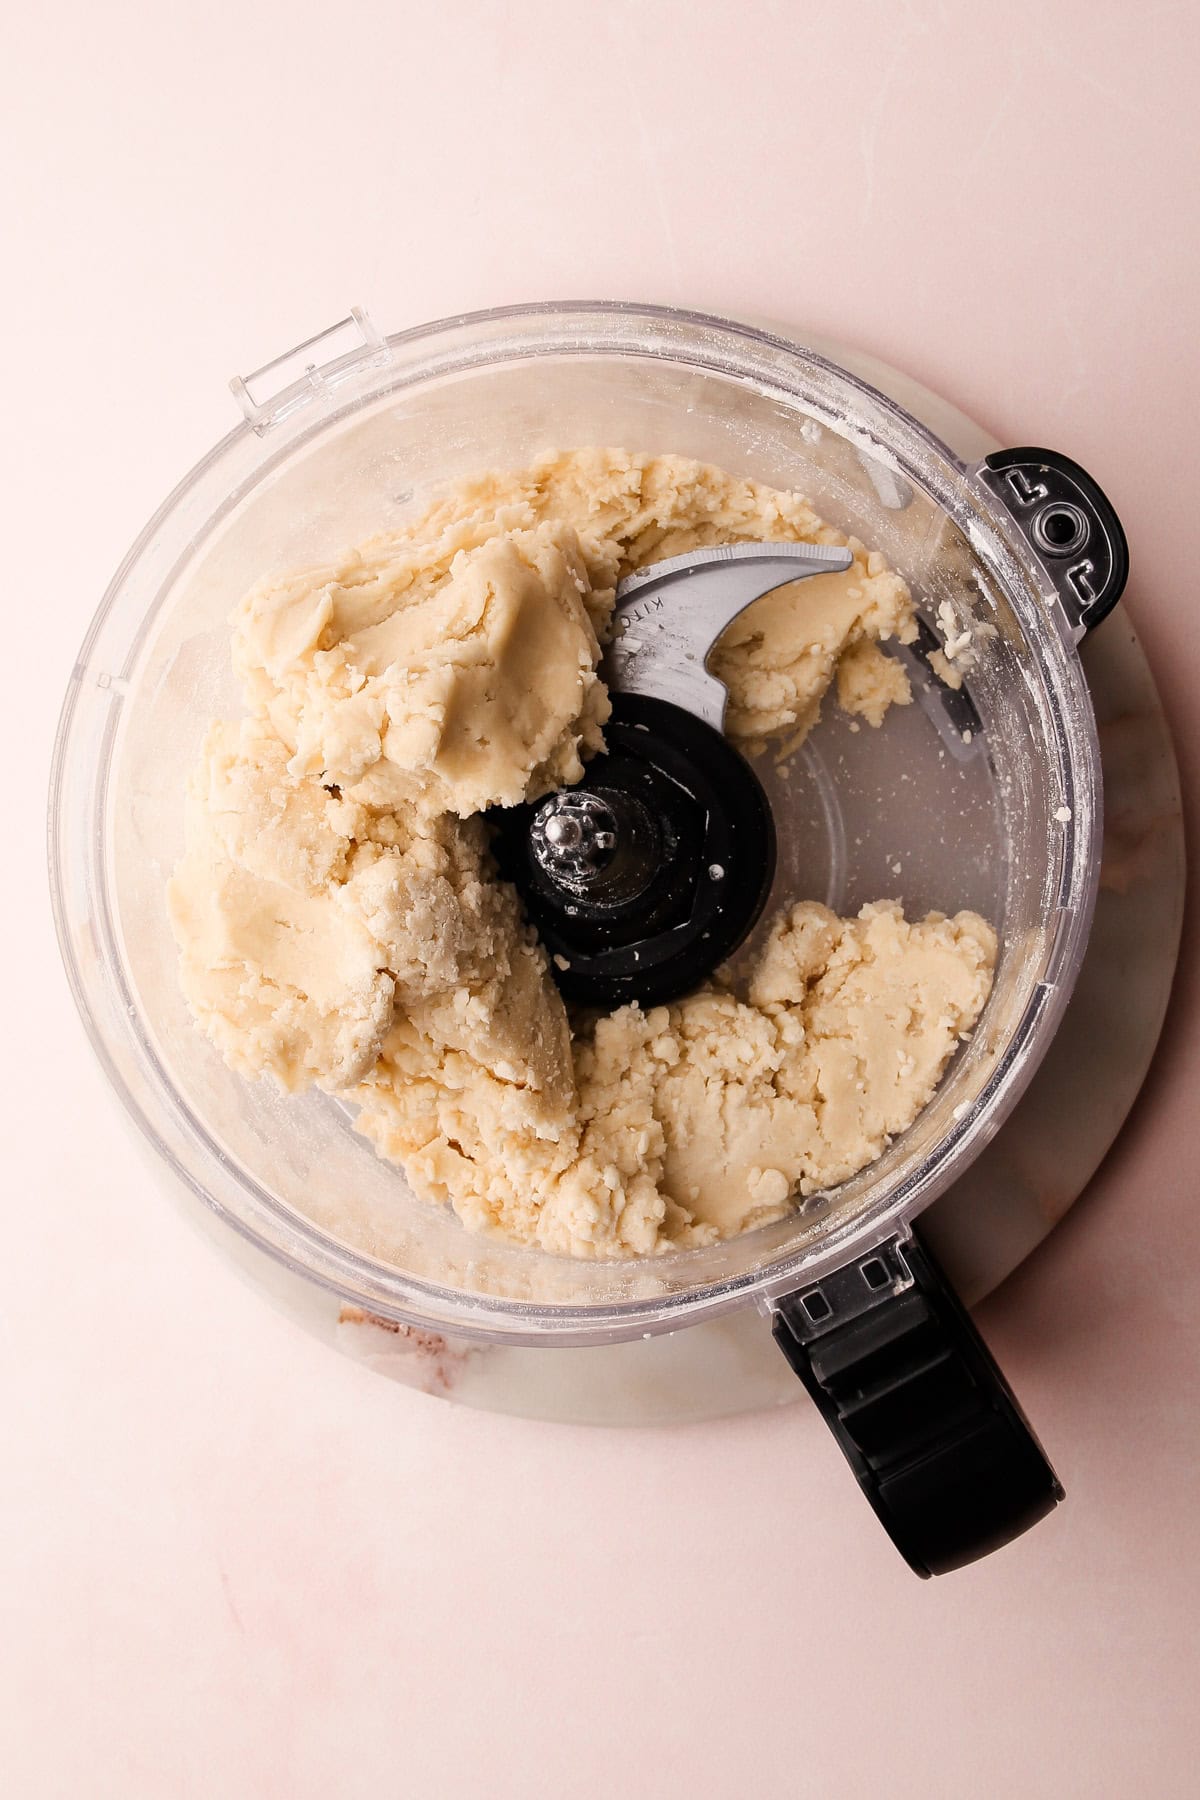
Step 3: Add in the milk and process until the dough comes together around the blade, then stop.
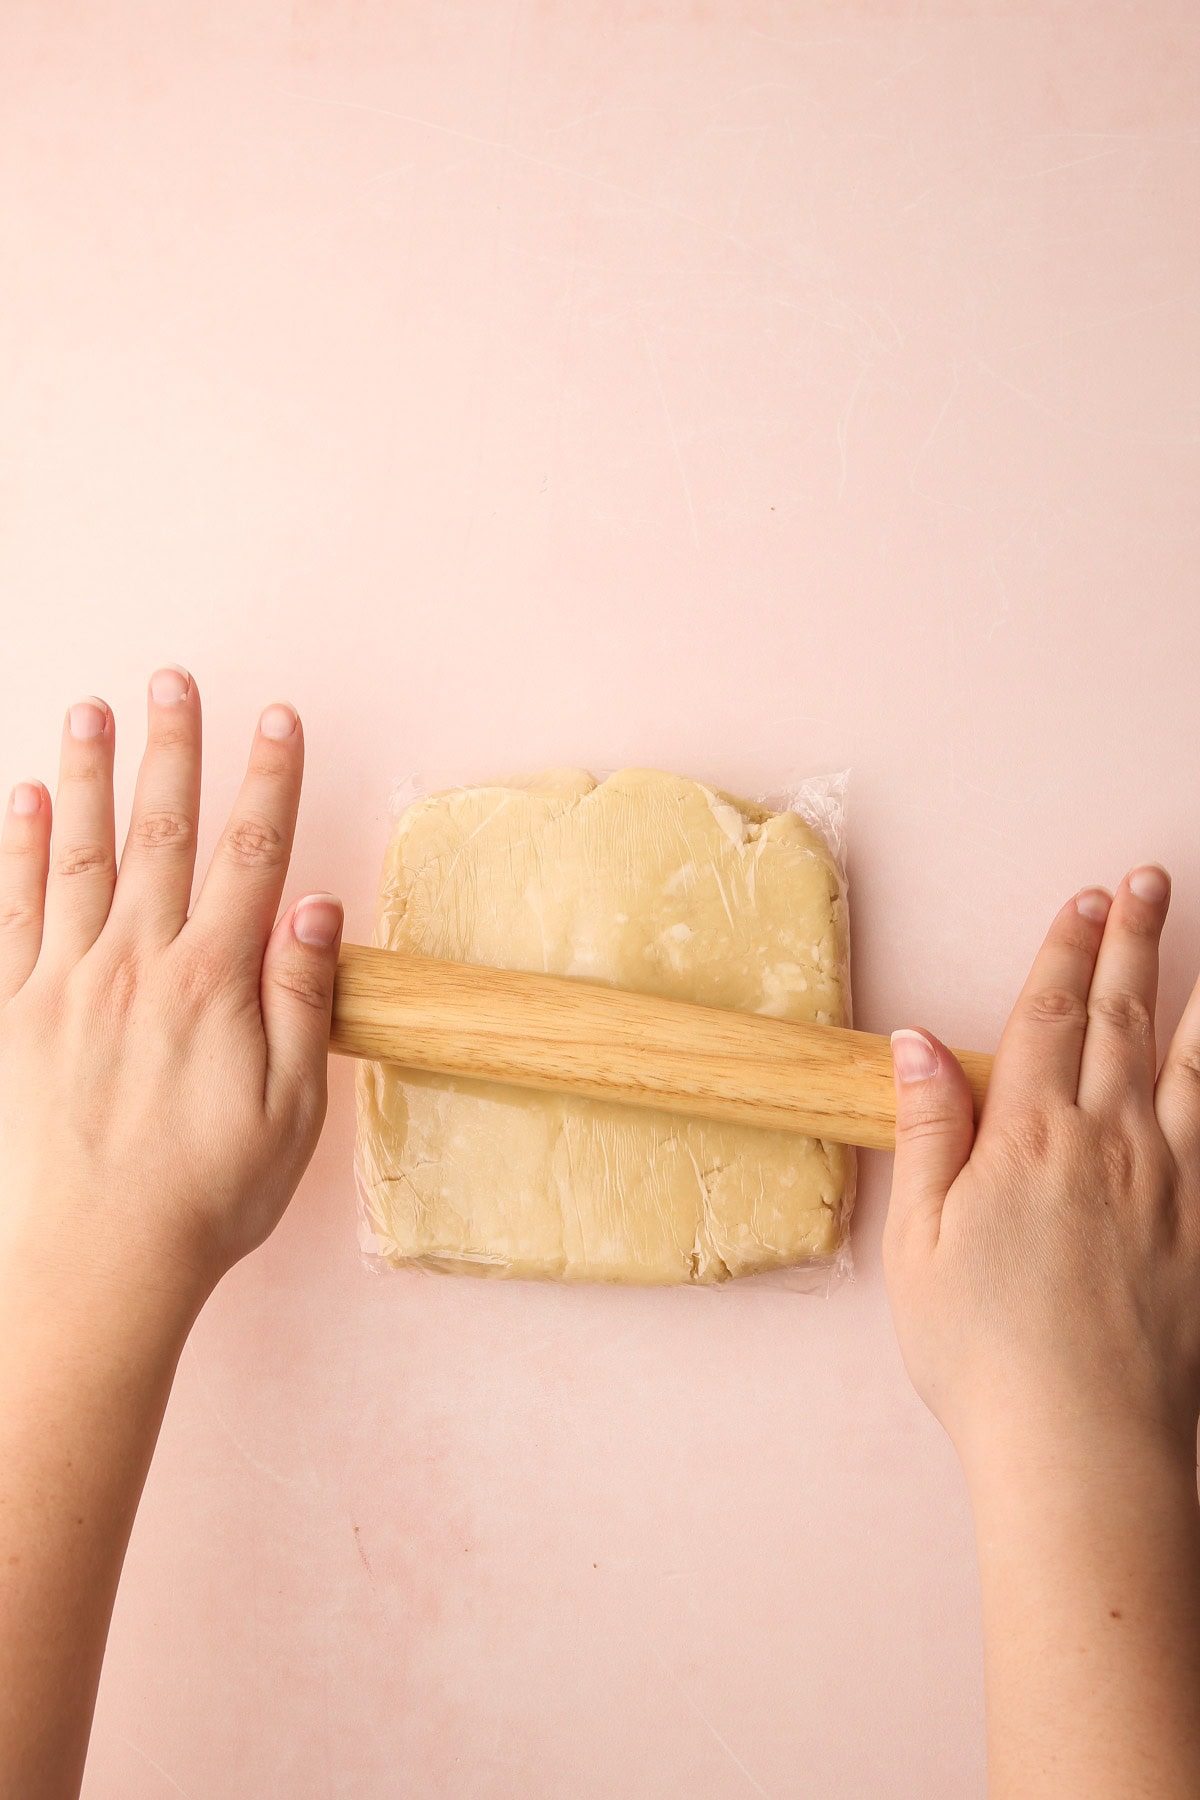
Step 4: Shape the dough into a rectangle and wrap it in plastic wrap then chill.
To get the perfect dough consistency, make sure to chill it thoroughly before rolling it out. Once it's chilled, take it out of the fridge and let it sit for 5-10 minutes to soften up a bit. You'll know it's ready to roll out when it makes an indentation when you gently press your finger into it.
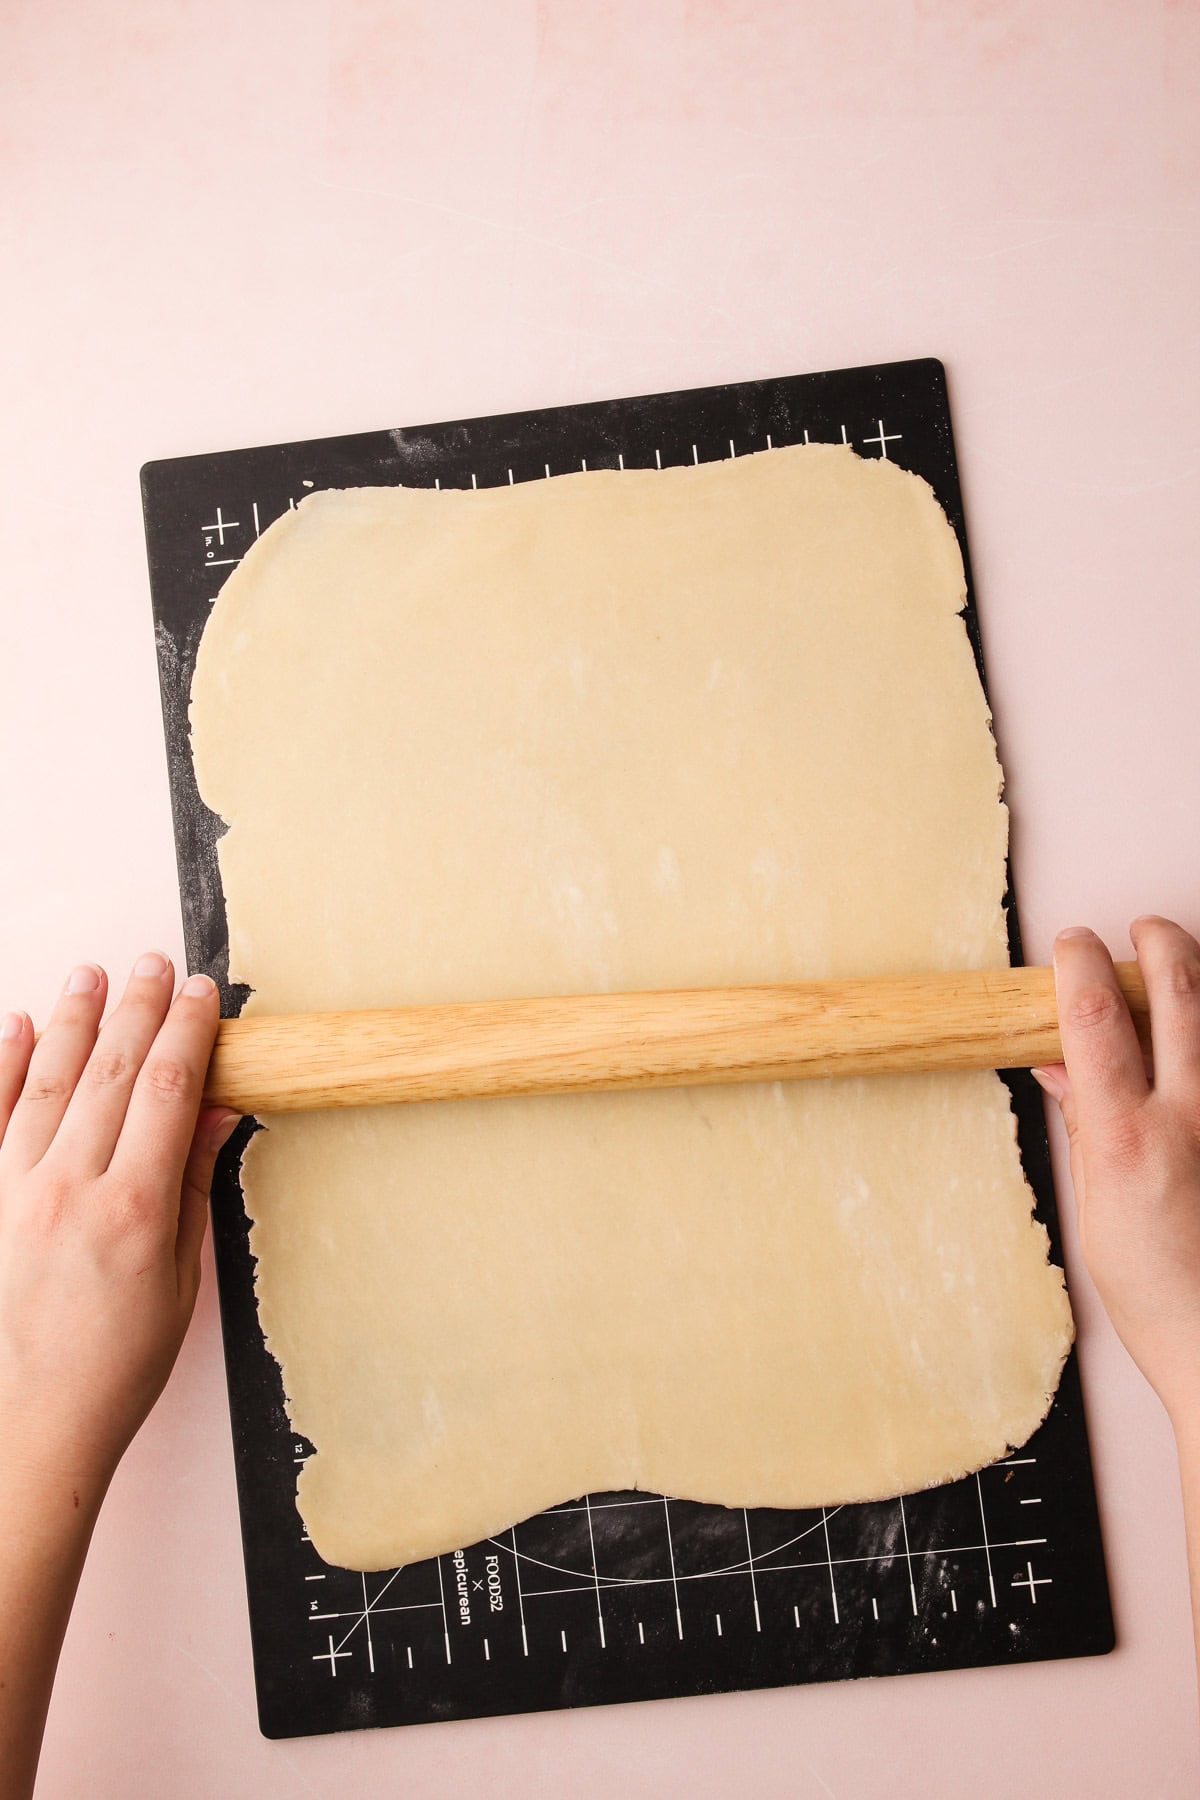
Step 1: Cut the dough in half and roll out one piece of dough to a rough 9-by-13 rectangle.
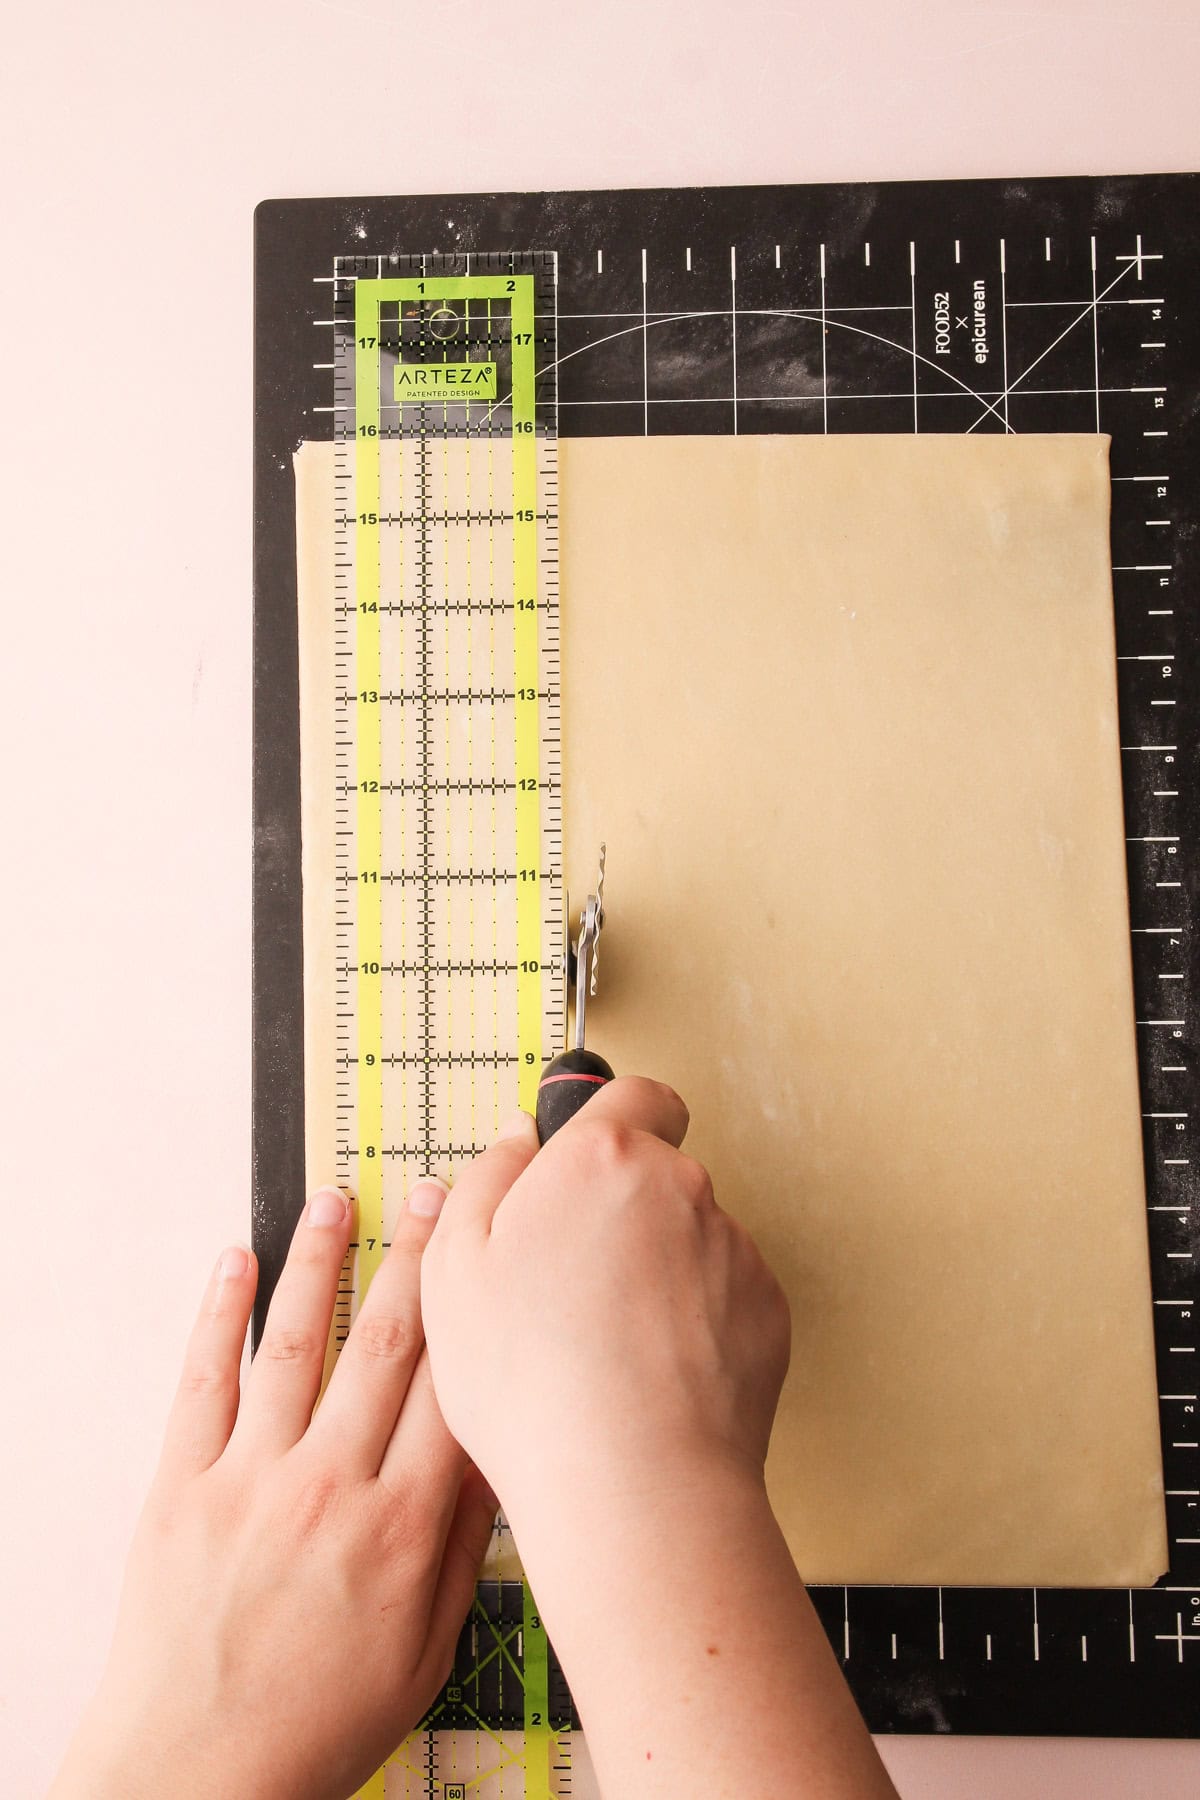
Step 2: Using a pastry wheel or chef’s knife, cut out as many 3-by-4-inch rectangles as you can.
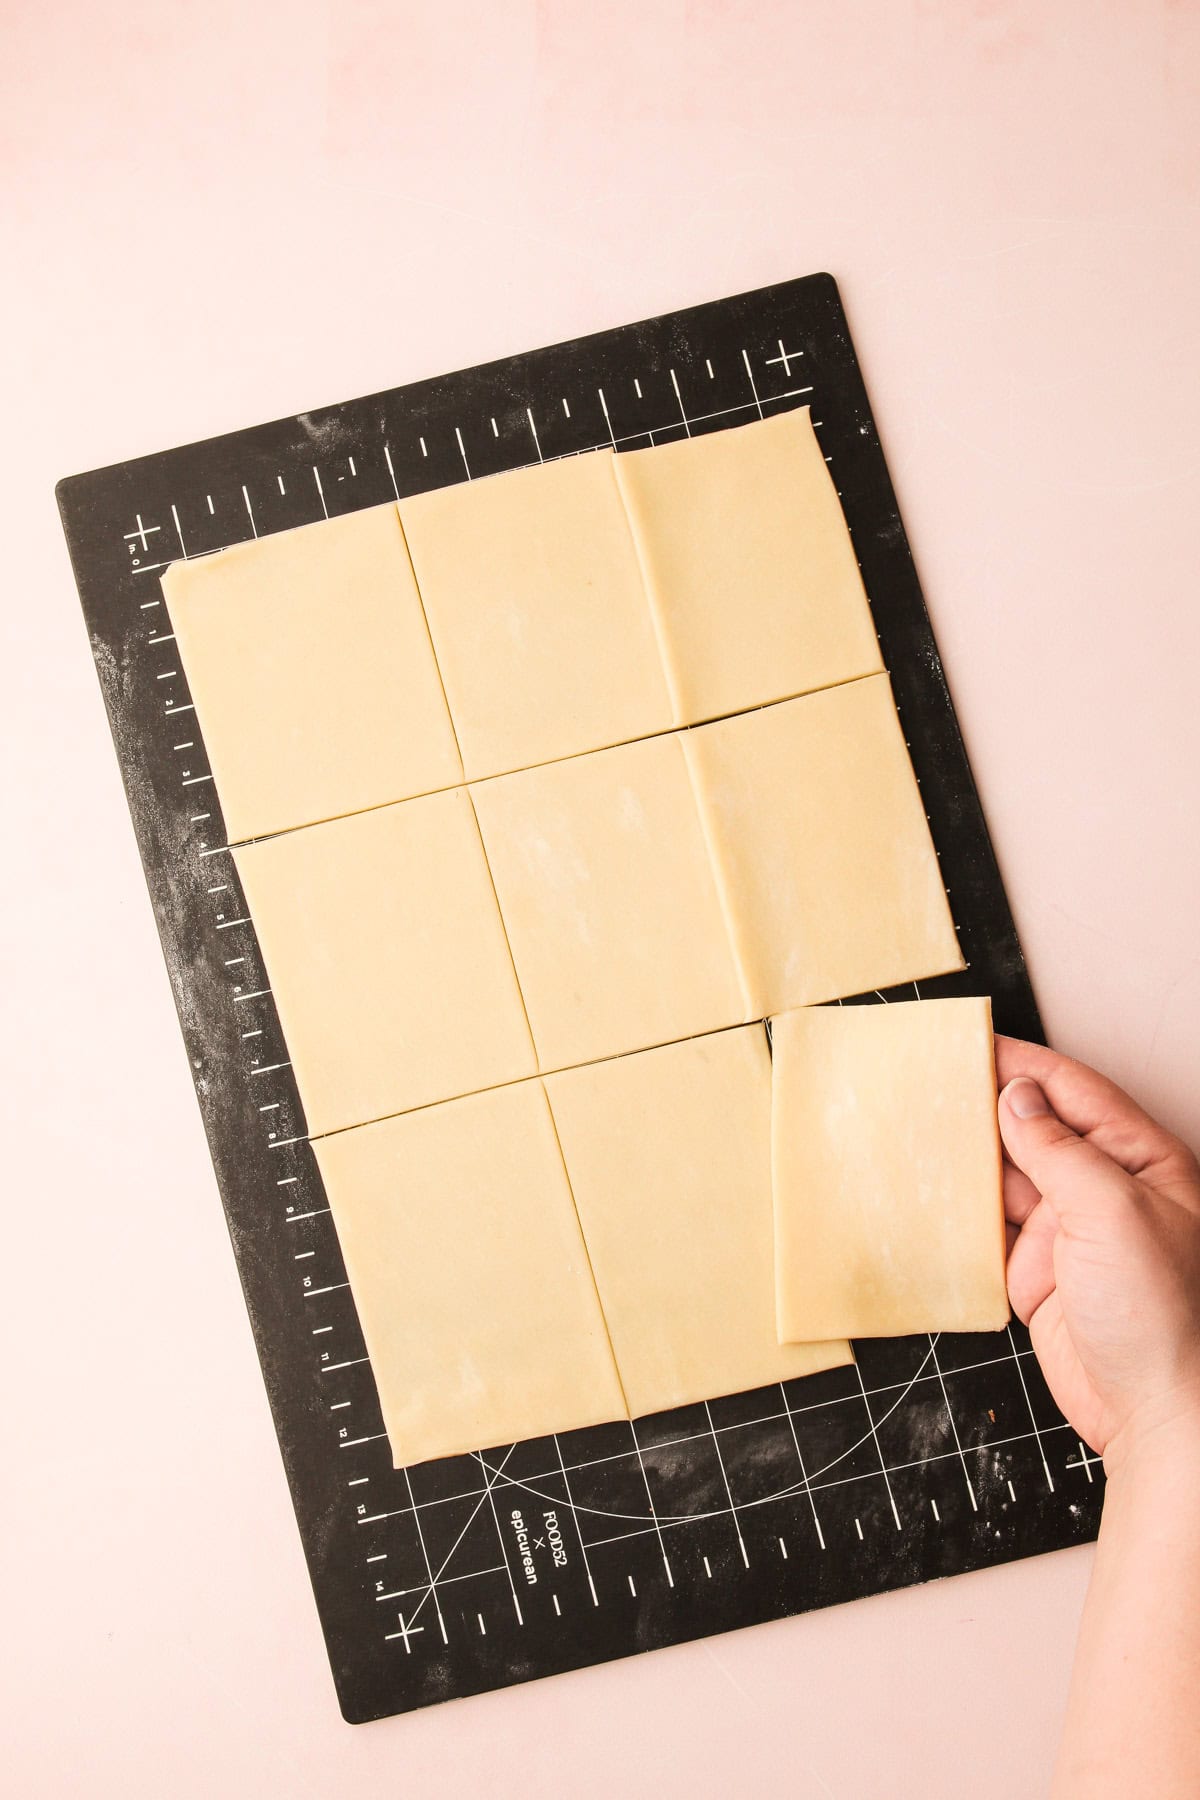
Step 3: Repeat with the second piece of dough.
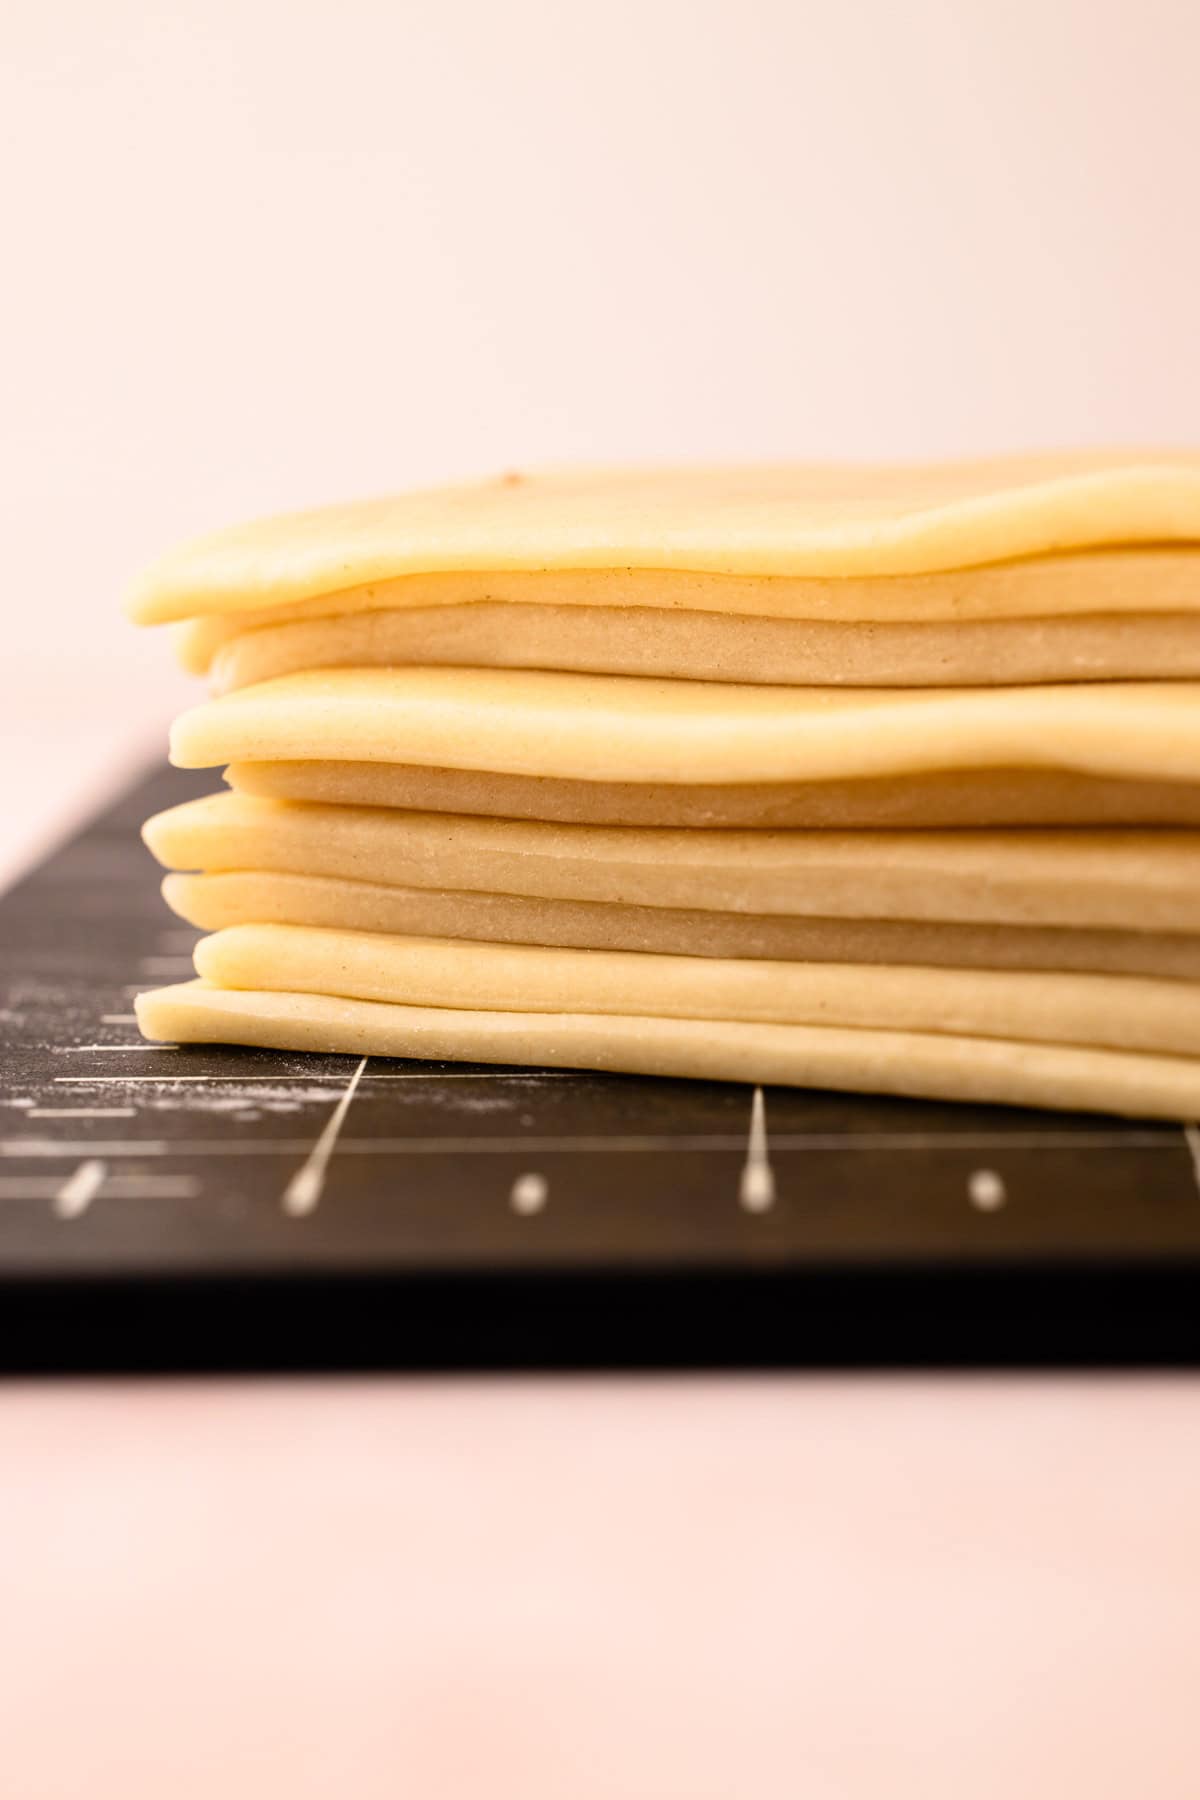
Step 4: Re-roll scraps only one time. This dough should yield between 16-18 rectangles.
Pop-Tart Pastry Tips
- I always suggest making dough a day ahead and letting it rest overnight as it's easier to handle and keeps its shape better.
- Generously flour your work surface, as well as your rolling pin. You don't want the pastry to stick to your surface.
- Use a ruler and a pastry wheel to help you cut the 4 x 3-inch rectangles. Or, use a rectangle cookie cutter if you have it.
- The exact size of the rectangle is less important than the thickness of the dough (see below). Feel free to change the size of the rectangle.
- After working with this dough over the years, I have found that the thickness of the rolled-out dough is crucial for a successful outcome. If the dough is too thin, the pop tart will collapse during baking. It's best to use a ruler to ensure that the dough is rolled out evenly to a thickness of ⅛ inch for best results.
How to Assemble Them
It’s important to seal the pop tart dough well so that the filling does not leak out. There are quite a few tricks used in this recipe to make sure all that delicious filling stays inside. I recommend you follow them all for the best result!
- Brush the bottom pastry with egg wash. This helps seal the dough together.
- After you place the second piece of dough on top of the filling, make sure to push down on all sides of the pastry.
- Use a fork and press down on the edges of the pastry.
- And finally, the most important step: use a pastry bench scraper to slice of the very tip of the edges. This not only cleans up the edges so the pop tarts look neat, but it also acts to truly seal the two pieces of pastry together. Using a knife doesn’t work the same, because knives are sharp and instead of mashing the two pieces of pastry together it just cuts right through them. If you don’t have a pastry bench scraper, I recommend using another tool that is dull, but not so dull that it can’t cut through the soft pastry. Even a ruler might work well!

Step 1: Line a baking sheet with parchment.
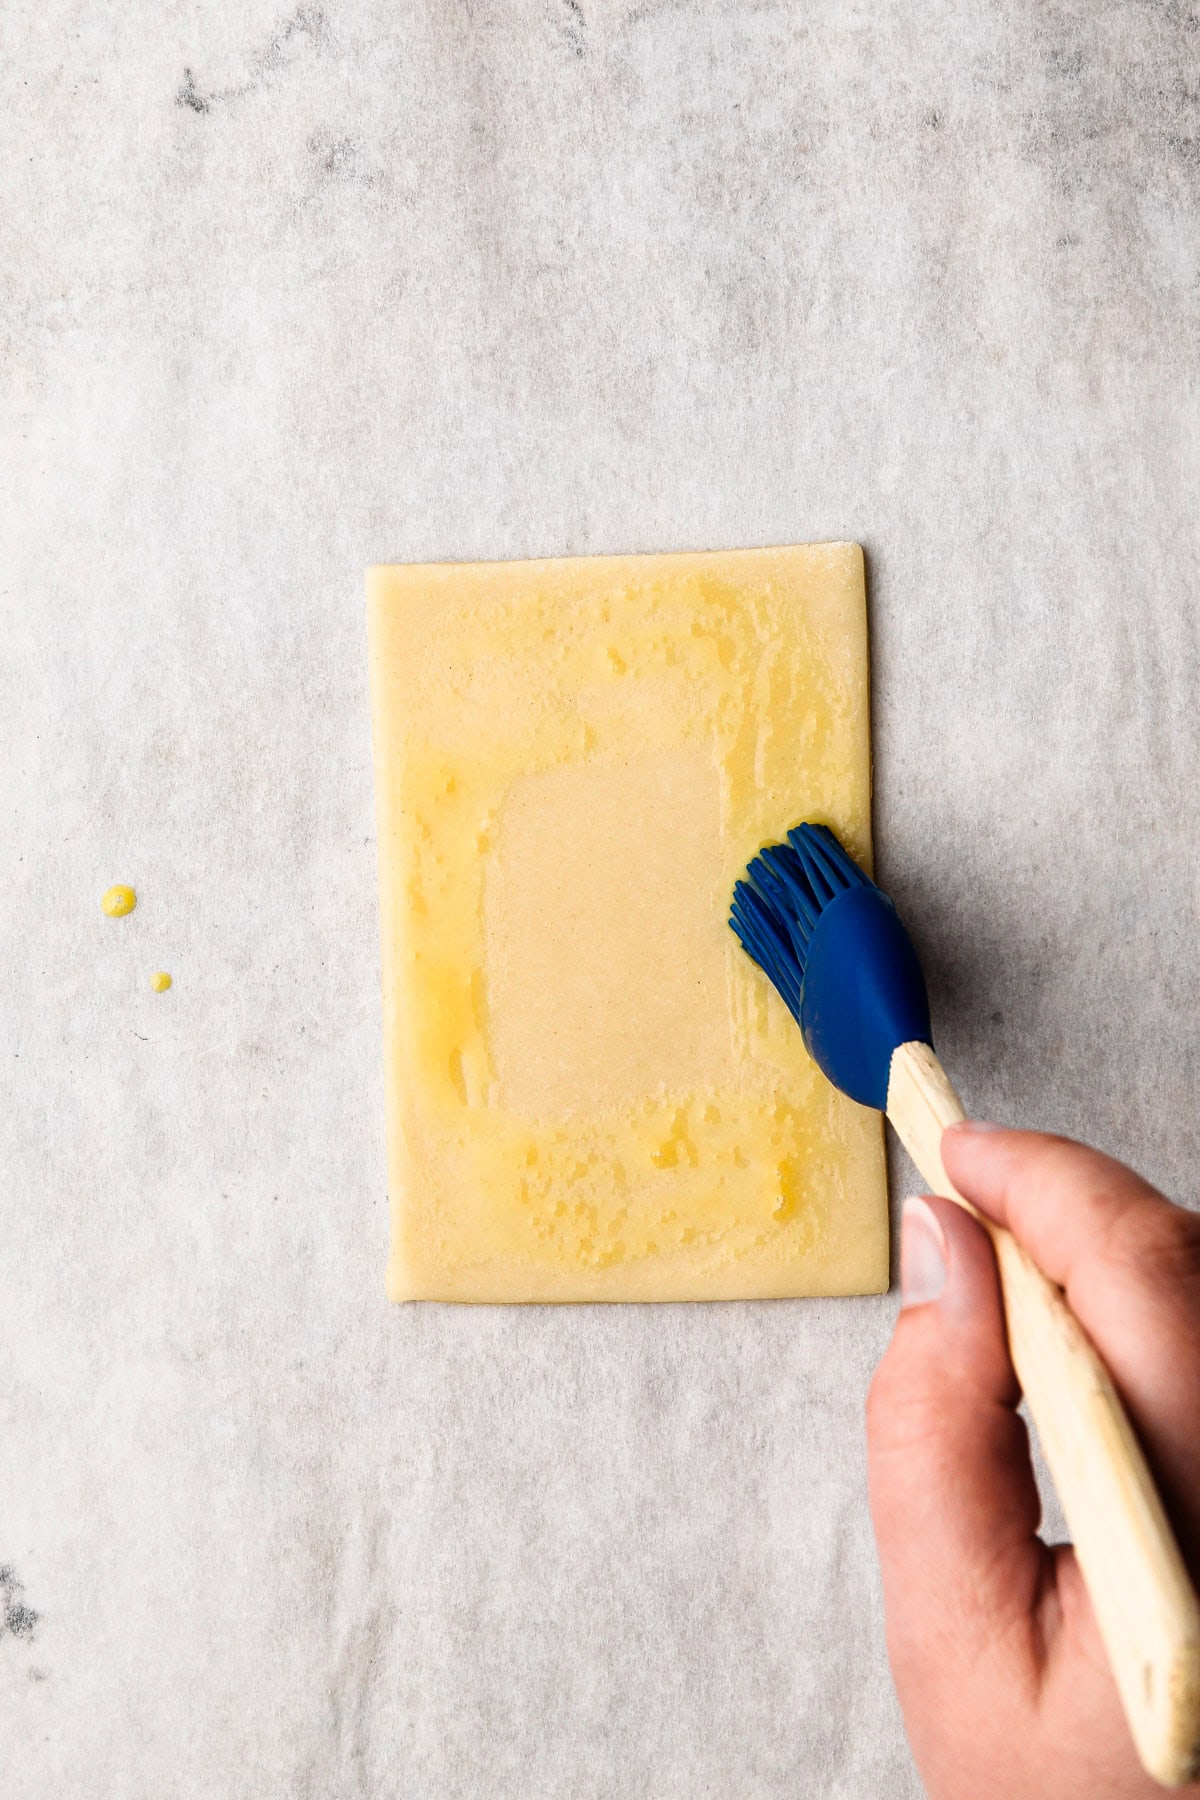
Step 2: Use a pastry brush to brush the egg wash around the edges of the pastry.
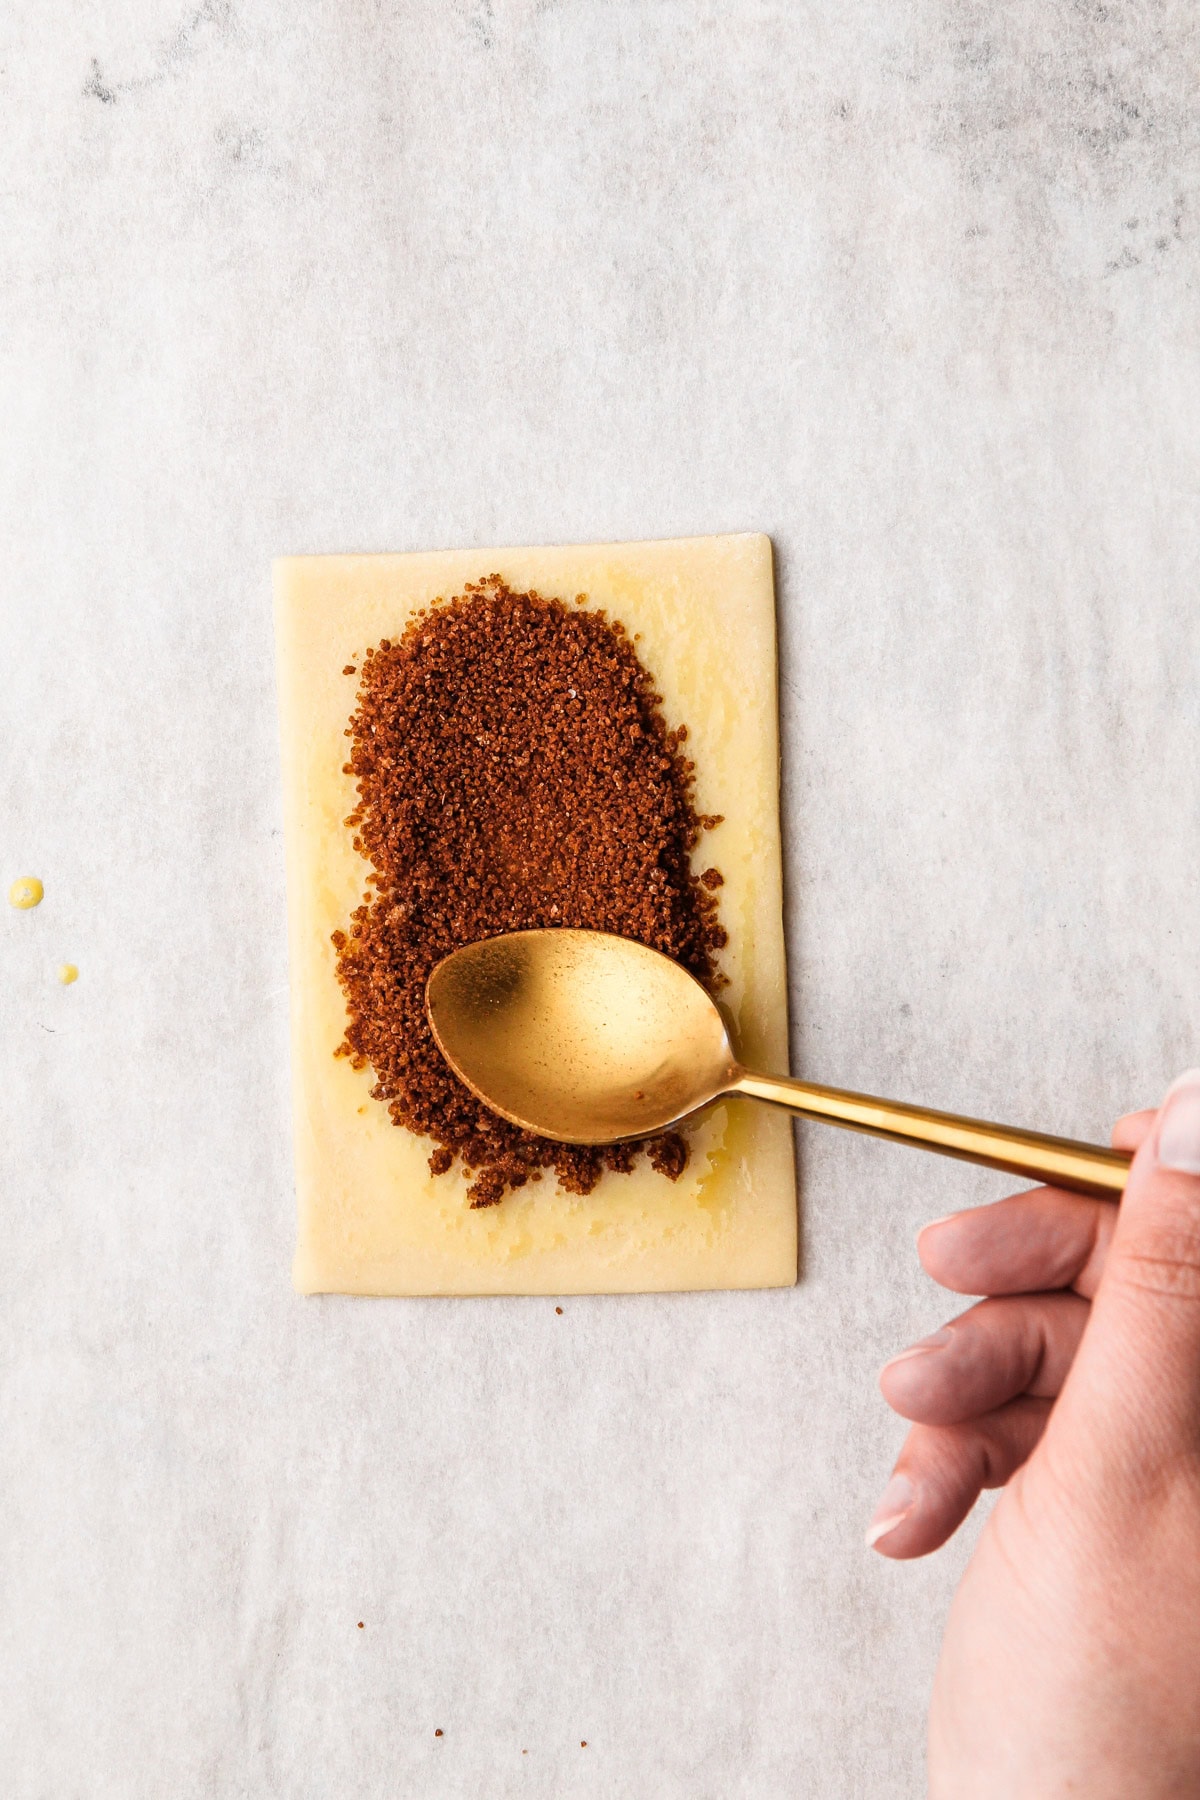
Step 3: Place an overfilled tablespoon of the brown sugar filling in the middle of the rectangle.
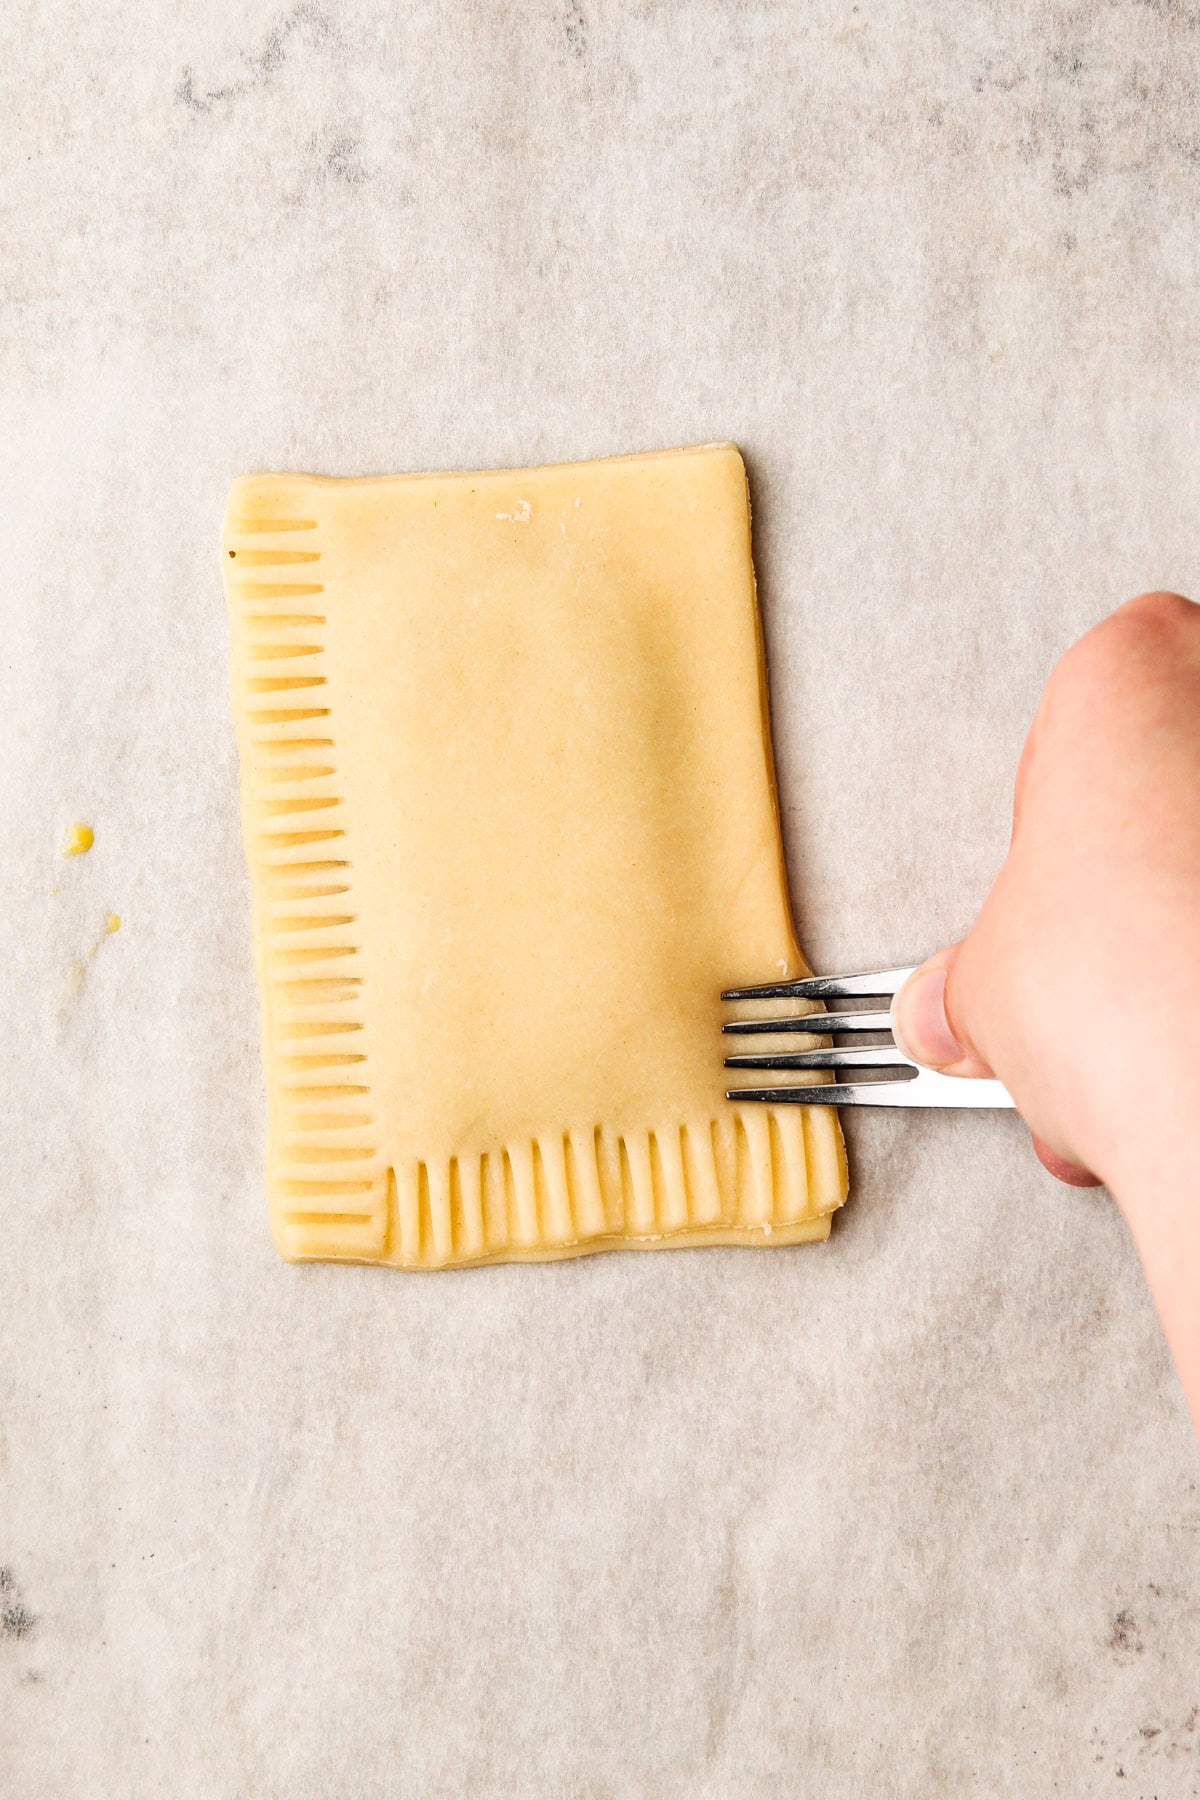
Step 4: Add a piece of pastry on top, and seal in the filling. Then use a fork and press down on the edges of the pastry.
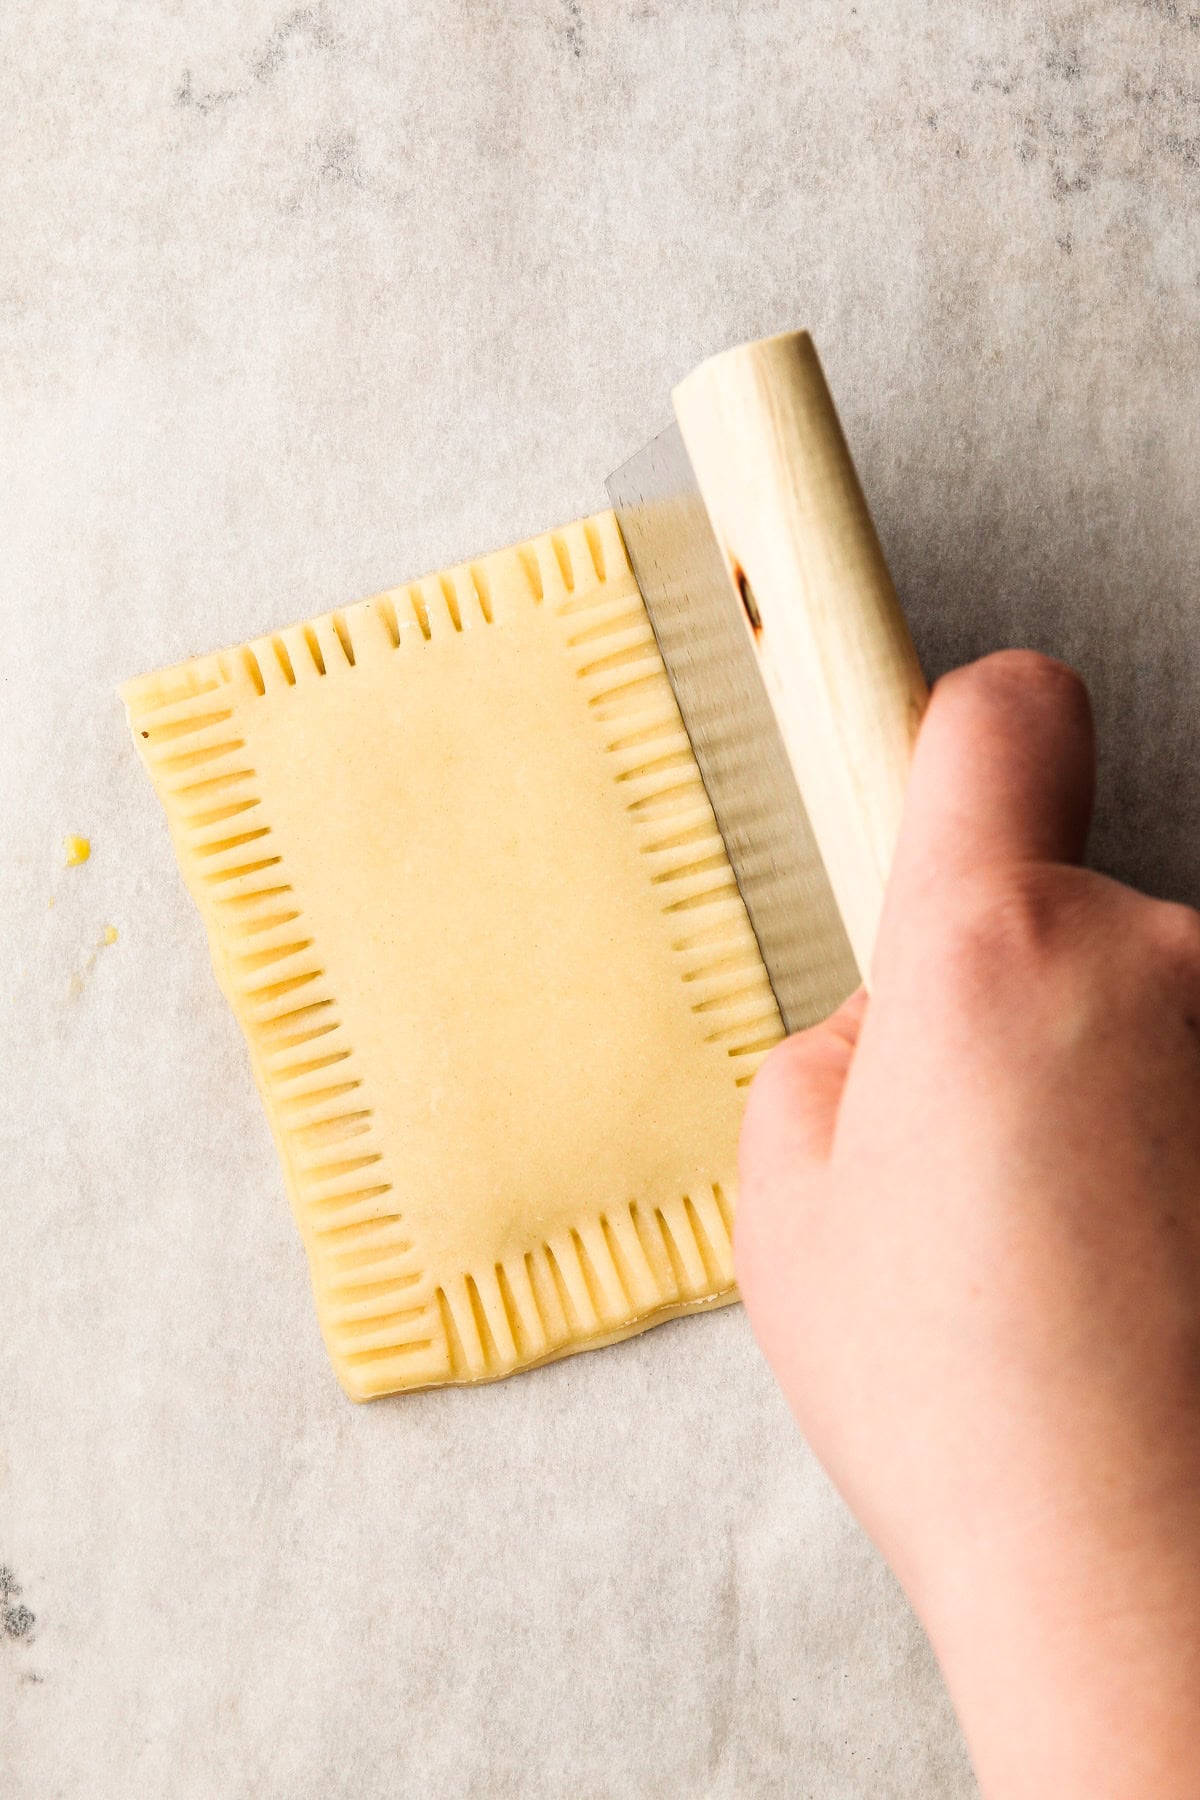
Step 5: Trim the edges of the dough with a bench scraper (or other dull blade). This will make it look neater and seal the edges properly.
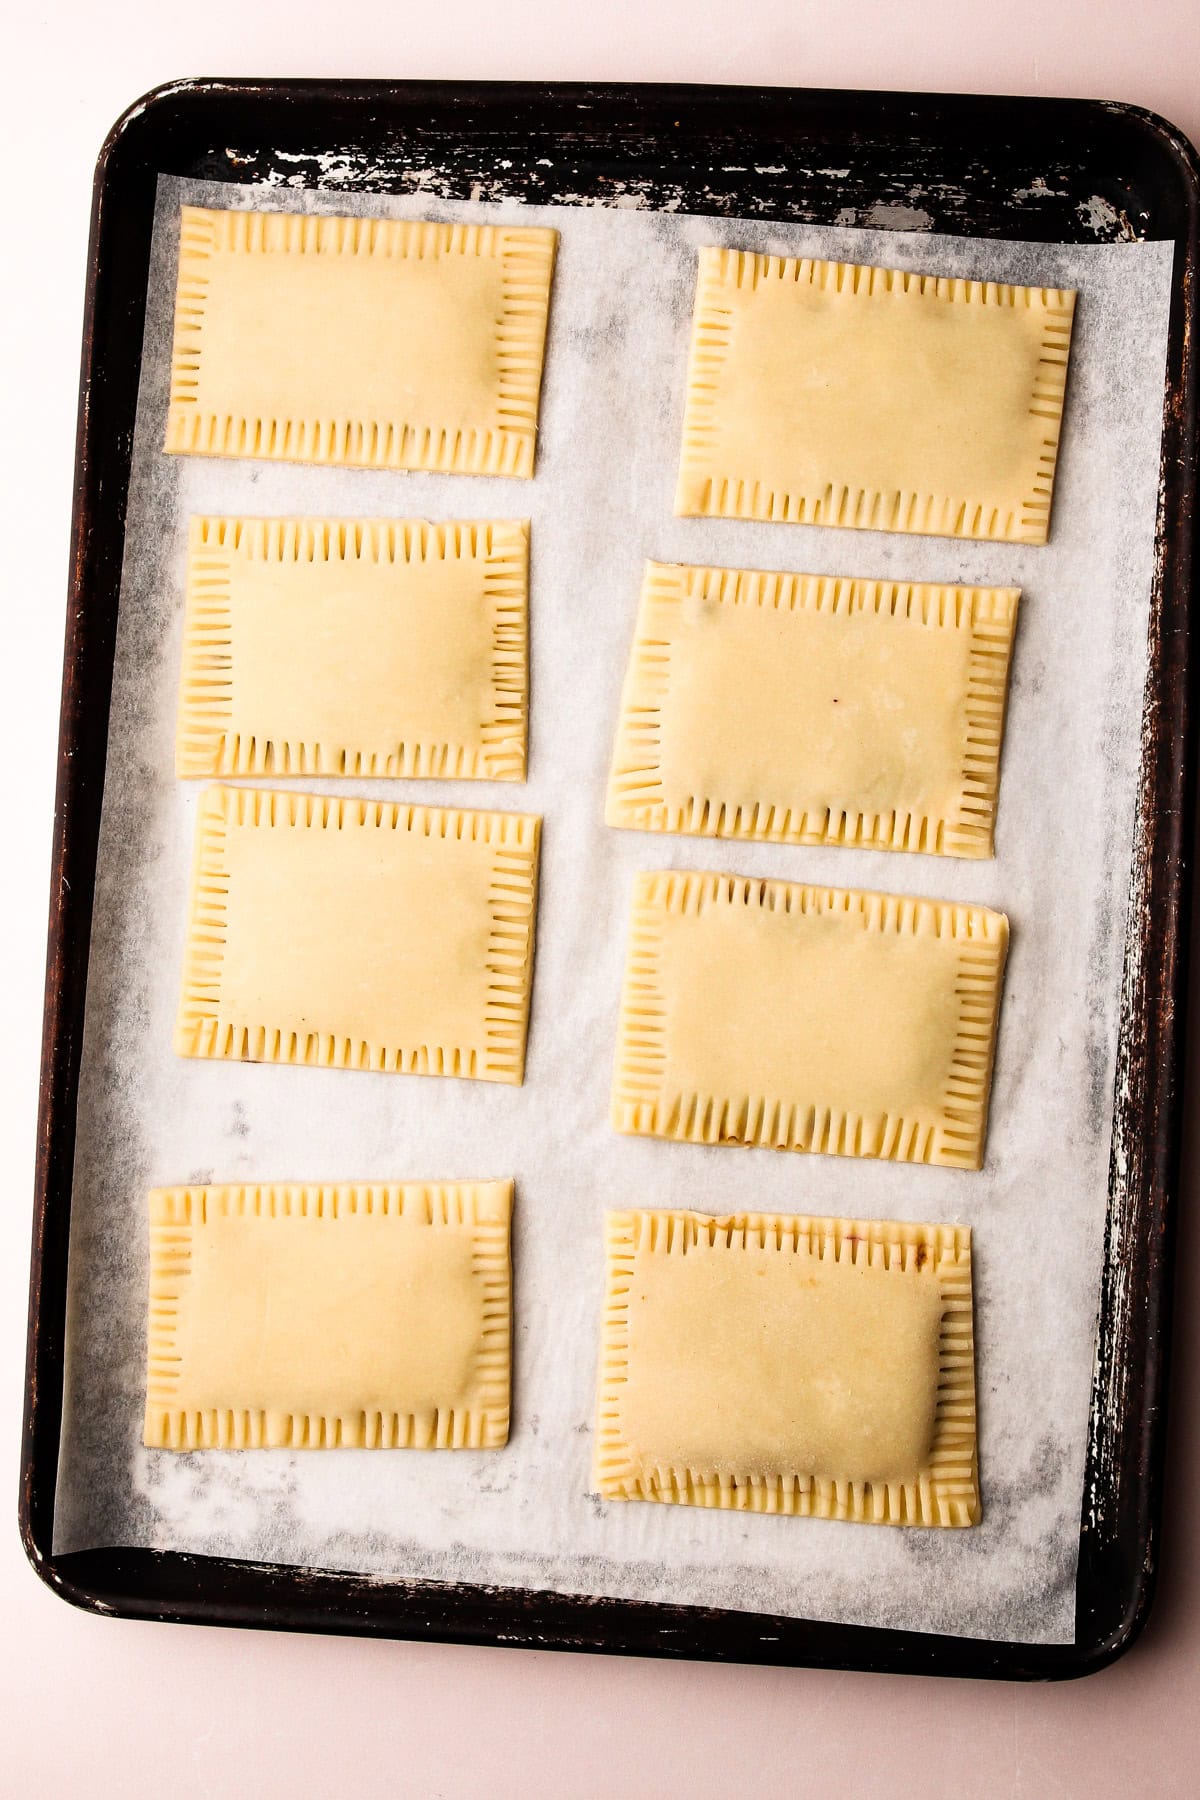
Step 6: Repeat with all pieces of pastry.
Baking the Pop Tarts
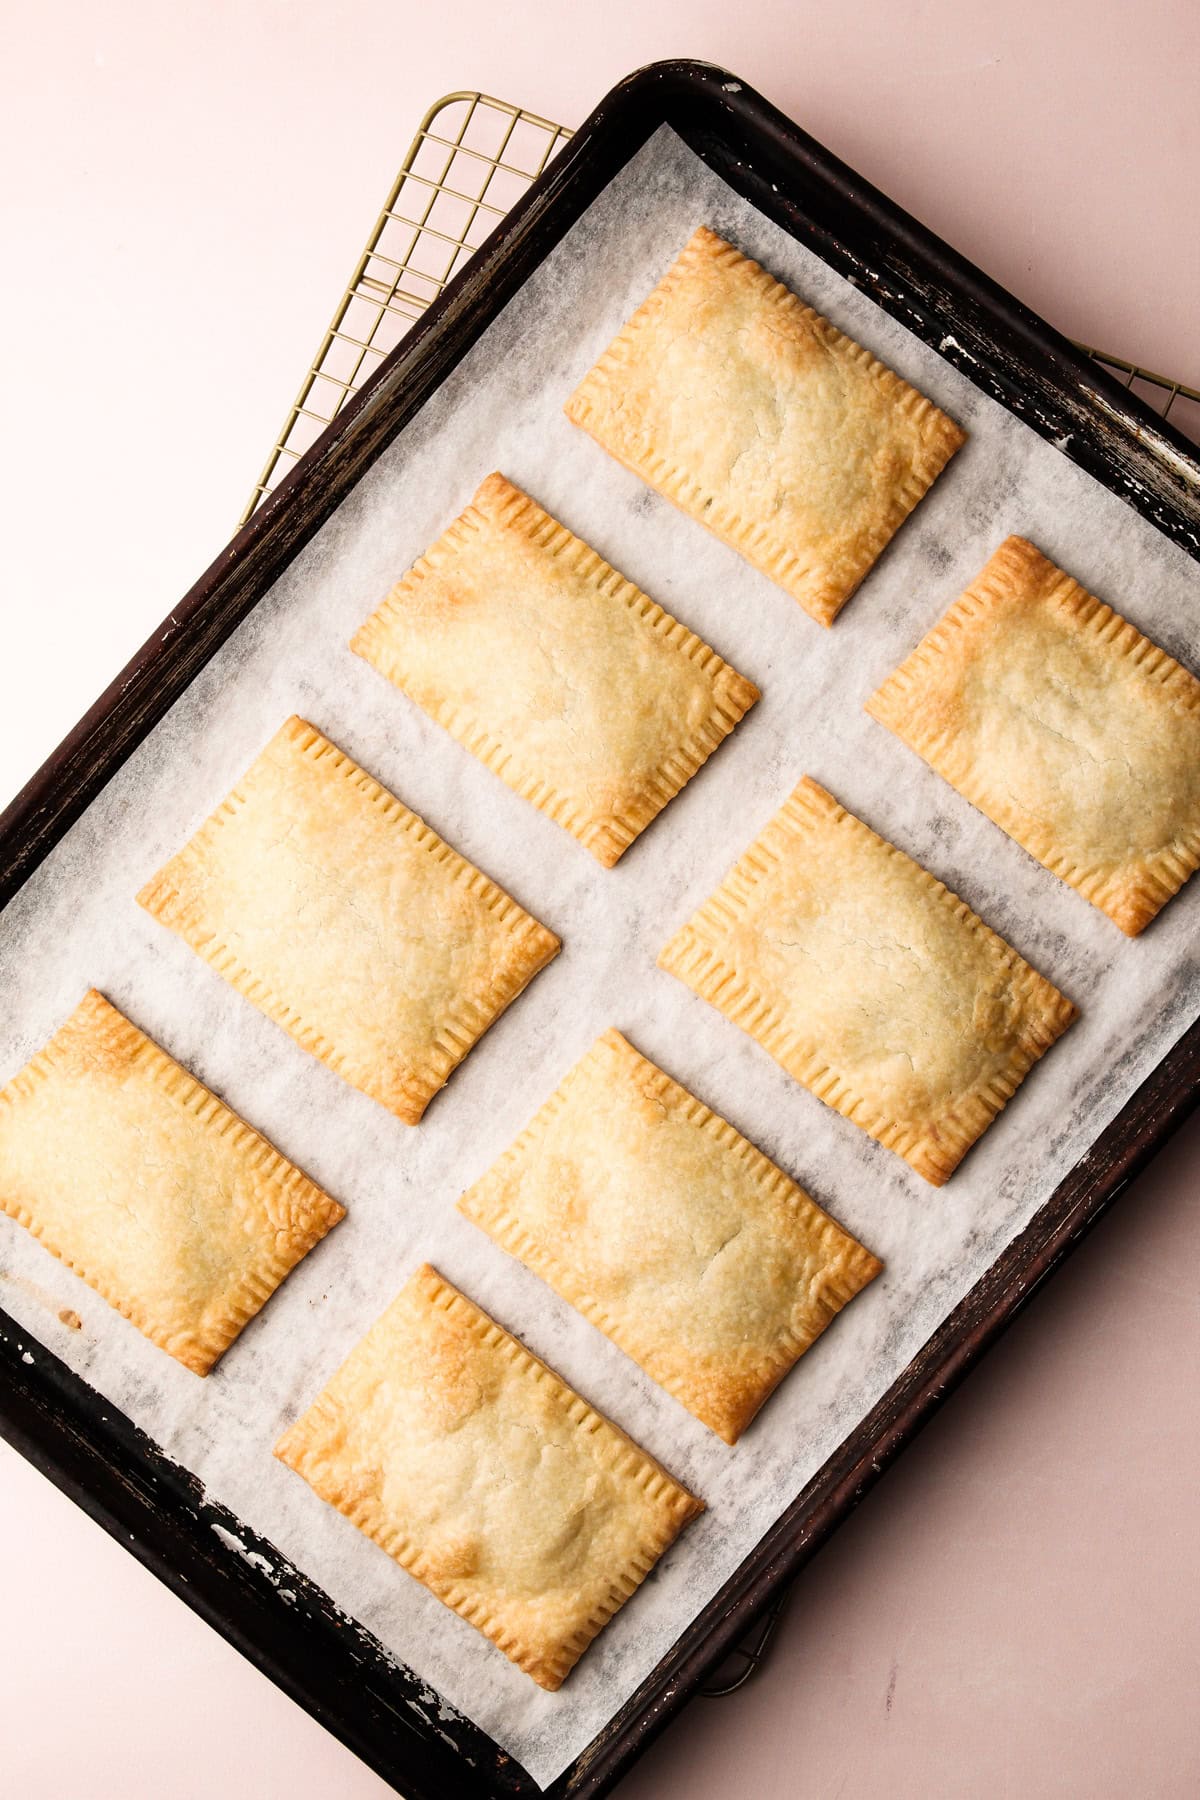
The most important step in baking these pop tarts is chilling them beforehand. Chilling the filled pastries ensures that they keep their shape well. Chill the filled pop tarts in the refrigerator for at least 30 minutes, or ideally 1 hour, before baking.
For best results, these pop tarts should be lightly baked. The aim is to avoid excessive browning on the dough. Bake them in the middle rack until the bottoms and edges are slightly golden, which should take approximately 25 minutes.
Frosting the Pop-Tarts
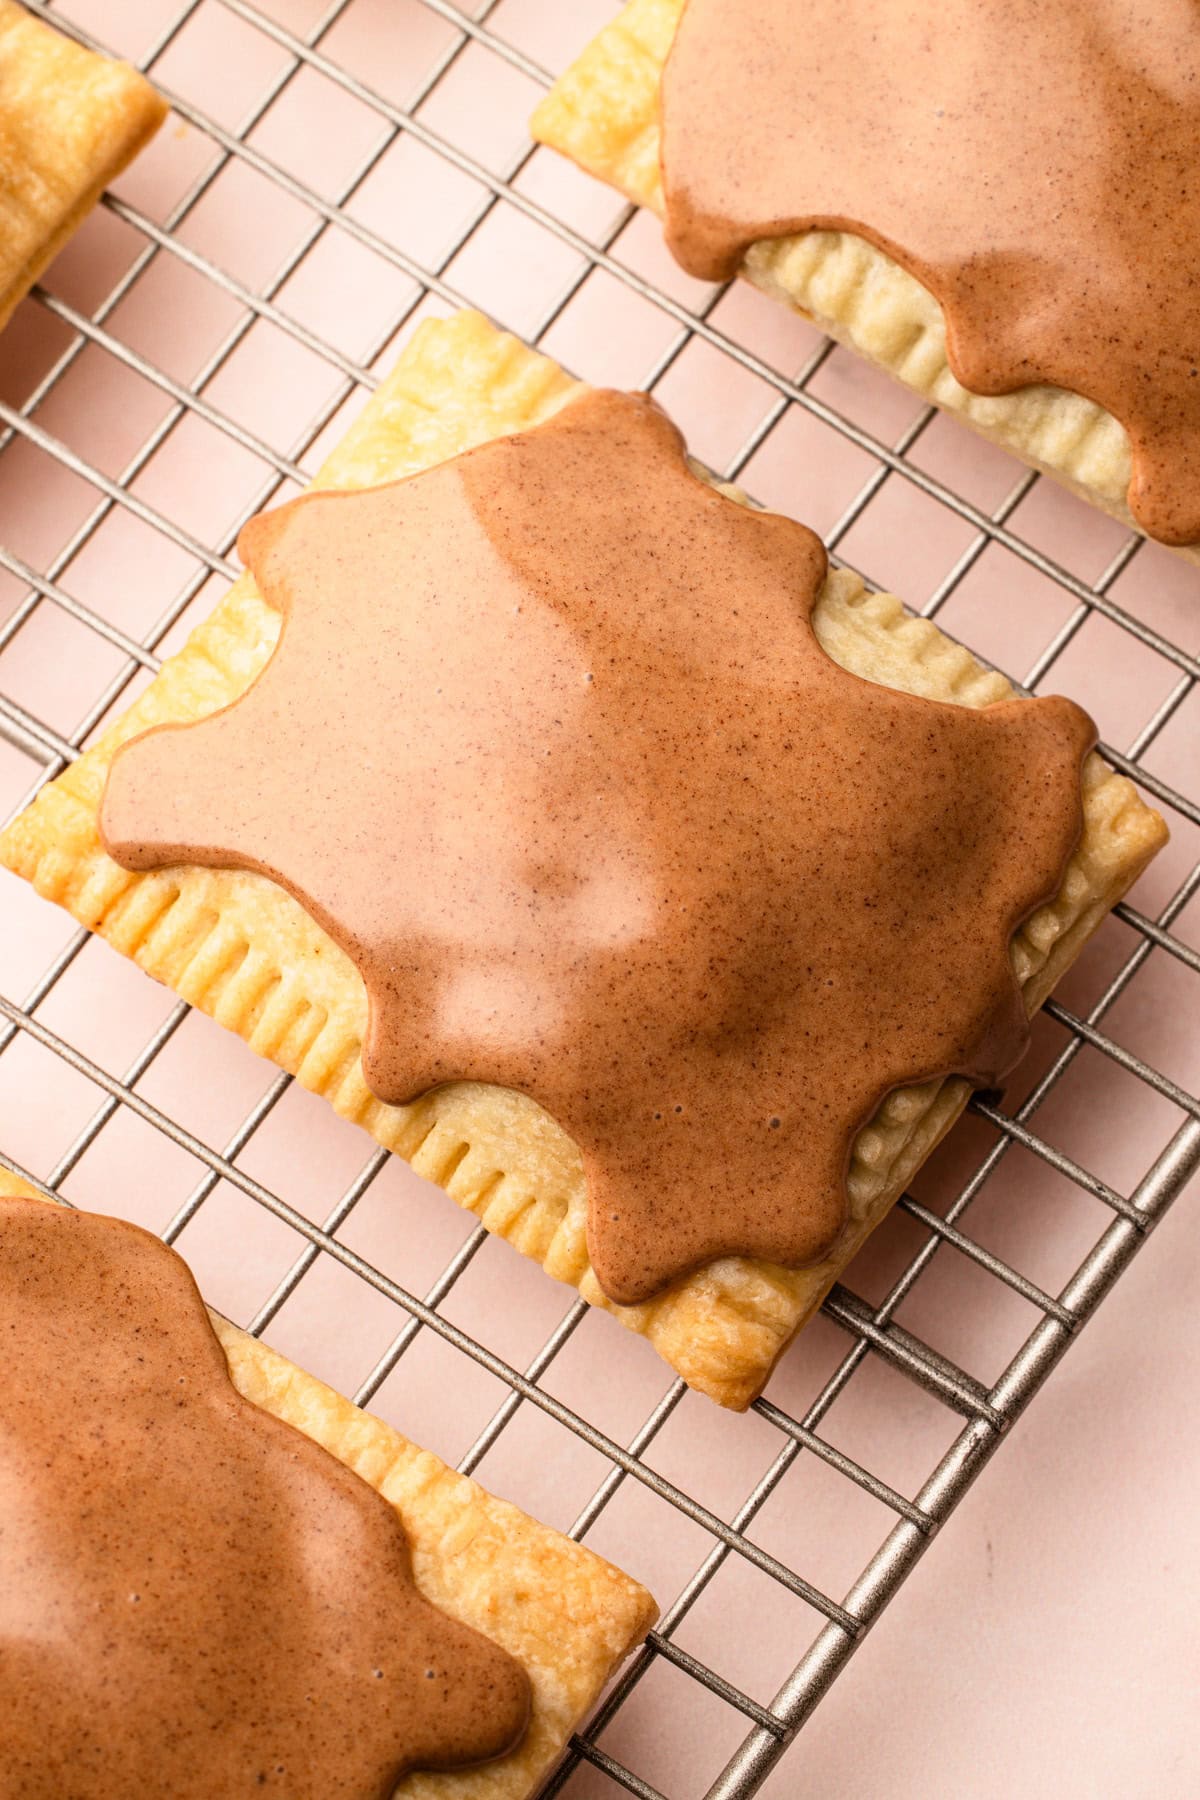
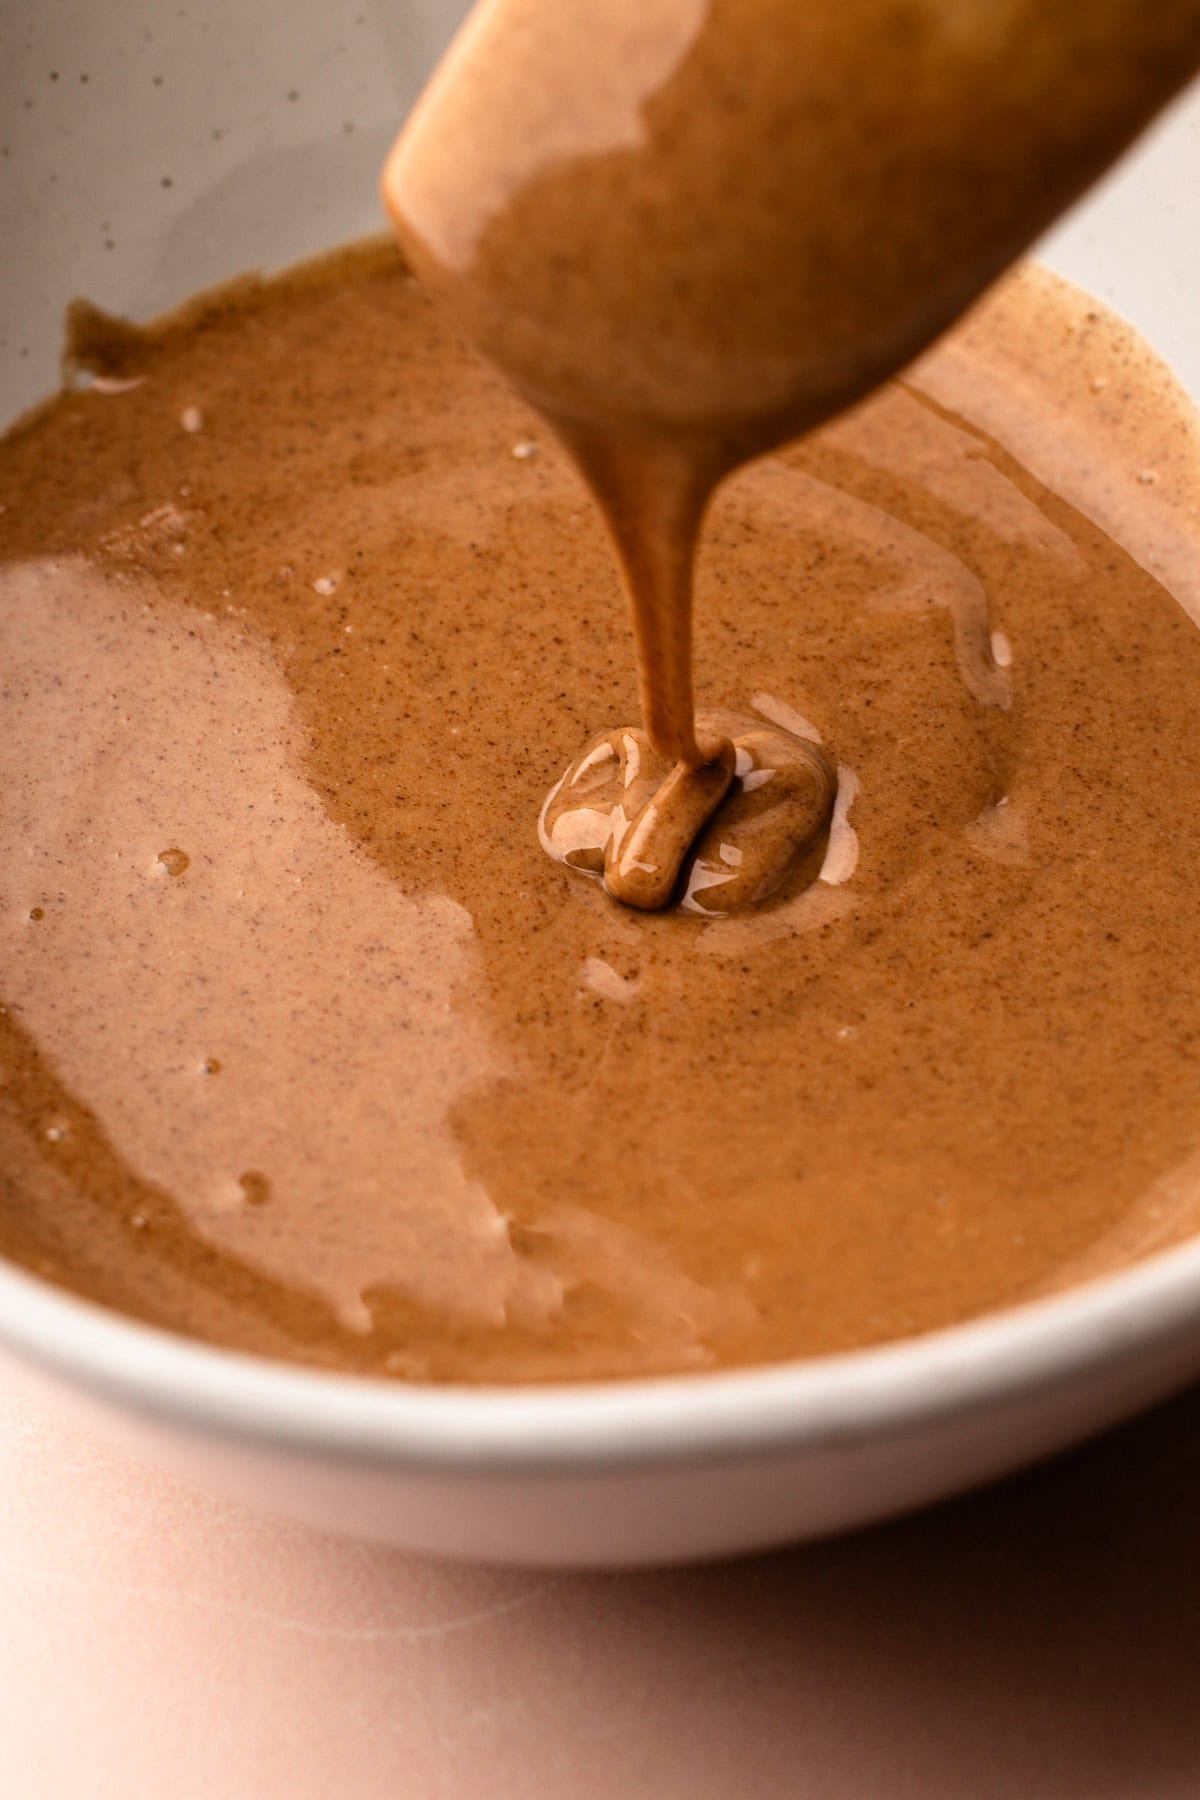
The frosting on top is not to be forgotten! It’s simple to make and consists of powdered sugar, cinnamon, a bit of milk, and a splash of vanilla extract. The glaze should be thick so it stays on top of the pop tart. You’ll know you have the right consistency if when you drizzle the glaze it keeps it’s shape for a few seconds when hitting the bowl.
If your glaze is too thin, add a tablespoon more powdered sugar at a time. If it’s too thick, add in more milk.
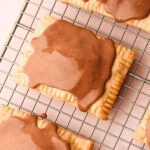
Once the pop tarts are cool, spoon on about 1 tablespoon of glaze and gently smooth it down along the top of the pop tart.

Kelli's Best Pop Tart Tips
Here are a few extra tips to help ensure success!
- Be mindful of the pop tart pastry getting too warm. If the butter in the dough has gotten soft, the dough will be difficult to roll out and hard to fill. Use the refrigerator if necessary in between steps.
- Use a rectangular cookie cutter for even and neat-looking pop tarts.
- Don't overfill the pop tarts. Most people have the urge to have as much filling as possible. But if you recall, store-bought pop tarts have just a thin layer of filling. It should be the same for the homemade version. If you fill the pastry too much, it could leak out and make a mess.
- Follow all of the instructions for sealing the pastry together. This will ensure that the pop tarts maintain their shape during baking. The final step of trimming the edges with a pastry bench scraper is crucial. This step is crucial as it not only cleans up the edges of the pop tarts, making them look neat, but also helps to seal the two pieces of pastry together properly. Using a knife won't work as it will just cut through the pastry, instead of mashing it off. Mashing helps the pastry to stick together like glue and creates a proper seal. If you don't have a bench scraper, you can use another tool that is dull but still able to cut through soft pastry. A ruler may work well as a substitute.
Serving and Storing
The pop tarts will keep well for up to 3 days, at room temperature, in a closed container. Just make sure that the glaze is completely set before you place them on top of one another.
Un-frosted pop tarts can even be frozen, baked, or unbaked for up to 1 month in the freezer. Defrost at room temperature.
More Hand Held Desserts
I am so honored when you make a recipe from my site! If you make this Brown Sugar Cinnamon Pop Tarts recipe, please leave a star ⭐️⭐️⭐️⭐️⭐️ rating with your experience! If you have any questions about this recipe, feel free to comment here, and tag me on Instagram!
Full Recipe
Homemade Brown Sugar Cinnamon Pop Tarts
These homemade Brown Sugar and Cinnamon Pop Tarts are out-of-this-world-good. Made from scratch with a buttery brown sugar filling, baked to perfection, and topped with a mouth-watering cinnamon glaze. Be sure to read through the article to see helpful step-by-step photos, expanded instructions and tips for having success with this recipe.
- Prep Time: 00:25
- Cook Time: 00:35
- Total Time: 00:55 plus chilling time
- Yield: 8-9 Pop Tarts
- Category: Dessert
- Method: Bake
- Cuisine: American
Ingredients
For Pop Tart Dough:
- 2–½ cups (300 grams) all-purpose flour, more for work surface
- 1 tablespoon powdered sugar
- ½ teaspoon (2 grams) coarse kosher salt (see note)
- 16 tablespoons (230 grams) unsalted butter, cold, cubed
- ⅓ cup (75 grams) whole milk
For Brown Sugar Cinnamon Filling and Assembly:
- ½ cup (100 grams) packed dark brown sugar
- 3 tablespoons (40 grams) unsalted butter, melted
- 1 tablespoon (16 grams) all-purpose flour
- 1 teaspoon ground cinnamon
- Egg wash
For Cinnamon Glaze:
- 1 cup (115 grams) powdered sugar
- 2 tablespoons milk, more as needed
- 1 teaspoon ground cinnamon
- ½ teaspoon vanilla extract
Instructions
Make the Dough:
- Add the flour, powdered sugar, and salt to the bowl of a food processor. Pulse until combined. Add in the butter and pulse 7 times. With the processor running, pour in the milk and process until the dough forms a cohesive ball.
- Remove the dough from the bowl and place it onto a piece of plastic wrap. Form the dough into a rectangle and wrap tightly. Using a rolling pin, roll the dough out until it stretches to the edges of the plastic wrap to ensure a tight seal.
- Refrigerate for at least 2 hours, but preferably overnight.
Make the Filling:
- In a small bowl, stir together the brown sugar, melted butter, flour, and cinnamon until well combined.
Prepare the Pop Tarts:
- Remove the chilled dough from the refrigerator and let rest at room temperature for 5 to 10 minutes, or until the dough is slightly softened and easier to roll. Divide the dough in half.
- On a well-floured work surface, roll out one piece of dough to a rough 9-by-13 rectangle, about ⅛-inch thick. Using a pastry wheel or chef’s knife, cut out as many 3-by-4-inch rectangles as you can. Repeat with remaining dough. Then, gather up the scraps and roll out the dough in the same manner, cutting out as many rectangles as possible. This dough should yield 16 to 18 rectangles total.
- Line a baking sheet with parchment paper and place half of the rectangles down on the baking tray.
- Use a pastry brush to brush the egg wash around the edges of the pastry.
- Place 1 heaping tablespoon of the brown sugar filling in the middle of each rectangle. Gently spread out the sugar until it is evenly distributed, leaving a ½-inch border around the edges of the pastry. Place the remaining pastry rectangles on top, taking care to seal the edges well. Use a fork to crimp the edges. Finally, using a bench scraper, trim the edges of the pastry. This makes the final product look neat and also seals the pop tarts well.
- Chill the tray of pop tarts in the refrigerator for at least 30 minutes. Once chilled, using a knife, gently pop holes through the top of the dough to let steam escape during baking.
Bake and Frost the Pop Tarts:
- Preheat the oven to 375°F and place an oven rack in the middle part of the oven. Bake the pop tarts in the preheated oven until the bottoms are slightly golden, about 25 minutes. Transfer to a wire rack and let cool completely, at least 1 hour.
- In a small bowl, whisk together the powdered sugar, milk, cinnamon, and vanilla. The glaze should be thick enough to keep its shape for a few seconds when drizzled off of a spoon; if it’s too thick, add more milk as needed.
- Spoon 1 tablespoon of glaze onto the middle of each cooled pop tart and gently smooth it down. Let the glaze set for at least 15 minutes. Serve.
Notes
Pop tarts will keep, covered, at room temperature, for about 3 days.
Weighing your flour is the most accurate way to measure. If you aren't going to weigh it, make sure to spoon it into the measuring cup, then level it off. If you scoop the flour out with the measuring cup and then level, it could change the outcome of the final product.
This recipe was tested using Diamond Crystal coarse kosher salt. If you use Morton's kosher salt or fine salt, decrease the volume by half.
Some of the links on this page may be affiliate links. Everyday Pie is a participant in the Amazon Associates Program. As an Amazon Associate I earn from qualifying purchases, at no extra cost to you.
Rebecca
These are amazing! I have made them quite a few times and they are delicious!
Caitlin
I’ve made this several times now and it’s THE BEST. I’ve improvised with fillings too-raspberry, blueberry/lemon, and even mango/citrus. People always love the brown sugar cinnamon ones, though, so I make sure I always include some of those. Thank you so much for sharing this recipe!
Netta
Hi! I was wondering if I could use a blender on pulse instead of a food processor??
Kelli Avila
I have not tried that, so I can't advise unfortunately. If you didn't have a food processor, your best bet might be to make it by hand.
Sheila
Delicious! I was too lazy to make lots of small ones so u made a giant one. The icing is 😍
Kelli Avila
Oh how fun! I bet that looked amazing! I'll have to try it.
Hallie
We absolutely live this recipe in our house. We've made it multiple times now. I have friends that request one when we make it. I do use while wheat flour.
Guin
Words cannot describe how well these turned out. In all my years of baking, I’ve never braved homemade pastry dough or pie crust. This recipe was easy to follow and made the most delicious, flaky crust. The filling and icing also turned out amazingly. 10/10 would recommend!!
Kelli Avila
Awesome! So happy you enjoyed the recipe!
Marnie
A fan favorite in my house!!
Sam
These were beyond delicious and I was so proud of myself for making the dough actually turn out! I give you all the credit though for providing a great dough recipe. Would just the dough be okay to use for a regular pie and would I need to roll it out any thicker or anything? I loved it so much I don't want to use anything else for a crust!
Kelli Avila
Hi! You should be proud! This recipe is a project! So happy you enjoyed. I too love the pop tart dough. You can totally use this for a pie crust! I think it would make enough for one 9" pie crust, possibly two. This crust will brown quickly though if you use it in a pie that requires a long high temperature though, so just be aware of that.
Kay
Hi, Can this be made vegan?
Kelli Avila
I haven't tried using any vegan substitutes here! Let us know if you do.
Kaitlyn
Thinking of making these for a baby shower. Could I half the size of the rectangles and make mini ones?
Maggie
I had never made pop tarts before, but these were fun to make and delicious!
Kelli Avila
So happy to hear this, Maggie!
Alexis
Would this work with dairy free butter?
Kelli Avila
I haven't tried, but an educated guess tells me it likely would!
Chelsea Rose
So so good! Love both the strawberry and the brown sugar version. Everyone who has tried these loved them. The first batch I made I left the filling in a mound and it was tasty but I liked how it melted together a bit more in the second batch that spread out evenly (like suggested).
Definitely will make again!