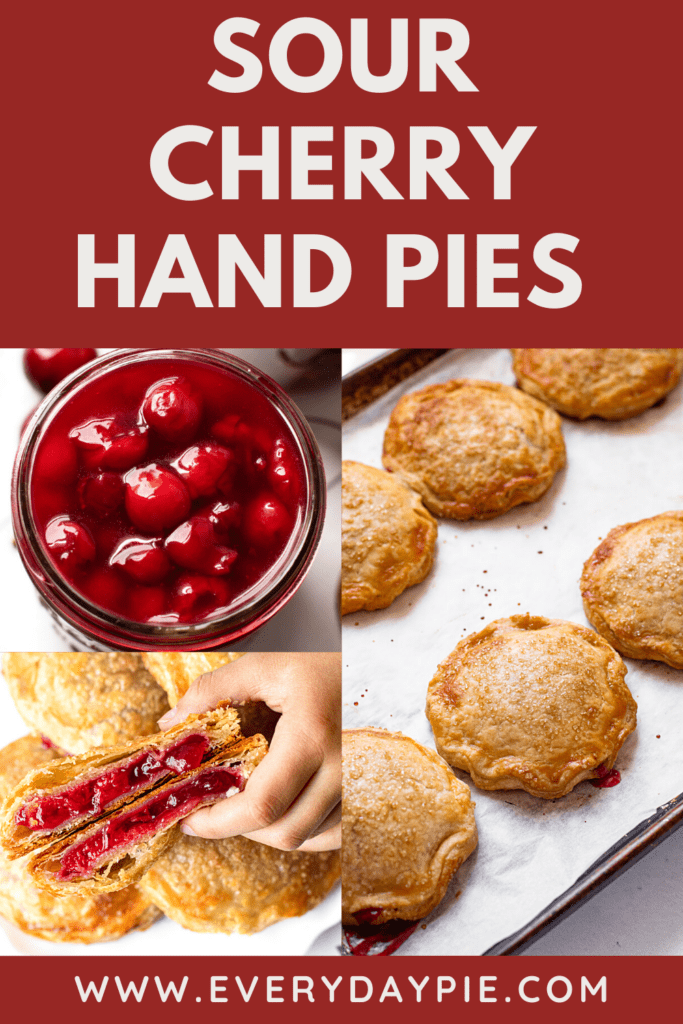

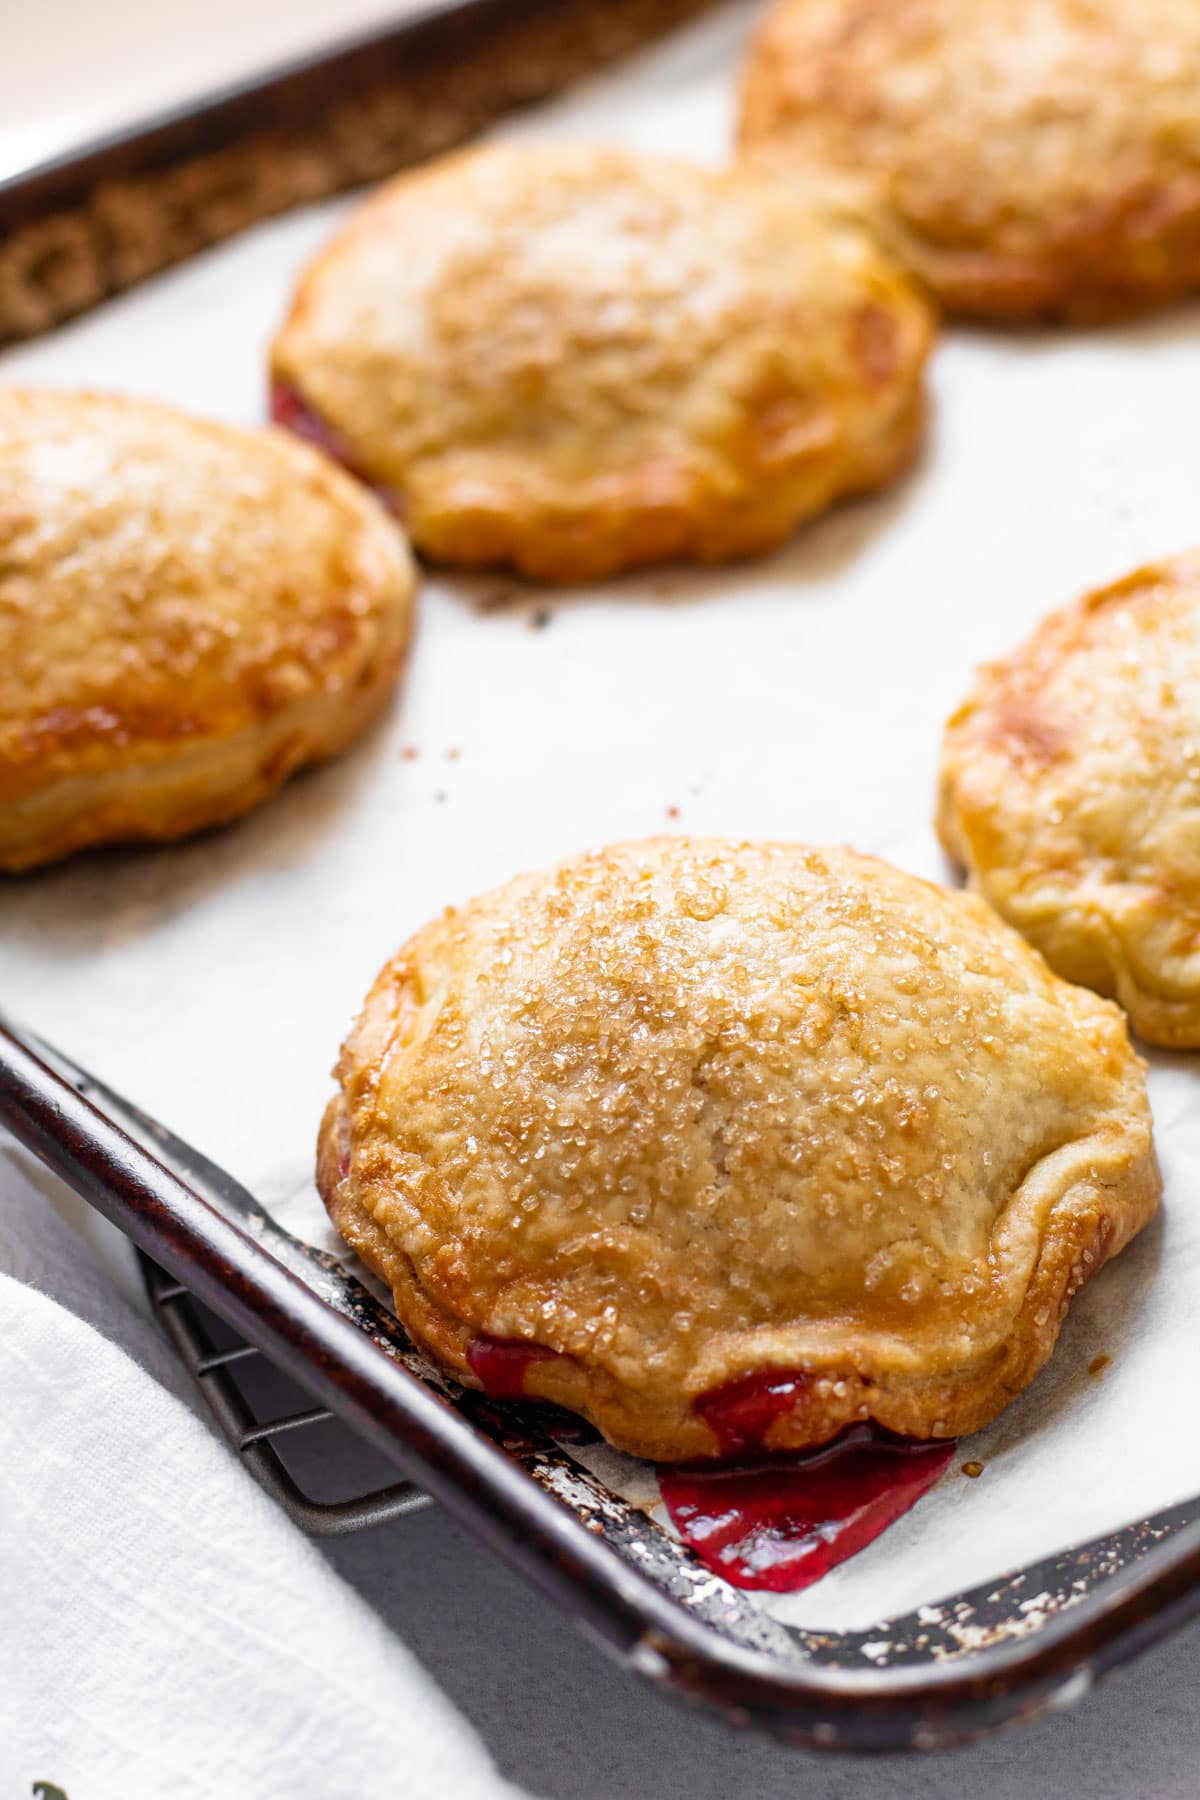
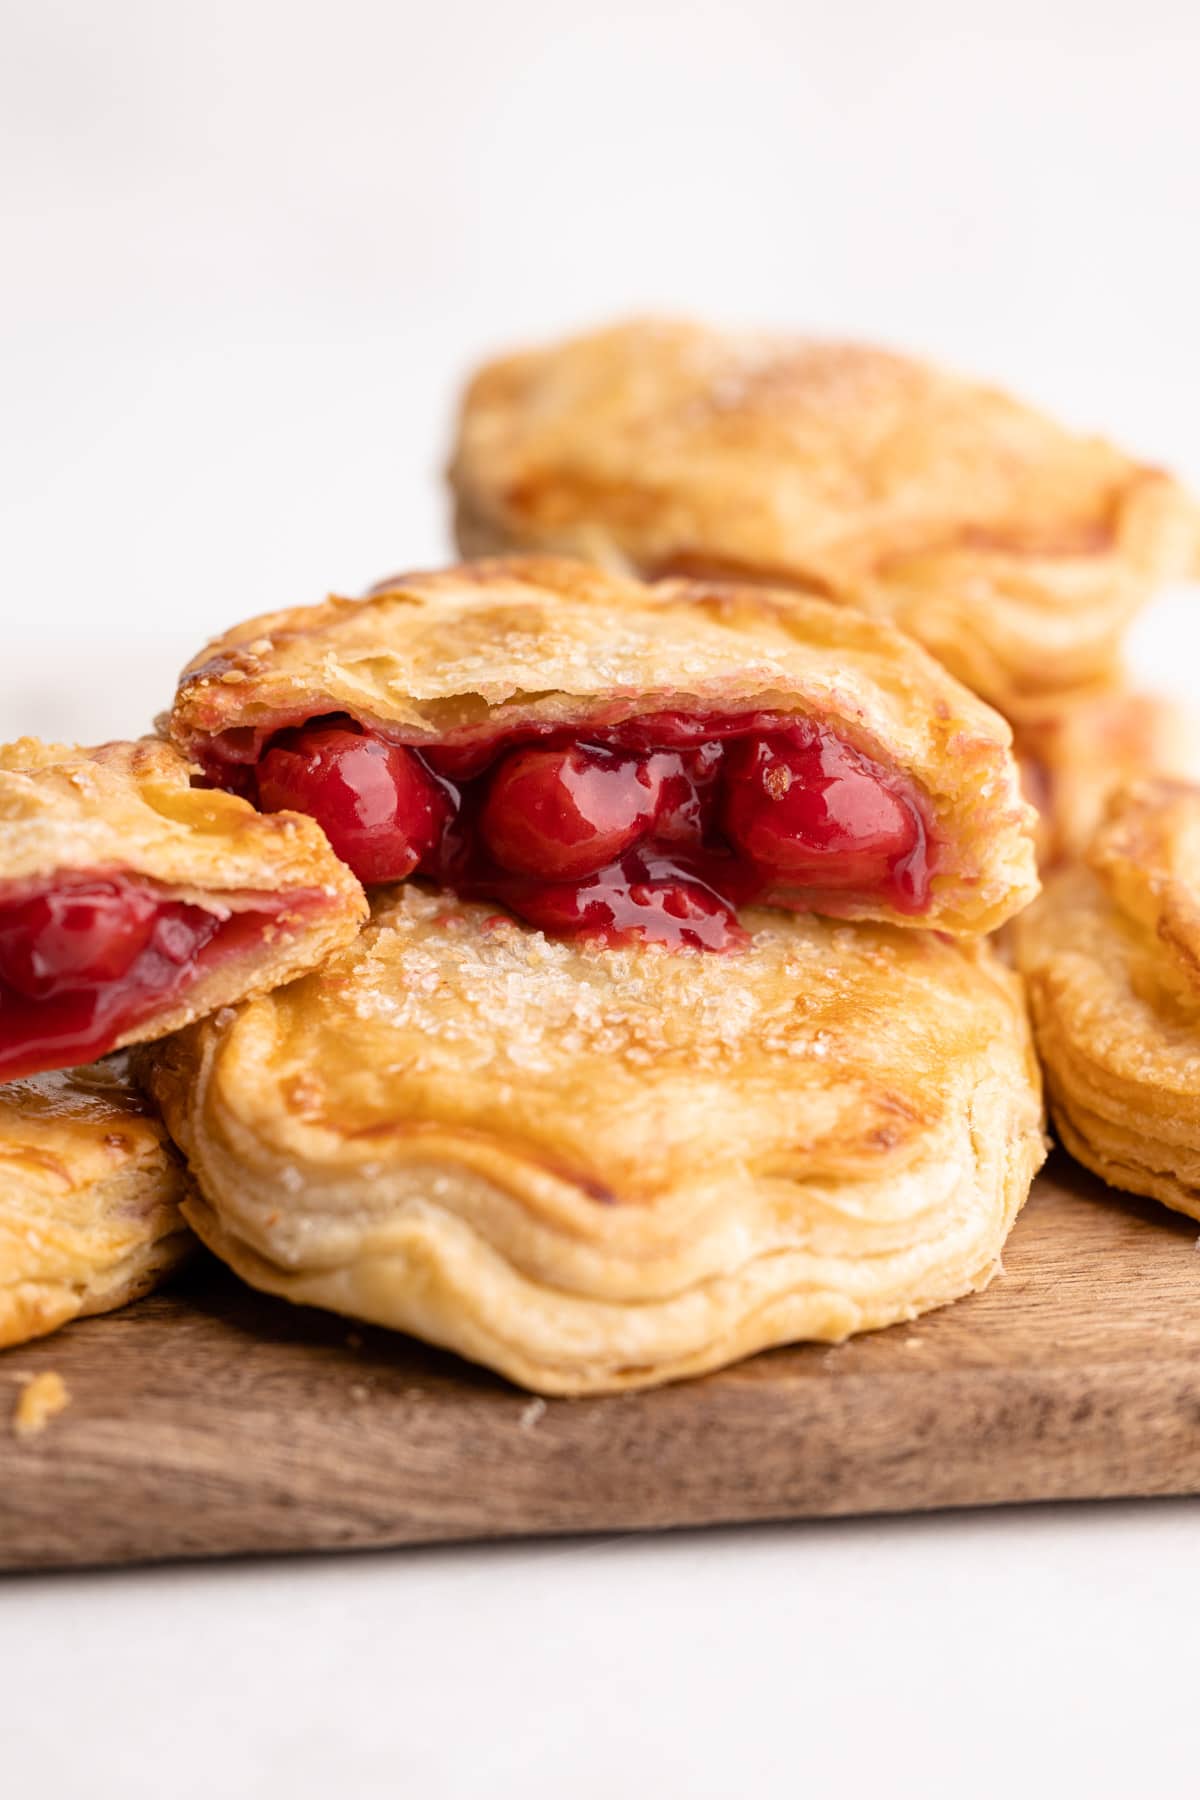
Featuring perfectly sweetened sour cherries baked inside of the flakiest pastry, these Cherry Hand Pies could be the poster child for the best summertime dessert. Not only are they hand-held, which makes them perfect for a potluck or outdoor gathering, they are also easier to make than you might think!
Want to save this recipe?
Enter your email & I'll send it to your inbox. Plus, get weekly updates from me!
Easy Cherry Pastry Pies
Cherry Hand Pies are just the treat to bring to any backyard cookout or potluck! This recipe takes all of the deliciousness of cherry pie and bakes into a handheld pastry crust. These hand pies are filled with juicy tart cherry filling and have the flakiest, most tender crust.
The best part? Hand pies freeze really well! So, go ahead and make a double batch to have some for now and some for later.
Ingredients Needed
Here is an overview of the ingredients needed for this recipe. The full recipe is listed below in greater detail.
- 1 batch All Butter Pie Crust
- sour cherries (or you can use sweet cherries if you can't find sour)
- granulated sugar
- cornstarch
- lemon juice
- tart cherry juice
- almond extract
- butter
Tools Needed
Here is a list of some of the primary tools I use in this recipe. You won't necessarily choose to use them all, but they are exactly what I used. Any links may contain affiliate links.
- food processor
- rolling pin
- pastry brush
- circle cutters
- baking basics: bowl, spatula, sheet tray, measuring cups
What Kind of Cherries to Use
There are quite a few types of cherries out there, and many of them will work for this recipe. Most cherries can be categorized as either sweet or sour. This recipe calls for sour cherries. The reason this matters is because the amount of sweetener called for is based on the cherries being sour.
You can use fresh or frozen sour cherries. Some common varieties that are good for pies are Montmorency or Morello.
I love using frozen cherries because they're already pitted and taste just as good. But this recipe is great with fresh cherries too.
Want to make this recipe but have sweet cherries? That's fine! You can use this recipe, but reduce the amount of sugar to ⅓ cup of sugar. The recipe has all the notes you need to make the adjustment.
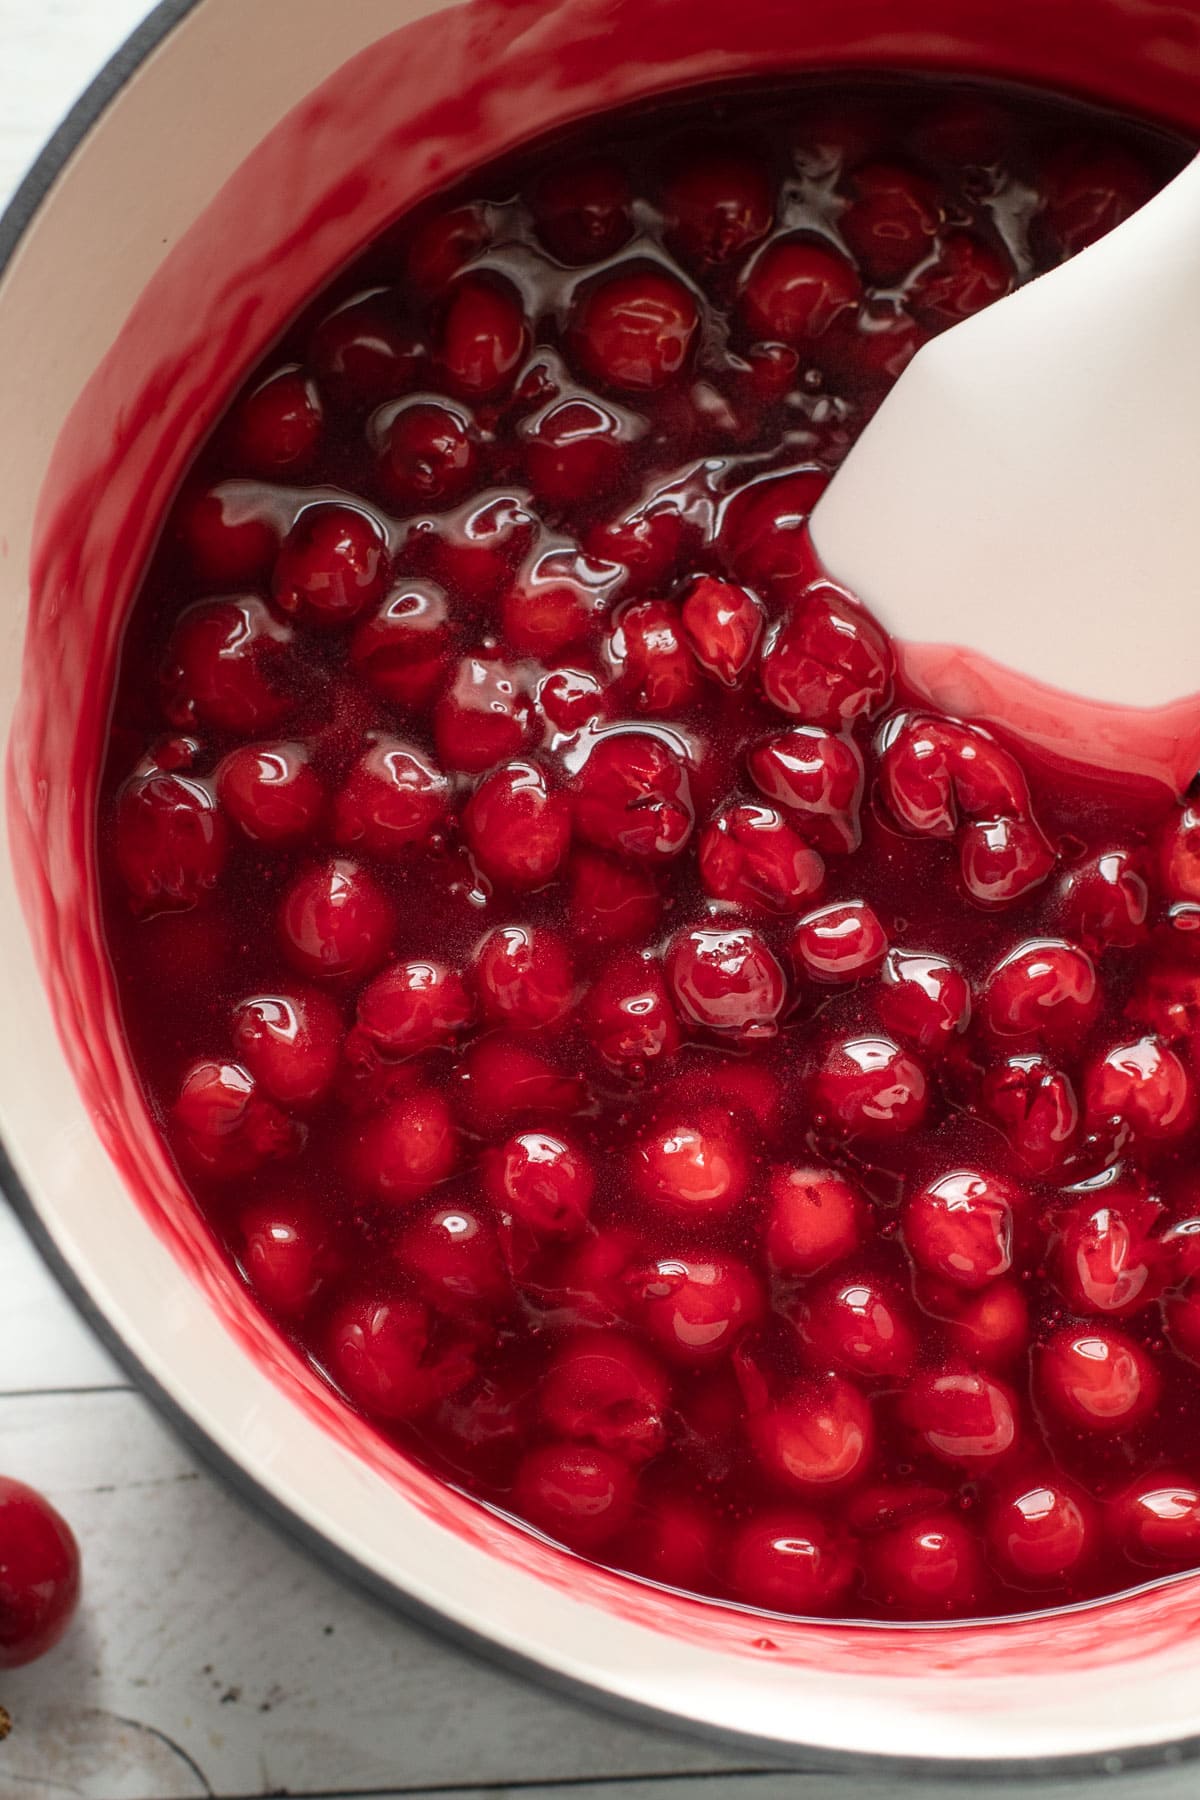
Making the Cherry Pie Filling
Hand pies bake quickly, which means there might not be enough time for the filling inside to bake by the time the pie crust is finished cooking. For this reason, the cherry filling needs to be made ahead of time.
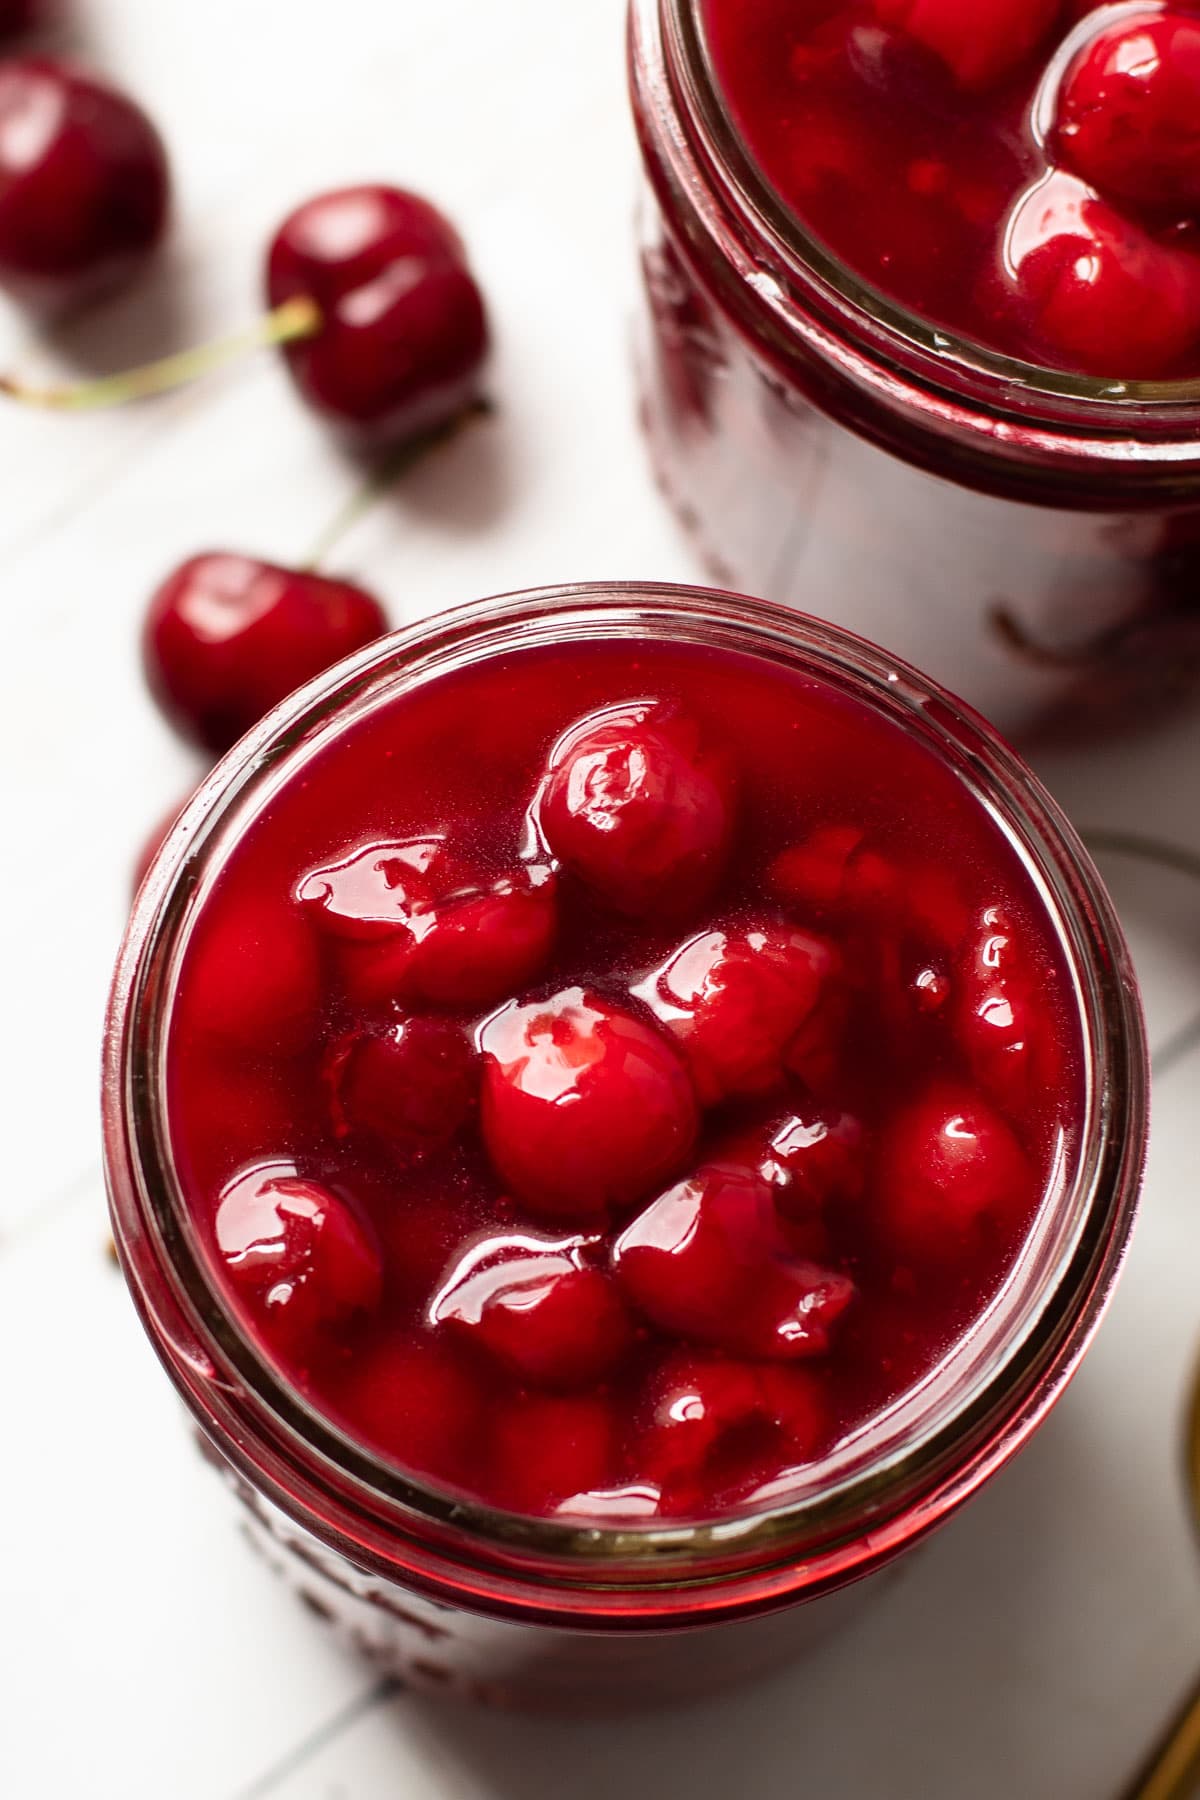
Making the cherry filling is a very simple recipe. Essentially, cherries are mixed together with sugar, lemon juice and cornstarch and then cooked. I wrote a whole post dedicated to making Cherry Pie Filling, so be sure to check that out for more tips.
You likely won't use all of the cherry pie filling made. You can enjoy any leftover cherry filling over ice cream or yogurt. It also freezes well.
Steps Needed to Make Cherry Hand Pies
There are a few steps needed to make hand pies. Luckily, the steps can be broken down and spaced apart, so in the end, it will seem very easy.
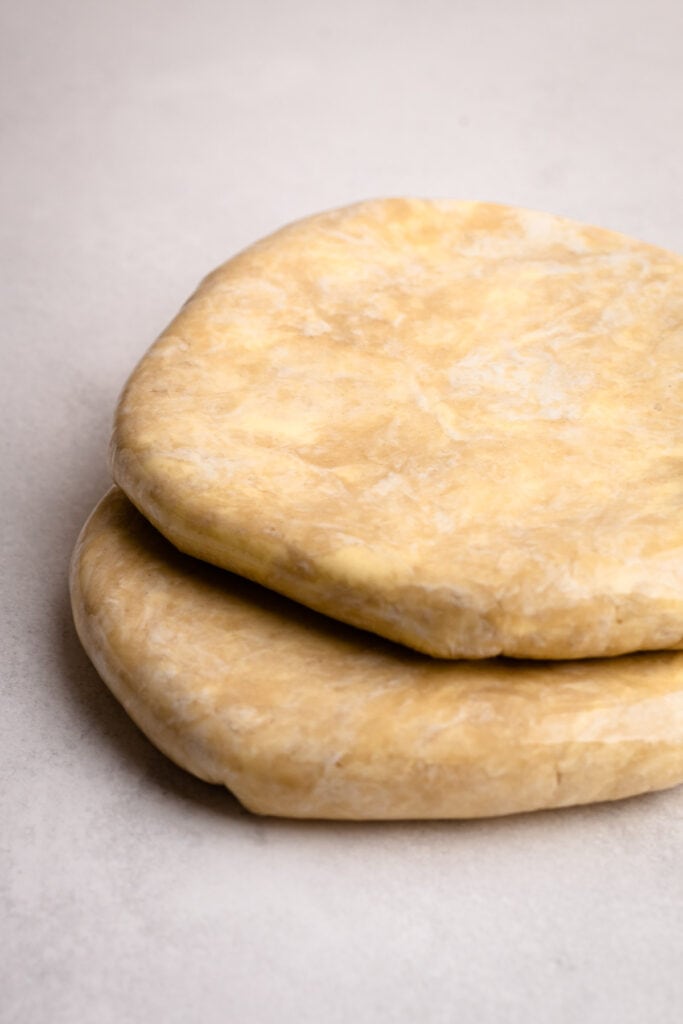
First, you have to make the pie dough. The dough needs to chill overnight. If you are new to making pie dough, check out this comprehensive guide on making butter pie dough.
Next, the filling needs to be prepared. This can be up to 7 days ahead of time. Just make sure it is chilled thoroughly before you assemble the pies.
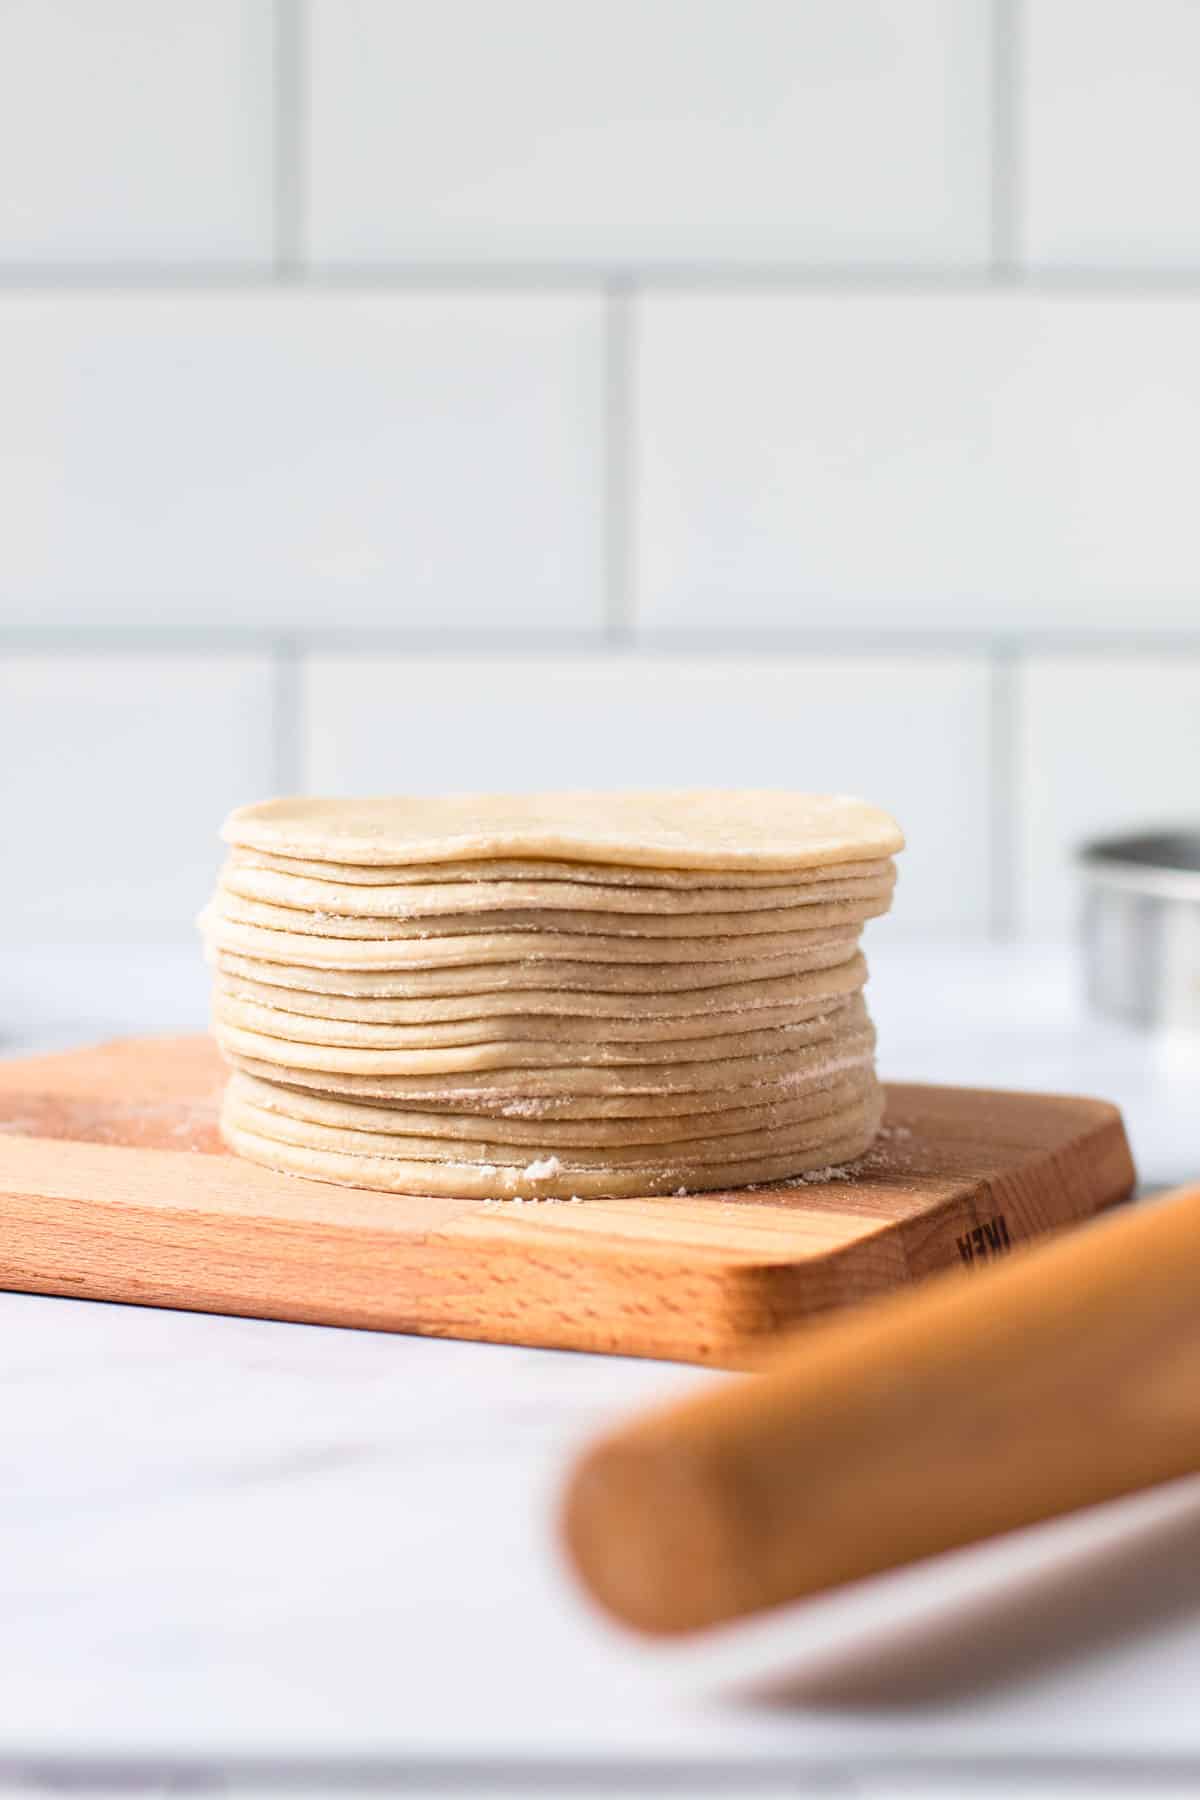
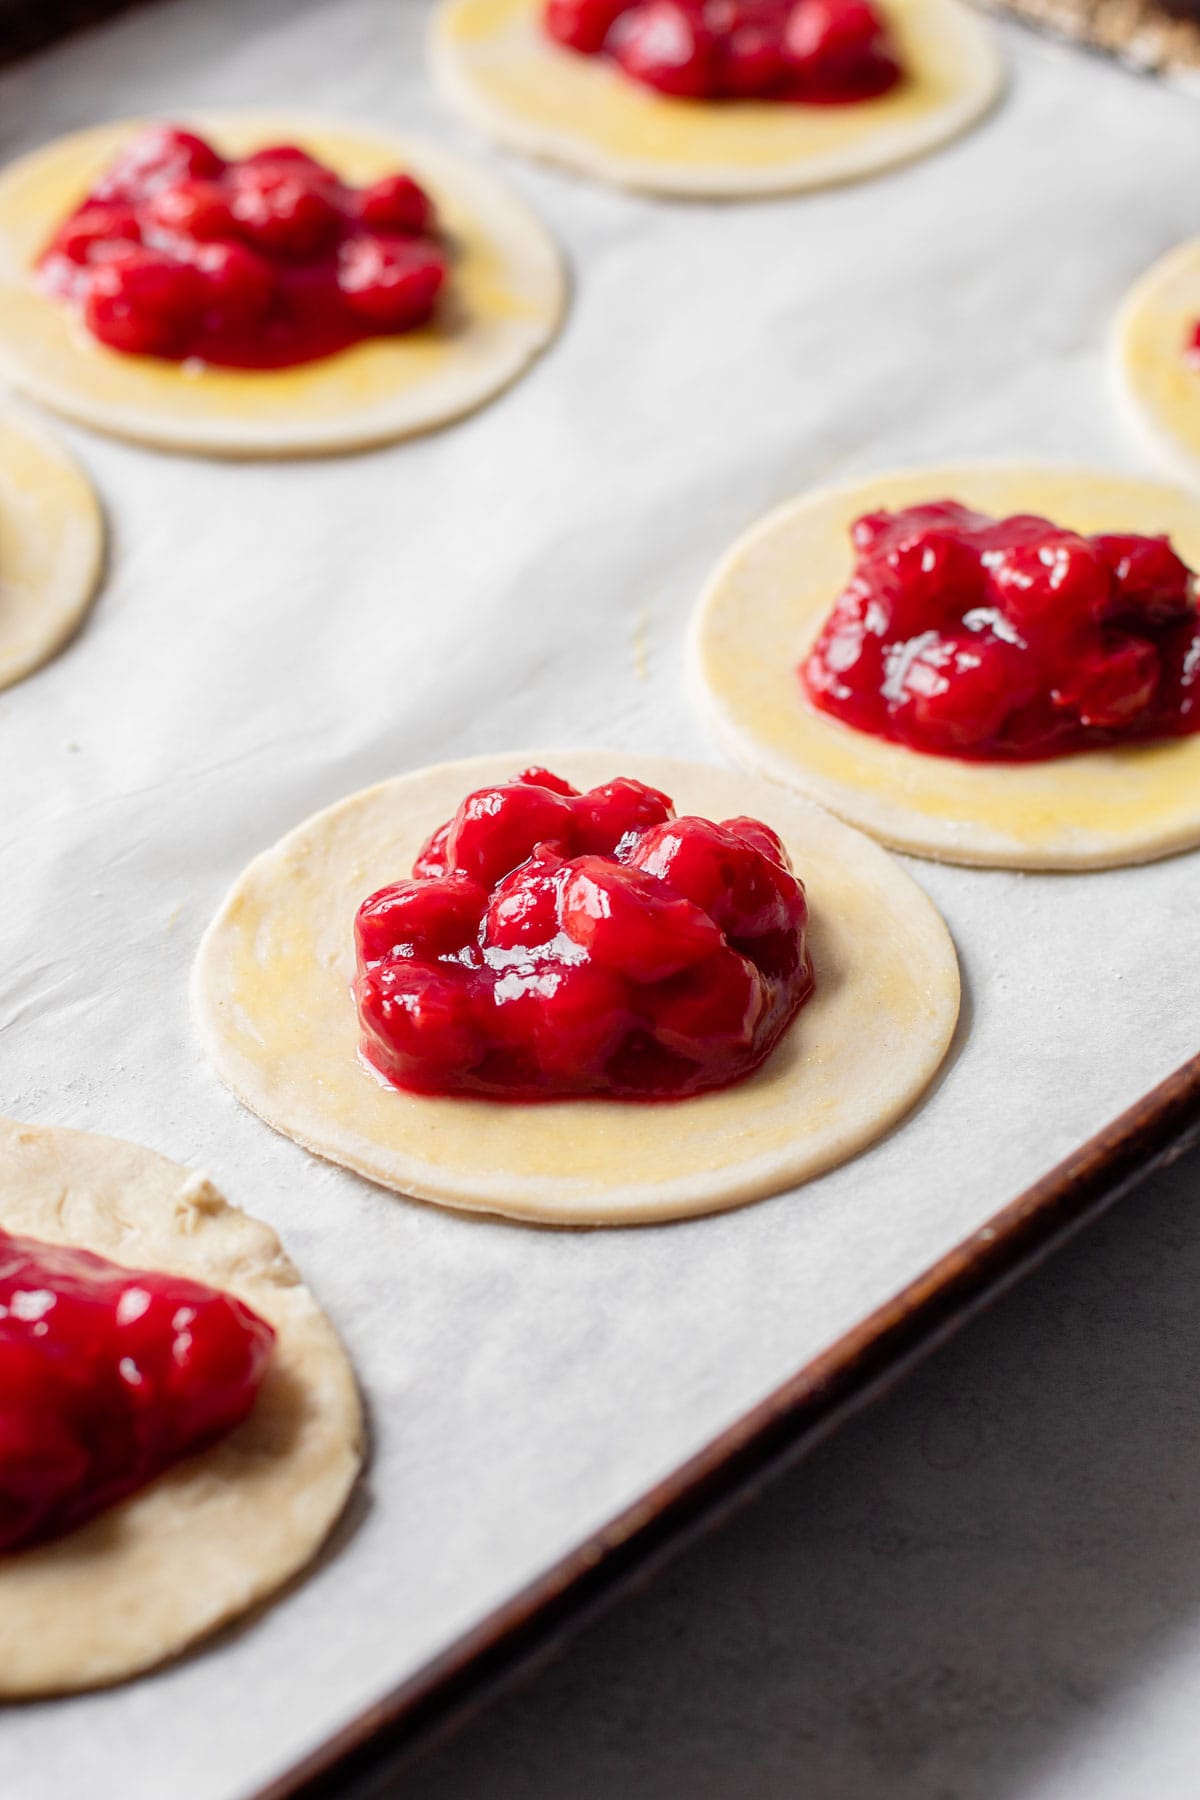
Like any pie, you'll need to roll out your dough. This recipe is based on a 4″ round hand pie. To simplify things, I recommend buying a 4″ circle cutter, especially if you plan to make hand pies of any variation in the future; I think you'll find it to be a "go-to" tool in your kitchen. If you don’t want to buy one, you can cut out a 4-inch circle of parchment paper and use it to trace and cut out the circles.
Keep in mind, if the dough gets too warm, it might need to be chilled between cutting out the circles and assembling the hand pies, as this step will take significantly longer without a circle cutter. Just be sure to keep an eye on your dough as you progress forward.
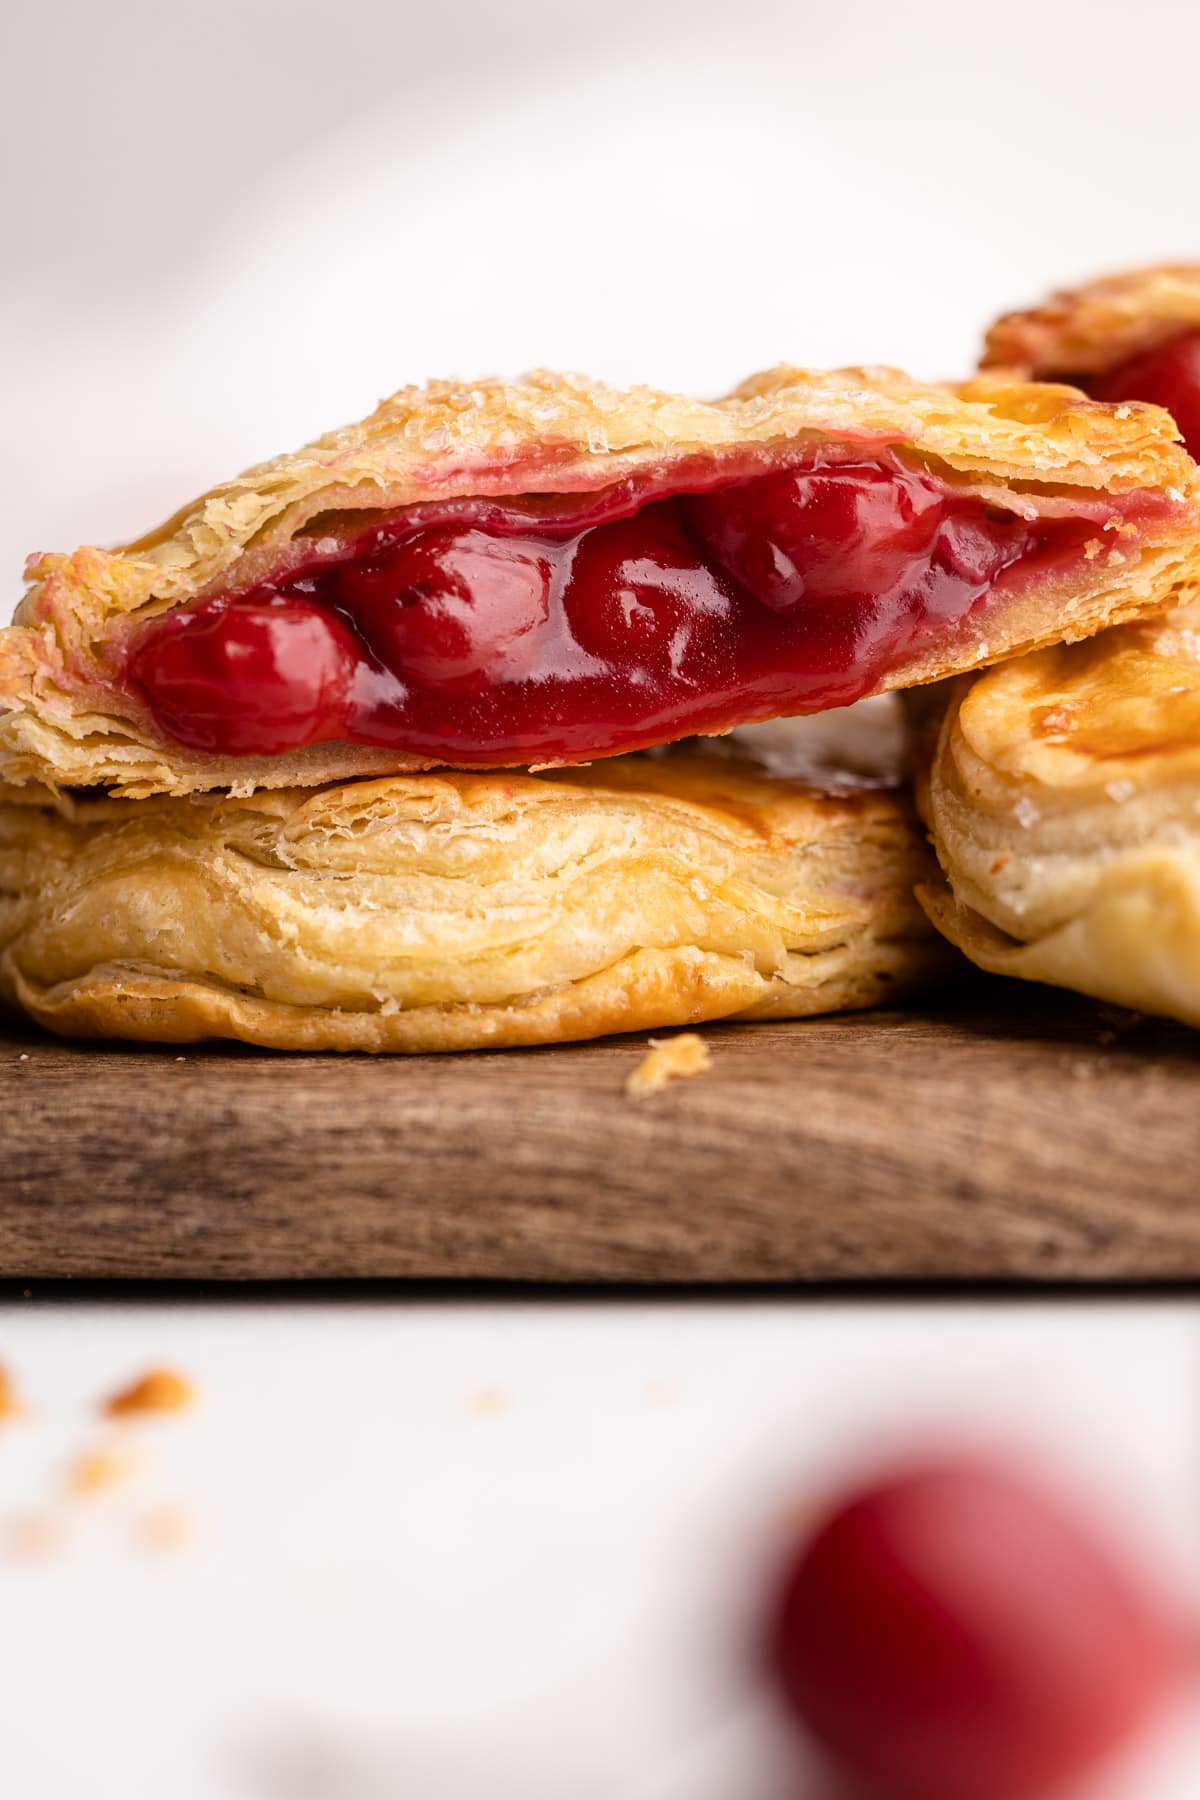
Once you have your dough rolled, it’s time to assemble: brush an eggwash around the edges of one circle of pie dough. Place about a ¼ cup of the cherry filling in the middle. Place a circle of pie dough over the top and press down on the edges to seal the two pieces together. Crimp the edges of the bottom to the top, which will seal the pie and add a decorative touch. Place the pies on a sheet pan lined with parchment paper. Repeat with the remaining dough circles. When finished, place the sheet pan inside a freezer to chill, while your oven preheats.
Troubleshooting Tips
- If at any point your pie dough is getting too warm, simply place it in the refrigerator or freezer to chill until it is easy to work with
- Filling the hand pies are a delicate balance of not overfilling them, and not under-filling them. If you find that you are having trouble closing the hand pies, then use less filling.
- It's best to chill the hand pies briefly before baking, or you can chill them overnight and bake the next day! Hand pies can even be frozen unbaked, and then later baked straight from the freezer.
How to Bake Cherry Hand Pies
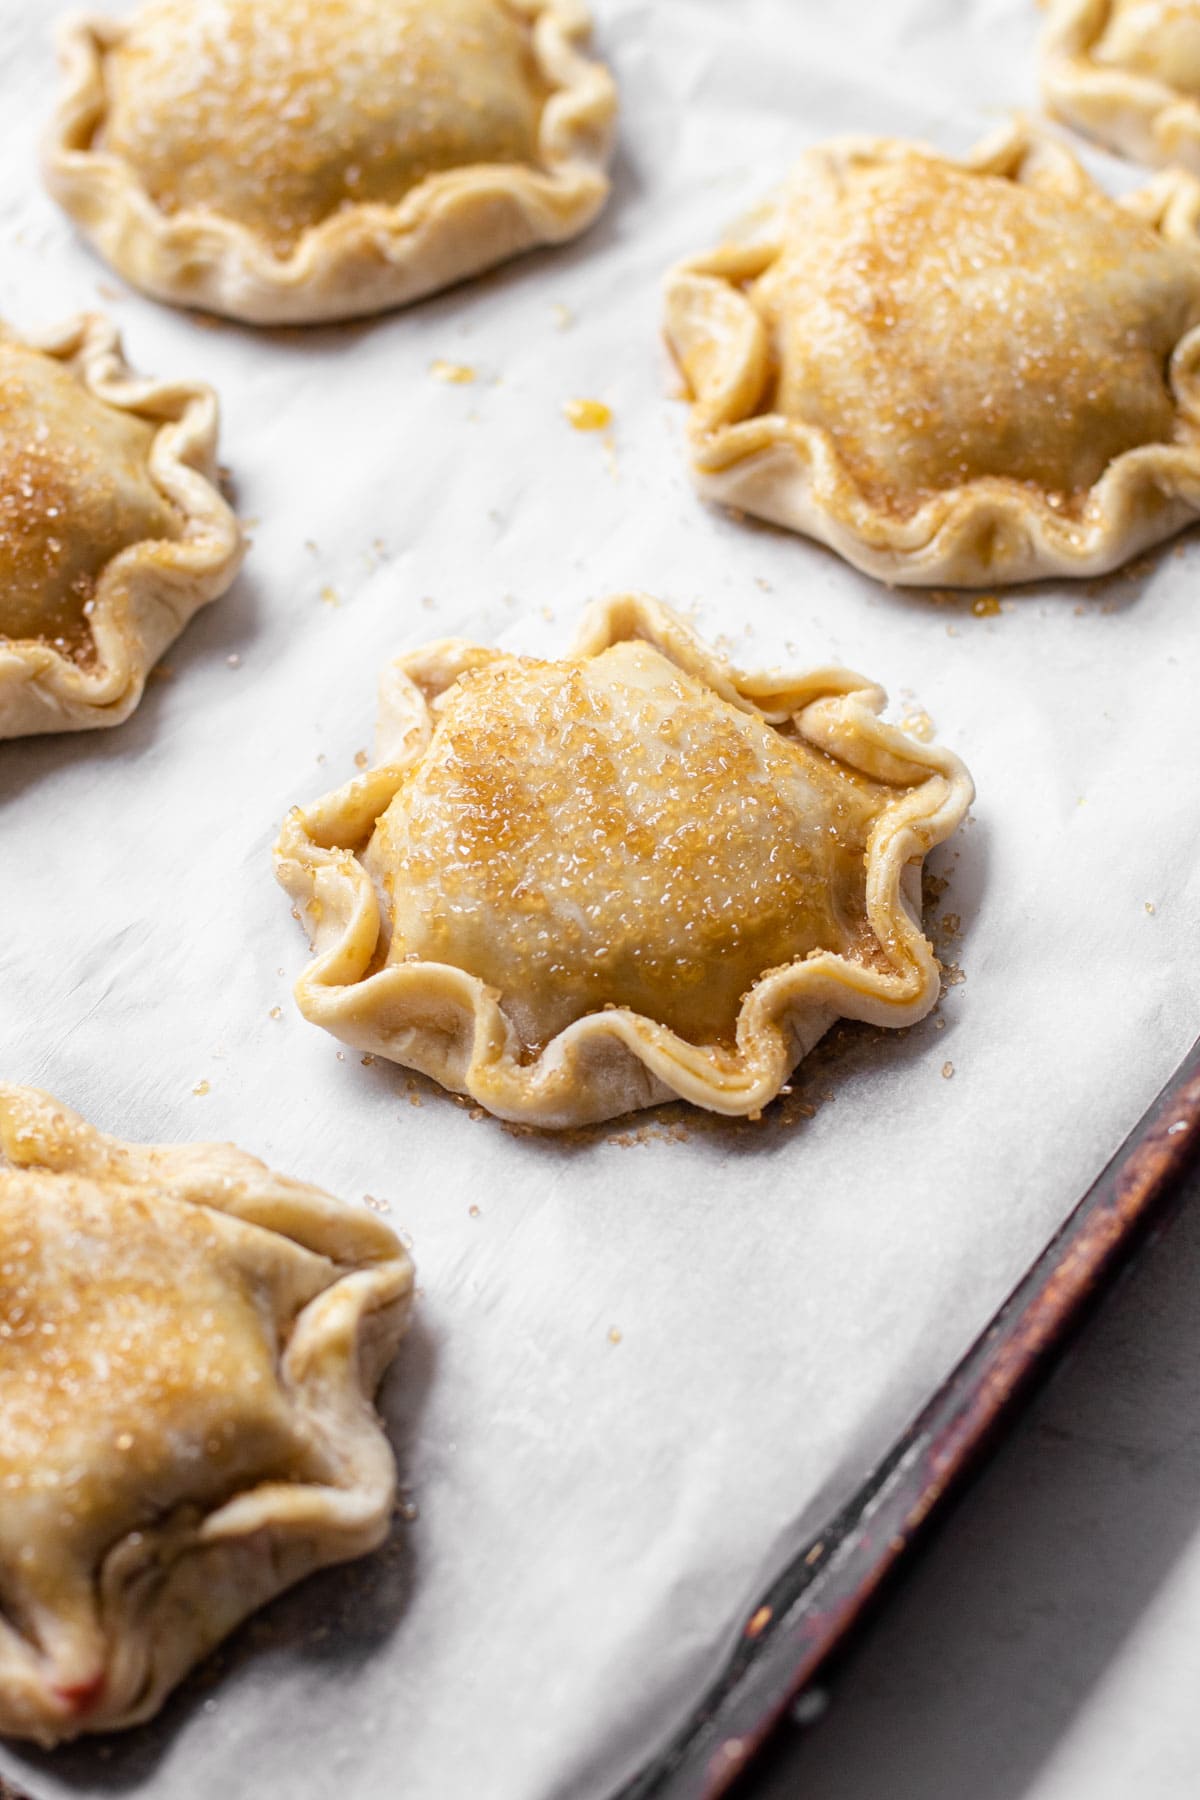
Before being baked, the hand pies can be optionally brushed with an egg wash and sprinkled with turbinado sugar for a beautiful color and crunch.
Because the filling is premade I find it unnecessary to poke holes in the pastry to let steam escape. However, if you'd like to make holes in the pastry for aesthetic reasons, it's fine to do so.
To bake, pre-heat the oven to 400ºF and set a rack to the second-lowest position in the oven. This small step will ensure a crisp bottom crust of the hand pies. Bake in the oven for 30-40 minutes, or until the pie dough is lightly golden all over. If you are baking from frozen, you may need to bake for an extra 10 minutes or so.
How to Freeze Unbaked Hand Pies
These can be frozen, unbaked, for up to 3 months. Assemble the hand pies up to the point of the final egg wash, and then freeze them flat on a sheet tray for 24 hours. Then, transfer to a bag with as much air removed as possible. Freeze for up to 2 months. The pies can be baked from frozen. Doesn't get much easier than that! Bake them as directed plus 10 additional minutes or so.
More Fruit Pie Recipes
I am so honored when you make a recipe from my site! If you make these Cherry Hand Pies, please leave a comment and a star rating with your experience! If you have any questions about this recipe, feel free to comment here, too!
Full Recipe
Cherry Hand Pies

Featuring perfectly sweetened sour cherries baked inside of the flakiest pastry, these Cherry Hand Pies could be the poster child for the best summertime dessert. Not only are they hand-held, which makes them perfect for a potluck or outdoor gathering, they are also easier to make than you might think! Want to make these ahead of time? These hand pies are perfect for assembling and freezing, and then baking right from frozen.
- Prep Time: 00:25
- Chill Time: 00:10
- Cook Time: 00:45
- Total Time: 1 hour 20 minutes
- Yield: 8 Hand Pies
- Category: Sweet Pies
- Method: Bake
Ingredients
For Pie Dough:
- 2-9″ Pie Dough Disks (1 batch)
For Cherry Filling:
- 1 pound (16 ounces or 450 grams) pitted sour cherries (fresh or frozen)
- ½ cup (100 grams) granulated sugar
- 2 tablespoons (15 grams) cornstarch
- 1 tablespoon fresh lemon juice
- 2 tablespoons (15 grams) tart cherry juice (see note)
- ½ teaspoon almond extract
- 2 tablespoons (25 grams) cold unsalted butter, diced (optional)
For Egg Wash:
- 1 large egg
- 1 teaspoon water
- Raw sugar (for the tops of the hand pies, optional)
Instructions
- Make pie crust and rest preferably overnight, or at a minimum of 4 hours.
- Add cherries, sugar, and cornstarch to a large bowl and toss to coat. Mix in lemon juice and cherry juice. Let sit until the sugars have started to dissolve, about 5 minutes (or longer if you are using frozen cherries).
- Transfer all ingredients to a large pot.
- Turn the heat on to medium and cook, stirring frequently until the filling is bubbling throughout. Turn off of the heat, stir in almond extract and butter.
- Pour into a shallow container and let cool completely (this will take several hours or overnight).
- Make the egg wash by whisking together the egg and the water together in a bowl.
- Line a 12x18” sheet pan with a piece of parchment.
- Roll out 1 disk of pie dough to about ⅛” thickness. Stamp out at least six 4” circles from the dough. Pile the dough scraps on top of one another and roll out one more time, enough to get at least 1-2 more circles. Repeat this process with the other dough disk to yield roughly 16-18 dough circles.
- Brush the egg wash around the edges of 1 circle of pie dough. Place about ¼ cup of cooled cherry filling in the middle. Place a circle of pie dough over the top and press down on the edges to seal the two pieces together. Crimp the edges of the bottom to the top to further seal the pie and to add a decorative touch.
- Place the pies on the sheet pan. Repeat with the remaining dough circles. When finished, place the sheet pan inside a freezer to chill, while the oven preheats.
- Preheat the oven to 400ºF and set a rack to the second-lowest position in the oven. Remove the pies from the freezer, brush the tops with an egg wash and sprinkle with raw sugar.
- Bake in the oven for 30-40 minutes, or until the pie dough is lightly golden all over.
Notes
If you don’t have and don't want to purchase cherry juice, you can substitute it with water, though it will have a little less cherry flavor and will be lighter in color.
The cherry filling can be made up to 7 days ahead of time.
Can't find sour cherries or want to use sweet cherries? Use just ⅓ cup of sugar in your filling.
If at any point your pie dough is getting too warm, simply place it in the refrigerator or freezer to chill until it is easy to work with
Filling the hand pies is a delicate balance of not overfilling them, and not under-filling them. If you find that you are having trouble closing the hand pies, then use less filling.
It's best to chill the hand pies briefly before baking as the instructions direct, or you can chill them overnight and bake the next day!
These can be frozen, unbaked, for up to 3 months. Freeze them flat on a sheet tray for 24 hours. Then, transfer to a bag with as much air removed as possible. The pies can be baked from frozen. Follow the instructions, but the total baking time will increase by about 10 minutes.
Some of the links on this page may be affiliate links. Everyday Pie is a participant in the Amazon Associates Program. As an Amazon Associate I earn from qualifying purchases, at no extra cost to you.
Kate Wilkinson
This recipe is one of my all-time favorites which combines two of my loves - cherries and handheld foods! It was so straightforward to make and utterly delicious. The almond extract in the cherry filling is the perfect addition; I've used just vanilla extract before but almond really sets this apart. When cherries are in season and cheap, buy extra to pit and keep in your freezer so you can make this all year round (though storebought frozen cherries work great, too!)
tamara
Would this recipe work with canned tart cherries in water?
Kelli Avila
I haven't tried, but I think it will. It's been on my list to test with canned cherries. If you give it a go, let me know how it turns out!
Florence Ng
Hi - you didn't include a note about the tart cherry juice...where to get that if I'm using fresh sour cherries?
Kelli Avila
I've updated the recipe to include that note: I purchase cherry juice and use that, whether using fresh or frozen. The note indicates that if you don't want to buy cherry juice, you can use water instead.
susan
Looking to improve my pie making skills, I decided to try hand pies so that I could try a variety of crusts and fillings from different sources. I came upon your recipe and I made all of the components - crust, filling and pies. Even though my pies did not look as nice as your unbaked photos (the dough needed refrigeration to hold a crimp, and they flattened out with baking), the results were delicious. Flakey crust, great filling. Sour cherries are rare in California, so I used fresh sweet cherries. The tart juice and lower sugar content of the filling really balanced out the flavors. I went and bought blueberry juice today to make the blueberry hand pies next! Thanks!
Sue
Had some frozen cherries so I made your filling. Delicious. Super easy and not too sweet. Turned it into a galette.