
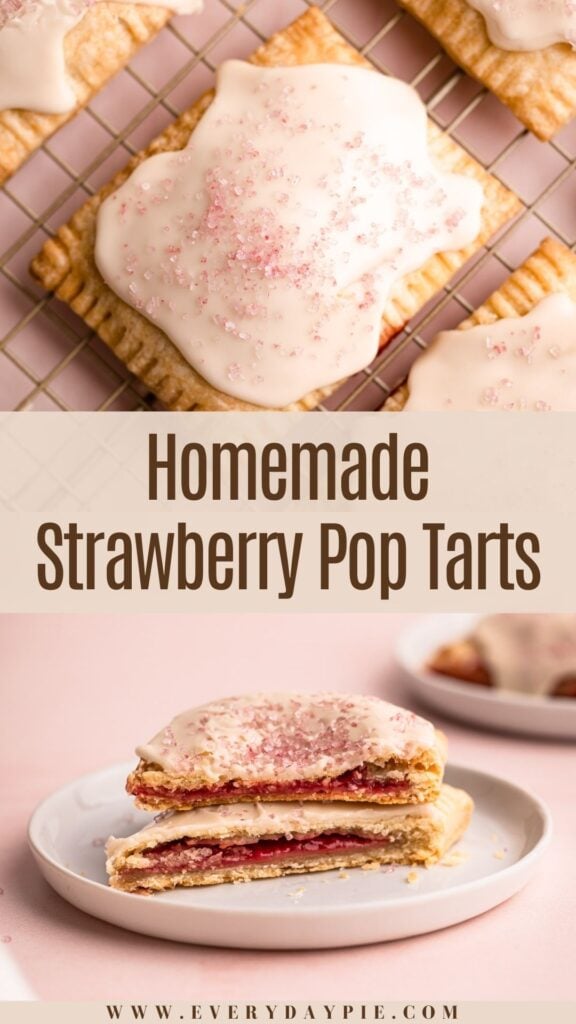
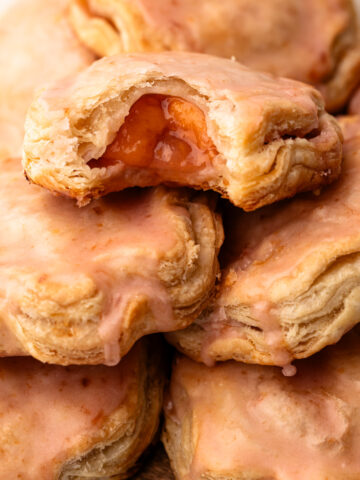
Make your own Homemade Strawberry Pop Tarts with buttery, tender pastry and a vibrant strawberry filling, finished with a simple vanilla glaze and sprinkles!

Want to save this recipe?
Enter your email & I'll send it to your inbox. Plus, get weekly updates from me!
Featured Review
⭐️⭐️⭐️⭐️⭐️
Made these over the past few days and they are delicious! Love that it’s a dedicated pop tart dough and the tips to keep the pop tarts sealed really helped mine! Thank you for a wonderful recipe!
- reader Chelsea
Like most children of the 1990s, I grew up eating pop tarts for breakfast (Strawberry and Brown Sugar Cinnamon Pop Tarts were my favorite). I would stick one in the toaster and eat it warm with a glass of milk, and I was good to go for the morning. I have nostalgic memories of them, but upon trying storebought pop tarts as an adult, I realized I could bake something far superior in my own kitchen. There is no comparing this homemade Strawberry Pop Tart recipe to anything you will find in a silver package housed inside a cardboard box.
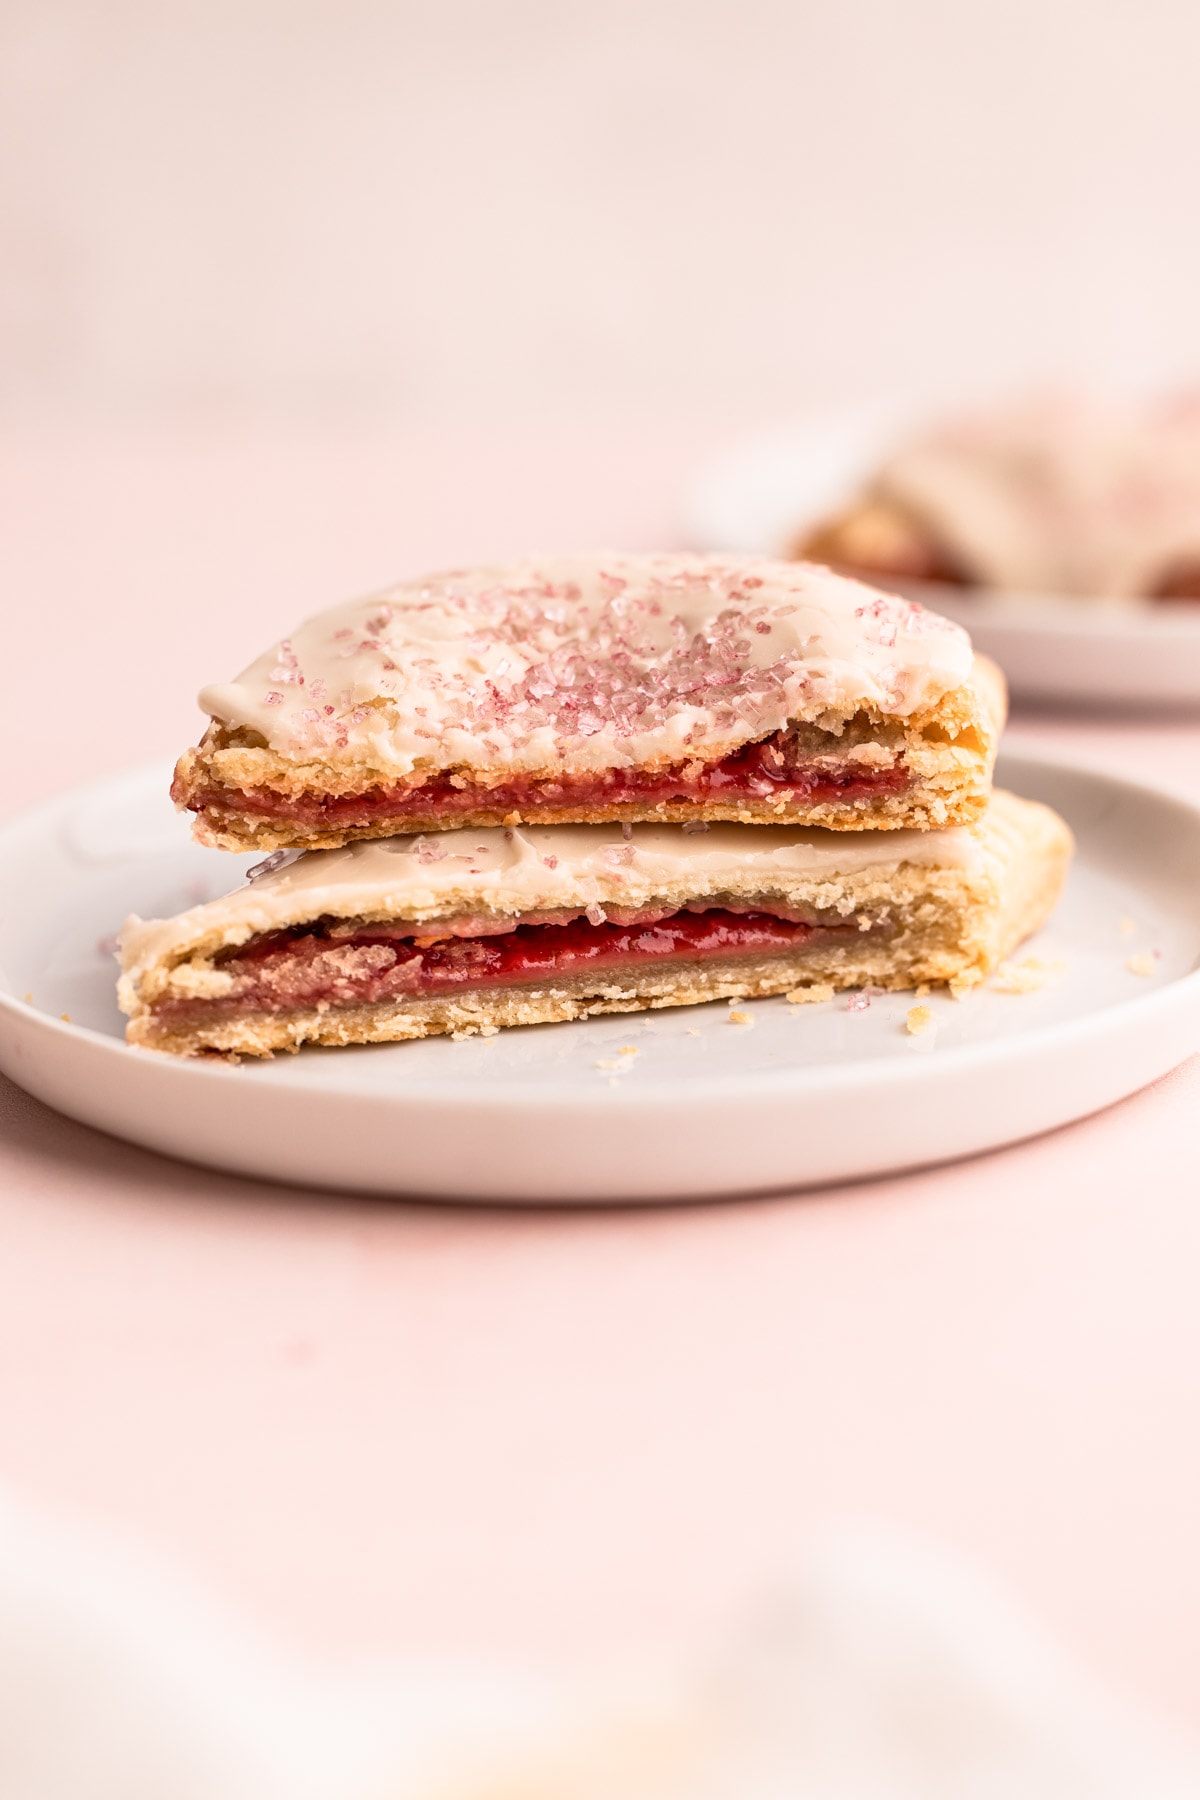
The star of this pop tart is the buttery, delicate pastry that I developed just for this recipe. It's different than pie crust, which is what a lot of other recipes use for homemade pop tarts (no judgment on that; I just think pop tart dough is different than pie dough). The filling isn't a jam, but instead a homemade strawberry reduction that actually tastes like fresh strawberries. And then finally, it is topped with a perfect layer of vanilla glaze and sprinkled with crunchy sugar. They are such a fun treat to bake up, and they freeze well, so you can have homemade pop-tarts any day of the week!
So, let's get to making it, shall we? The article below is jam packed full of useful information. You can jump around using the menu below, or skip to the end of the article for the full recipe.
Jump to:

Ingredients Needed
Here is an overview of the ingredients needed for this recipe. The full recipe is listed below in greater detail.
- all-purpose flour
- powdered sugar
- unsalted butter
- whole milk
- fresh or frozen strawberries
- cornstarch
- egg wash
- vanilla extract
- coarse kosher salt (this recipe was tested using Diamond Crystal coarse kosher salt. If you use Morton's kosher salt or fine salt, decrease the volume by half.)
Preparing the Pop Tart Dough
The pastry in this recipe is not traditional flaky pie dough. In fact, making a flaky pastry is the opposite of what you would want for a pop tart; otherwise, you’d be making hand pies, right?
The dough is made in a food processor. Instead of leaving large chunks of butter in the dough, the instructions call for running the processor until the dough clumps together around the blade. This ensures the butter is worked into the dough enough, which will prevent the dough from rising too much in the oven.
A touch of sugar is added to the dough, as well as a bit of milk, to make the pastry more flavorful and tender.

Step 1: Pulse the dry ingredients together in a food processor.
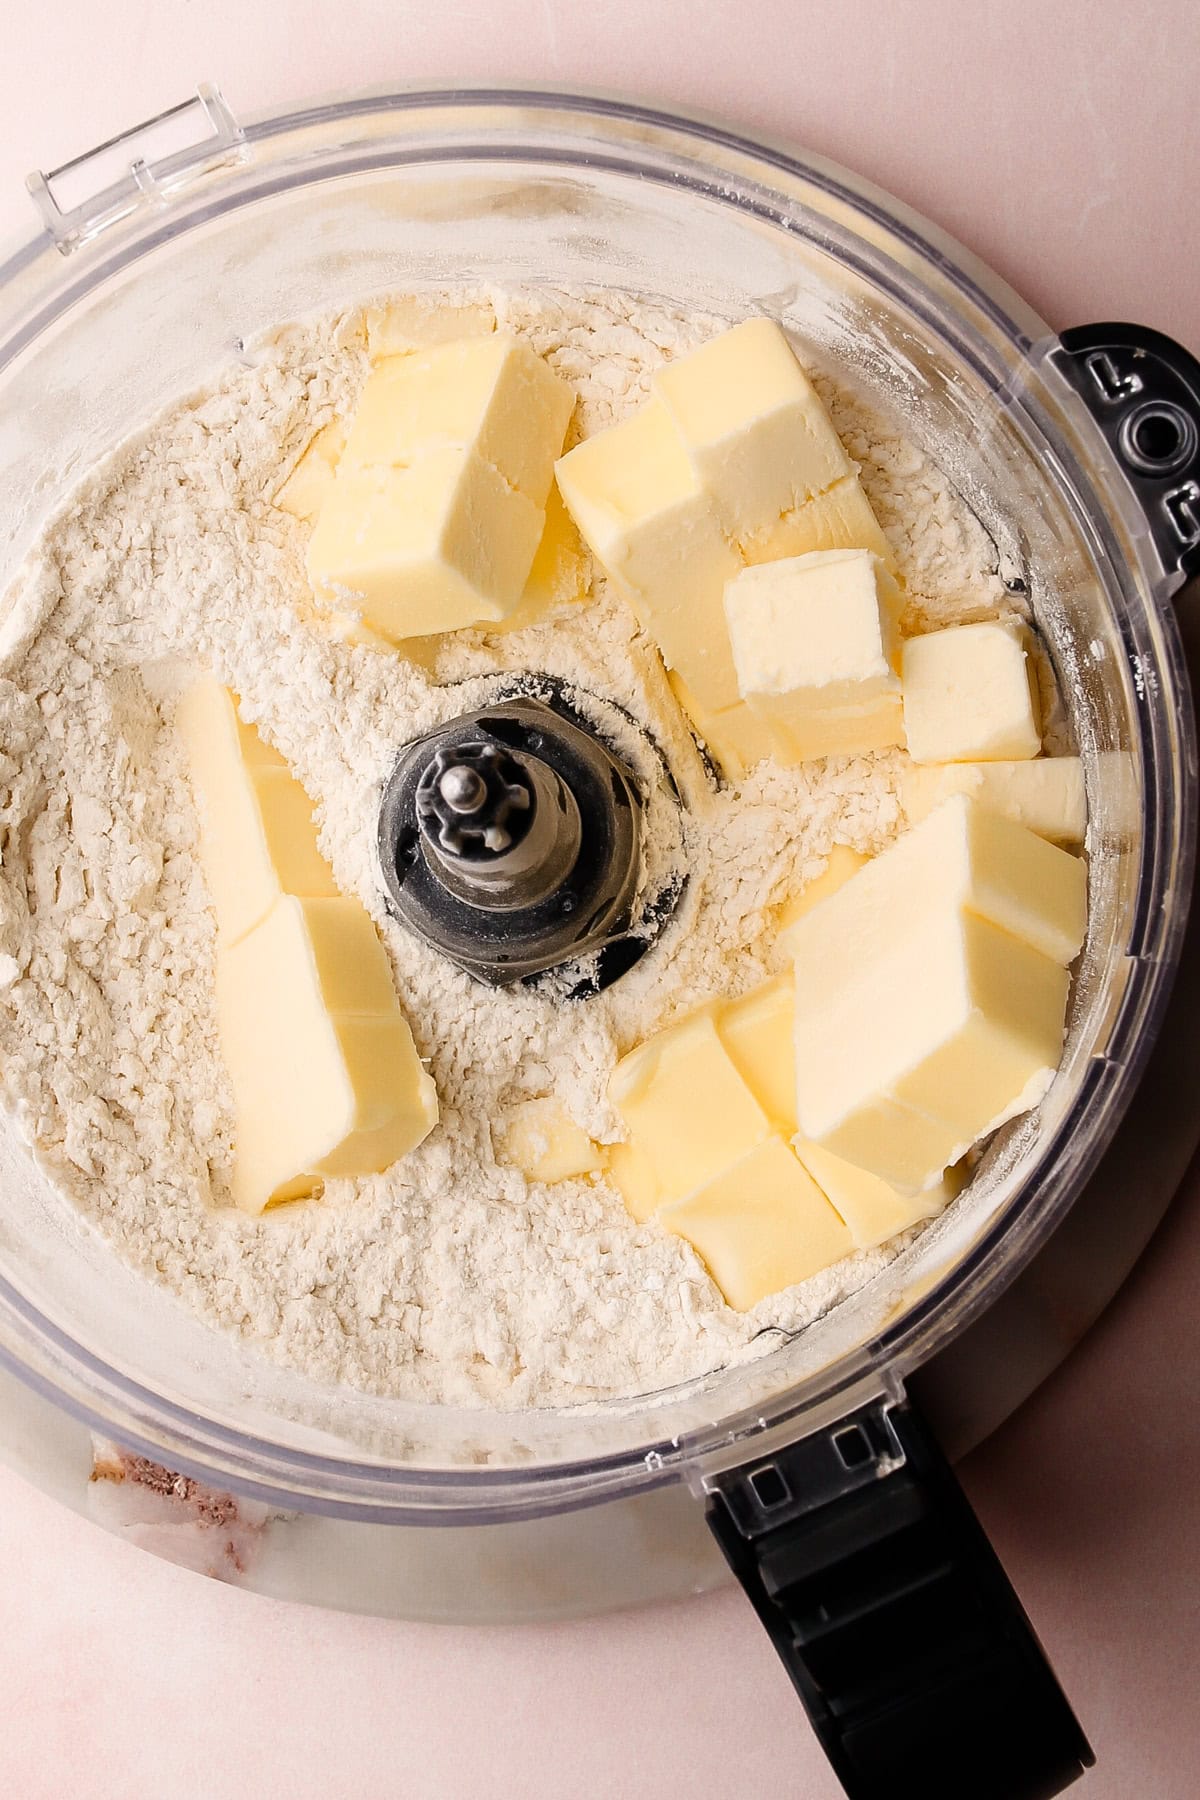
Step 2: Add in the cold butter and pulse the butter into the flour until it is mostly worked in.

Step 3: Add in the milk and process until the dough comes together around the blade, then stop.

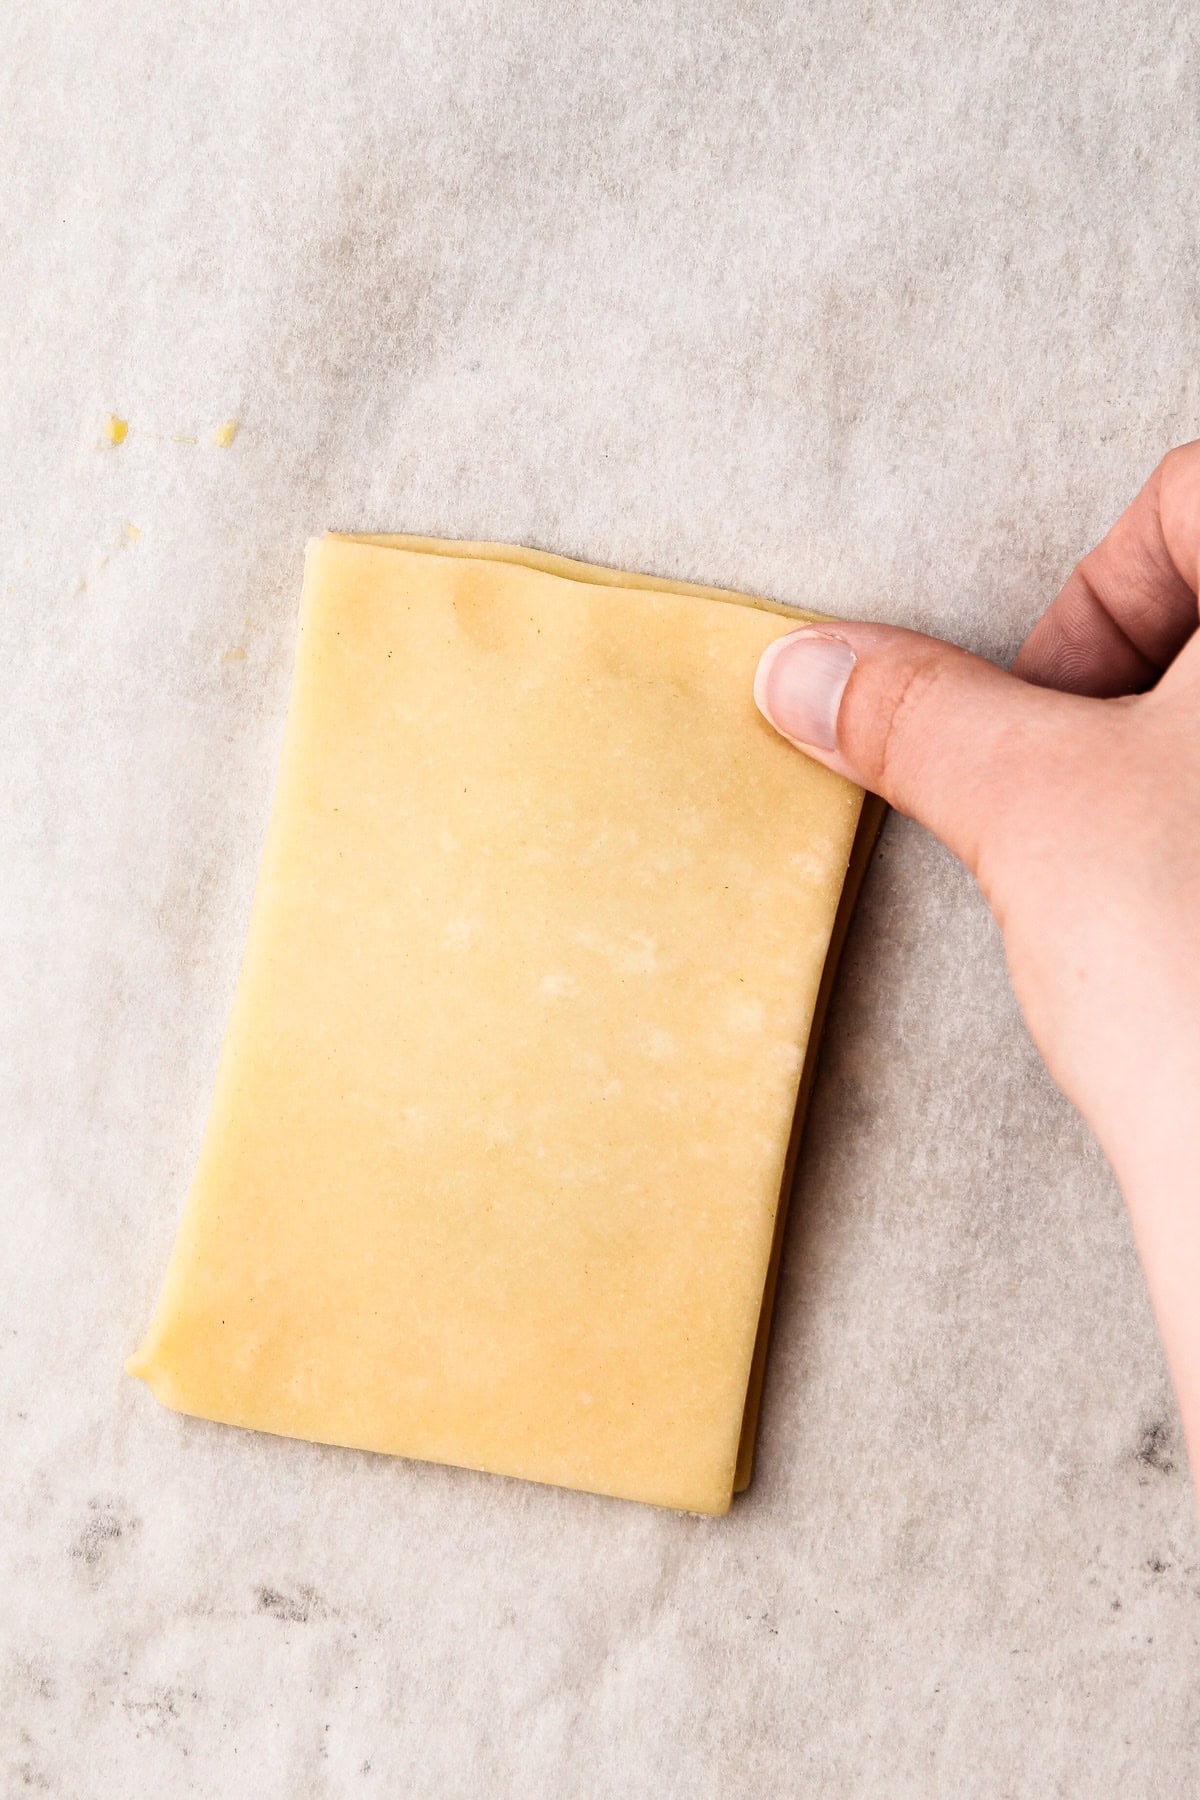
Step 4: Shape the dough into a rectangle and wrap it in plastic wrap then chill.
Chill the dough before rolling. After removing it from the fridge, let it soften for 5-10 minutes. You'll know it's ready to roll out when it makes an indentation when you gently press your finger into it.

Step 1: Cut the dough in half and roll out one piece of dough into a rough 9-by-13 rectangle.
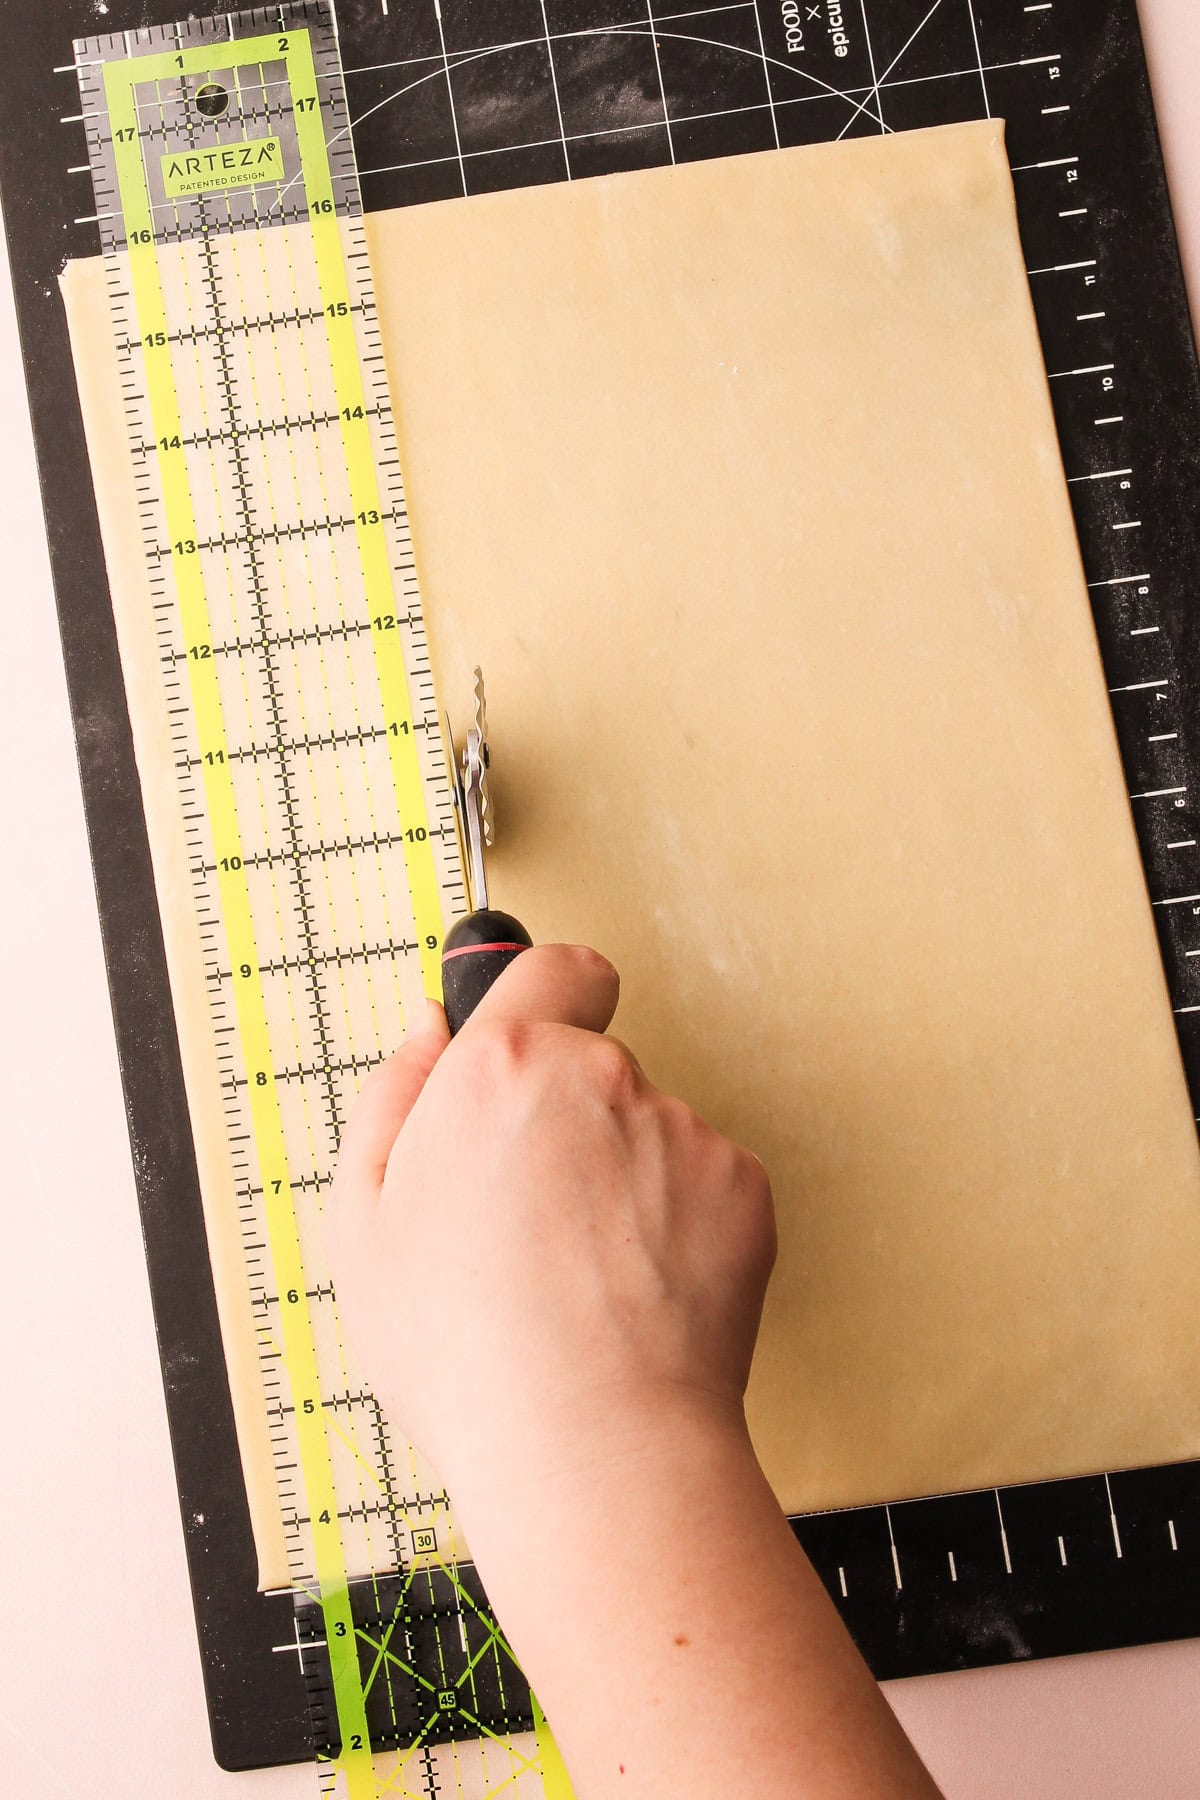
Step 2: Using a pastry wheel or chef’s knife, cut out as many 3-by-4-inch rectangles as you can.
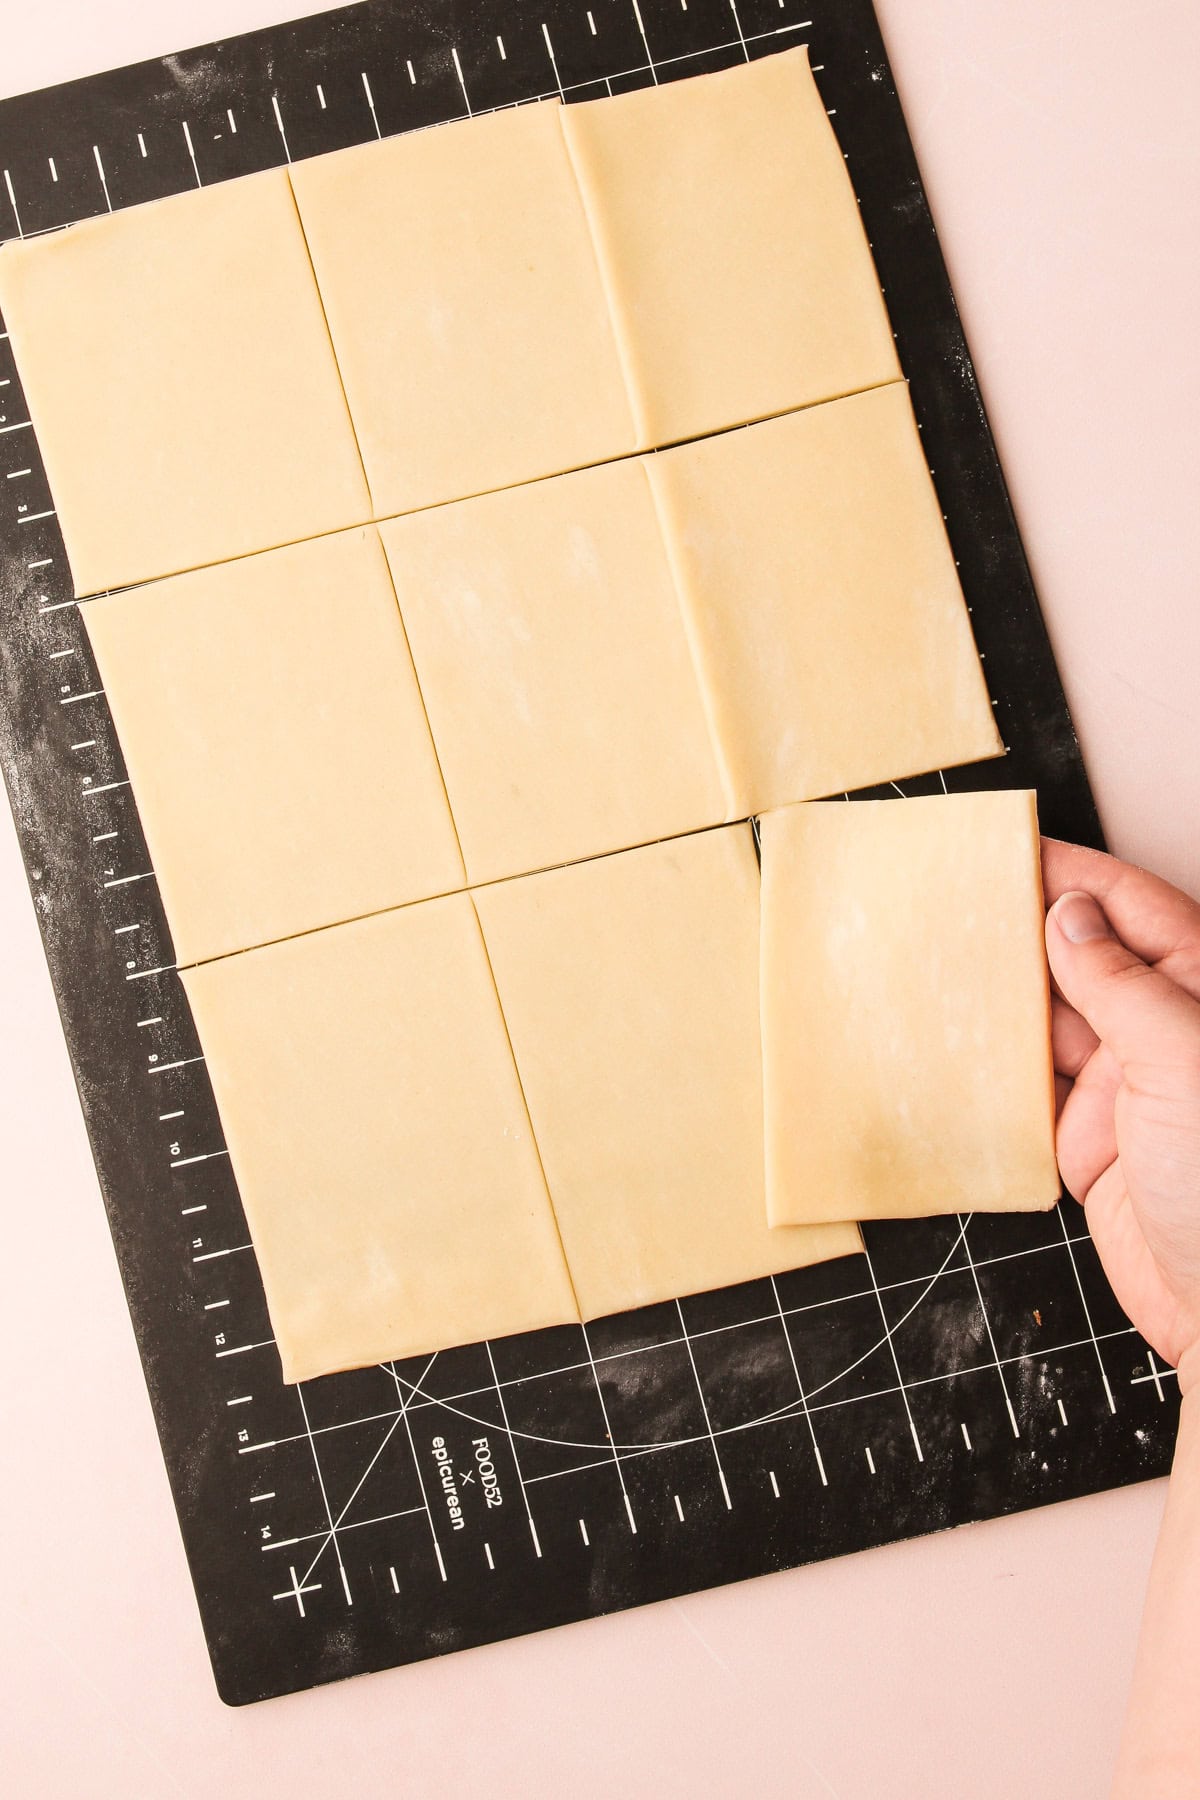
Step 3: Repeat with the second piece of dough.
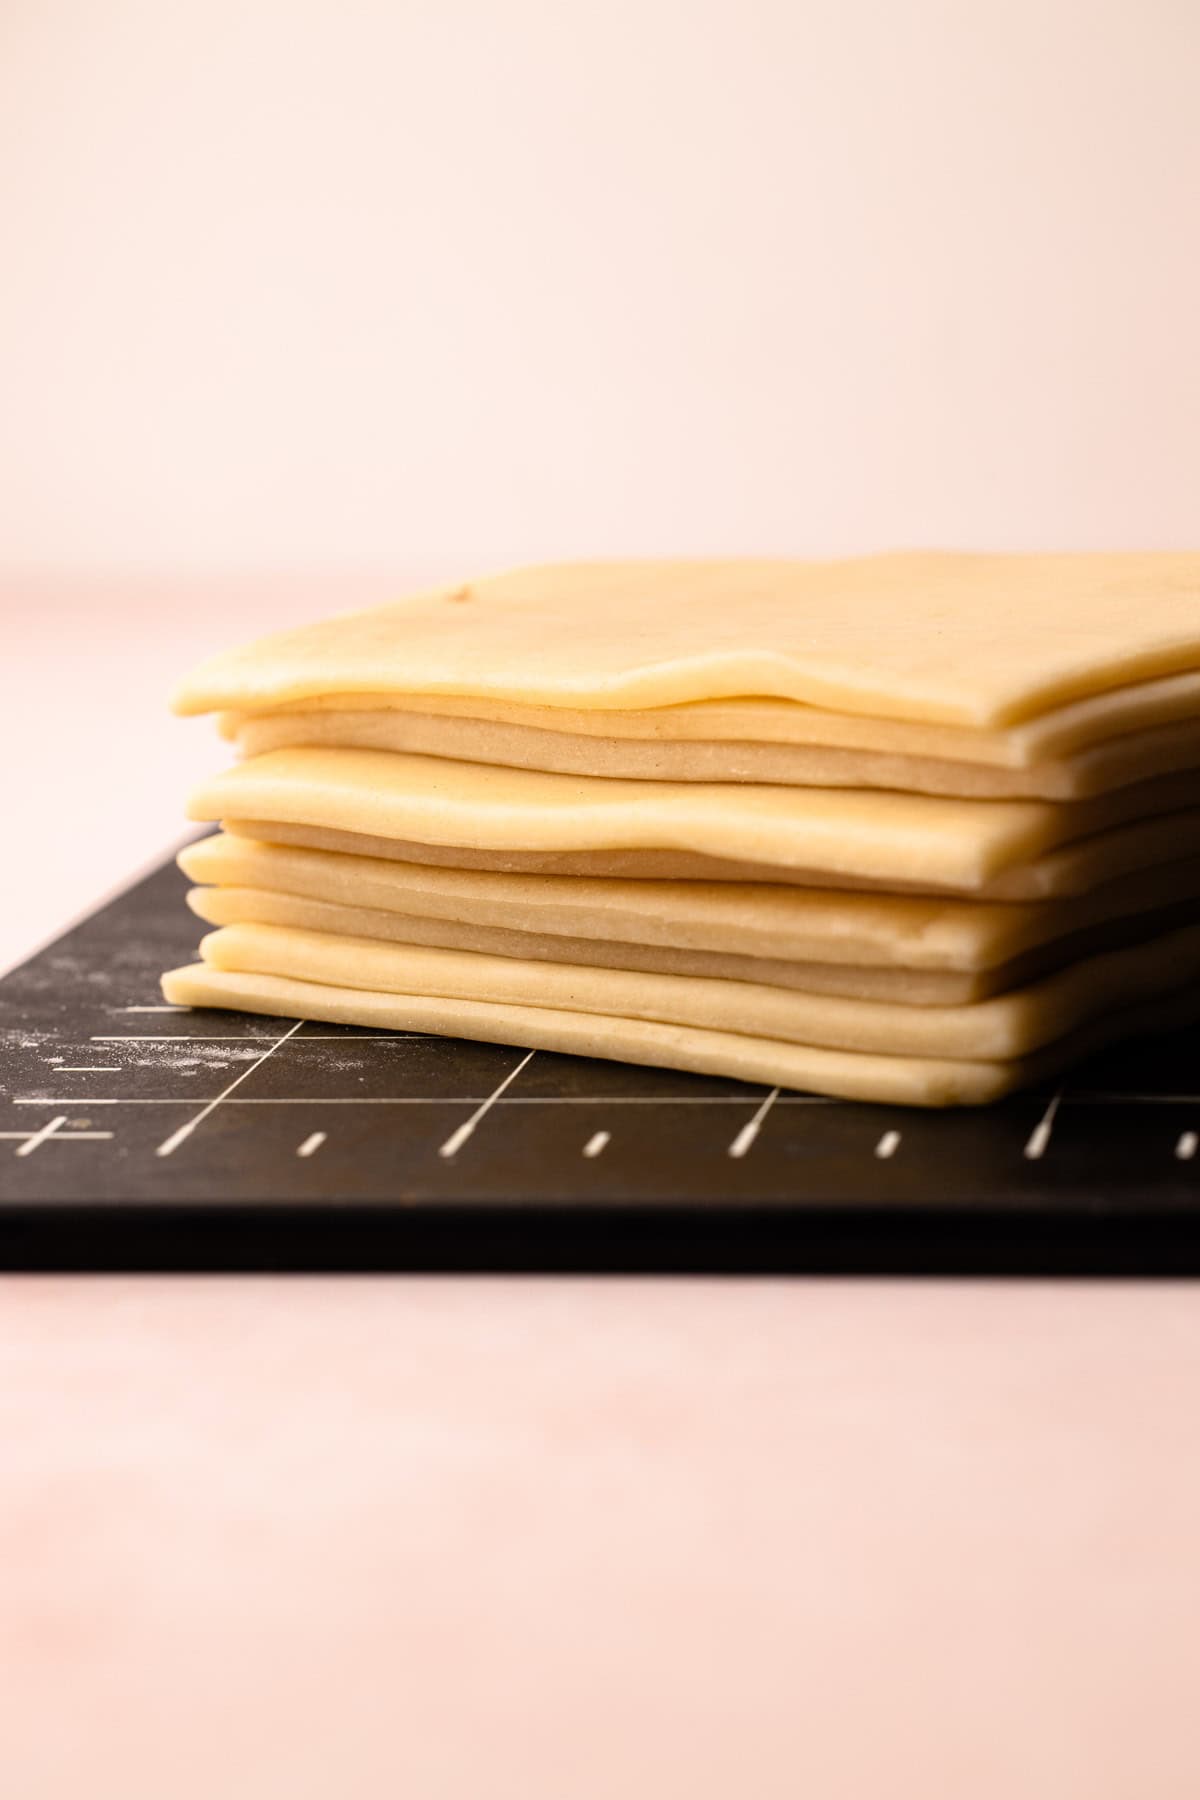
Step 4: Re-roll scraps only one time. This dough should yield between 16-18 rectangles.
Pop-Tart Pastry Tips
- Don't forget the golden rule of pastry: keep things cold. If at any point your pastry gets too warm and becomes difficult to handle, simply move it into the refrigerator for about 15 minutes.
- I always suggest making the dough a day ahead and letting it rest overnight, as it's easier to handle and holds its shape better.
- Generously flour your work surface and rolling pin. You don't want the pastry to stick to them.
- Use a ruler and a pastry wheel to help you cut the 4 x 3-inch rectangles. If you have a rectangle cookie cutter, you can also use it.
- The exact size of the rectangle is less important than the thickness of the dough (see below). Feel free to change the size of the rectangle.
- After working with this dough over the years, I have found that the thickness of the rolled-out dough is crucial for a successful outcome. If the dough is too thin, the pop tart will collapse during baking. It's best to use a ruler to ensure that the dough is rolled out evenly to a thickness of ⅛ inch for best results.
Making the Filling
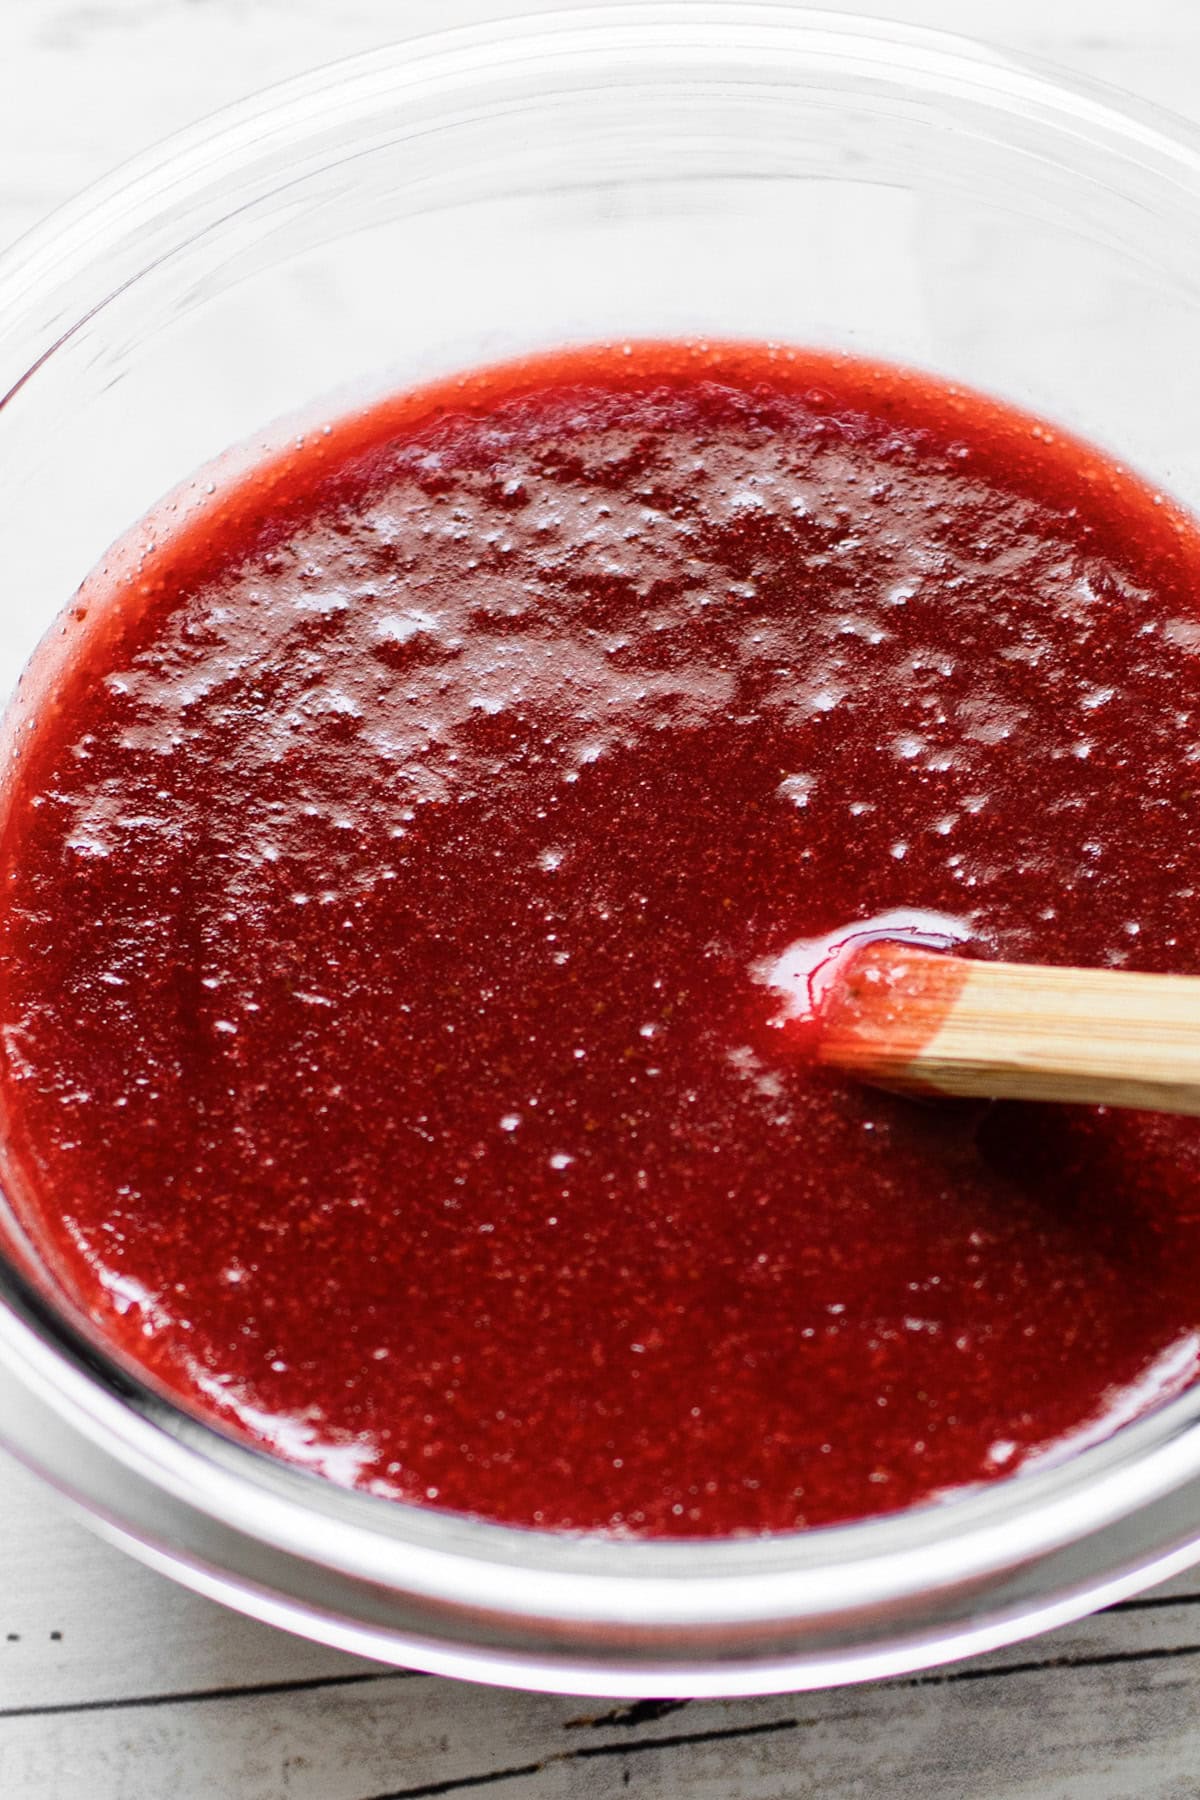
If I can convince you of one thing, it's that you should make your own strawberry filling for this. Skip the store-bought jam because the homemade version is what sets these pop-tarts apart. It's essentially a slightly reduced strawberry puree that is thickened for the perfect taste and texture.
To make this strawberry filling, simmer strawberries (frozen or fresh) with sugar until the juices release. Then, using either an immersion blender or a regular blender, puree the strawberries. Once smooth, the strawberries are heated again, and a cornstarch slurry is added to thicken the filling. Unlike jam, the moisture is not cooked out of the strawberries, so the cornstarch thickens it to the correct consistency.
It's important to use the best quality strawberries you can find! The juicier and sweeter the strawberry, the better tasting the filling will be.
This strawberry filling recipe yields more than you will need for the pop tarts. You can use the extra strawberry filling in other pastries, breads, ice cream, oatmeal, or even in place of jam on bread. Or, you can use it to make more pop tarts! It also freezes well.
How to Assemble Them
It’s important to seal the pop tart dough well so that the filling does not leak out. There are quite a few tricks used in this recipe to make sure all that delicious filling stays inside. I recommend you follow them all for the best result!
Pro-tip: don't overfill the pop tarts. Most people have the urge to have as much filling as possible. But if you recall, store-bought pop tarts have just a thin layer of filling. It should be the same for the homemade version. If you fill the pastry too much, it will naturally leak out of the sides.

Step 1: Use a pastry brush to brush the egg wash around the edges of the pastry.

Step 2: Place an overfilled tablespoon of the strawberry filling in the middle of the rectangle.
Step 3: Add a piece of pastry on top, and seal in the filling.

Step 4: Then use a fork and press down on the edges of the pastry.
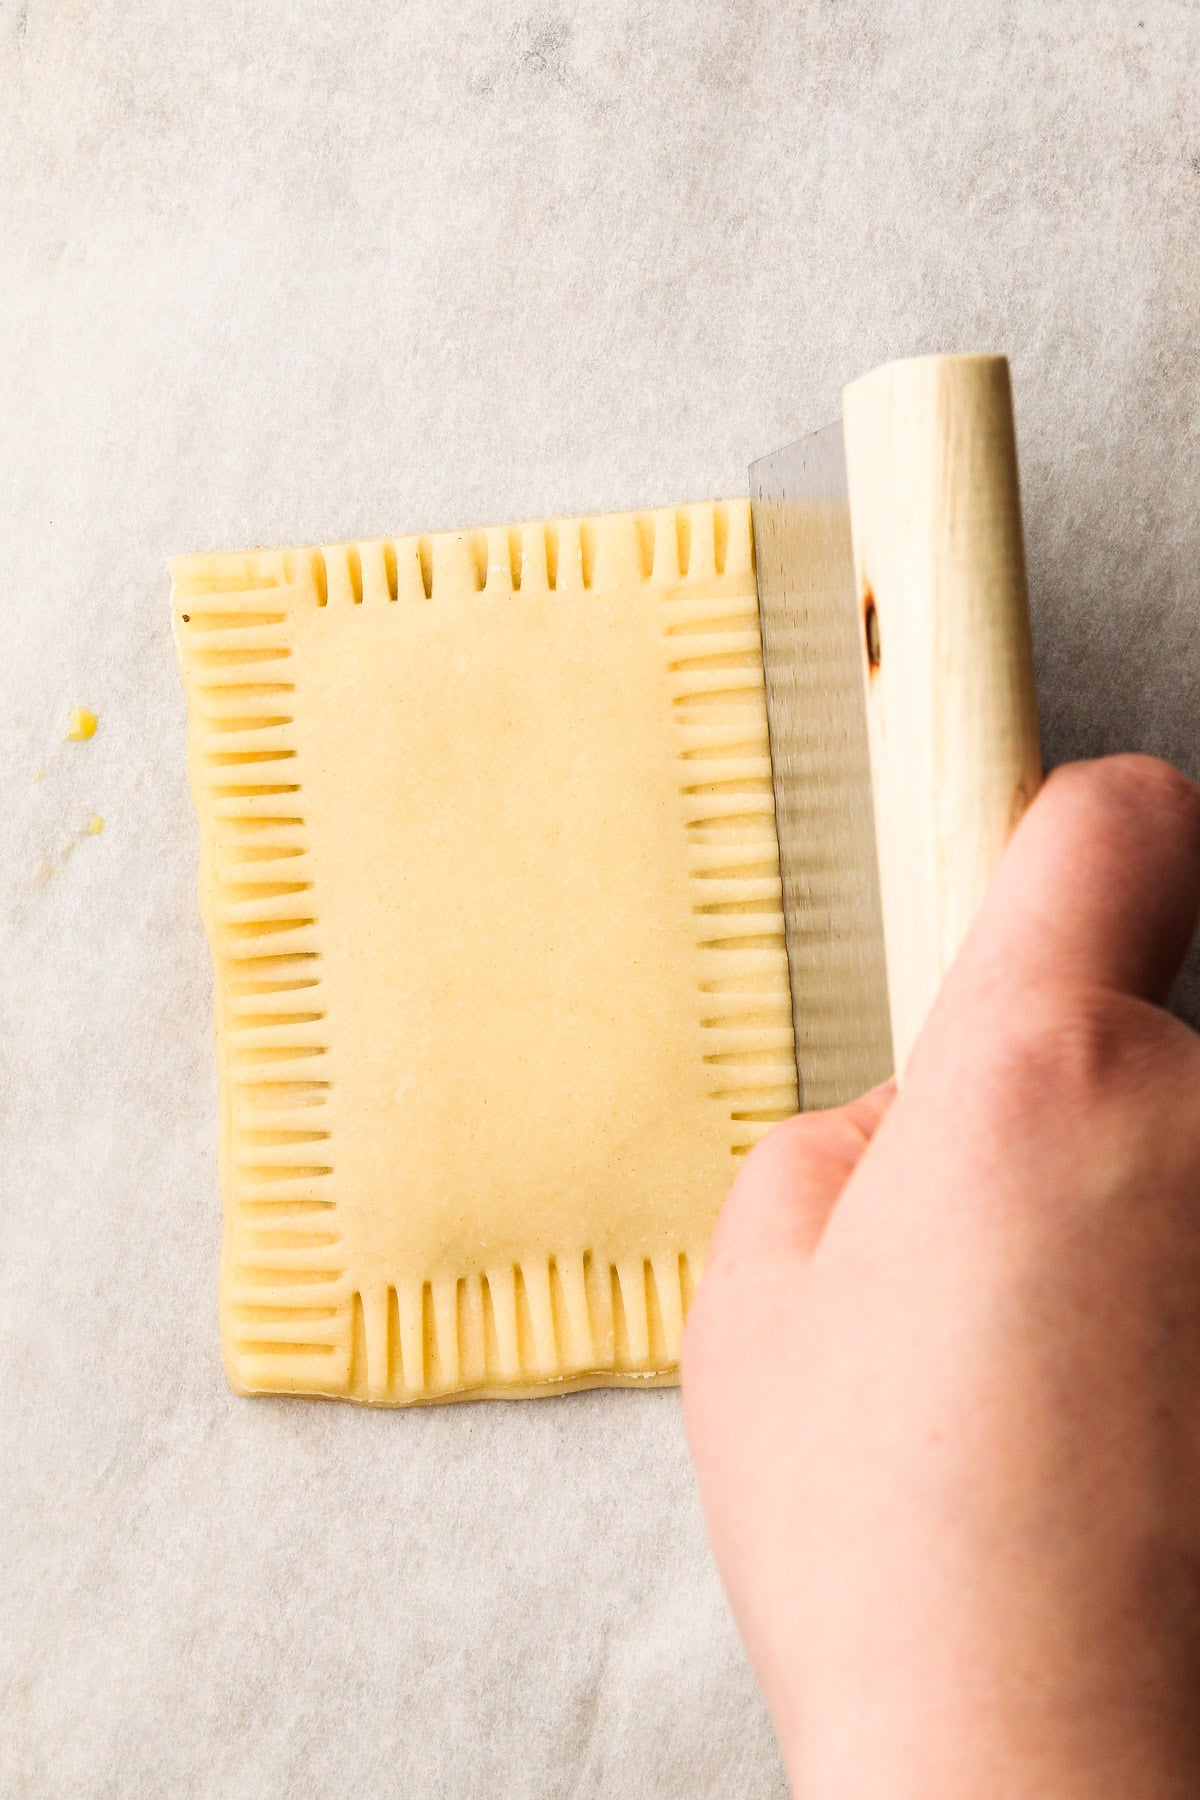
Step 5: Trim the edges of the dough with a bench scraper (or other dull blade). This will make it look neater and seal the edges properly.
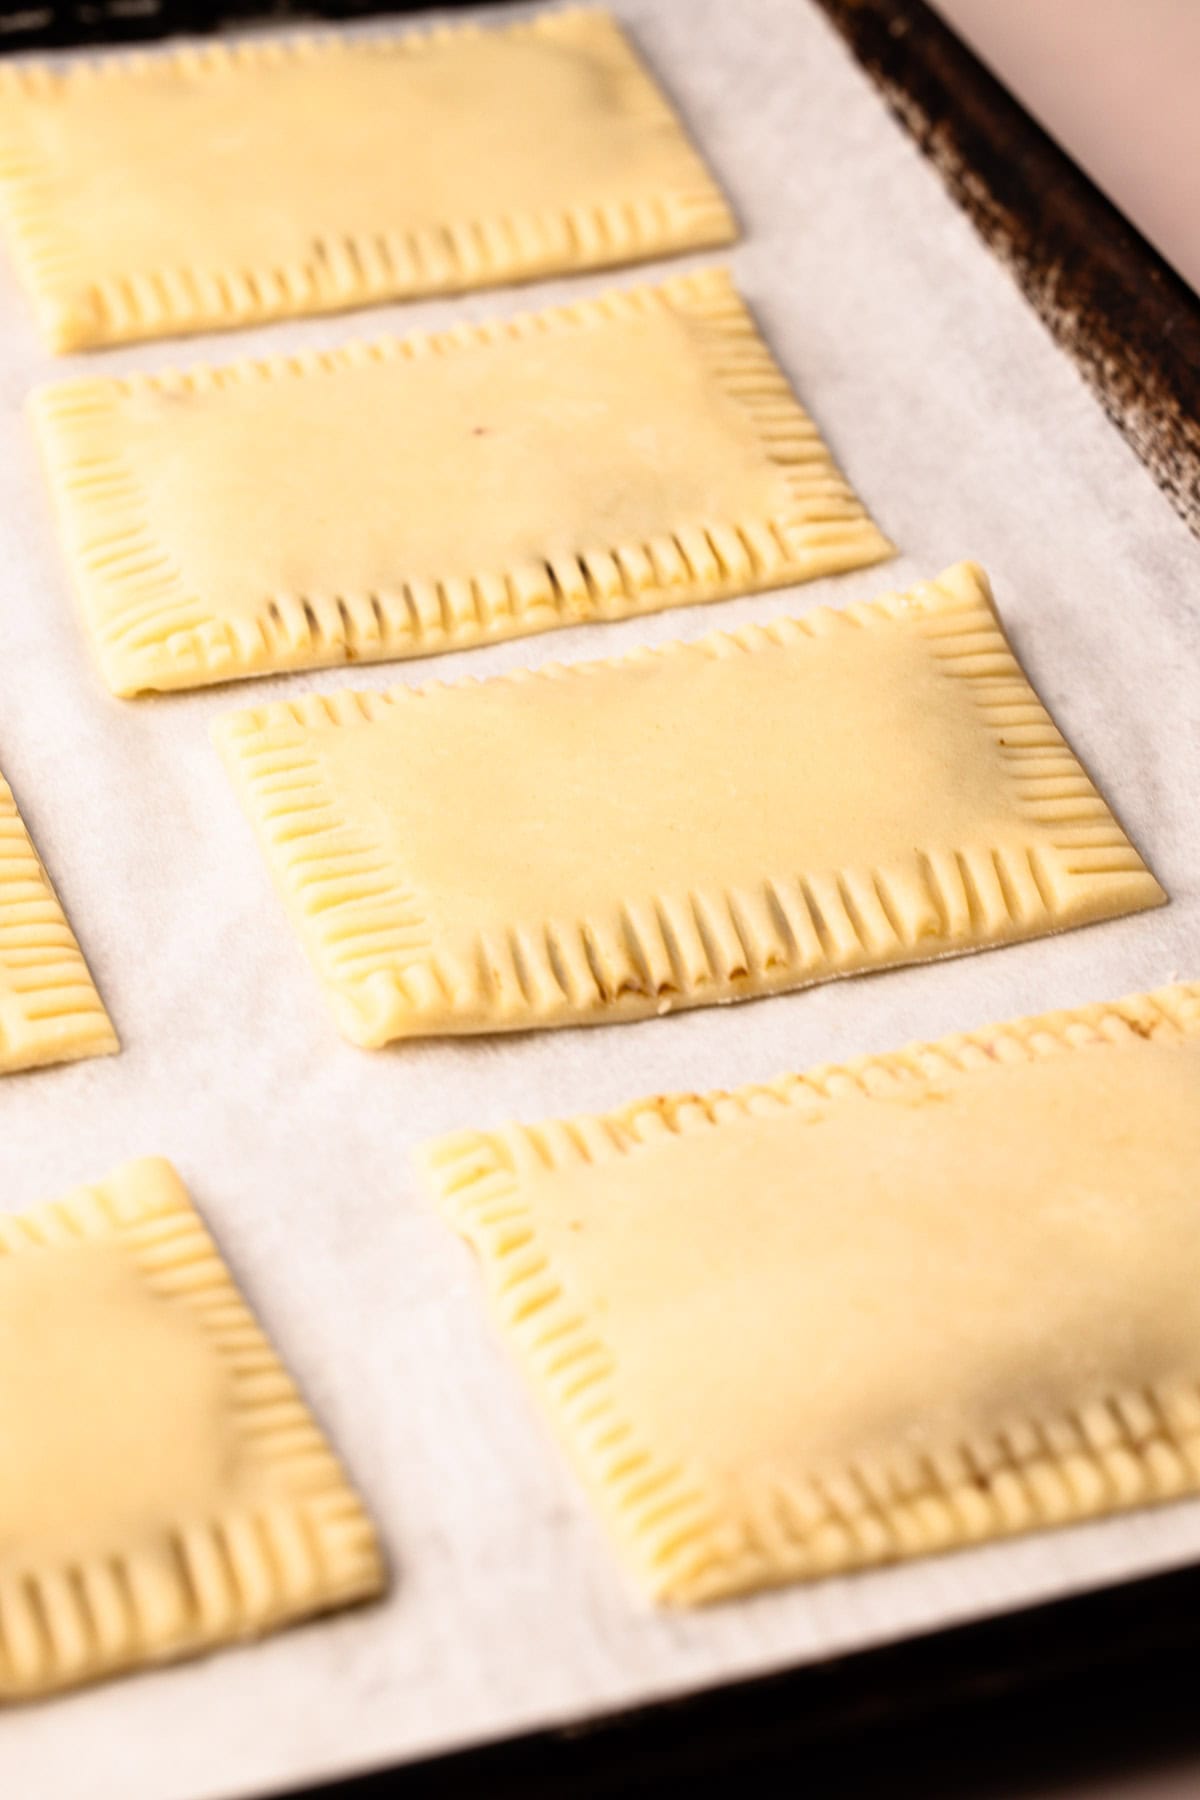
Step 6: Repeat with remaining pop tarts.
The Bake
The most important step in baking these pop tarts is chilling them beforehand. Chilling the filled pastries ensures that they keep their shape well. Chill the filled pop tarts in the refrigerator for at least 30 minutes, or ideally 1 hour, before baking.
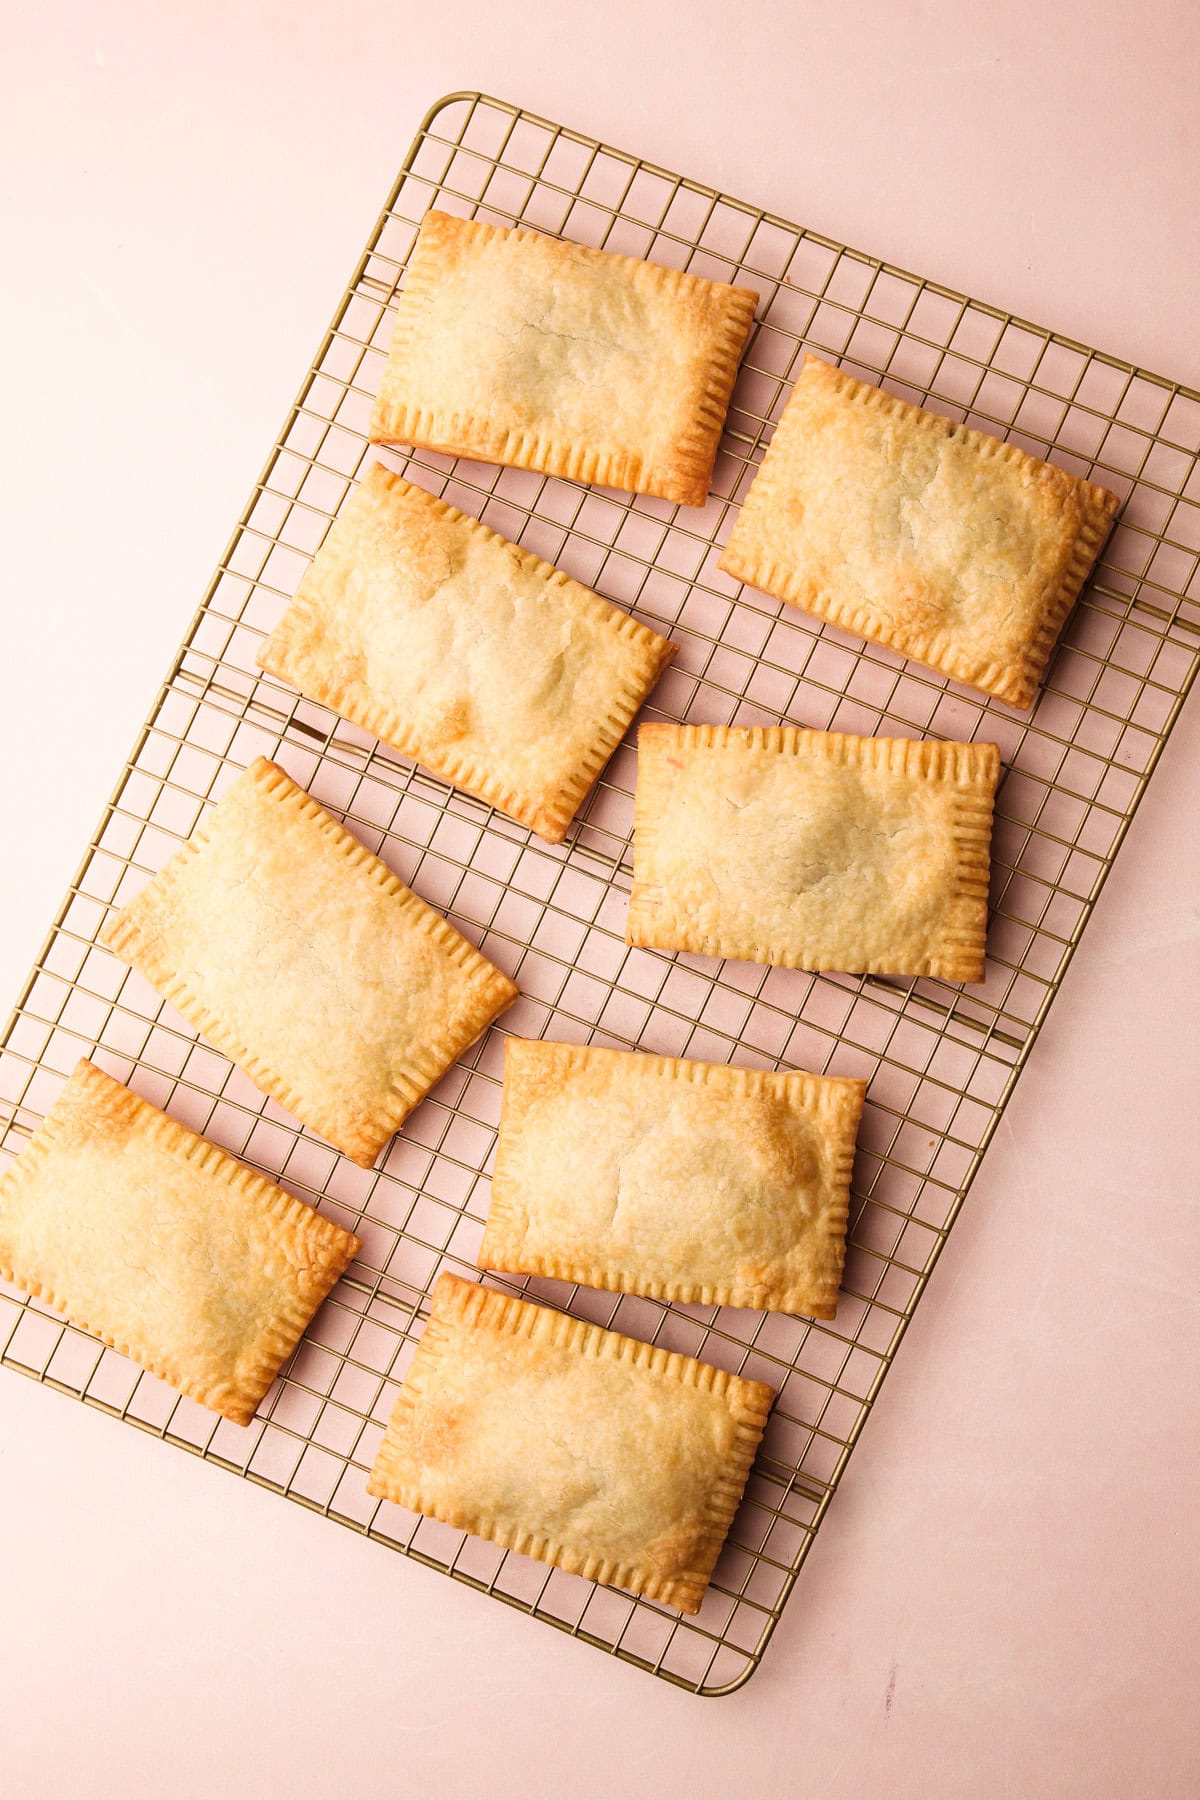
For best results, these pop tarts should be lightly baked. The aim is to avoid excessive browning on the dough. Bake them in the middle rack until the bottoms and edges are slightly golden, which should take approximately 25 minutes.

The Finishing Touch
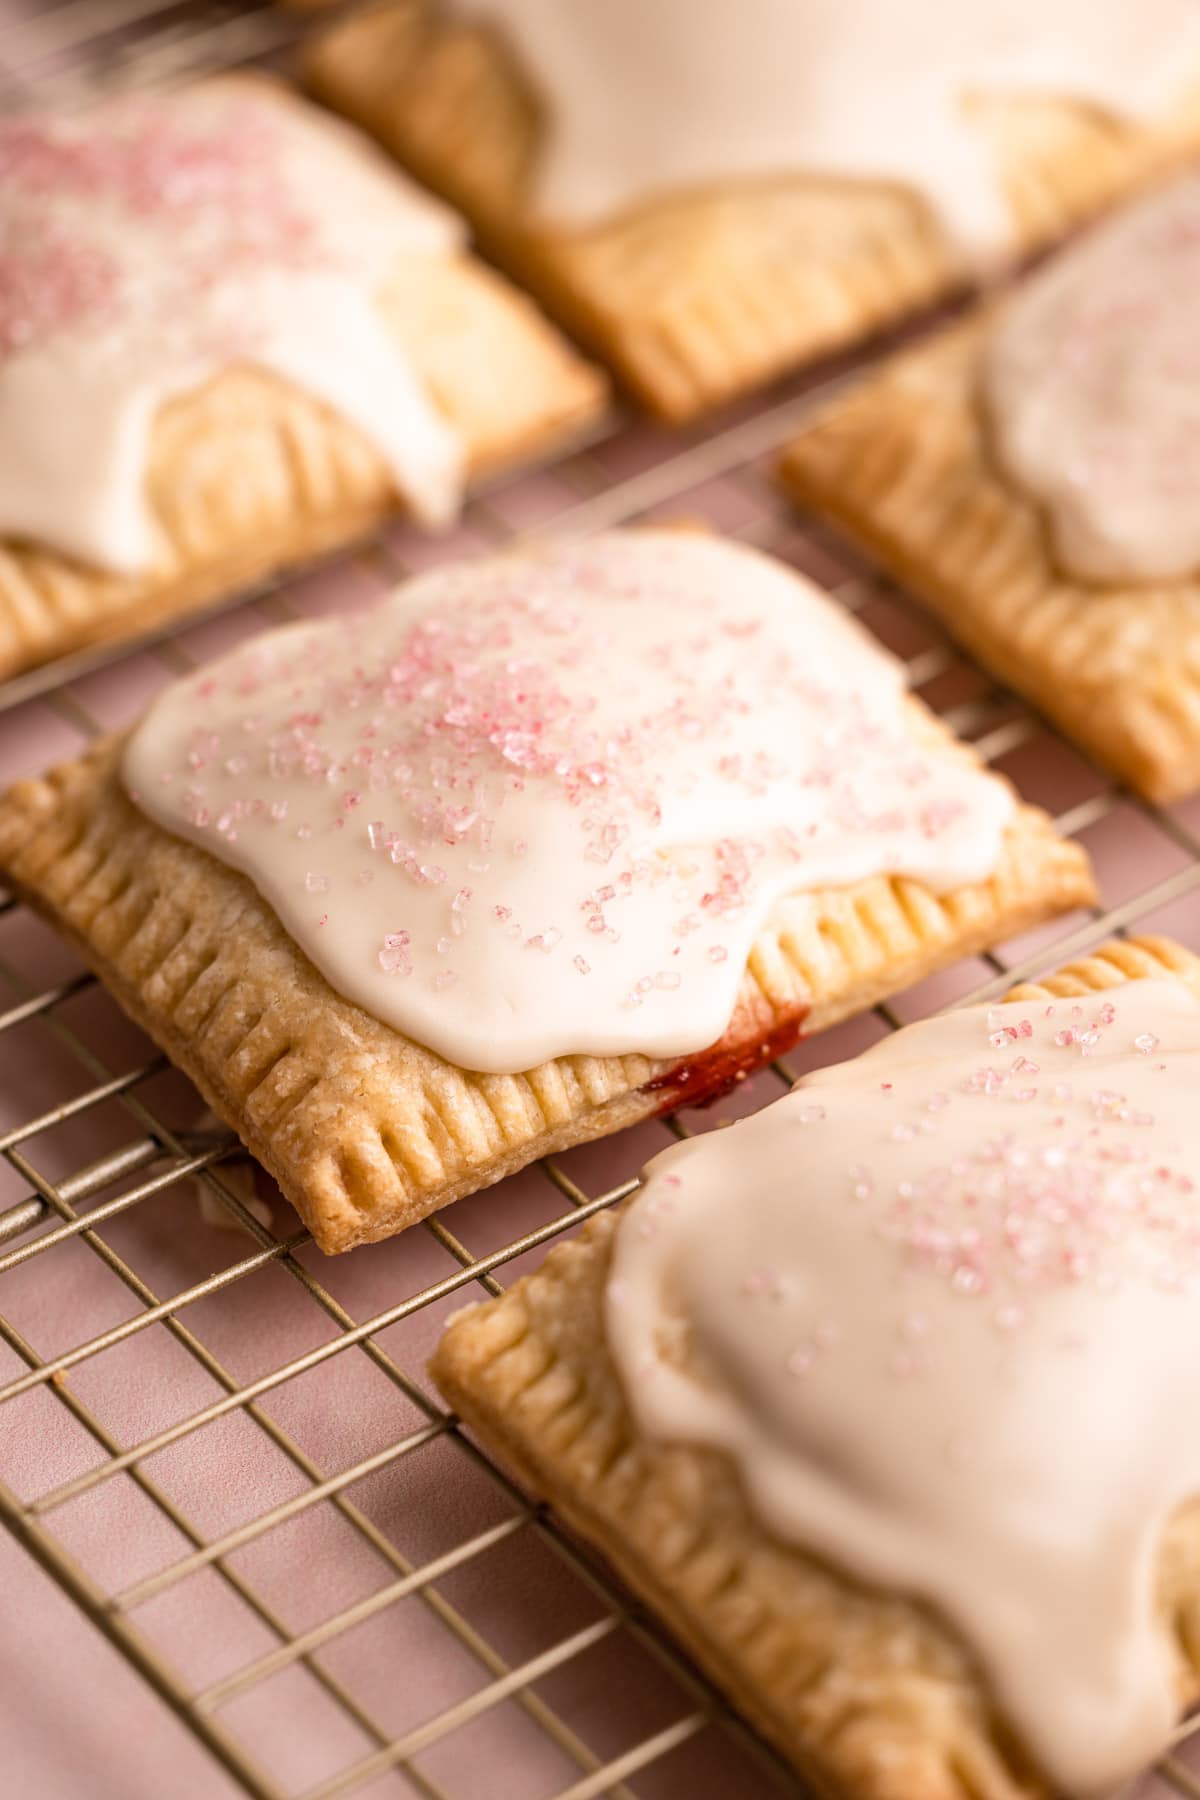
Don't forget the frosting on top! It's easy to prepare: powdered sugar, a little milk, and a splash of vanilla extract. The glaze should be thick enough to stay on top of the pop tart. You'll know you have the right consistency when you drizzle the glaze and it holds its shape for a few seconds before sinking into the bowl.
If your glaze is too thin, add a tablespoon more powdered sugar at a time. If it’s too thick, add in more milk.
Once the pop tarts are cool, spoon on about 1 tablespoon of glaze and gently smooth it down along the top of the pop tart.
Freezing and Storing
The pop tarts will keep well for up to 3 days, at room temperature, in a closed container. Just make sure that the glaze is completely set before you place them on top of one another.
Un-frosted pop tarts can even be frozen, baked, or unbaked for up to 1 month in the freezer.
Watch the Video
More Hand Held Desserts
I am so honored when you make a recipe from my site! If you make this Strawberry Pop Tart recipe, please leave a star ⭐️⭐️⭐️⭐️⭐️ rating with your experience! If you have any questions about this recipe, feel free to comment here, and tag me on Instagram!
Full Recipe
Homemade Strawberry Pop Tarts

This may be a bold statement, but, these are the best Homemade Strawberry Pop Tarts. These adorable little treats might be small in size, but they are huge on flavor. Homemade strawberry filling is tucked inside an easy-to-make buttery pastry, and finished with a simple vanilla glaze.
- Prep Time: 00:25
- Cook Time: 00:35
- Total Time: 00:55 plus chilling time
- Yield: 8-9 pop tarts
- Category: Dessert
- Method: Bake
Ingredients
For Pop Tart Dough:
- 2–½ cups (300 grams) all-purpose flour, more for work surface
- 1 tablespoon powdered sugar
- ½ teaspoon (2 grams) coarse kosher salt (see note)
- 16 tablespoons (230 grams) unsalted butter, cold, cubed
- ⅓ cup (75 grams) whole milk
Strawberry Filling:
- 1 pound strawberries, cleaned, hulled and sliced
- ½ cup (100 grams) granulated sugar
- Pinch of coarse kosher salt
- 2 teaspoons cornstarch
- 2 teaspoons fresh lemon juice
- egg wash
Vanilla Glaze:
- 1 cup (115 grams) powdered sugar
- 2 tablespoons milk, more as needed
- ¼ tsp vanilla extract
- Sprinkles, if desired
Instructions
Make the Dough:
- Add the flour, powdered sugar, and salt to the bowl of a food processor. Pulse until combined. Add in the butter and pulse 7 times. With the processor running, pour in the milk and process until the dough forms a cohesive ball.
- Scrape the dough from the bowl and place it onto a piece of plastic wrap. Form the dough into a rectangle and wrap tightly. Using a rolling pin, roll the dough out until it stretches to the edges of the plastic wrap to ensure a tight seal.
- Refrigerate for at least 2 hours, but preferably overnight.
Make the Strawberry Filling:
- In a medium pot, stir together the strawberries, sugar, and salt. Cook over medium heat until bubbling. Reduce the heat to medium-low and simmer for 5 minutes.
- Shut off the heat. Using an immersion blender (or a regular blender), puree the strawberry mixture.
- In a small bowl, whisk together the cornstarch and the lemon juice. Whisk the mixture into the pureed strawberries.
- Return the heat to medium and bring the filling to a boil. Once the mixture has thickened, remove it from the heat.
- Chill the filling for at least 12 hours, or overnight.
Prepare the Pop Tarts:
- Remove the chilled dough from the refrigerator and let it rest at room temperature for 5 to 10 minutes, or until it is slightly softened and easier to roll. Then, divide the dough in half.
- On a well-floured work surface, roll out one piece of dough to a rough 9-by-13 rectangle, about ⅛-inch thick. Using a pastry wheel or chef’s knife, cut out as many 3-by-4-inch rectangles as you can. Repeat with the remaining dough. Then, gather up the scraps and roll out the dough in the same manner, cutting out as many rectangles as possible. This dough should yield 16 to 18 rectangles total. If the dough is very warm once all rectangles are cut, briefly chill them down in the refrigerator for 15 minutes.
- Line a baking sheet with parchment paper and place half of the rectangles down on the baking tray.
- Use a pastry brush to brush the egg wash around the edges of the pastry.
- Place 1 heaping tablespoon of the strawberry filling in the middle of each rectangle. Place the remaining pastry rectangles on top, taking care to seal the edges well. Use a fork to crimp the edges. Finally, using a bench scraper, trim the edges of the pastry. This makes the final product look neat and also seals the pop tarts well.
- Chill the tray of pop tarts in the refrigerator for at least 30 minutes.
Bake and Frost the Pop Tarts:
- Preheat the oven to 375°F and place an oven rack in the middle part of the oven. Bake the pop tarts in the preheated oven until the bottoms are slightly golden, about 25 minutes. Transfer to a wire rack and let cool completely..
- In a small bowl, whisk together the powdered sugar, milk, and vanilla. The glaze should be thick enough to keep its shape for a few seconds when drizzled off of a spoon; if it’s too thick, add more milk as needed.
- Spoon 1 tablespoon of glaze onto the middle of each cooled pop tart and gently smooth it down. Add sprinkles or coarse sugar before the glaze sets.


Notes
Pop tarts will keep, covered, at room temperature, for about 3 days.
Weighing your flour is the most accurate way to measure. If you aren't going to weigh it, make sure to spoon it into the cup, and then level it off. If you scoop the flour out with the measuring cup and then level, it could change the outcome of the final product.
This strawberry filling recipe yields more than you will need for the pop tarts. You can use the extra strawberry filling in other pastries, breads, with ice cream, with oatmeal or even in place of jam on bread. Or, you can use it to make more pop tarts! It also freezes well.
Be mindful of the pop tart pastry getting too warm. If the butter in the dough has gotten soft, the dough will be difficult to roll out and hard to fill. Use the refrigerator if necessary in between steps.
Avoid overfilling the pop tarts with too much strawberry. Just like store-bought pop tarts, the resulting pastry should have a thin layer of filling. Overfilling may cause the filling to leak out and create a mess.
Follow all instructions for sealing the pastry together to ensure the shape of the pop tarts is maintained during baking. The final step of using a pastry bench scraper to trim the edges is crucial for cleaning them up and sealing the pastry. Avoid using a knife, as it will cut through the pastry. If you don't have a bench scraper, you can use a dull tool like a ruler.
Some of the links on this page may be affiliate links. Everyday Pie is a participant in the Amazon Associates Program. As an Amazon Associate I earn from qualifying purchases, at no extra cost to you.
Kate Wilkinson
Exceptional recipe! I made these for a friend’s birthday and they were a HIT!! So tasty and buttery, plus I have some leftover strawberry filling to spread on toast!! I love everything Kelly posts; her recipes are so clear, informative, and easy to follow (even for complicated things). A+!
Kelli Avila
You've made my day! Appreciate you sharing your experiences with the recipes here on Everyday Pie!
Hallie
We continue to love this recipe. We make it about twice a year. We have friends that come in from out of town and they request it every time.
I substitute the flour for whole wheat flour. It turns out amazing every time. We highly recommend this recipe!
Kelli Avila
So happy you enjoy it! And thanks for sharing how your swap works.
Liz
Delicious and super fun! You are right it is a project. So worth it though! 🍓🥰🍓
Donna
Hi Kelli, in your demonstration video you use a rectangular cookie/pastry cutter. Could you tell me where you found one that would be 3x4 inches? I have looked on Amazon and have only found cutters in a 4.5 inch length x 3 inches wide. Thank you for your assistance.
Kelli Avila
Hi Donna! My dear husband made me this cutter, as I was making so many pop tarts! If you wanted to purchase one of the ones you saw on amazon, it's okay to slightly change the size. It just might impact the total bake time (increase or decrease as needed) and you might need to add a little more or a little less filling.
Nichi
Can you do a banana cream pie toaster pastry?
Marie Lee
Can frozen strawberries be used?
Kelli Avila
Defintely!
JOY L.
Can you make these and then be put in freezer for future bake off?
Kelli Avila
Yes! Absolutely. They can be frozen either unbaked or baked! When you are ready to bake from frozen, bake as instructed but tack on a few extra minutes at the end until they are just barely golden.
Genesis
OMG! So amazing! This dough is soo flaky and delicious. I loved it so much, I’m wondering if I would be able to use this dough recipe for mini tarts?
Kelli Avila
I'm so glad you enjoyed them! You could use the dough elsewhere if you want!
Chelsea R.
Made these over the past few days and they are delicious! Love that it’s a dedicated pop tart dough and the tips to keep the pop tarts sealed really helped mine! Thank you for a wonderful recipe!
Kelli Avila
I'm so glad you loved it!
Michele
Love, love, love this recipe!! And my daughter and her husband and my grandson all loved the pop tarts, too! Thank you!!
Kelli Avila
Yay! So glad you enjoyed!