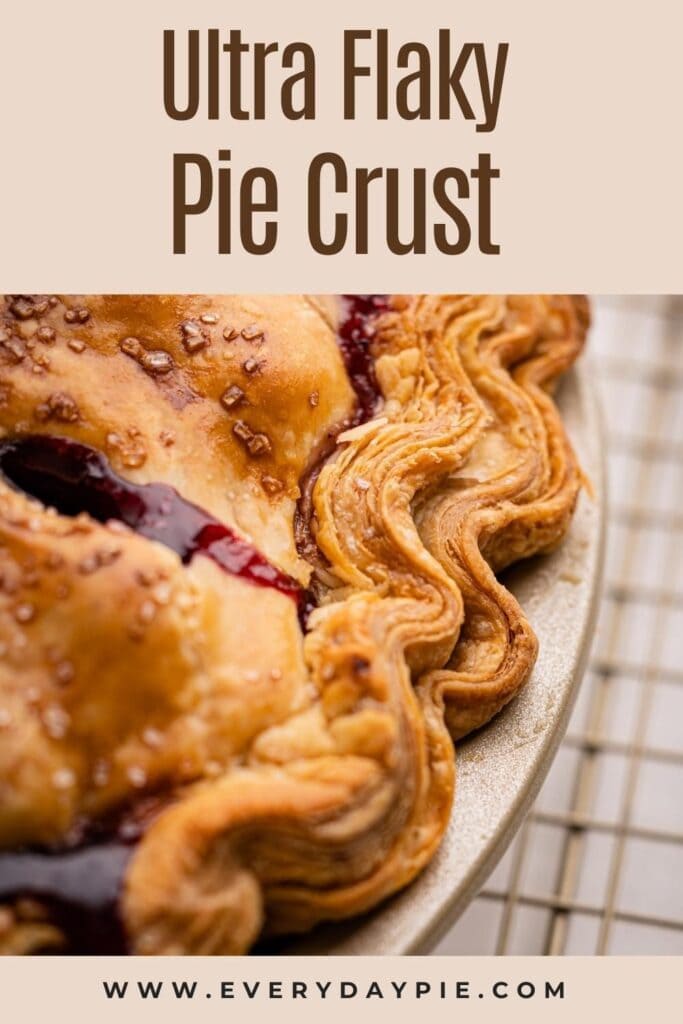

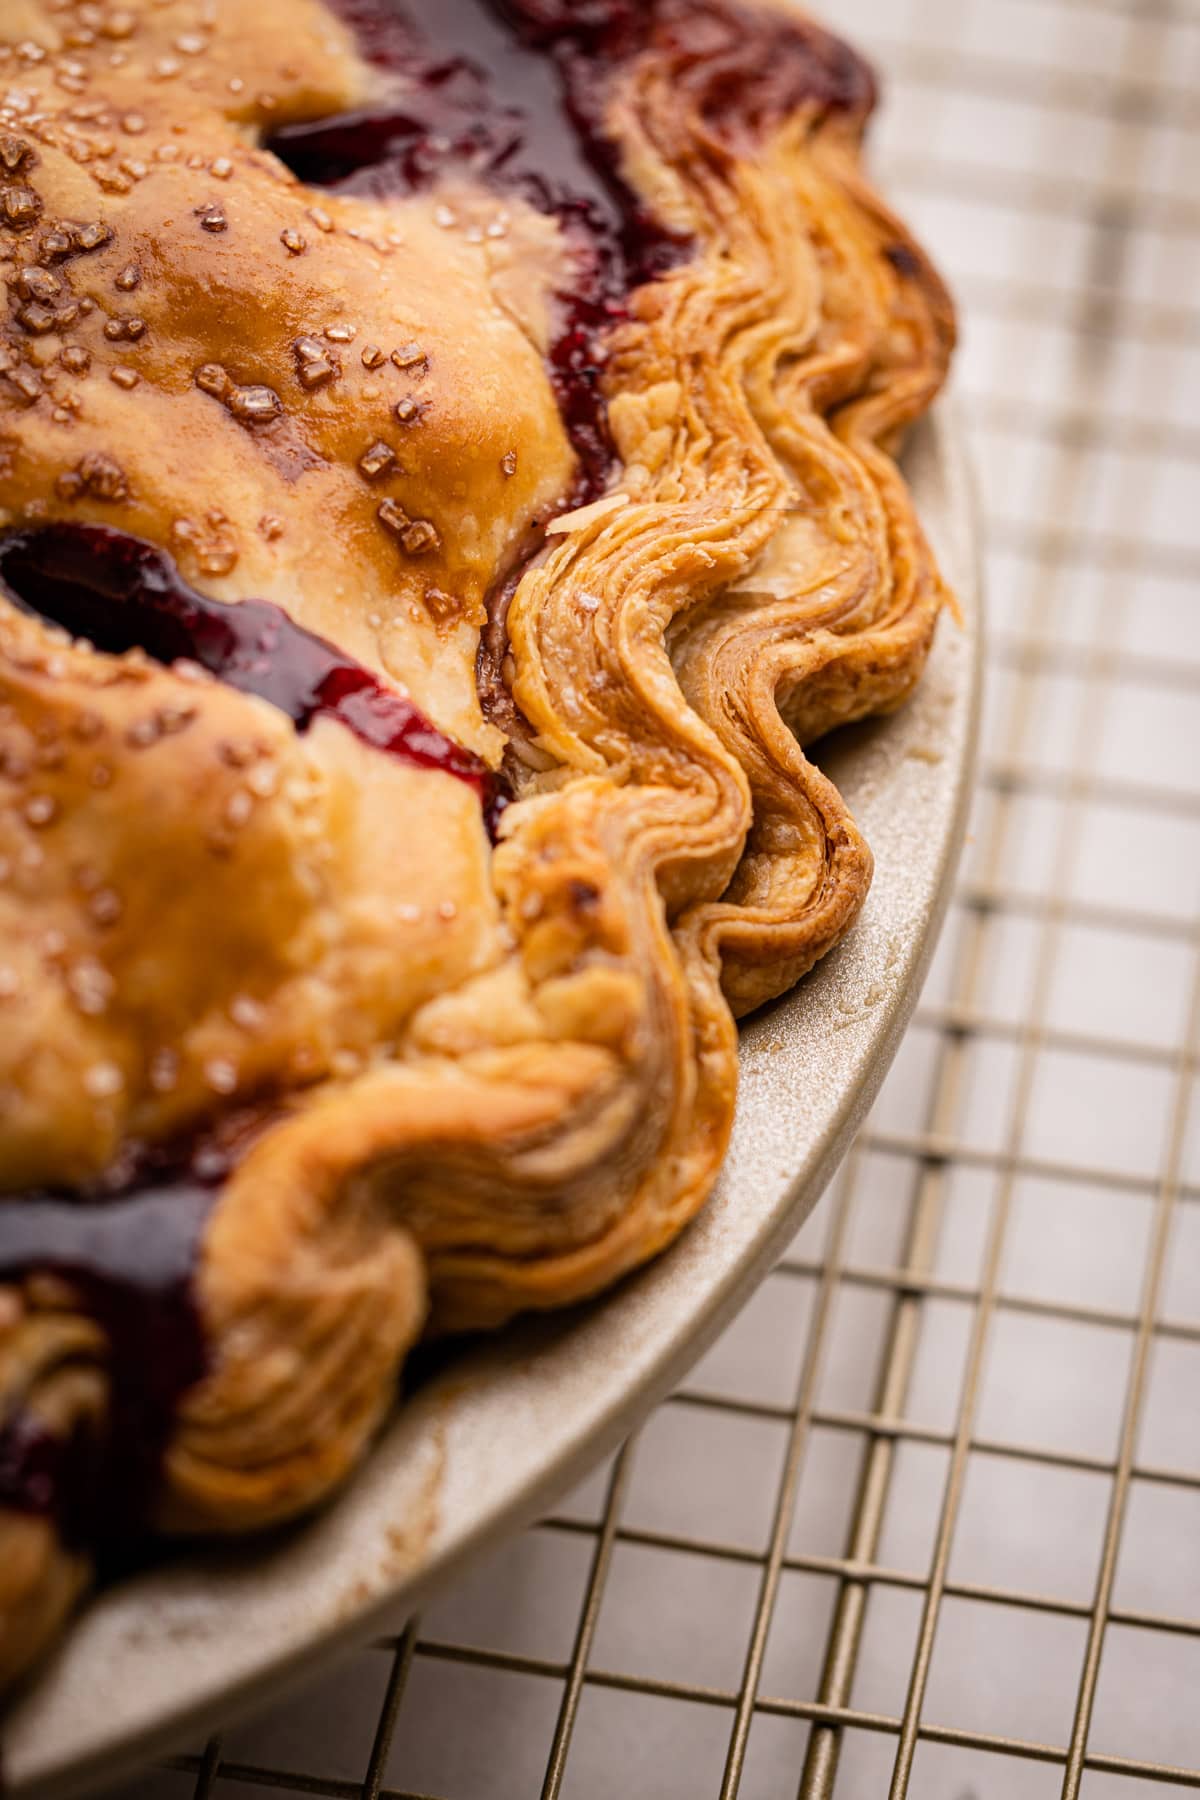
Using a few simple ingredients and an easy folding technique, this Super Flaky Pie Crust recipe makes for the most flavorful, puff pastry-like layers that will make your pies the star of the show.
Want to save this recipe?
Enter your email & I'll send it to your inbox. Plus, get weekly updates from me!
This pie crust is different from the average pie crust. With countless recipes just a quick Google search away, there are many techniques and ingredients you can use to create various pie crusts. However, most people today seem to want just one type: a super flaky pie crust.
While I have a few recipes that will result in a lovely mildly flaky pie crust (such as this butter pie crust, this cream cheese pie crust, or this sour cream pie crust), I wanted to share a recipe for the absolute flakiest pie crust around. This recipe is a marriage between puff pastry and an all-butter crust. It's so flavorful, beautiful and best of all: any home baker can make. A notable point to consider is that this is not the most tender pie crust, due to the natural formation of gluten as the flaky layers are built up. Pie crust is always a balance between tender, flaky, crumbly, and crisp. This recipe leans toward flaky and crisp, with just enough tenderness to hold together without being tough. If you are new to pie dough and want to dive deep into the nitty gritty of making pie dough, check out my Pie Crust tutorial. You can start there and come back here if you want.
So, let's get to making it, shall we? The text below offers tons of tips and helpful notes, or you can scroll to the bottom to grab the recipe and get started!
Jump to:
Ingredients Needed
This is an overview of the ingredients, as well as an explanation behind them. For the full recipe, scroll down to the end of the article.
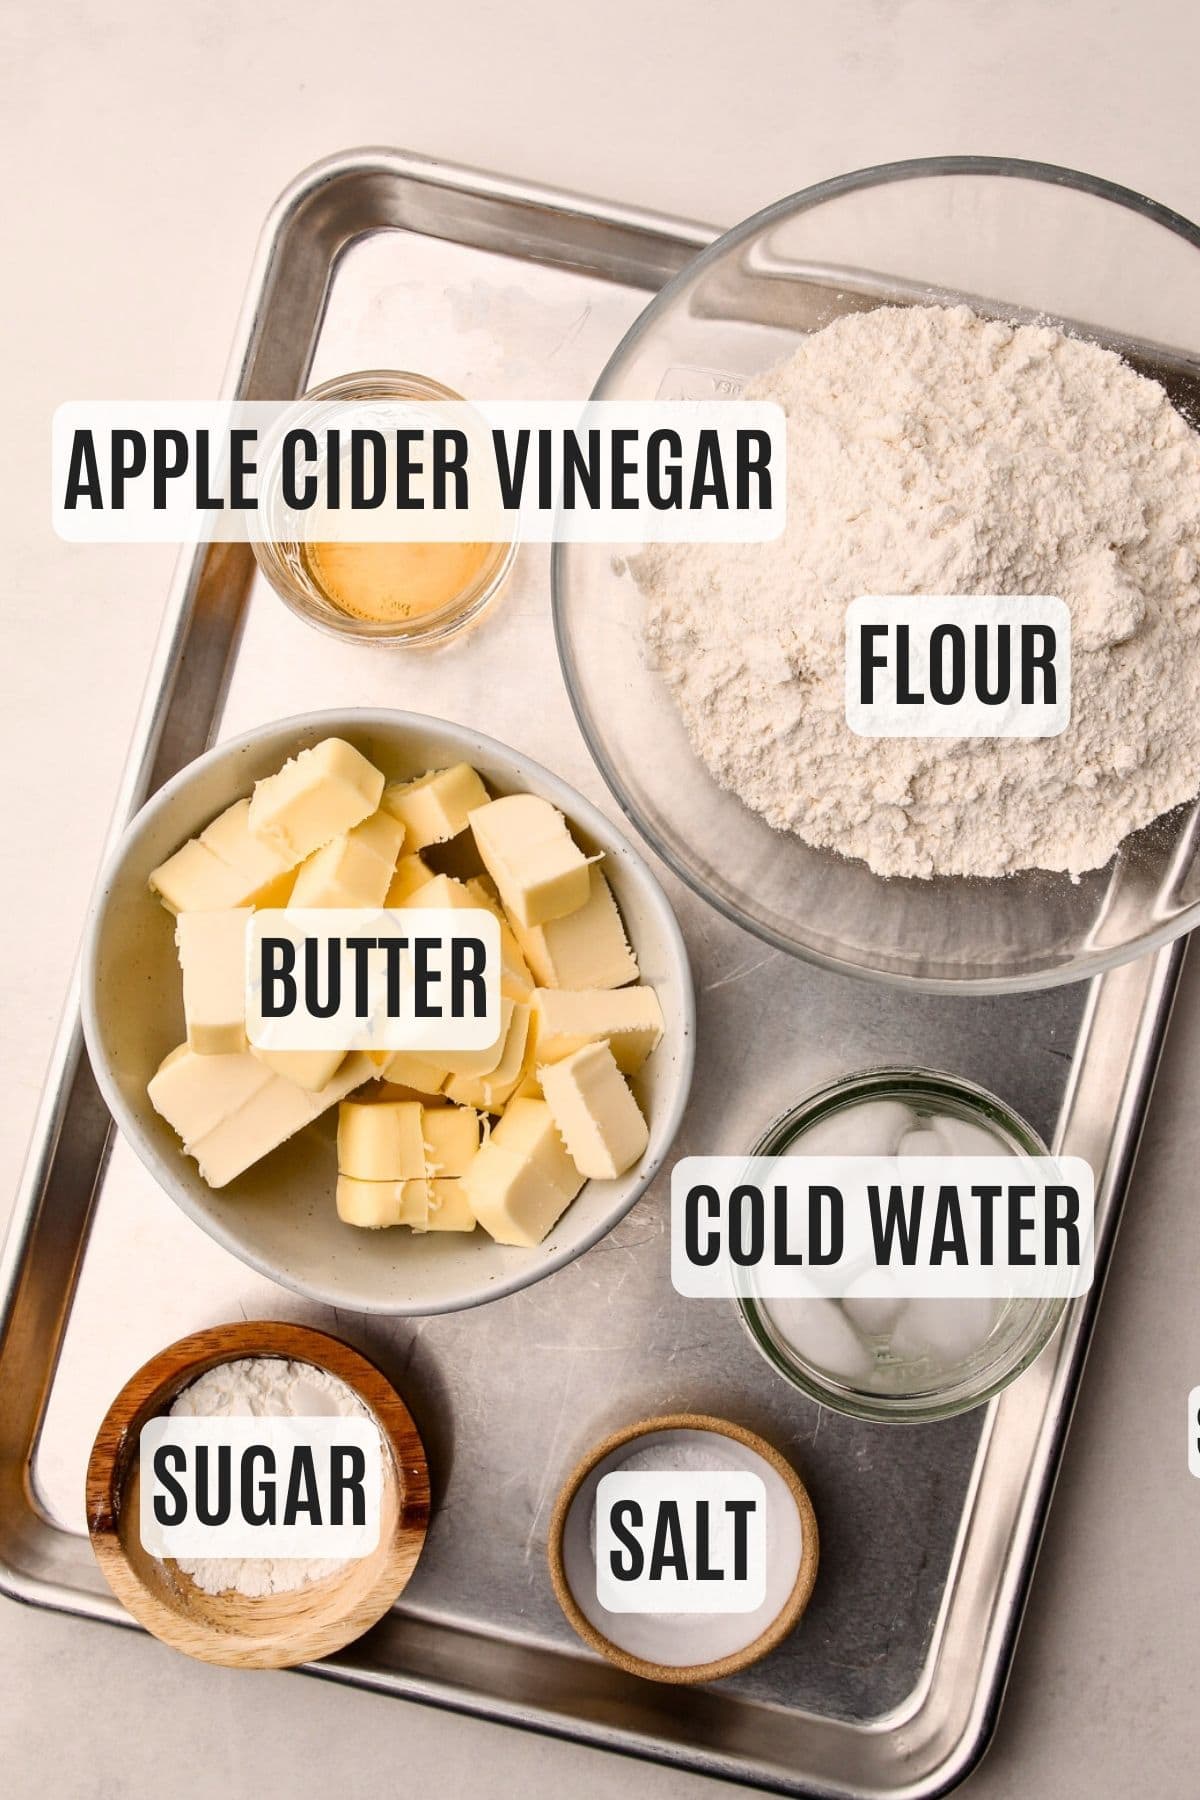
- all purpose flour: I love King Arthur Flour and always recommend using it.
- salt: This recipe was tested using Diamond Crystal coarse kosher salt. If you use Morton's kosher salt or fine salt, decrease by about half for volume, or use the same amount by weight.
- apple cider vinegar: This helps make the dough tender by inhibiting too much gluten formation and it brings a nice subtle hint of tang to the crust that keeps it nicely balanced.
- sugar: Just a little helps with flavor development and browning.
- unsalted butter
- ice water
How to Make It
This recipe, when compared to traditional pie crust recipes, uses more butter and leaves it in larger chunks. Because of this, more water is needed to bring it together. Adding water increases the potential for more gluten to form.
To prevent the dough from becoming too tough, a stand mixer is used to bring the dough together quickly and with minimal handling.
However, it's essential to follow the recipe and not let the machine run for too long, either while "mixing the butter in" or after the water has been added and the dough has come together.
Here is a visual overview of the steps needed to make this recipe:
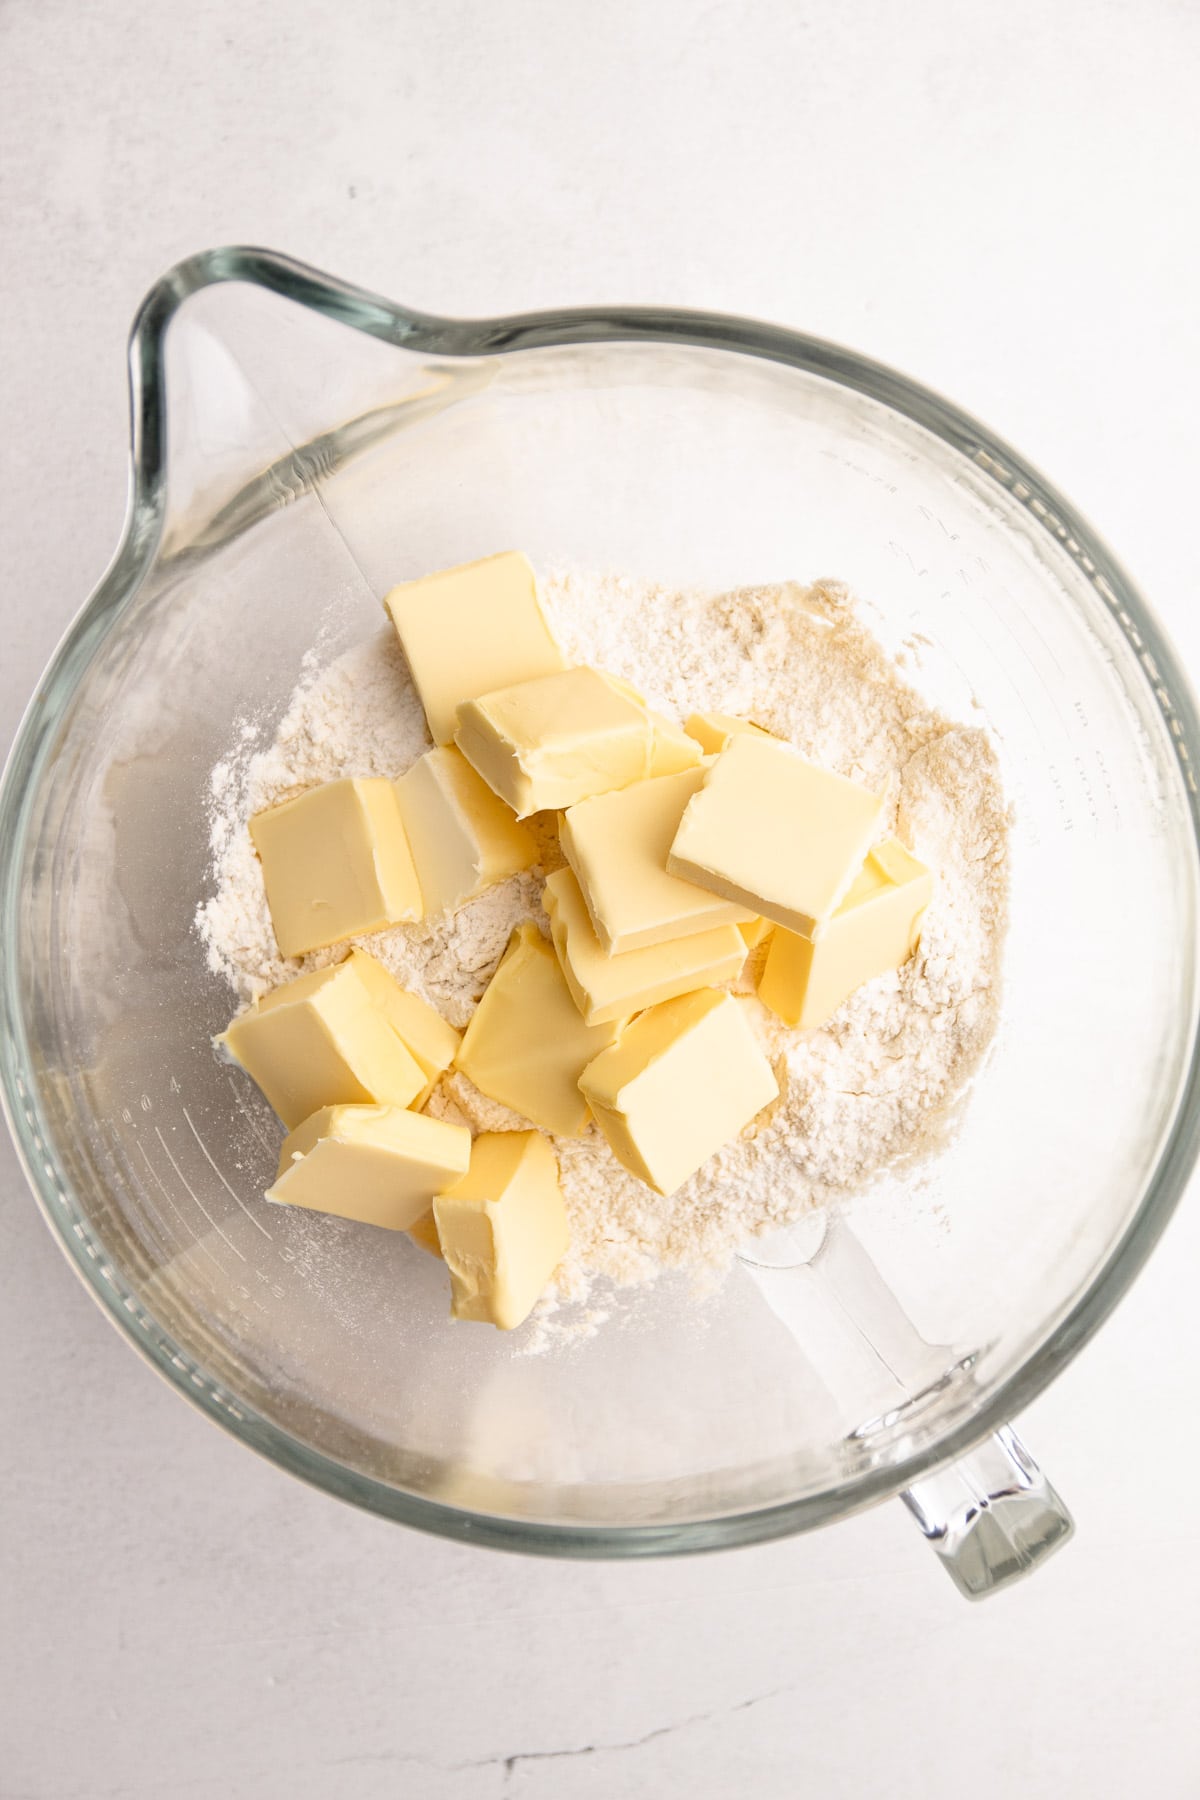
Step 1: Mix the dry ingredients, then dice the cold butter into 1 tablespoon-sized pieces and add to the flour mixture.
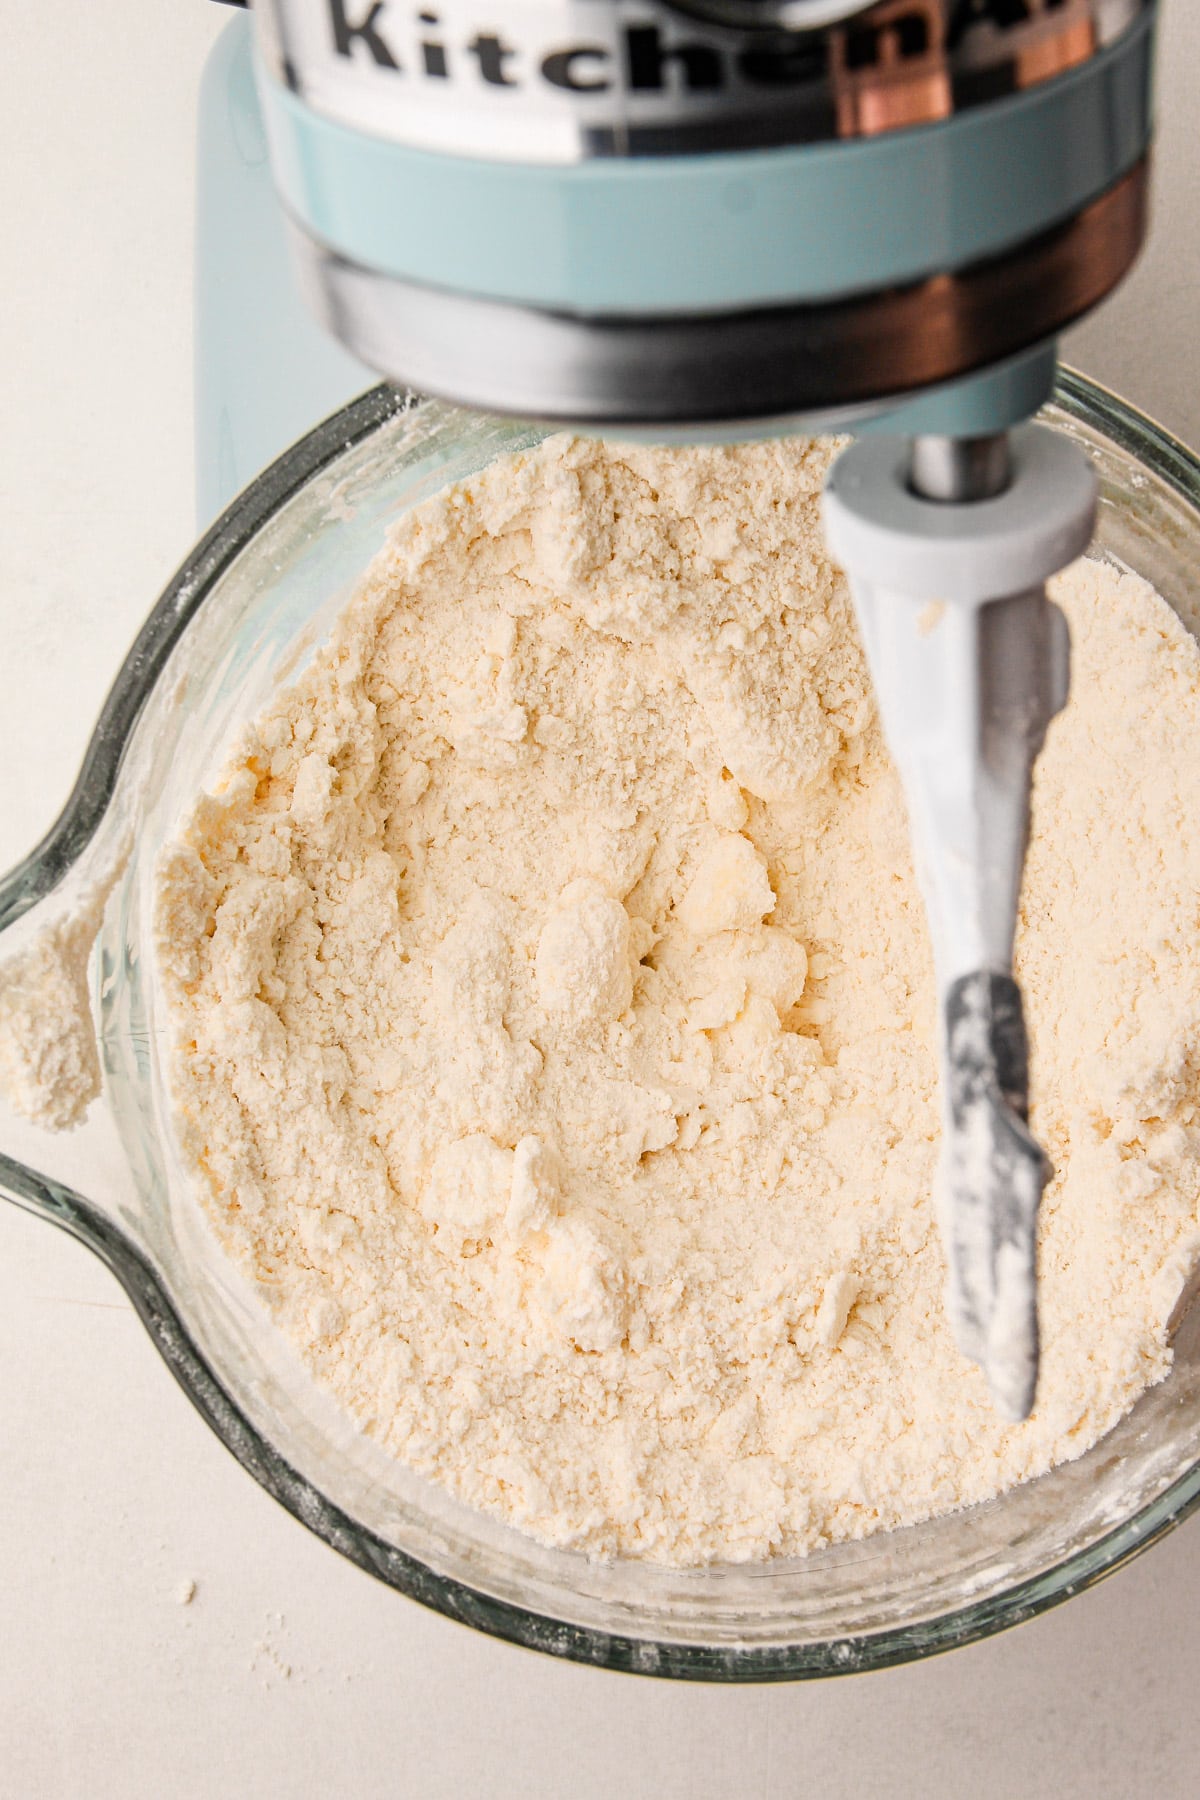
Step 2: Let the paddle cut the butter into the flour for about 30 seconds, leaving large butter chunks visible in the flour. Do not overwork the butter in, they need to be left in larger chunks.
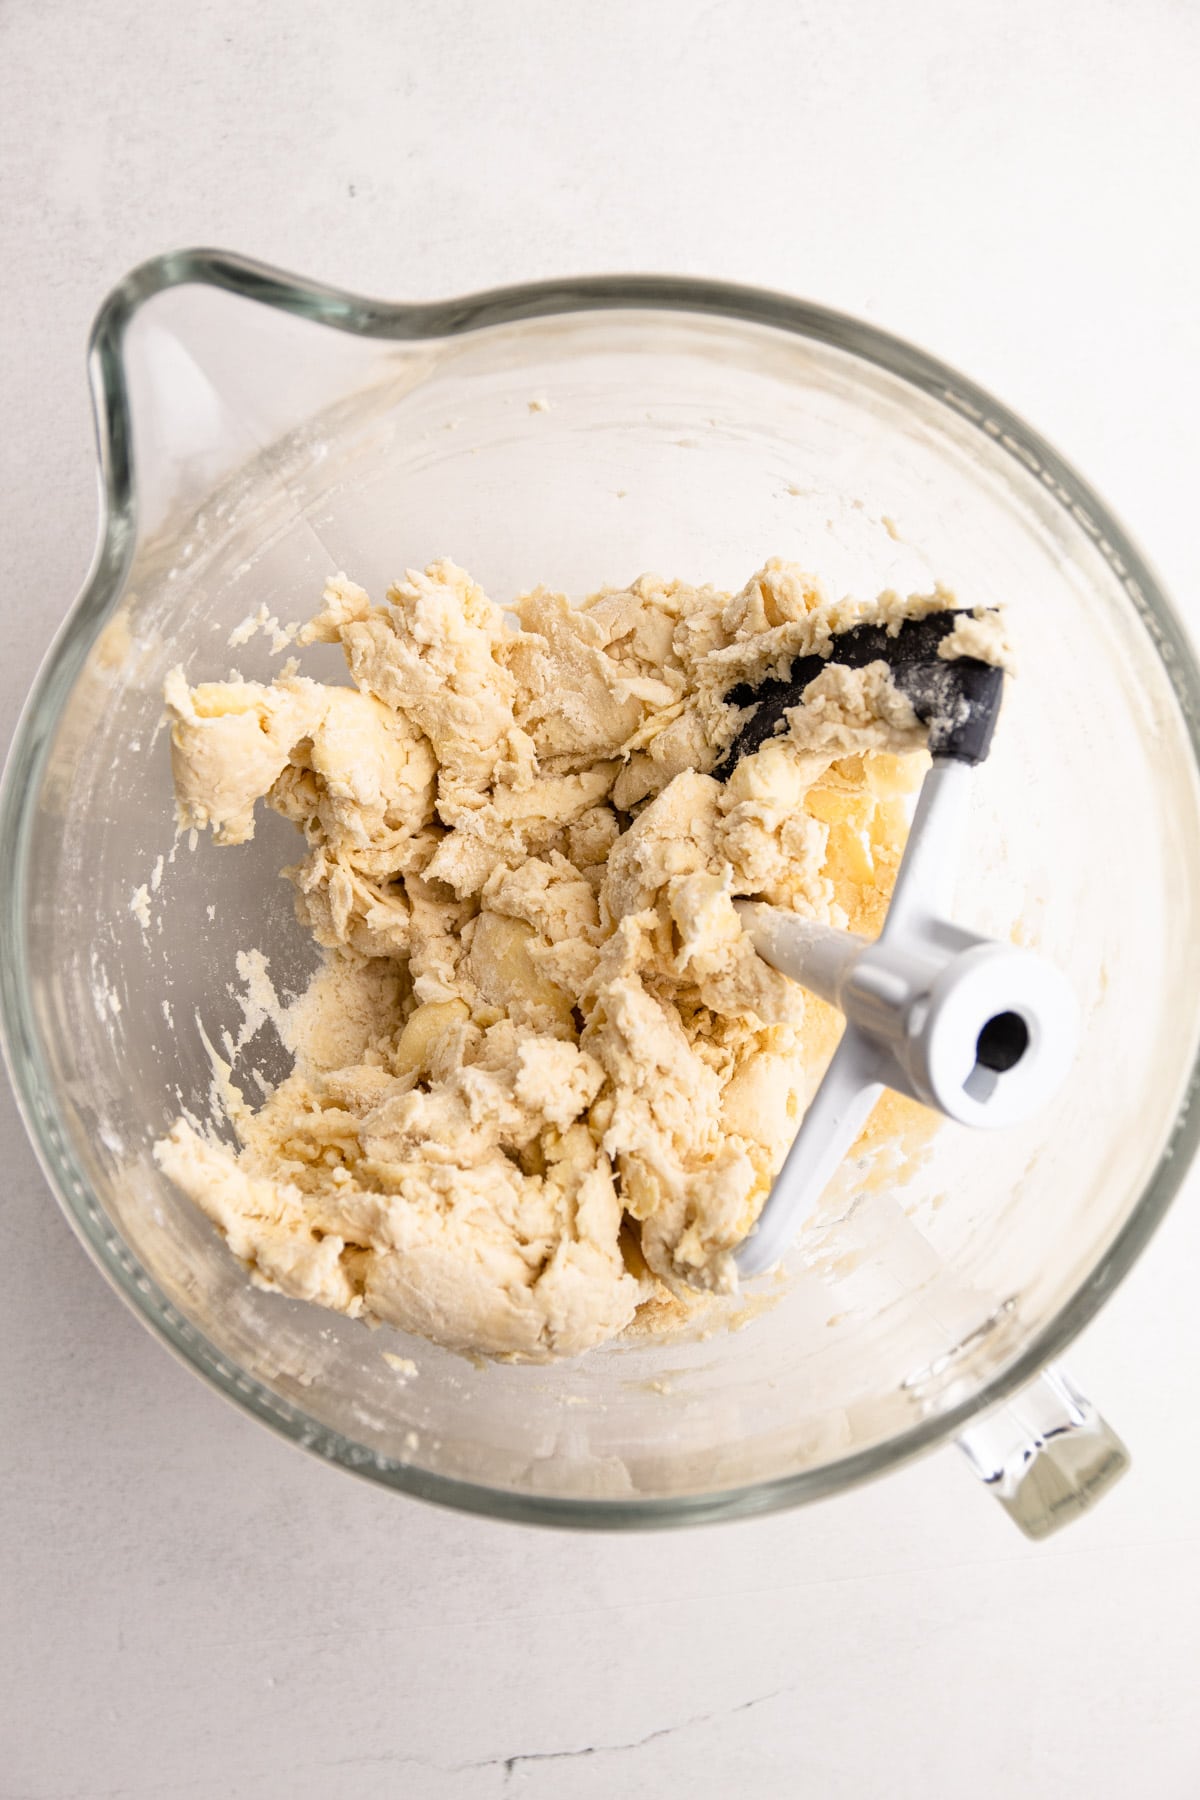
Step 3: Stream in half the water to start, adding more until the dough comes together around the blade. Then shut it off.
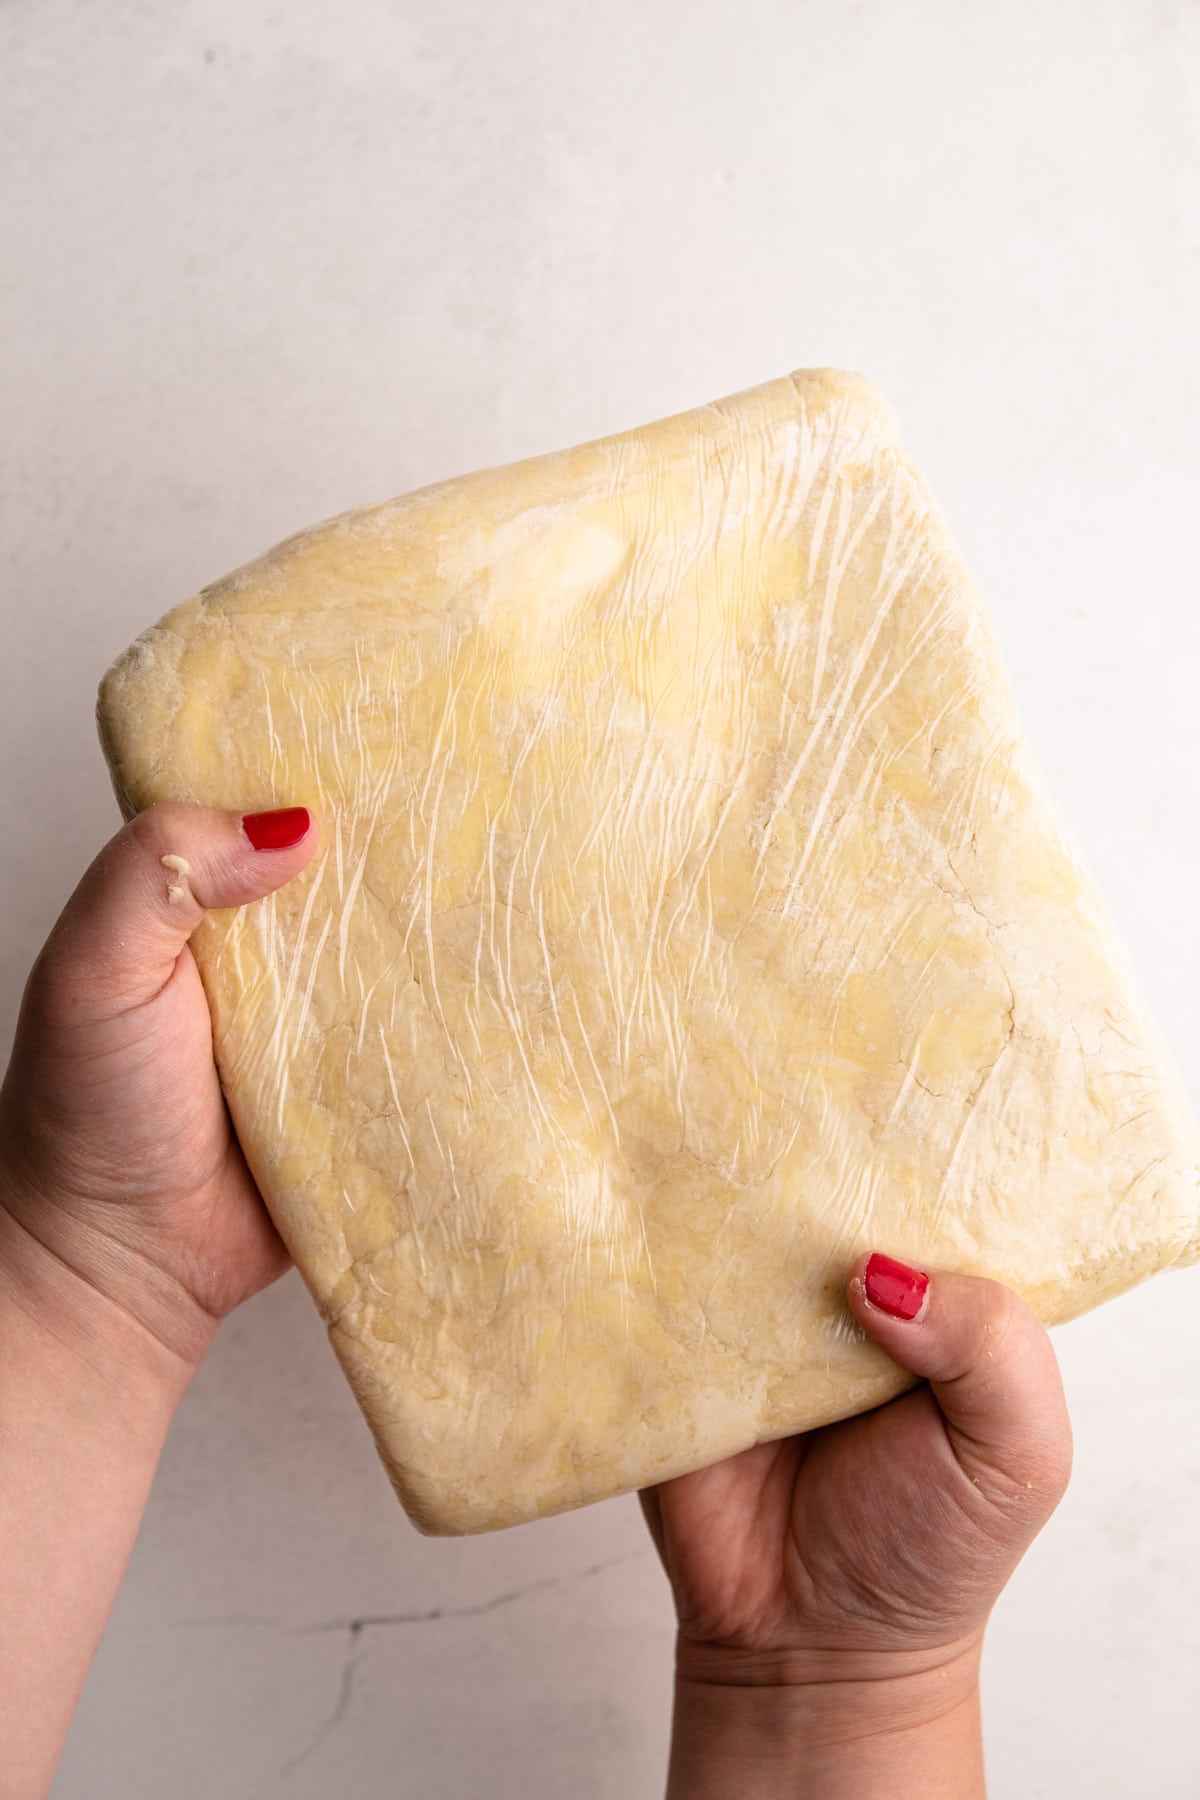
Step 4: Shape the dough into a 1-inch-thick rectangle and wrap tightly in plastic wrap. Place in the refrigerator to chill for at least 2 hours, or overnight.
Troubleshooting Proper Hydration
Like all pie crusts, the amount of water needed can vary depending on how the dough comes together. A properly hydrated dough should have no dry, powdery spots and should clump together easily when squeezed. Unlike traditional pie dough, this recipe relies on very large chunks of butter that are only lightly mixed into the flour. Because the fat is not fully incorporated, more water is usually needed to hydrate the flour.
However, some readers have run into trouble by overmixing the butter into the flour at the start. When the butter is too thoroughly worked in, the flour becomes partially coated in fat and ends up needing less water. If the full amount of water is added at that point, the dough becomes overhydrated. To avoid this, mix the butter into the flour using a stand mixer fitted with the paddle attachment for just 30 seconds. It may seem like the butter is not broken down enough, but that is exactly what you want. The larger pieces will be flattened and layered into the dough later during the folding stage, which creates the signature flakiness of this crust.
Always start with the lesser amount of water, and add more only as needed to achieve a shaggy dough that clumps together around the blade.
Folding the Pie Dough
This recipe is based on the technique of lamination (which is the same technique used when making puff pastry or croissants).
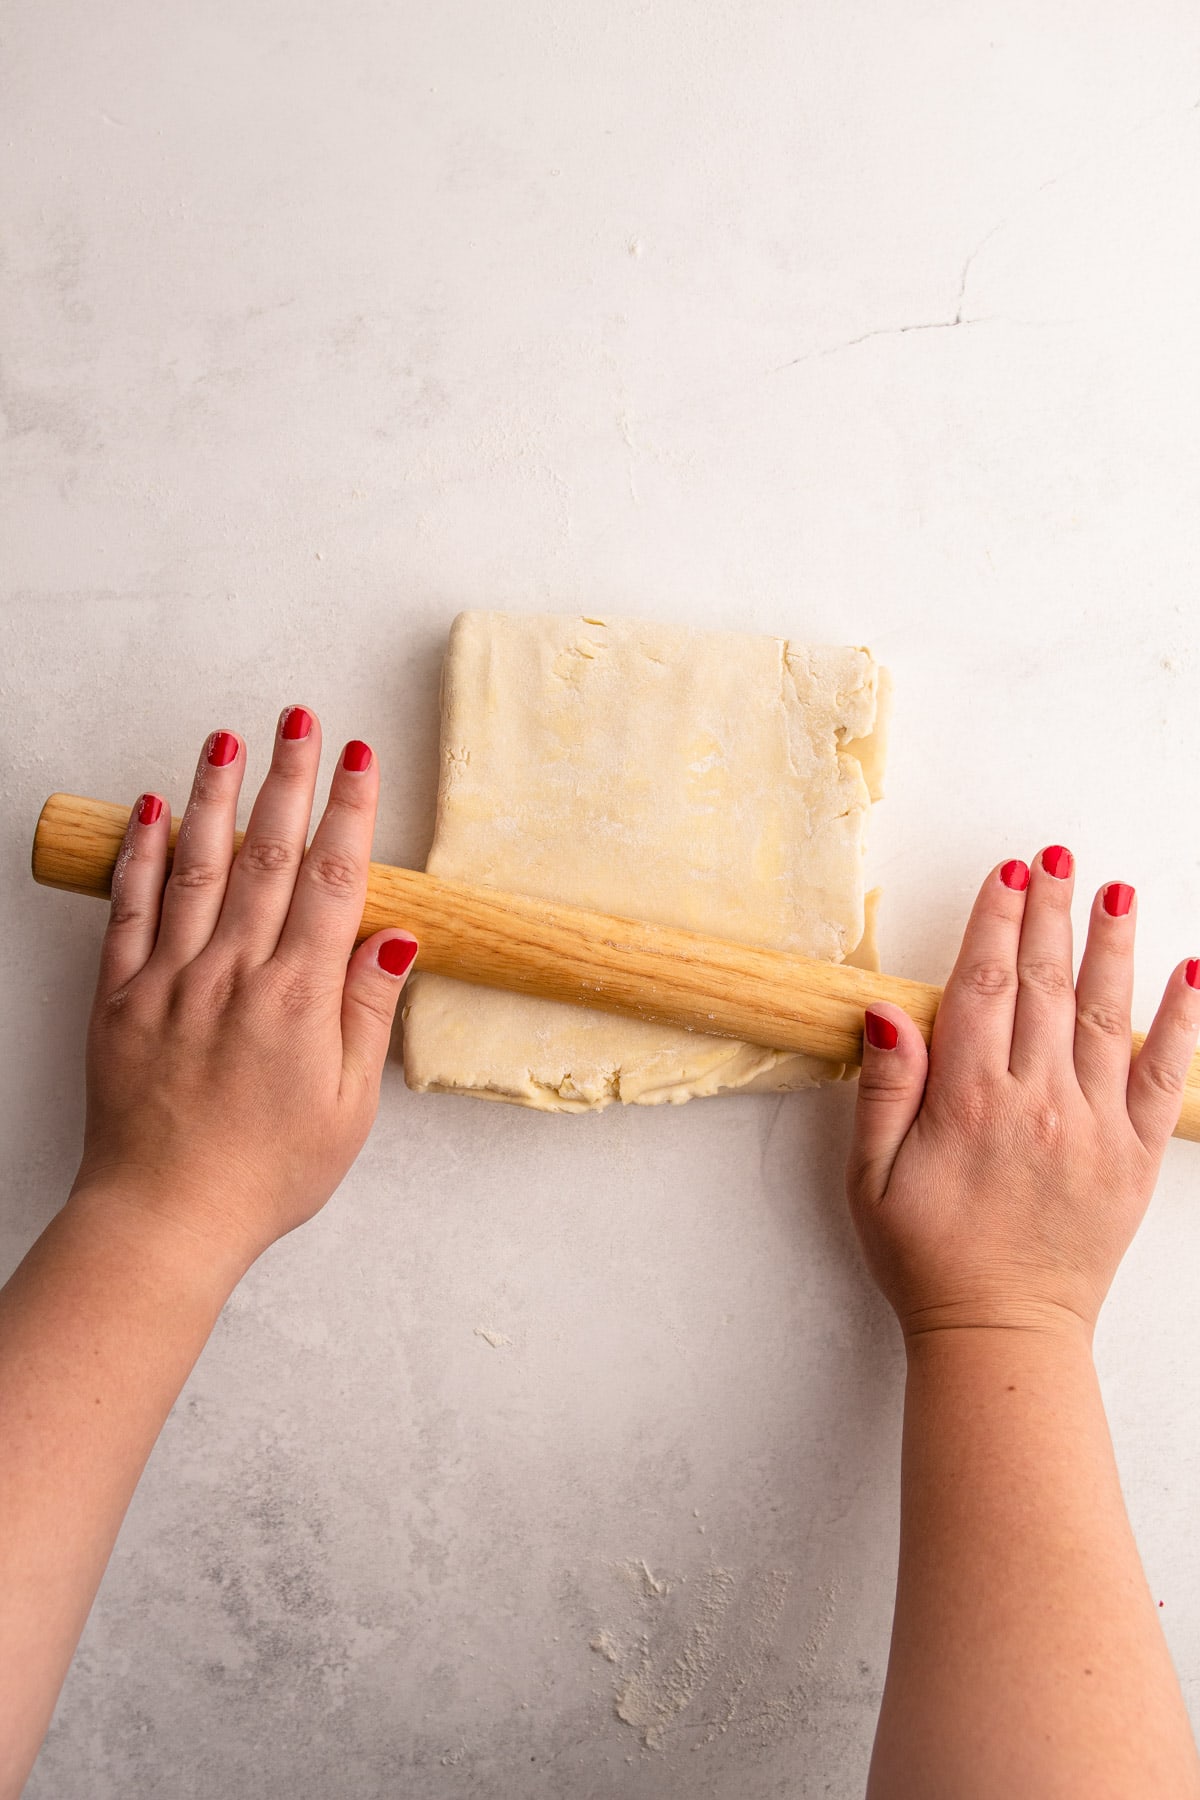
This requires rolling the butter-spiked dough into a rectangle and folding it three times to create six layers. When baked, the moisture in the butter evaporates, causing the dough to rise and create flaky layers.
Here is a visual overview:
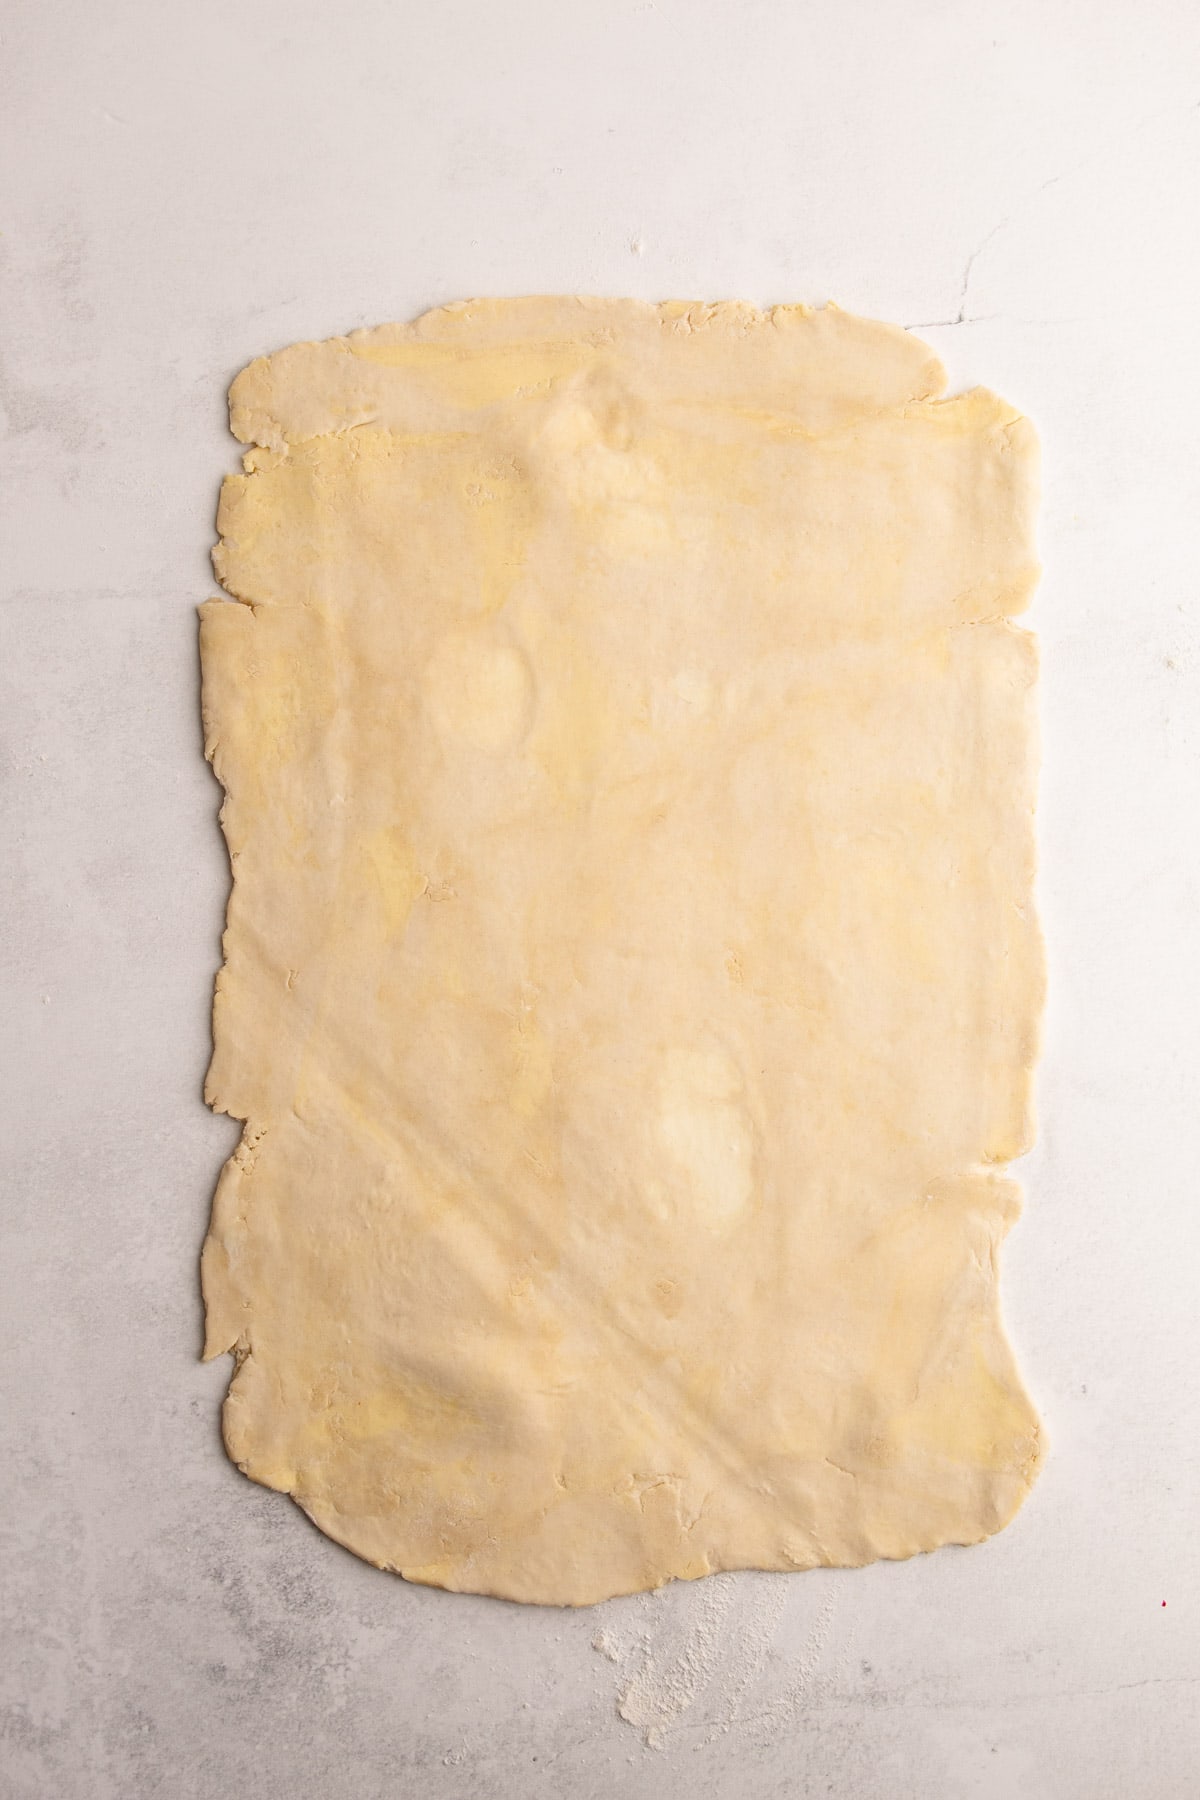
Step 1: On a floured work surface, roll the dough into a 16-by-10-inch rectangle.
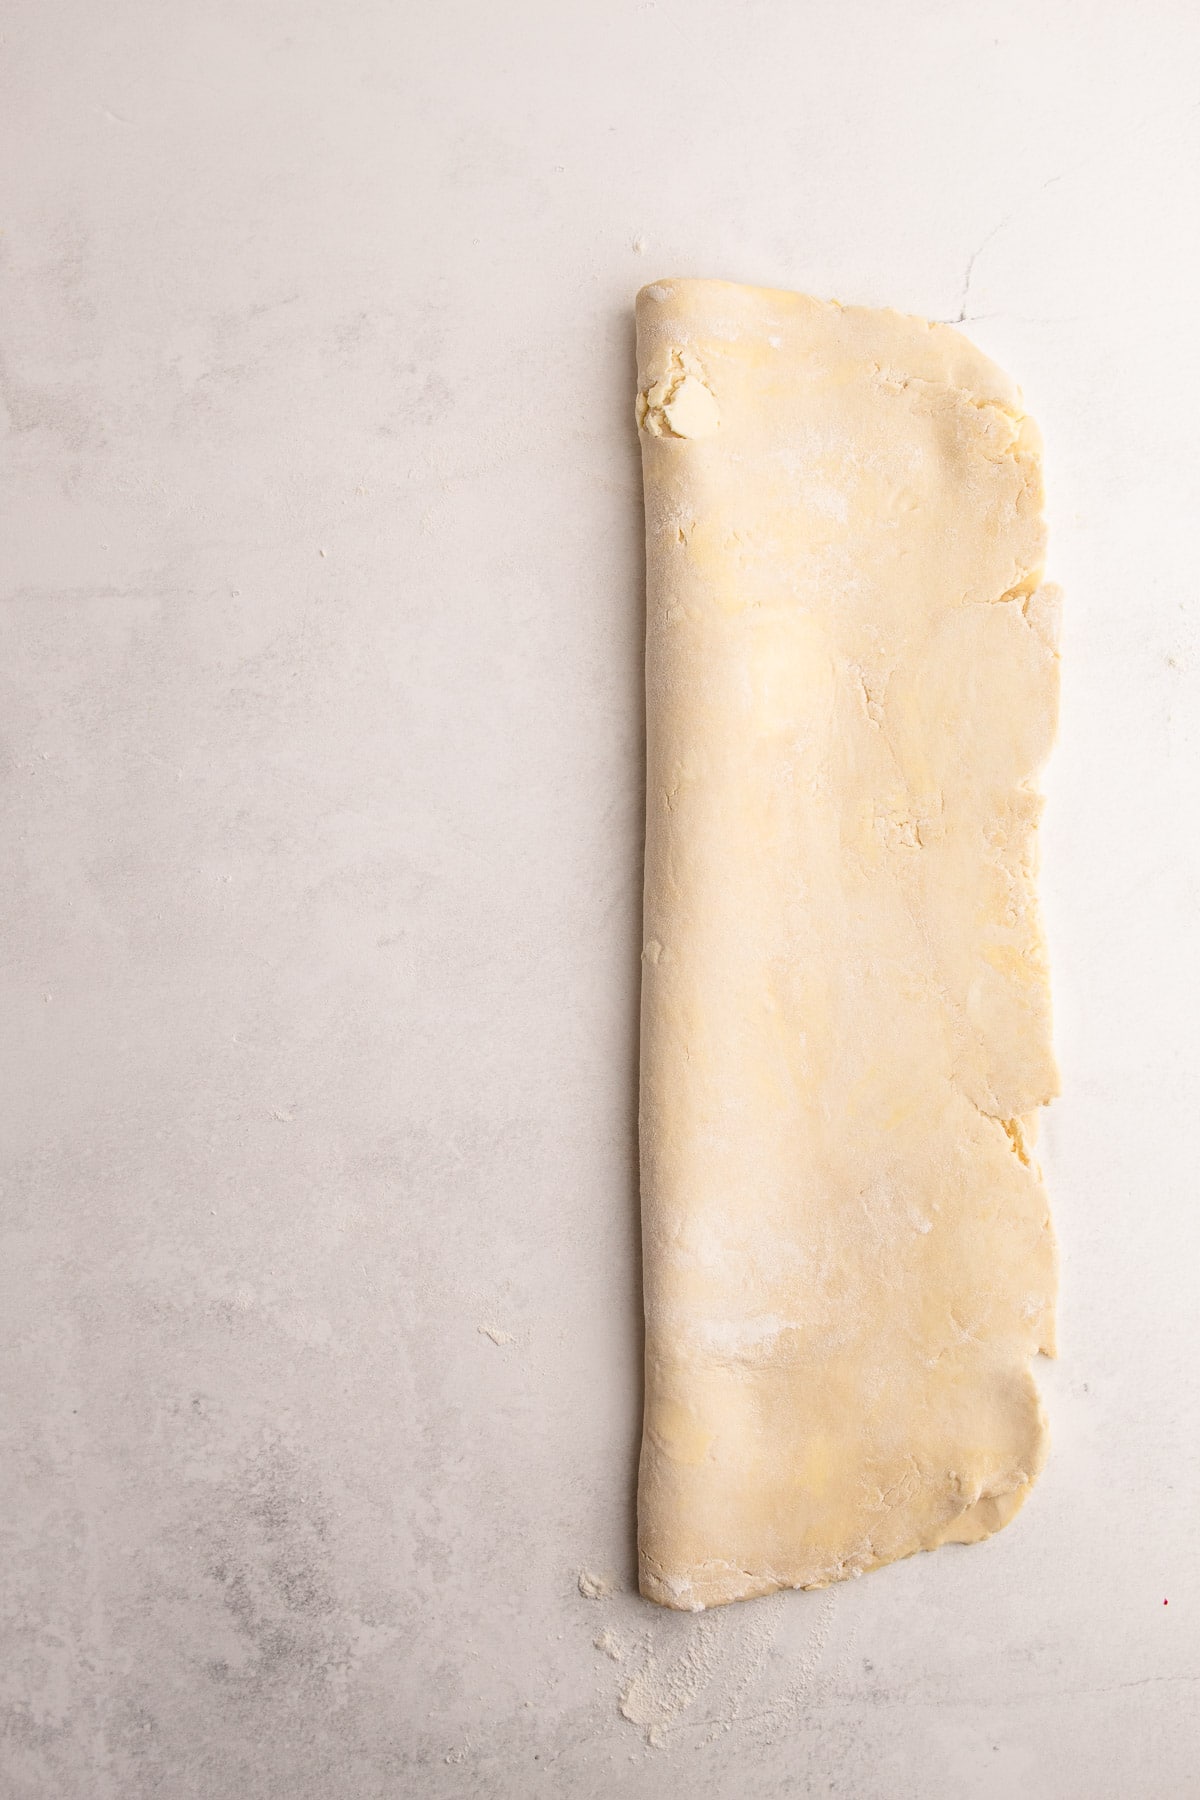
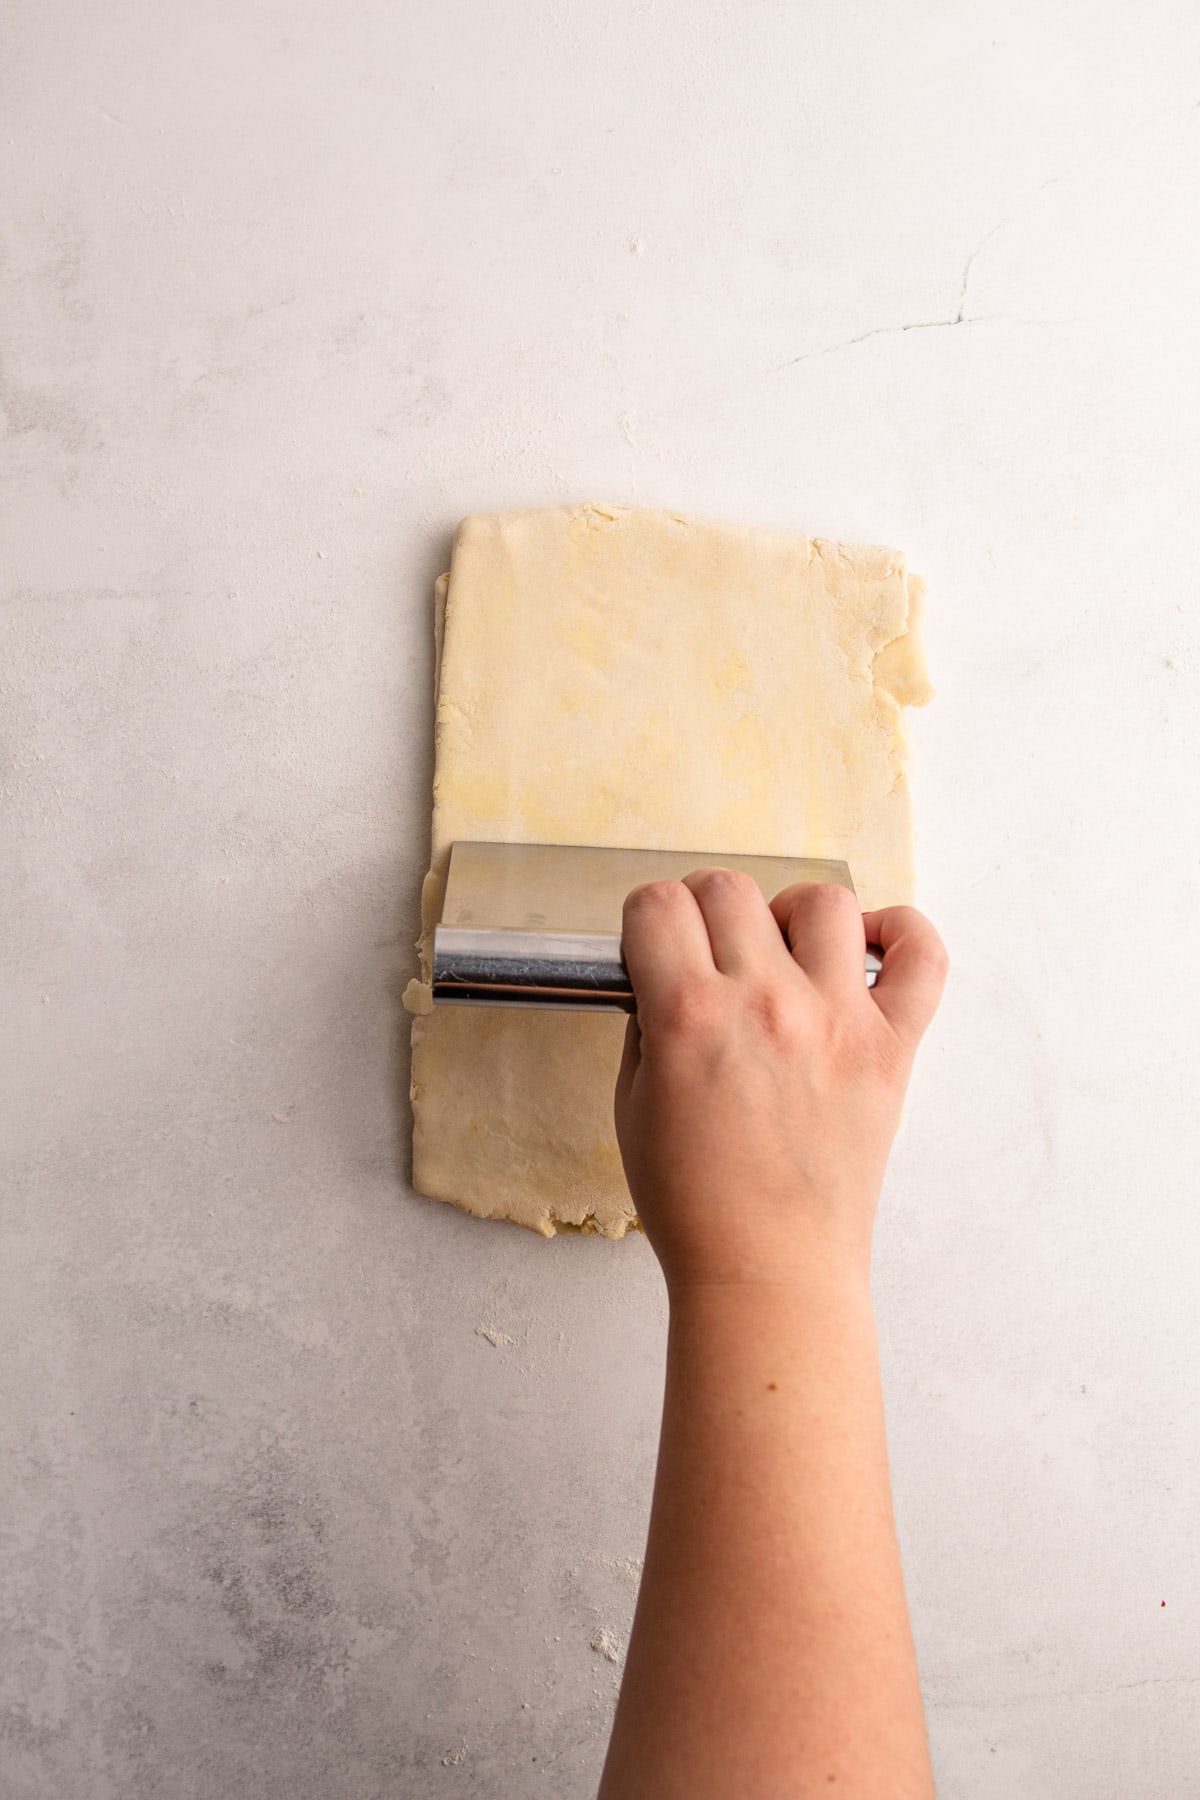
Step 2: Brush off any excess flour from the surface of the dough with a dry pastry brush. Fold the dough in half from the long side, forming a long, skinny rectangle.
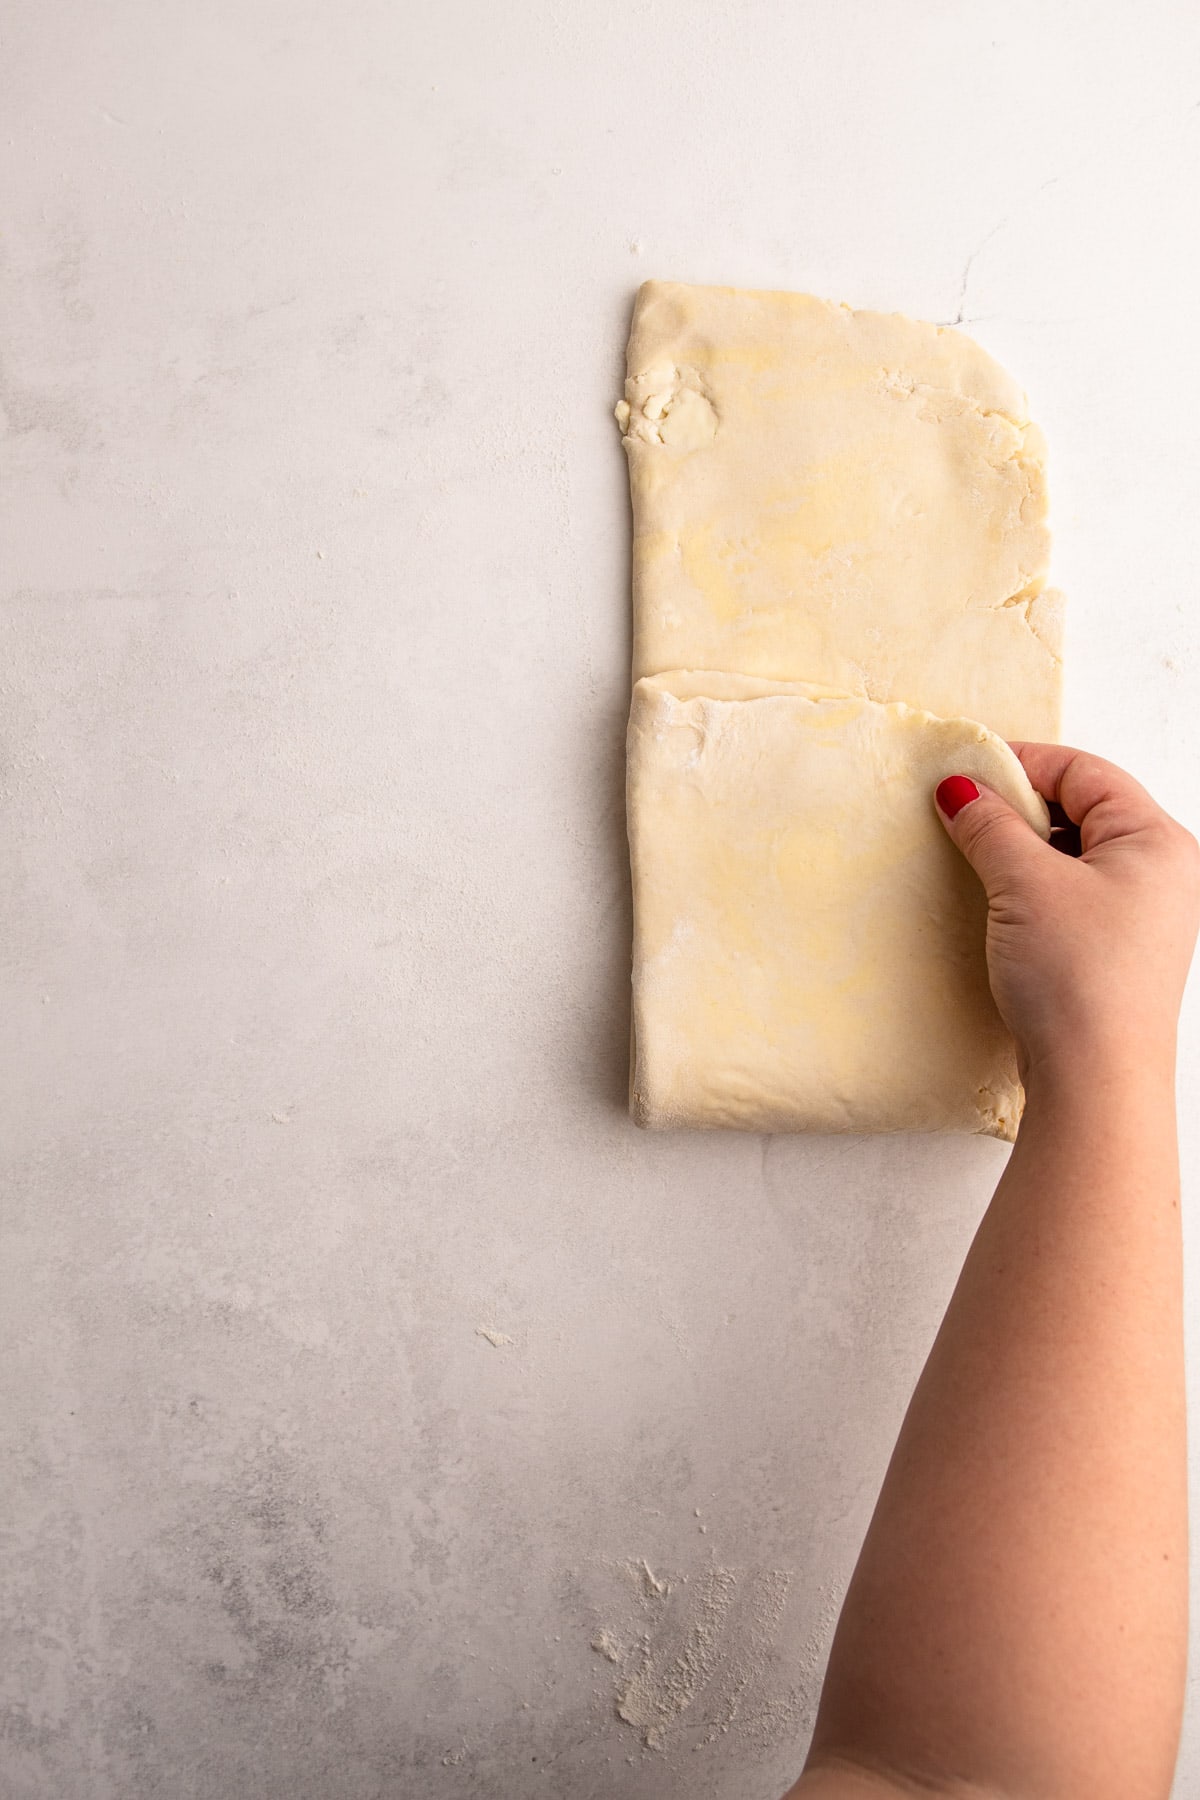
Step 3: Then, fold one of the short sides over by about ⅓.
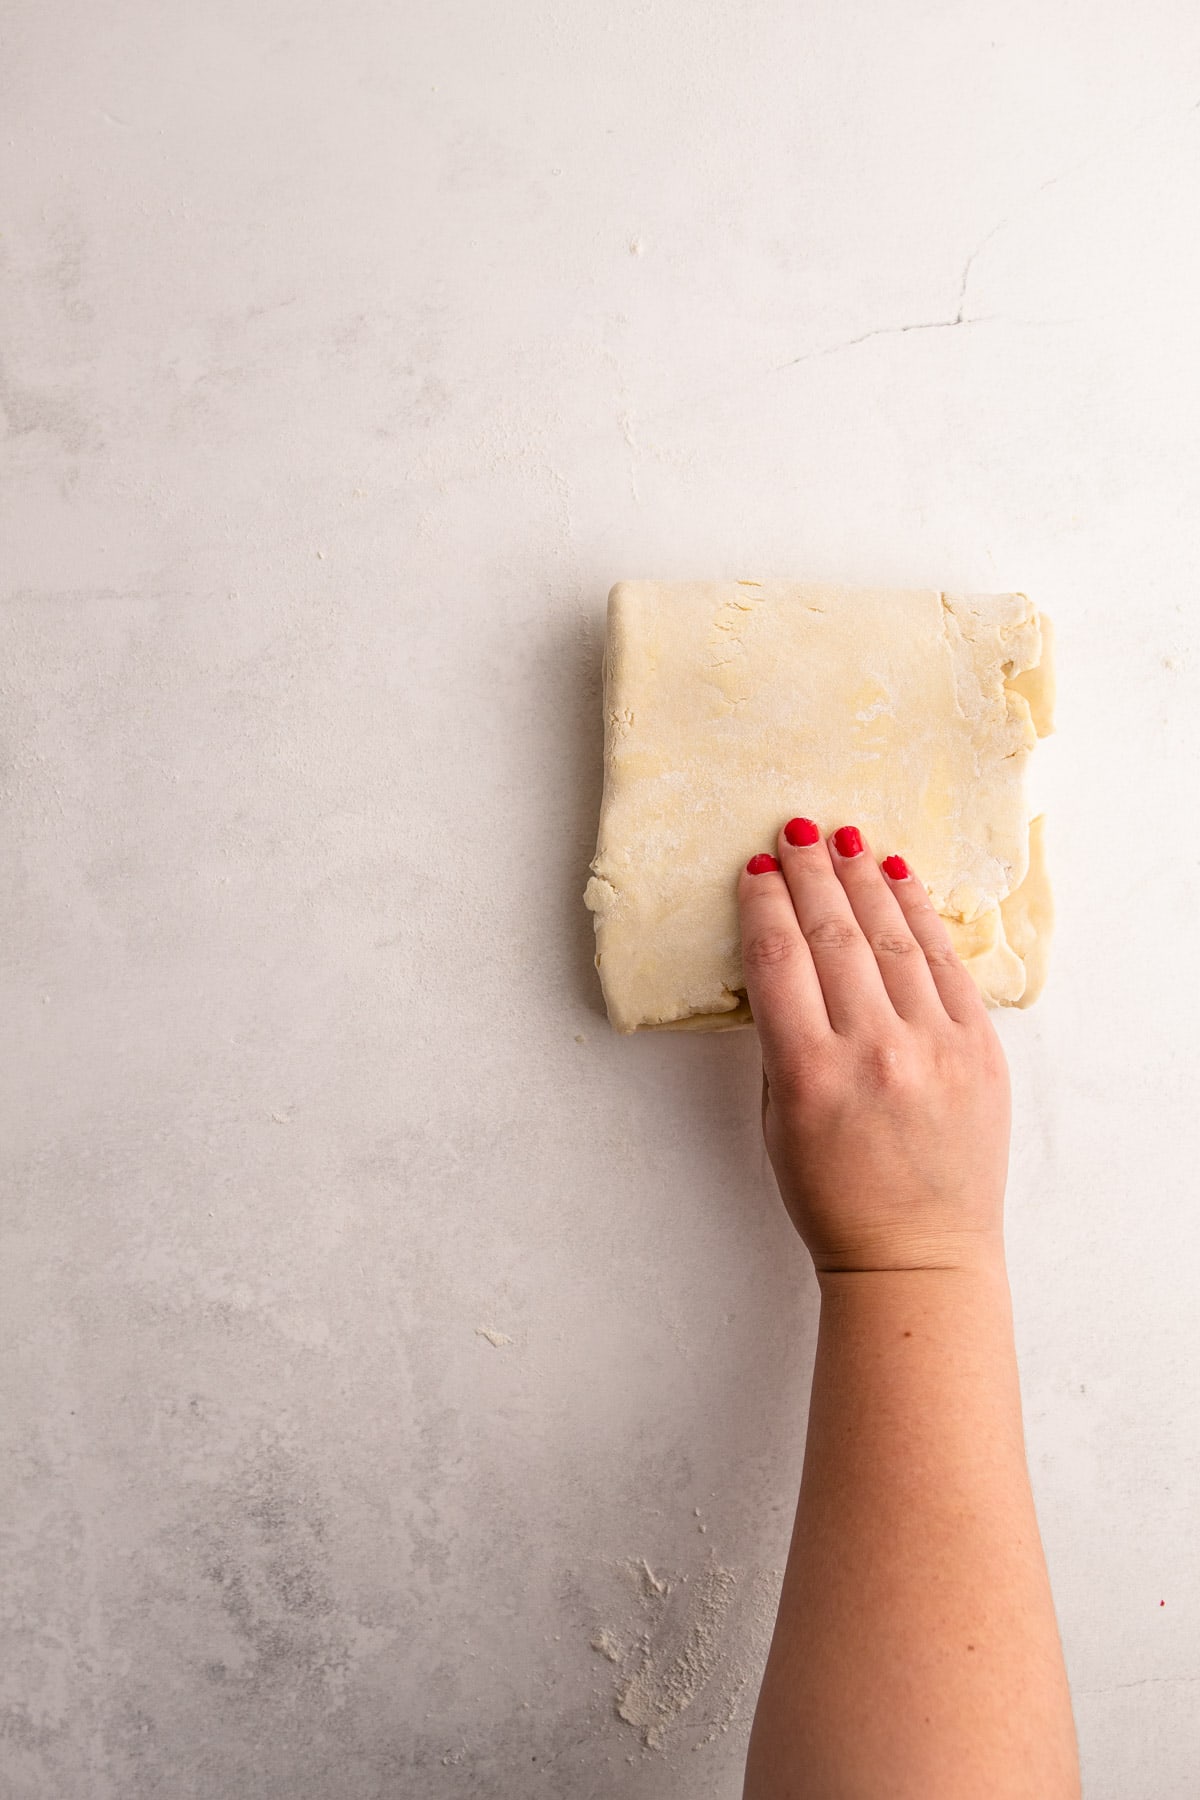
Step 4: Repeat folding over the opposite short side to form a thick, mostly square, layered piece of dough.
Step 5: Roll out the dough into a rectangle about 8 inches in length.
Step 6: Cut the dough in half to form two pieces of pie dough.
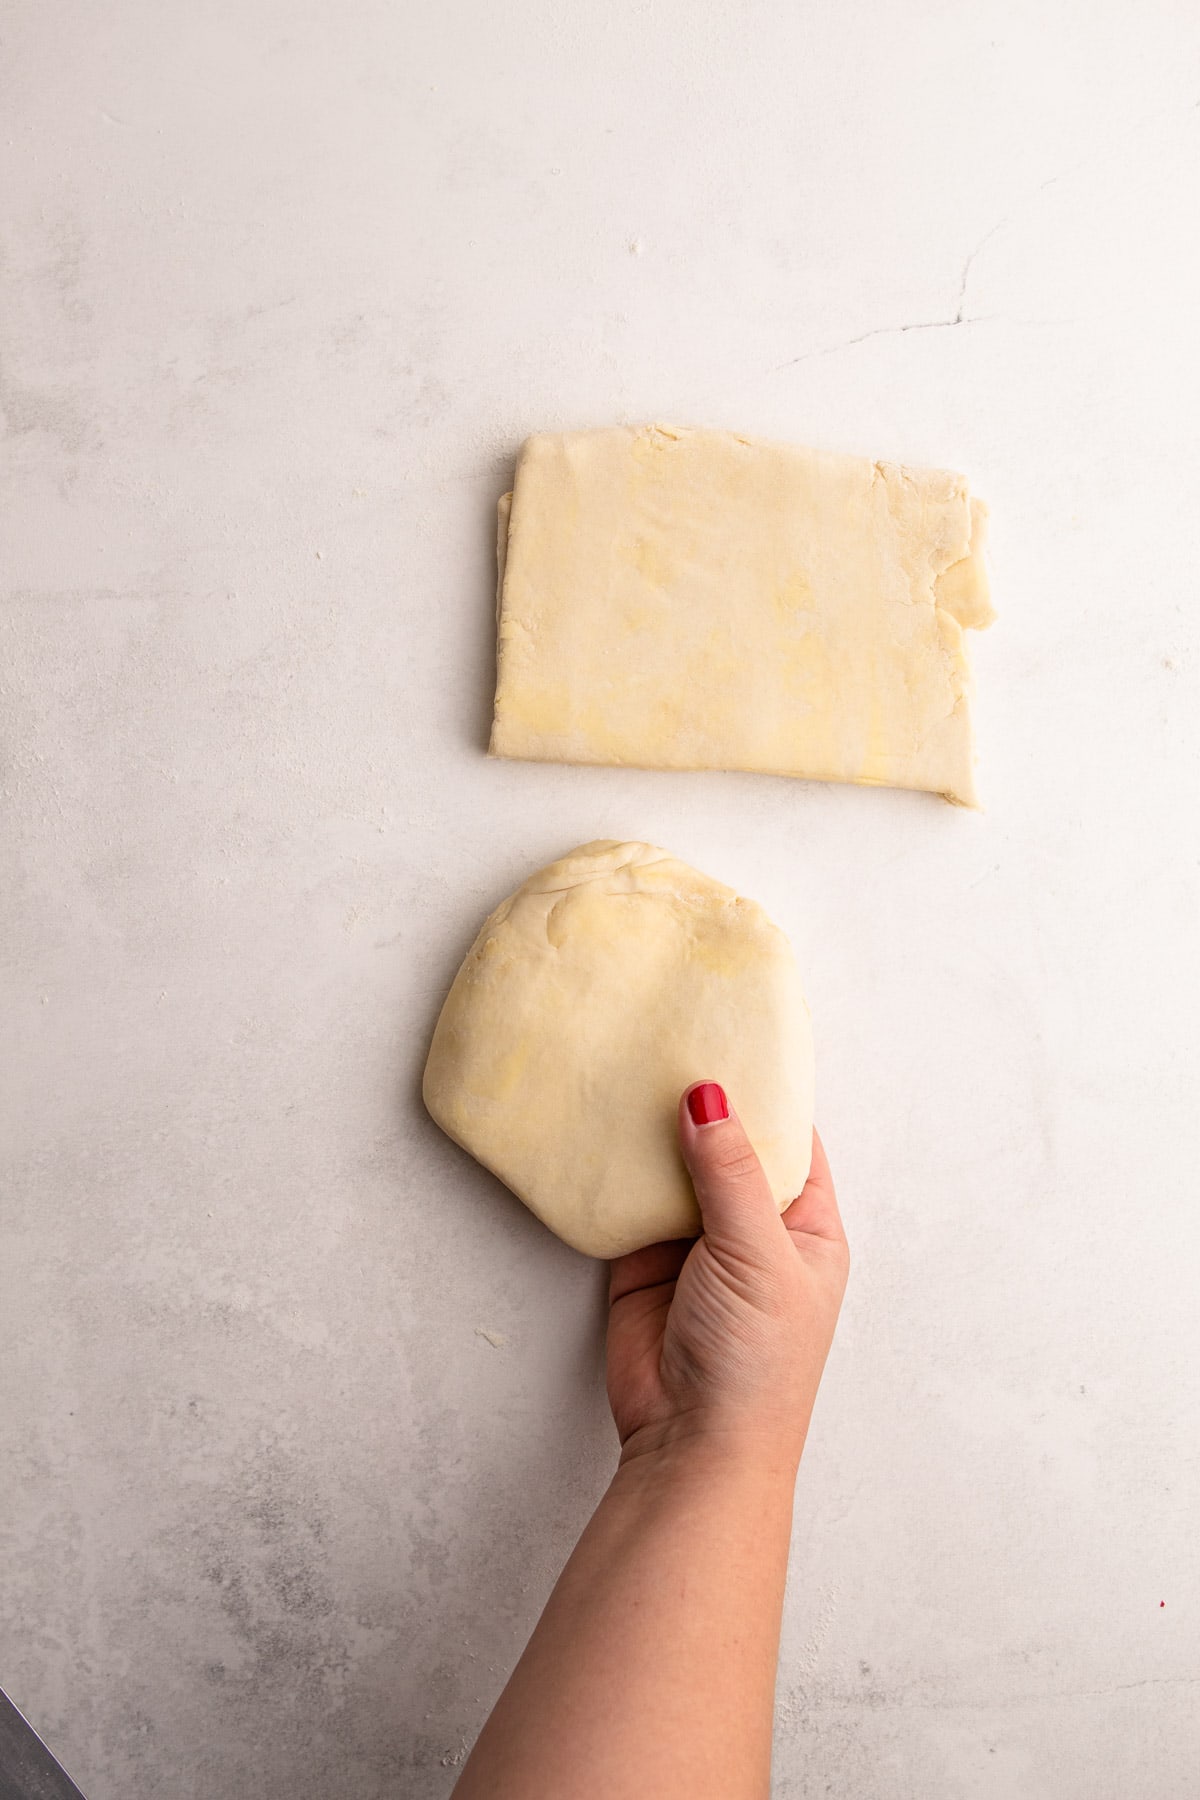
Step 7: If desired, the dough can be shaped into a circle at this point, or left as a square.

Step 8: Wrap each piece tightly in plastic wrap and let the dough chill for at least 30 minutes or up to 2 days.
Storing Flaky Pie Crust
Pie dough keeps well in the refrigerator for 1 to 2 days or in the freezer if wrapped tightly in plastic wrap. Once wrapped, use a rolling pin to flatten it into a disc and pushing the dough up against the plastic, creating an airtight seal, then refrigerate or freeze it.
Kelli's Best Tips for Success
- Weigh your ingredients. An electronic kitchen scale is not a huge investment. You can get one for around $25. I can't recommend enough that if you want to get good at baking, get a scale.
- The bigger the butter chunks, the flakier your pie will be so don't overwork it in the stand mixer.
- The ambient temperature and the temperature of your dough can affect the flakiness of your pie crust. To maintain lamination, ensure the butter doesn't melt into the dough. If your house is hot, chill the dough longer. If the dough is too cold and cracks when rolling, let it sit at room temperature for a few minutes. This recipe specifically includes enough water to keep the dough malleable even when cold so it's easy to laminate.
- Let the dough rest overnight if possible. Resting the dough keeps the butter chilled and lets the gluten relax, making it easier to roll out and preventing shrinkage during baking. This recipe strikes a balance, allowing enough rest time without being overly fussy.

What Pie Recipes Pair Well with Flaky Pie Crust
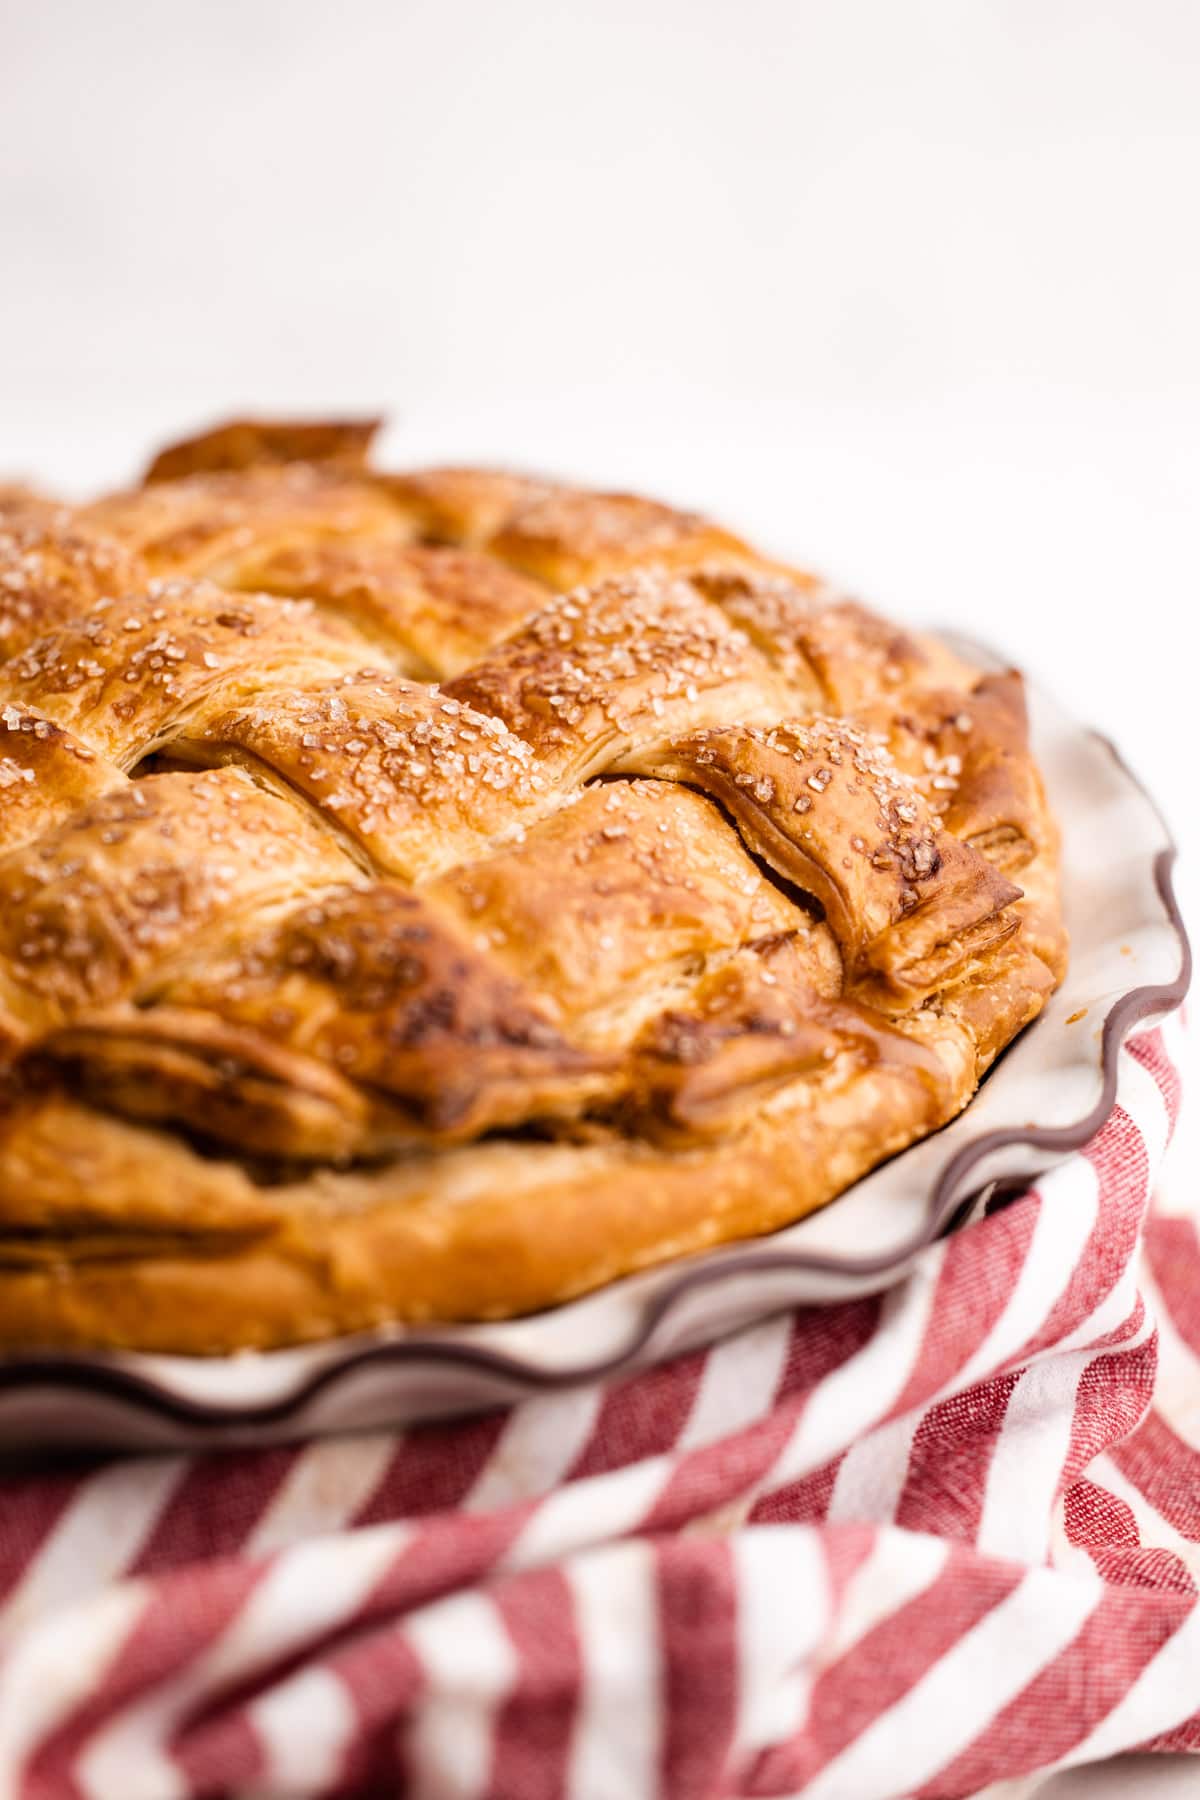
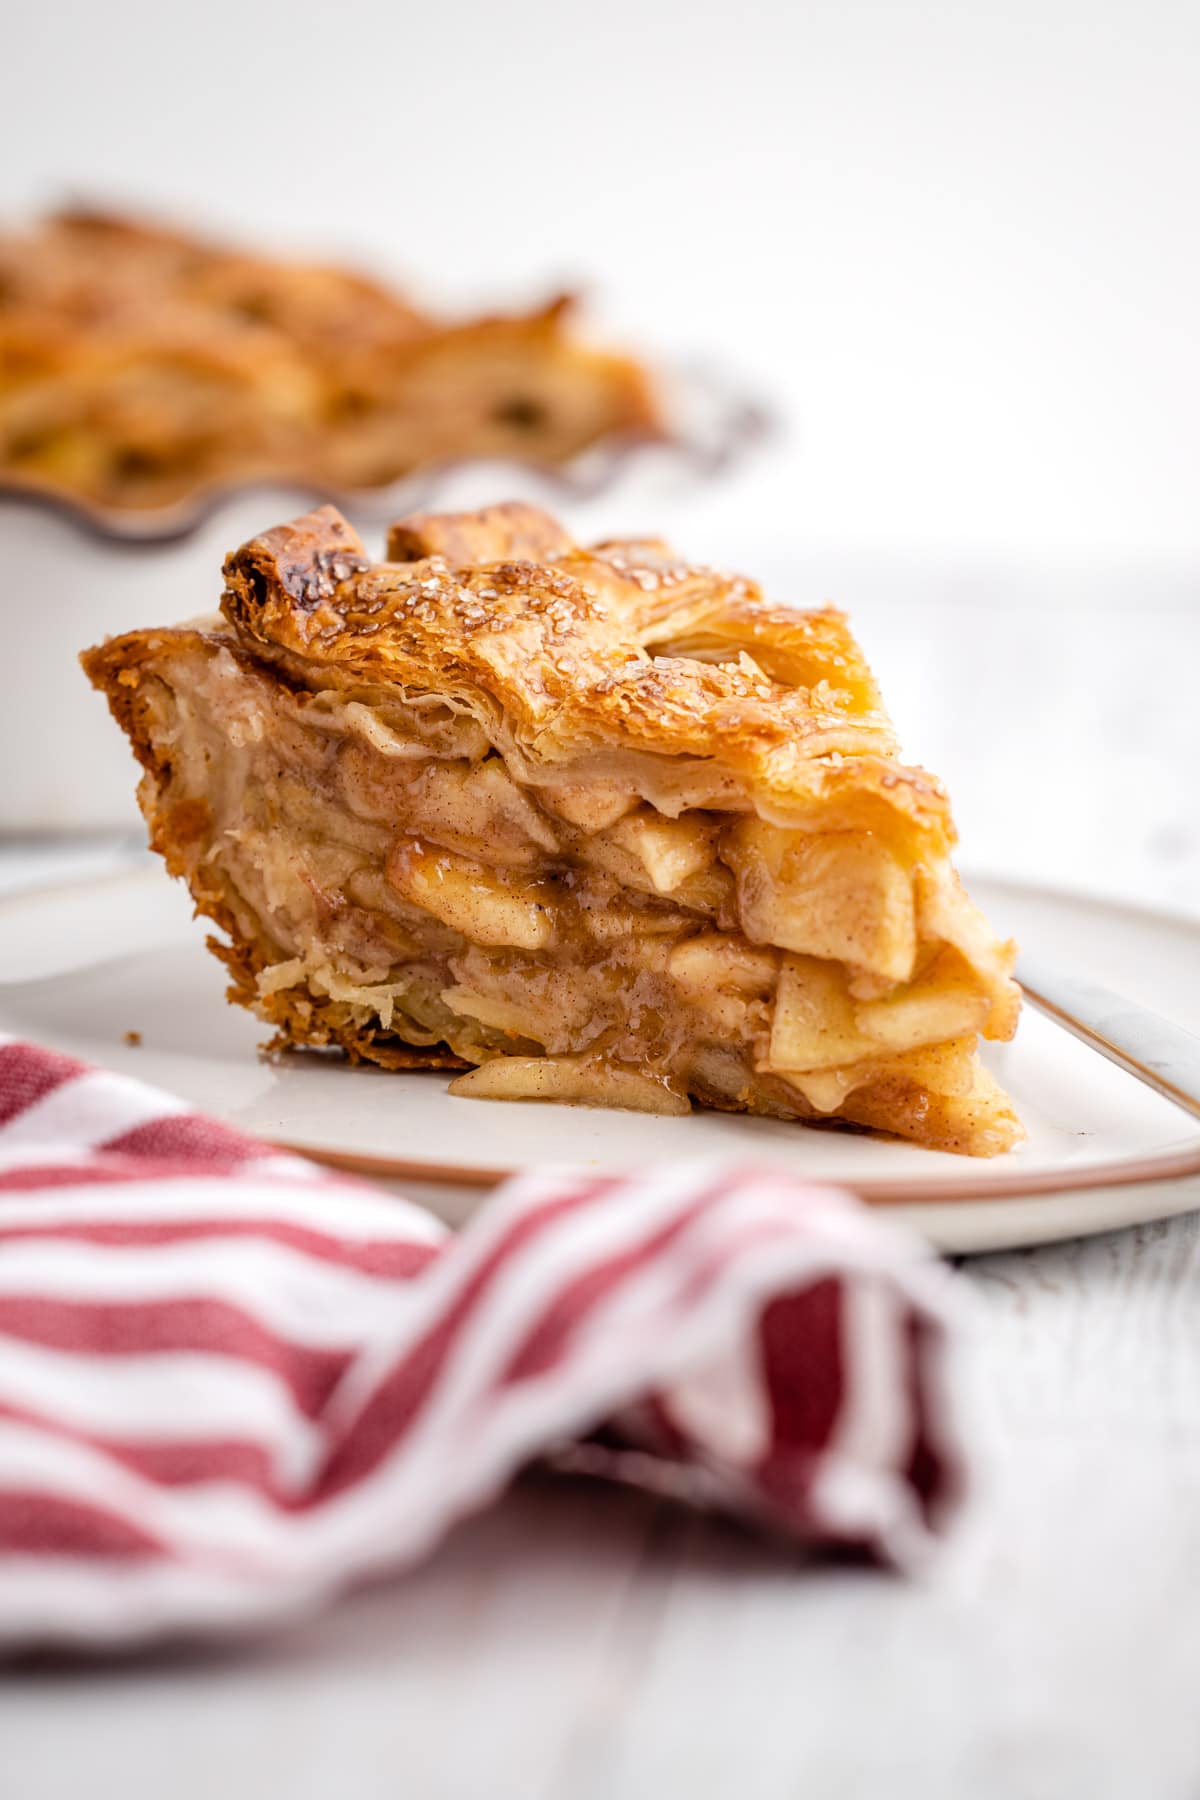
This pie is perfect for classic fruit pies or savory pies that will be served at room temperature or warm. This is a highly opinionated piece of advice, but this pie crust not ideal for cold pies like cream pies. When served cold, flaky dough can taste stale, similar to cold croissants or puff pastry. The buttery, flaky texture is best at room temperature.
If you are looking for a pie crust that is good for a pie that is to be served cold, check out this Pâte Sucrée (Sweet Pie Crust) recipe.
How to Bake a Flaky Pie Crust
Almost as important as how you prepare pie pastry is how you bake it. There is one main rule to remember when it comes to baking all butter pie dough: very cold dough should be put in a very hot oven.
Beyond that, baking this pie crust depends on the filling, but it generally bakes best at a higher temperature. For a double fruit pie, start at 425ºF for 20 minutes, then lower to 400ºF for the rest of the bake, usually about an hour. Follow the specific instructions for your filling or refer to this guide: How to Bake a Double Crust Pie.

Watch the Video
More Resources:
For more reading and resources, check out these recipes and tutorials:
I am so honored when you make a recipe from my site! If you make this Flaky Pie Crust recipe, please leave a star ⭐️⭐️⭐️⭐️⭐️ rating with your experience! If you have any questions about this recipe, feel free to comment here, and tag me on Instagram!
Full Recipe
Flaky Pie Crust

Using a few simple ingredients and an easy folding technique, you can make super flaky pie crust at home. This recipe yields a flavorful puff pastry-like flaky pie crust that will leave everyone impressed. Be sure to check out the full step-by-step article above for a more in-depth analysis and instruction of this recipe, or watch the video for a visual overview.
- Prep Time: 00:15
- Total Time: 15 minutes
- Yield: 2 (9") pie crusts
- Category: Pie Crust
Ingredients
- ¾ cup ice water, more or less as needed (see note)
- 2 tablespoons apple cider vinegar
- 3 cups (360 grams) all-purpose flour, more for work surface
- 1 tablespoon granulated sugar
- ½ teaspoon coarse kosher salt
- 18 tablespoons (255 grams) cold unsalted butter
Instructions
- In a liquid measuring cup, combine the ice water and vinegar and set aside in the refrigerator.
- In the bowl of a stand mixer fitted with a paddle attachment, combine the flour, sugar, and salt. Mix on low speed until combined.
- Dice the cold butter into 1-tablespoon pieces. Add the butter to the mixer bowl and turn the mixer on low (cover the bowl with a towel if flour starts to spill out). Let the paddle cut the butter into the flour for 30 seconds. There should still be large chunks of butter visible in the flour, with most of them the size of a walnut. Do not overwork the butter.
- With the mixer running, slowly stream half of the chilled water mixture into the dough. Mix until most of the dough comes together around the paddle, adding more water as needed, and then immediately shut off the mixer to avoid overworking the dough. Remove the dough from the mixer bowl and transfer it to a work surface. The dough should hold together easily when handled. Quickly shape the dough into a 1-inch-thick rectangle and wrap tightly in plastic wrap.
- Transfer the dough to the refrigerator and let it rest for at least 2 hours. If your kitchen is warm, you may want to let it rest for a longer period to fully chill.
- Unwrap the dough and place it on a lightly floured work surface. Use a rolling pin to roll the dough, dusting with flour if necessary, into a 16-by-10-inch rectangle. Brush off any excess flour from the surface of the dough with a dry pastry brush.
- Fold the dough in half from the long side, forming a long, skinny rectangle. Then, fold one of the short sides over by about ⅓. Repeat folding over the opposite short side to form a thick, mostly square, layered piece of dough. Please see the step-by-step photos above or the video for a visual tutorial, if needed.
- Roll out the dough into a rectangle about 8 inches in length. Cut the dough in half to form two pieces of pie dough. If desired, the dough can be shaped into a circle at this point or left as a square. Wrap each piece tightly in plastic wrap and let the dough chill for at least 30 minutes or up to 2 days. It is easiest to roll out the dough if it has chilled and rested overnight.
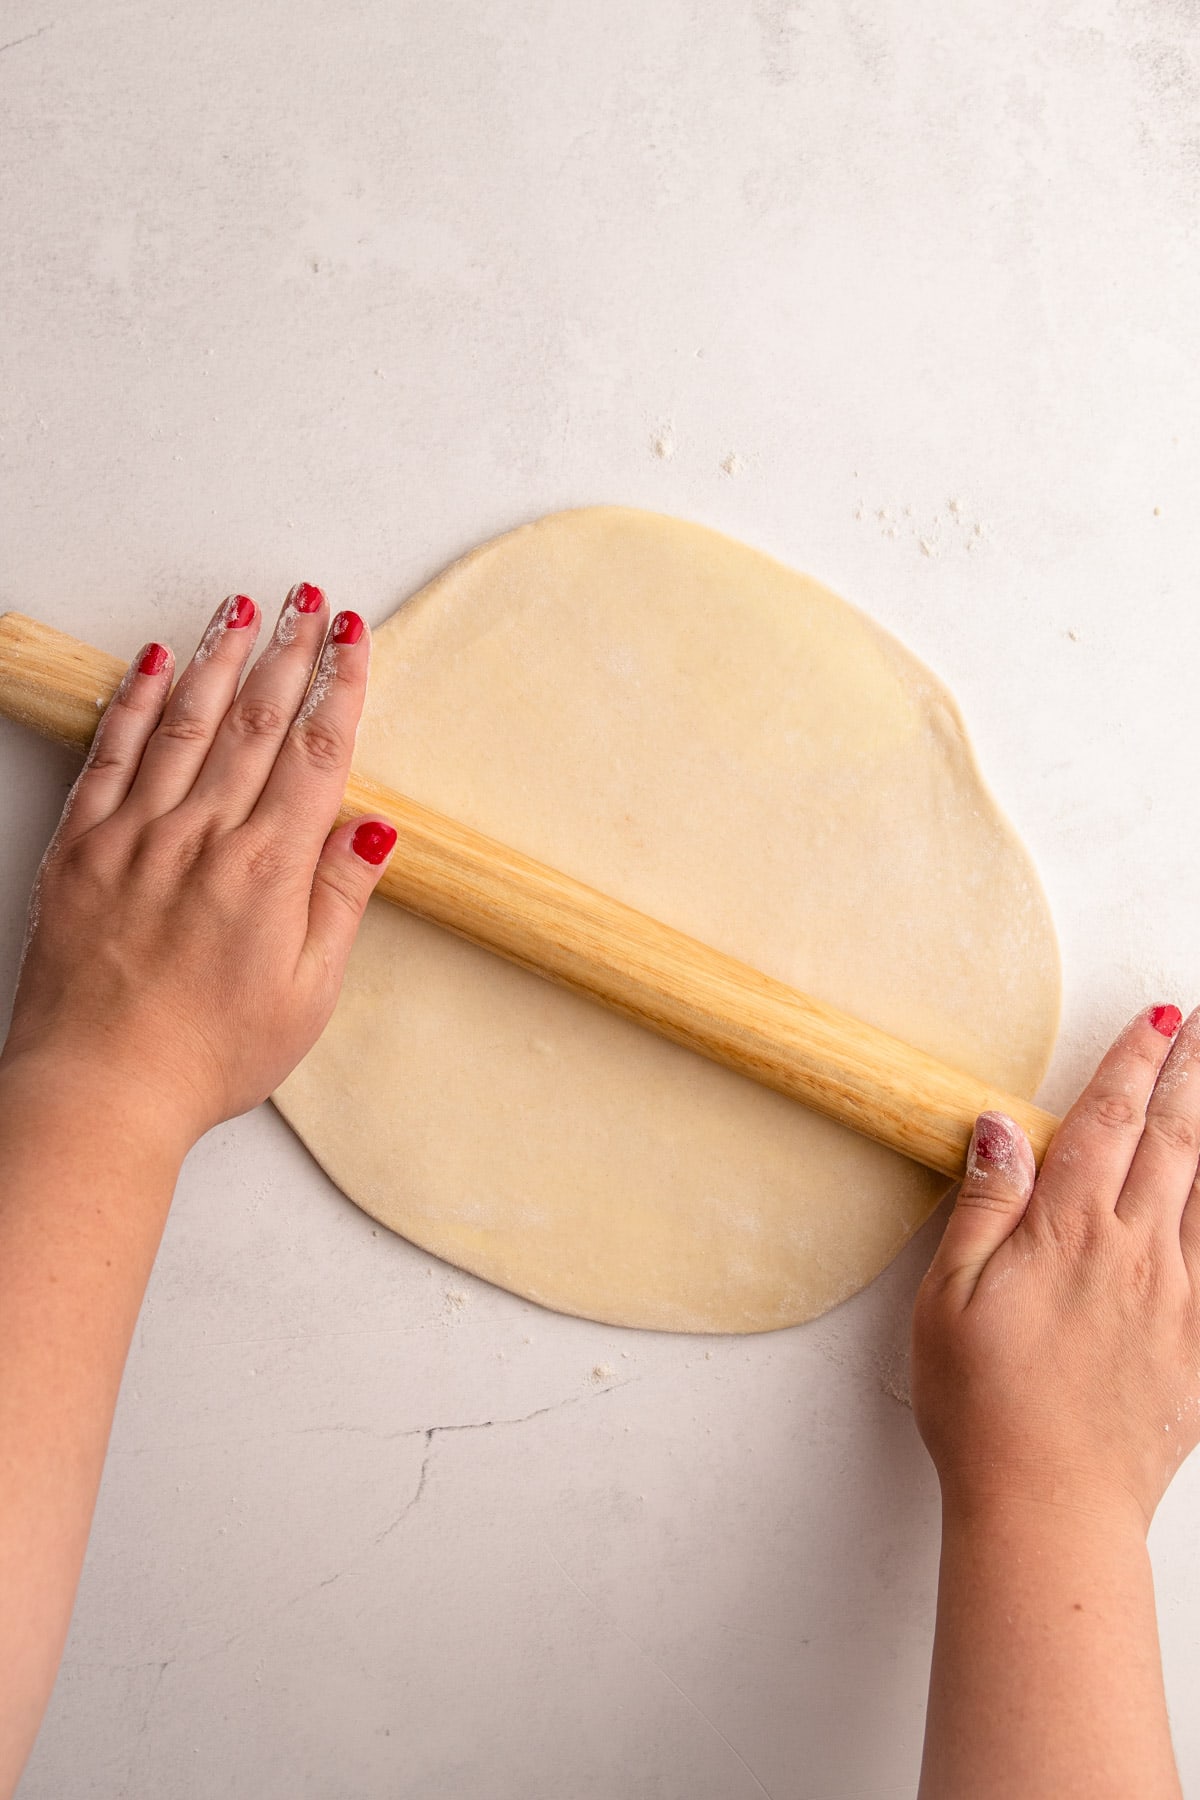
- When ready to use, roll out each piece of pie dough to a thickness of about ¼ inch and use as desired or as directed in a recipe. Refer to the notes in the post above for more information on how to store, freeze, use, and bake with this flaky pie dough.
Notes
This recipe was tested using Diamond Crystal coarse kosher salt. If you use Morton's kosher salt or fine salt, decrease the volume by half.
Weighing your flour is the most accurate way to measure. If you aren't going to weigh it, spoon it into the cup, and then level it off. If you scoop the flour out with the measuring cup and then level, it could change the outcome of the final product.
You can store this flaky pie crust in the refrigerator for about 2 days or the freezer for up to 3 months. If you plan to store it for an extended period of time, than wrap it up twice!
Some readers have needed less water than ¾ cup. This is likely due to how much the butter is worked into the flour. If too much butter is incorporated into the flour, it affects the flour's ability to absorb water. Do your best to work the butter in just barely (as the recipe instructs, for 30 seconds) so that the flour can absorb the prescribed amount of water. However, start with half the amount at first, and see where your dough is. If it's still dry, add in the full amount of water. When I make this recipe, I usually add more than ¾ cup, because my butter is barely worked into the flour, which makes for a flakier pie crust.
Looking for baking instructions for this pie? See section titled: How to Bake a Flaky Pie Crust, or check out this How to Bake a Double Crust Pie.
Some of the links on this page may be affiliate links. Everyday Pie is a participant in the Amazon Associates Program. As an Amazon Associate I earn from qualifying purchases, at no extra cost to you.
Abigail
This is one of the best pie crusts I’ve ever made. It was super easy to put together, the instructions were really clear, and it turned out so flaky. I used it for an apple pie and it was honestly the best one I’ve made!
Siena
This is my go-to pie crust. Itis incredibly quick to make and tastes delicious. I have had issues with shrinkage. My guess is I am crimping it right at the edge of the pie pan and need to make the crimps taller.
Kelli
All pie crusts are not equal.
Sure, most have similar ingredients, but process makes the difference. I think I may have left a review previously, but every time I make this crust, I feel brilliant and victorious, and want to attempt a cartwheel in celebration, but settle for patting myself on the back.
Use the pictures and follow each step, and although it doesn't look like other crusts youve made, stick with the process, I promise, it'll work out.
Thank you for a BRILLIANT crust! It's buttery and just beyond with the flakey layers.
Bert
I have been baking pies for 50+ years. Instructors always instructed me NOT to overwork the dough once liquid is added. This is certainly very worked with the laminating. How is it not tough? I will try it though with all of the positive reviews.
Kelli Avila
Hi Bert. The instructions and ingredients take into account the science of baking to prevent it being super tough. However, just like any laminated pastry, such as puff pastry or croissants, some gluten must be formed in order for those layers to be able to hold up. This is NOT a tender crust, it focuses on being a flaky crust, that when baked properly has that classic shatter and crisp bite of laminated dough. There are many other pie crusts on my website that prioritize tenderness with some flaky layers, such as my all butter pie crust.
Gord
Great recipe, very workable dough
Lisa Patterson
Hello, I would like to try this recipe. I noticed some people commented that the recipe is not mentioned in grams. The flour measurment is listed in grams but not the butter. It says "18 tablespoons cold unsalted butter" but does not give the gram measurment for this. The other ingredients I guess don't need gram measurments, if you are using cups for measuring the liquid. Although I have seen some recipes mention even the amount of grams for the liquid. I am looking at the recipe card, the one that it takes me to when I say "Jump to Recipe".
Kelli Avila
Hi Lisa, thanks for pointing out that oversight. I've updated to include the grams. 18 tablespoons of butter is 255 grams, or 1 cup plus 2 tablespoons, or 2 sticks plus 2 tablespoons. Lots of ways to measure it! Hope you enjoy the recipe.
Hanna Holle
I used this recipe for a chicken pot pie from scratch around Thanksgiving. Returned to it tonight to prep for some Quiche tomorrow! I absolutely love it and I highly recommend.
Meredith
I don't own a stand mixer and wouldn't use one enough to justify the cost. Should I adjust the amount of time when using an electric hand mixer? Thanks, Meredith
Kelli Avila
It can't be done by a hand mixer. You are better off working the butter in by hand, though I have to be honest, there is a lot more room for error when done by hand.
Liz
Hey can you make a video of you putting the pie together? The recipe is amazing, I want to learn how to make it look like yours too!
Cris
Please put the ingredients in metric form also. I read through comments and see that others are not able to find them also.
Kelli Avila
Hi Cris, are you looking at the actual recipe? I always put my ingredients in grams for accurate measuring. -Kelli
Sally
Love your flaky pie crust recipe. My question is can the recipe be doubled? Your recipes are wonderful. Glad you’re feeling better. 🙏
Kelli Avila
Yes, so long as you have a large enough mixer! I never do more than double though, it gets to be too much dough!
Ellen
I agree, it is flaky. But it is a lot like rough puff. How did you get such defined crimping? Mine baked out and left a tasty but not too pretty edge to the pie.
Kelli Avila
Hi Elaine, yes it is quite like puff pastry. If your edges went wonky, it either has to do with the temperature of your pie or oven (the pie dough should be very cold and the oven well preheated) or it has to do with not resting your dough for long enough, which will make the gluten more active and more likely to get wonky in the oven. Maybe you might find this article I wrote useful: 11 Baking Tips for Perfect Pies
Katy Q
This dough came together fairly well, and rolled out really easily. It was very soft, and actually had a lot of elasticity, not something I'm used to with the many recipes I've tried. I made the apple pie and baked according to the directions, and while the filling was really good, I was so disappointed that the crust, though browned nicely on top, was completely raw otherwise! 20 minutes at 425°, and 55 minutes at 375°, on the lowest rack. Filling was bubbly as I was removing it from the oven. I did have it on a piece of foil to catch any dripping, not sure if that caused the crust not to cook?
Carlie
I’m an avid baker but pie crusts have always scared me, until this one! This is the best pie crust I’ve had or made! I’ve made it both with regular butter and even recently tried it with the country crock plant butter sticks and it still worked perfectly. This recipe is now my go to and has never failed.
Kelli Avila
Carlie, I'm so happy you've found a pie crust that works for you. And thanks for sharing that plant-based butter works too!
Braden
This crust comes out so cool, and the layers are pretty irresistible. I prefer the "Best Butter Pie Crust" recipe for its tenderness as my go to, but this one is really fun every once in a while to mix it up and really wows.
Mila
Sorry how much butter and water would it be in grams?
Thank you! I really liked this recipe, I'll try it with the apple pie recipe 🙂
Kelli Avila
Pleaser reference the recipe card---that information is listed.
Chi-Ling Cheng
Im in the same boat as the person asking this question and have scrolled up and down to see where the measurements are posted in metric but could not spot it. As the recipe description pointed out, measuring by weight to be more accurate, it’s a bit convoluted trying to find the conversion to grams separately individually outside of the recipe. Maybe you can point us to where the metric measurements are more specifically?
Taylor
This was my first time making pies, and I definitely overworked the butter (I tried my hardest to not!) but even still it was absolutely delicious. I made 2 pies for 4 people to have choices and thinking I’d have plenty of leftovers. I only have the tiniest slice of apple left!! (And some pecan but apparently I was the only one who liked pecan pie lol). So so good and will use this for future recipes. And I followed the recipe, as changing a recipe means you’ll change the end result y’all
Liz
The extra time involved in resting the dough and then laminating it is so completely worth it. I used this recipe in conjunction with Kelli's Apple Pie recipe and even had a guest ask me how I got my pie crust so puffy and flaky. Said commenter is a friend who is also a fellow baker and makes pies all the time, so I preened pretty hard when he asked me about it! Thank you, Kelli, for this gem of a crust recipe!
Erica
Gosh, I feel stupid even asking this question, but here I go. I read the entire recipe and you talk about cold pie crust hot oven. So my question is, do you roll out the dough into the pie tin and then put in refrigerator to cool before baking? Or do you go straight in to the oven with everything after you roll out dough?
Kelli Avila
Hi Erica, not a stupid question at all! The answer is: either! The point being is that if you took a long time to roll out the dough and / or you have a hot kitchen, roll it out, put it in the pie tin (and fill it if you need to), and then while the oven preheats let it firm up. I must admit I do this 100% of the time I bake---but it's a persnickity ask so I don't always put it in the instructions since it's not technically necessary. Even 15 minutes in the freezer is a good move! Just make sure it's cold, whether that be because it chilled well before you roll it out and you moved fast, or because you placed it in the fridge or freezer to chill for a bit. Good luck!
Natalie
Would I be able to use this pie crust for 2 pumpkin pies since they don't need to top to be covered while cooking?
Thank you.
Gail Steck
Will it work using a food processor?
Kelli Avila
Unfortunately no. The other way to do it is by hand.
Carol Lam
Super excellent flakey puff pastry recipe. I’ve always wanted an easy laminated pastry that holds up on its own and isn’t completely saturated with butter, and most importantly doesn’t require complex folding and sheets of butter. This is it! I feel good about feeding this to the kiddos as a treat. Thank you! Will keep this one. I didn’t use 2 tbsp of vinegar, I just used 1 I was worried I could taste it and it worked just fine!
Stefan Cartmale
4 stars not 5 as I think there is a mistake with water quantity stated:
Having made several pie crusts, I noticed after pouring in half a cup of the water and vinegar mixture, that the dough was just about perfect. I stopped pouring in the water and the crust turned out beautifully. I used a high quality vegan butter as I have recently been diagnosed with a dairy allergy, thus the need for a new crust recipe to try. All worked well. I made the crust again today and again stopped short of using all the called for water. I see other people have also questioned the quantity stated. Just my 2 cents but I only needed just a dash over half cup to get the dough the correct consistency.
Kelli Avila
The recipe states 3/4 cup of water, more or less as needed. And the instructions state to add half of the water, adding more as needed. There is nothing wrong with the recipe as written. Also just a friendly FYI, vegan butter is not the same as dairy butter, and you should anticipate that it will act differently in recipes.
George Noland
Just a general comment regarding the concern about varying amount of water required. Believe it or not the humidity of your work environment at the time of mixing will play a huge role in the amount of water ( or flour ) required adjustment for optimum hydration to mirror the recipe. It has a much larger impact than one would imagine....so I always observe and adjust based on the humidity
rc
Can you use Einkorn flour for this recipe?
Kelli Avila
I have never tried. Let us know if you do!
Lisa Keys
This recipe is exactly as described and I found measurements to be accurate. Having said that this dough is better suited to pastries like napoleons. I found it quite flaky, crisp but very tough to cut through as a bottom fruit pie crust. It took a lot of muscle to slice it. The edges of the crust baked up caramelized and shattering crisp. I only did a single crust pie and will use remaining dough in more of a puff pastry way. Thank you for sharing.
Lisa Keys
How do you handle the pie edges? Do you crimp them? Are they sealed?
Tamara
I used only half of the water and vinegar mixture. I pop cubbed butter in the freezer for 10 min..and followed all afterward. Dough came together by adding only half of the water. Lets see how it taste. I like to try different recipes and i have perfect one. I am a professional bread and viennoiserie baker.
Kelli Avila
Changing the recipe can, and usually does, have an impact on the final result. The recipe doesn't call for putting the butter in the freezer. Hope it still turns out okay for you.
Dana
This recipe is a dream come true. It is the first pie crust I’ve ever used that didn’t shrink…not even a smidge. Very flaky and great taste. Thank you!
George Milliken
This is my second time with this pie. The first one was not only beautiful, but it tasted great. I managed to get one small slice before the rest of the pie disappeared. One thing that bothered me (but no one else) was that the bottom of the pie crust looked unfinished. It was a little slimy. My apples were prepared following your instructions, so there was not an abundance of liquid when I assembled the pie. I want to precook the crust (bottom), let it cool, and then make the pie with a top crust. Is this a good idea, or should I skip it and follow the recipe? I am still a novice with pies, so any guidance or suggestions will be greatly appreciated
Kelli Avila
Hi George! You should not need to precook the bottom. If baked properly, the bottom should cook just fine. Have you ever checked your oven temperature? Check out this post about baking a double crust fruit pie, in particular the section "Cold Pie + Hot Oven" and "Tips for Getting Your Bottom Crust Baked"
Katie Q
This recipe looks great, I'm excited to try it. I have a pie dough recipe that calls for ice water and vodka, equal parts of each. Do you think replacing the vinegar with vodka would work? I think they serve the same purpose.
Susan
Vodka is a great exchange for the vinegar! Make sure it is ice cold!
Maddi
Excellent Recipe, but my god you have way too many ads it makes your site unbearable. I have to view the print recipe and watch someone else lamination video because its just exhausting trying to navigate this ad hellscape.
Jen
Awesome recipe, thank you! I just used this for a chicken pot pie, the beautiful flaky layers were visible on the edges and in the air slits on top! Thanks again for a great, and easy to follow recipe!!
Ada
Loved it very flaky zero problems
Ellie
This was the best pie crust I’ve ever made! I ended up needing to add a little more than 3/4 cup of water. I put my sliced butter in the freezer for five minutes while I measured the other ingredients. I ended up using the mixer for almost a minute because my butter was so firm, but I still had very large chunks of butter throughout. Absolutely recommend this!!
Donna Oliphint
My dough seems too wet, too. I used White Lily flour and wonder if that is the culprit. I'm continuing with the recipe and hoping it works out in the end since the apple pie I'm making is a special request for my new son in law! I'll let you know how it turns out.
Kelli Avila
Yes, white lily flour is quite a bit different. I'm hoping it still works for you!
MK
Hi, I just made two batches of this crust and stuck it in the freezer for Thanksgiving. I’m making your blueberry cranberry pie and something else to be decided. It came together nicely with exactly 3/4 cups of water for me. I was wondering if you had any thoughts on pie birds? Do you ever use them? I have one, but I’m not exacting sure when/how to use it. Thanks for the great recipe!
Kelli Avila
Hi! I have them, and they're cute. And have used them. But I don't find them worth using for any purpose to be honest.
Ellie
I’m making this for my pies for Thanksgiving, but was wondering if the recipe could be doubled to make four crusts? I don’t want to risk overworking the dough so I won’t do it today, but in the future I might.
Kelli Avila
Hi! I actually made a double batch at once myself of this yesterday and unfortunately I would not recommend it. I had a hard time getting it to hydrate properly. So I would recommend doing it separately.
Sharon
Will using pastry flour work in your pie crusts? I am thrilled I found your website. Thank you for the recipes and tips.
Kelli Avila
Hi! It depends on the recipe. I wouldn't suggest it for this flaky pie crust recipe. You could and should use it for my butter pie crust recipe, and of course omit the cornstarch since that is only added to make a faux pastry flour.
Jane Howard
Hi Kelli: Why do you use cornstarch in your Basic Butter pie crust? I don't see it in this one?
Just wondered.
Thanks, Jane
Kelli Avila
Hi Jane! I have a lot of pie crust recipes on this site, with each one working towards a specific goal. For my basic butter pie crust, I'm looking for a more tender buttery crust, so I use cornstarch in place of some of the flour to make a faux pastry flour. For this recipe, I'm hoping to achieve a flaky crust, and inherently it isn't going to be as tender since it is laminated, so I omit the use of cornstarch in this one since it's an extra ingredient that won't make much difference in terms of tenderness.
V gominho
Hi Kelli, just wanted to confirm that the ice water is 3/4 cup. This plus the vinegar is almost a cup so the dough was always soft even after resting overnight.
Kelli Avila
Hi! Yes--that is accurate, in fact 3/4 cup is on the low side for this recipe and I instruct to add more as needed. Did you see the video and see the texture of what it should look like? It shouldn't be mushy. It should firm up but roll out easily. It isn't as hard as traditional pie dough. If yours is soft I worry that was a mistake somewhere along the lines--was the butter too soft? Did the butter get integrated too much? Would love to work this out with you!
Abby
Hi Kelli, just noting here that this happened to me, too. Made the recipe with 3/4 cup water + vinegar, and the dough was much too wet - almost a yeasted bread dough consistency. I weighed the flour, butter was cold and chunky. Promise. I made it again with half the water and it was perfect. For what it’s worth! V2 is resting overnight right now, but I can tell it will be perfect. 🙂
Kelli Avila
Hi Abby! Thanks for letting me know. I have to figure out what is going on here! I know the recipe is solid (as in, there are no errors / typos in the recipe). I've made it SO MANY times. However, something is going on. I suspect it has to do with how much the butter is worked into the flour, because if your recipe worked better with only half the amount of water (which is roughly a hefty amount of 1/3---) I suspect the butter is getting worked into the flour too much, impacting the ability for the flour to absorb the water. Or it could be what temp the butter is and or different types of flour absorbing different amounts of liquid. Though my bakers instinct and knowing the recipe, I feel like it's v likely butter too absorbed into the flour. I'm going to do some experimenting to see why others are having drastically different experiences than I am with this recipe, but for now will make a note to add less water initially until it comes together. Thanks!