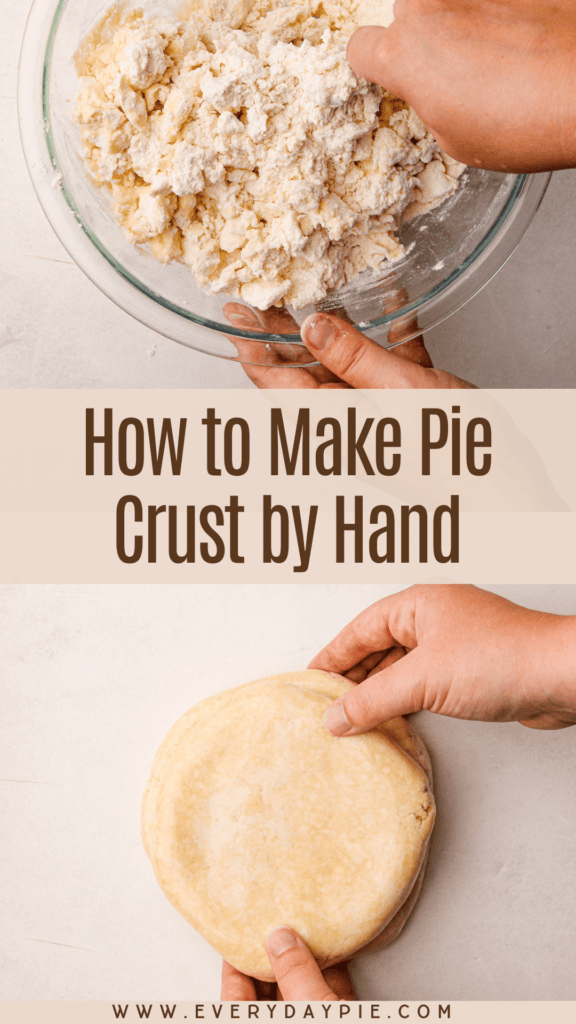
You don’t need fancy equipment to make great pie dough at home—just five minutes, two hands, and a big bowl! This tutorial will teach you everything you need to know for How to Make Pie Crust by Hand to create beautiful and delicious handmade pie crust!
Want to save this recipe?
Enter your email & I'll send it to your inbox. Plus, get weekly updates from me!
After many years of baking pies in professional kitchens in very large batches with machines, I forgot how quick and simple it can be to make pie crust by hand. It wasn’t until I started this website that I truly fell in love with the simplicity of the process. There is a connection to feeling the flour, butter, and water with your hands and using all of your senses to know when you've made the perfect pie crust. I know many people feel intimidated by the "rules" and myths surrounding the process, but I’m on a mission to change that. Making great pastry from scratch is completely achievable—and learning by hand is the best way to start.
Beyond how satisfying it is to make pie crust by hand, it also results in lovely flaky pastry. Compared to making it in a food processor, the butter naturally stays in larger pieces in the dough, which can result in a flakier crust. The cleanup is simple, and I promise the results will always be worth the effort.
So, let's get to making it, shall we? The article below is jam-packed full of useful information. You can jump around using the menu below, or skip to the end of the article for the full recipe.
Jump to:
Ingredients Needed
At its heart, good pie dough is a balance of three key ingredients: flour, butter, and water. The water interacts with the flour to form the gluten that creates the structure of the dough. You want to develop just enough gluten so the pastry has some strength to hold its shape but not so much that it's tough. The butter coats the flour, helping to inhibit excess gluten formation, and it also creates pockets of steam as it melts in the oven, creating that flakiness we all love.
This is an overview of the ingredients needed for this recipe, as well as an explanation behind them. For the full recipe, scroll down to the end of the article.
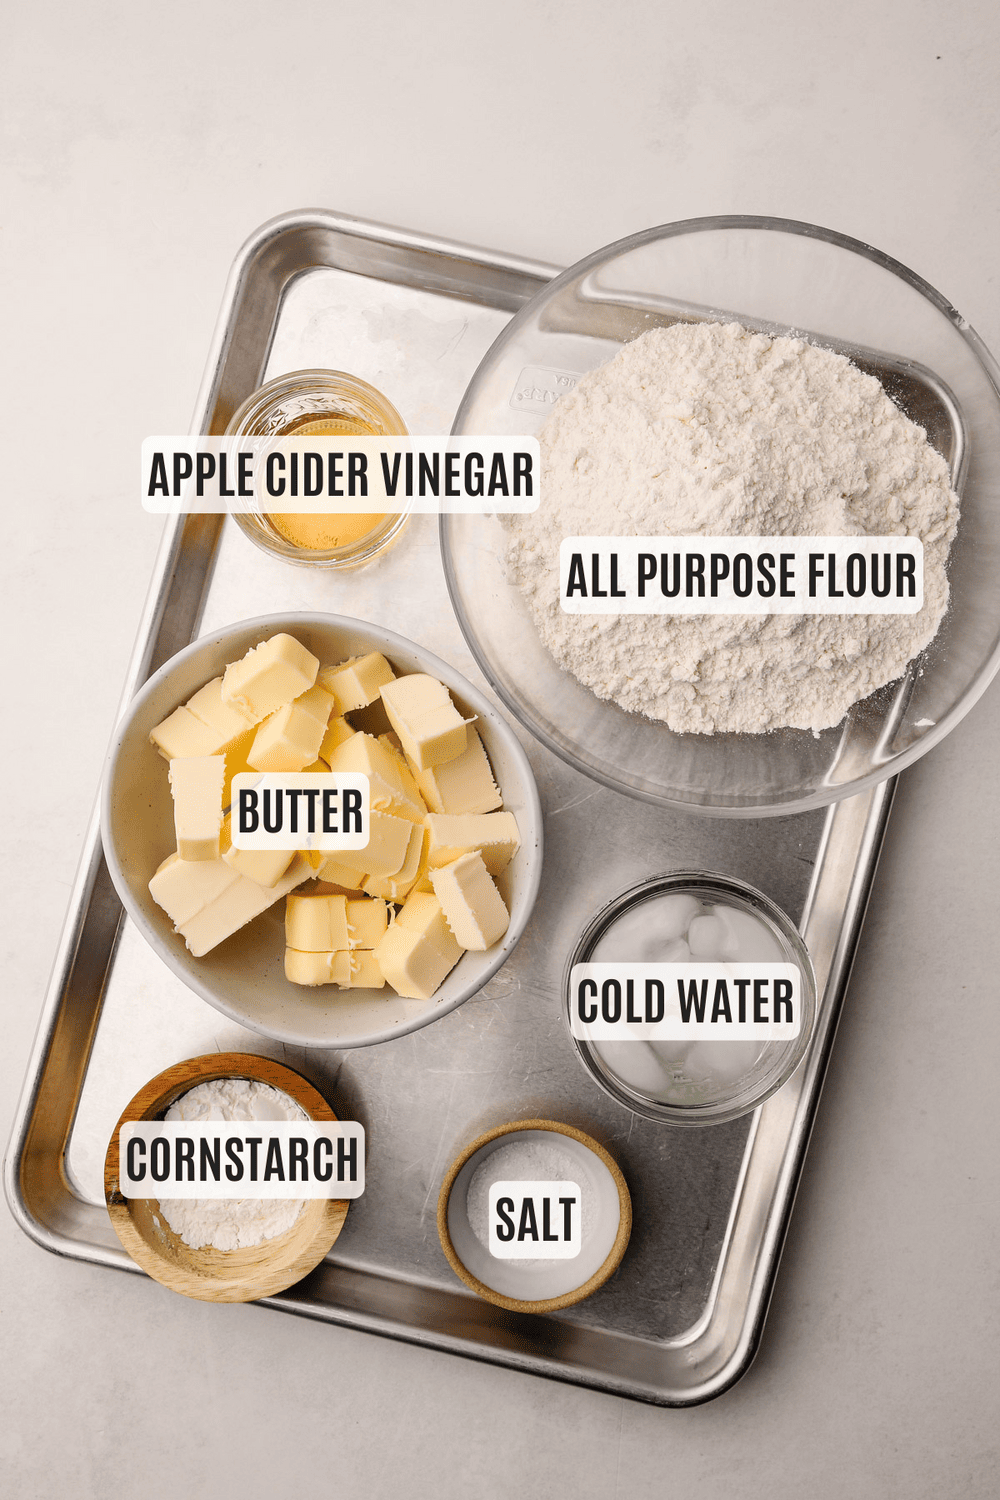
- all purpose flour: Generally speaking, pastry flour is the best flour for making pastry because it has a lower protein content. But most people don't keep it in their kitchen, so this recipe it calls for all-purpose flour. If you do have pastry flour, feel free to use that instead.
- cornstarch: This helps to keep the pie crust more tender by inhibiting excess gluten from forming.
- unsalted butter: This recipe is designed for regular American butter. If you use higher-fat European butter, you may need less liquid and a bit more flour, so it's not recommended.
- salt: This recipe was tested using Diamond Crystal coarse kosher salt. If you use Morton's kosher salt or fine salt, decrease by half for volume or use the same amount by weight. Want to learn more about this? Check out this Guide to Baking with Salt.
- apple cider vinegar: This is added to keep the crust tender and to improve the flavor.
- cold water: It doesn't need to be ice water, but it should be very cold.
How to Make Pie Crust by Hand
My motto is always practice makes progress (not perfection). Making pastry requires various skills that will improve over time with practice, especially when making pie crust by hand. Don't be discouraged if your initial attempt doesn't yield a picture-perfect pie. Any homemade pie dough you make is worlds better than anything you can buy at the store, so don't be worried if you are a beginner: you're going to do great!
Here is a visual overview of the steps to make pie crust by hand. The full recipe is listed below in the recipe card.
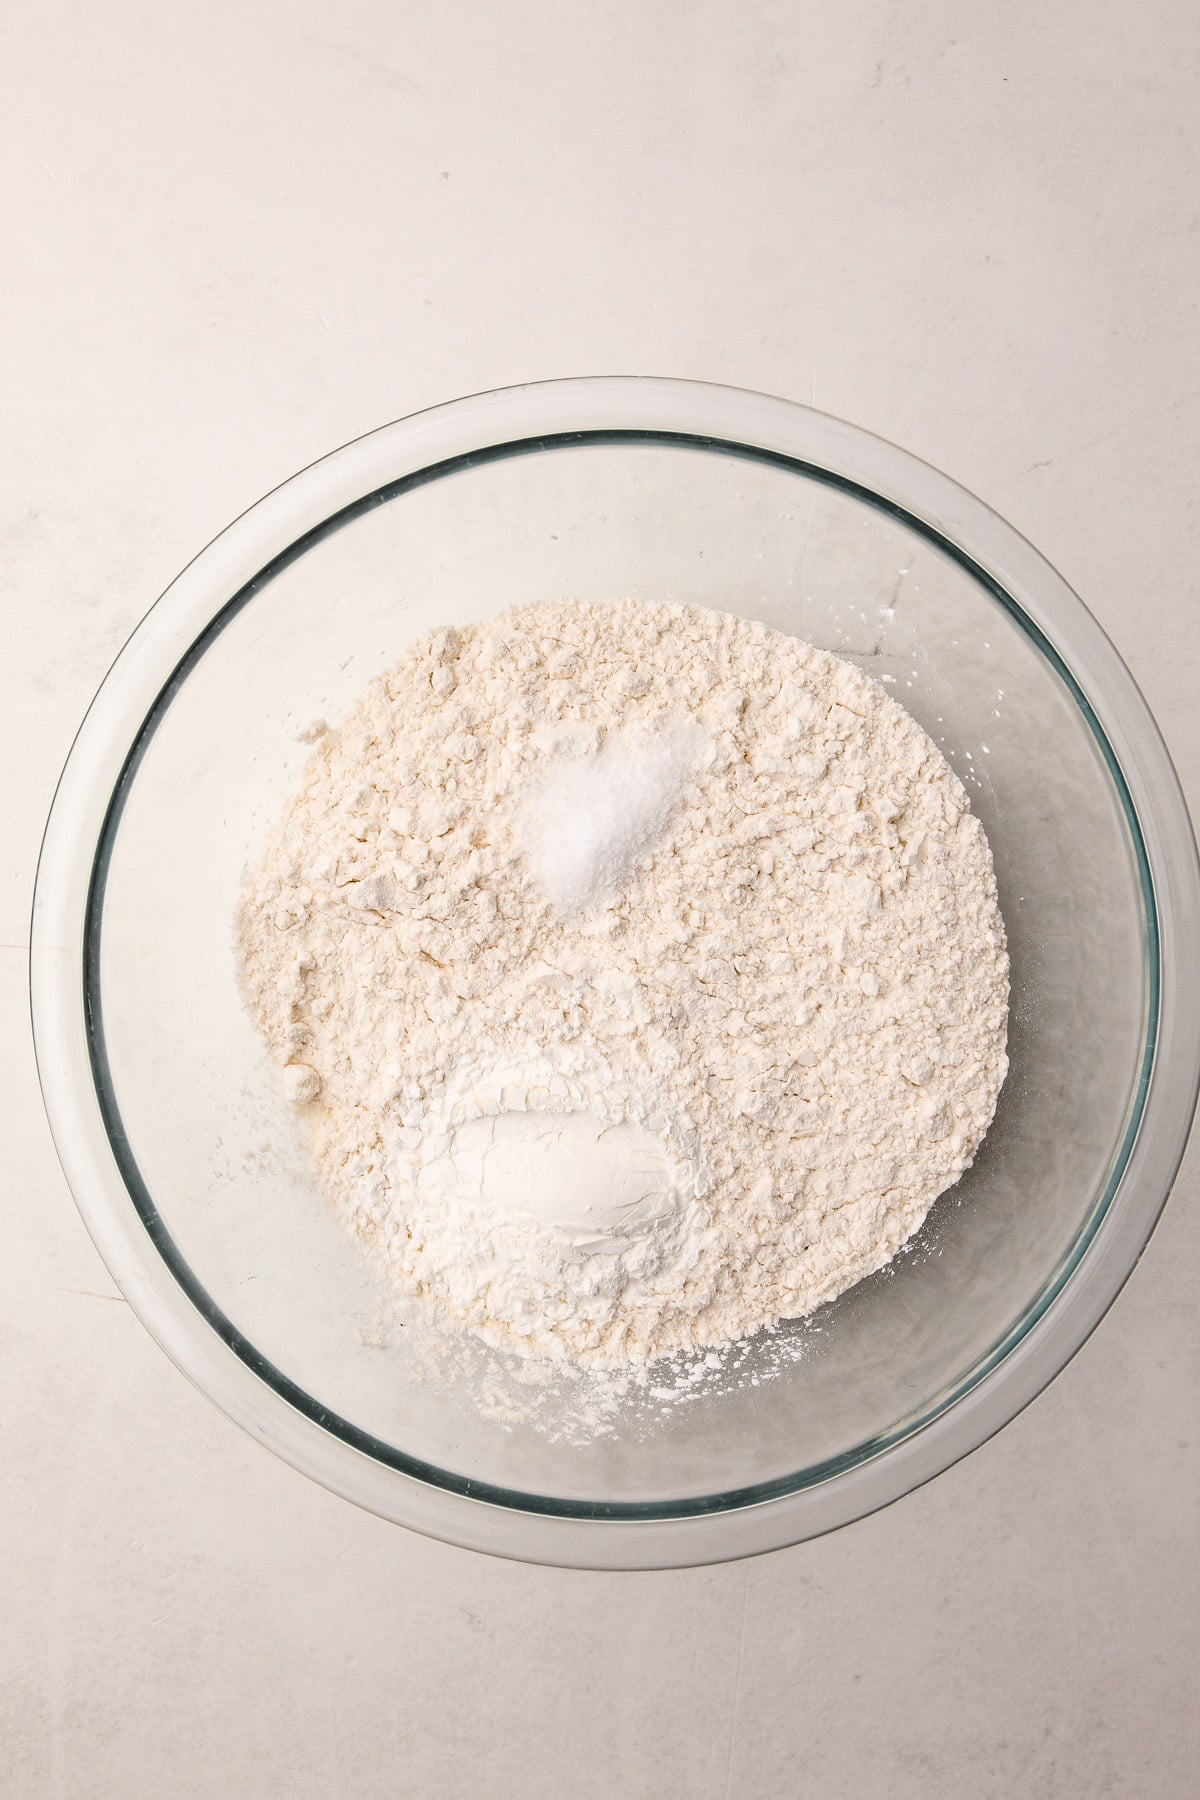
Step 1: Mix the dry ingredients together in a large bowl.
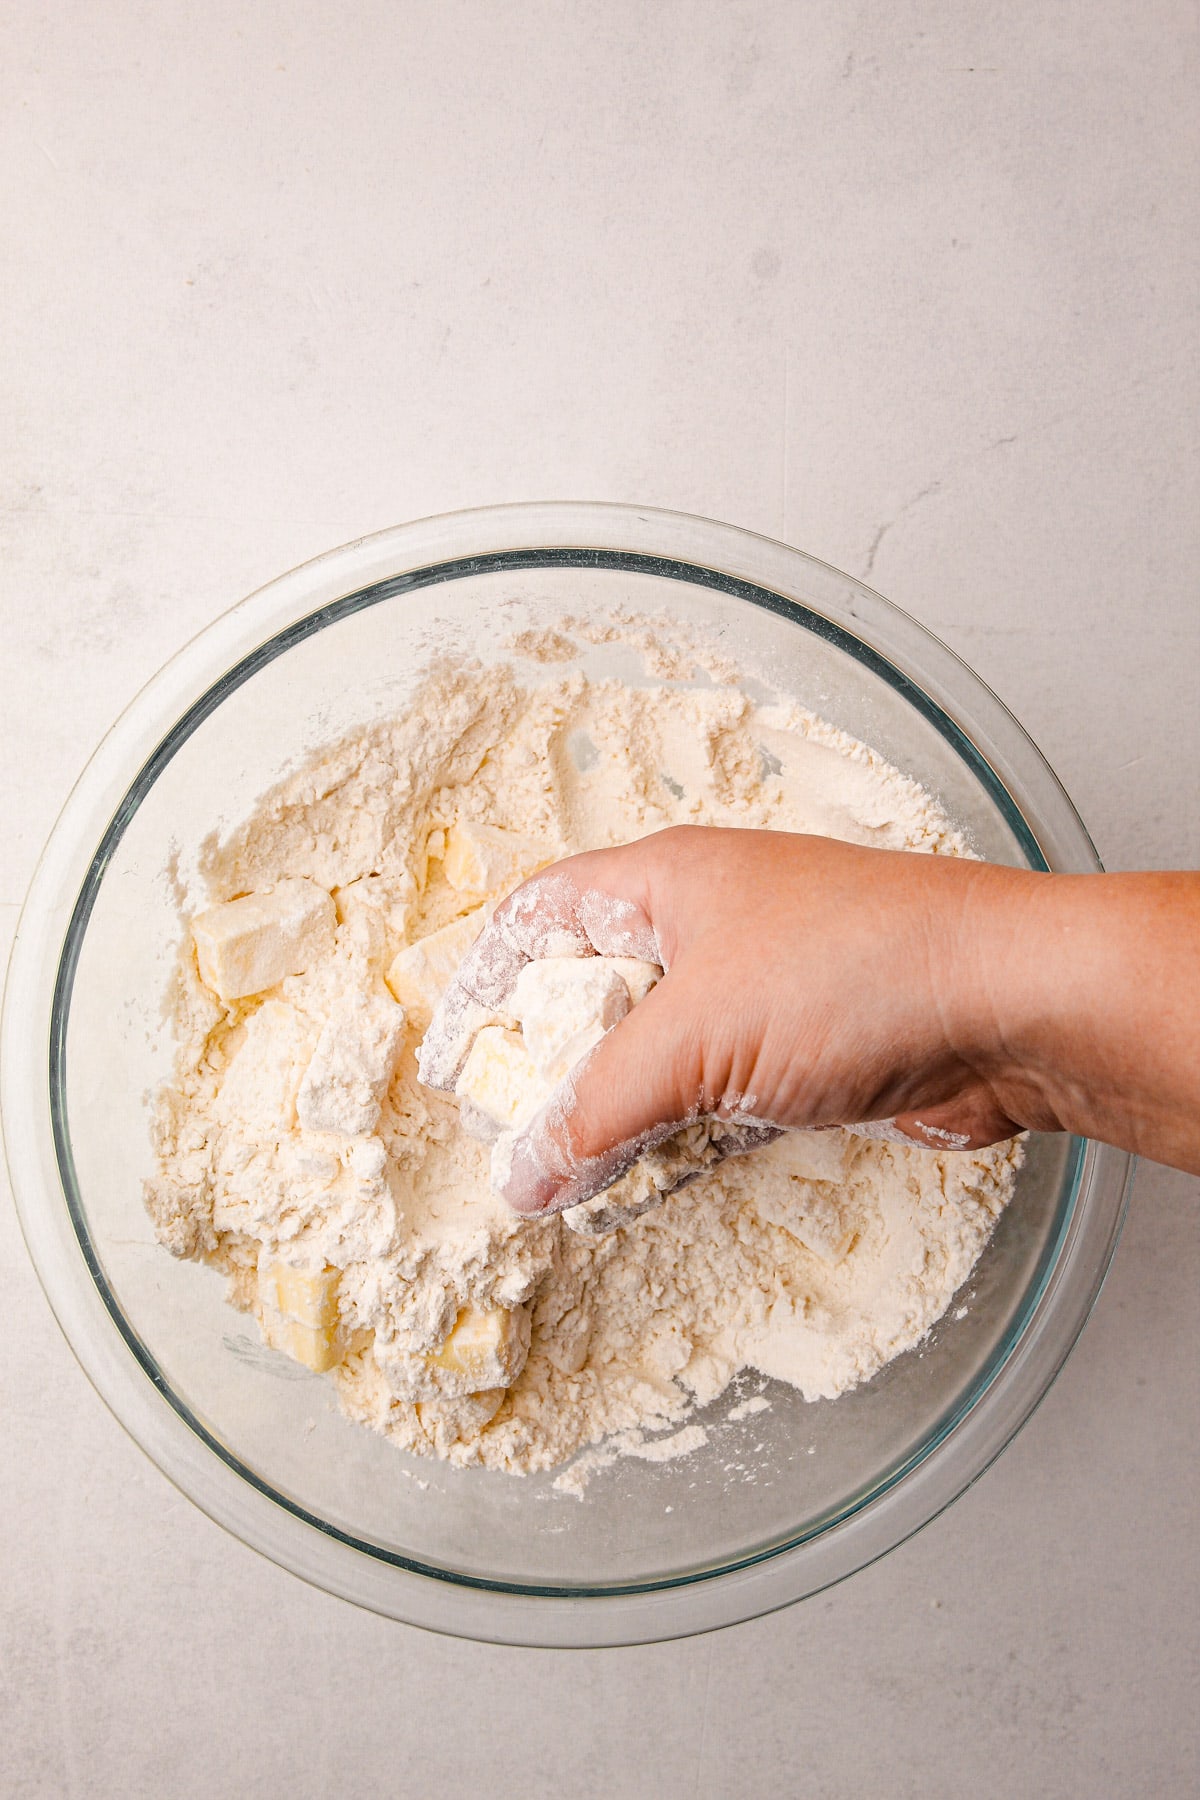
Step 2: Add in the cold butter and toss it around so the flour coats it all over.
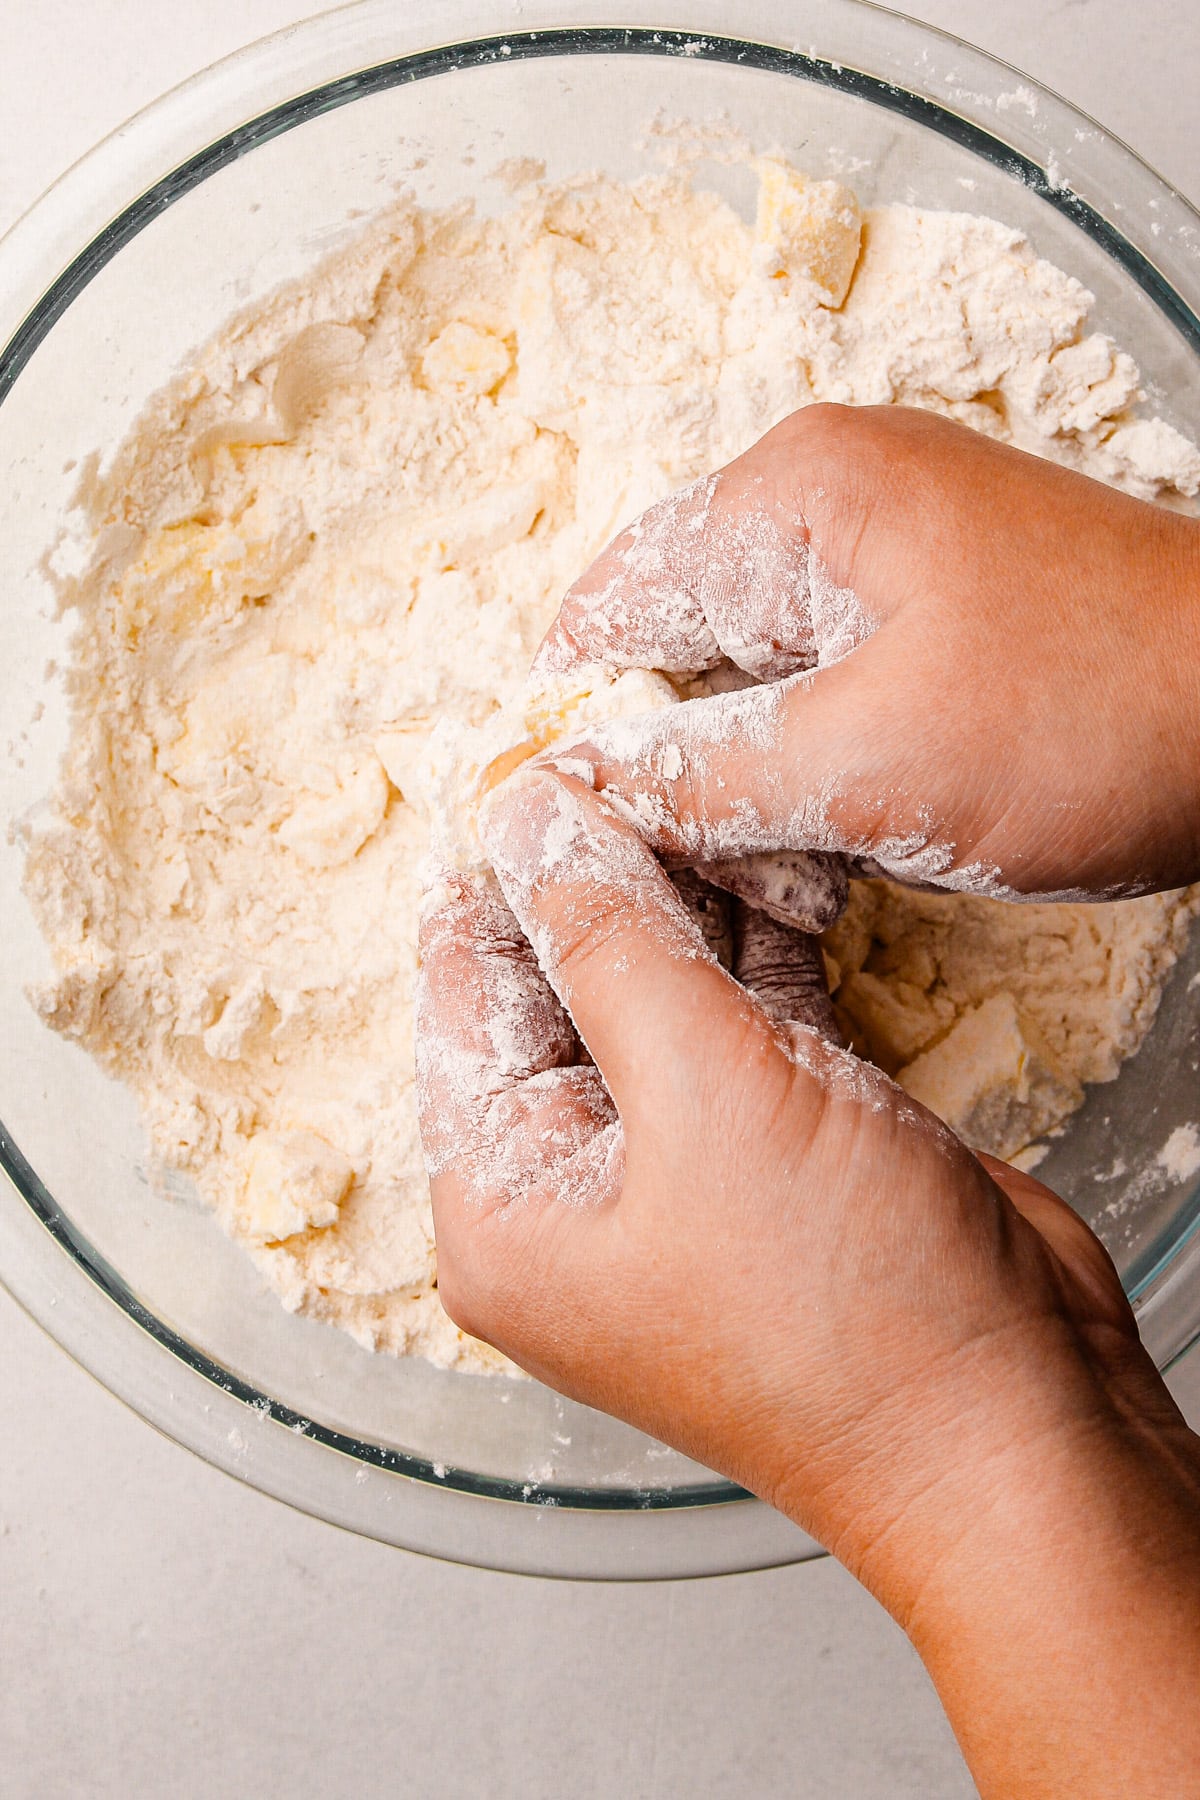
Step 3: Using your fingers, squeeze and work the butter into the flour. Continue until most of the butter looks shaggy. Some larger pieces can remain, up to the size of a marble.
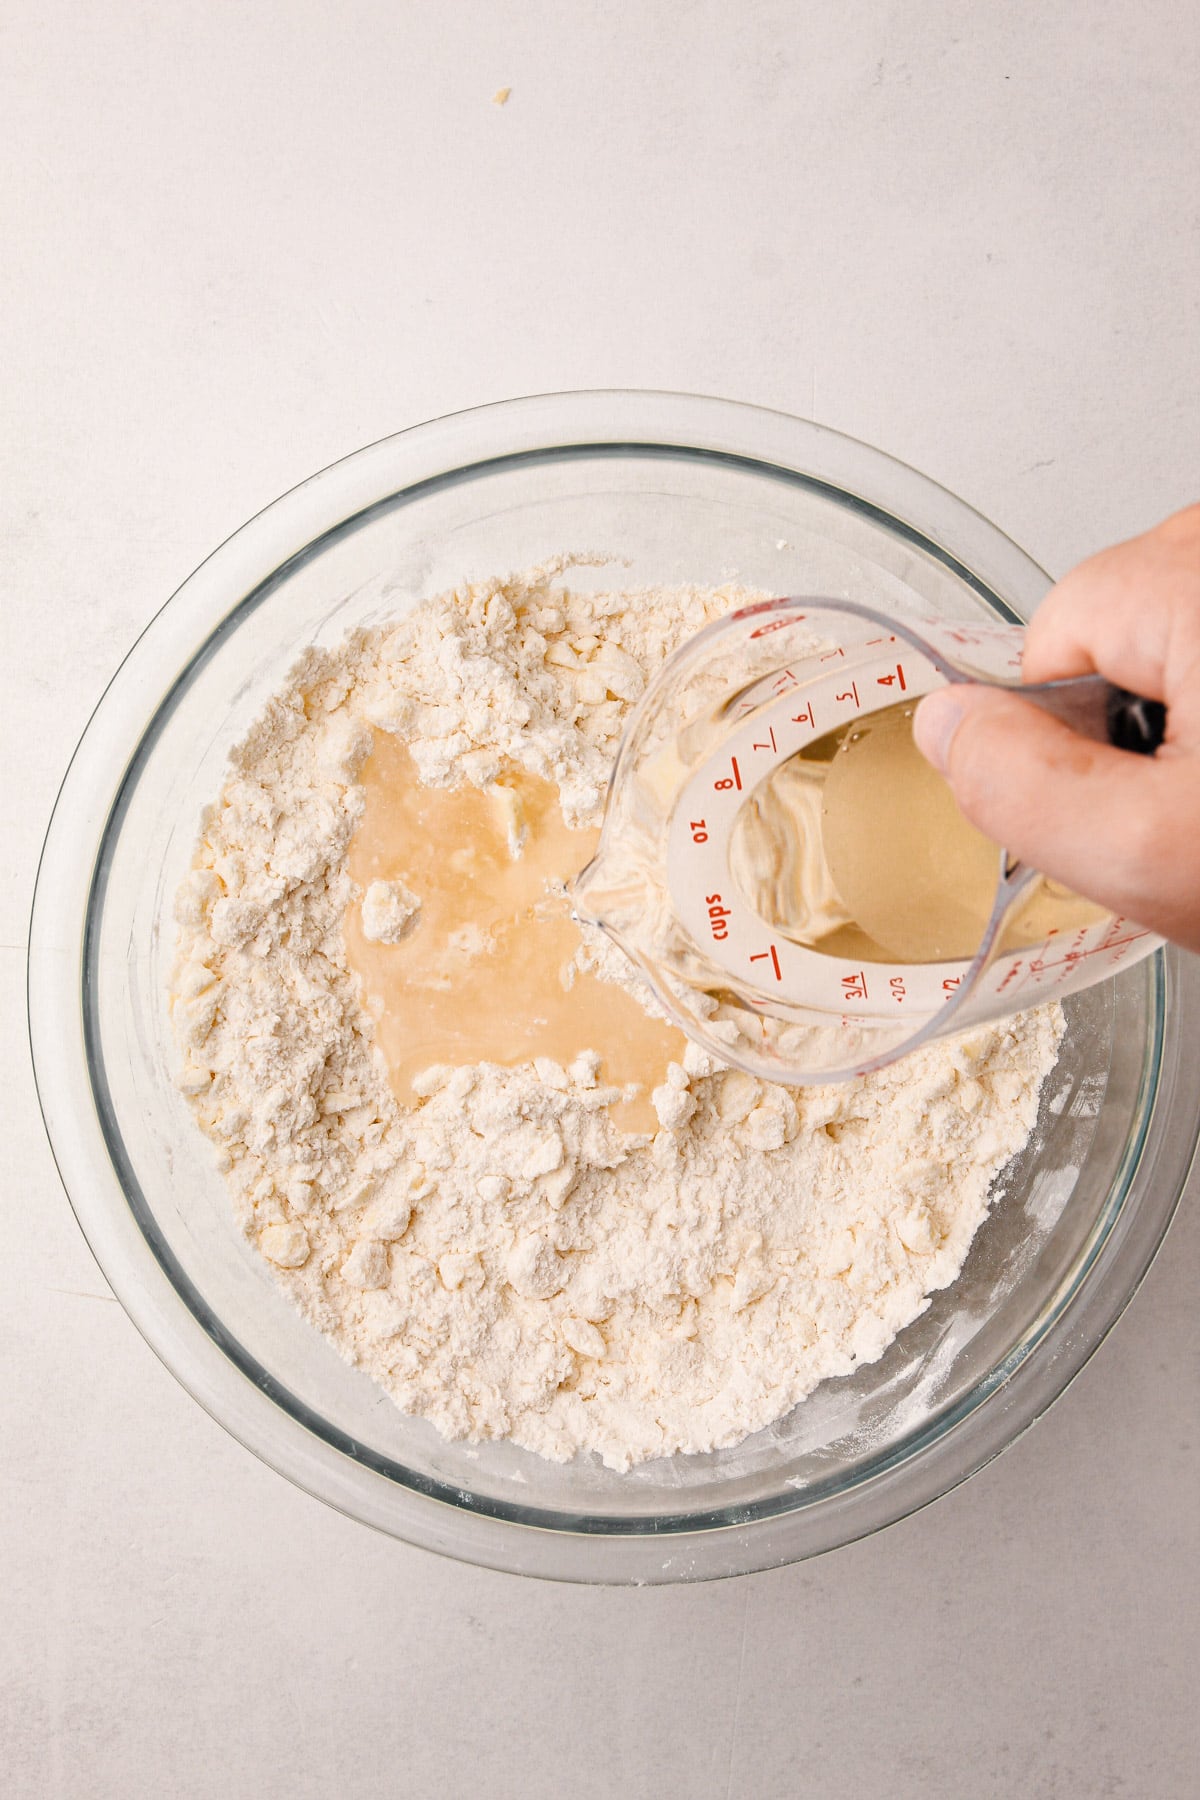
Step 4: Add the vinegar to the water, then drip in ¾ of it throughout the dough. Toss the mixture together with your fingers or a spatula.
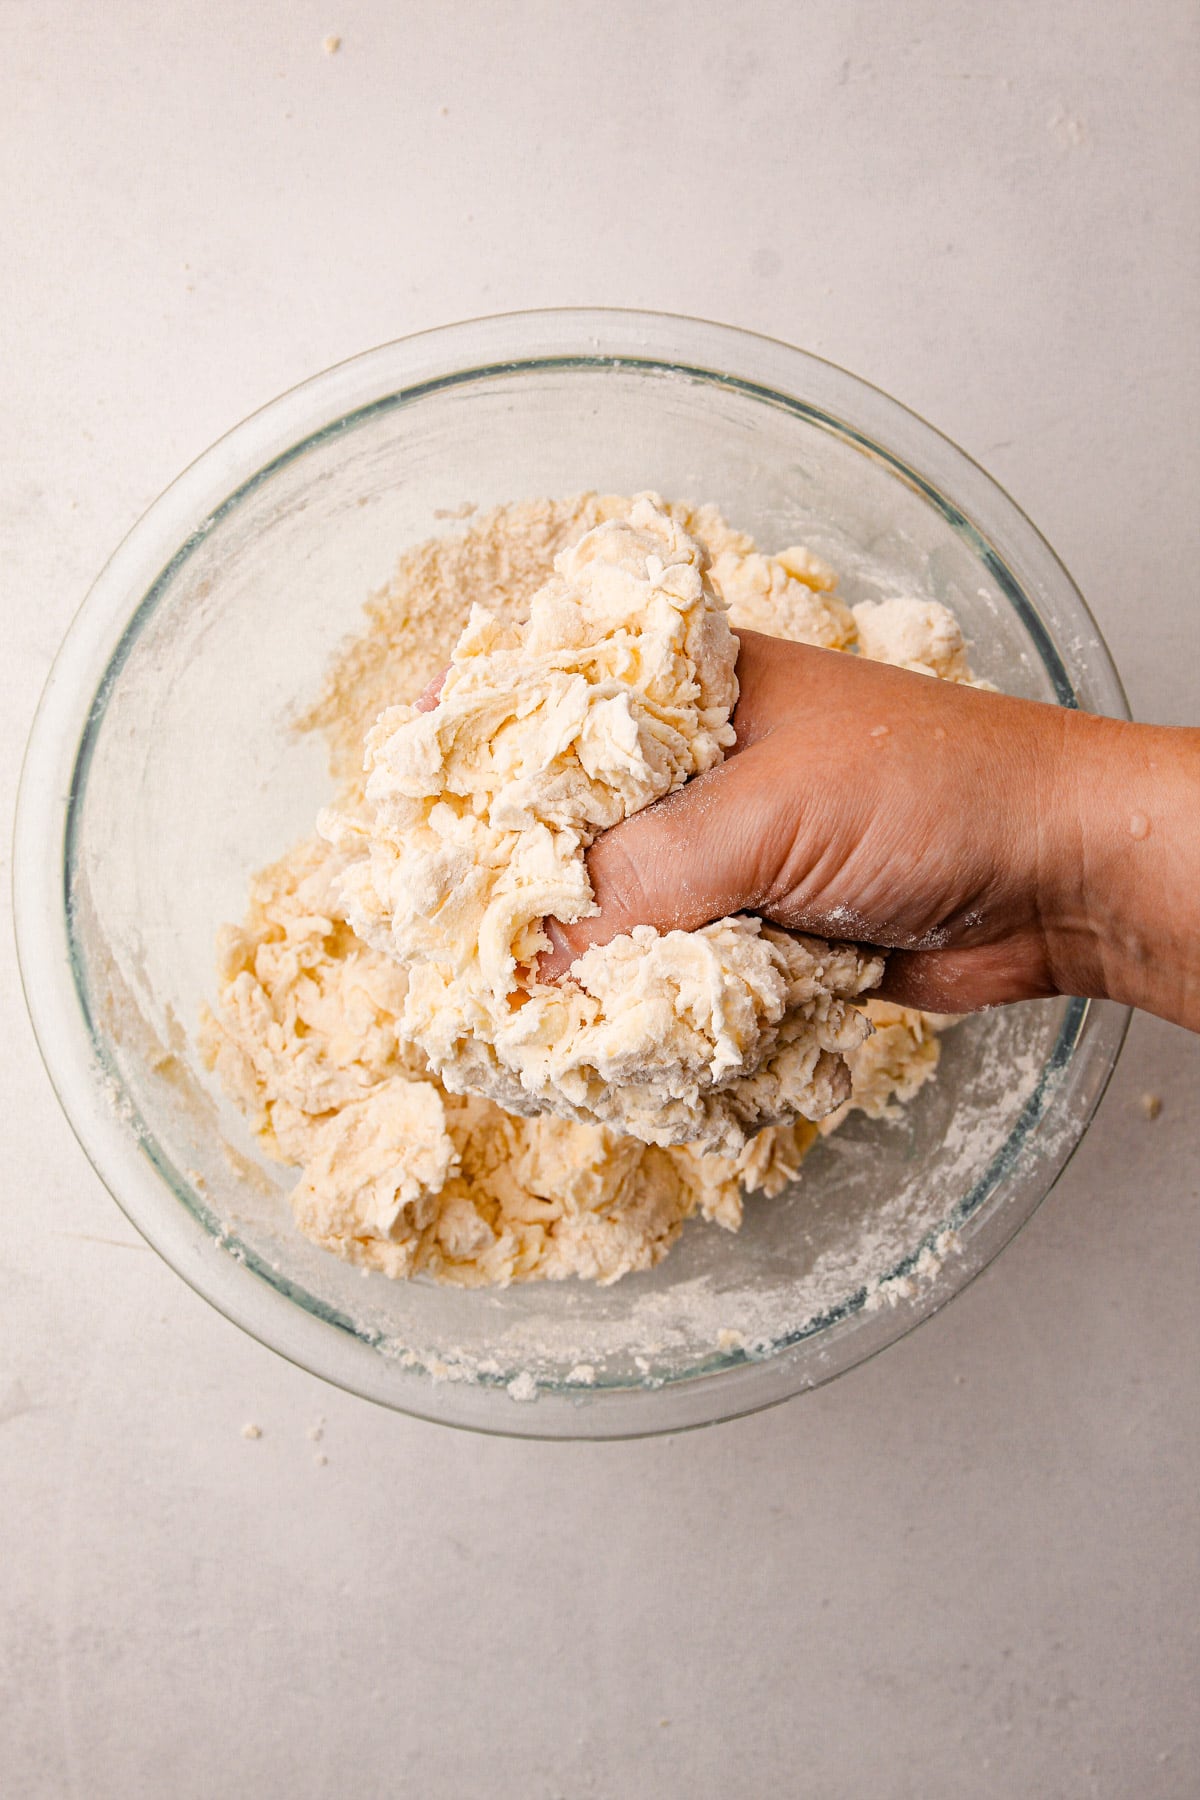
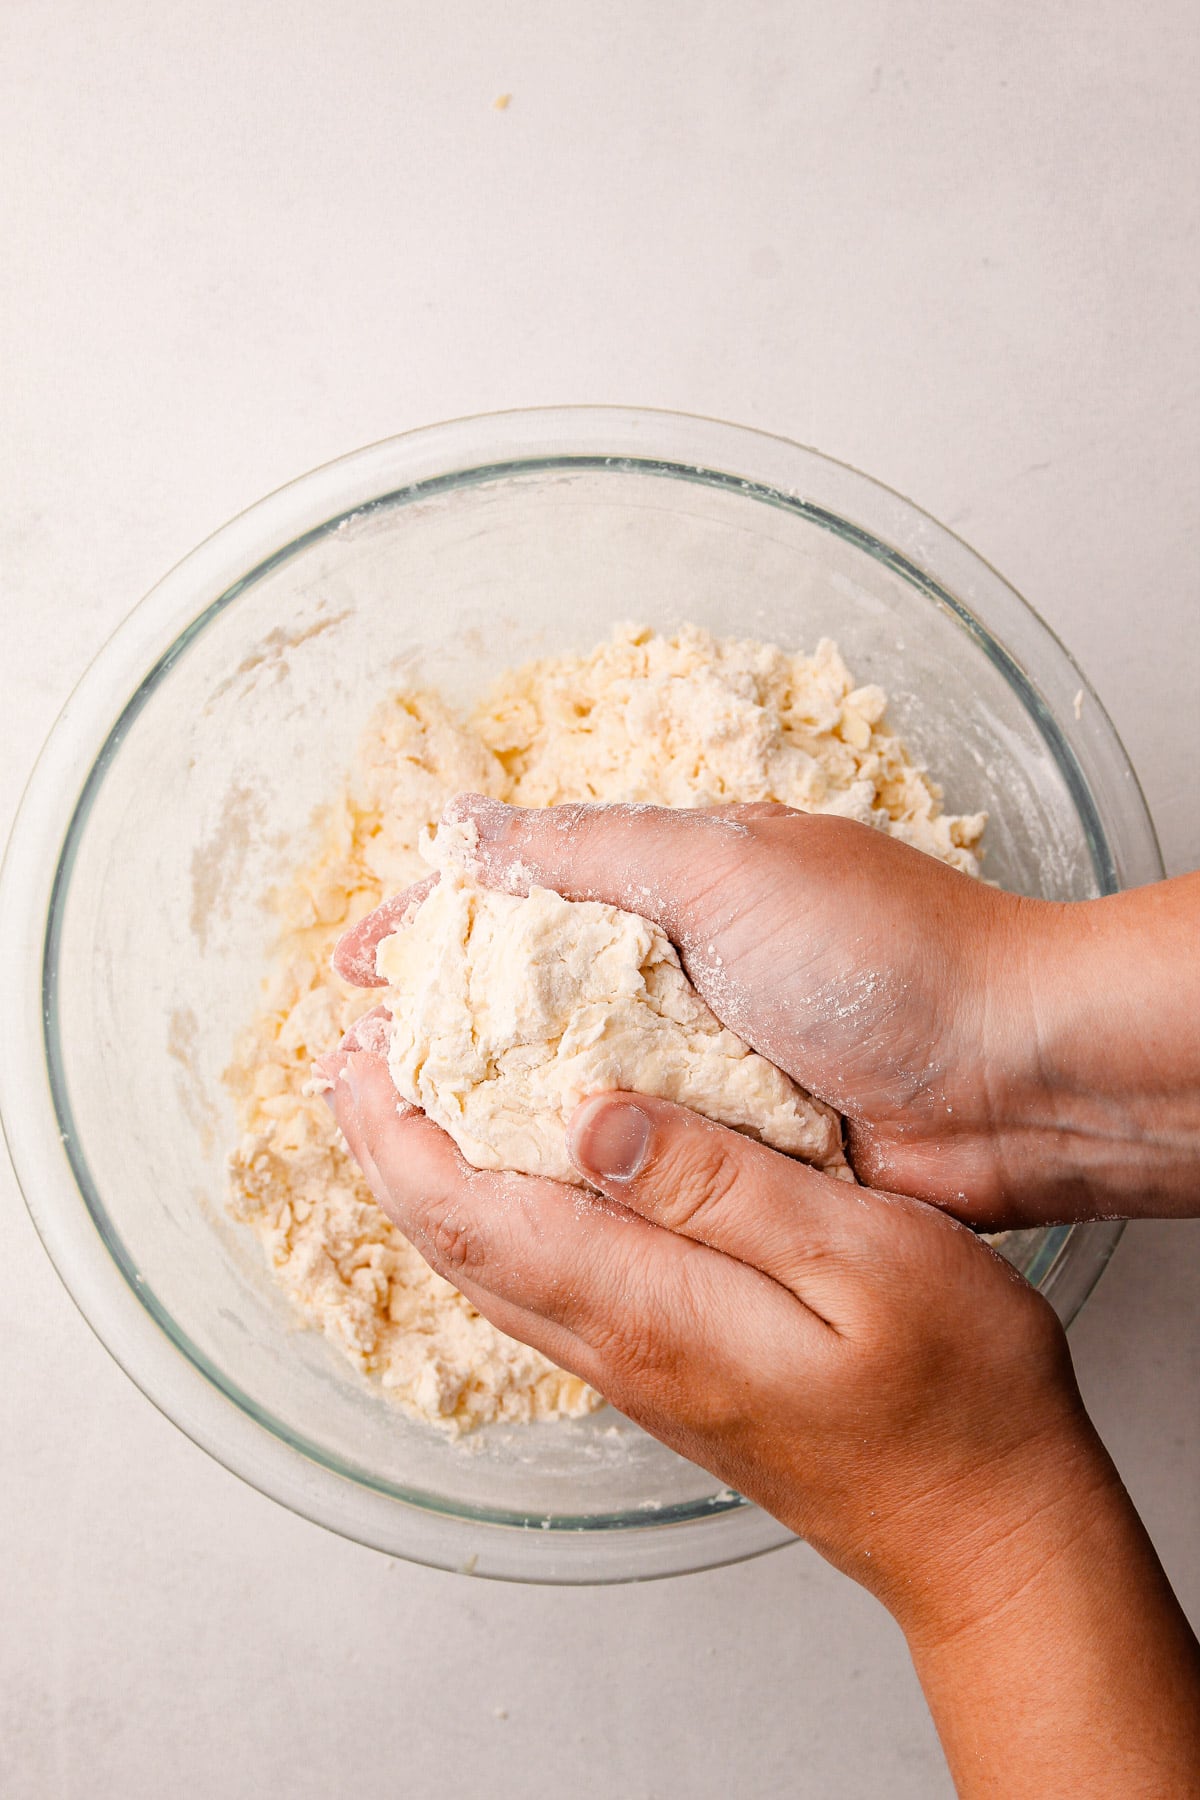
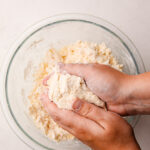
Step 5: If there is enough water, the dough should squeeze together easily with your hands. Drip in more water as needed, adding only enough to bring the dough together.
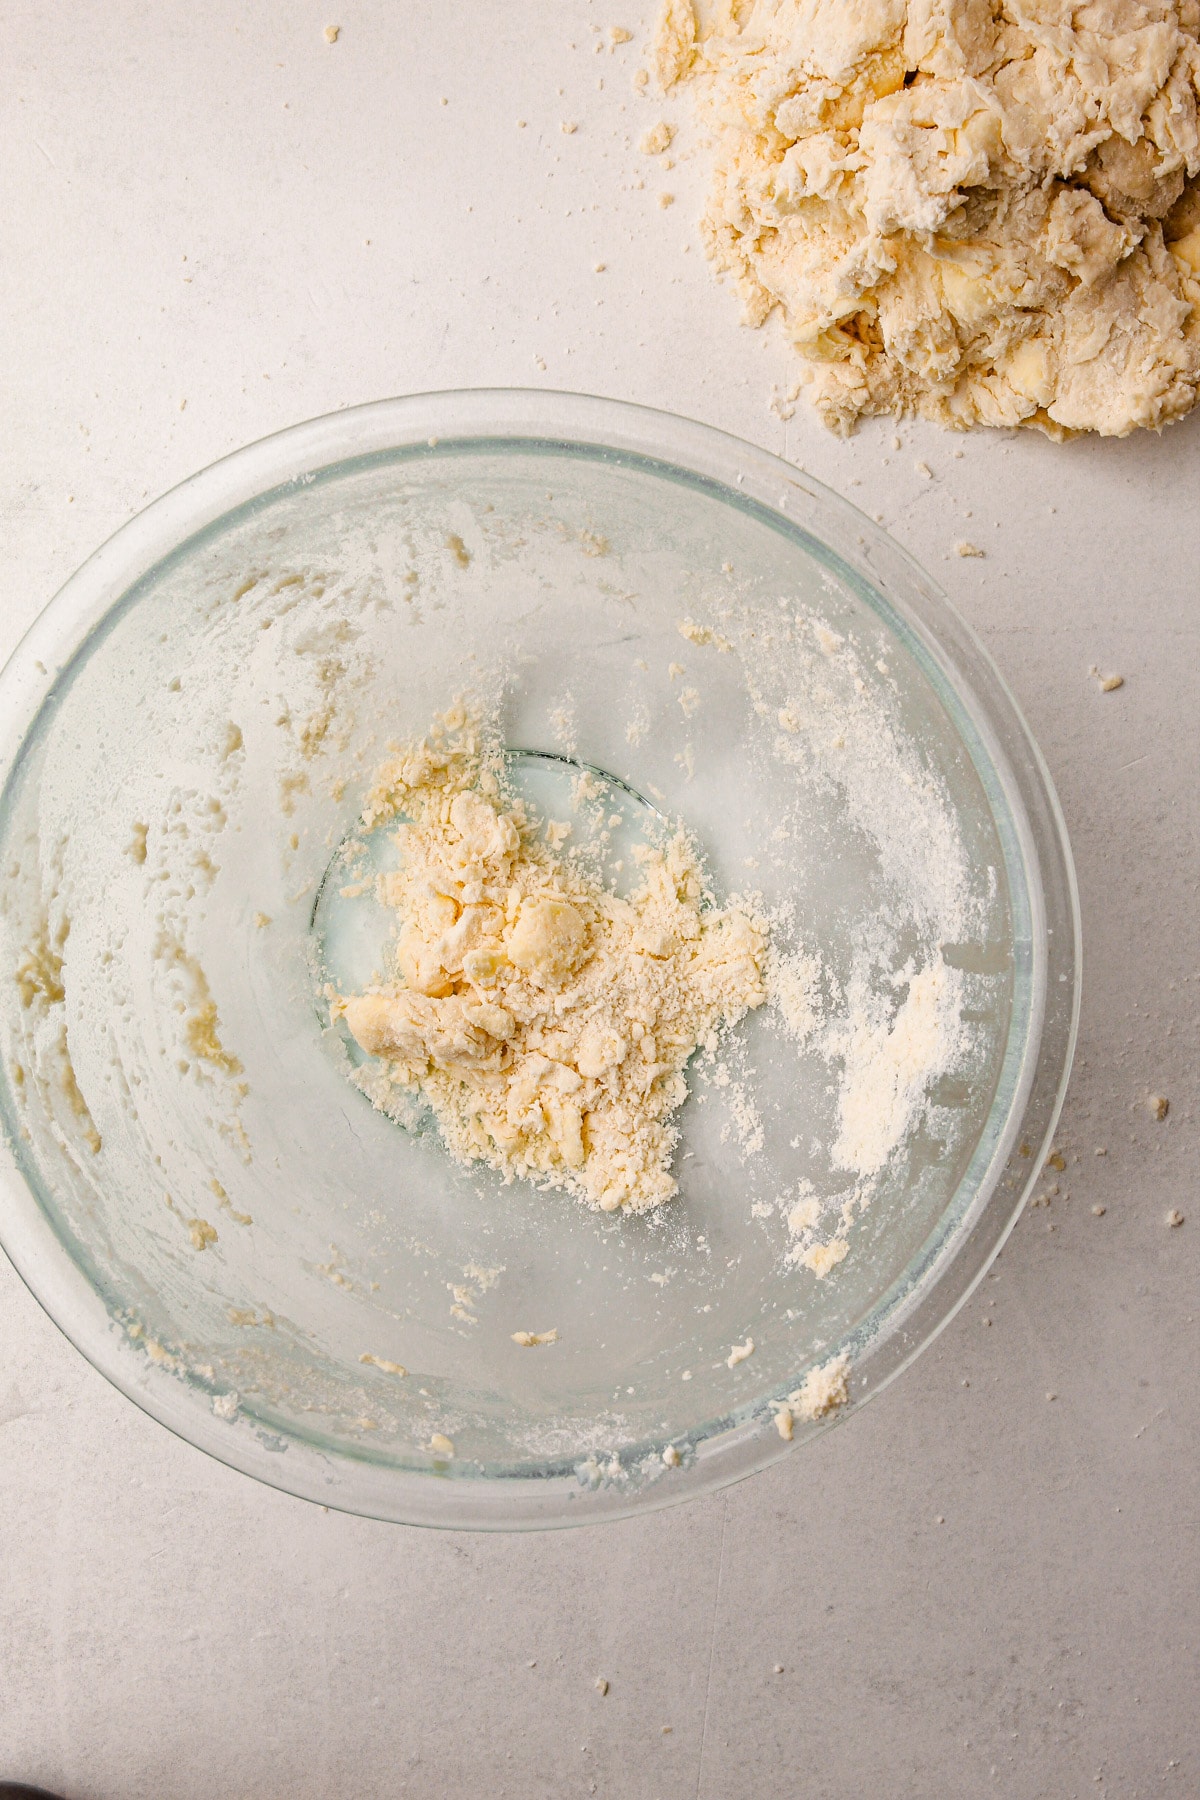
Step 6: Transfer the hydrated dough to a work surface, leaving any dry mixture behind. Add a few drops of water to the remaining powdery bits in the bowl, just enough to bring them together, then add it the rest of the dough.
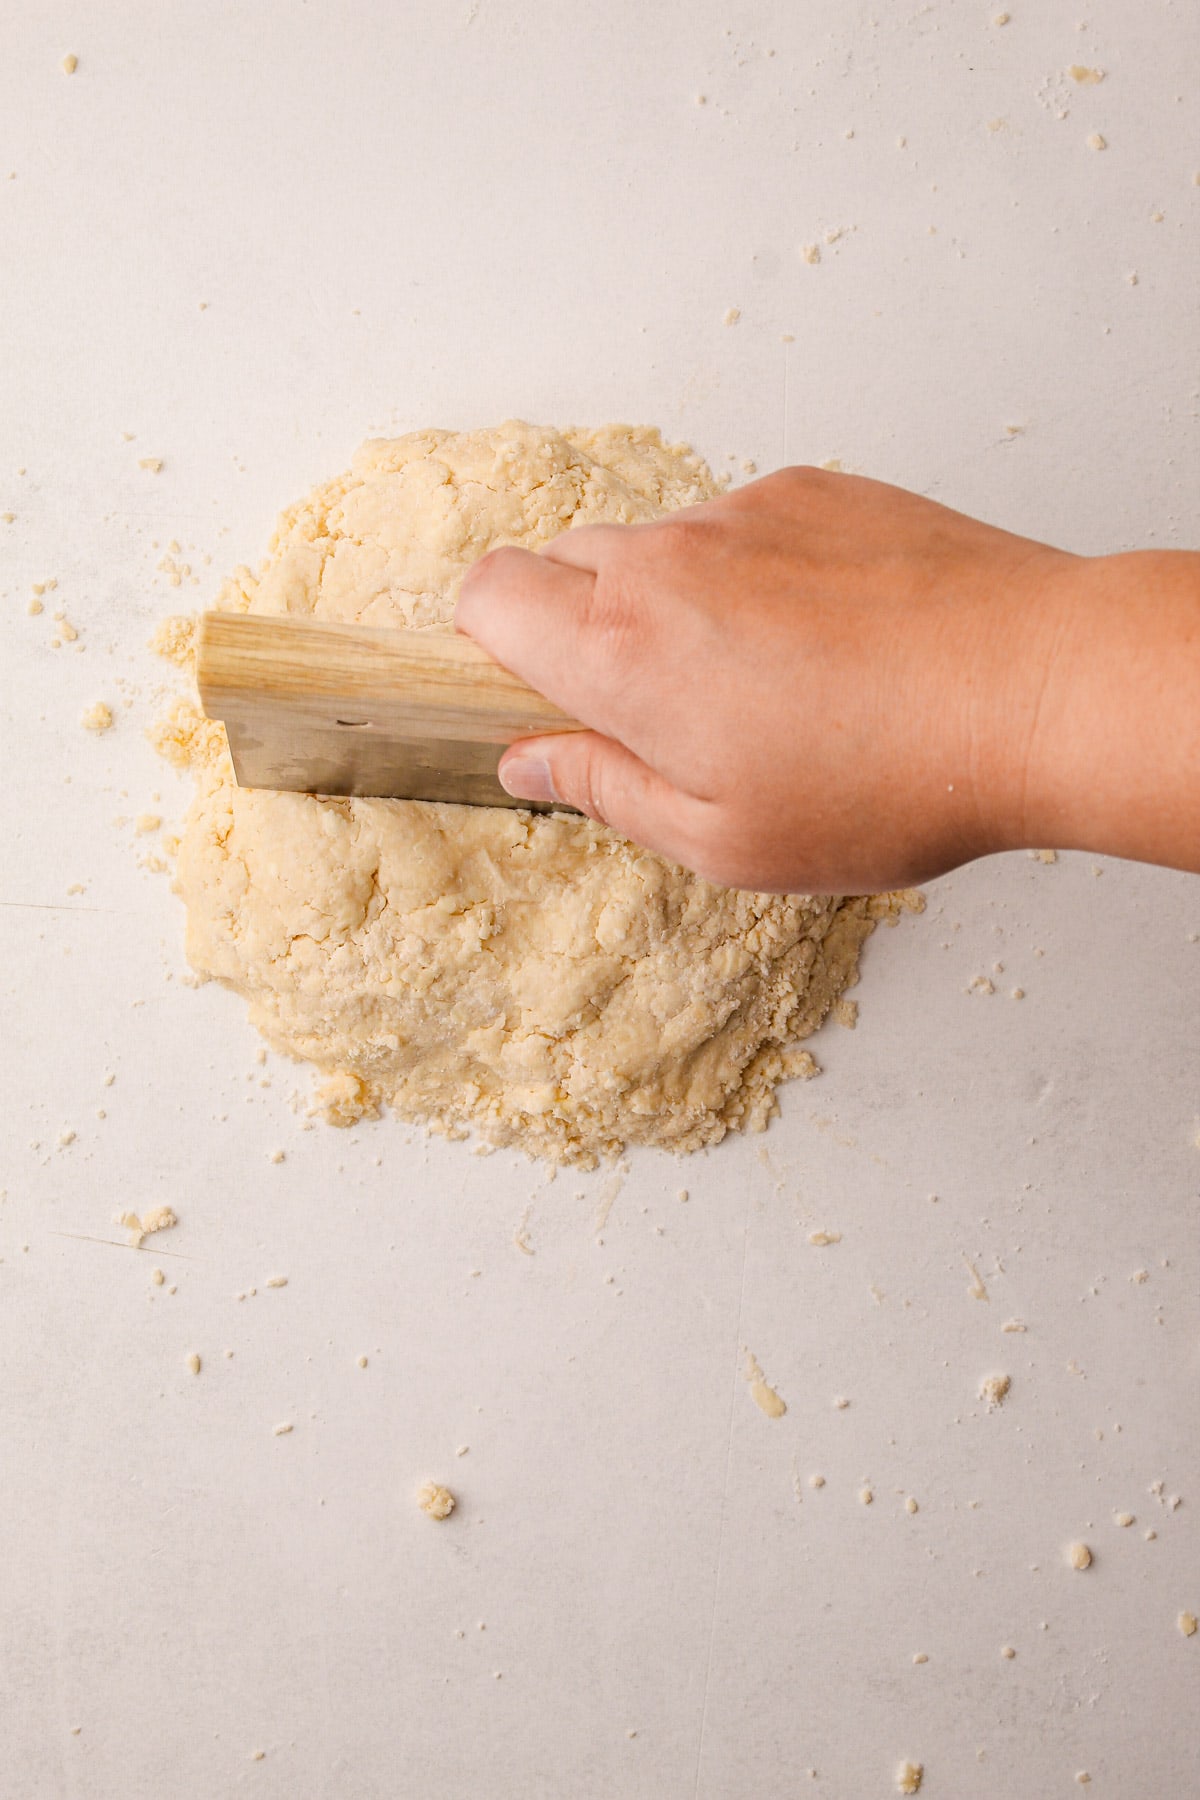
Step 7: Bring the dough together into one large mass. Use a bench scraper to divide the dough in half.
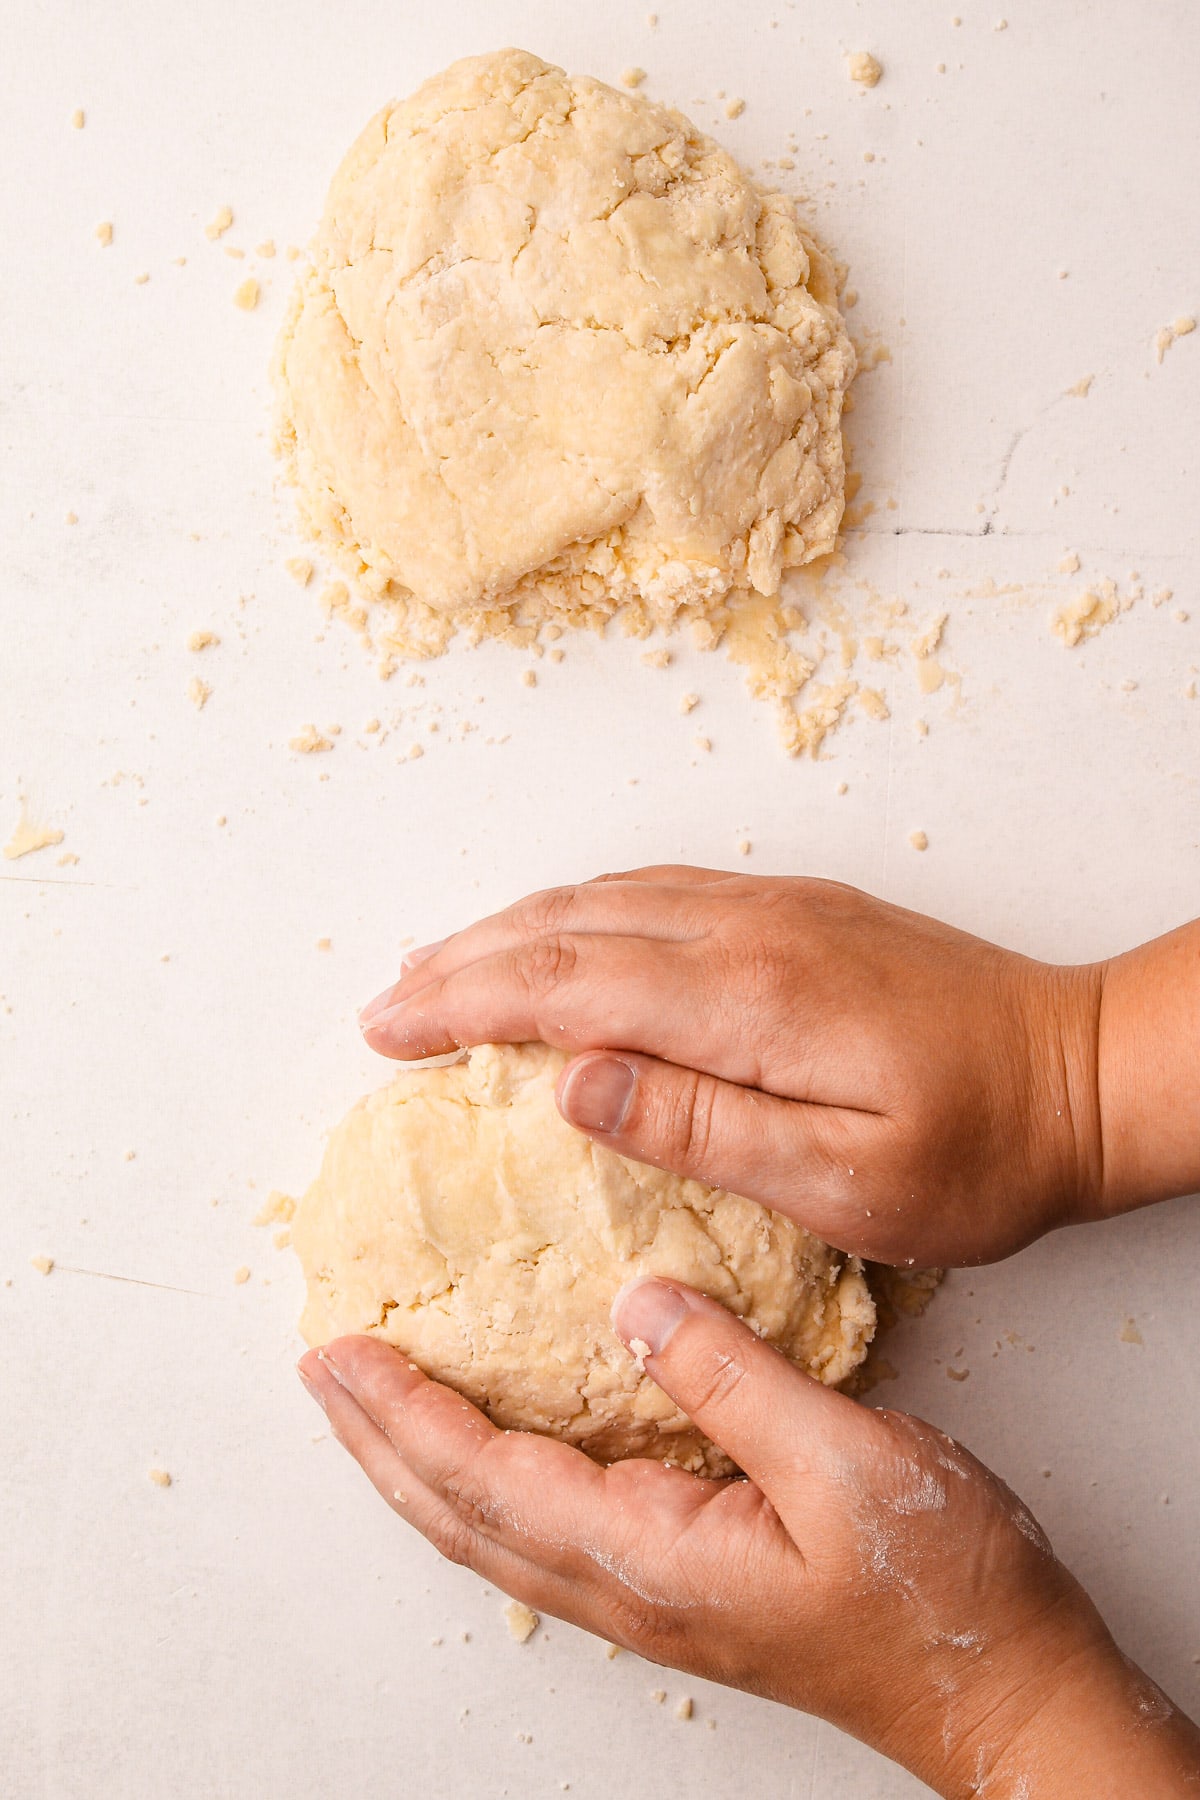
Step 8: Form each piece into a disk, place each in a piece of plastic wrap, and wrap tightly.
Avoiding Under-Hydration (A Common Mistake)
Under-hydrated dough is difficult to work with—it will be stiff, hard to roll out, and prone to cracking. It also results in a tough texture when baked. Many bakers fear adding too much water so they hold back and end up with under-hydrated dough instead. Personally, I prefer slightly over-hydrated dough because it’s easier to roll out. To avoid under-hydration, ensure there are no dry, powdery spots in the flour mixture, as they won’t disappear with resting. The dough should hold together easily when squeezed. If any areas seem dry, moisten them with a few drops of water or use my favorite tool: a kitchen-safe water spray bottle.
Kelli's Best Tips
- In baking, the amount of flour that a recipe uses will determine the quantities of the other ingredients needed. So it's important to measure your flour accurately, and I recommend weighing it. An electronic kitchen scale is not a huge investment. You can get one for around $25.
- The bigger the butter chunks, the flakier your pie will be. If you love the look of super flaky dough that almost looks like puff pastry, leave some of your butter chunks about the size of a marble. Additionally, you can give it a "lamination" after it has chilled and before you bake with it, as in this recipe for Ultra-Flaky Pie Dough.
- Make sure the pie dough is well hydrated. Make sure there are no dry, powdery spots; they won't disappear even during resting. The dough should hold together easily when squeezed. Add more water as needed.
- The whole process should take no more than 10 minutes; if it takes longer, your butter may get too warm. If your kitchen is warmer than 70°F, work quickly and use the refrigerator or freezer to chill the butter if needed.
- Let the dough rest overnight. I never advise making dough the same day you plan to bake it. It's essential for the dough to hydrate properly and for the gluten to relax before you roll it. If need be, the dough can technically be rolled out about an hour after it is made, but letting it rest overnight will give you the best results.
Storing Handmade Pie Crust
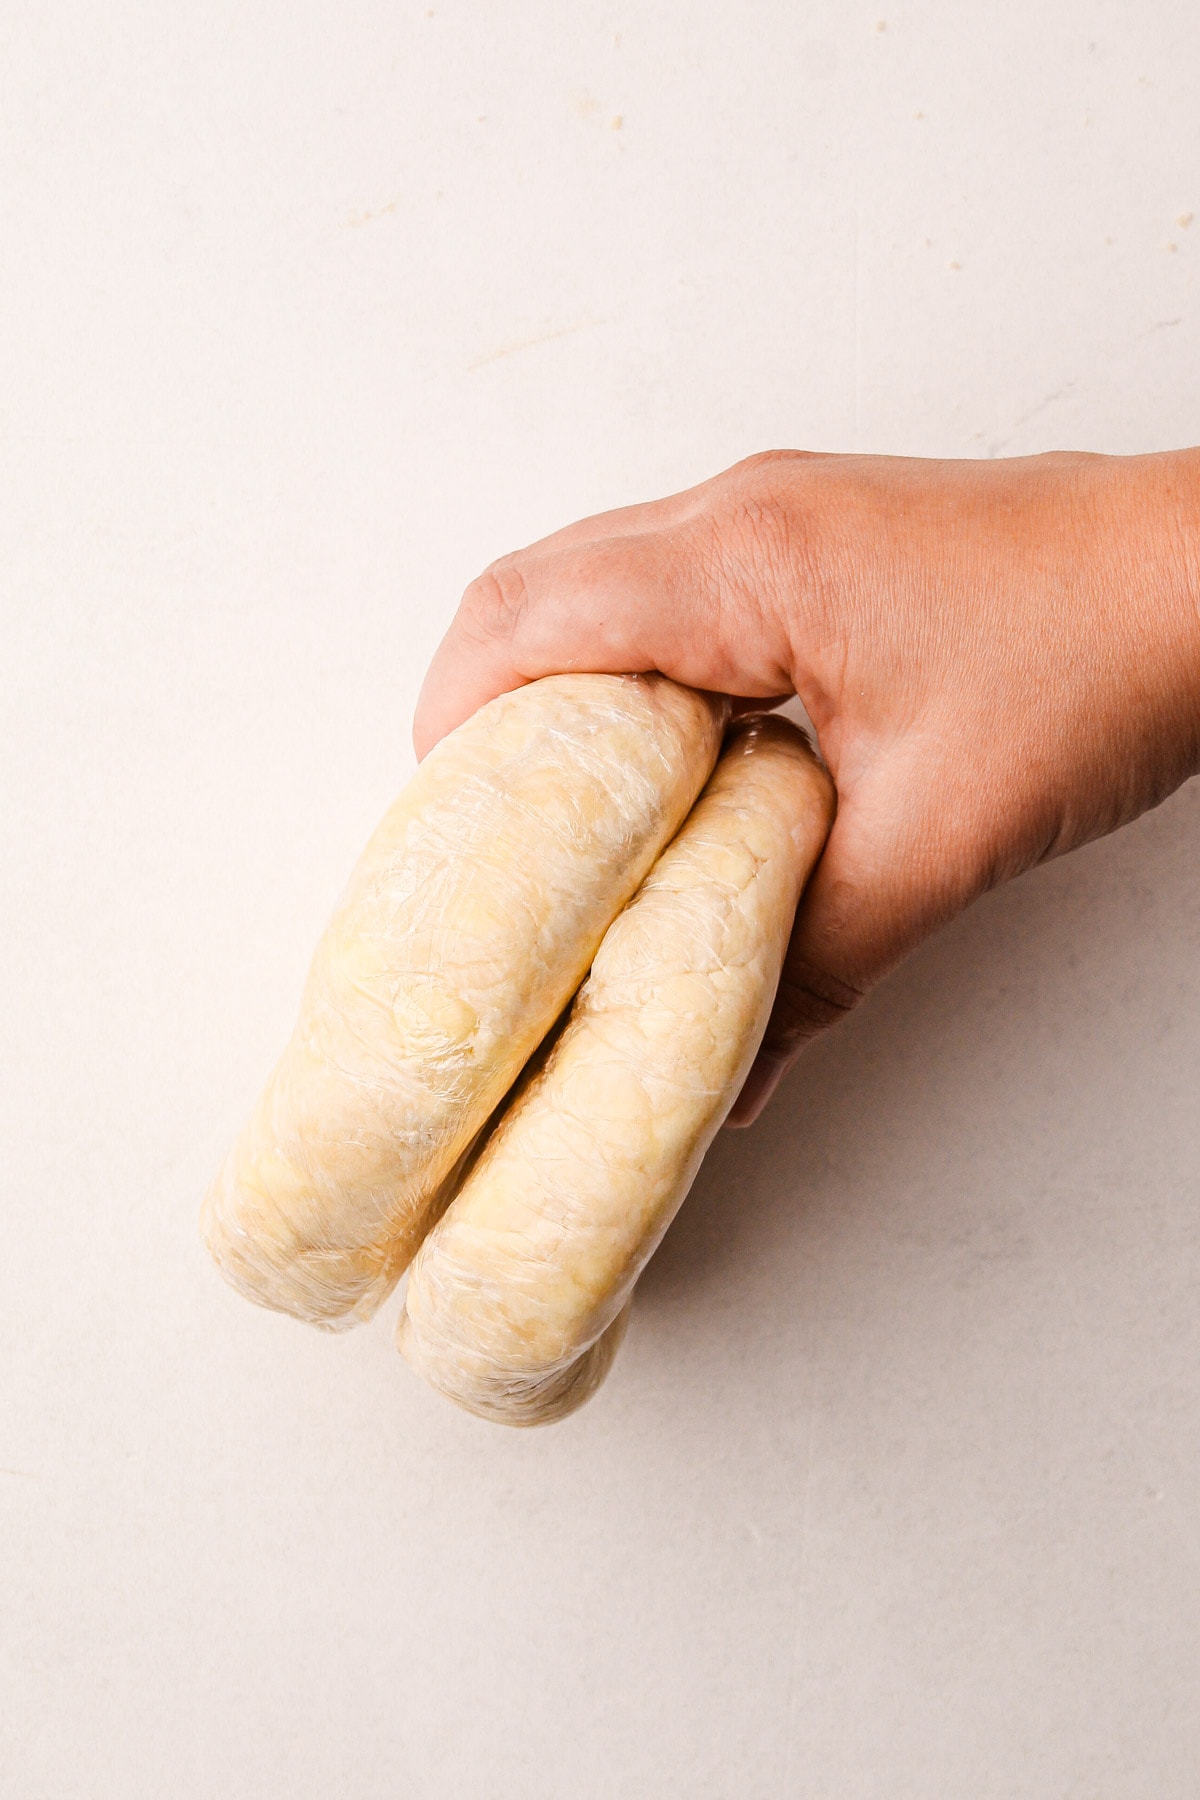
Pie dough keeps well either in the refrigerator or the freezer. But first, you need to wrap it well! Wrap the pie dough as tightly as you can in plastic wrap, then use a rolling pin to roll out the wrapped disk and flatten it so it fills any gaps and essentially makes an airtight seal with the plastic wrap. This helps prevent it from oxidizing (or turning a muddled gray color).
Pie dough made by hand will keep for about 2 days in the refrigerator. It will keep well in the freezer for up to 3 months. If you plan to store it for an extended period of time, wrap it in a double layer of plastic wrap.
More Resources
For more reading and resources, check out these recipes and tutorials:
I am so honored when you make a recipe from my site! If you use this tutorial on Making Pie Crust by Hand, please leave a star ⭐️⭐️⭐️⭐️⭐️ rating with your experience! If you have any questions about this recipe, feel free to comment here, and tag me on Instagram!
Full Recipe
How to Make Pie Crust By Hand
This tutorial will teach you everything you need to know for How to Make Pie Crust by Hand to create beautiful and delicious handmade pie crust!
- Prep Time: 00:10
- Total Time: 00:10
- Yield: 2-9" Pie Crusts
- Category: Pie Crust
Ingredients
- 2–¾ cups (330 grams) all-purpose flour
- 2 tablespoons (14 grams) cornstarch
- ½ teaspoon coarse kosher salt
- 18 tablespoons (250 grams) cold unsalted butter, cut into 1-inch pieces
- 1 tablespoon (15 grams) apple cider vinegar
- ½ cup (120 grams) ice water, more as needed
Instructions
- In a large bowl, whisk together the flour, cornstarch, and salt.
- Add the butter and toss to coat with the flour. Using your fingers, squeeze and work the butter into the flour. Use both hands and make the motion as if you were dealing out cards. Continue squeezing and tossing until most of the butter looks shaggy. Some larger pieces can remain, up to the size of a marble.
- Add the vinegar to the ice water. Drip in ¾ of it throughout the dough, then toss the mixture together with your fingers. When there is enough water added, the dough should easily squeeze together with your hands. Transfer any fully hydrated dough to a work surface. Drip in more water as needed to any remaining dry spots. Add just enough water to bring the dough together.
- Using your hands, gently bring the dough together into one large ball. Divide it into two equal pieces, about 12 ounces each. Shape each piece into a rough disk.
- Place each disk in a piece of plastic wrap and wrap tightly.
- Using a rolling pin, roll the wrapped dough out until it stretches to the edges of the plastic wrap to ensure a tight seal.
- Refrigerate for at least 2 hours, but preferably overnight.
Notes
Weighing your flour is the most accurate way to measure. If you aren't going to weigh it, make sure to spoon it into the measuring cup and then level it off. If you scoop the flour out with the measuring cup and then level it, it could change the outcome of the final product.
This recipe was tested using Diamond Crystal coarse kosher salt. If you use Morton's kosher salt or fine salt, decrease the volume by half.
You can store this pie dough in the refrigerator for 2 days or the freezer for up to 3 months. If you plan to store it for an extended period of time, wrap it in a double layer of plastic wrap.
How you bake a butter pie crust is just as important as how you prepare it. The key rule: very cold dough should go into a very hot oven, ideally at 425ºF. However, it's best to refer to the filling recipe for any specific key details about baking the crust. See this Guide to Baking Double Crust pies for more baking tips.
This tutorial was originally published in 2020. Since then, I've updated the accompanying article and step-by-step tutorials to offer the best possible guidance on how to make it.
This recipe makes enough pastry to make one double-crust pie or two single-crust pies. You can halve the recipe if you only want to make one single-crust pie.
Some of the links on this page may be affiliate links. Everyday Pie is a participant in the Amazon Associates Program. As an Amazon Associate I earn from qualifying purchases, at no extra cost to you.
Alicia
Hi! Should the cornstarch be 2 tsp instead of 2 tbsp? I weighed out 14 grams and it was much less than 2 tbsp. Not sure if I missed something obvious! Thank you 🙂
Kelli Avila
Hi Alicia, when I develop each recipe, I measure and record both the volume and the weight of the ingredients from the start—they're not conversions. The weight stays consistent no matter who makes it, but volume measurements can vary depending on many factors, which is why I recommend using weight always 🙂 -Kelli
Heather C
How long must you bake the pie crust? I want to make quiches both large and mini.
Thank you.
Kelli Avila
It depends on the recipe you are using. Check out a quiche recipe of mine and it will instruct you how to bake the pie crust.
Deborah Jordan
Trying this recipe for the first time I hope it turns out well I will let you know later
Heather
Hi, can I use this dough to make hand pies? Do you have a guess on how many it might yield?
Kelli Avila
Hi Heather! Yes you can. It will yield about 8 4-inch hand pies.
Dannica
Is there a different recipe if using pastry flour?
Kelli Avila
If using pastry flour, omit the cornstarch and use 2-3/4 cups plus 2 tablespoons pastry flour (or 345 grams).
Skyla
No direction for cooking Time on or crust and doesn’t tell you what to pre heat the oven to
Kelli Avila
Hi Skyla, the directions for cooking will depend on the type of pie you are baking. This recipe is just for making the pie crust. Use the directions for the pie you are baking for how to bake the crust.
Terry Bryant
I made this for my wife’s chocolate pies. One was great the other I didn’t roll it out thin enough. Crust was thick and barely had enough room for the insides. Was still VERY good.
Tracy
OMG!! I made a chicken pot pie with this crust. It is absolutely the best one I have made so far, without buying the crust pre-made. One thing I would say, is after you let the dough set overnight let it sit for 3 min. Before attempting to roll out. Absolutely delicious! Will be perfect for a perfect apple pie too!
Michelle
Hello,
We are away on vacation and I left my scale and only have flour, water and butter. Will it really change it if I don’t have cornstarch or vinegar? I have malt vinegar. Not apple cider vinegar. Can that be used? But no cornstarch.
Kelli Avila
Hi! No---you can do it with those three ingredients (do you have a pinch of salt?) To measure the flour without the scale spoon it into the cups and then level. Add in an extra 2 tablespoons of flour to replace the cornstarch. And equal amount of water to replace the apple cider vinegar. I'm sure your pie crust is still going to be delicious. Enjoy vacation 🙂
Verslint
Hi, thanks for the recipe! Does this scale up or should you rather make 2 seperate batches?
Kelli Avila
You can make 2 batches at once!
josephine
easier than i thought!!!
Anita Pang
Hi Kelli,
I am going to make the pie crust first time. Is it ok to use plain white flour instead of all purpose flour as I have some left at home.
Anita
Kelli Avila
Hi Anita. I'm not sure what you mean by plain white flour?
Liza
thanks for sharing I really needed this because I don't have the tools when I make the pie crust. thanks for sharing!
Jamie McNair
Hi I'm Jamie McNair I work in a prison kitchen need a we can use this crust recipe it just needs to feed 2000 can you help with the measurements for a group that size
Trixi
Jaime for 2000
This is an assumption based in each crust you will get 8 servings. Or the standard 8 slices of double crust pie.
I'll give it to you in pounds gallons.
Flour 181.9 or l82 pounds
Cornstarch 7.7 pounds
Salt 1.625 pounds
Butter 137.8 pounds
Apple cider Vinager 1 gallon
Water 7.925 gallons
These are pretty rough but I tried.
Trixi
Andy
Hi,
I’m wondering at what temperature and for how long I should bake the pie crust?
Kelli Avila
Hi Andy! Lots of resources for this information on my site. The truth is it depends on what your filling is. But if you are looking for some basic information, here are two pages to start on: https://everydaypie.com/how-to-blind-bake-pie-crust/ and https://everydaypie.com/how-to-bake-a-double-crust-pie/
Kerry Viney
Hi is this pastry recipe suitable for making a tray of apple shortbread, pastry top and bottom? Ive been searching for the perfect recipe. Thankyou
Kelli Avila
Sure!
Erika Renae
I just made this recipe and it was AMAZING! Super super easy and I was shocked that I finally did something right ! Love this thank you💜
Kelli Avila
Best message ever! So happy to hear 🙂
Calyn Bonner
I love this recipe! Very easy to follow. The crust came out so flaky and light. Will definitely be using this as my go-to crust recipe!
Kelli Avila
Thanks for sharing! So happy you enjoyed!