
This easy Gluten Free Pie Crust recipe, made using a 1:1 gluten-free flour blend, creates the perfect gf crust for any sweet or savory pie.
Want to save this recipe?
Enter your email & I'll send it to your inbox. Plus, get weekly updates from me!
Everyone deserves to enjoy pie, whether they can consume gluten or not, and that’s where this amazing gluten-free pie crust comes in. For a time, I had to go gluten-free after being diagnosed with a severe raw wheat allergy. Over two years, I worked to figure out what was safe for me to bake and eat, and this pie crust is the result of that journey. My goal was to create a crust that tastes just as good as a traditional butter pie crust without being fussy or requiring a bunch of unusual flours, as many gluten-free recipes tend to do. The resulting recipe is a buttery, tender pie crust that’s easy to make with none of the gluten!
So, let's get to making it, shall we? The article below is jam-packed full of useful information. You can jump around using the menu below, or skip to the end of the article for the full recipe.
Jump to:
Understanding the Differences in Gluten-Free Pie Crust
Let's get this out of the way: Gluten-free pastry will never taste exactly like wheat pastry—it’s simply different because it lacks gluten. However, it’s entirely possible to make a gluten-free pastry that tastes great, is easy to work with, and is a perfect stand-in for the traditional version.
For the longest time, I tried making gluten free pie dough the same way I made a traditional wheat flour recipe, and it made the gluten-free version frustrating to work with. Then I switched my approach, treating the dough differently, and the results were amazing—a fuss-free pie crust that still tastes delicious. Honestly, making gluten-free dough turned out to be so much easier than traditional pie dough!
How this gluten free pie crust differs from traditional butter pie crust:
- Gluten free pie crusts just won't be as flaky as gluten pie crusts. In order to make the dough workable, you'll need to incorporate the butter fully throughout the dough (and those chunks of butter are what make a butter pie crust flaky).
- Gluten free dough actually is easier to work with! What you lose in flakiness, you gain in ease. Gluten-free dough is surprisingly fuss-free. With the butter fully incorporated, the dough takes on a play dough-like consistency, making it easy to roll out.
- It can be rolled out right away! One of the perks of gluten-free dough is that it can be rolled out right away! Without gluten, there’s no need to rest the dough to prevent overworking it. Just ensure your butter isn’t too soft. If the dough starts sticking or is difficult to roll out, chill it for 10-15 minutes before trying again (see below for more rolling tips).
- Re-roll the dough scraps multiple times without worrying about the dough becoming tough. Without gluten, the dough stays tender no matter how often you roll it out
Ingredient Overview
This is an overview of the ingredients, as well as an explanation behind them. For the full recipe, scroll down to the end of the article.
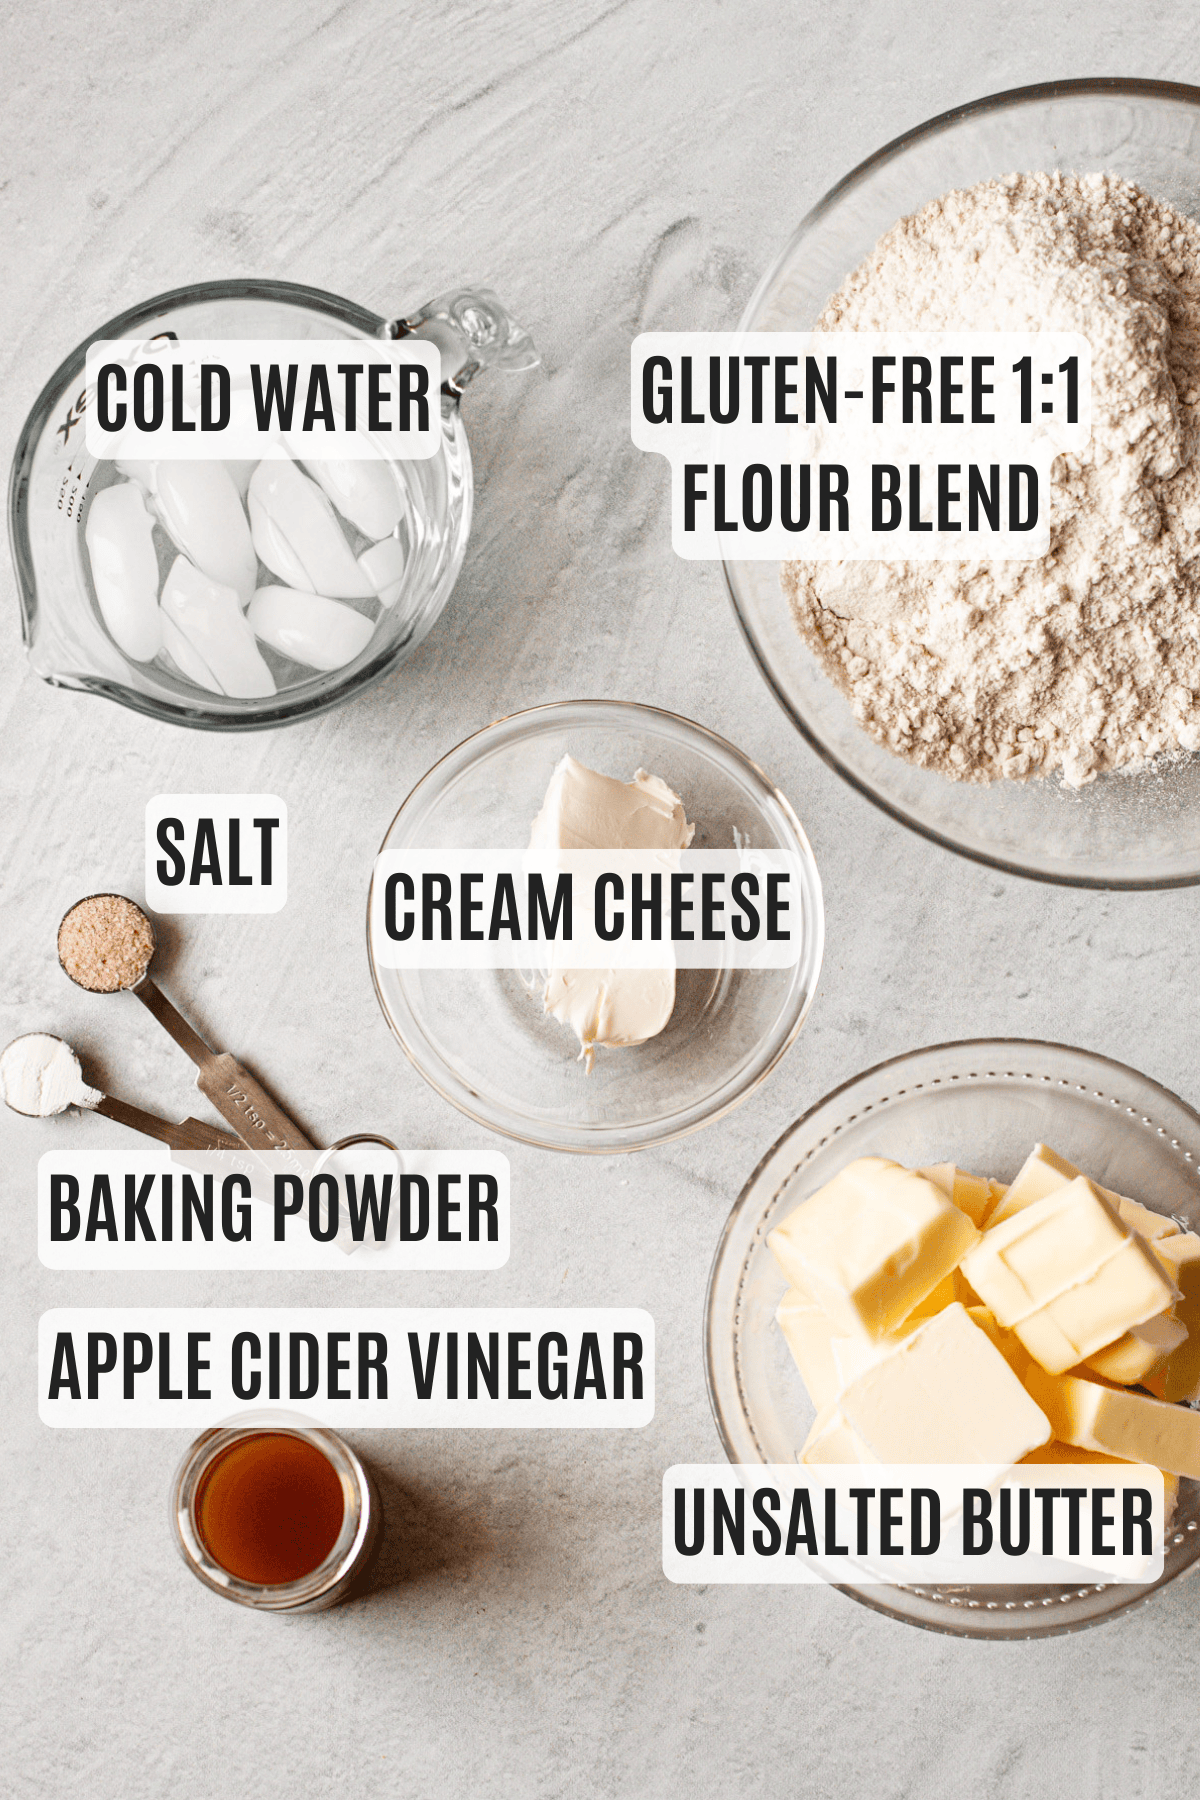
- 1:1 gluten-free flour (This a type of flour blend designed to replace regular all-purpose flour formulated to mimic the properties of wheat flour. King Arthur Flour Measure for Measure Flour and Bob's Red Mill 1-to-1 Baking Flour are the two I specifically have worked with and liked.)
- salt (This recipe was tested using Diamond Crystal coarse kosher salt. If you use Morton's kosher salt or fine salt, decrease by about half for volume, or use the same amount by weight )
- baking powder (this adds just a touch of lift in the gluten-free pie crust making it feel lighter and more tender)
- unsalted butter: Make sure you use good quality butter here! I like unsalted that way you can control the amount of added salted. Don't use European or high fat butter. Many people have successfully substituted dairy-free butter in this recipe, though I haven't personally tried it myself.
- cream cheese: This really helps improve the flavor and the texture of the gf dough. If you need it to be dairy-free, you can try to omit the cream cheese and add in an extra tablespoon of the butter substitute you choose.
- apple cider vinegar: This improves the flavor of the pie crust.
- cold water: Water brings the whole thing together, but it should be cold to help keep the temperature of the dough as chill as possible. Honestly, when I don't have ice laying around I'll just let the tap run for 30 seconds to get water cold and use that.
How to Make Gluten-Free Pie Crust
This recipe uses a 1-to-1 gluten-free flour blend. There are several brands available, and I’ve had success with both Bob’s Red Mill and King Arthur Flour 1-to-1 blends. Be sure to choose a blend that is specifically labeled as a complete substitute for all-purpose flour.
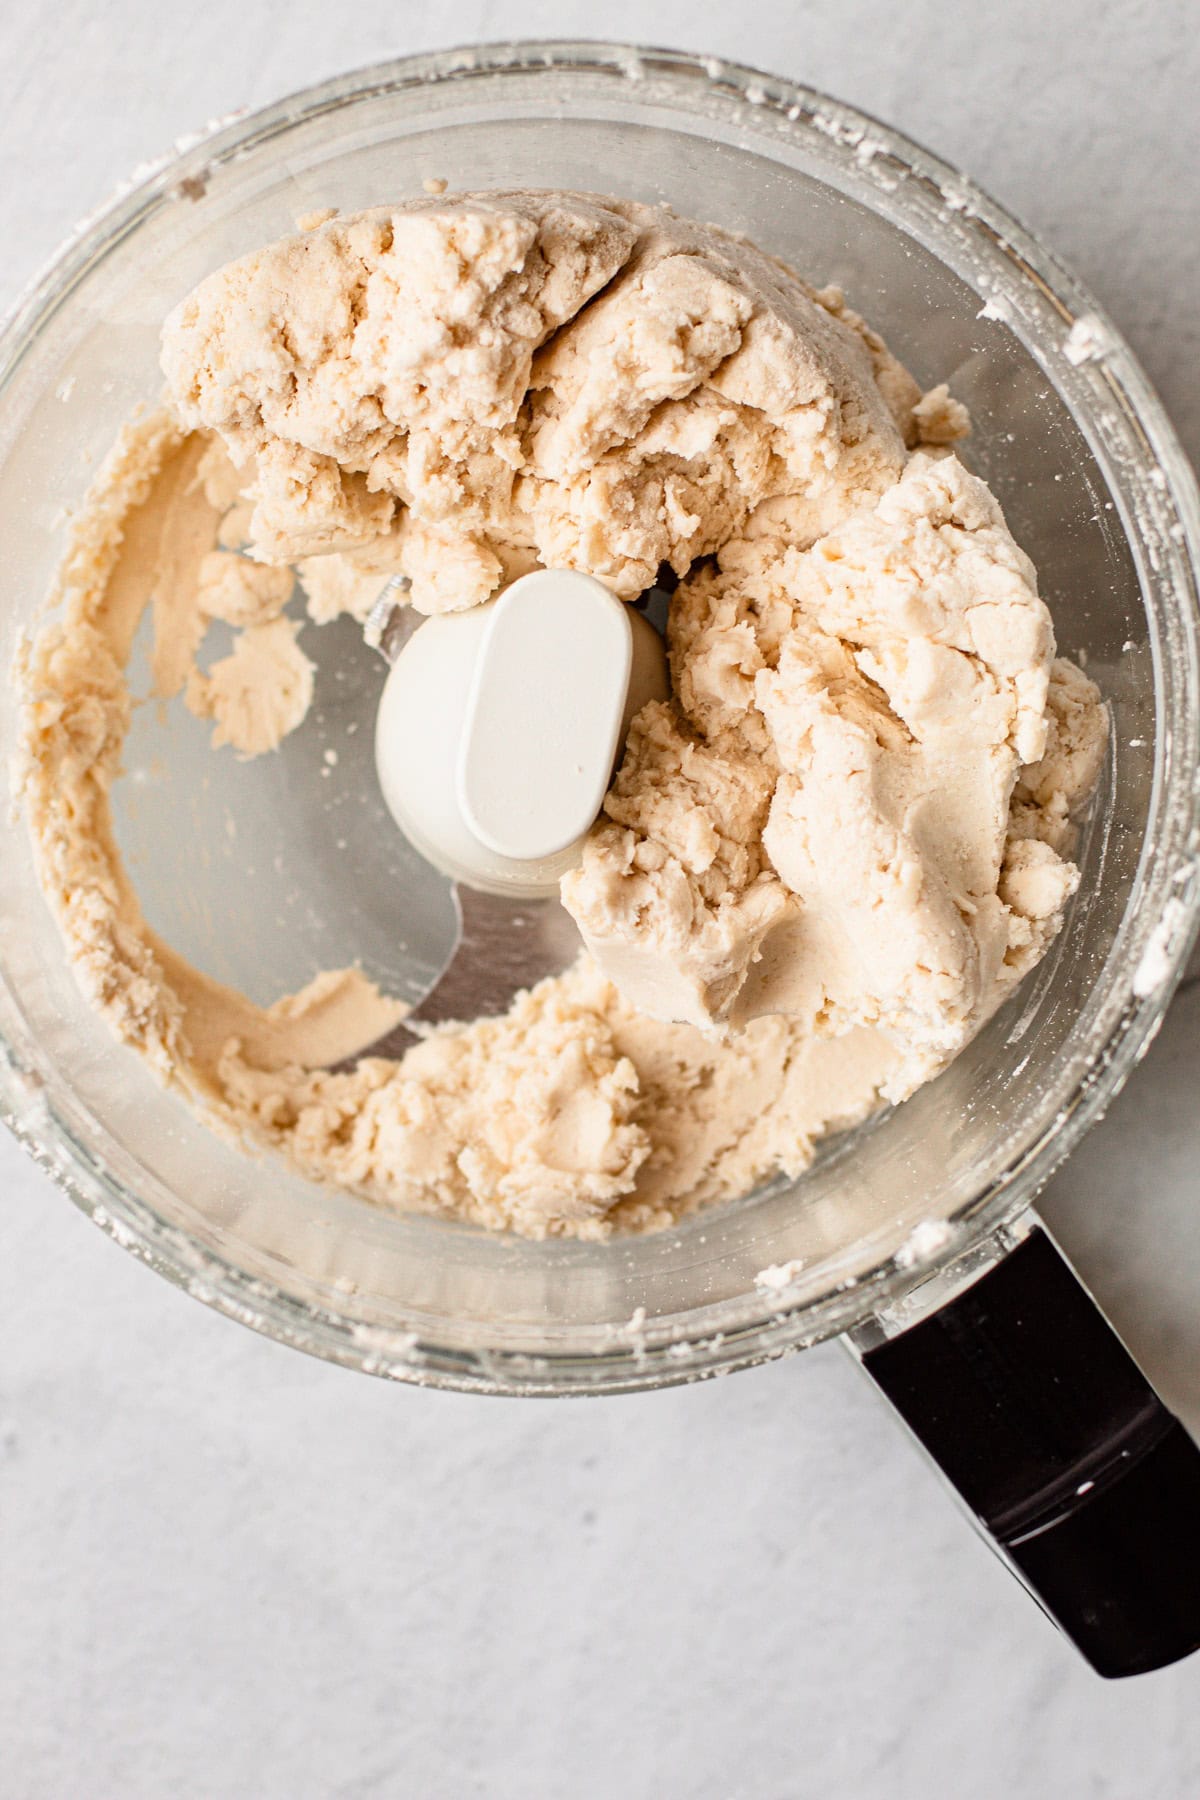
Make this dough in either the food processor or an electric stand mixer. The dough comes together by pulsing the gluten-free flour and salt, then adding the butter and cream cheese, pulsing a few more times, and slowly pouring in the vinegar-water mixture while the motor is running. Keep processing until the dough clumps together around the blade—that’s how you’ll know it’s done. Unlike traditional flaky pie dough, this one fully incorporates the butter, making it easier to handle. If your dough doesn't come together into a cohesive ball it will be difficult to roll out.
Storing Gluten Free Pie Crust
The pie crust can be rolled out right away (see more on this below). If you are storing it for later use, wrap each pie dough disk tightly in plastic wrap. Use a rolling pin to flatten the dough, filling any gaps and creating an airtight seal.
Store the wrapped dough in the refrigerator for 3-4 days or in the freezer for up to 3 months. For longer storage, wrap the dough an additional time.
How to Roll it Out
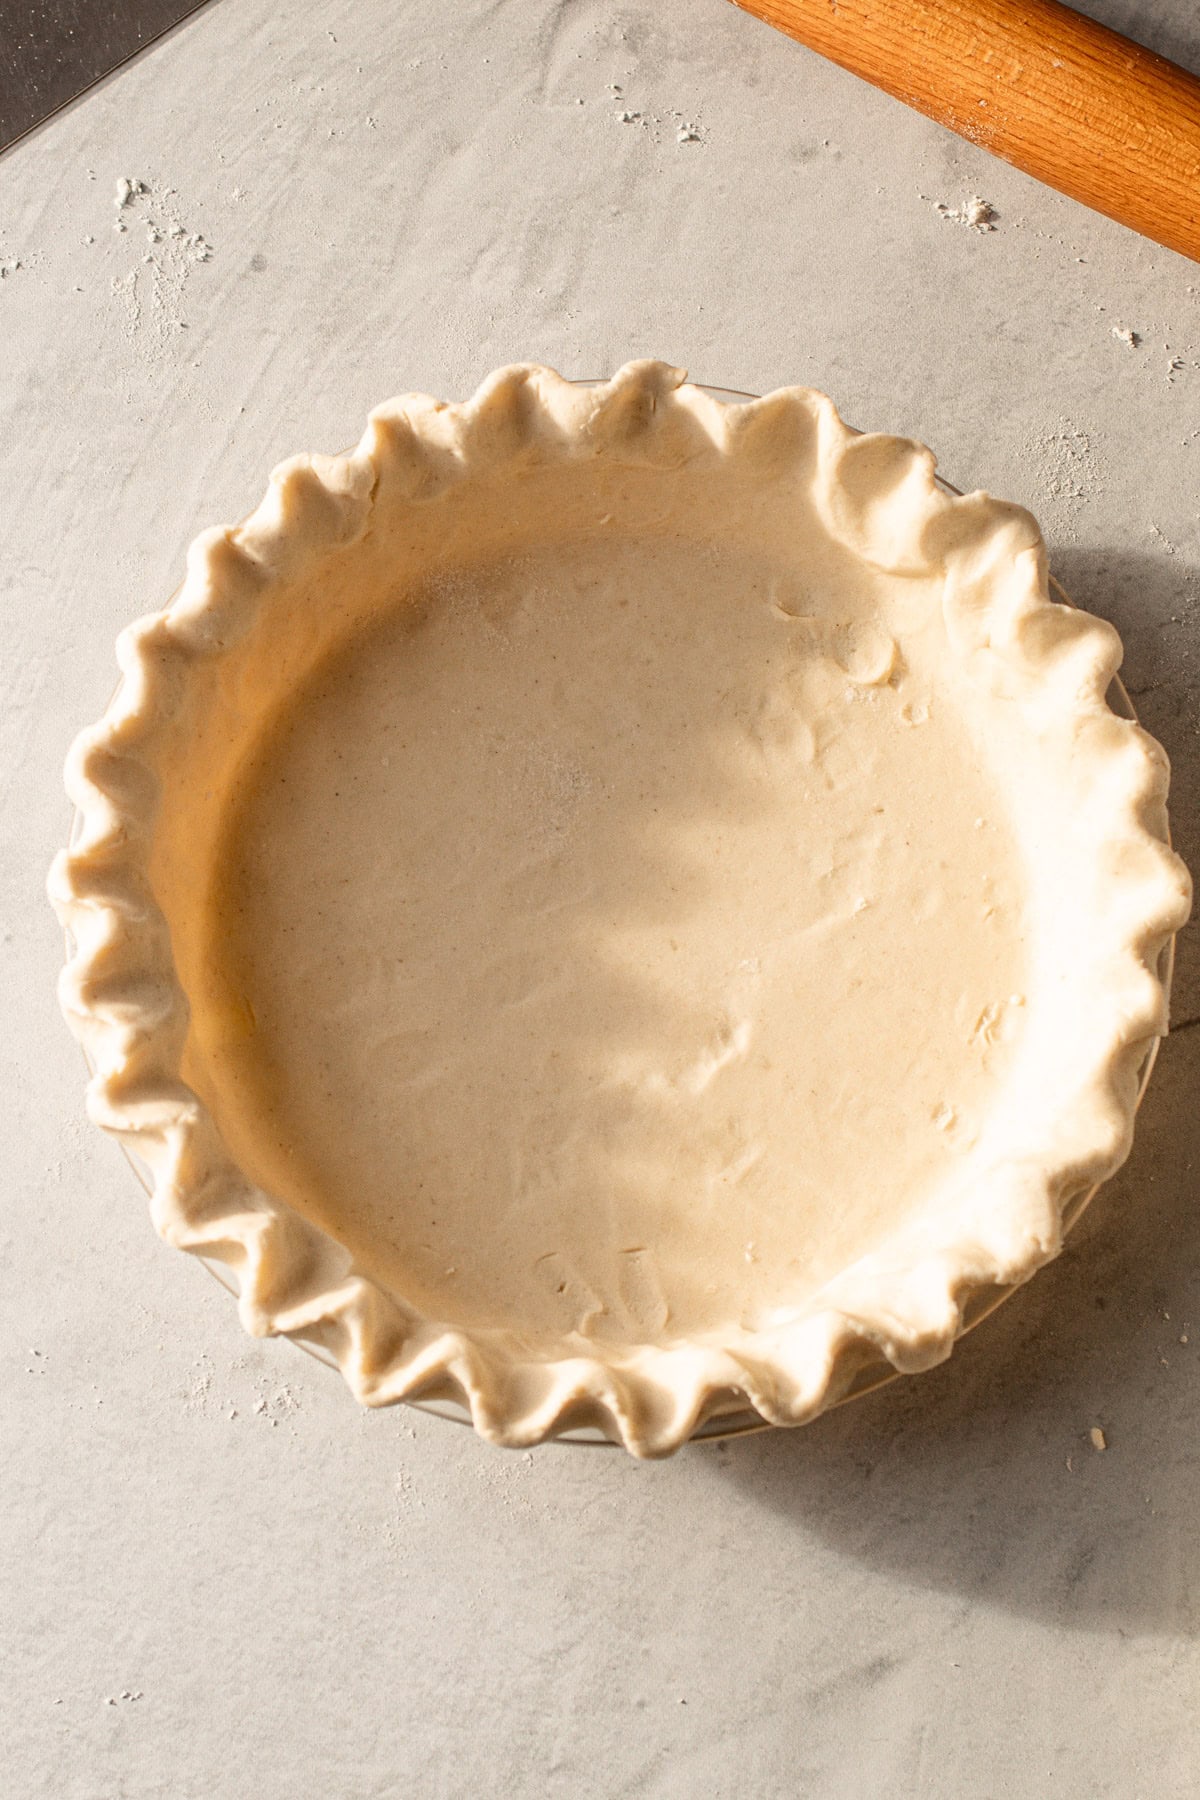
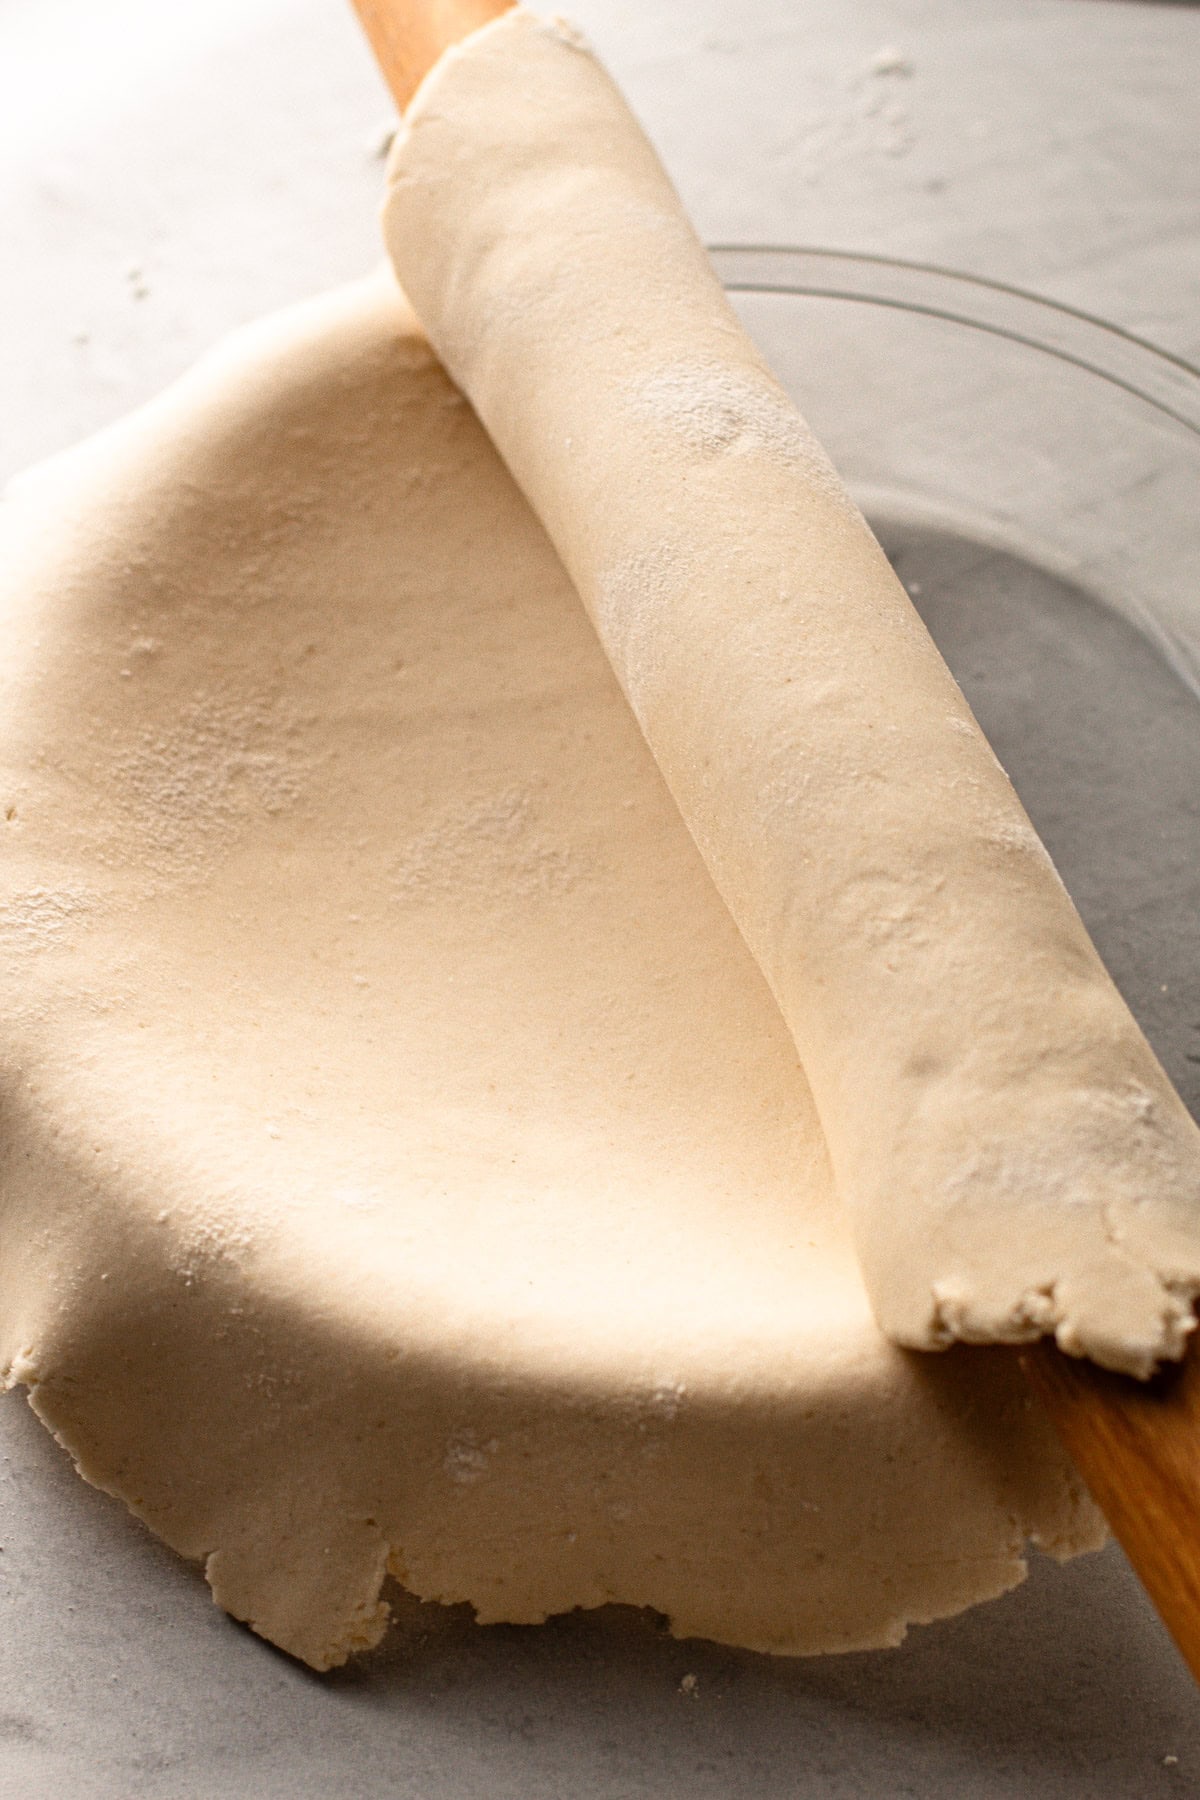
This dough is easy to roll out as long as you handle it gently. If it tears, you can simply press it back together once it’s in the dish. Generously flour your work surface and the dough, then roll it out into an 11-inch circle. If it starts sticking, use a bench scraper or spatula to lift it up and flour underneath. Roll the dough onto the rolling pin, then gently unroll it over the pie plate. Crimp the edges and patch any holes. Chill the dough until it's cold before proceeding with par-baking or filling.
If the dough has been refrigerated, let it sit at room temperature for about 10 minutes until it softens enough to leave a slight indentation when pressed. For frozen dough, either thaw it in the fridge overnight or let it sit at room temperature until it's soft enough to roll, which can take 30 minutes to an hour depending on the temperature of your kitchen. Once the dough is workable, follow the same steps for rolling and preparing as above.

Gluten-Free Pie Crust Baking Tips
Almost as important as preparing your pie crust is how you bake it.
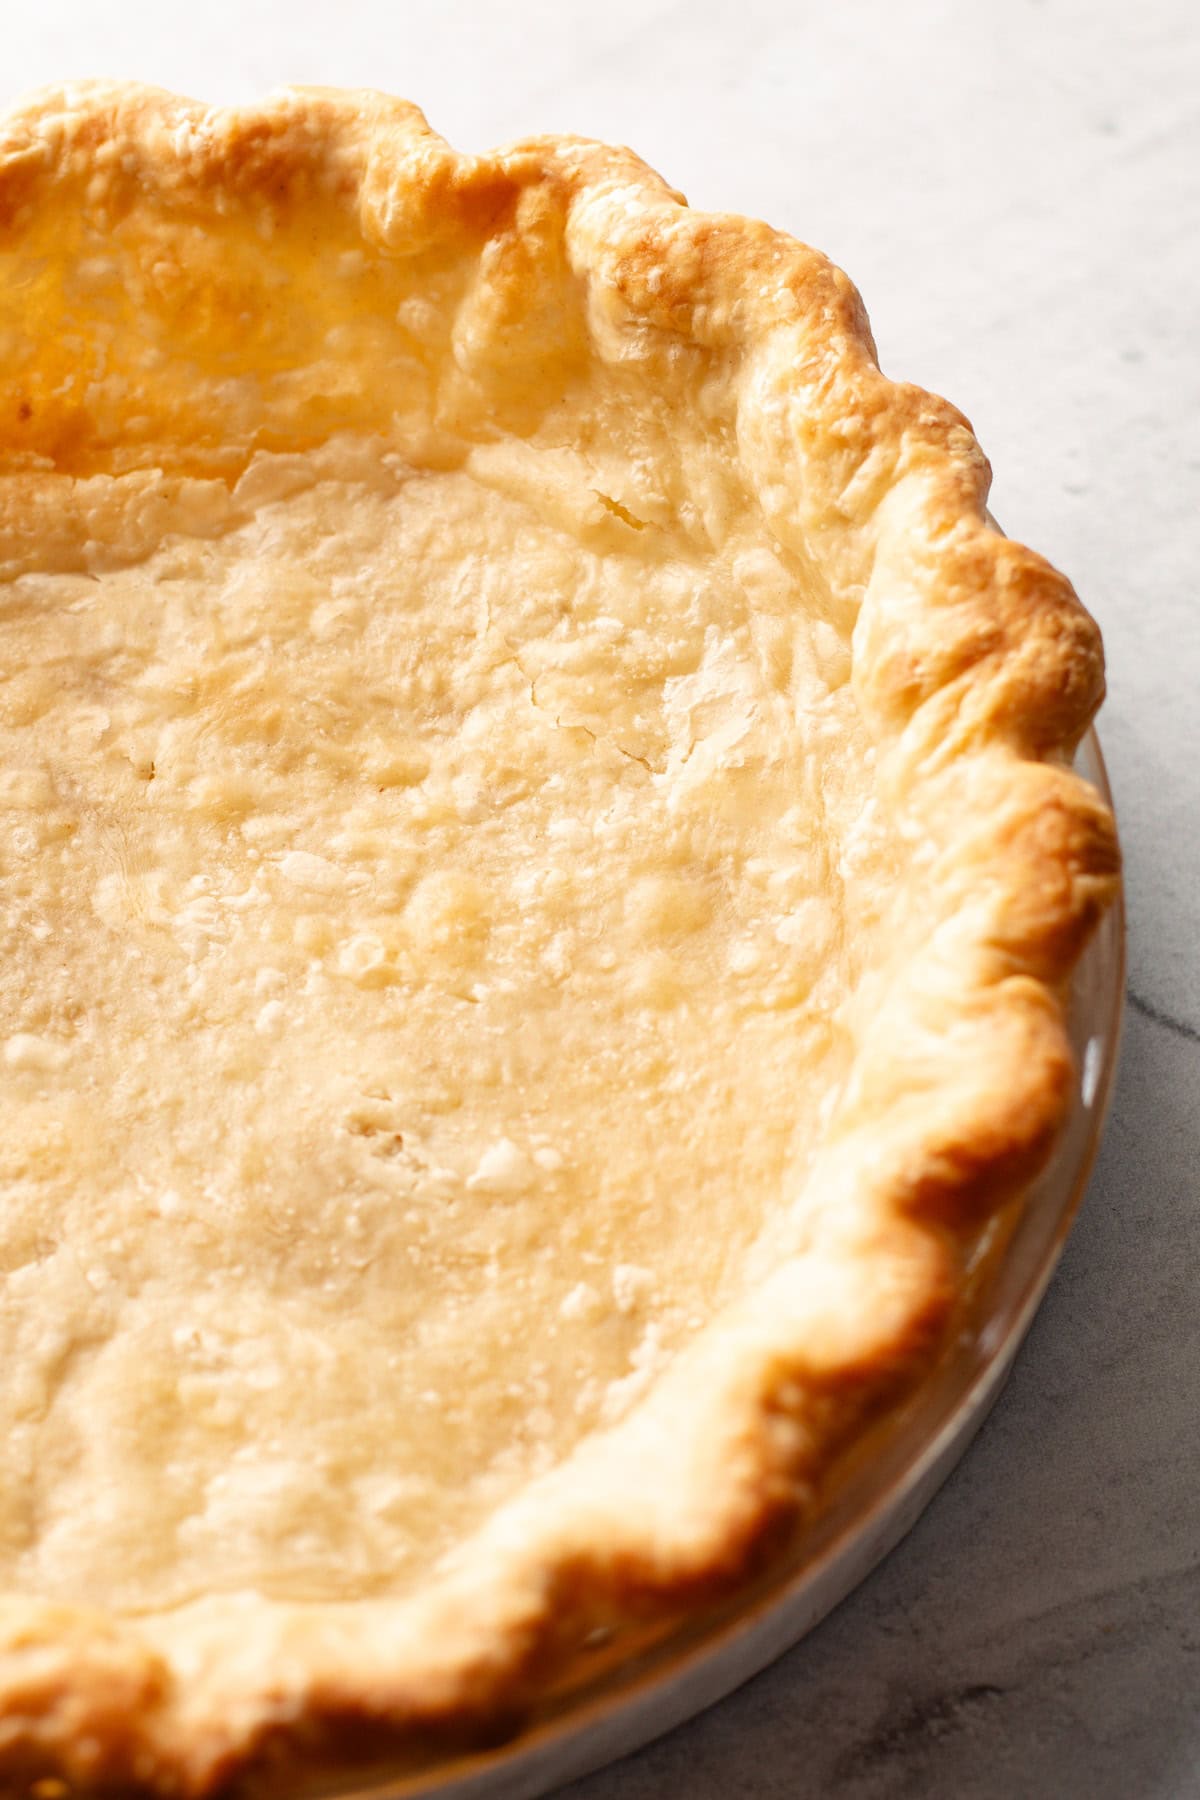
Gluten-free pie crusts can melt, lose their shape, or sink if the dough is too warm or the oven isn’t properly preheated. Always place cold dough in a preheated, hot oven. Chilling the dough before baking helps it maintain its shape.
Bake your pie crust at a temperature between 375ºF and 400ºF. Check your specific recipe for the exact temperature, but keep this range in mind.
Some pie recipes call for blind baking. Follow a Blind Baking Guide for instructions, noting that the maximum temperature for gluten-free crusts should not exceed 400ºF.
If the crust begins to brown too quickly, tent it with foil to prevent over-browning while the filling bakes.
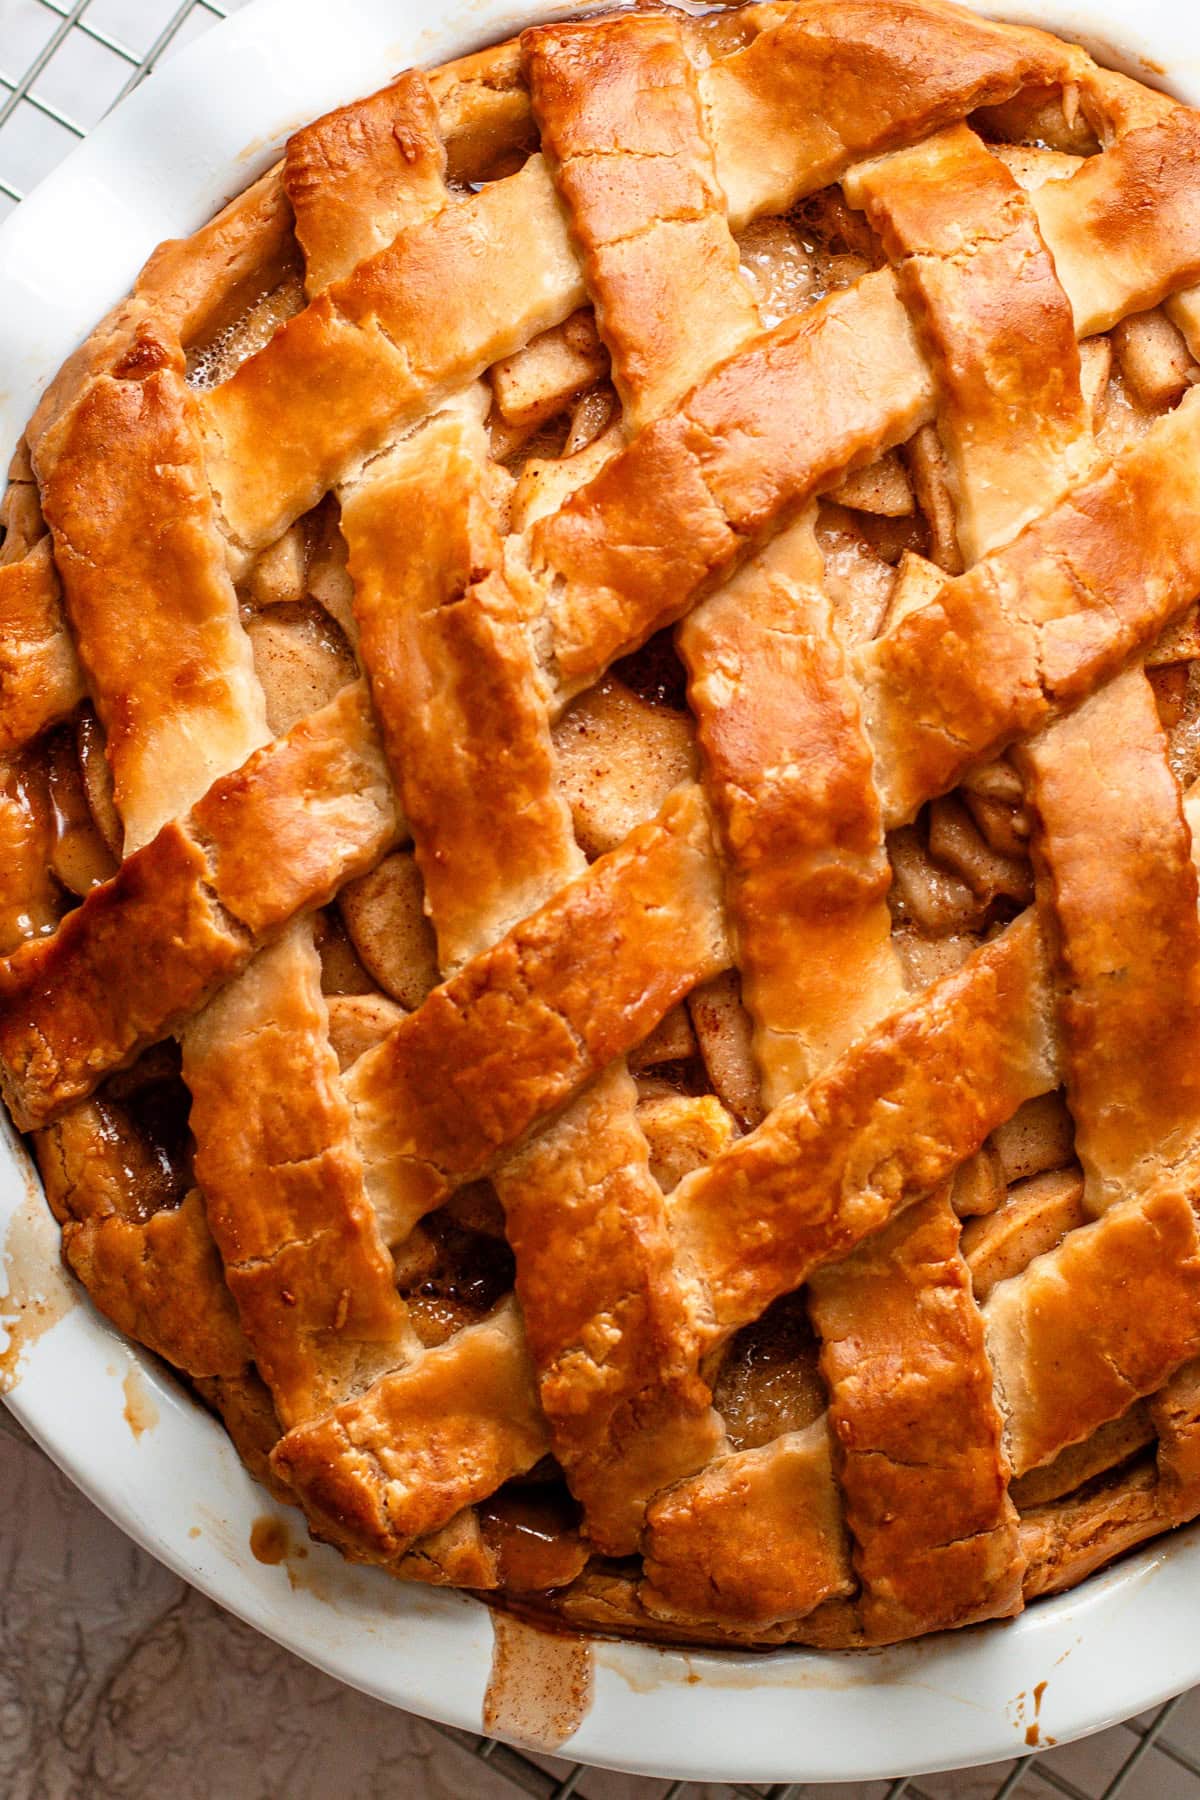
Gluten-Free Pie Filling Ideas
These recipes feature gluten-free fillings and pair perfectly with this gluten-free pie crust.
I am so honored when you make a recipe from my site! If you use tutorial on Making Pie Crust by Hand, please leave a star ⭐️⭐️⭐️⭐️⭐️ rating with your experience! If you have any questions about this recipe, feel free to comment here, and tag me on instagram!
Full Recipe
Gluten Free Pie Crust
This easy Gluten Free Pie Crust recipe, made using a 1:1 gluten-free flour blend, creates the perfect gf crust for any sweet or savory pie.
- Prep Time: 00:10
- Total Time: 10 minutes
- Yield: 2 single pie crusts (or 1 double crust)
- Category: Pie Crust
- Method: Food Processor
Ingredients
- 2-½ cups (300 grams) 1:1 gluten-free flour blend, more for work surface
- ½ teaspoon coarse kosher salt
- ½ teaspoon baking powder
- 16 tablespoons (226 grams) cold butter, cut into ¼-inch pieces
- 4 tablespoons (55 grams) cream cheese, cubed
- 1 tablespoon (15 grams) apple cider vinegar
- ⅓ cup (75 grams) ice water
Instructions
- Add the gluten-free flour blend, salt and baking powder to the bowl of a food processor and pulse to combine.
- Add in the butter and cream cheese and pulse 7 times.
- Add the vinegar to the water. With the motor running, pour the water mixture into the flour. Continue to process the dough until it forms together into a ball around the blade.
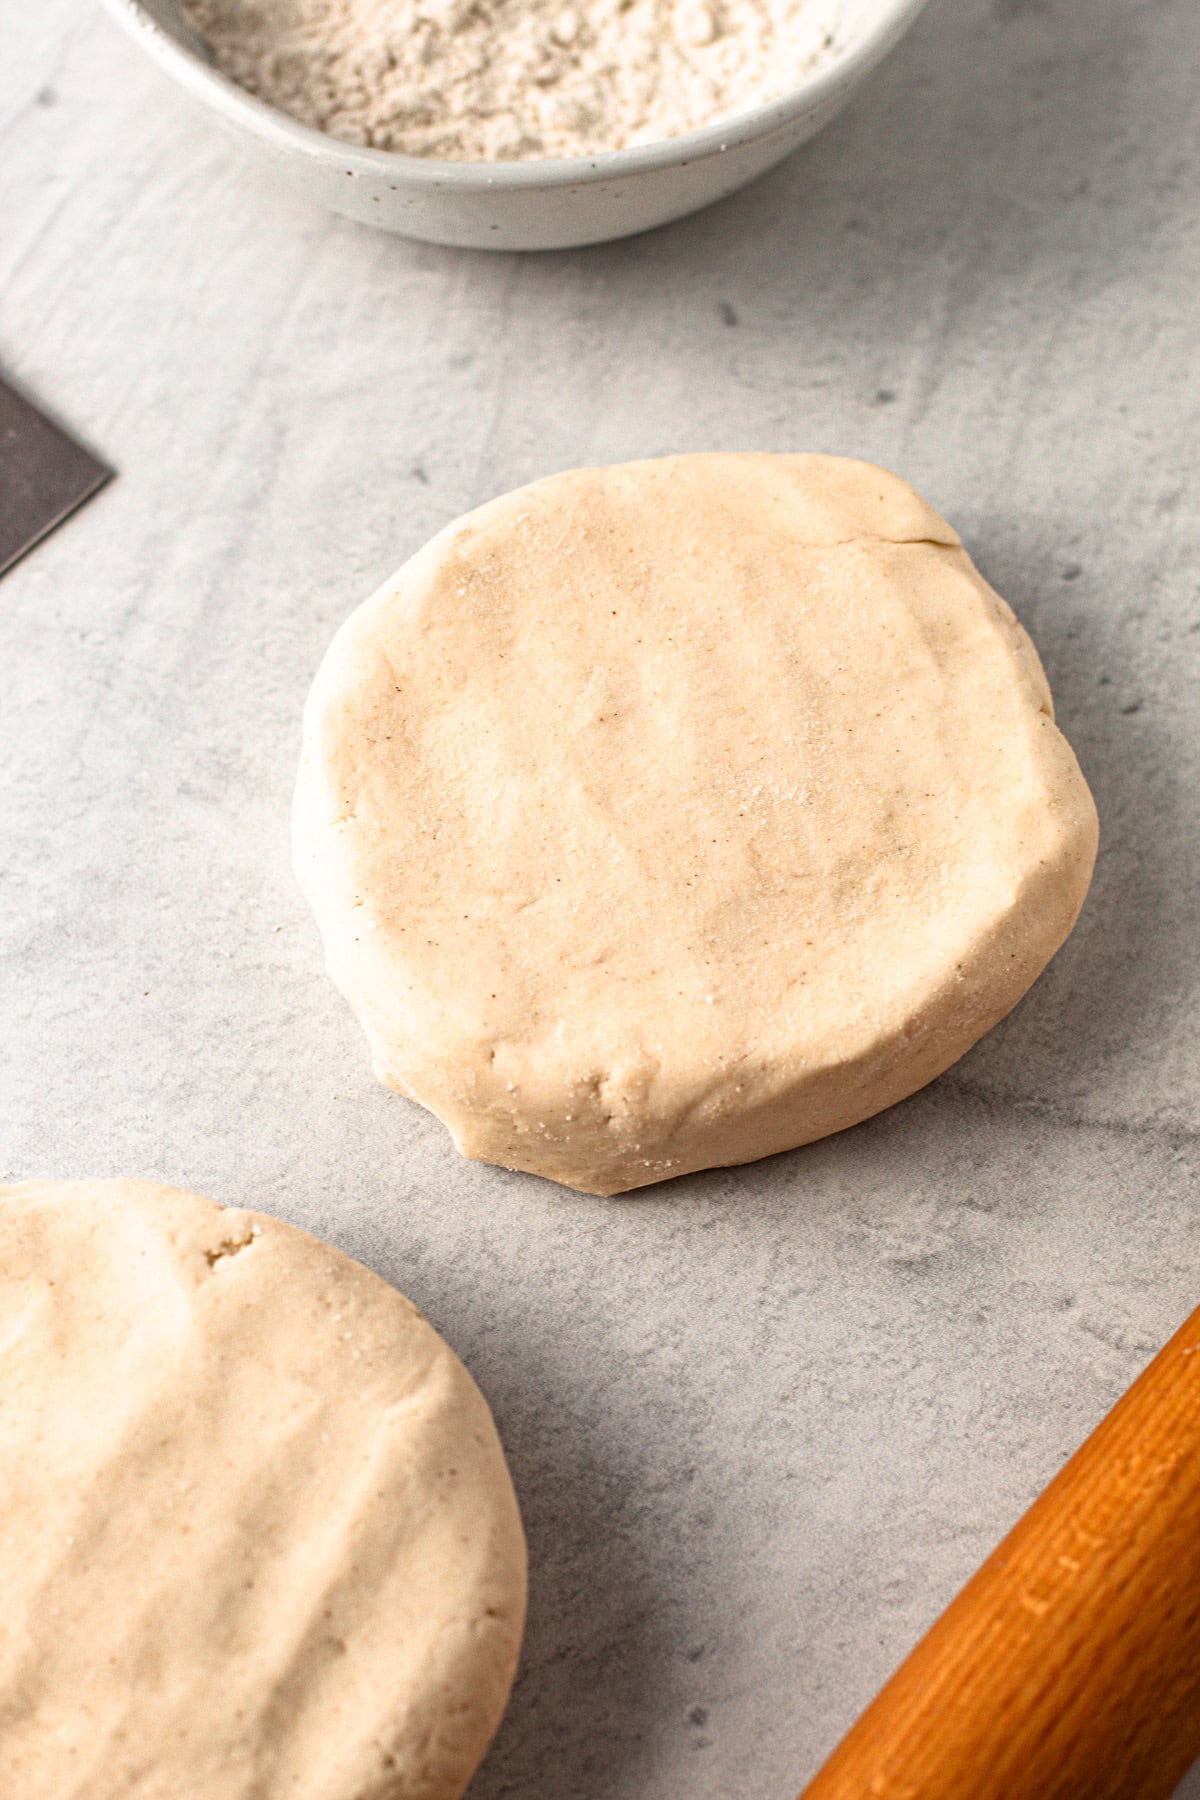
- Remove the dough from the processor and divide it into two equal portions.
- At this point, you can roll out the dough immediately on a well floured surface, or you can store the dough in plastic wrap for up to 3 days in the refrigerator (or 3 months in the freezer).
Equipment
 Buy Now →
 Notes
This recipe was tested using Diamond Crystal coarse kosher salt. If you use Morton's kosher salt or fine salt, decrease the volume by half.
This has been successfully tested with King Arthur Flour Measure for Measure Gluten-Free Flour and Bob's Red Mill 1-1 Gluten-Free Baking Flour.
To make this in a stand mixer: blend the dry ingredients first, then paddle in the cream cheese and butter until it's not longer visible (but still crumbly). Then gradually add in the liquid until it comes together around the paddle.
Dough can be stored in the refrigerator for about 3 days, or in the freezer for up to 3 months. Defrost in the refrigerator overnight, or let sit at room temperature for about an hour, though being careful not to let it get too soft.
Originally published in 2019, this recipe has been regularly re-tested and updated to ensure it remains perfect.
Some of the links on this page may be affiliate links. Everyday Pie is a participant in the Amazon Associates Program. As an Amazon Associate I earn from qualifying purchases, at no extra cost to you.
Kristi Meyers
How long do you bake it and at what temperature when a recipe calls for a baked pie crust?
Lisa
Oops! Ignore my comment. Just realized this is for two crusts.
Sophia
This is by far THE BEST gluten free pie crust I have ever made. I have made this sooo many times now for a lot of different pies and it always turns out great. People can’t believe it’s gluten free and neither can I.
Having made it so many times I have noticed that some gluten free flour blends require you to add more flour. Keeping it longer in the fridge and then letting it soften in room temperature before you bake with it makes it easier to manage without it breaking when you move it into the pie dish.
For sweet pies just mix in some sugar.
Thank you so, so much for this lovely recipe! ❤️
Kelli Avila
Hi Sophia, I'm so glad you've found this recipe useful! And thanks for sharing your experience and feedback. Kindly, Kelli
May Reid
Just made this crust with Bob’s 1:1 flour. Followed directions as written. Crust browned nicely and had a very nice texture. Not gritty. Made butter tarts that were delicious! Crust does need very careful handling but is fabulous compared to other gf crust recipes I’ve tried. Highly recommend!
mary Zink
The gluten-free pie crust turned out perfect for my pumpkin pie. I blind baked it for about 35 minutes and it turned out great!
Karen K
This is the best gf pastry recipe I have found and I have been baking gf for close to 20 years. Unfortunately my daughter now needs to be dairy free as well. Has anyone substituted something for the butter. I'm not usre if I should use lard, shortening or dairy free butter. Any ideas?
Penny O
Great crust! It was 100% my fault I didn't use parchment so the edges stuck to the pan. I think the cream cheese also helps the crust to stick together. I had to press most of it in.
Kristine
The best gluten free pie crust recipe! And I have tried a lot of gluten free pie crust recipes.
Sophia
Unfortunately I don't own a food processer or a stand mixer, do you think it would be possible to make this by hand instead?
Kelli Avila
Hi! Yes, I do. Work the butter into the gf really well, and then add in the liquid ingredients. You can slightly knead the dough until it comes together to be uniform.
tegan
Can you make this without the cream cheese? what is the purpose of cream cheese?
Need this to be dairy free, will be using dairy free butter.
Thank you!
Kelli Avila
Hi Tegan. The cream cheese adds flavor and moisture. You can try to substitute it with equal parts dairy-free butter, but I haven't tested it myself and it will likely be slightly different.
tegan
I made it with a vegan cream cheese and it came out perfectly delicious, once of the best savory pie crust I have ever had. My husband and son also loved it!!
Kelli Avila
Tegan, thanks for sharing the substitutes that worked for you! That's so help. And really glad you and your family enjoyed it 🙂 -Kelli
Gwyn Dixon
Good morning, I am quite new to GF cooking and am really enjoying experimenting with various challenges. Ive started my annual christmas baking and am looking for an alternative sweet biscuit pastry for my fruit mince pies. Could I add some sugar to your recipe? Have to say, it is the friendliest recipe Ive read so far. Feeling much more condifent about giving it a go. Looking forward to your response,
Regards, Gwyn.
Kelli Avila
Hi Gwyn! Welcome to my site. This is a great recipe to start with if you are new to gluten-free baking. You can absolutely add sugar to this. I'd recommend adding in 1/4 cup powdered sugar to make this more of a sweet dough. I wouldn't recommend granulated sugar here, as the granules of sugar will make the dough trickier to work with. Good luck!
Angela
Mine ended up way to wet. I measured everything properly. Very strange.
Kelli Avila
How did you measure your flour, and what flour brand did you use? Once you let it rest, did it end up coming together? Would love to help you figure this out!
Sophia
So did mine. I’m not sure why but maybe it was the flour blend I used. I also used regular water and not ice water. I tried putting it in the fridge for 15 min but it didn’t set much.
I ended up adding more flour and reduced the amount of water for the next batch and it tasted amazing. 🙌
Stephanie
This recipe is my go-to recipe for gluten free pie crust! I've tried other people's recipes, but they just don't stand up to this one. It's flaky and tasty! Often times my family members who are not gluten free can't tell the difference and my family members who are gluten free are always thankful there's a desert they can eat!
Kelli Avila
Thanks for stopping by and sharing, Stephanie! I'm so happy you enjoyed it!
Lisa
Does it require a whole cup of butter because of the gluten free flour? Typically a crust requires 1/2 c butter to 1-1/4 cup of flour.
Allison Marie Mitchell
What's the purpose of the vinegar?
Kelli Avila
Flavor! You won't taste it necessarily, it just gives the dough a more nuanced flavor to it.
Niko Marshall
Can ghee be substituted for butter as long as it is chilled?
Kelli Avila
Hi Niko, I haven't tried! Butter has milk solids in it as you know, and adding in a fat such as ghee without it might affect the pie dough. I'd suggest adding in a bit less by about 2 tablespoons than the recipe is called for to start. You can use a bit more water if needed to get the pie dough to come together. Let me know how it goes!
Irene
So helpful, thank you!