

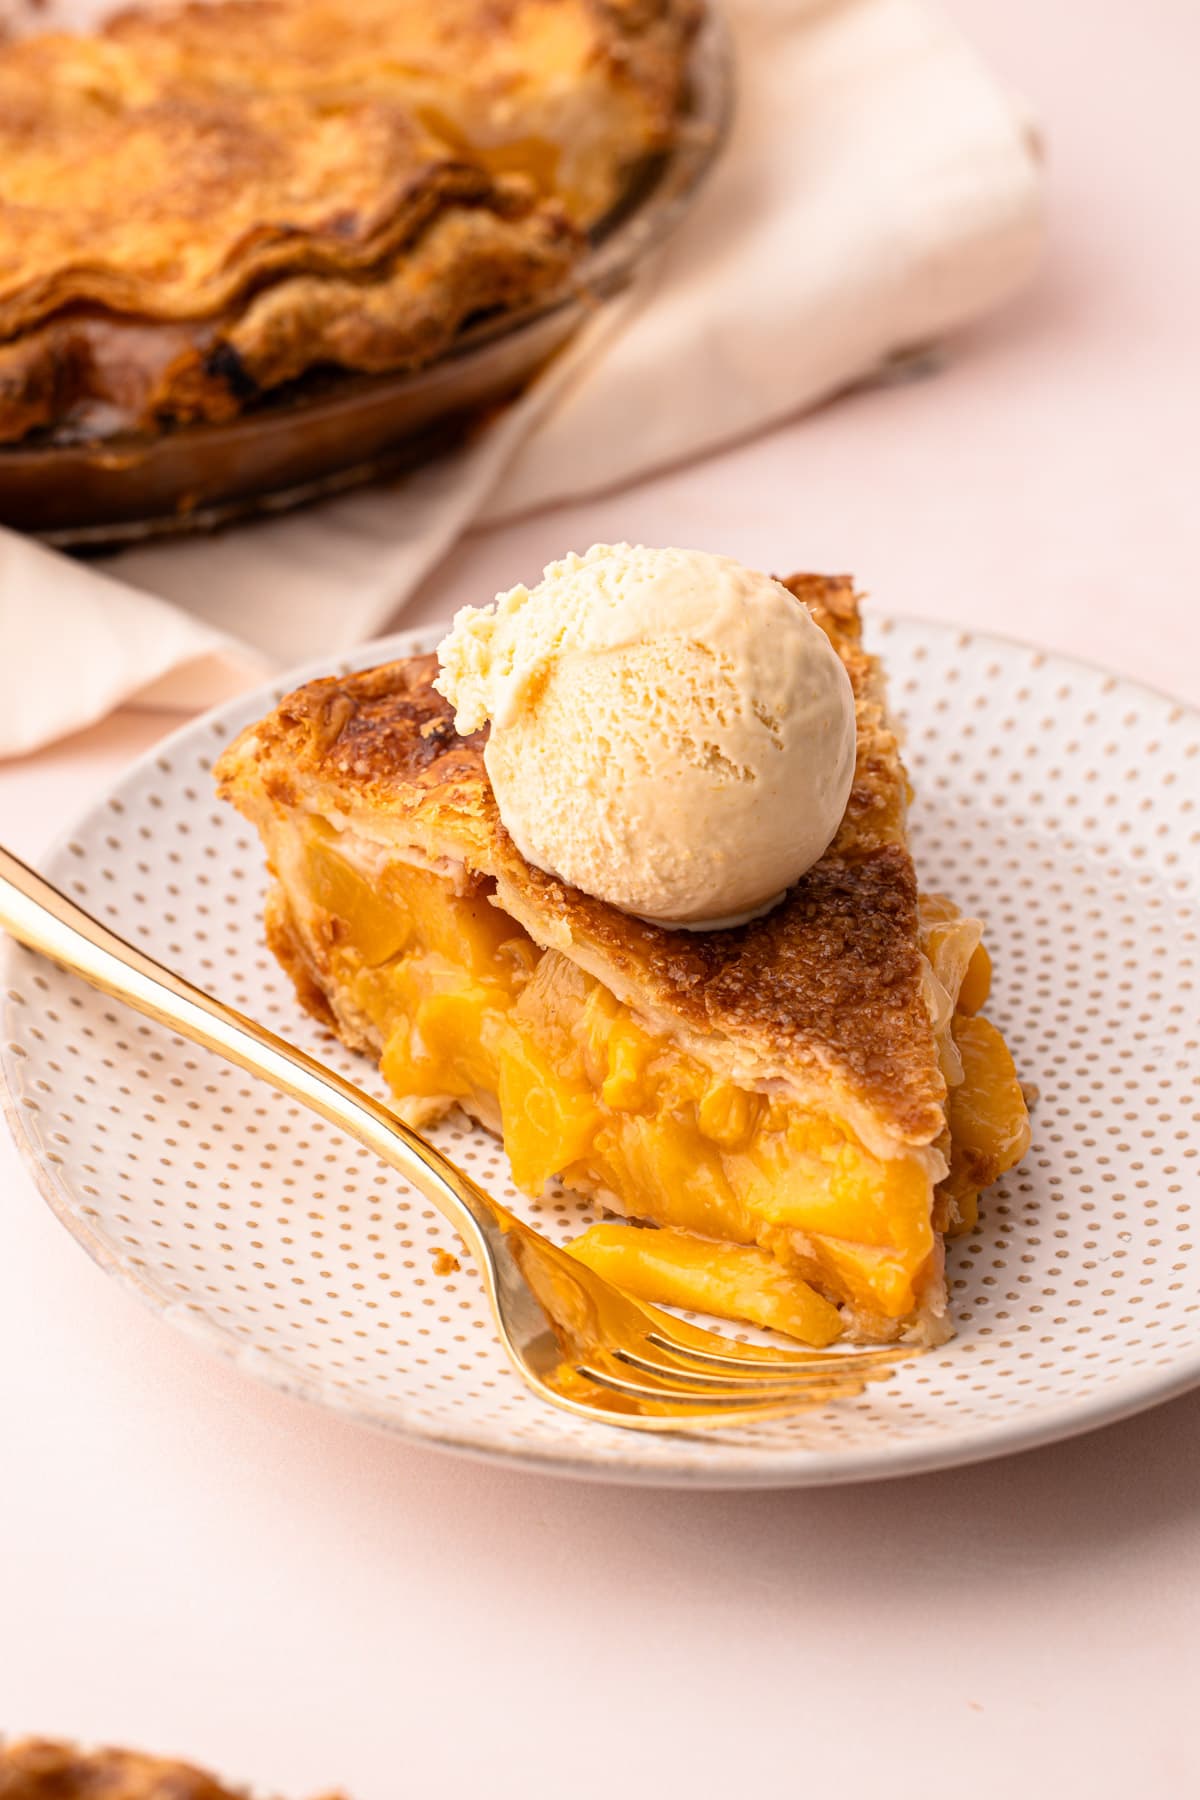
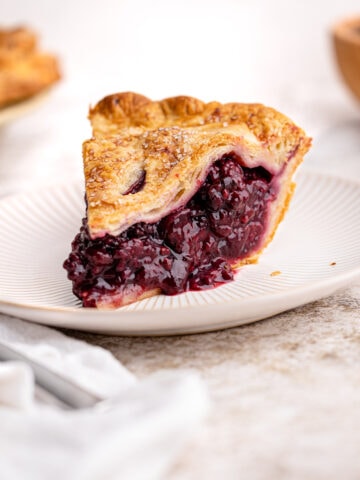
This classic peach pie recipe features ripe, fresh peaches tucked and baked inside a flaky, buttery double pie crust. The filling ingredients are minimal, adding only what is needed so those bright, juicy peaches can shine!
Want to save this recipe?
Enter your email & I'll send it to your inbox. Plus, get weekly updates from me!
Peach season is upon us, and if we're lucky, we may find ourselves with plenty of these beautiful stone fruit to turn into a perfect peach pie.
Peaches have a delicate flavor that can easily be overshadowed when baked with other ingredients, so I paid special attention to making sure this pie really emphasizes the peaches, with very little interference from other flavors. Similar to my peach pie filling recipe, this pie features a hint of almond extract to enhance the peach flavor and a pinch of nutmeg to add a touch of nuanced warmth. It's all baked inside a classic, flaky pie crust that is crisp and buttery.
All in all, this recipe is perfect: It's sweet, crisp, and sure to impress anyone who gets a slice. And I'll just throw it out there: serve this with peach ice cream for the absolute best peach pie slice ever.
So, let's get to making it, shall we? The text below offers tons of tips and helpful notes, or you can scroll to the bottom to grab the recipe and get started!
Jump to:

Ingredients Needed
Here is an overview of the ingredients needed for this recipe. The full recipe is listed below in greater detail.
Here is a list of the ingredients needed for this recipe. The full recipe is listed below in greater detail.
- fresh, ripe peaches (see more on this in the "It's All About the Peach" section, below)
- fresh lemon juice
- cornstarch
- granulated sugar
- fresh nutmeg (just a pinch)
- salt
- vanilla and almond extracts
- butter pie crust (there is a full recipe dedicated to this, but everything you need to make it is listed below in the recipe)
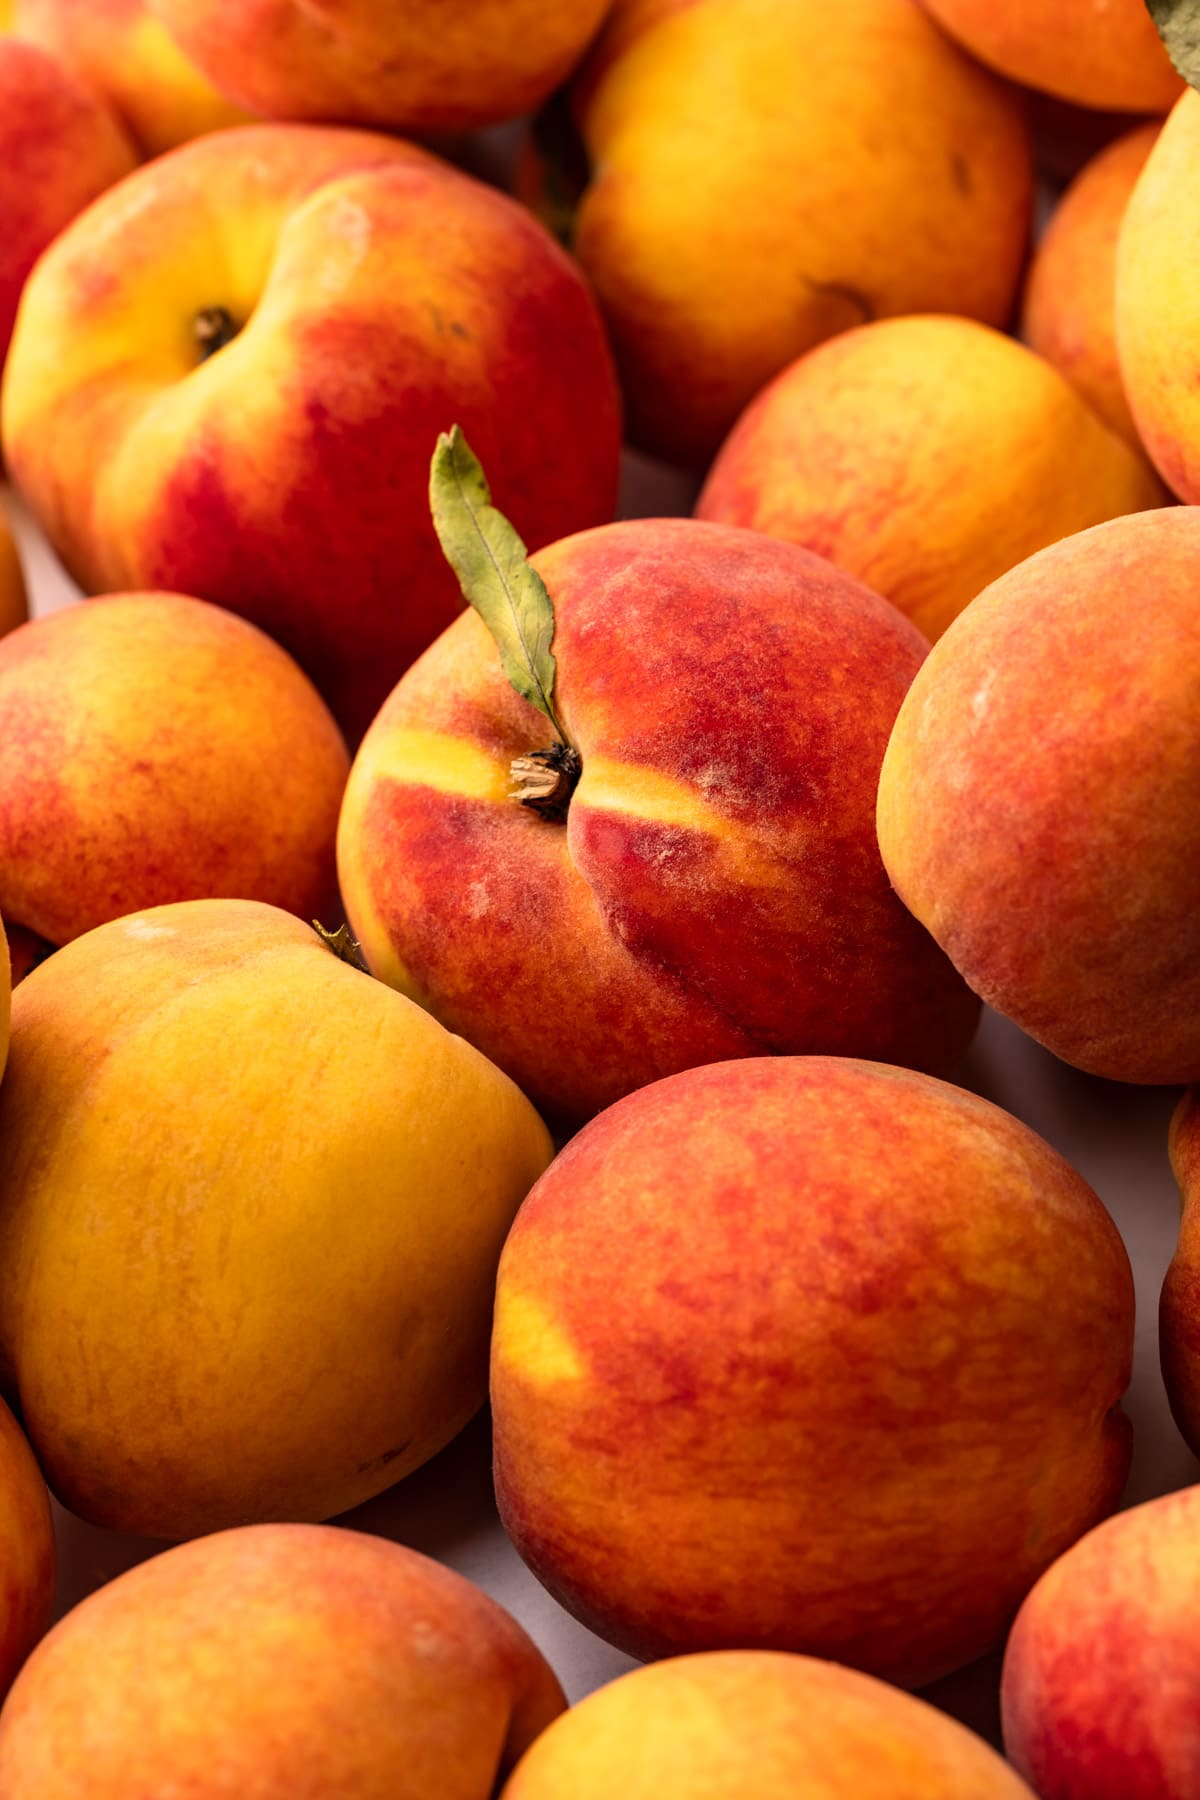
Peaches! Peaches! Peaches!
Before we go into how to make this Peach Pie, it must be said that the quality of the peaches you put into your pie will directly result in how good your pie is. If you use unripe, flavorless peaches, those features won't magically change when you turn them into a pie. Peaches have such a nuanced flavor that no amount of baking or sugar can change a flavorless peach. So be sure to choose the best quality peaches that you can, and ensure they are just ripe. Taste one to make sure it tastes like peach.
To Peel or Not to Peel
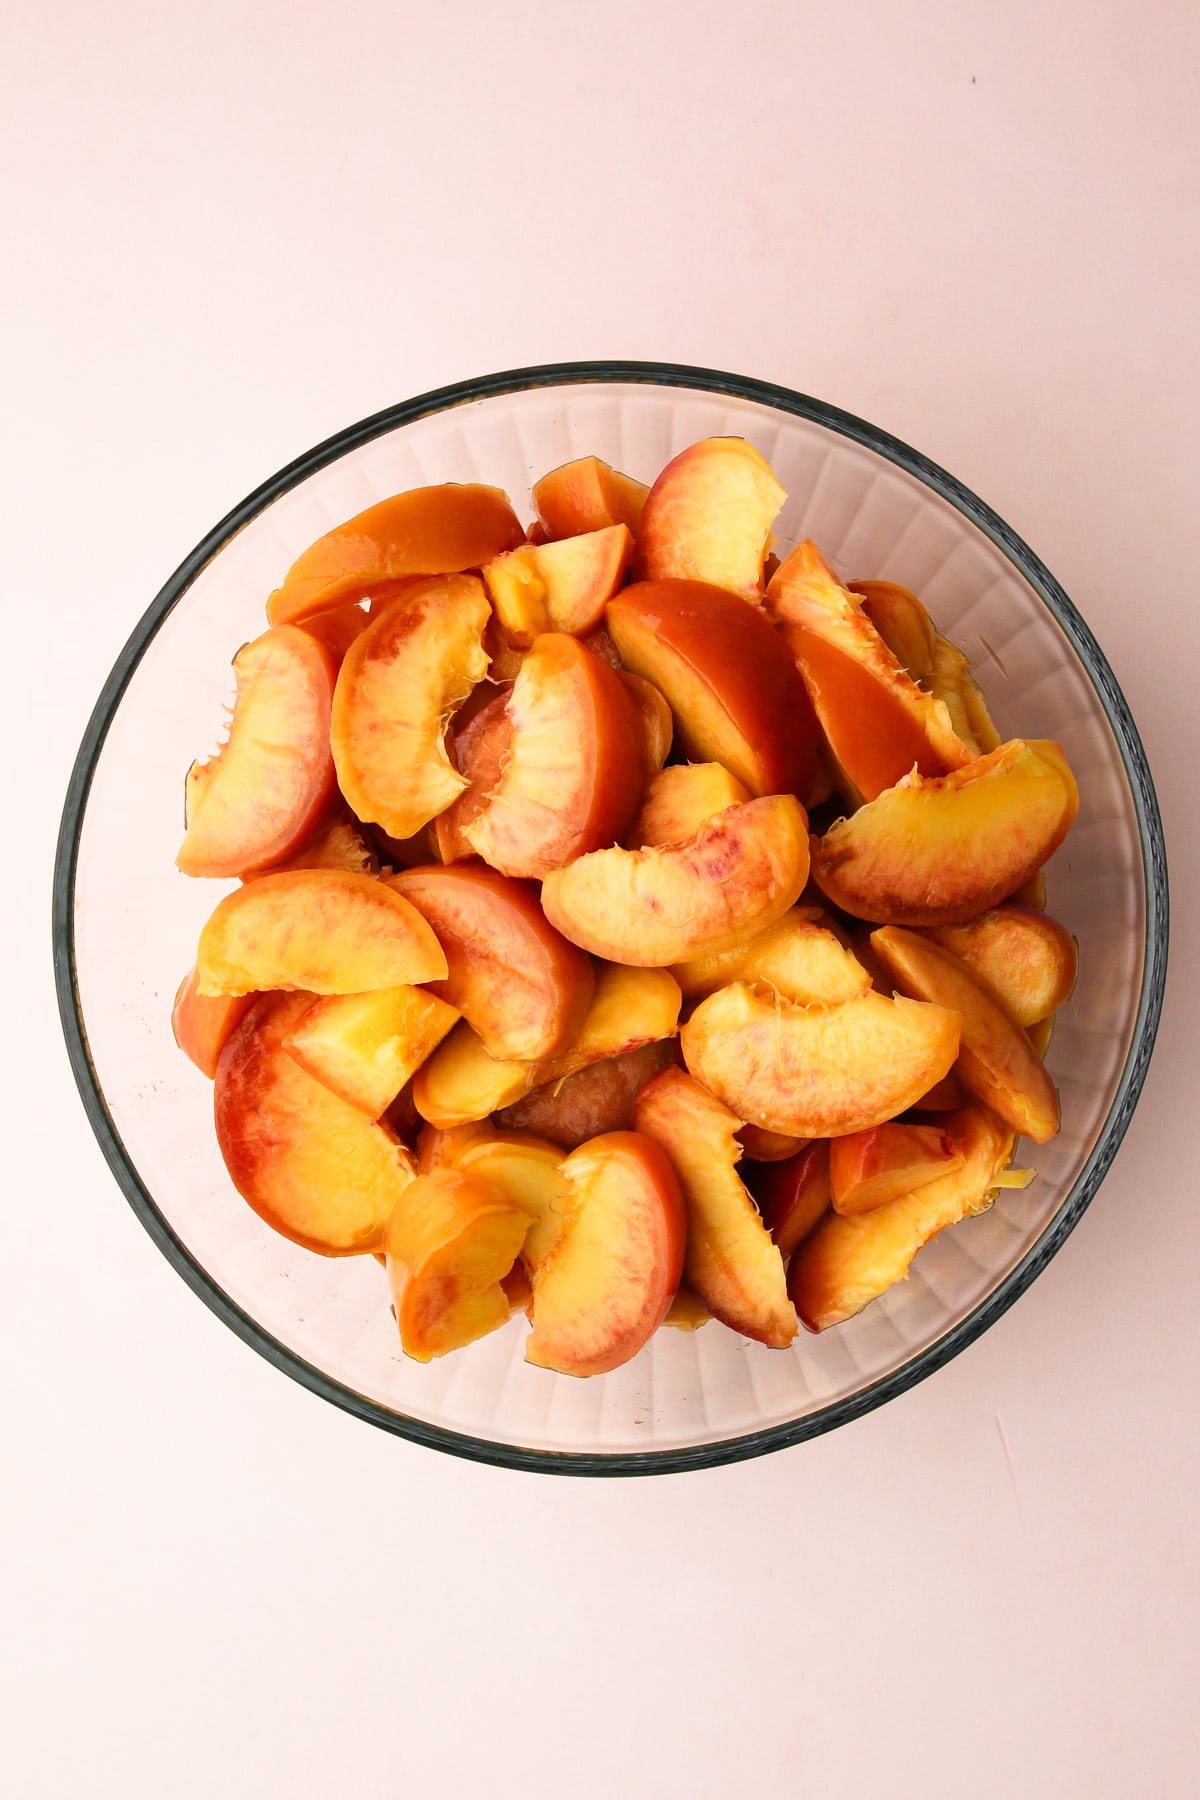
Ultimately, whether or not to peel your peaches is a matter of personal preference. The skin of a peach contains nutritional value, including fiber, vitamins, and minerals. It's pretty soft and easy to chew, however that textural component may not align with your desired goal, depending on the dish you plan to make. I prefer to peel the peaches for pie, or at least peel most of them. Sometimes I leave on some peels to impart some color in the filling.
If this is new to you, I wrote an entire guide to peeling peaches (and one about freezing surplus peaches). You can check that out for full step-by-step instructions.

Different Shades of Peach
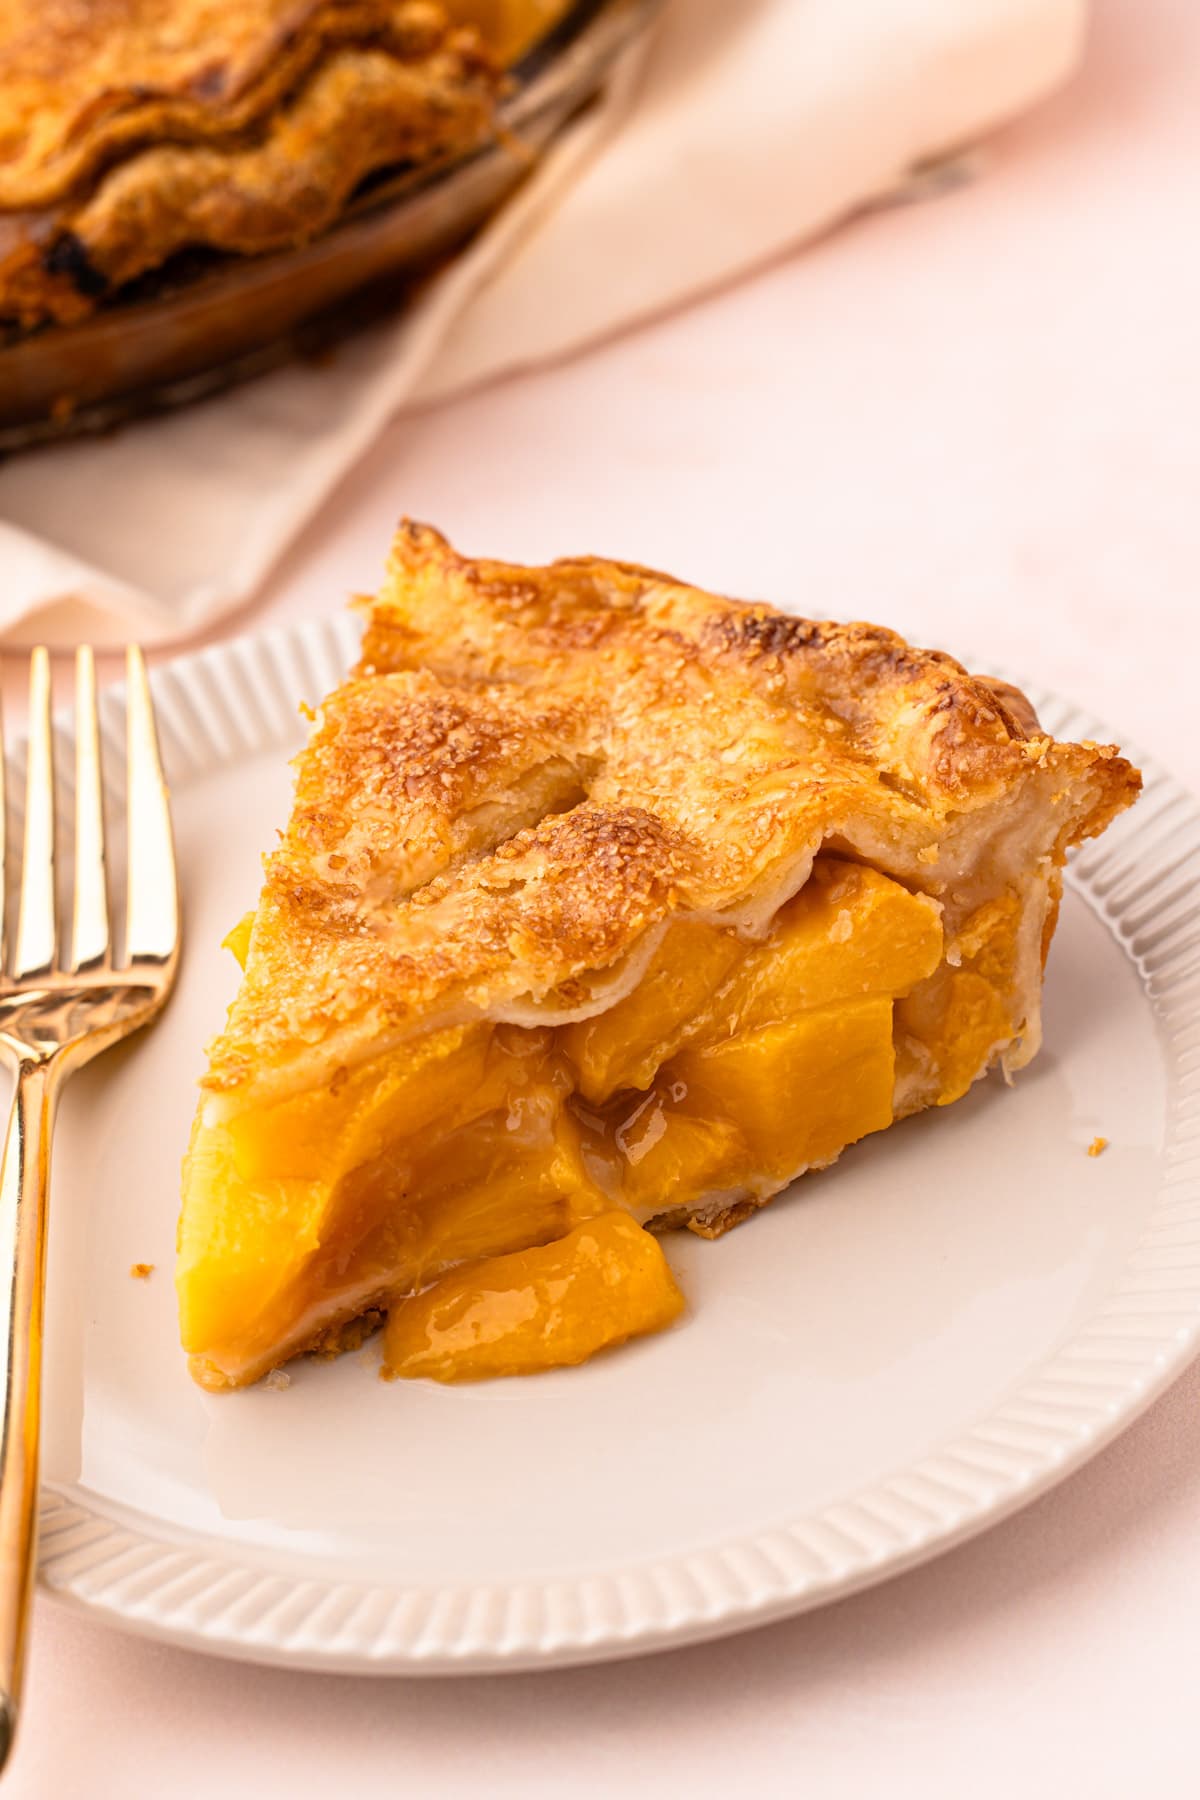
The color of your pie filling can vary due to the color and ripeness of your peaches.
During testing, I had some pies that were much more red and pink (aka peachy) and some that were much more on the yellow and green spectrum. Neither is wrong! Different varieties of peaches have different amounts of yellow or red pigment in their flesh and skins. You can even see the variation in colors in my photos, which were taken during various stages of the recipe testing process.
I found that during the early part of the season, I was getting more yellow peaches and, towards the end, more red.
The Most Frequently Asked Question: Straining the Juice
One of the most frequent questions I get when it comes to fruit pies is: should I strain the juice before baking so my crust doesn't get soggy?
I know this is likely to be a hot topic here, too, as peaches can be very juicy, and I have a few things to say on the matter. The short of it is: no. That peach liquid contains tons of flavor, and I don't see any reason why that flavor shouldn't be in the pie.
The most important technique to avoid a soggy crust has nothing to do with the amount of liquid and everything to do with baking the pie well. This means putting a cold pie crust in a very hot oven, and baking it for long enough for the thickener to become activated. For more on this, check out the section below and this guide to Baking a Double Crust Fruit Pie. The directions you'll need for this pie are also listed in the recipe card below.
The second way to avoid a soggy crust to not use overripe fruit. Use fruit that is just ripe. Overripe stone fruit is excessively juicy and turns too soft in the oven after a long bake.
Pie Crust Options
Whatever pie crust you use, you'll need a top and a bottom crust since this is a double-crust peach pie. There are lots of options, but here are my recommendations:
How to Make It
As with most pies, there are a few steps you need to complete to get to the finished product. Many of these components can be broken down into steps and in advance (see the guidance on this in the recipe card notes section).
Here is a visual overview:
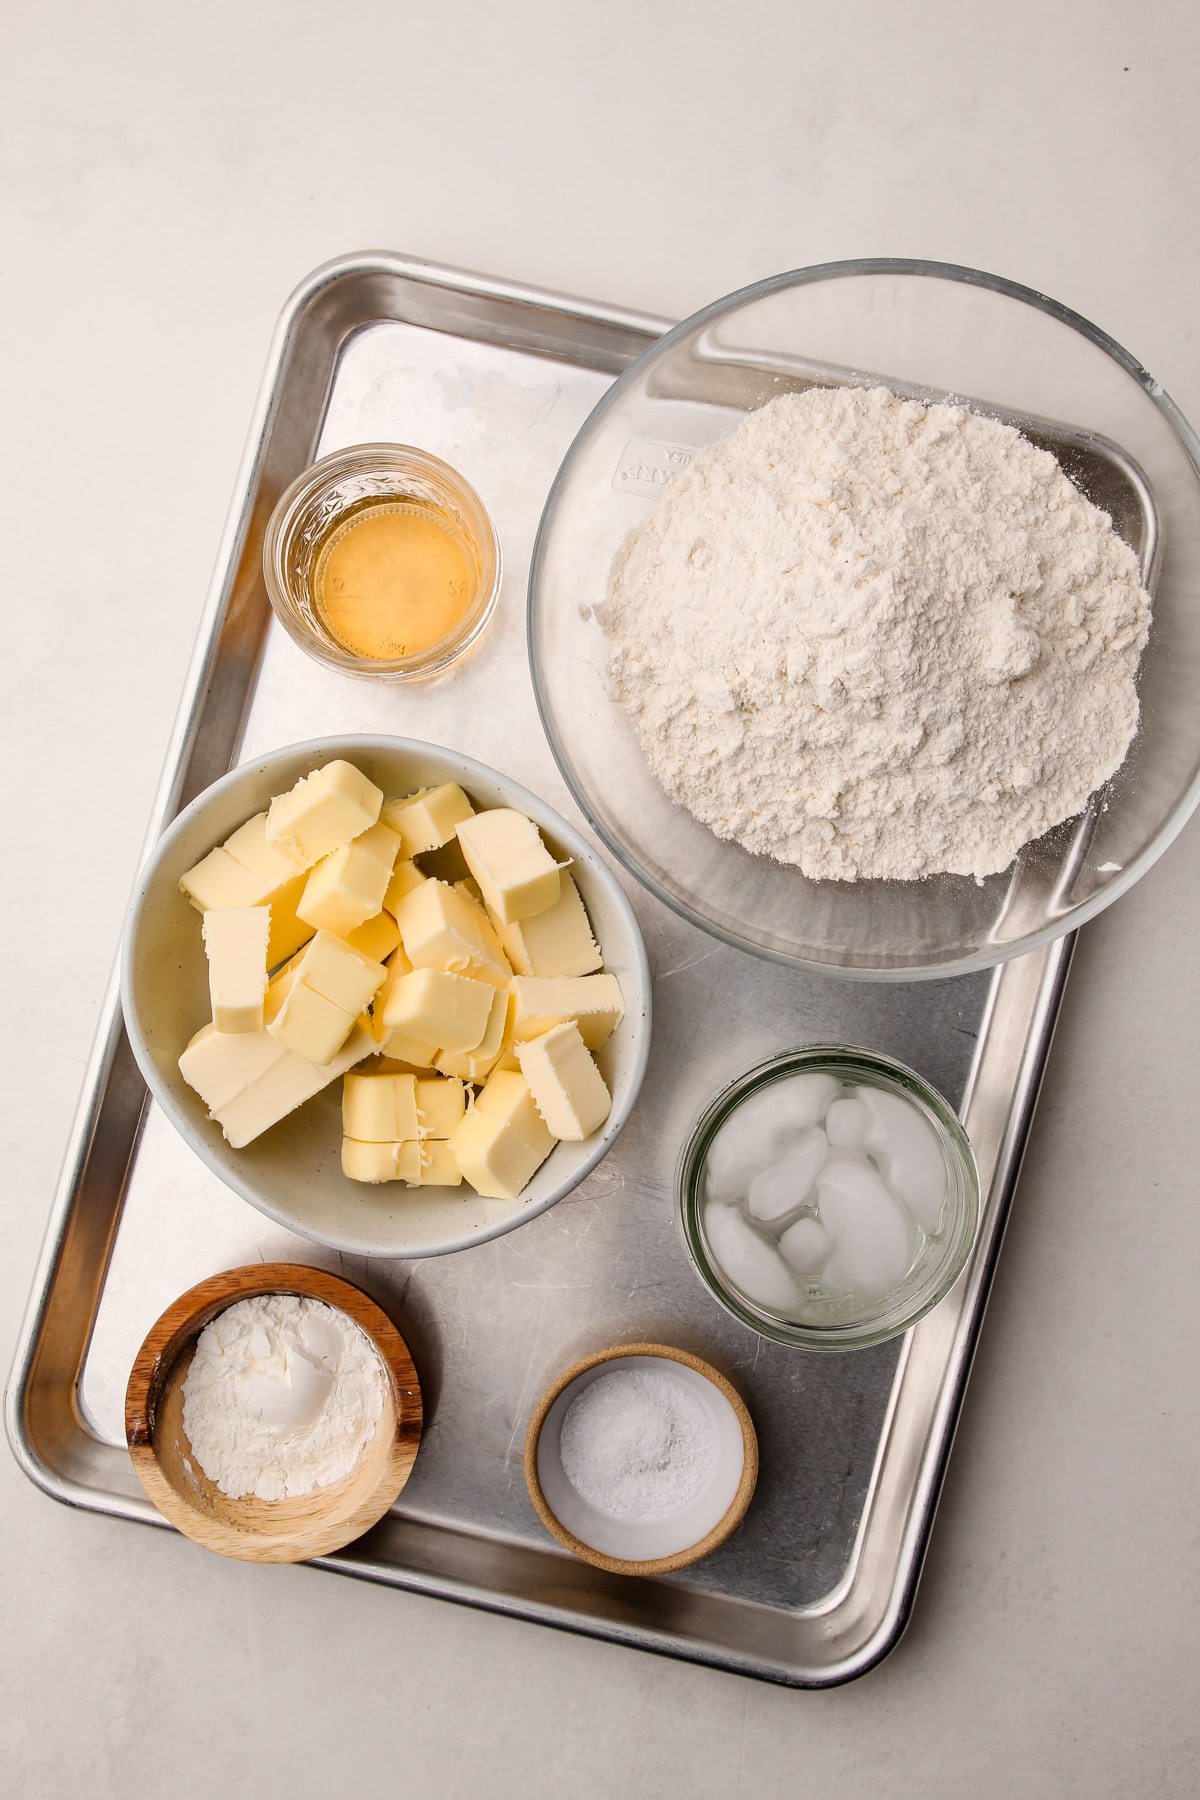
Step 1: Make the butter pie crust by hand, in a stand mixer or in a food processor.
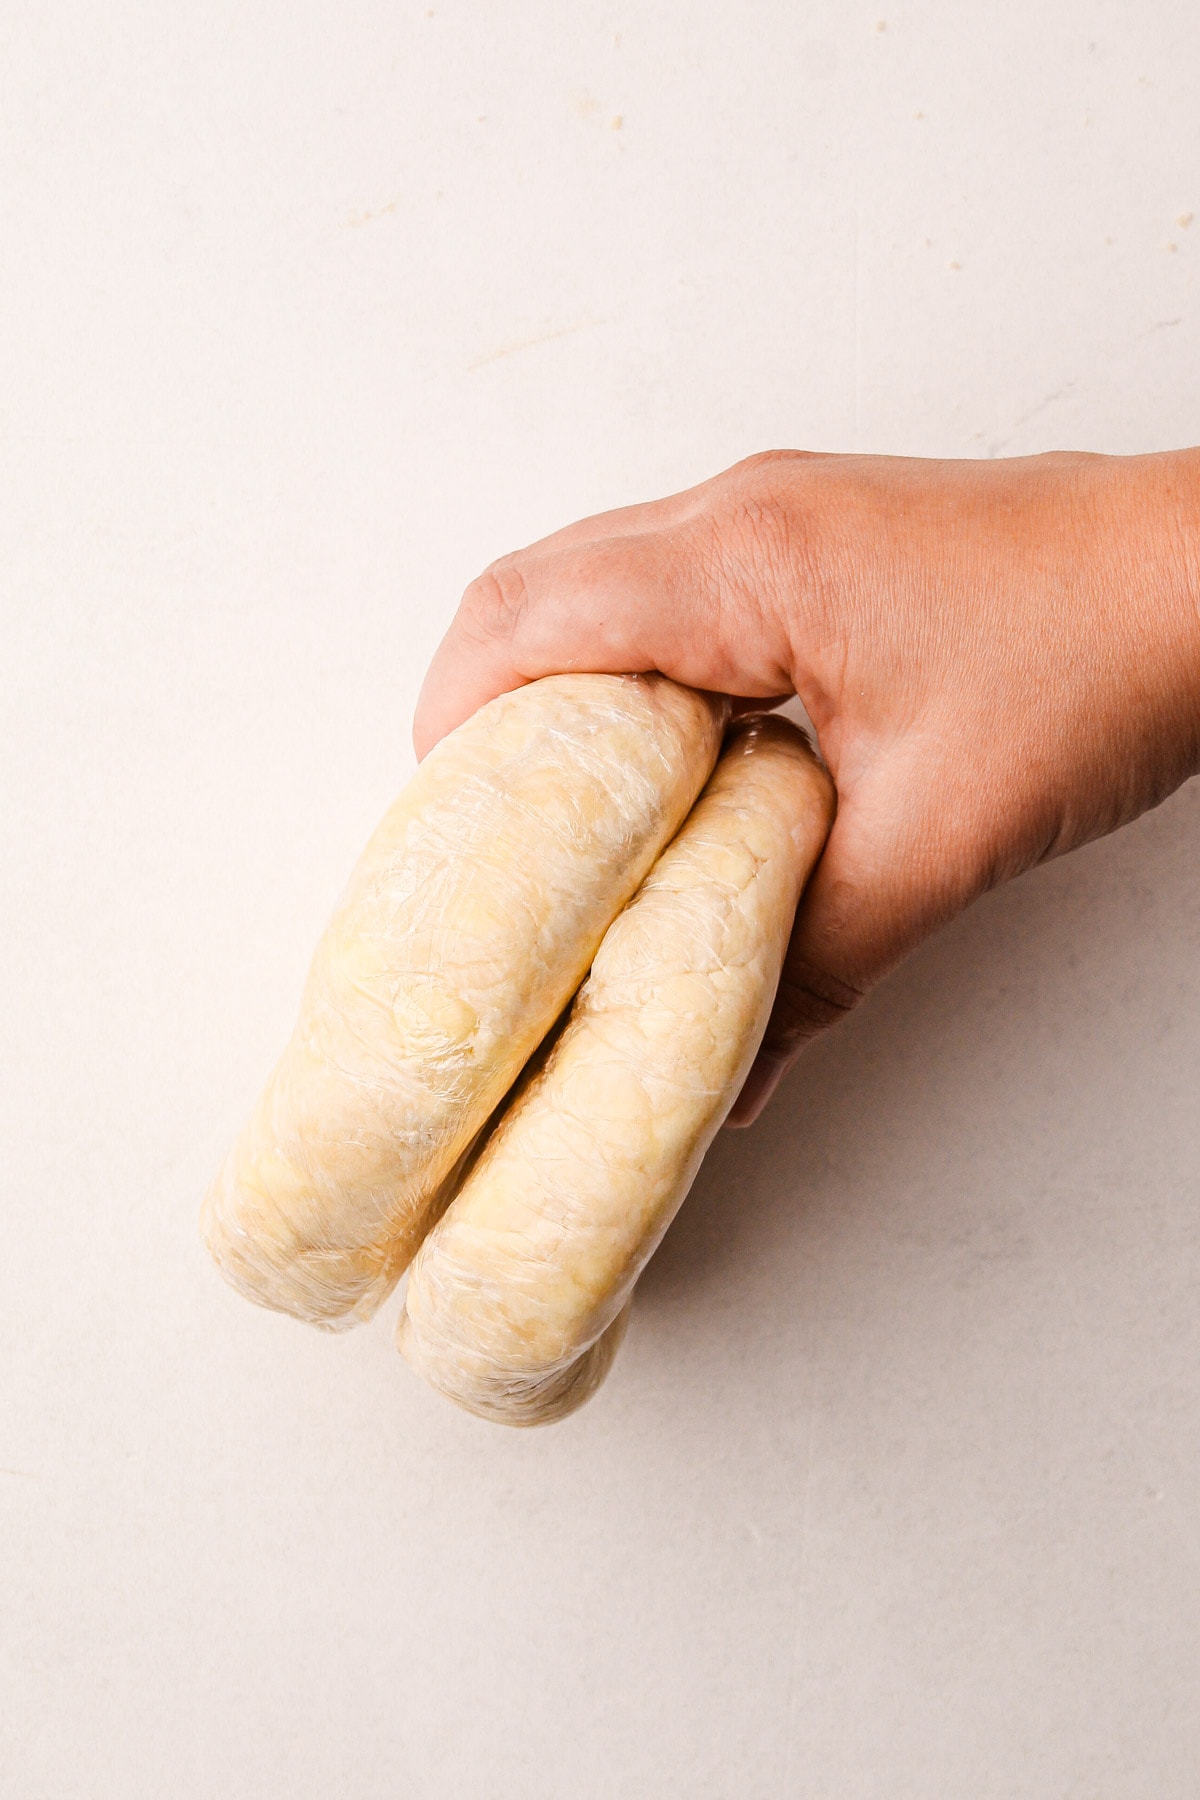
Step 2: Let it rest for at least two hours, but it's best to do this a day ahead of time.
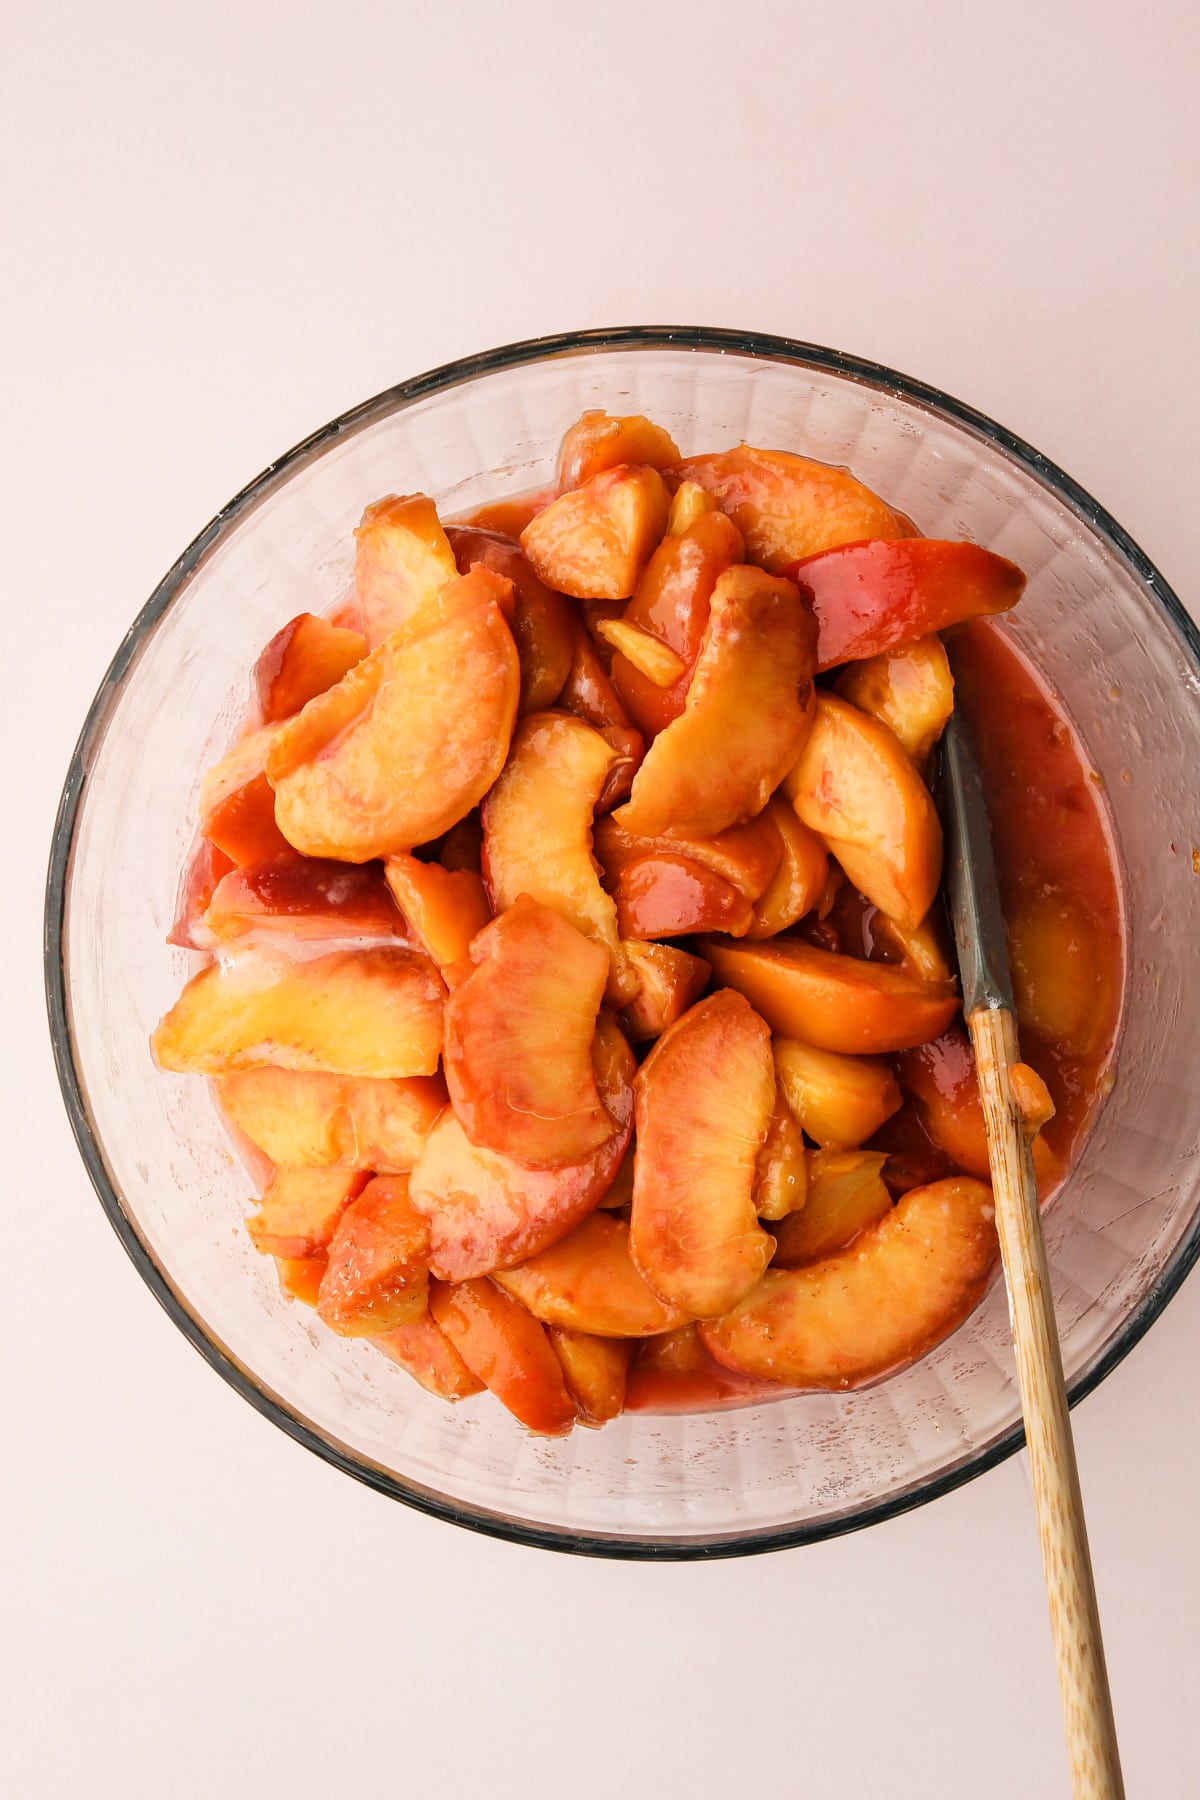
Step 3: Prepare the peaches (peeling them if desired) and assemble together the peach pie filling.
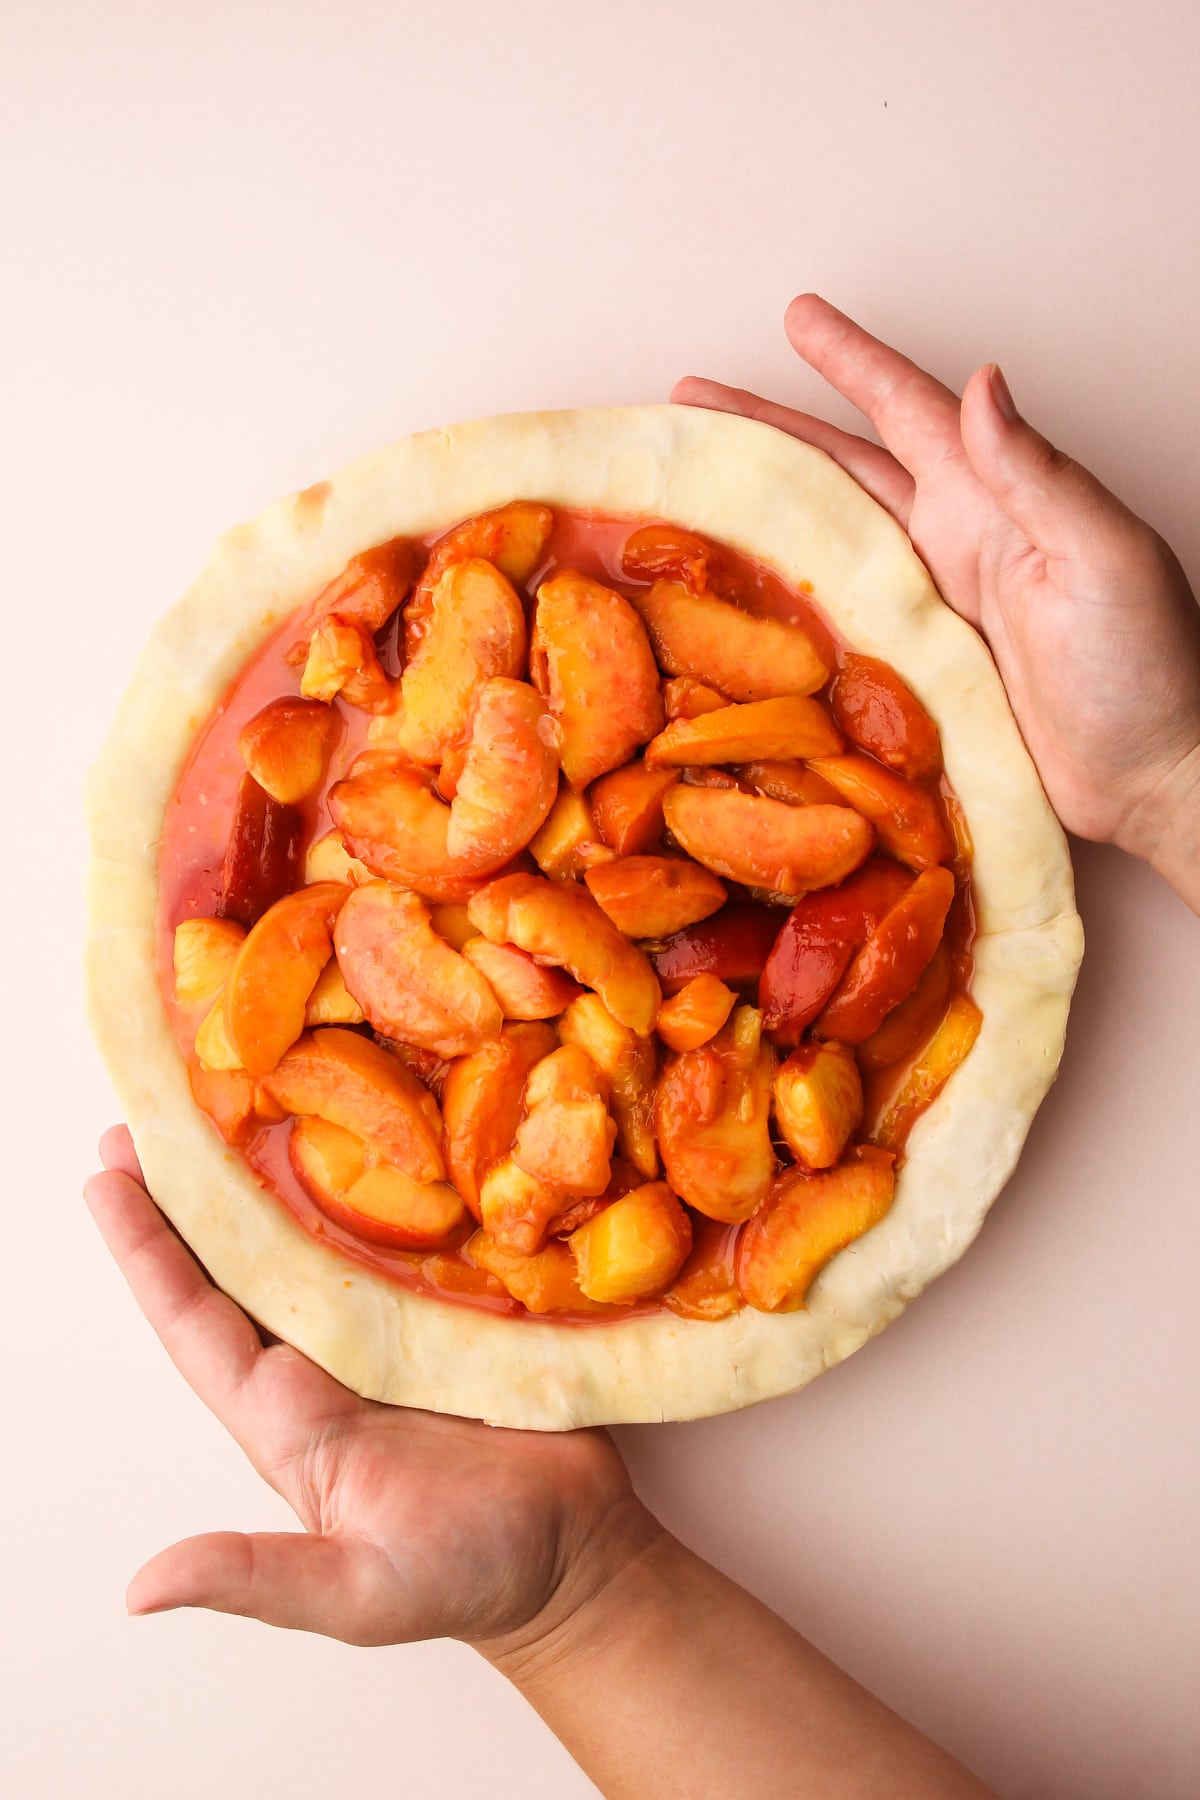
Step 4: Roll out the pie crust and add in the peach pie filling.
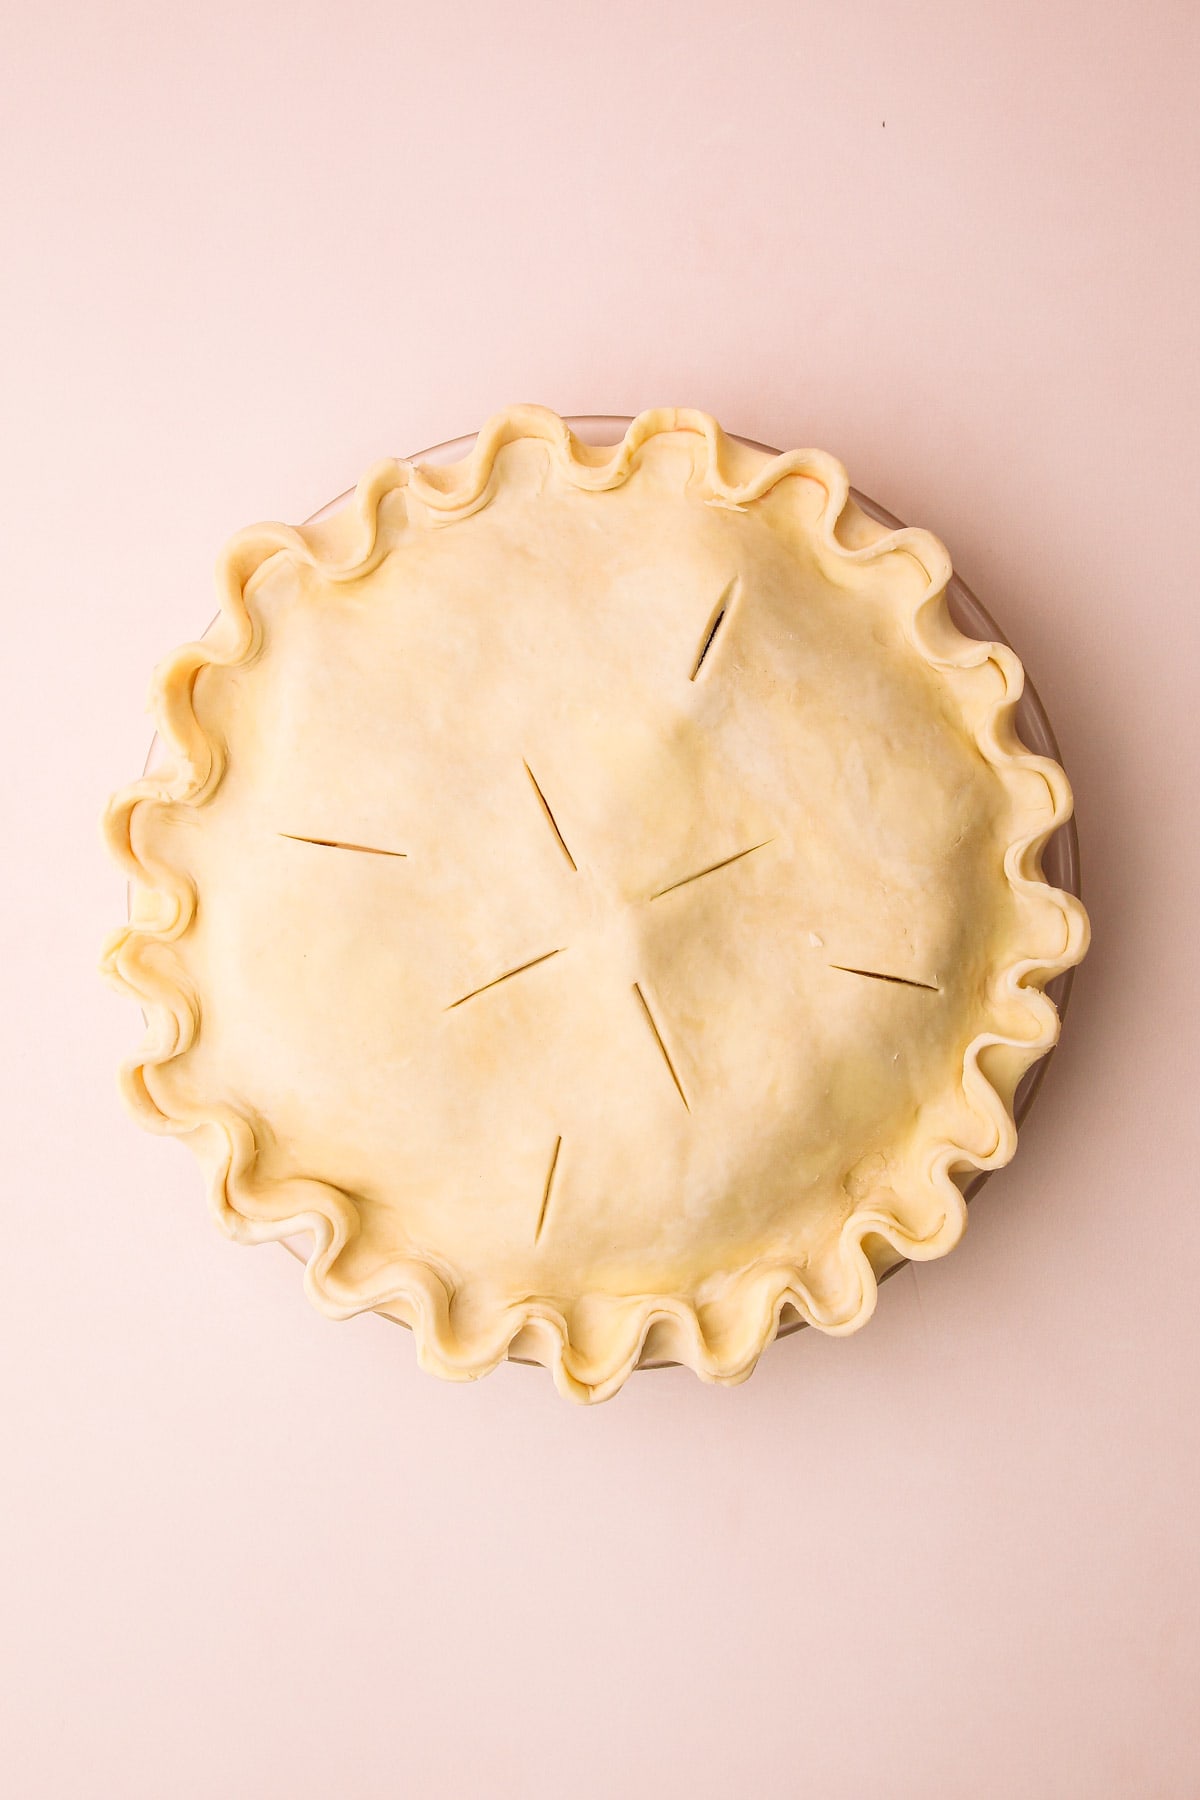
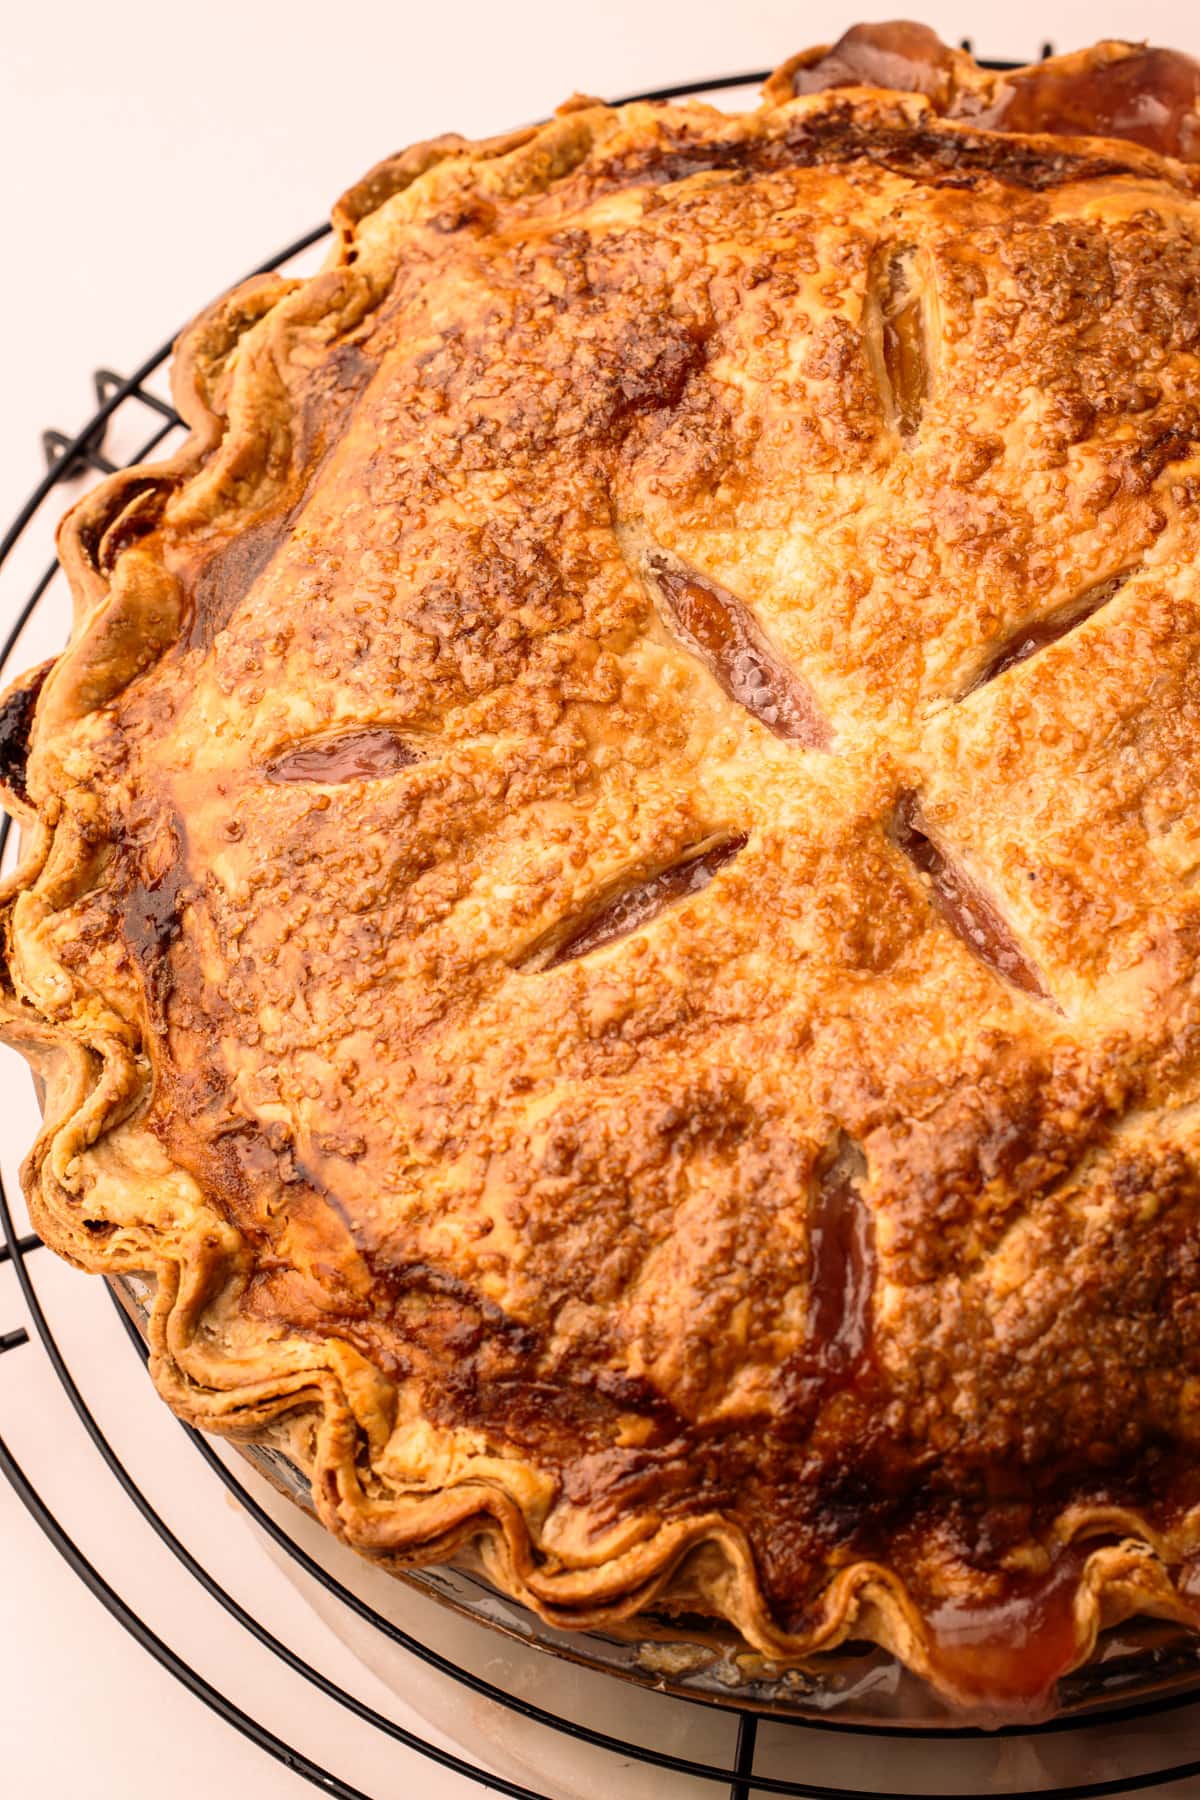
Step 5: Place on the top crust, crimp as desired and cut some steam holes in the pastry. Optionall brush with an egg wash and some coarse sugar.
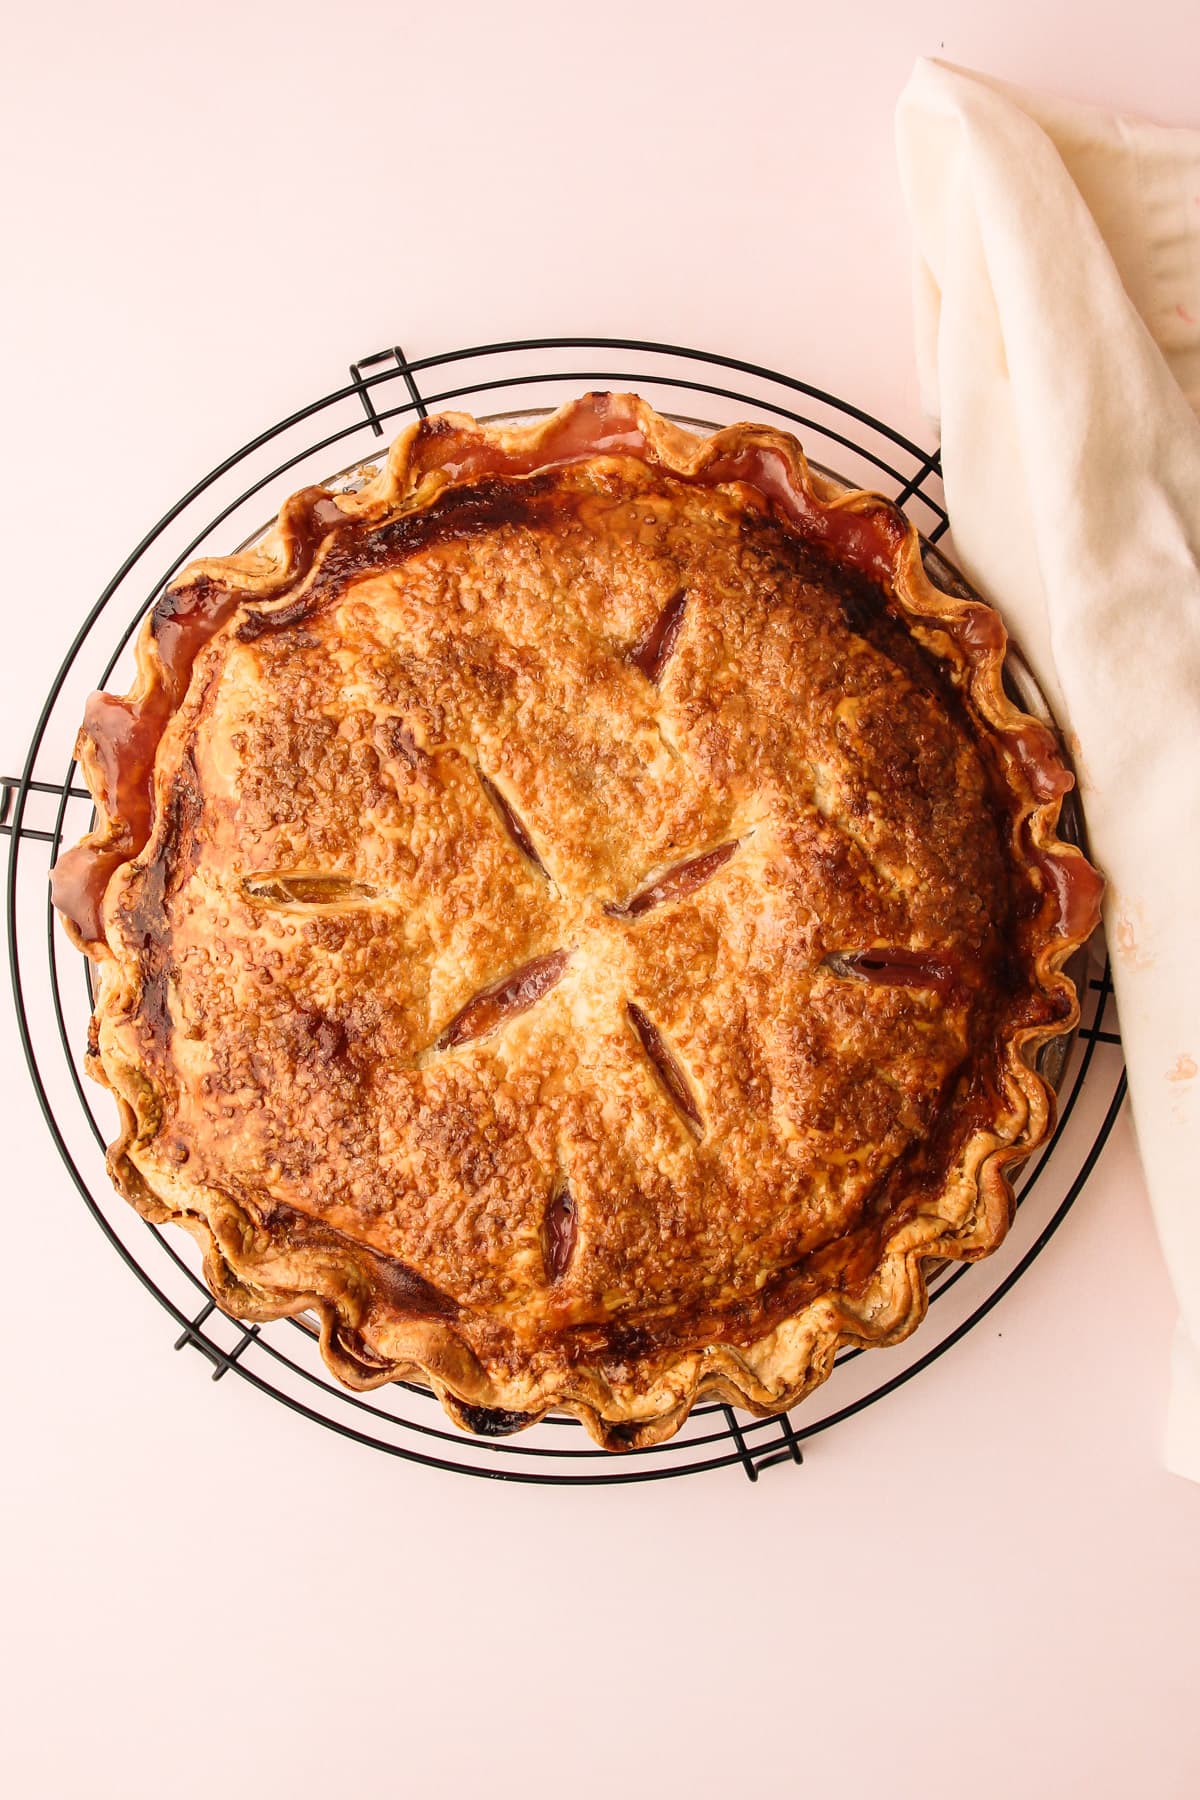
Step 6: Bake the pie until golden brown and bubbly. For more in-depth details on baking double-crust fruit pies, see this article.
How to Tell When It's Done
It’s important to make sure that the pie is cooked long enough to reach a high enough temperature to activate the cornstarch.
There are a few ways to tell when your pie is done.
- The first is by visual: look for the pastry to be golden and the pie to be puffed up nearly all the way through. It puffs up because the fruit has reached the temperature needed for it to "boil." As it cools, it will deflate.
- Look for the filling to be bubbling from the middle of the pie. The bubbling doesn't need to be rapid; look for at least one bubble in the center while checking the pie.
- The most foolproof way to ensure your pie is baked properly is to use an instant-read thermometer. I always use one to check the temperature of each and every pie that I bake. You want the internal temperature to be above 200ºF for a peach pie.
Serving and Storing
If the pie is sliced when it's hot, or even warm, it will be runny. The longer it sits, the thicker the filling will become.
Serve the baked pie at room temperature. It can be served as-is, but may I please recommend serving it with Fresh Peach Ice Cream? It's an unreal double-peach combination.
A baked peach pie can be stored at room temperature, covered, for 1 day. If you are storing it longer, cover it and place it in a refrigerator. It can always be reheated later to take the chill off and to crisp up the pastry.
Kelli's Best Tips for Amazing Peach Pie
- Use just ripe, in-season, delicious peaches. Do not use overripe, mushy peaches. They are too juicy and won't keep their integrity during the long bake that a pie requires.
- If your local peaches aren't quite ripe, you can "condition" them by leaving them stem side down at room temperature on a towel-lined tray for 1-3 days. Check daily. Once they're fragrant and slightly soft, they're ready to use.
- Cut the peaches in a mix of wedges and bite-sized pieces for optimal texture in the finished pie
- Mix the peaches, sugar, and cornstarch together first, then add in the wet ingredients to prevent any clumps of cornstarch
- Arrange the sliced and diced peaches so that they are packed tightly together in the crust, helping to prevent the filling from sinking after it is baked.
- Preheat the oven well, and bake the pie until it reaches an internal temperature over 200ºF.
More Peach Recipes
More Recipes Featuring Fruit

I am so honored when you make a recipe from my site! If you make this Peach Pie recipe, please leave a star ⭐️⭐️⭐️⭐️⭐️ rating with your experience! If you have any questions about this recipe, feel free to comment here, and tag me on Instagram!
Full Recipe
Perfect Peach Pie

This classic peach pie features ripe, fresh peaches tucked and baked inside a flaky, buttery double pie crust.
- Prep Time: 00:25
- Cook Time: 00:60
- Total Time: 1 hour 25 minutes
- Yield: Serves 8-10
- Category: Sweet Pie
- Method: Bake
- Cuisine: American
Ingredients
- 1 batch Butter Pie Crust (see notes for alternatives)
- 3 pounds (about 7-9) ripe peaches, peeled (optional), pitted
- ¾ cup (150 grams) granulated sugar
- 3 tablespoons cornstarch
- Pinch coarse kosher salt
- ¼ teaspoon ground nutmeg
- 1 tablespoon lemon juice
- 1 teaspoon vanilla extract
- ¼ teaspoon almond extract
Instructions
- Prepare the butter pie crust and let rest overnight, if possible.
- Preheat the oven to 425ºF and place an oven rack in the lower and middle part of the oven.
- Roll out the pastry: Roll out 1 pie pastry disk to an 11-inch circle. Fit the pastry into a 9-inch pie plate, making sure to press the pastry into the sides and the bottom. Roll out the second disk of pastry and cut strips to make a lattice, if desired, or just roll out as a full top crust. Place the lattice strips or top crust in the refrigerator until ready to use.
- Cut the peeled peaches into a mixture of wedges and bite-sized pieces.
- In a large bowl, mix together the peaches, sugar, cornstarch, salt, and nutmeg with a rubber spatula. Then add the lemon juice, vanilla extract, and almond extract.
- Place the peach pie filling and all the juices inside of the pie plate fitted with pastry. Arrange the peaches in the pie crust to eliminate any gaps between the fruit.
- Place the top pie crust over the peaches, trim the edges, and crimp the bottom and top crusts together.
- Cut a few slits in the crust to help the steam escape while it is baking.
- Brush the top crust with an egg wash and sprinkle with coarse sugar, if desired.
- Bake on the lowest rack for 25 minutes.
- Lower the oven temperature to 400ºF. If the crust is browning, cover the outer edges with aluminum foil or a pie shield, leaving the middle of the crust exposed. Bake for another 35-40 minutes, or until the juices are bubbling and the temperature of the middle of the pie reaches above 200ºF.
- Let the pie cool at room temperature for 6 hours to let the juices set up.
- Serve at room temperature.
Notes
A classic butter pie crust is great here. Some other good choices would be this Ultra Flaky Pie Crust, Sour Cream Pie Crust or Cream Cheese Pie Crust.
Peeling the peaches is optional! If you need some guidance on how to do it, check out this tutorial on How to Peel Peaches.
Add the frozen peaches to the sugar and other ingredients, and let it macerate for 10-15 minutes, or until the sugar is dissolved. Do not totally defrost the peaches before baking.
The most foolproof way to ensure your pie is baked properly is to use an instant-read thermometer. For a peach pie, aim for an internal temperature above 200ºF. For more in-depth details on baking double-crust fruit pies, see this article.
A baked peach pie can be stored at room temperature, covered, for 1 day. If you are storing it longer, cover it and place it in a refrigerator. It can always be reheated later to take the chill off of it and to crisp up the pastry.
Some of the links on this page may be affiliate links. Everyday Pie is a participant in the Amazon Associates Program. As an Amazon Associate I earn from qualifying purchases, at no extra cost to you.
Doreen Ruggles
Can you use frozen peaches? If yes how many cups?
Donna
This was my first attempt at a peach pie. The pie was delicious and the best pie dough I have ever made. I made a lattice top and my only problem was that the juice ran under the pie so some of it was a little bit burnt under the pie. How do I prevent this from happening?
Kelli Avila
I'd suggest making taller edges next time. How did you shape them?