
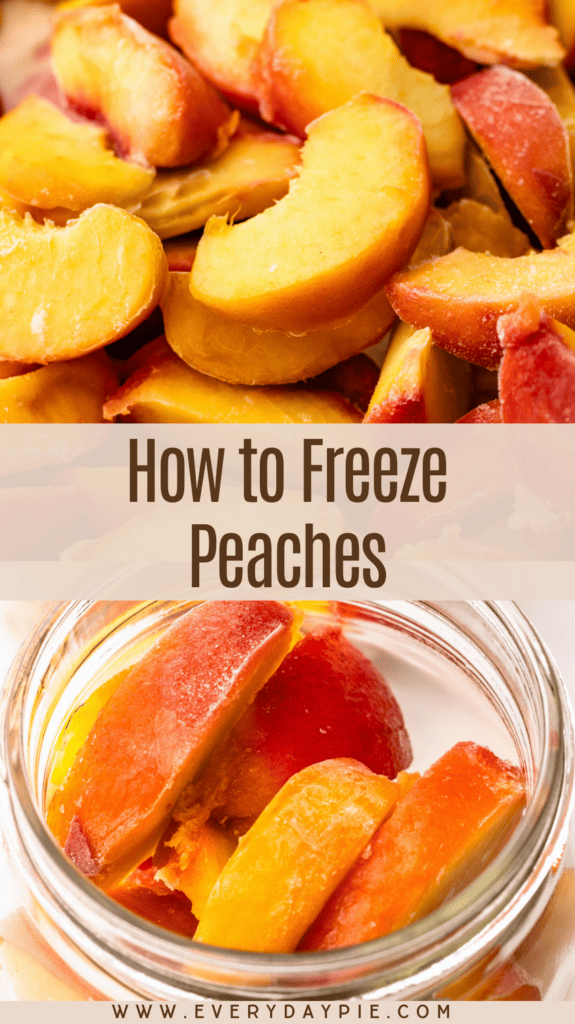
Capture the magic of peach season all year long with this tutorial on how to freeze peaches.
Want to save this recipe?
Enter your email & I'll send it to your inbox. Plus, get weekly updates from me!
How to Freeze Fresh Peaches
We all can agree that the difference between an out-of-season peach that has traveled a long distance from industrial farms and locally grown in-season peaches is vast.
Maybe you are lucky and have a peach tree in your backyard, or if you're like me, you tend to magically accumulate bushels of peaches when they're available locally. And if you're also like me, you've considered taking advantage of your freezer space to preserve some of those peaches for later, less bountiful times.
The truth is I love my freezer for preserving, though I feel "frozen food" has gotten an undeserved bad reputation. I use it regularly as a means of storing in-season fruits and veggies, as well as whole double crust fruit pies. It's an easy way to preserve the seasonal food without having to go through the canning process. Canning was for my pre-child days when I had so much more extra time. These are not those days.
This article is a quick guide on properly freezing in-season peaches (or other stone-fruit) so you can enjoy their goodness all year round in recipes such as Peach Turnovers, Perfect Peach Pie and Peach Cobbler.
Let's Talk Peaches
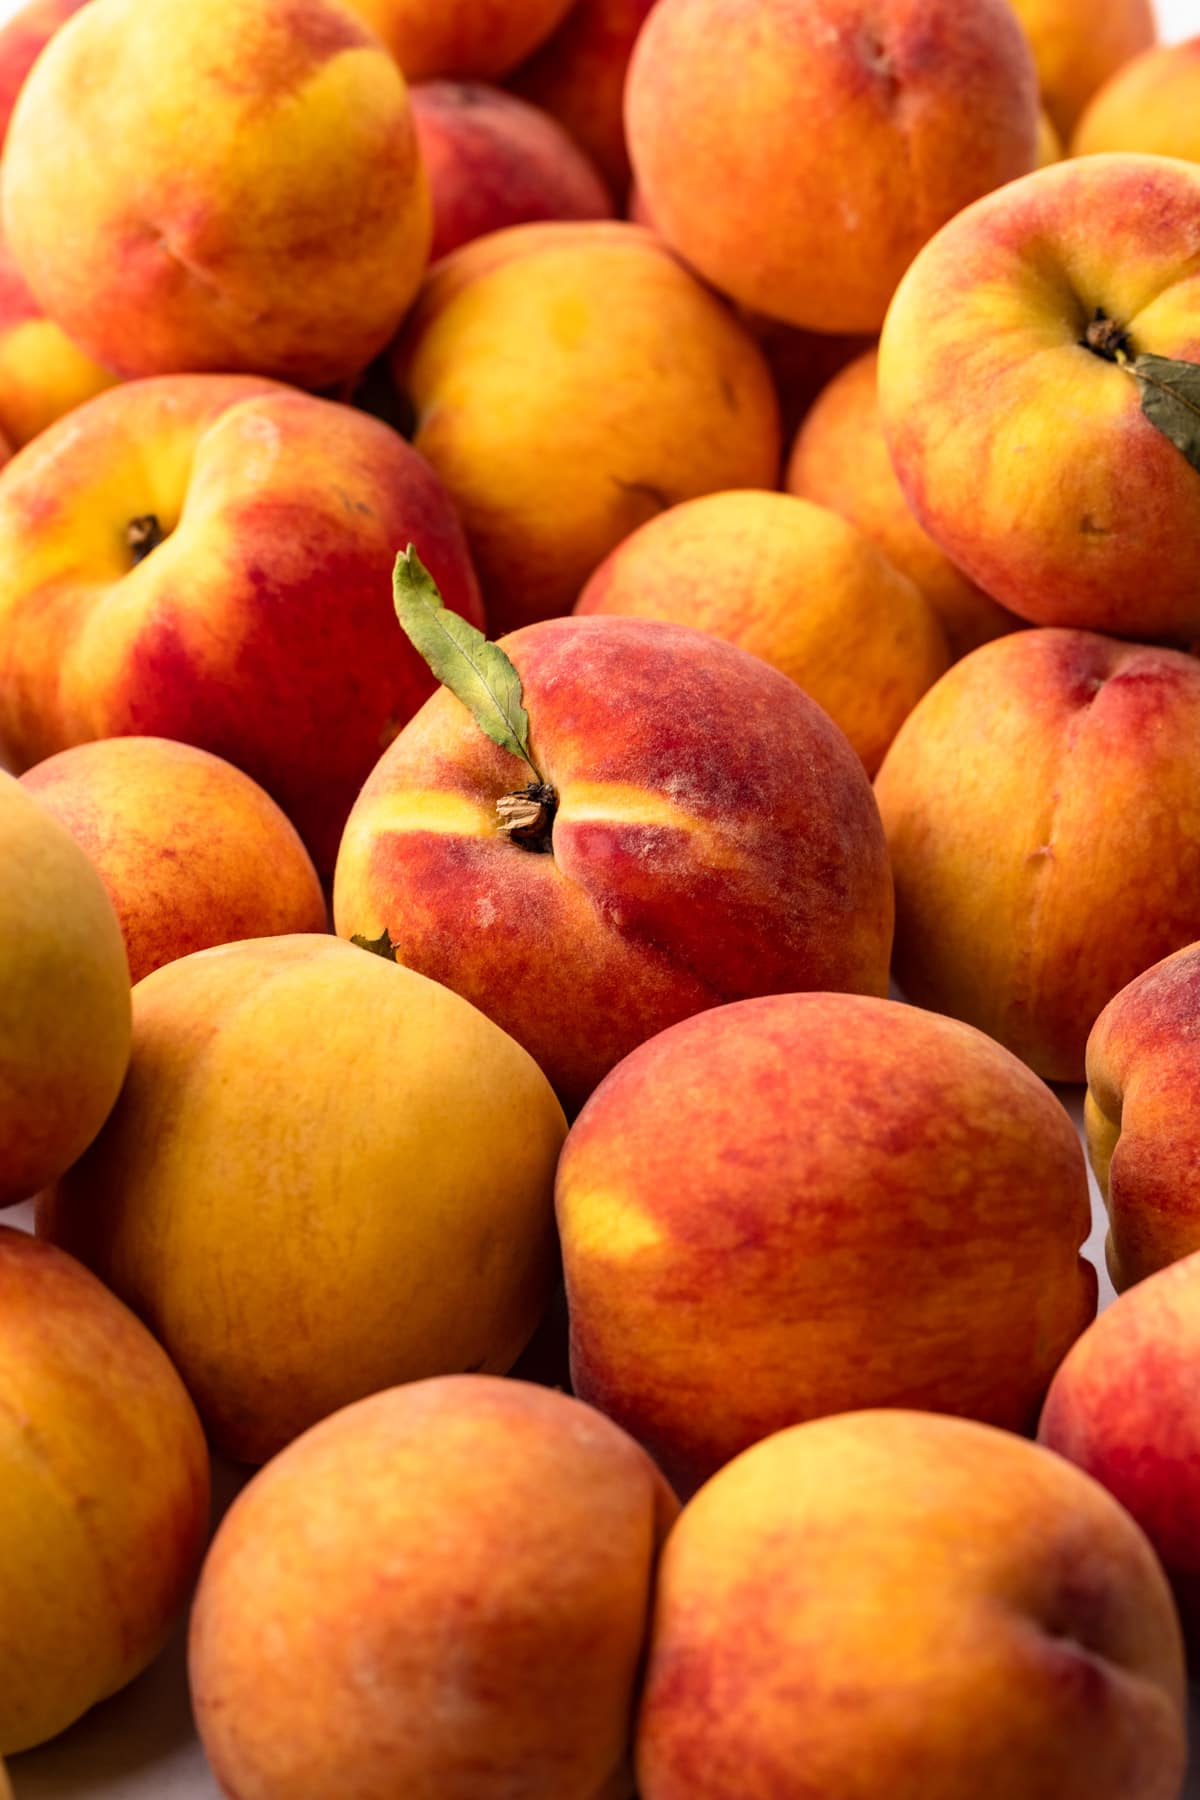
Before we discuss how to freeze peaches, it must be said that the quality of the peach you put into the freezer will be the quality of the peach you get out. Meaning, if you put an unripe, flavorless peach in the freezer, those factors won't magically change when frozen. If anything, they'll get worse.
Choose the best quality peaches you can, and ensure they are just ripe.
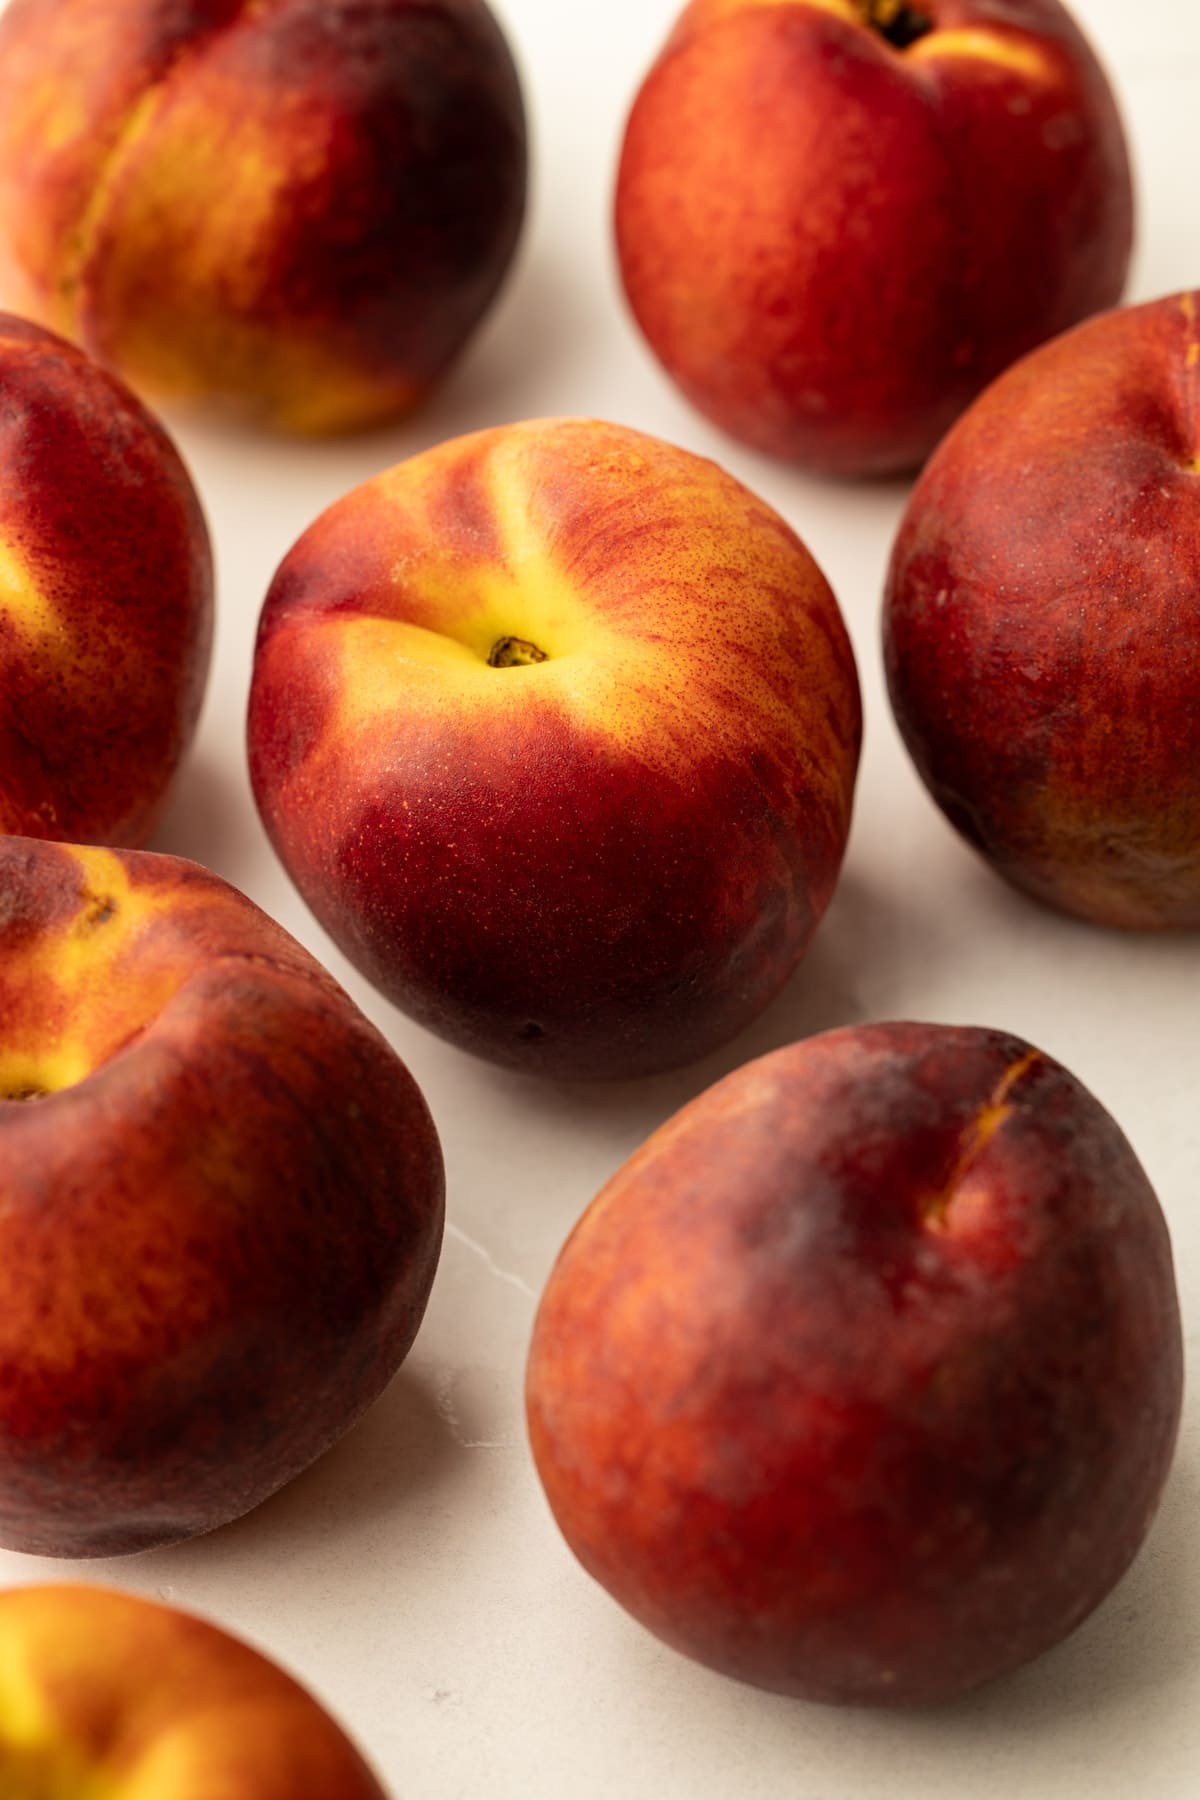
Clingstone vs. Freestone Peaches
There are many different varieties of peaches out there, but two distinctions worth noting are clingstone and freestone peaches. As their name suggests, clingstone peaches have flesh that clings to the pit in the center, making it difficult to "cleanly" get the pit out.
Freestone peaches on the other hand, also as the name suggests, has flesh that easily separates from the pit. These are the peaches where if you slice through the center you can then gently twist and the two halves will cleanly separate.
It's unlikely your peach will be labeled, but a quick test of knowing which is to slice in half and twist. If it easily comes out, it's a freestone.
If it resists, don't force it! Clingstone peaches can be easily removed in segments, just in a different manner (a step-by-step guide on this below).
Clingstone peaches are more likely to be found earlier in peach season, with freestone peaches being common towards the end of the season.
How to Ripen Peaches AKA "Conditioning"
If you have local peaches that are in season but not quite ripe, that's okay! You can "condition" the peaches by leaving them at room temperature, stem side down. I usually leave them on a kitchen towel-lined sheet tray. Depending on the peach, it can take 1-3 days. Check them every day.
Once they are fragrant and just soft, they are ready to use.
They can stay on the counter but will continue getting riper and eventually overripe. Or place them in the refrigerator to extend the shelf life until they're ready to use.
Best Way to Clean Peaches
Wash your peaches, even if they appear to be clean, especially when you plan on preserving them for an extended period of time.
- Fill a large bowl with cold water and a generous splash of distilled white vinegar. The recommended ratio is 1 part vinegar to 3 parts water, but feel free to estimate.
- Add the peaches to the vinegar-water mixture, and using your hands, a soft cloth, or a soft brush, clean away any visible dirt on the surface. Let the peaches sit for a few minutes.
- Pull them out of the water and into a colander, and rinse well.
After going through the ServSafe certification in culinary school, I know how easy it is for bacteria and dirt to spread, even if the fruit will be peeled! So cleaning my produce is a step I always take and recommend you do as well.
Leaving the Peel On or Not
Ultimately whether to peel the peach is a matter of personal preference. The skin of a peach contains nutritional value, including fiber, vitamins and minerals.
It is pretty soft, and easy to chew, however that may not be your desired goal. It does add another textural component, and depending on the dish you plan to make with them, it might not be a good thing. I usually leave the skins on, because I don’t mind the texture.
I wrote an entire Guide to Peeling Peaches if this is new to you. You can check that out.

Overview of Steps
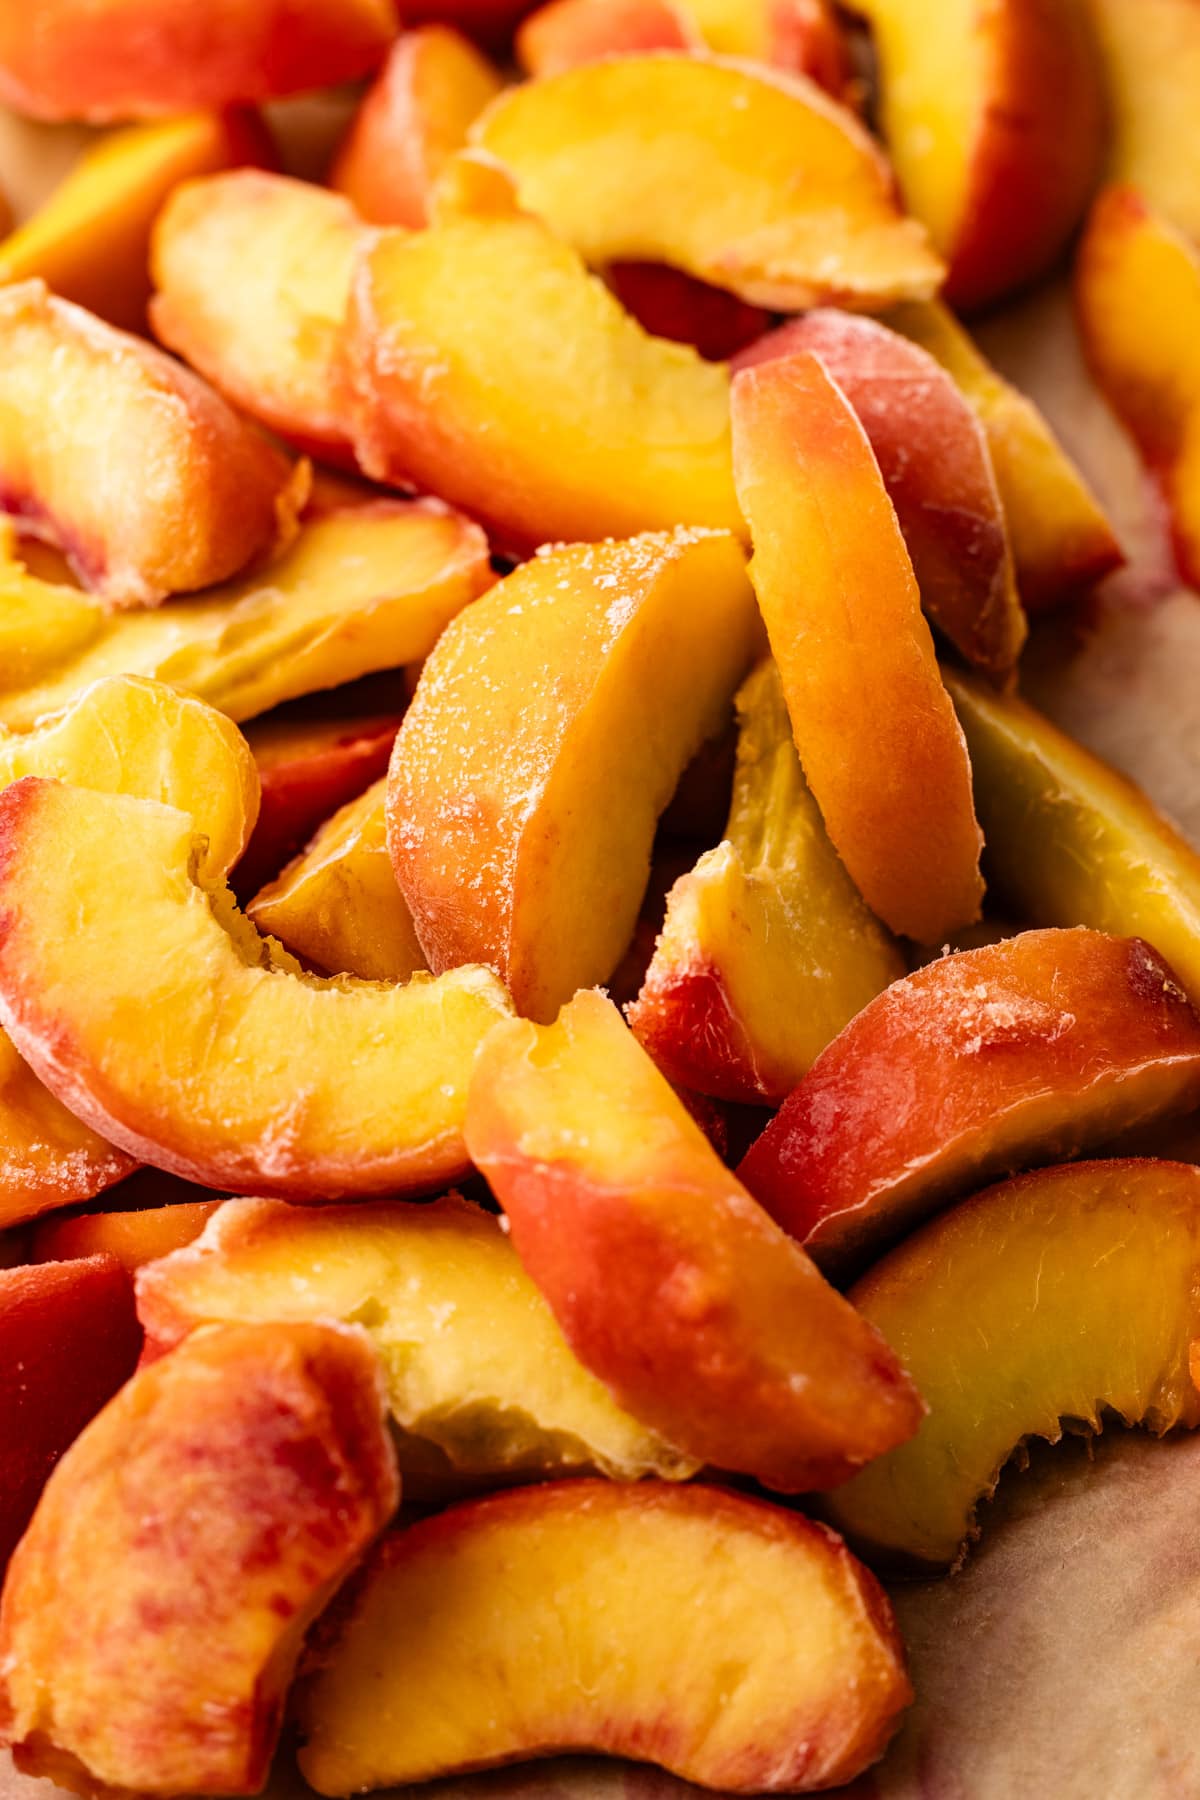
Once you've decided whether or not to leave the skins on, decide how you want the peaches to be sliced. You can freeze them in segments, or diced. Decide what makes the most sense for what you plan to use them for in the future. If you have a lot of peaches, they can be prepared in various ways.
Note: If you have freestone peaches you can simply split the peach in half, remove the pit and then segment, instead of following the method described below for clingstone peaches.
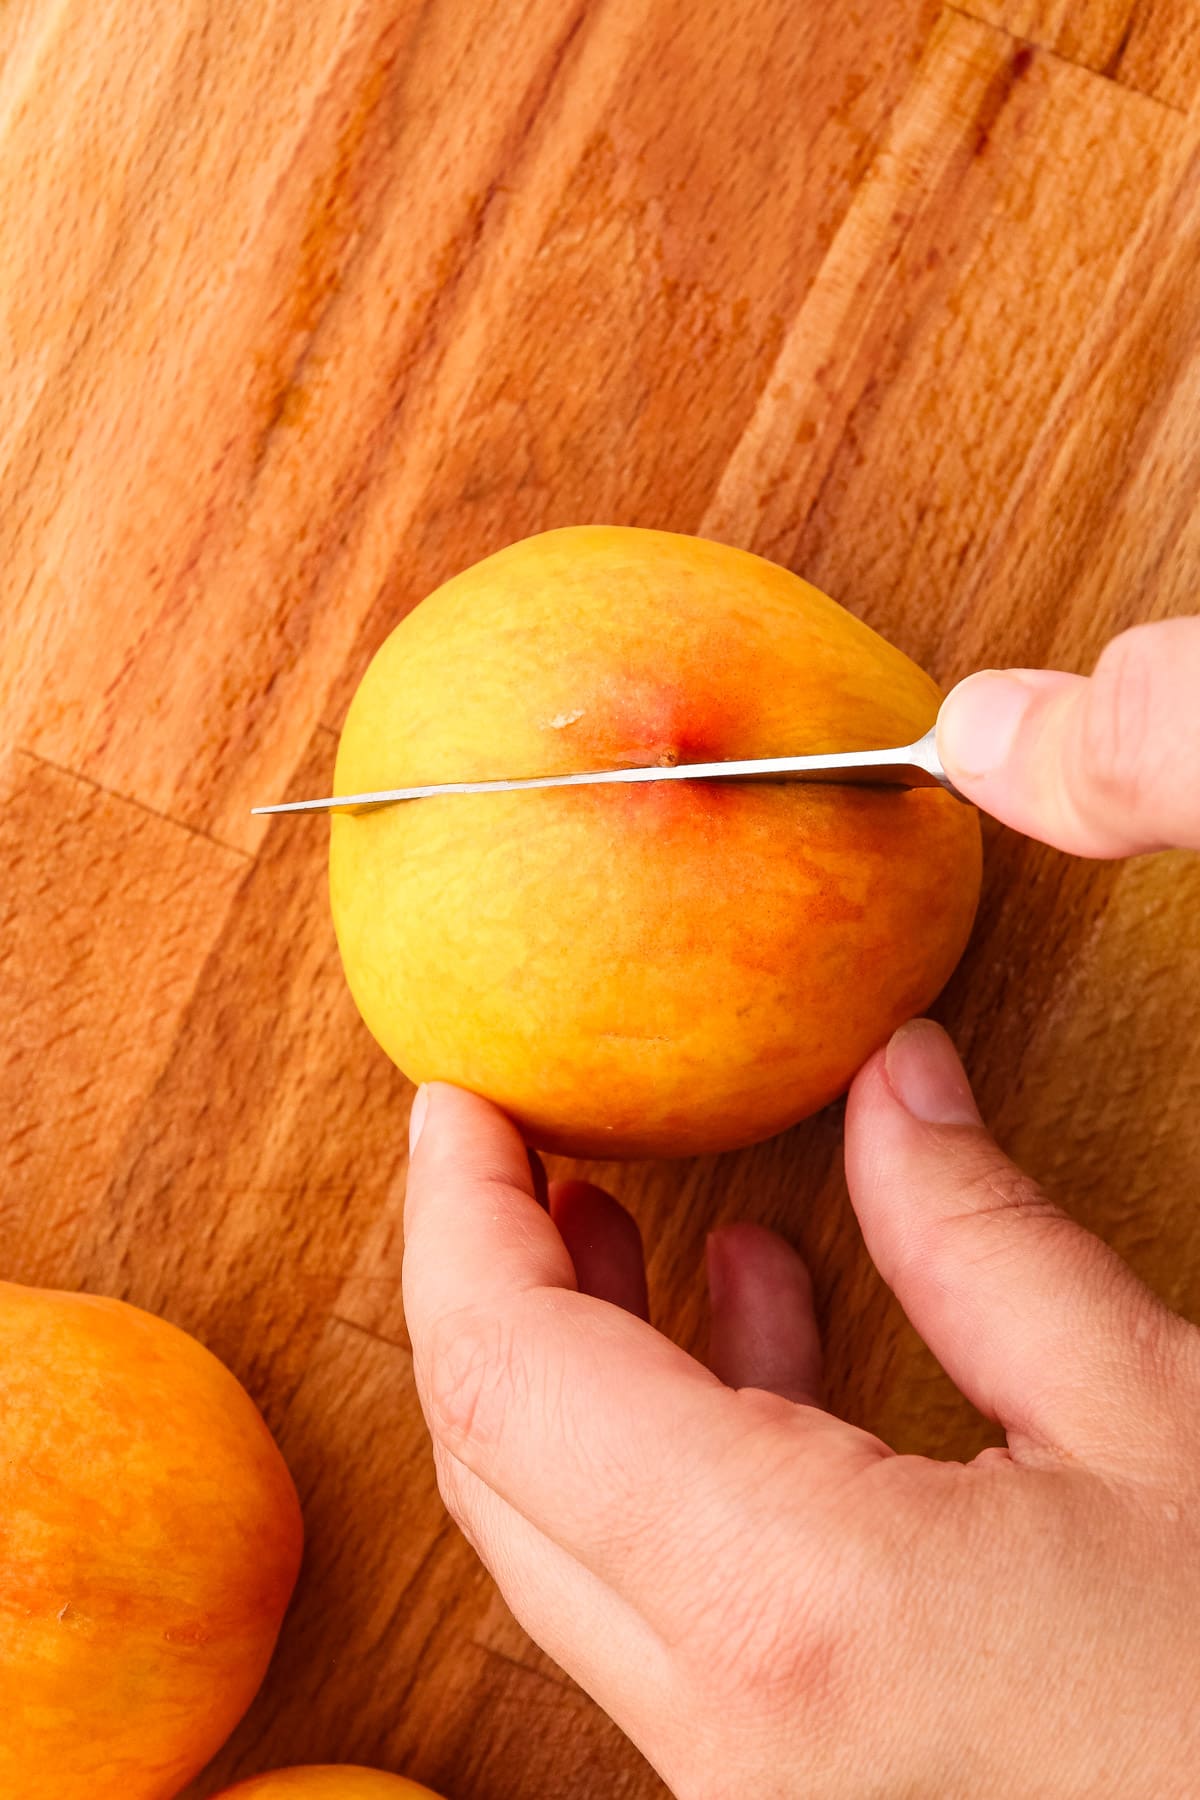
Step 1: Slice vertically through the entire peach, beginning at the stem and ending at the opposite side.
Step 2: Then, carefully hold the peach and slice a segment off from the first cut mark.
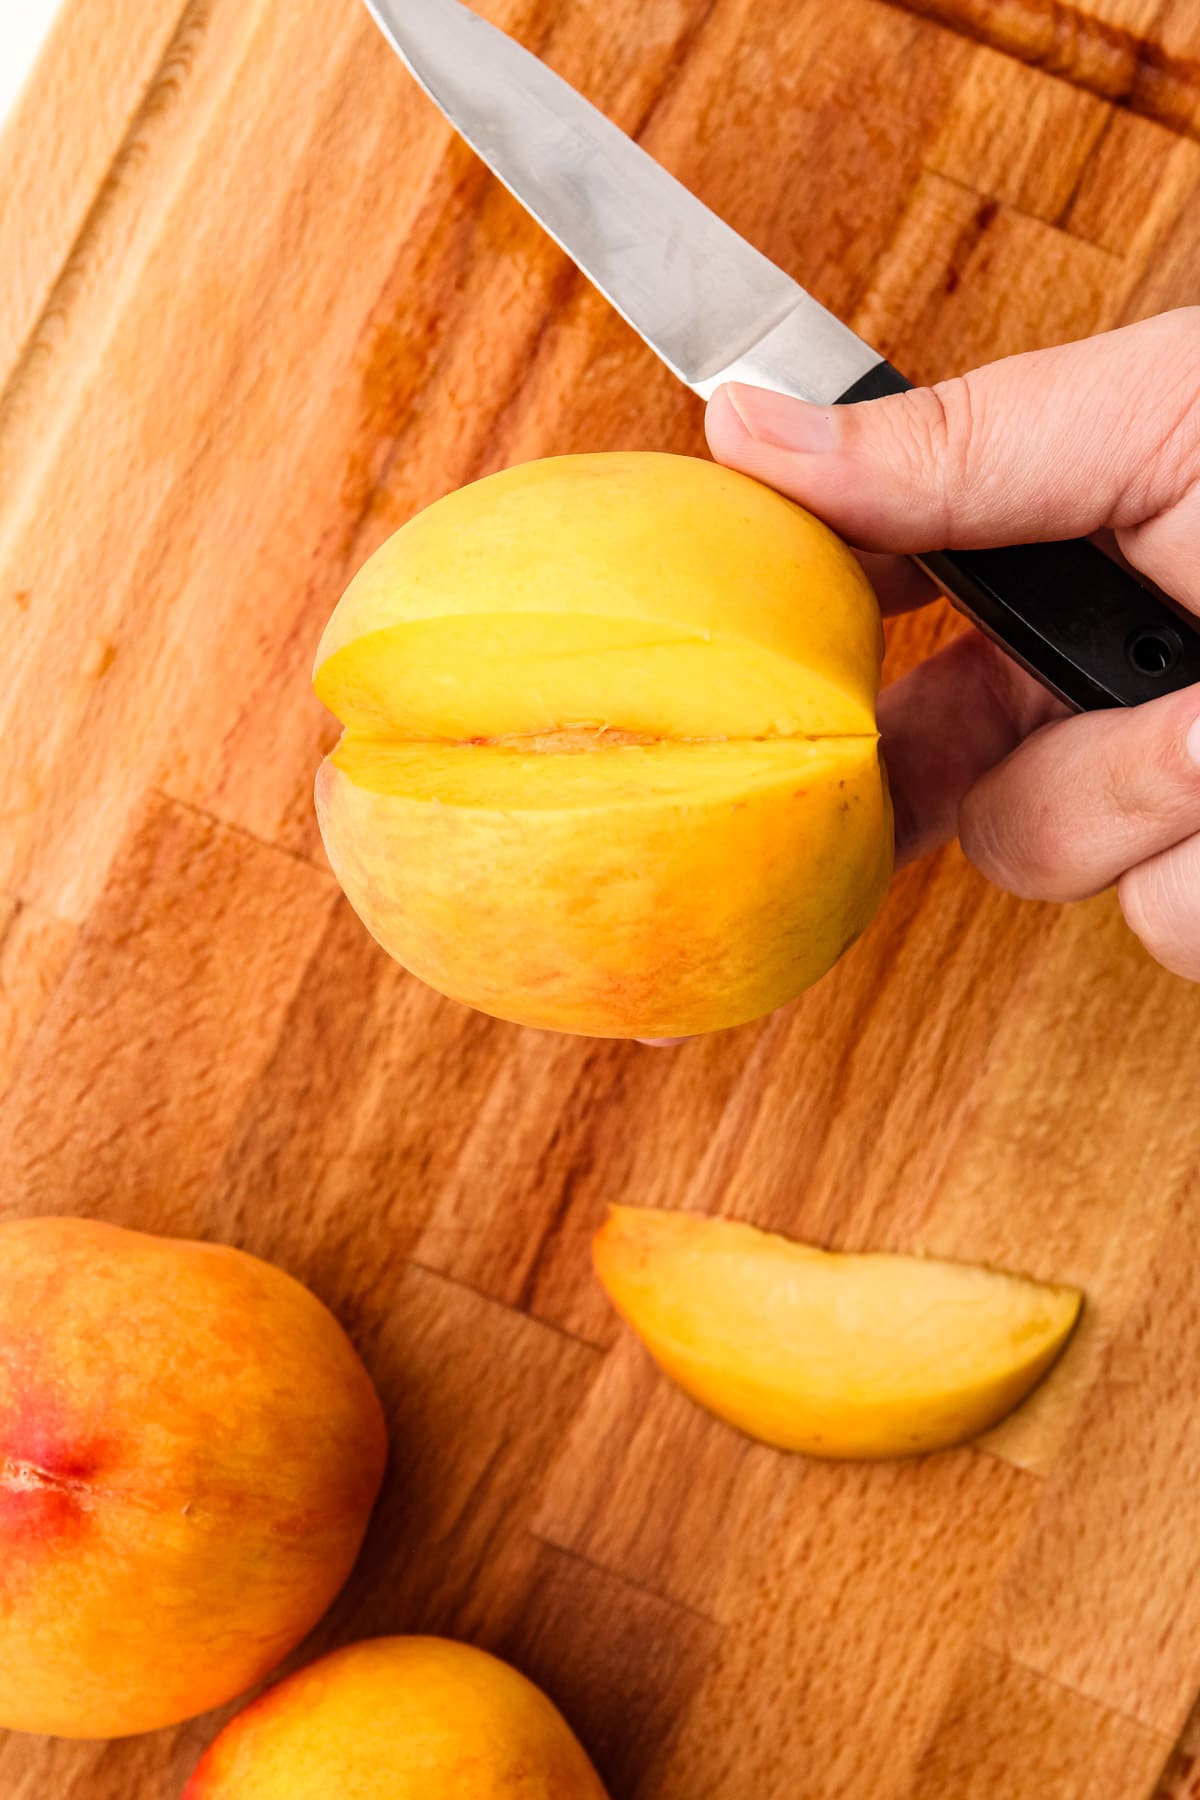
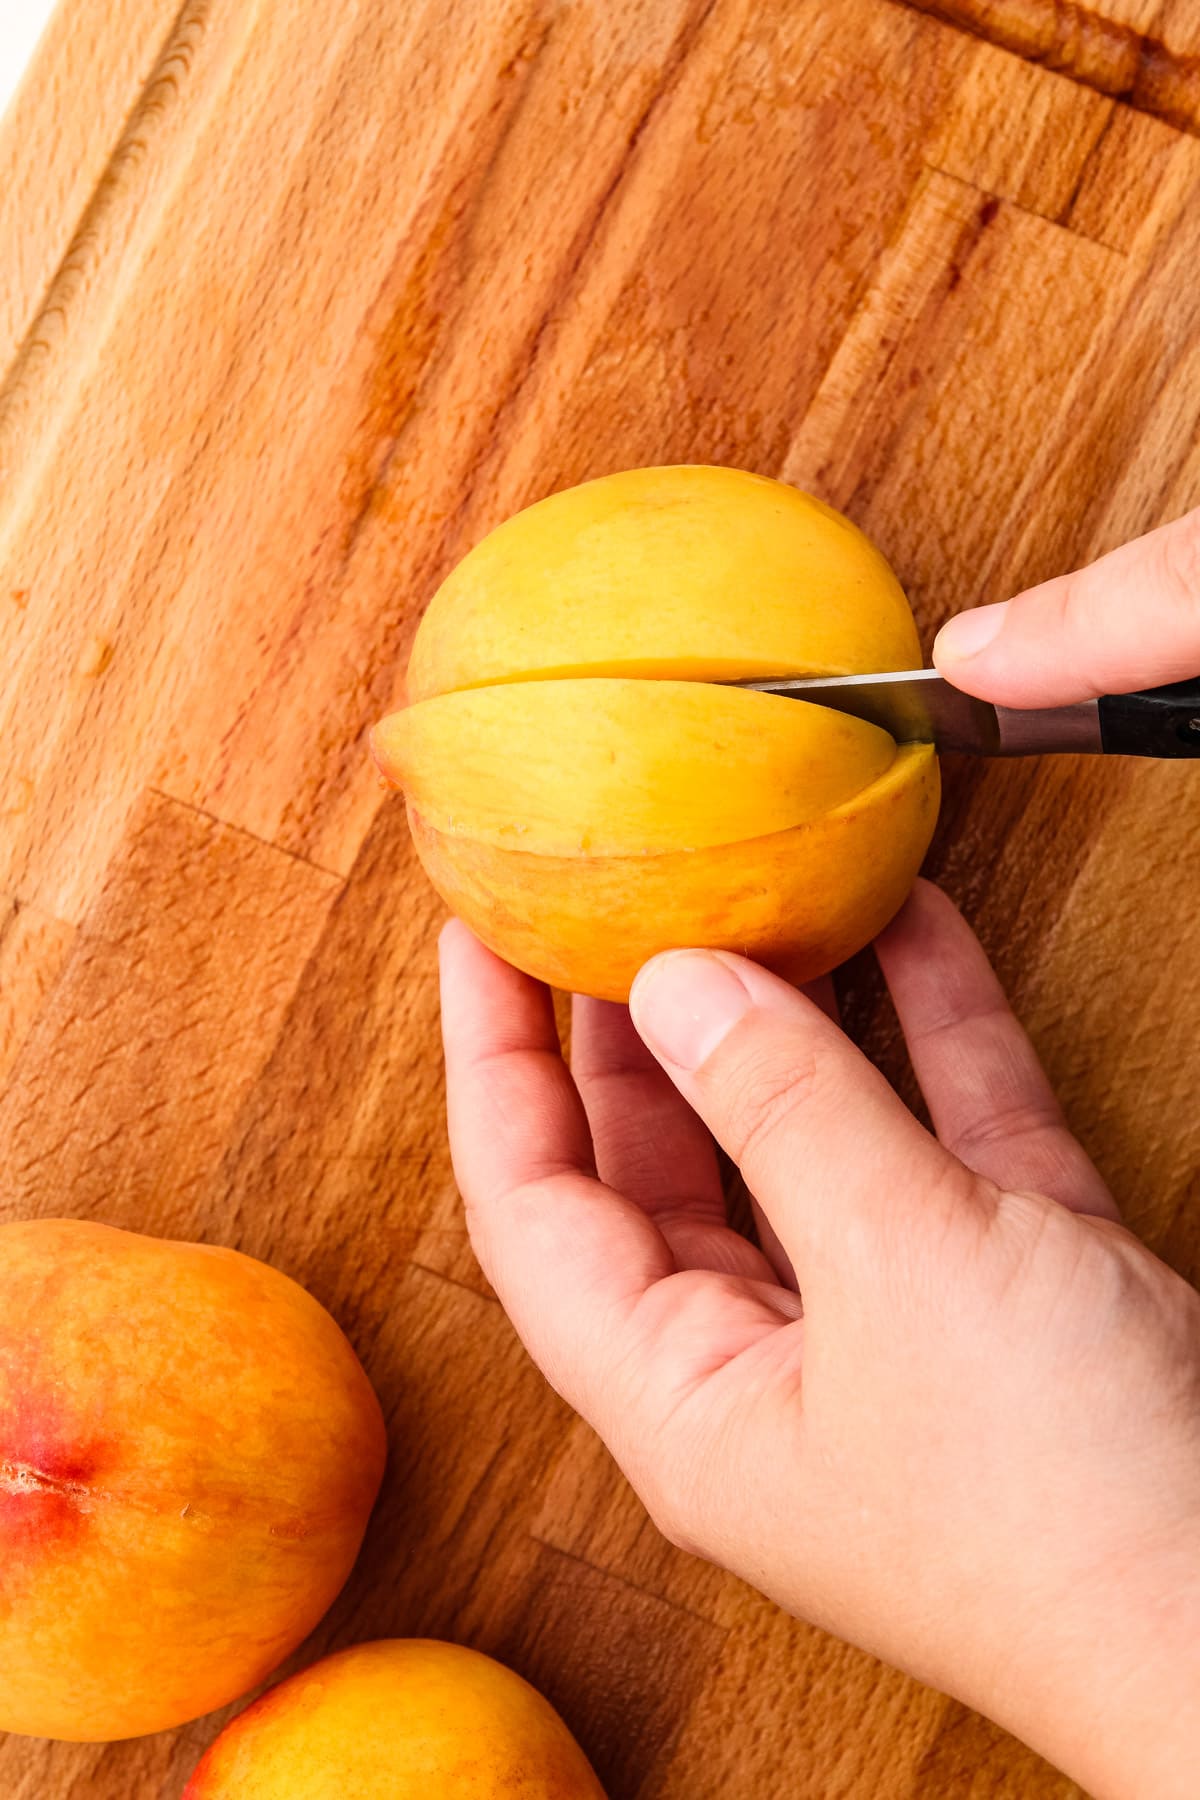
Step 3: Using your knife, gently pop out that first segment. This step can be the most challenging, but once it's done it's easy breezy to cut the remaining segments.

Step 4: Continue to slice 7 more segments, and twist off each one. This method is gentler and easier than separating the halves of a clingstone peach.
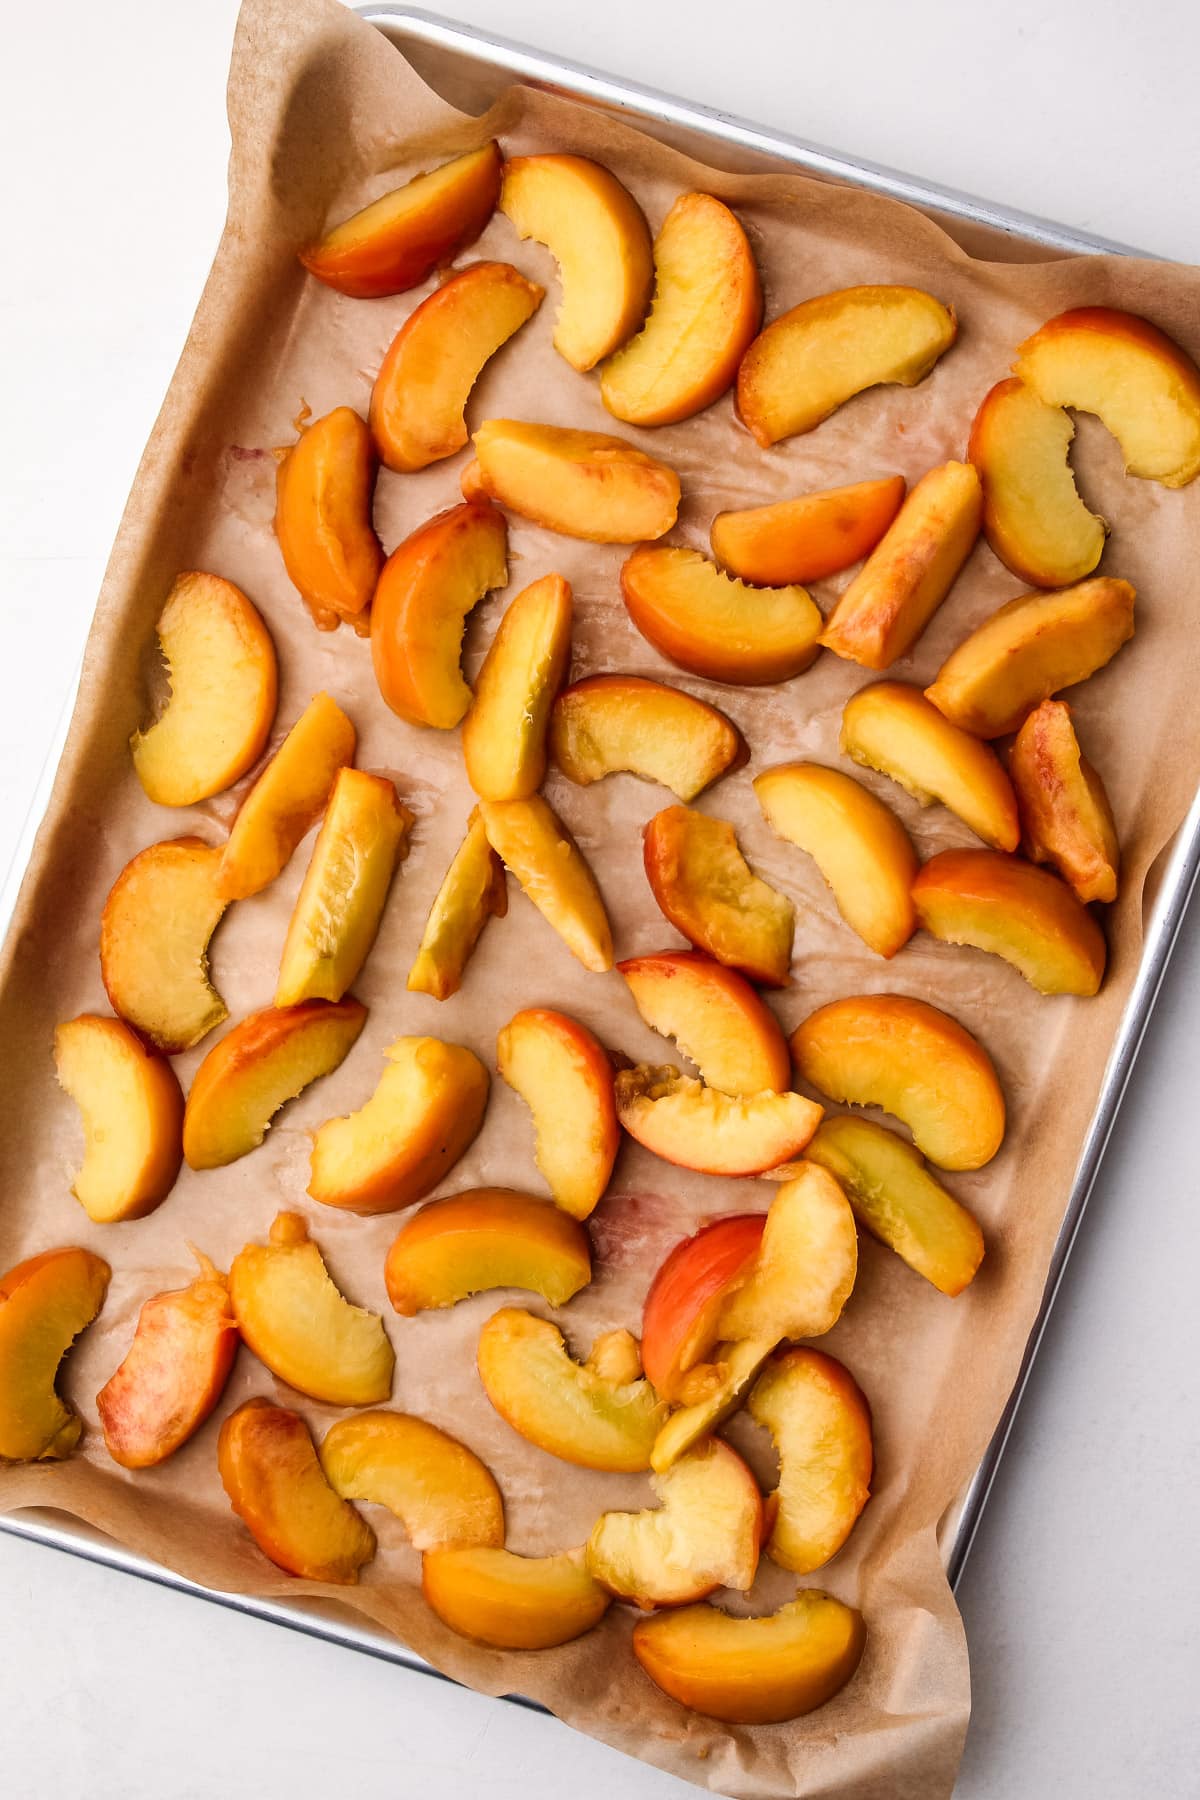
Step 3: Place the peaches on a parchment lined sheet tray, with space in between each and freeze until solid, at least 4 hours
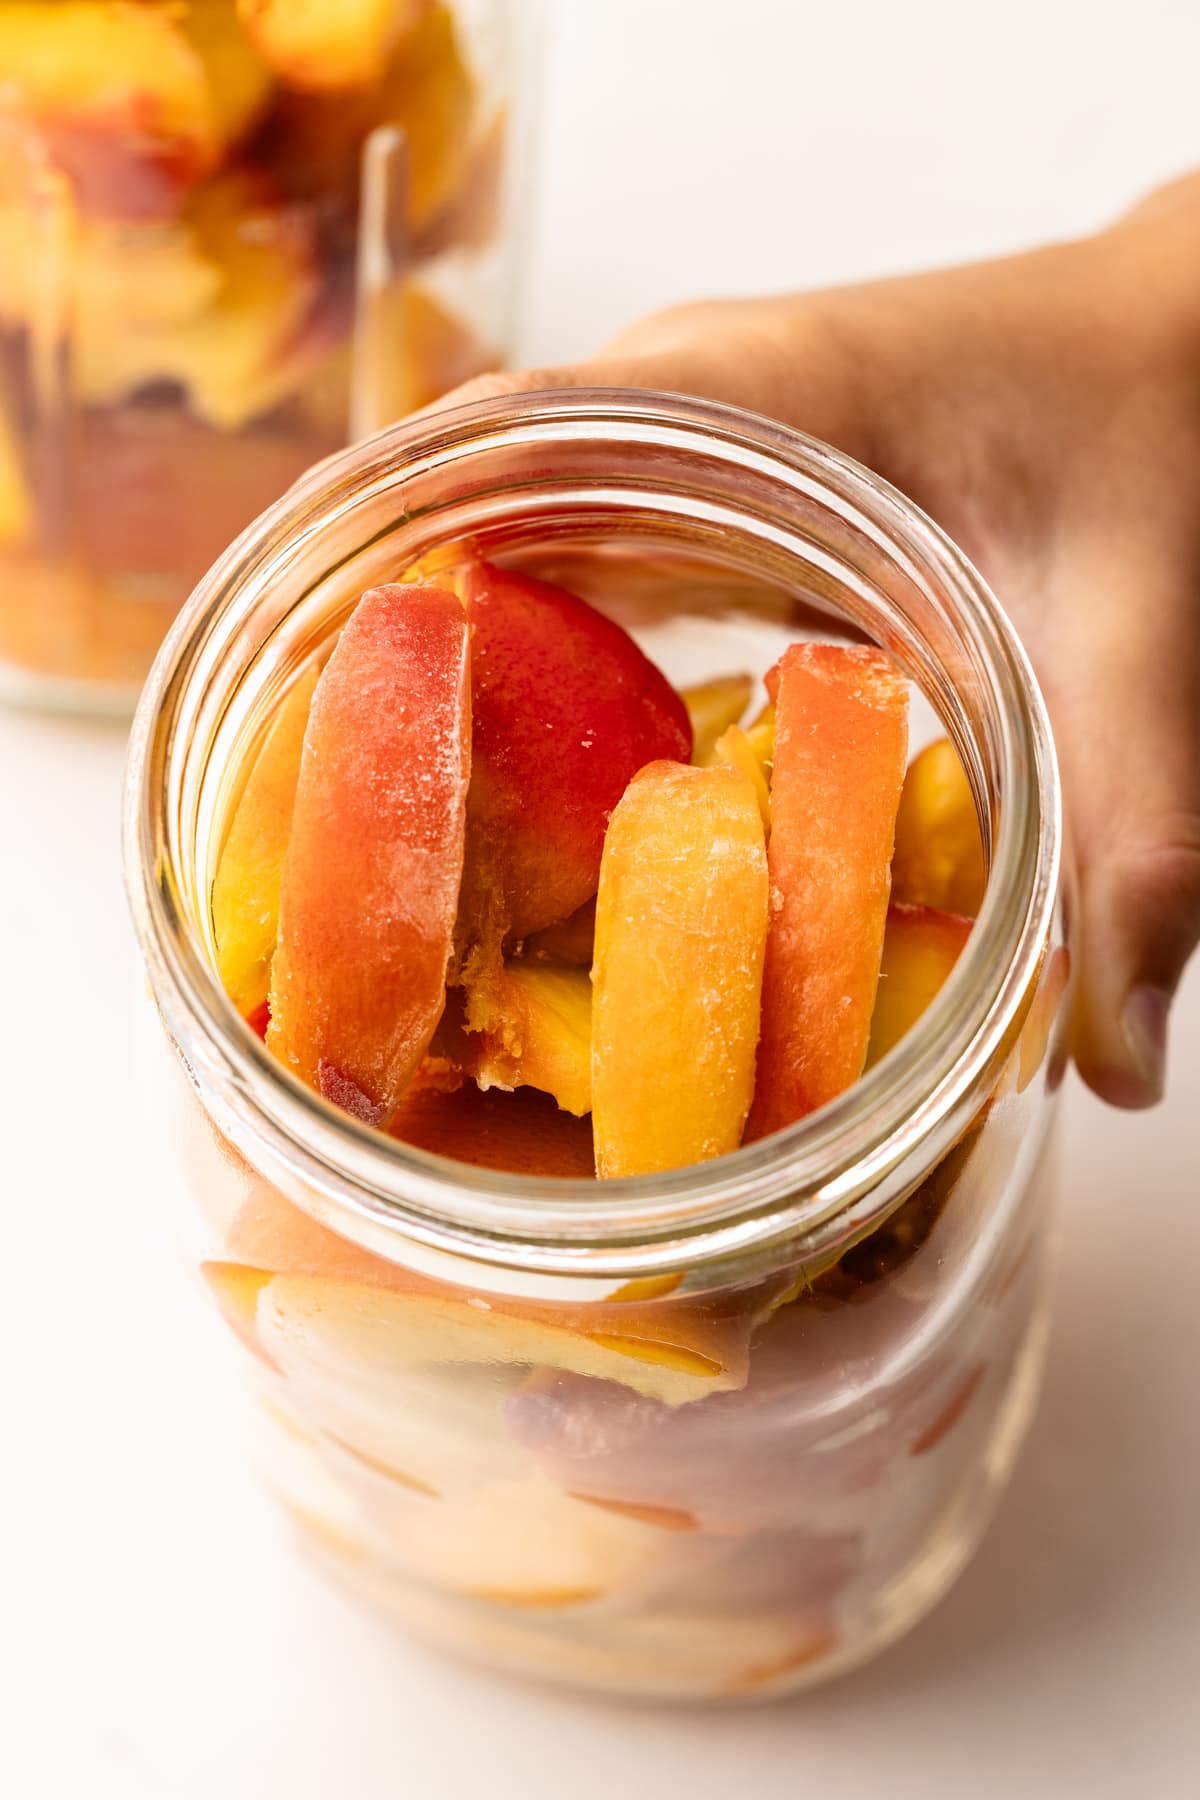
Step 4: Once frozen, transfer to long-term airtight storage.
Freezing them spaced apart on a sheet tray is important so they don't get stuck together. If you just toss them in a bag and throw them in a freezer you'll have one big hunk of strawberry.
Storage
Store the peaches in an air tight container. Plastic bags or silicone bags are good. Try to remove as much air from them as possible. Obviously, if you have a vacuum sealer, that would be the best way to preserve them for longer.
Mason jars are also useful, and it's often how I store them, but they won't last as long since removing air from them is hard and ice crystals tend to form. This isn't the worst thing to happen, but it's not ideal.

Using + Defrosting
Once the peaches are frozen, they can be used frozen as is or defrosted.
The best way to defrost is by thawing them slowly overnight in the refrigerator. They will naturally change the texture and lose some liquid. But it's all delicious, and you might even enjoy having that peach syrup that naturally comes out.
Here are some recipes that are perfect for using frozen peaches:
More Kitchen Tutorials


Full Recipe
How to Freeze Peaches

Capture the magic of peach season all-year long with this tutorial on how to freeze peaches.
- Prep Time: 00:10
- Freezing Time: 04:00
- Total Time: 4 hours 10 minutes
- Yield: As desired
Ingredients
- Fresh, in-season ripe peaches
- Water
- Distilled White Vinegar
Instructions
- Wash the peaches: fill up a big bowl of cold water. Add a few big glugs of distilled white vinegar. Either using your hands or a soft cloth, wipe away any visible dirt on the surface, and let the peaches sit for a few minutes. Pull them out of the water and into a colander, and rinse well. Transfer the peaches to a towel to dry.
- Prepare the peaches as desired, either blanched and skin removed, or with skin on, and either segmented or diced. See the body of the article above for tips on this.
- Place the peaches on a parchment line sheet tray, spaced in between each piece. Use multiple trays if needed. Freeze until solid, at least 4 hours
- Once frozen, transfer to long-term air-tight storage, such as plastic bags. Remove as much air as possible to help prevent ice crystals forming on the peaches.
- Frozen peaches will last 6-12 months in the freezer, but are best consumed within the first 3 months.
Notes
See this post for how to Peel Peaches.
It must be said that the quality of the peach you put into the freezer will be the quality of the peach you get out. Meaning that if you put an unripe flavorless peach in the freezer, those factors won't magically change when frozen. If anything, they'll get worse. Choose the best quality peaches you can, and ensure they are just ripe.
Some of the links on this page may be affiliate links. Everyday Pie is a participant in the Amazon Associates Program. As an Amazon Associate I earn from qualifying purchases, at no extra cost to you.
Leave a Reply