There is no more delicious chocolate croissant than the one that comes out of your oven! This extensive tutorial has everything you need to know to make Homemade Chocolate Croissants (also known as Pain au Chocolat) with step-by-step photos, a video, and lots of tips!

Want to save this recipe?
Enter your email & I'll send it to your inbox. Plus, get weekly updates from me!
Straight from the oven, a warm chocolate croissant is miraculous, with crisp, buttery flaky layers and pools of melty chocolate. I'm a chocolate croissant girl through and through, and will always choose it over a plain croissant. And this recipe does not disappoint.
With extensive recipe testing over a period of years, I created an amazing yet approachable easy-ish homemade croissant recipe for the home baker. The shortcut dough is like the croissant version of rough puff pastry, resulting in gorgeous, achievable pastries anybody would think are straight from a Parisian bakery.
This easy chocolate croissant recipe will guide you through every step of the process. If you want to dive deeper into making croissants, check out this Classic Croissant recipe, or reference that Easy Croissant recipe.
So, let's get to making it, shall we? The article below is jam-packed full of useful information and a video. You can jump around using the menu below, or skip to the end of the article for the full recipe.
Jump to:
- Ingredients Needed
- Type of Chocolate to Use
- Tools Needed
- How to Make the Dough
- Proofing the Dough
- The Butter Layer
- Laminating the Dough
- Shaping the Chocolate Croissants
- Proofing (and Yeast)
- Baking Good Croissants in a Home Oven
- Serving and Storing
- More Baking Bucket Lists Recipes
- More Pastries
- Full Recipe
- Pin it For Later
Ingredients Needed
Here is an overview of the ingredients needed for this recipe. The full recipe is listed below in greater detail. I tried my best to give as many substitutions as possible, but sometimes a recipe works best only with the ingredients called for, and this is one of those cases. If you want to try a different ingredient than what is named, you will have to do your own experimentation to see if it affects the final product.
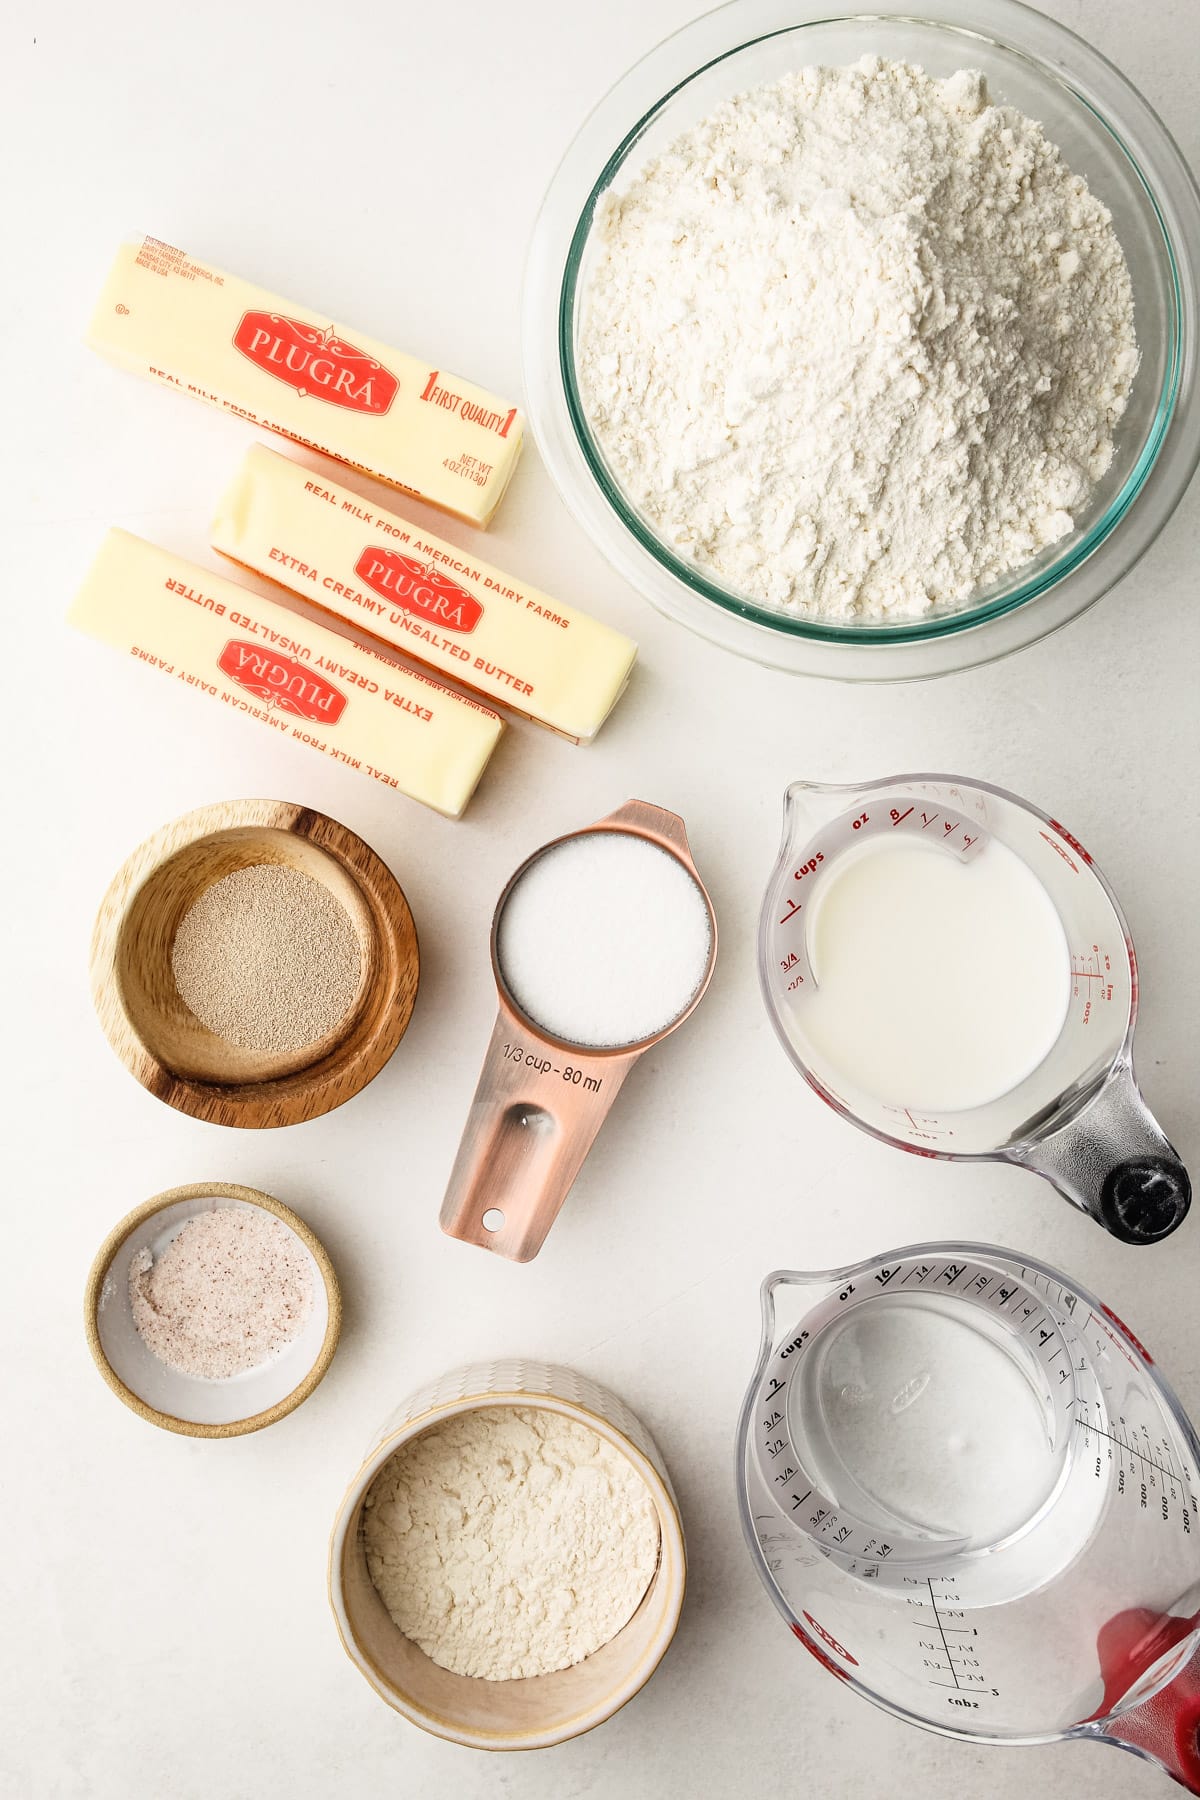
- high-fat (European-style) unsalted butter (Brands such as Kerrygold, Plugra, Cabot Extra Creamy, and Vital Farms worked well. Look for butter with a fat content of 82%. If you really can’t find any high-fat butters, I have made this recipe with standard butter. The results are a little less flavorful and the crumb on the finished croissant isn’t as even, but it’s still possible.)
- bread flour (I recommend King Arthur or Bob's Red Mill, which is what I tested this recipe with)
- instant yeast (I only tested this recipe with the "red" SAF instant yeast and cannot advise on alternative yeast options)
- granulated sugar
- fine sea salt (for yeasted breads, fine sea salt works well for its ability to dissolve quickly and evenly. If you don't have it, I suggest using the gram amount listed in the recipe to ensure the salinity level is correct with a different type of salt.)
- whole milk
- chocolate batons or a chopped chocolate bar (see more below)
- egg wash
Type of Chocolate to Use

Traditional chocolate croissants are made with chocolate batons, which are long slender sticks of chocolate. They aren't the easiest to find for home bakers though. I purchased a large box of them that was pricey. I also found a smaller quantity of them. They're fun to have, and really give the croissants that classic look--but it's absolutely fine to skip them and use a cut up chocolate bar instead. It won't be quite as precise as the batons, but it'll do the job just fine.
Use a serrated knife to cut a bar of dark chocolate to make your own batons.
Tools Needed
Here is a list of some of the primary tools I use in this recipe. You won't necessarily choose to use them all, but they are exactly what I used. Any links may contain affiliate links.

- Stand Mixer: The instructions call for using a stand mixer to assemble the dough and the butter.
- Plastic wrap: I know some people are averse to plastic, but it keeps the moisture inside the dough during the resting time in the refrigerator. It's possible to reuse the same piece of plastic wrap or you could use parchment paper instead, but it can be trickier.
- Rolling pin: There are many different styles out there. Use the one you are most comfortable with. I actually use two rolling pins nearly every time I roll anything out, one tapered French dowel rolling pin and one straight dowel rolling pin.
- Bench scraper: This helps keep your dough in the correct shape, but it’s not absolutely essential.
- Ruler: Useful for ensuring your dough is rolled out to the proper sizes.
- Clean / Kitchen-safe spray bottle: This is used to add a mist of water to the baking trays for a higher rise in the croissants
- Pastry wheel or sharp knife: This is used for cutting the dough during lamination and for cutting it during shaping.
- Dry pastry brush: To get any excess flour off the dough.
- Wet pastry brush: For brushing on the egg wash.
- A sheet pan: For holding the dough in the refrigerator while it rests and for baking the croissants.
- Room thermometer: This is useful for having a true understanding of the ambient temperature of your home. I have two in my kitchen that I use whenever I'm baking.
Do you really need all of these tools? At the end of the day, all you really need is a rolling pin and a bowl. However, using the above-mentioned tools (which is everything I use) makes making croissants easier.
Something to mention that isn't a tool: you'll need space in both your freezer and refrigerator that can fit a sheet pan when making the dough. The dough will need to rest multiple times, so it's helpful to prepare a designated spot in advance to ensure you have enough room.
How to Make the Dough
Croissant pastry is a yeasted dough wrapped around a butter "block" and laminated several times before being shaped, proofed, and baked. This easy recipe takes the same idea, but uses as many shortcuts as possible.
This easy croissant dough is a semi-lean dough, meaning it has a small amount of sugar and fat added to it. It's made in a stand mixer.
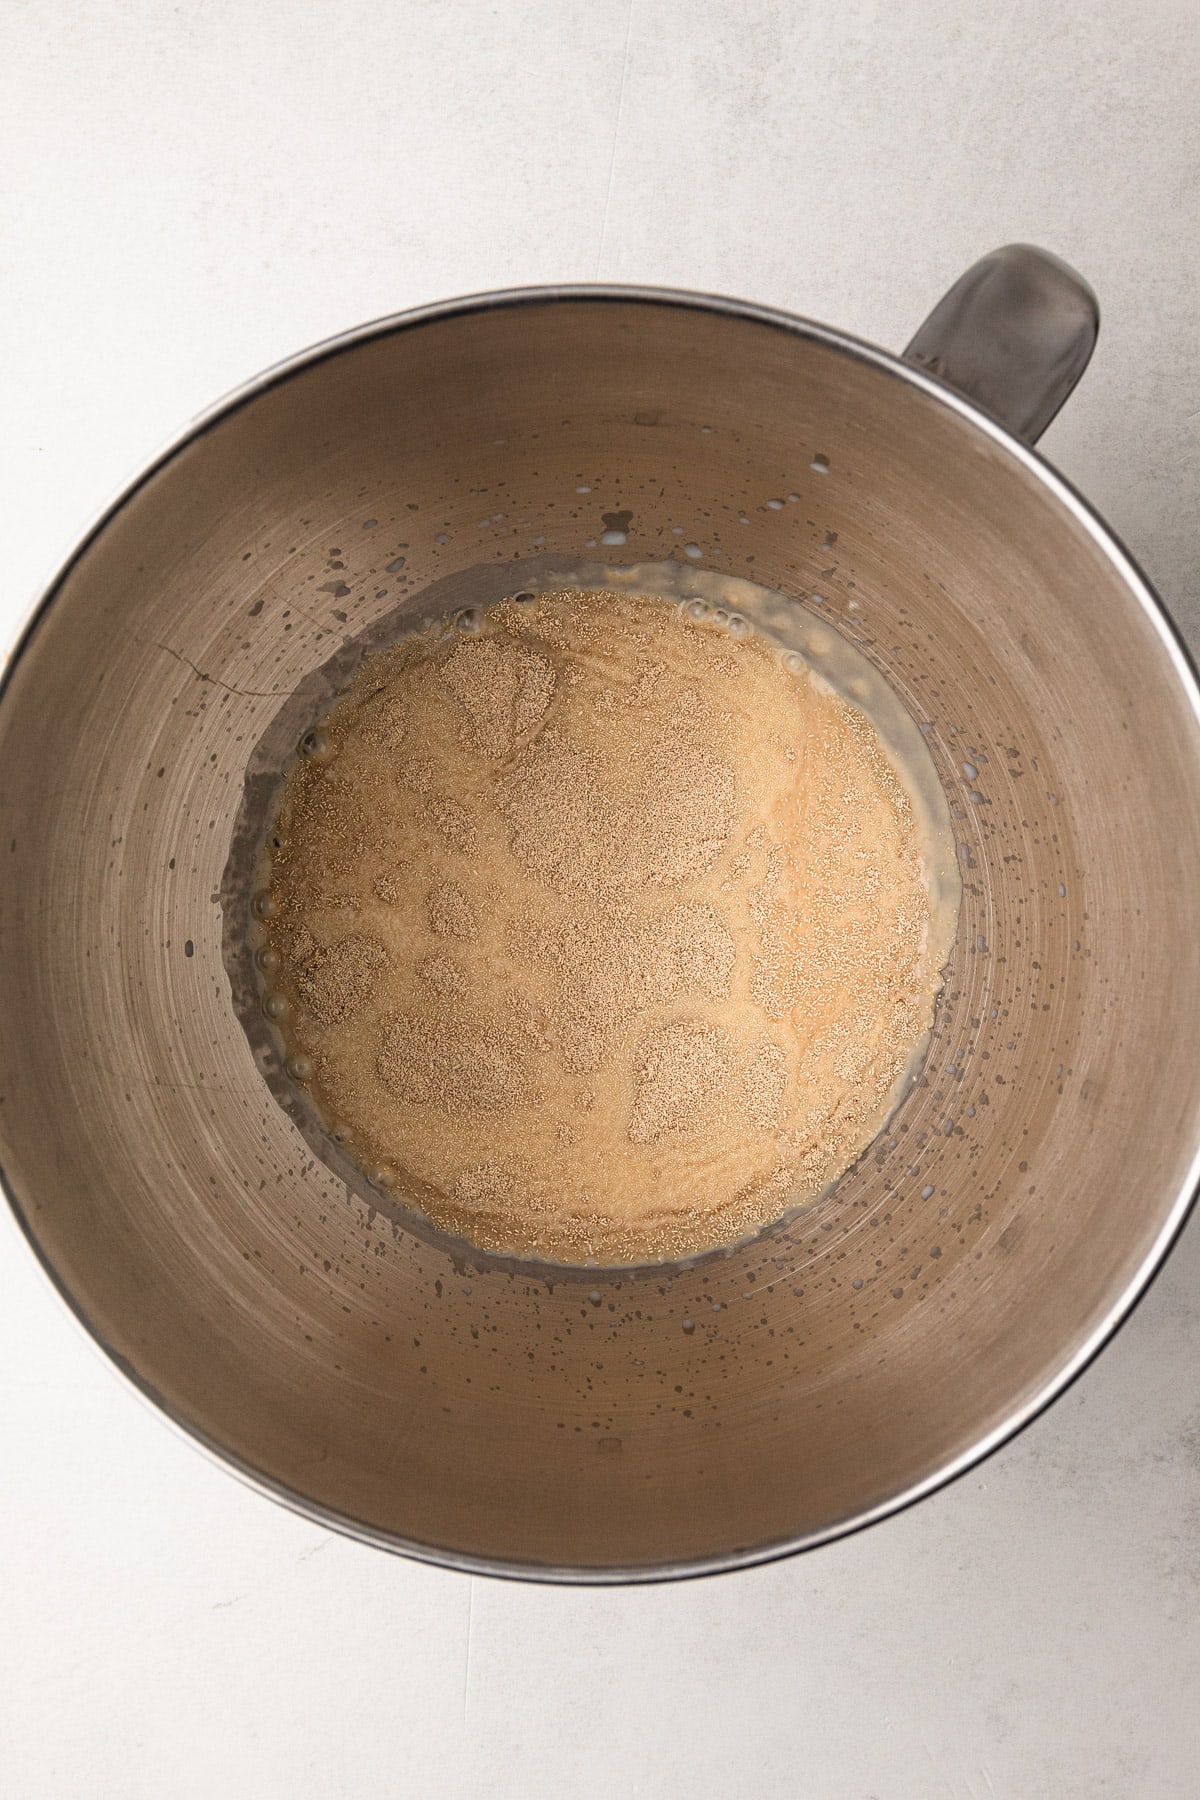
Step 1: Add the liquid ingredients to the mixer, plus the yeast.
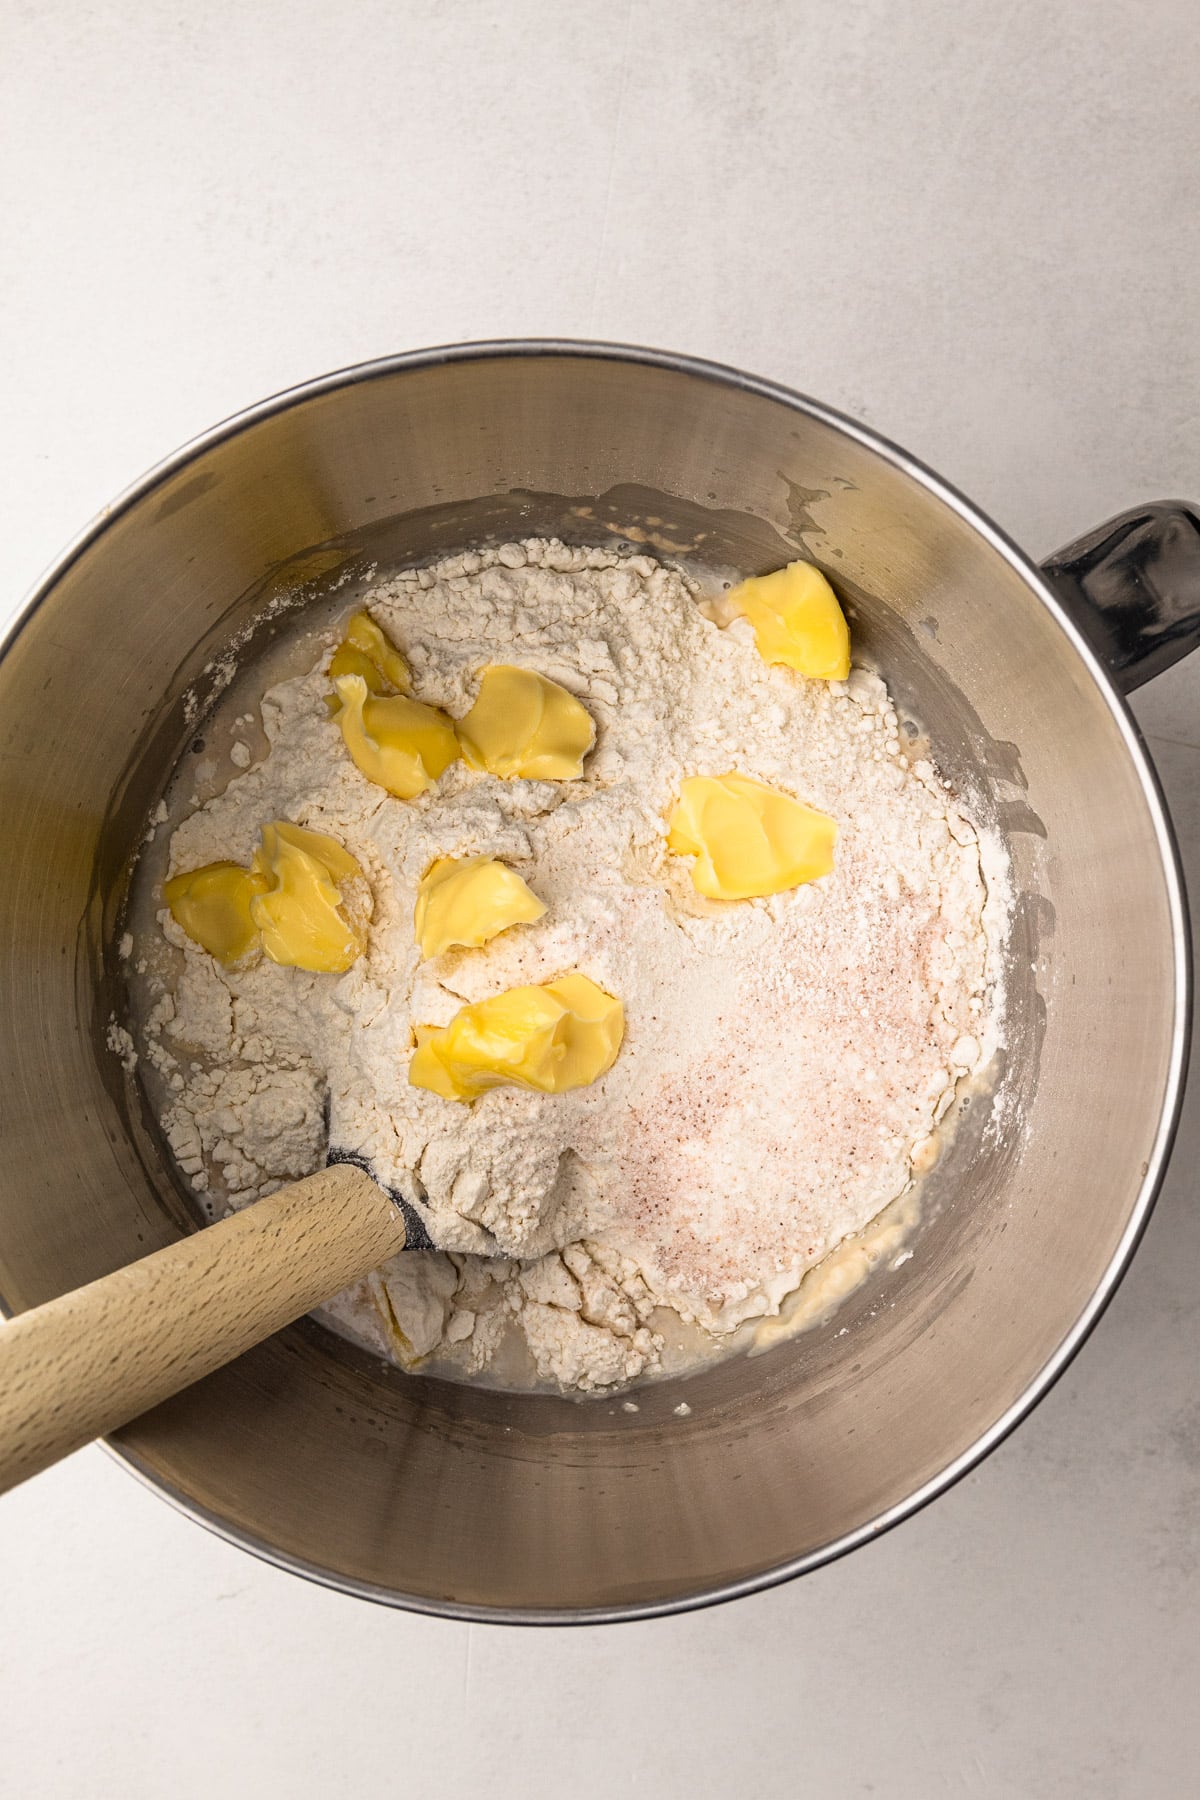
Step 2: Add the flour, salt and softened butter on top.

Step 4: Mix the dough for about 5 minutes.

Step 4: Hand knead for 1 minute to ensure the butter is fully mixed in.
Proofing the Dough
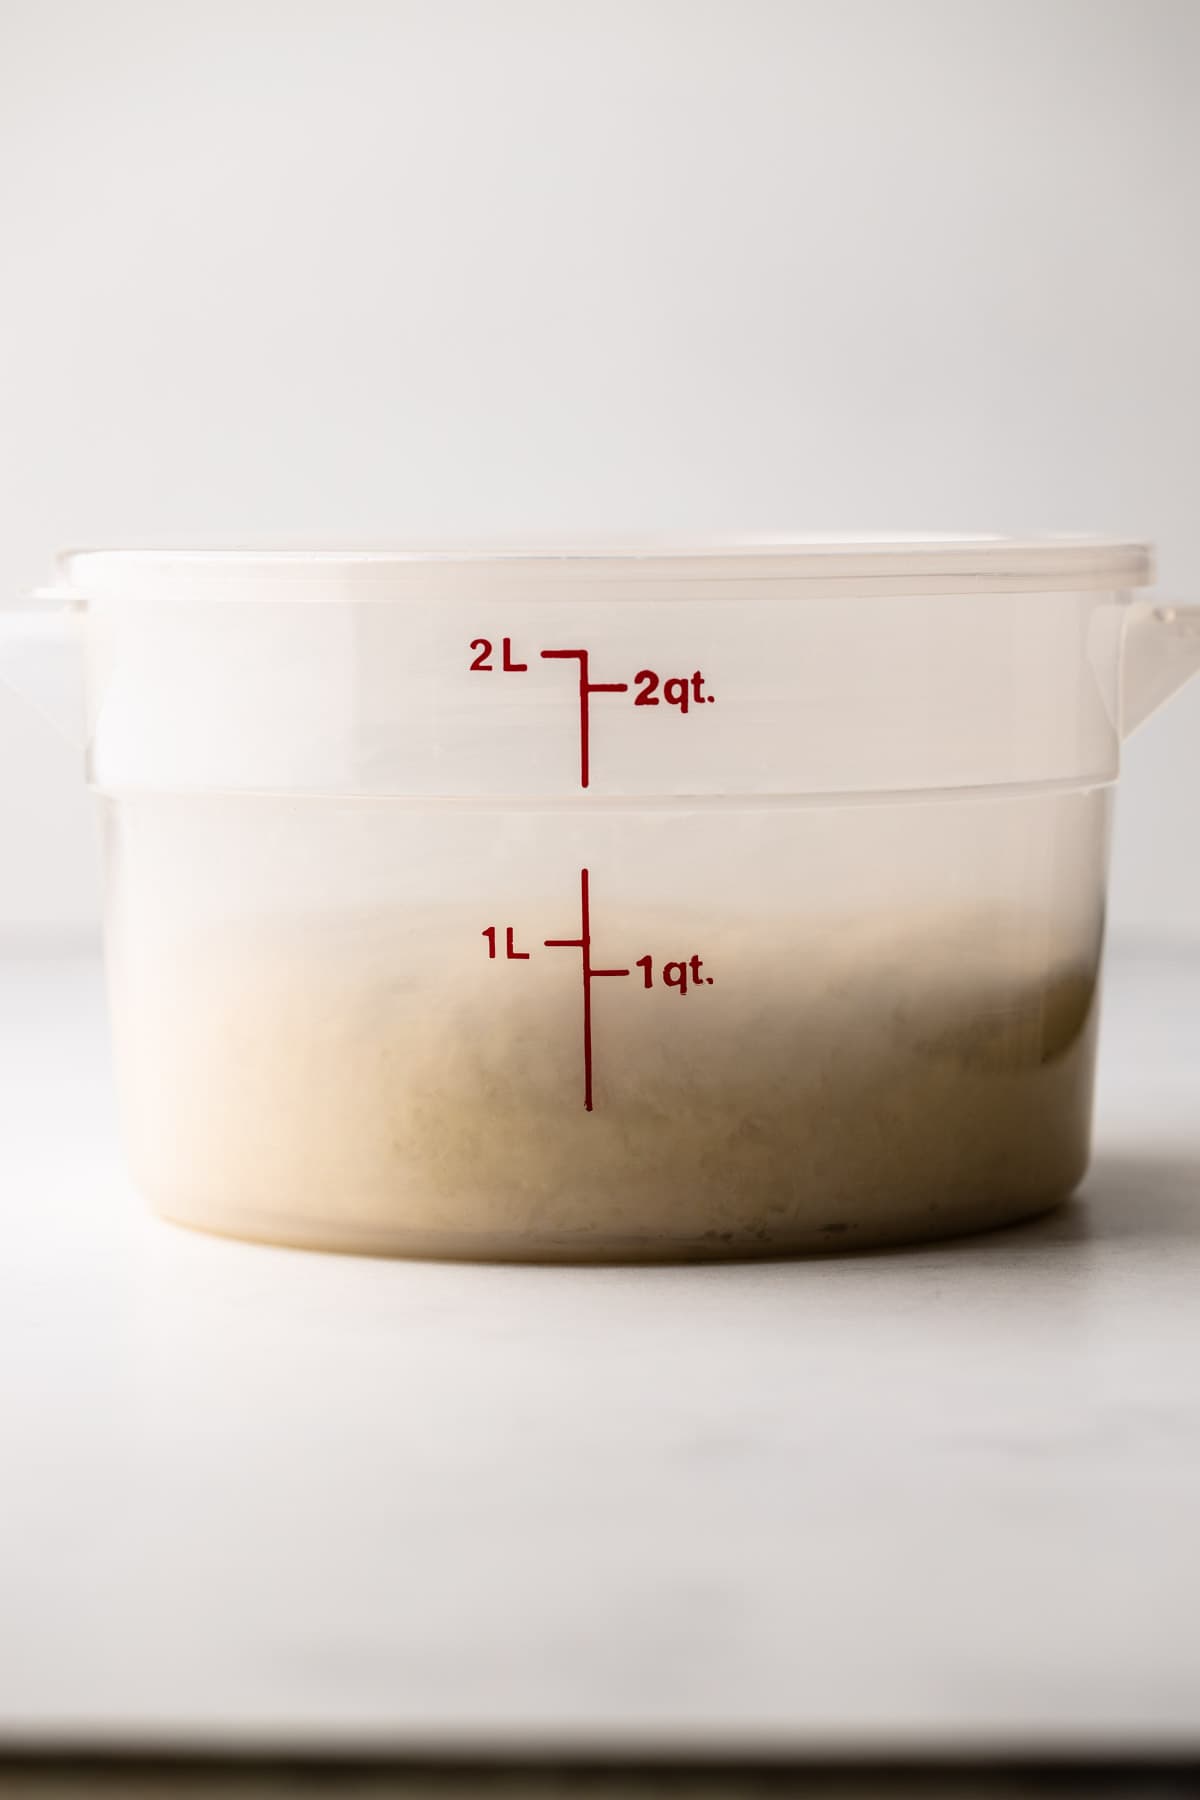
The ambient temperature of your home and the temperature of the ingredients used are both important and have an effect on yeasted pastry. If it's too cold in your kitchen (below 70ºF), then it might take longer than 1-2 hours. If it's too hot (above 80ºF), then it might be ready in an hour.
The goal is to get the dough to double in size in 1-2 hours.
The Butter Layer
One of the biggest shortcuts in this recipe that makes it less fussy is, unlike traditional croissants, it will not use a butter block.
Instead, softened butter is spread onto the croissant dough. It isn’t quite as precise, but it’s amazing how close the result is to the “real thing.”

Step 1: Add softened butter and flour to a mixer.

Step 2: Paddle it until it's completely combined.
Laminating the Dough
After the butter is spread on, the dough is folded down three times.
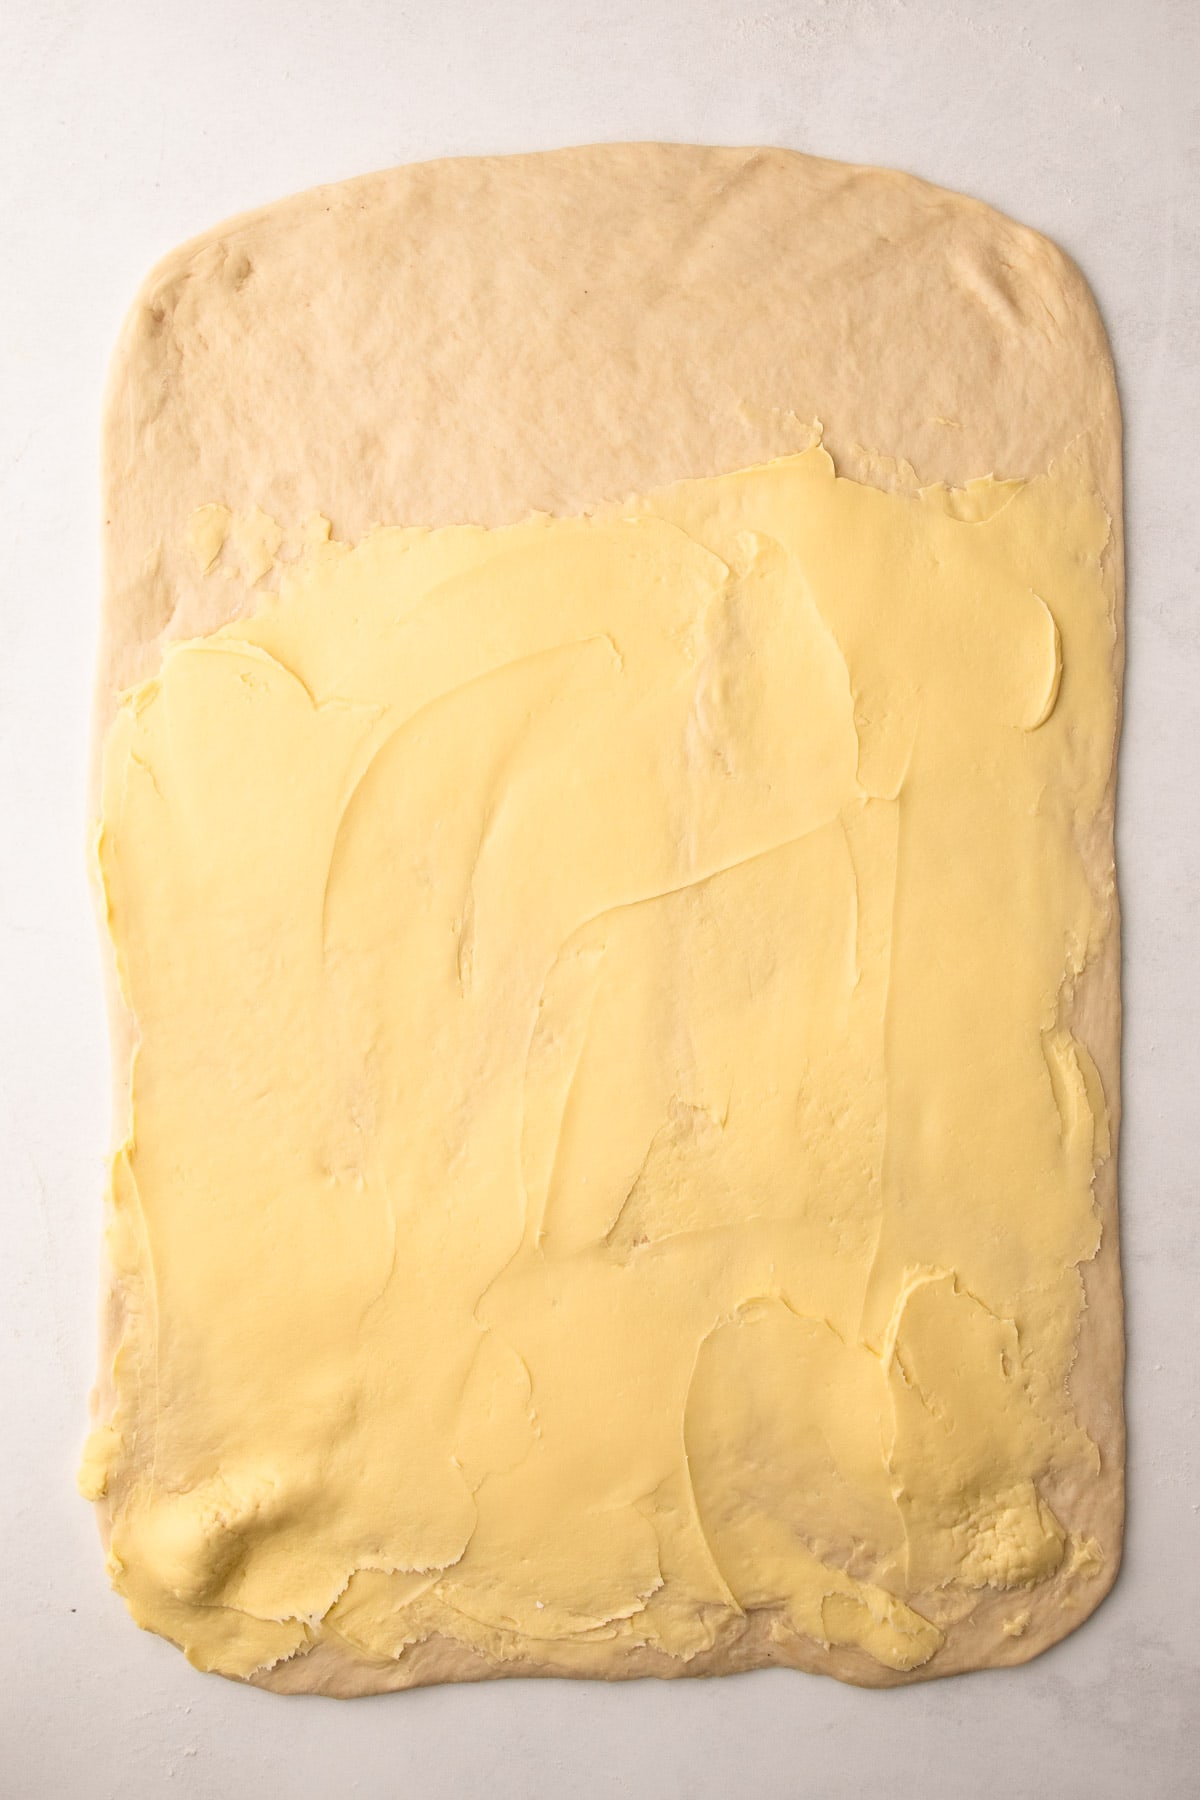
Step 1: Butter is spread onto ¾ of the dough.
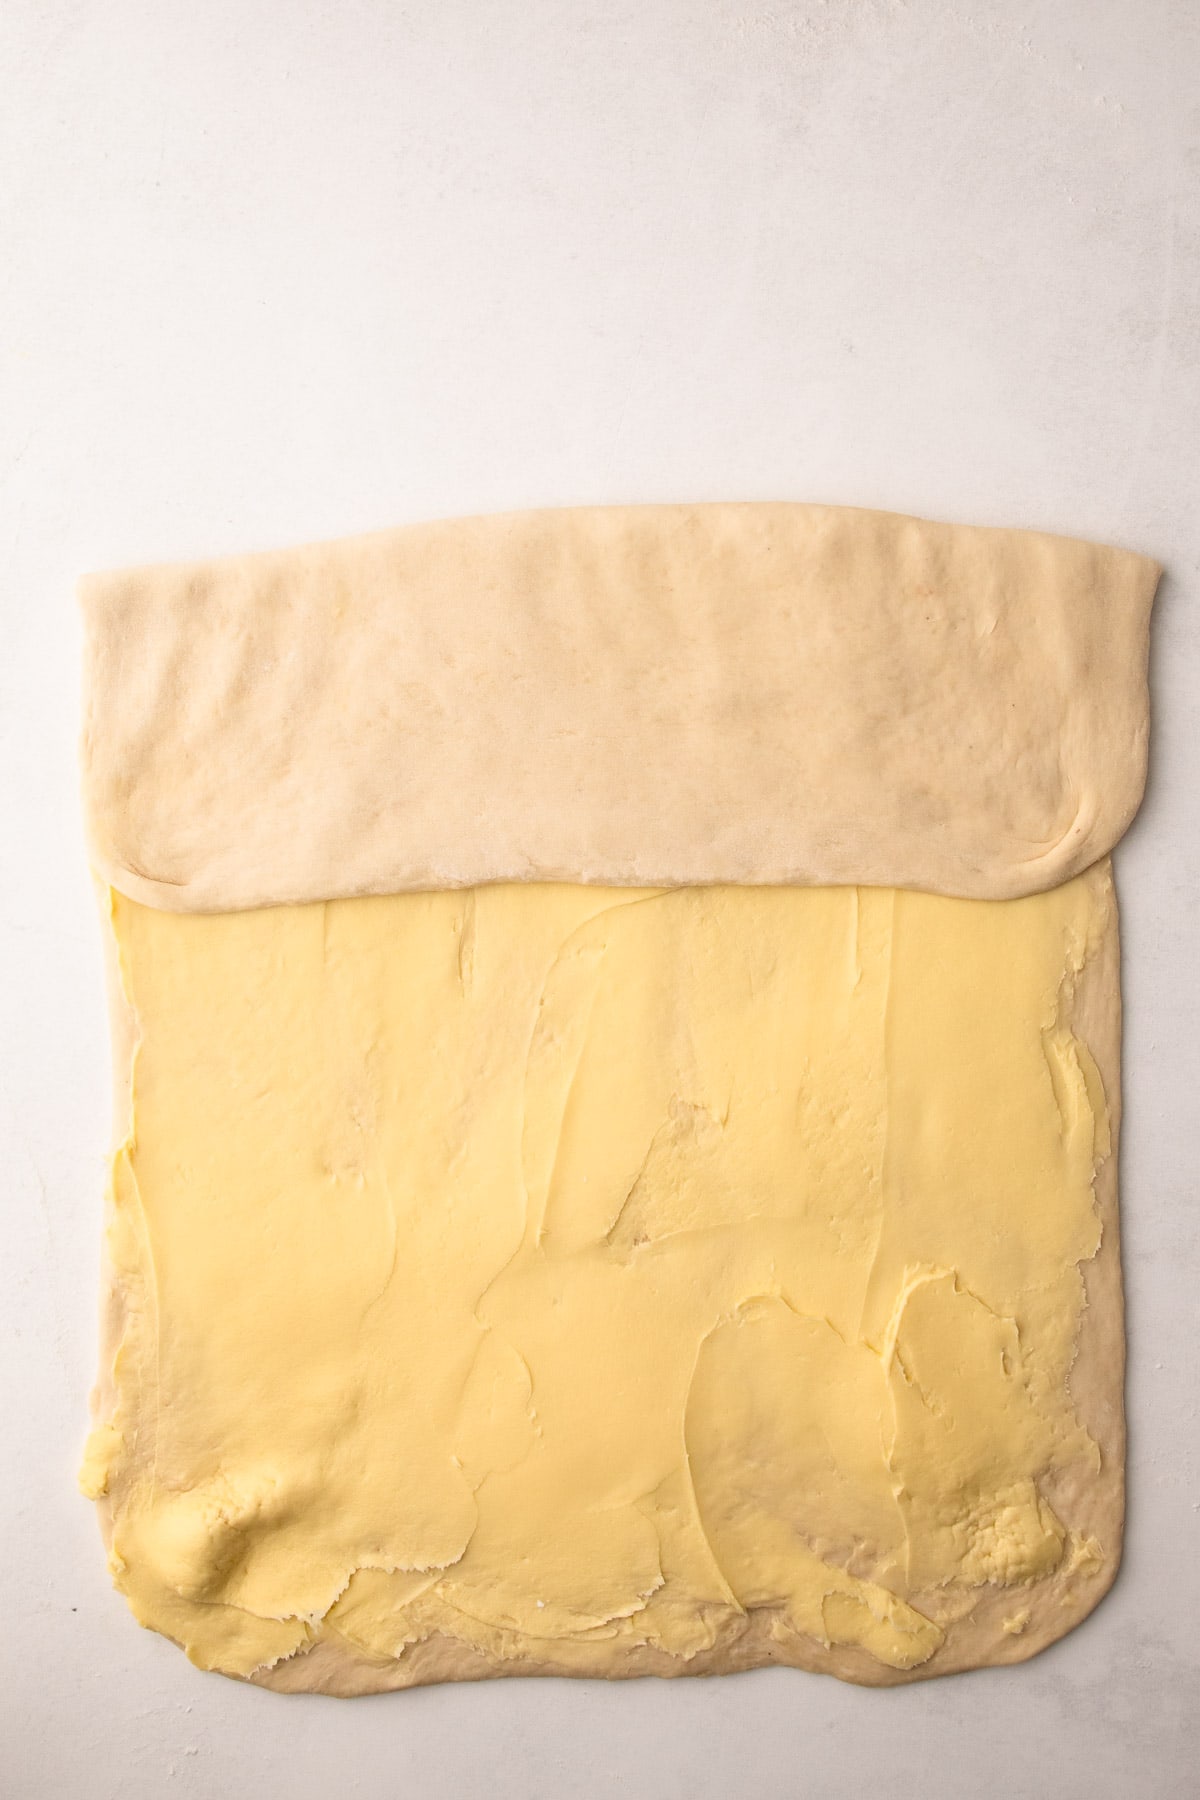
Step 2: The top ¼ is folded down.

Step 3: Repeat folding down another ¼ of the dough.

Step 4: Repeat one last time to achieve even layers of dough-butter-dough.
Then the dough is rolled out and laminated once. And that’s it! That’s all this recipe requires in terms of lamination.

These steps are meant to be less precise and more forgiving than traditional laminating methods.
After the dough is laminated, it will be chilled for about two hours, or until the dough is about 40ºF to 50ºF.
Shaping the Chocolate Croissants
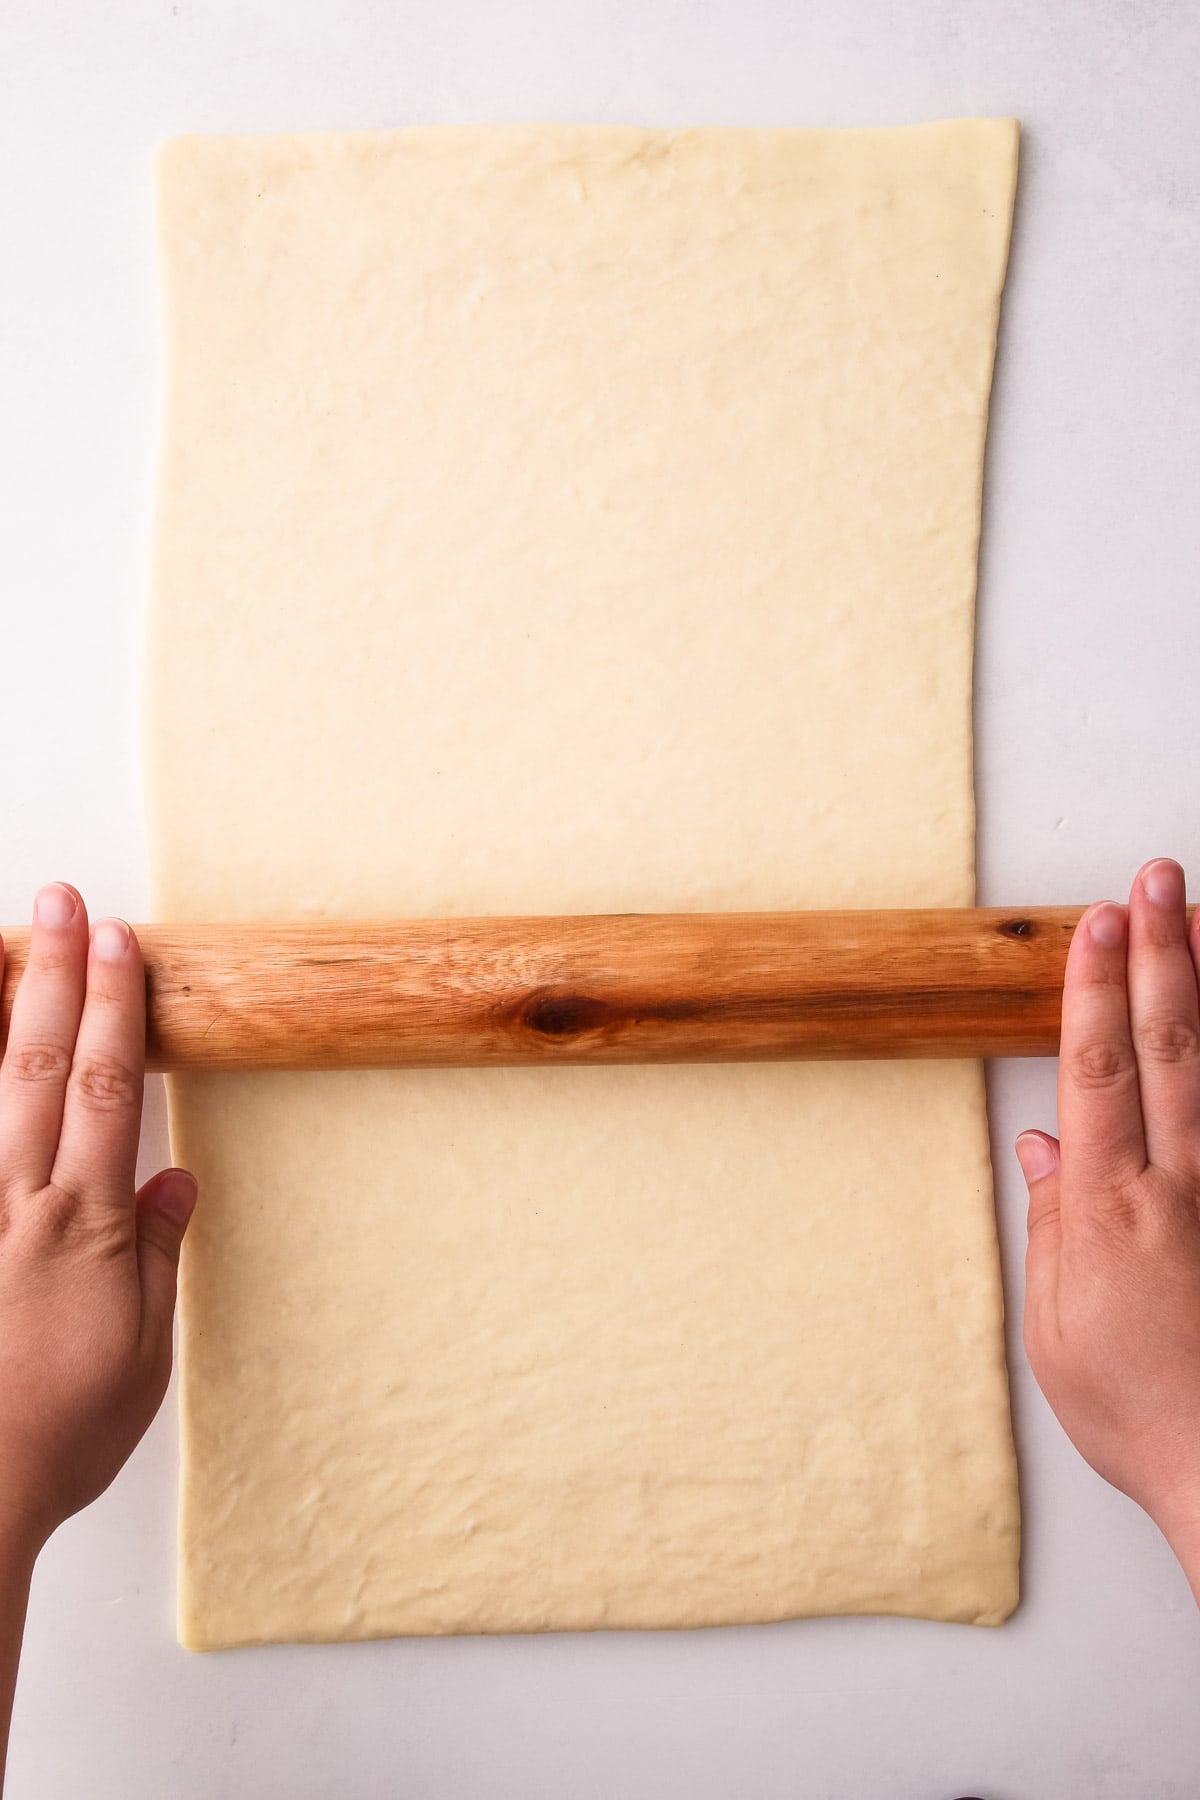
Once the dough is chilled, it is rolled out to a rough 11x19-inch rectangle. For neat chocolate croissants, square off the edges to make an exact rectangle of 10x18 inches.
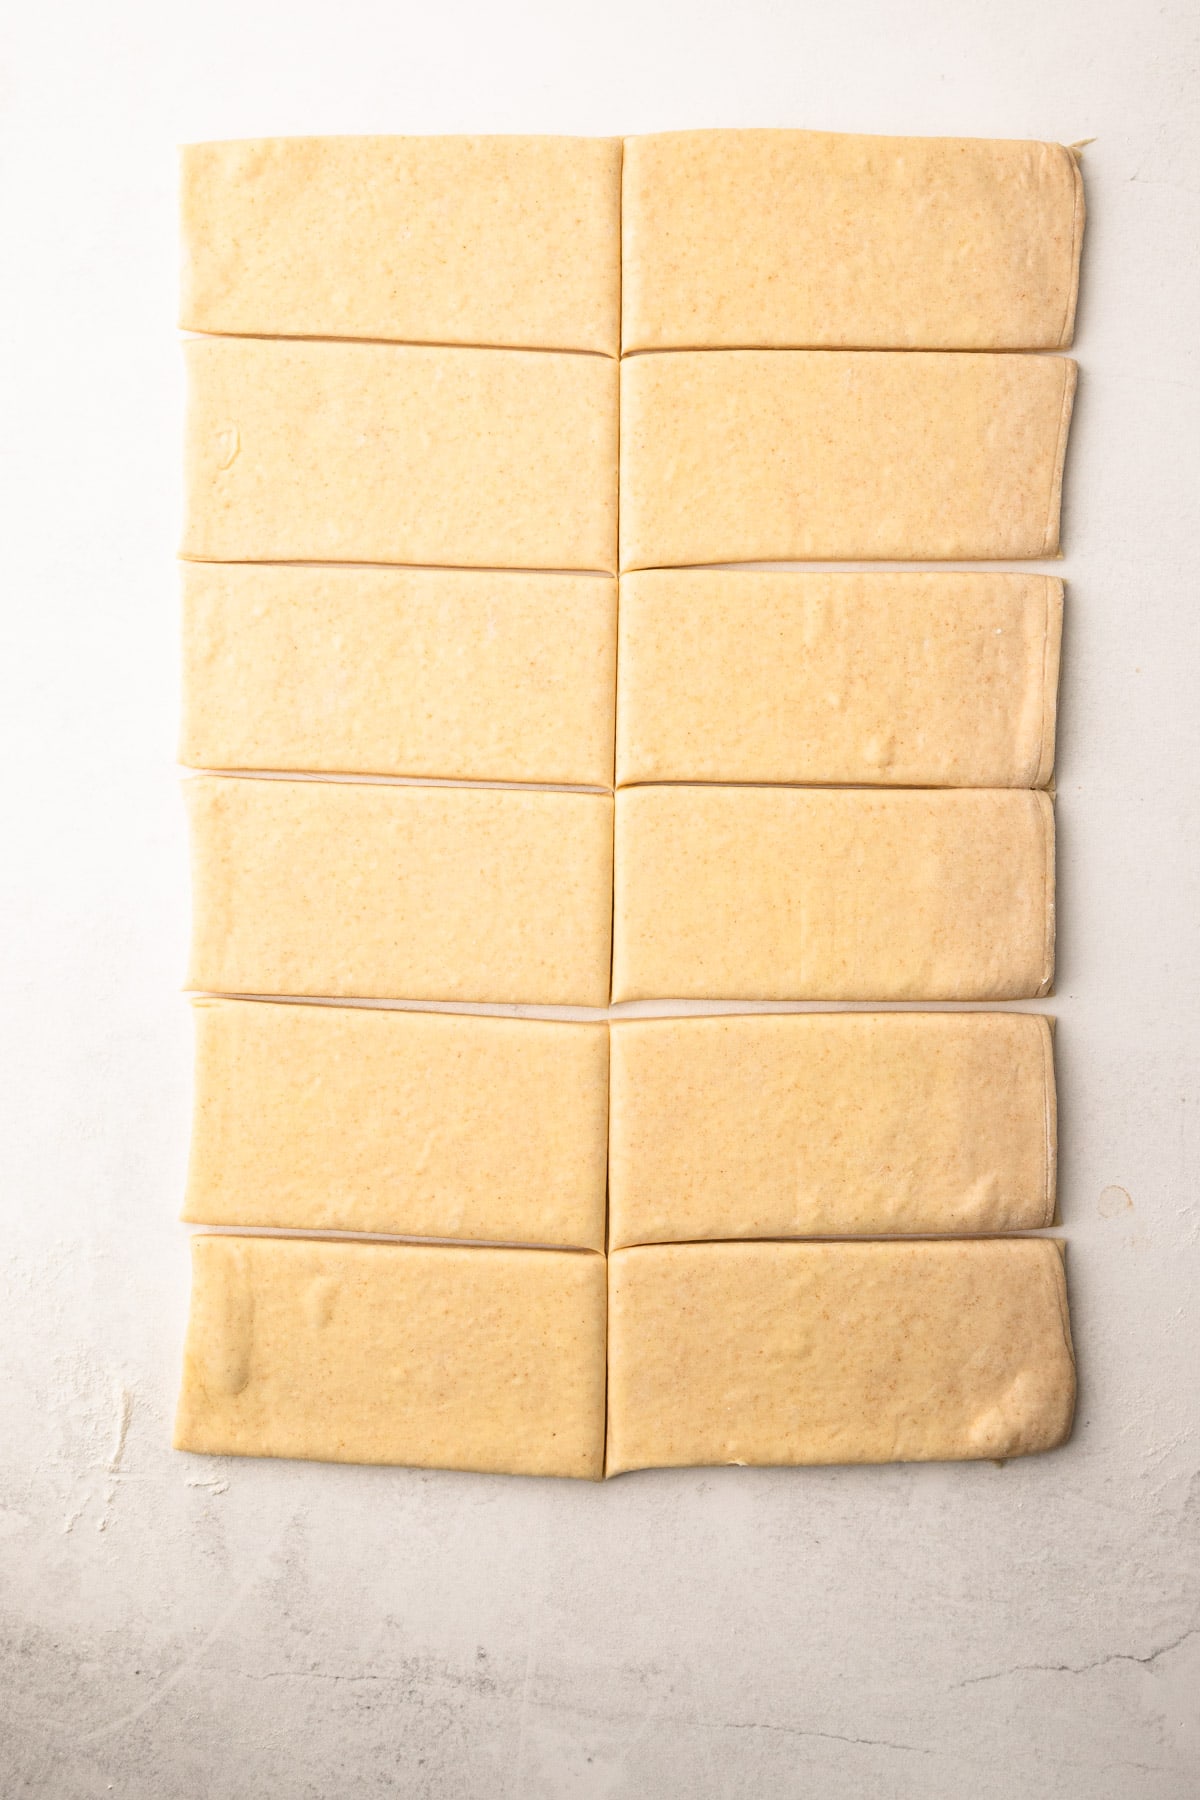
Use a ruler to cut twelve 3x5-inch rectangles.
This is a good time to ensure the dough is still cold. If it isn't, briefly rest the rectangles in the freezer for 10 minutes or refrigerator for 15 minutes. Then move on to the final shaping.
There are several ways to shape chocolate croissants, and it really comes down to preference. I prefer to place two of the chocolate batons spaced apart, and then roll the croissant around them. Once the croissants are baked, you can easily enjoy two separate pieces of chocolate croissant that both contain chocolate, which I like, so that's the method I'm sharing here.
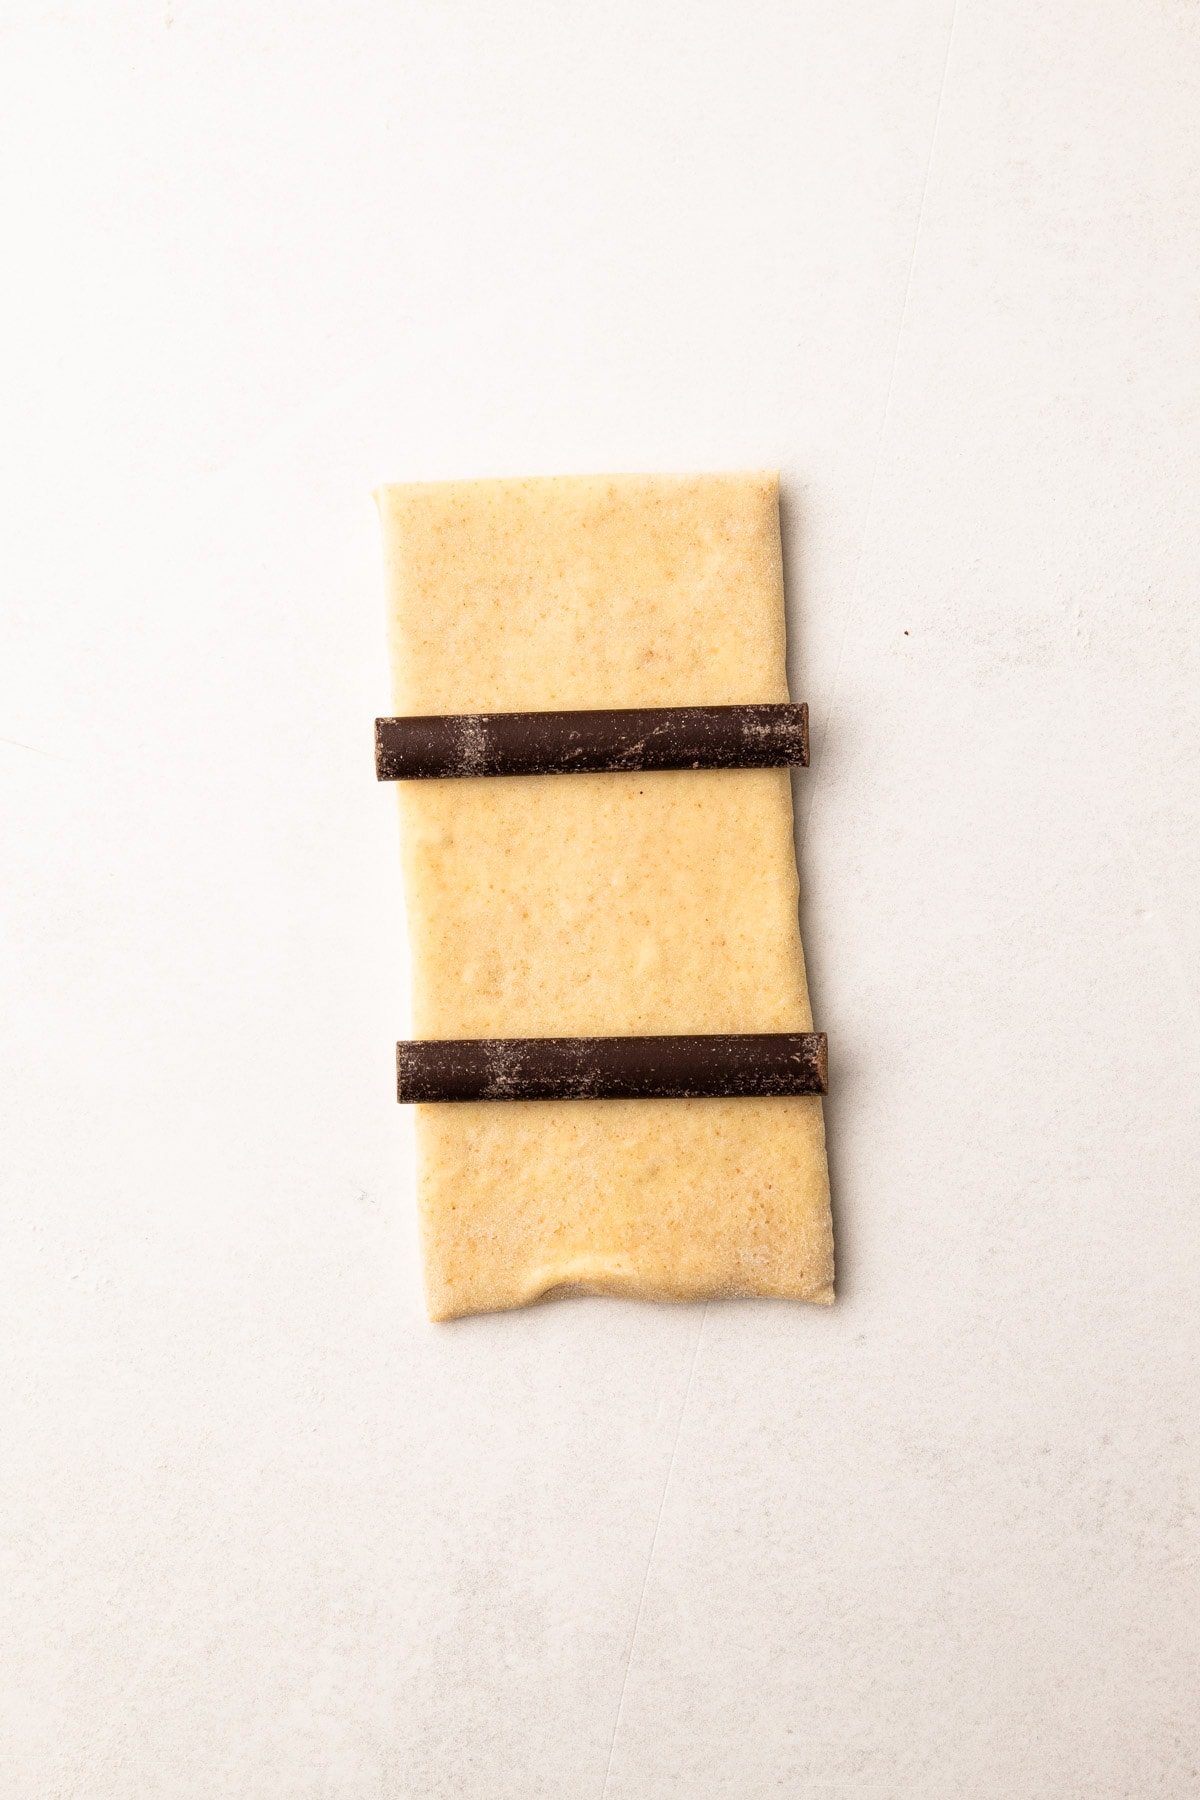
Step 1: Place two batons (or cut chocolate bar) spaced equally apart from the middle of the rectangle.

Step 2: Pull up the short side of the dough towards the middle and press it in, adhering the two pieces of dough together.

Step 3: Repeat this with the top short side of the dough.

Step 4: Finish by folding the two halves towards each other.
Proofing (and Yeast)
After shaping the croissants, the next step is proofing (or fermentation). This process is necessary to achieve the airy final texture of the pastry.
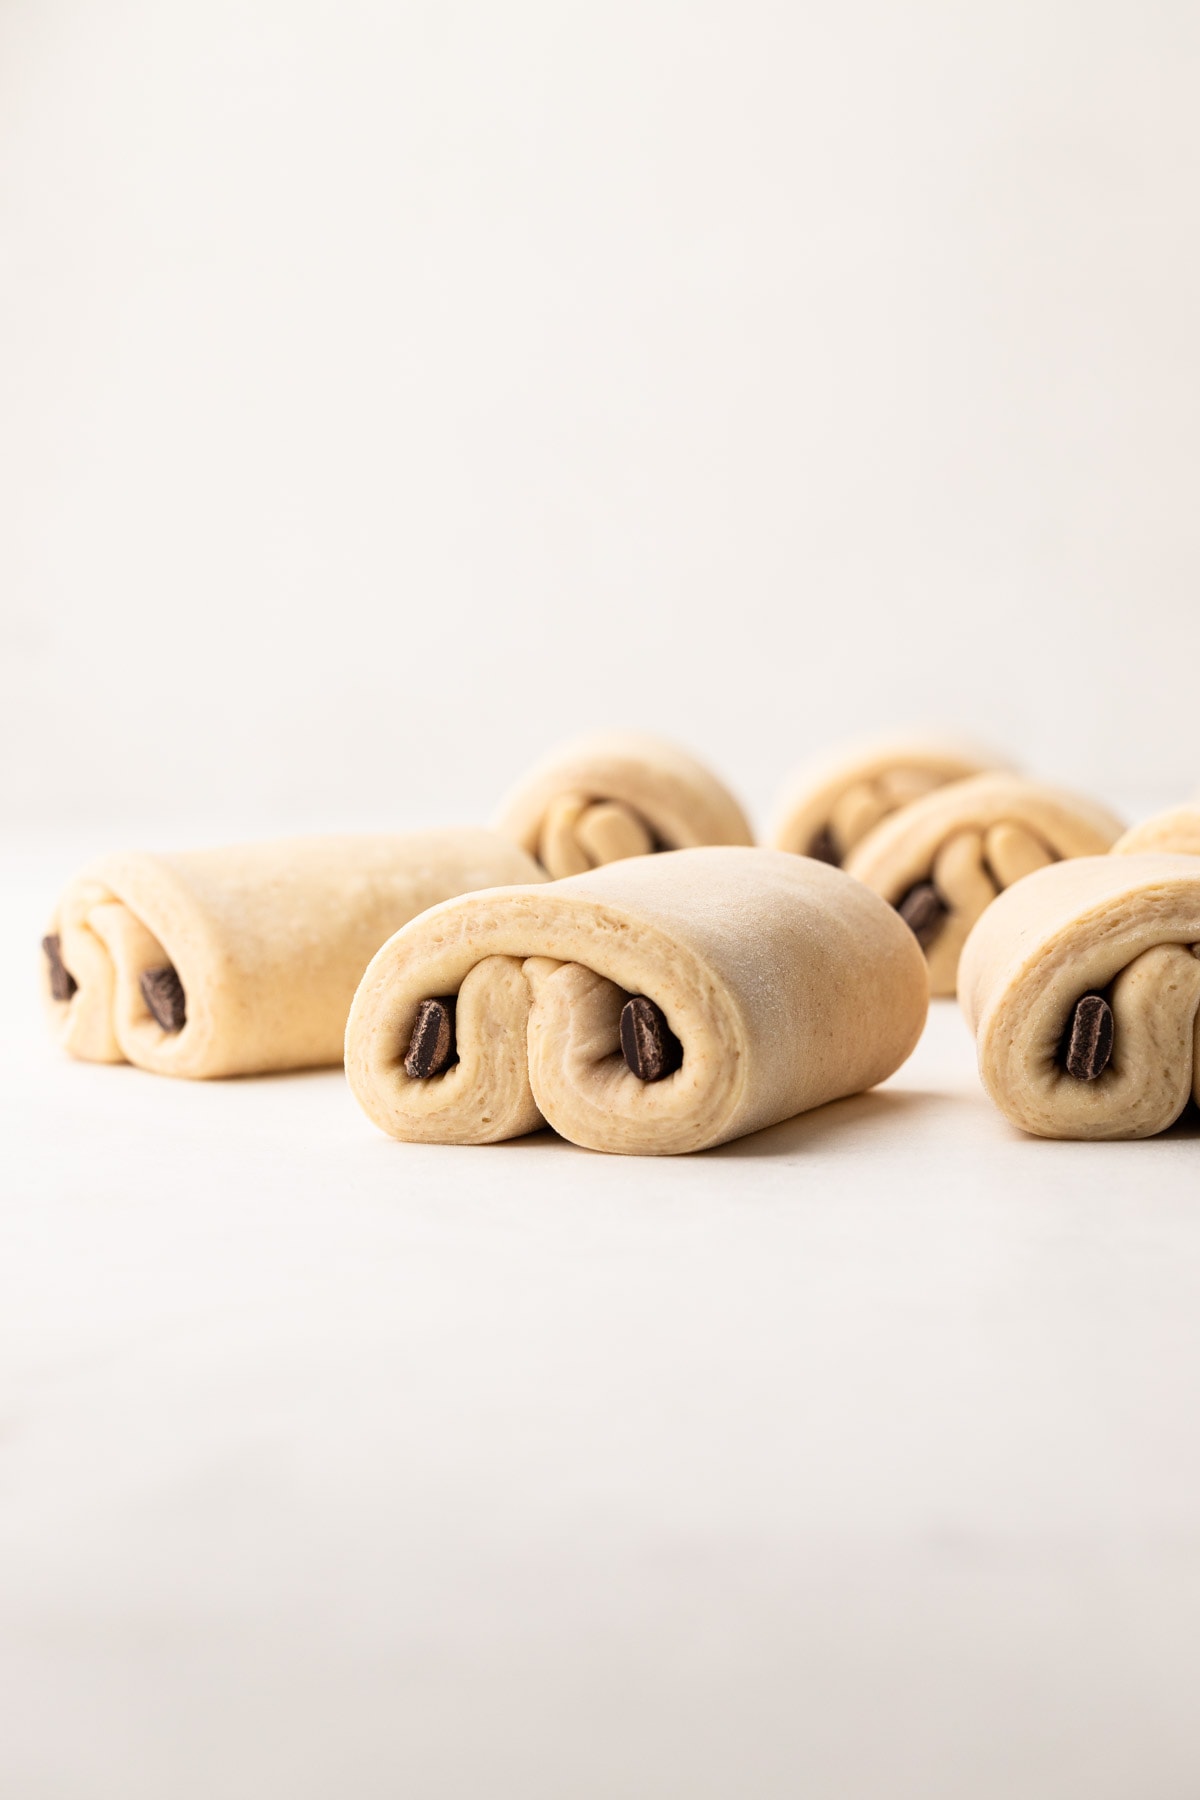
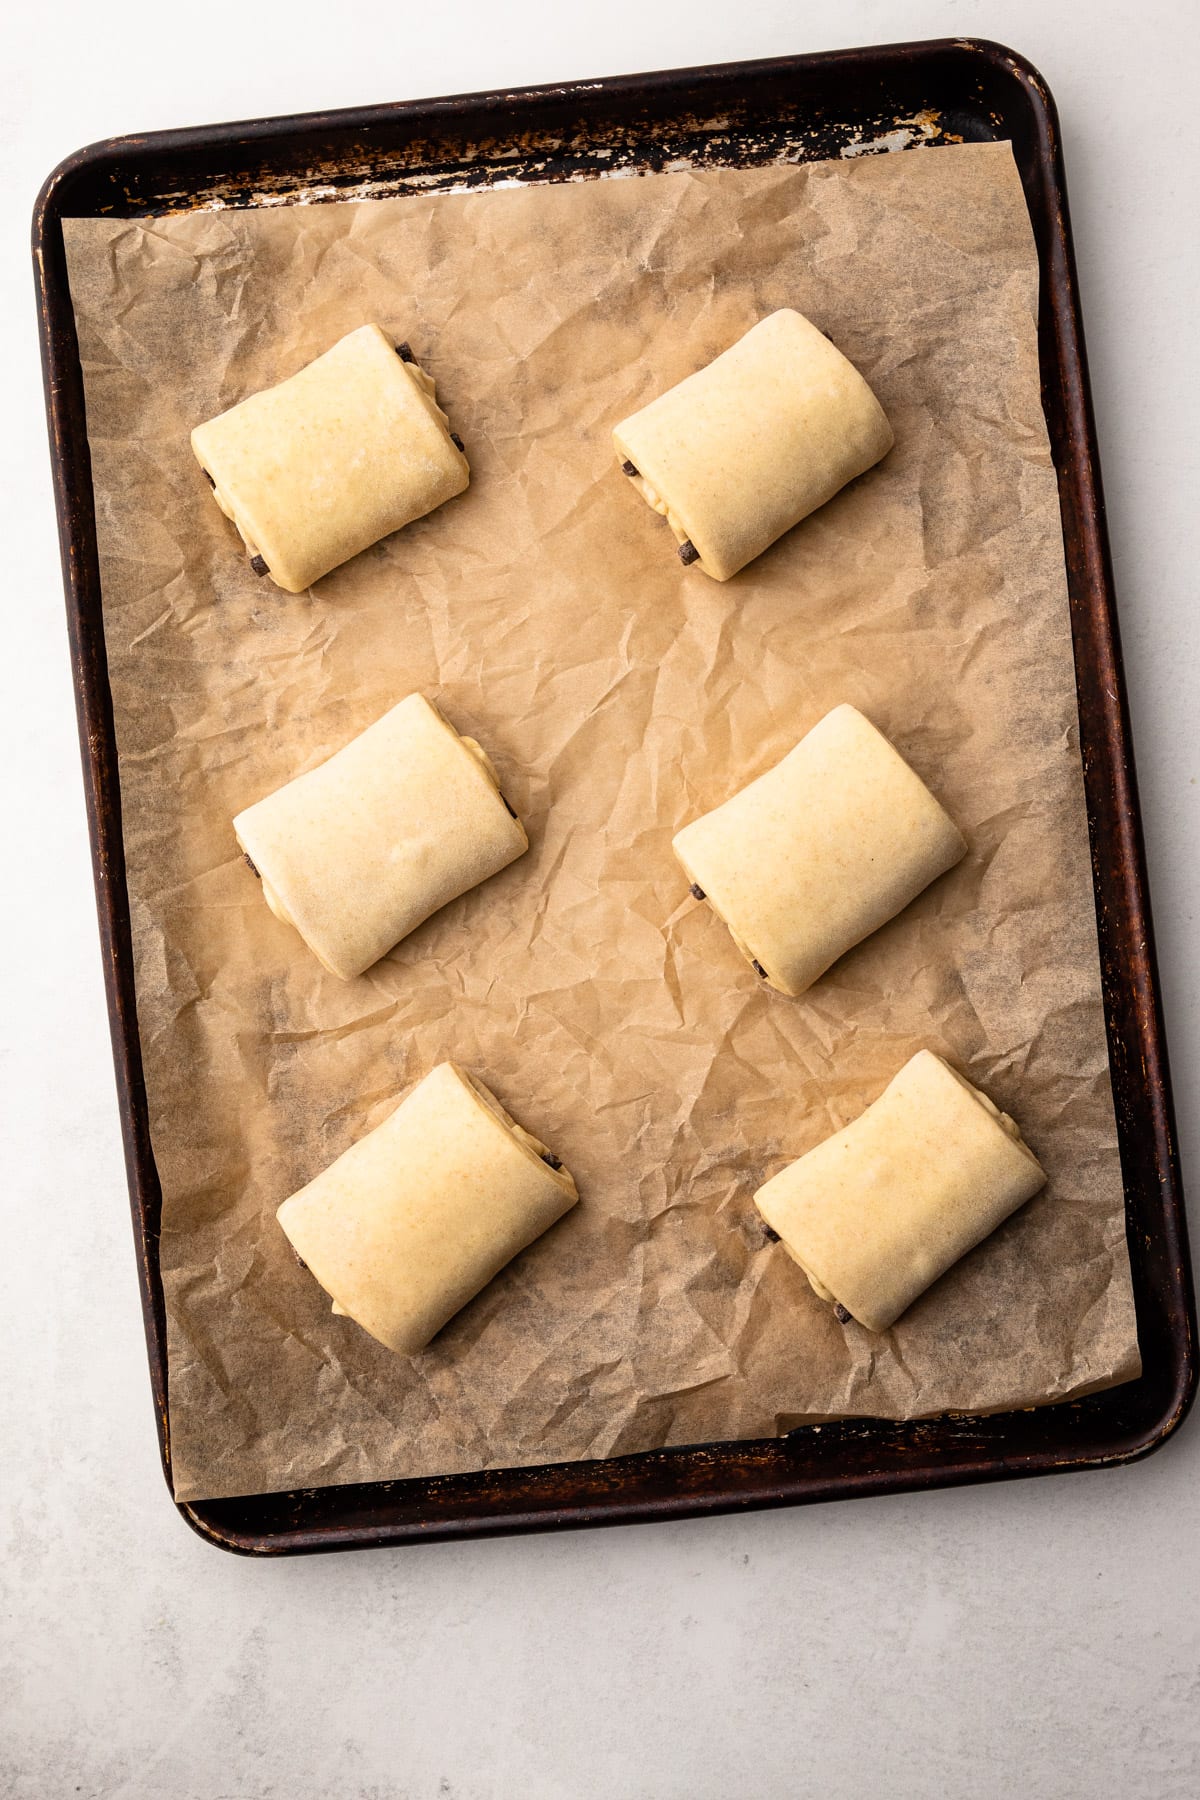
Once the croissants are shaped, place six of them spaced equally apart on two parchment-lined baking sheets.
How To Tell When The Croissants are Done Proofing
It will take an average of 2-4 hours for the croissants to fully proof in a warm, draft-free space. When they are properly proofed, they will have about doubled and size and be very, very jiggly.

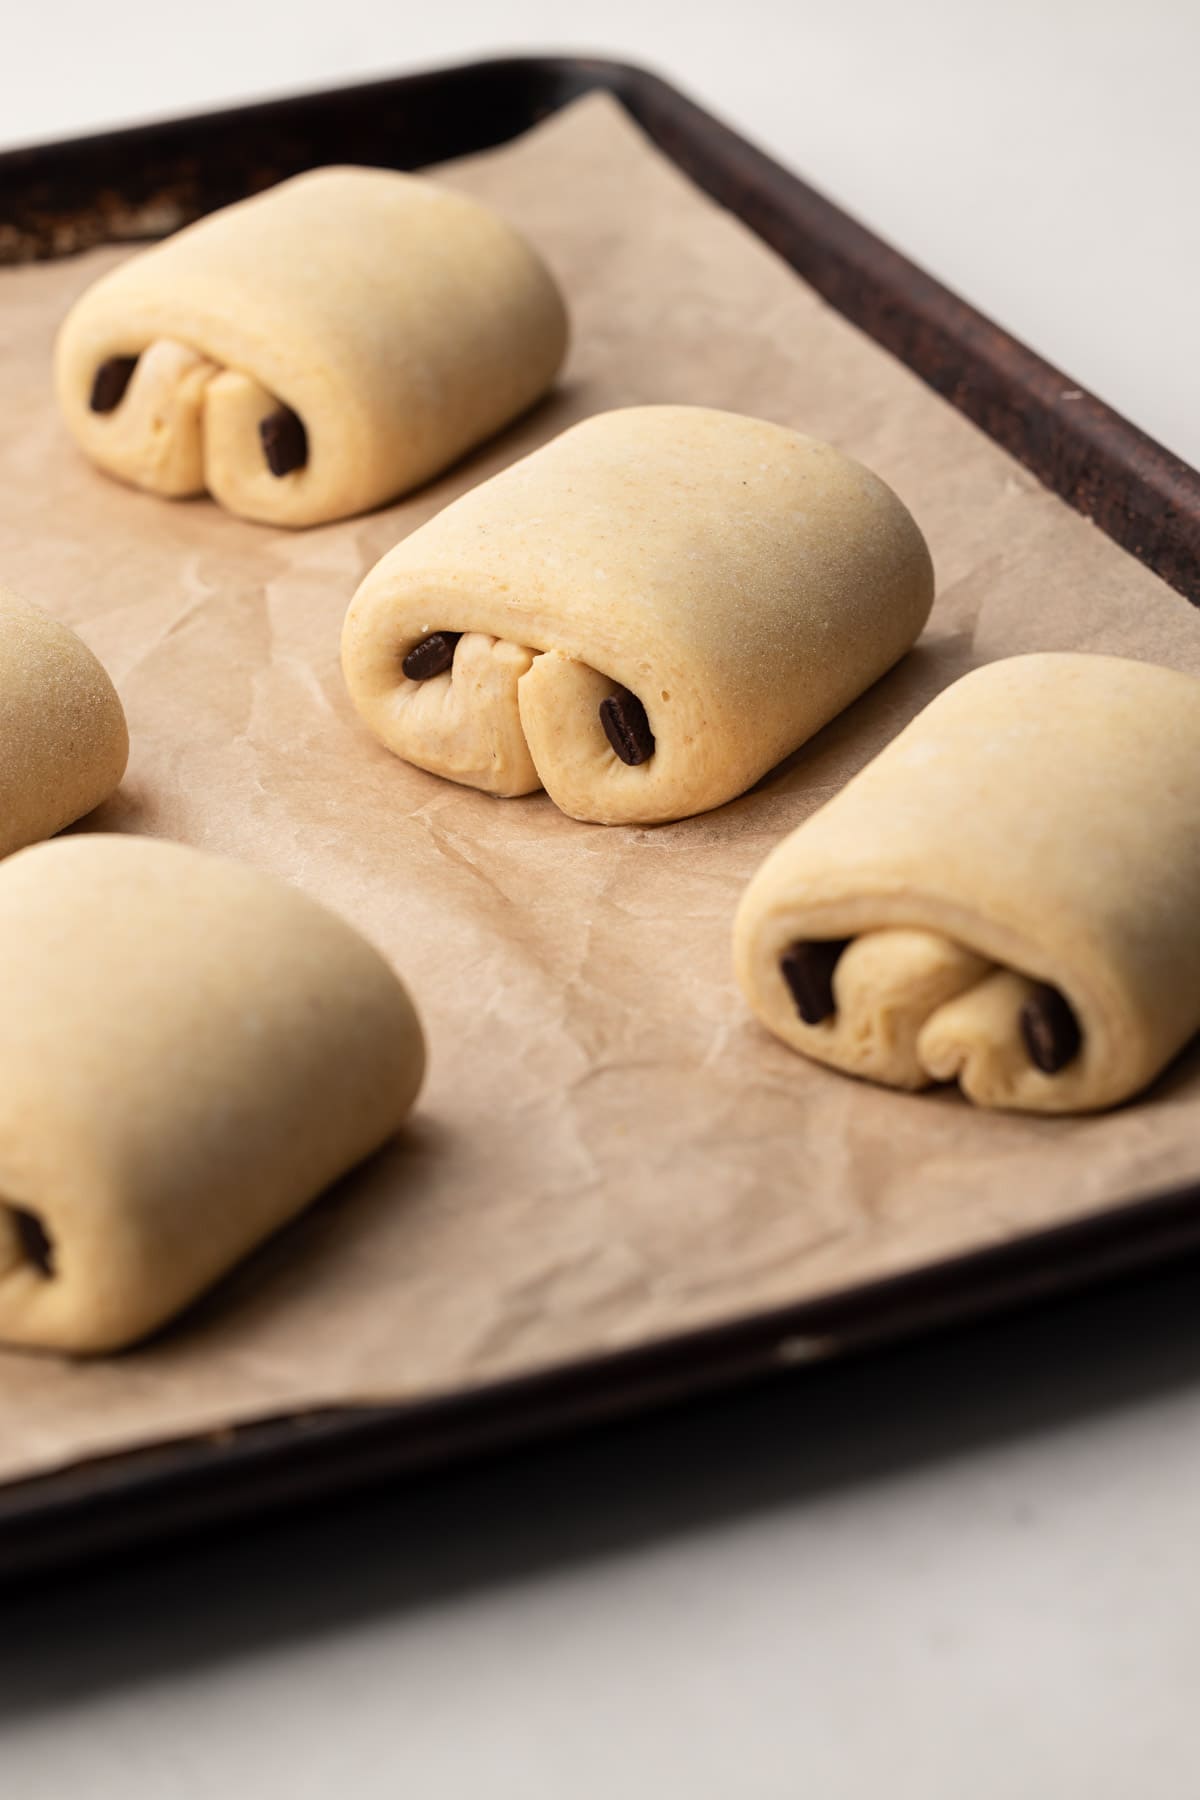
It is very easy to underproof the croissants for fear of over-proofing them. And this is the mistake I often made early on when developing this recipe.
At this stage they are incredibly delicate, and it's important to keep the proofing intact.
Baking Good Croissants in a Home Oven
The last step before baking is time to egg wash the croissants.
Gently brush the egg wash onto the croissants, avoiding the exposed layered areas of the pastry if possible. This could fuse the dough together and prevent lift.
And finally, one last trick to get good at-home croissants: a spritz of water on the baking sheets. Adding a bit of "steam" in the hot oven helps the initial rise (also known as oven-spring) of the croissants to bake up higher. Use a kitchen-designated spray bottle to mist the parchment-lined sheet tray around the croissants, but if that isn't available, carefully flick some water onto the tray instead. Just be sure not to get water on the croissant dough.
Then, finally, after all that hard work: it's time to bake.
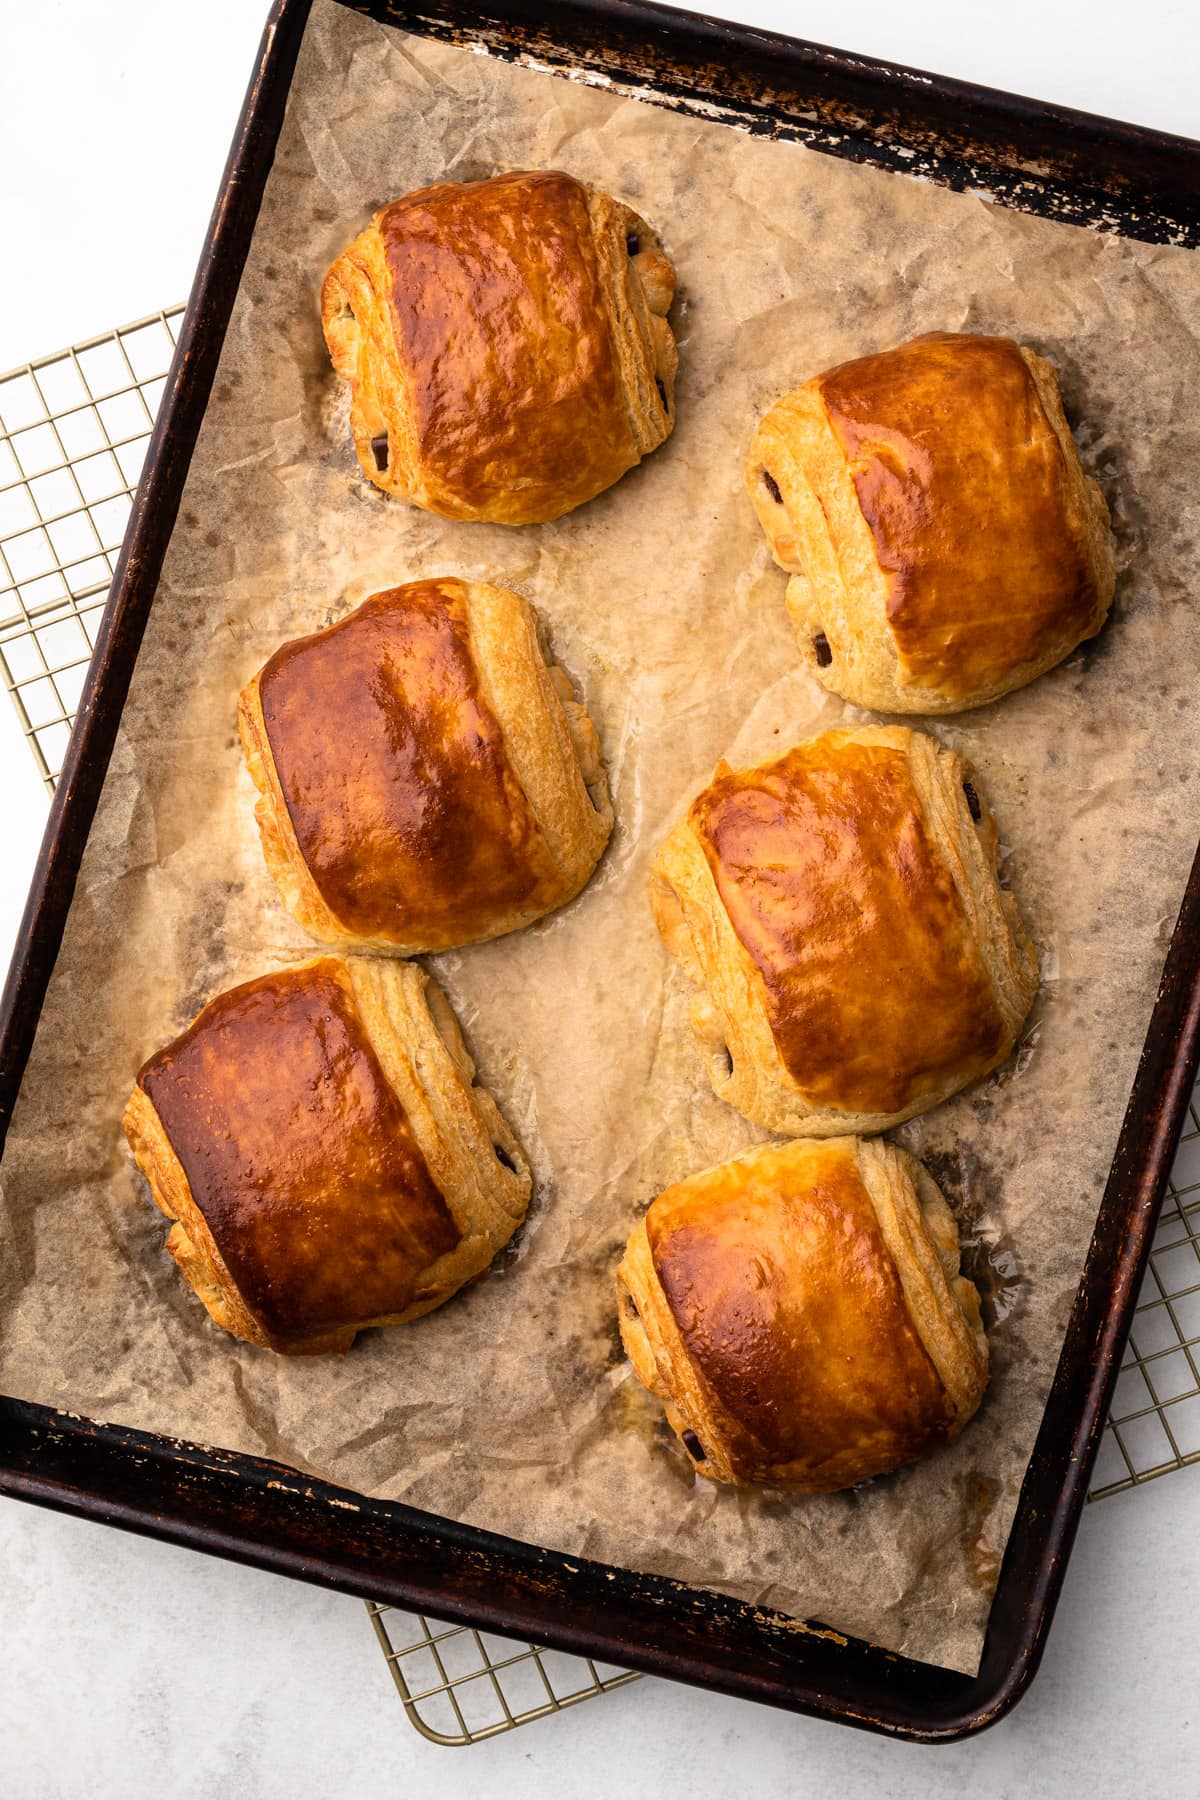
The oven will be preheated much higher than the actual temperature at which that the croissants will be baked. This helps with oven spring.
Bake as instructed and keep them in the oven depending on how dark you like your croissants. If well-cooked is what you are after, let them continue to bake a few extra minutes than what the recipe suggests.

Serving and Storing
Chocolate croissants are best served within a few hours of baking. They'll be crisp on the outside and soft and buttery on the inside.
They can be "refreshed" anytime by gently reheating them in a toaster oven.
Leftover chocolate croissants can be stored covered at room temperature for 2 days. They can also be frozen in an airtight container for 1-2 months. Defrost at room temperature and then refresh in a toaster oven.

More Baking Bucket Lists Recipes
Want to check some more advanced bakes off of your baking bucket list? Check out this list!
- Puff Pastry (Classic or Rough)
- How to Make Choux Pastry
- Classic Cream Puffs
- Classic Fruit Tart
- Easy Pastry Cream
More Pastries
I am so honored when you make a recipe from my site! If you make these Chocolate Croissants, please leave a star ⭐️⭐️⭐️⭐️⭐️ rating with your experience! If you have any questions about this recipe, feel free to comment here, and tag me on instagram!
PrintFull Recipe
Homemade Chocolate Croissants
- Prep Time: 00:45
- Proof + Resting: 04:30
- Cook Time: 00:24
- Total Time: 5 hours 39 minutes
- Yield: 12 chocolate croissants
- Category: pastry
- Method: bake
- Cuisine: French
Ingredients
For Croissant Dough:
- ¾ cup (180 grams) water
- ½ cup (120 grams) whole milk
- ¼ cup (50 grams) granulated sugar
- 2-½ teaspoons (9 grams) instant yeast (see notes)
- 4 cups (480 grams) bread flour
- 1 teaspoon (7 grams) fine sea salt
- 4 tablespoons (56 grams or ½ stick) unsalted European-style butter, cubed and softened (see notes)
For Croissant Butter:
- 20 tablespoons (280 grams or 2-½ sticks) unsalted European-style butter, softened, cubed
- ¼ cup (30 grams) all-purpose flour
For Assembly:
- 1 egg yolk
- 1 tablespoon heavy cream
- 24 chocolate batons (or 2 (4-ounce) bittersweet baking bars cut into ½-inch sticks)
Instructions
Make and Laminate the Dough:
- For the croissant dough: In the bowl of a stand mixer fitted with a dough hook, add all of the dough ingredients in this order: water, milk, sugar, instant yeast, bread flour, salt, and softened butter cubes.
- Turn the mixer on low and mix until the dough comes together and the sides of the bowl are clean. Continue kneading the dough in the machine for 5 minutes.
- Transfer the dough to a work surface and knead for 1 minute to ensure the butter is fully incorporated. It's okay if the dough is not smooth.
- Place the dough in a covered bowl or container and let rise for 1-2 hours, until the dough is just about doubled in size. Do not let the dough proof beyond doubling in size.
- When doubled, remove the dough from the container and flatten it to remove any gas bubbles. Wrap the dough in plastic wrap and transfer it to the freezer while the croissant butter is prepared. It should be there for no more than 15 minutes.
- For the croissant butter: Add the softened butter to a clean stand mixer bowl and sprinkle the flour on top. Using the paddle attachment, mix on low until the butter and flour are combined. Scrape the butter off the paddle and mix again for about 30 seconds to ensure the butter is smooth with no unmixed butter or flour.
- Remove the croissant dough from the freezer. Roll the dough to a rough 10-by-20-inch rectangle on a lightly floured work surface. Brush off any excess flour using a dry pastry brush.
- Using an offset spatula, spread the butter on the bottom ¾ of the dough, going all the way to the edges. There should be no butter on the top ¼ of the dough.
- Take the top of the dough and fold it down about ¼ of the way down (about 5 inches). Repeat this fold twice more (taking the top part of the dough and folding it ¼ of the way down) until the butter is no longer visible.
- Rotate the dough counterclockwise 90 degrees so the dough seam faces the right.
- Evenly roll out the dough lengthwise, using flour as necessary, to a rough 8-by-20-inch rectangle. Brush off any excess flour.
- Take the top short side of the dough rectangle and fold it ⅓ of the way down. Repeat with the bottom short side up, like a business letter.
- Wrap the dough tightly in plastic wrap, then refrigerate for 2 hours.
- Pre-shape the dough: Evenly roll out the chilled dough to an 8-by-12-inch rectangle, or as close as possible to this. Do not fight the dough. If it’s springing back, leave it as is, wrap it in plastic, and place on a sheet pan. Chill the dough for 15-30 minutes.
- Using only a very light dusting of flour, if any, roll out the chilled croissant dough to the final length of 11 by 19 inches. Using a ruler and a pastry wheel, cut off any uneven edges of the rectangle, so you have a perfect 10 by 18 inch rectangle.
- Cut the dough in half down the middle vertically, so you have two 5-inch wide strips.
- Then make 5 horizontal cuts 3 inches apart, resulting in twelve 3-by-5-inch rectangles.
Shape and Bake the Chocolate Croissants:
- Working with one rectangle at a time, place two chocolate batons off-center from the middle of the dough, equally spaced apart. Pull the short side of the dough over the chocolate to the middle and press down to adhere the dough together. Repeat with the other short side. Then fold the two halves of the dough towards each other.
- Repeat this process with the remaining rectangles of dough and chocolate batons.
- Place six croissants each on two parchment-lined sheet pans with the smooth side of the croissant facing up. Very loosely cover the baking sheets with plastic wrap to prevent the dough from drying out.
- Let proof in a warm place for 2-4 hours, or until the croissants have nearly doubled in size and are incredibly jiggly.
- Place a rack in the lower middle and the middle parts of the oven and preheat the oven to 425ºF.
- When the oven is ready, carefully remove the plastic wrap from the croissants.
- In a small bowl, whisk together the egg yolk and cream. Brush the top of the proofed croissants with the egg wash. Using a clean, food-safe spray bottle, spritz cold water on the parchment around the croissants to create steam in the oven (which helps the croissants bake up taller).
- Turn the heat down to 375ºF and bake the croissants in the oven for 24-26 minutes, switching and rotating the trays halfway through, or until the croissants are a beautiful golden brown.
- Remove the chocolate croissants from the oven, and let them cool briefly before enjoying.
- Croissants are best enjoyed fresh. To store, let sit at room temperature for 24 hours, and beyond that in a covered container. They can be “refreshed” in the toaster oven.
Notes
Please reference the article on making Shortcut Croissants for additional information, if desired.
Although I offer both weight and volume measurements, weighing your flour is the most accurate way to measure. If you aren't going to weigh it, make sure to spoon it into the measuring cup, then level it off. If you scoop the flour out with the measuring cup and then level, it could change the outcome of the final product.
This recipe was tested using fine sea salt. If you use Diamond Crystal kosher salt you will need to increase by about double for volume, or use the same amount by weight.
Butter brands such as Kerrygold, Plugra, Cabot Extra Creamy, and Vital Farms worked well in testing. Look for butter with a fat content of 82%. If you really can’t find any high-fat butters, I have made this recipe with standard butter. The results are a little less flavorful and the crumb on the finished croissant isn’t as even, but it’s still possible.
I only tested this recipe with the "red" SAF instant yeast and cannot advise on alternative yeast options.
Because of the shortcut method of adding the butter to to the dough, it is likely to break up a bit during shaping, resulting in bumpy pastry. Don't worry about this, it's normal and unavoidable.
Chocolate batons are fun to use, but they also can be quite expensive. It’s also fine to cut a dark chocolate bar crosswise into ½-by-3-inch wide rectangles. Use a serrated knife to cut it for best results.
Pin it For Later

Some of the links on this page may be affiliate links. Everyday Pie is a participant in the Amazon Associates Program. As an Amazon Associate I earn from qualifying purchases, at no extra cost to you.





Joe
Made these and they came out great!