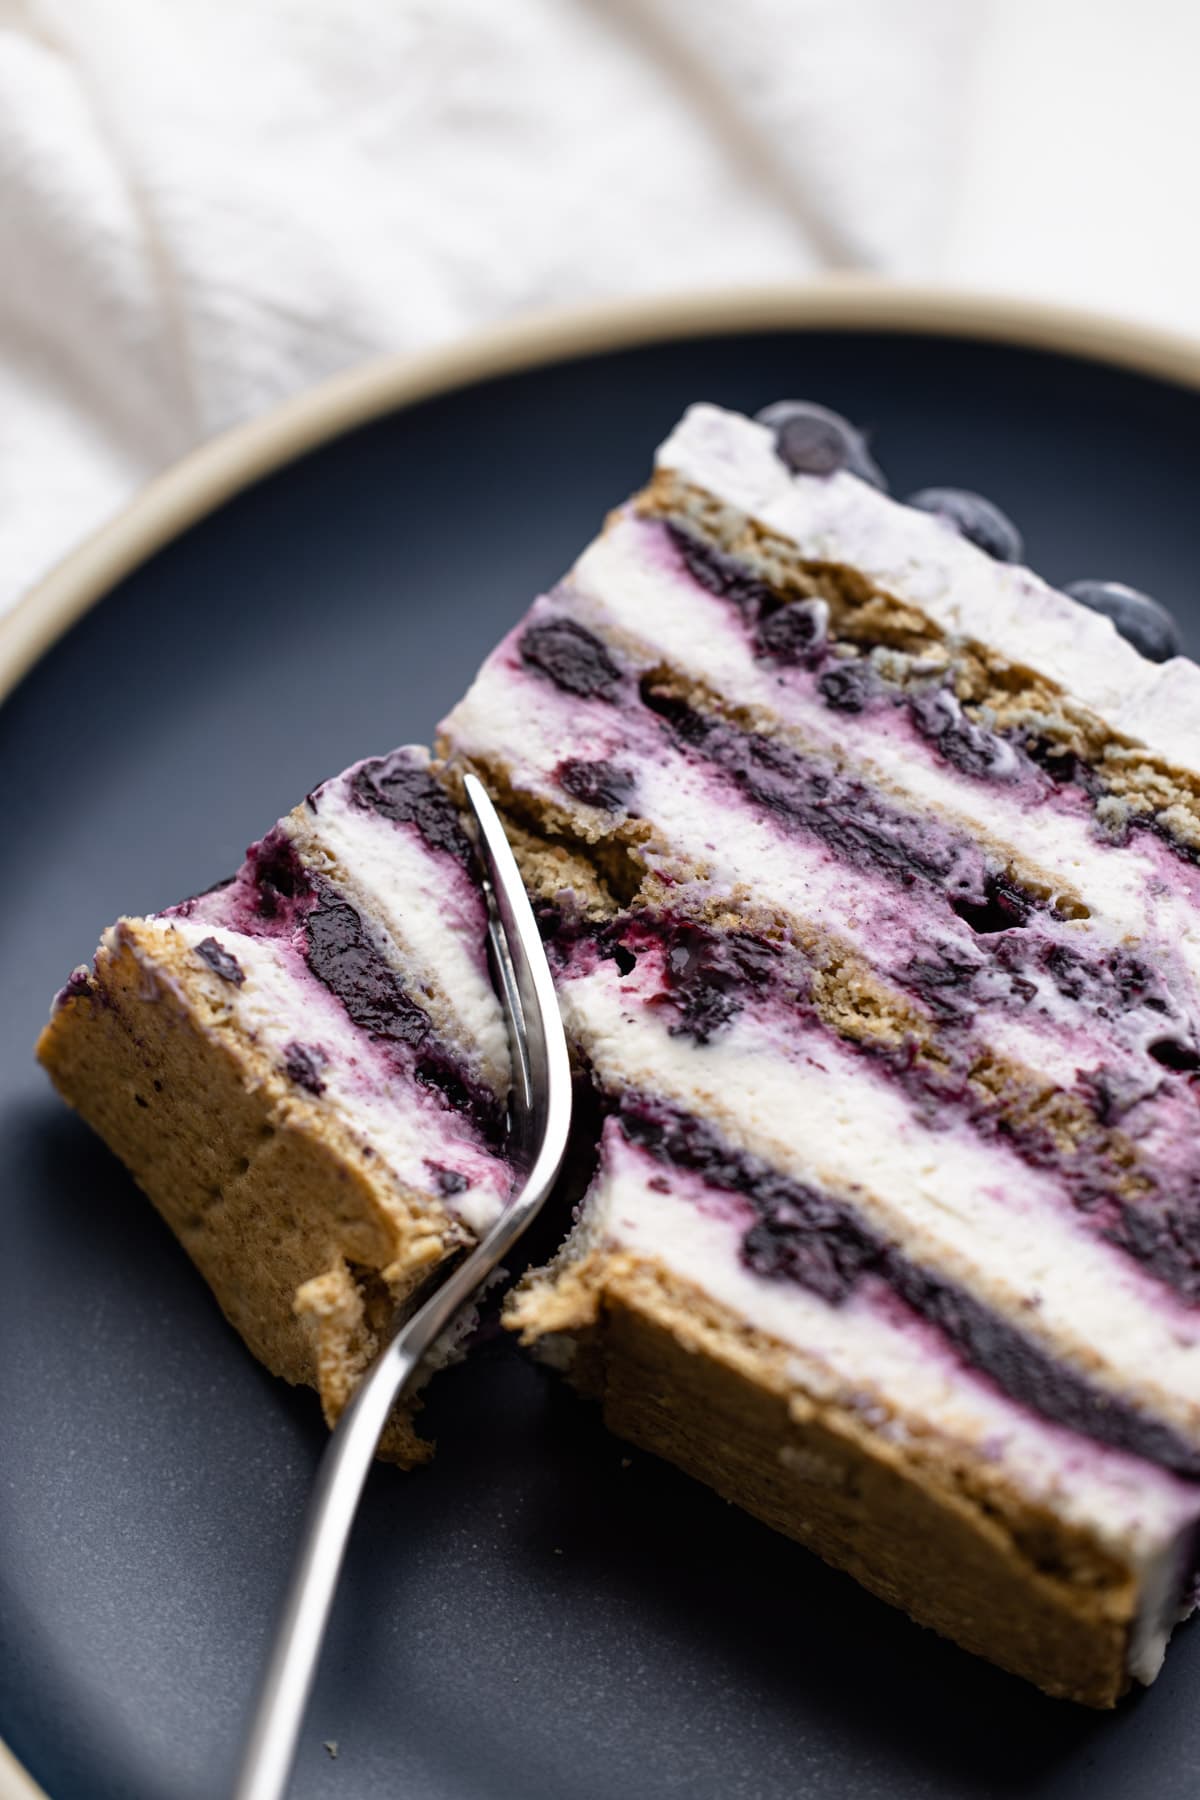
An easy no-bake treat, this Blueberry Icebox Cake is made up of layers of graham crackers, sweet mascarpone cream, and a delicious blueberry pie filling.
Want to save this recipe?
Enter your email & I'll send it to your inbox. Plus, get weekly updates from me!
No-Bake Mascarpone Blueberry Cake
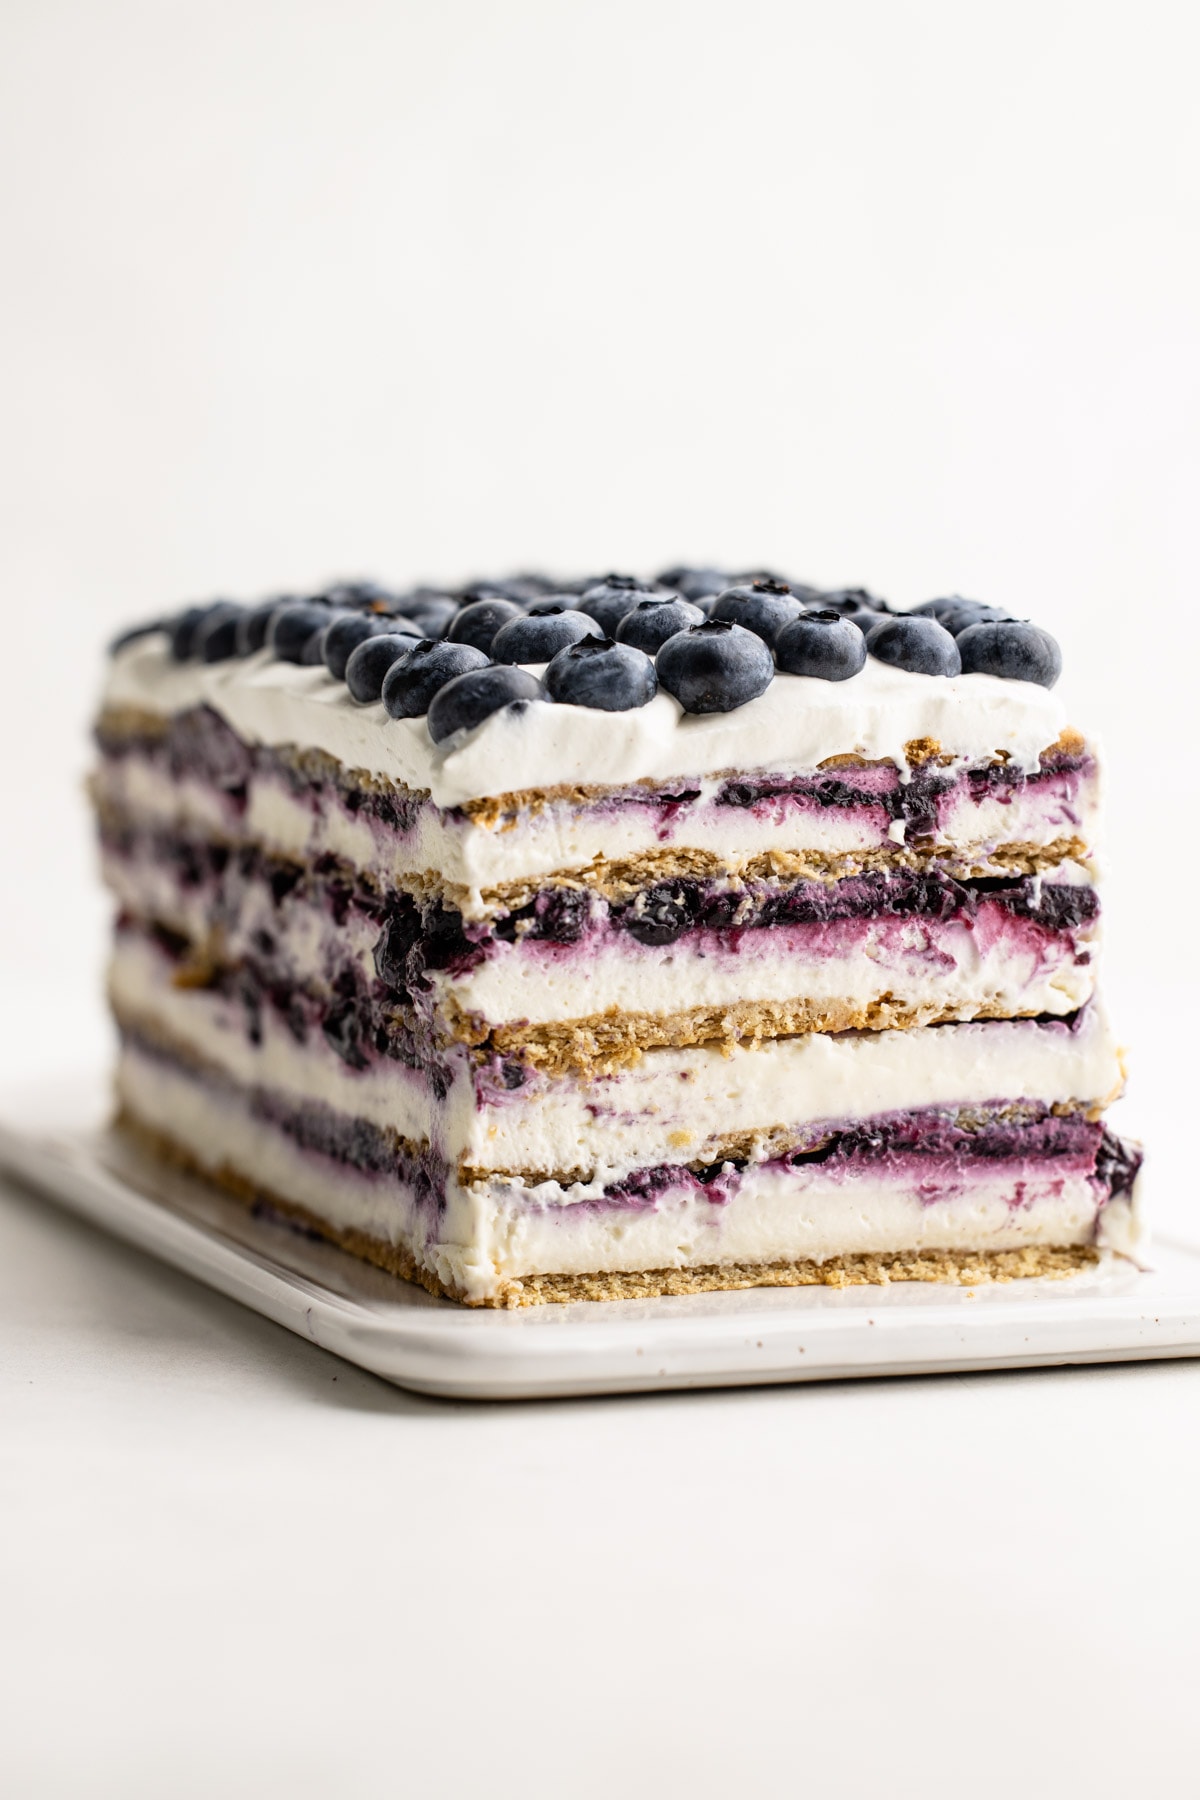
Imagine a blueberry pie meets a cake and a cheesecake and that's exactly what you'll get with this Mascarpone Blueberry Icebox Cake.
This beautiful summer dessert is a simple no-bake treat that consists of layers of a no-bake mascarpone cheesecake and blueberry pie filling layered between graham crackers that transforms into a cake-like treat after an overnight rest in the refrigerator.
It is impressive looking and entirely fool-proof to make. This is the summer recipe to have on hand when the weather is just too dang hot to fire up the oven or even the grill.
So, let's get to making it, shall we? The text below offers tons of tips and helpful notes, or you can scroll to the bottom to grab the recipe and get started!
More of a visual person? Check out the video of me making it below, located right above the recipe!
But first, what is an icebox cake?
An icebox cake is a no-bake dessert made from a few simple ingredients. Often, icebox cakes have graham crackers or some other cookie element layered with cream and other ingredients. The dessert is assembled and rests in the freezer or the refrigerator for a period of time, which allows the graham crackers to soften as they soak up the sweet cream. It truly makes this dessert taste and feel like a cake, thanks to the texture and feel of the ingredients perfectly coming together.
Ingredients Needed
- graham crackers
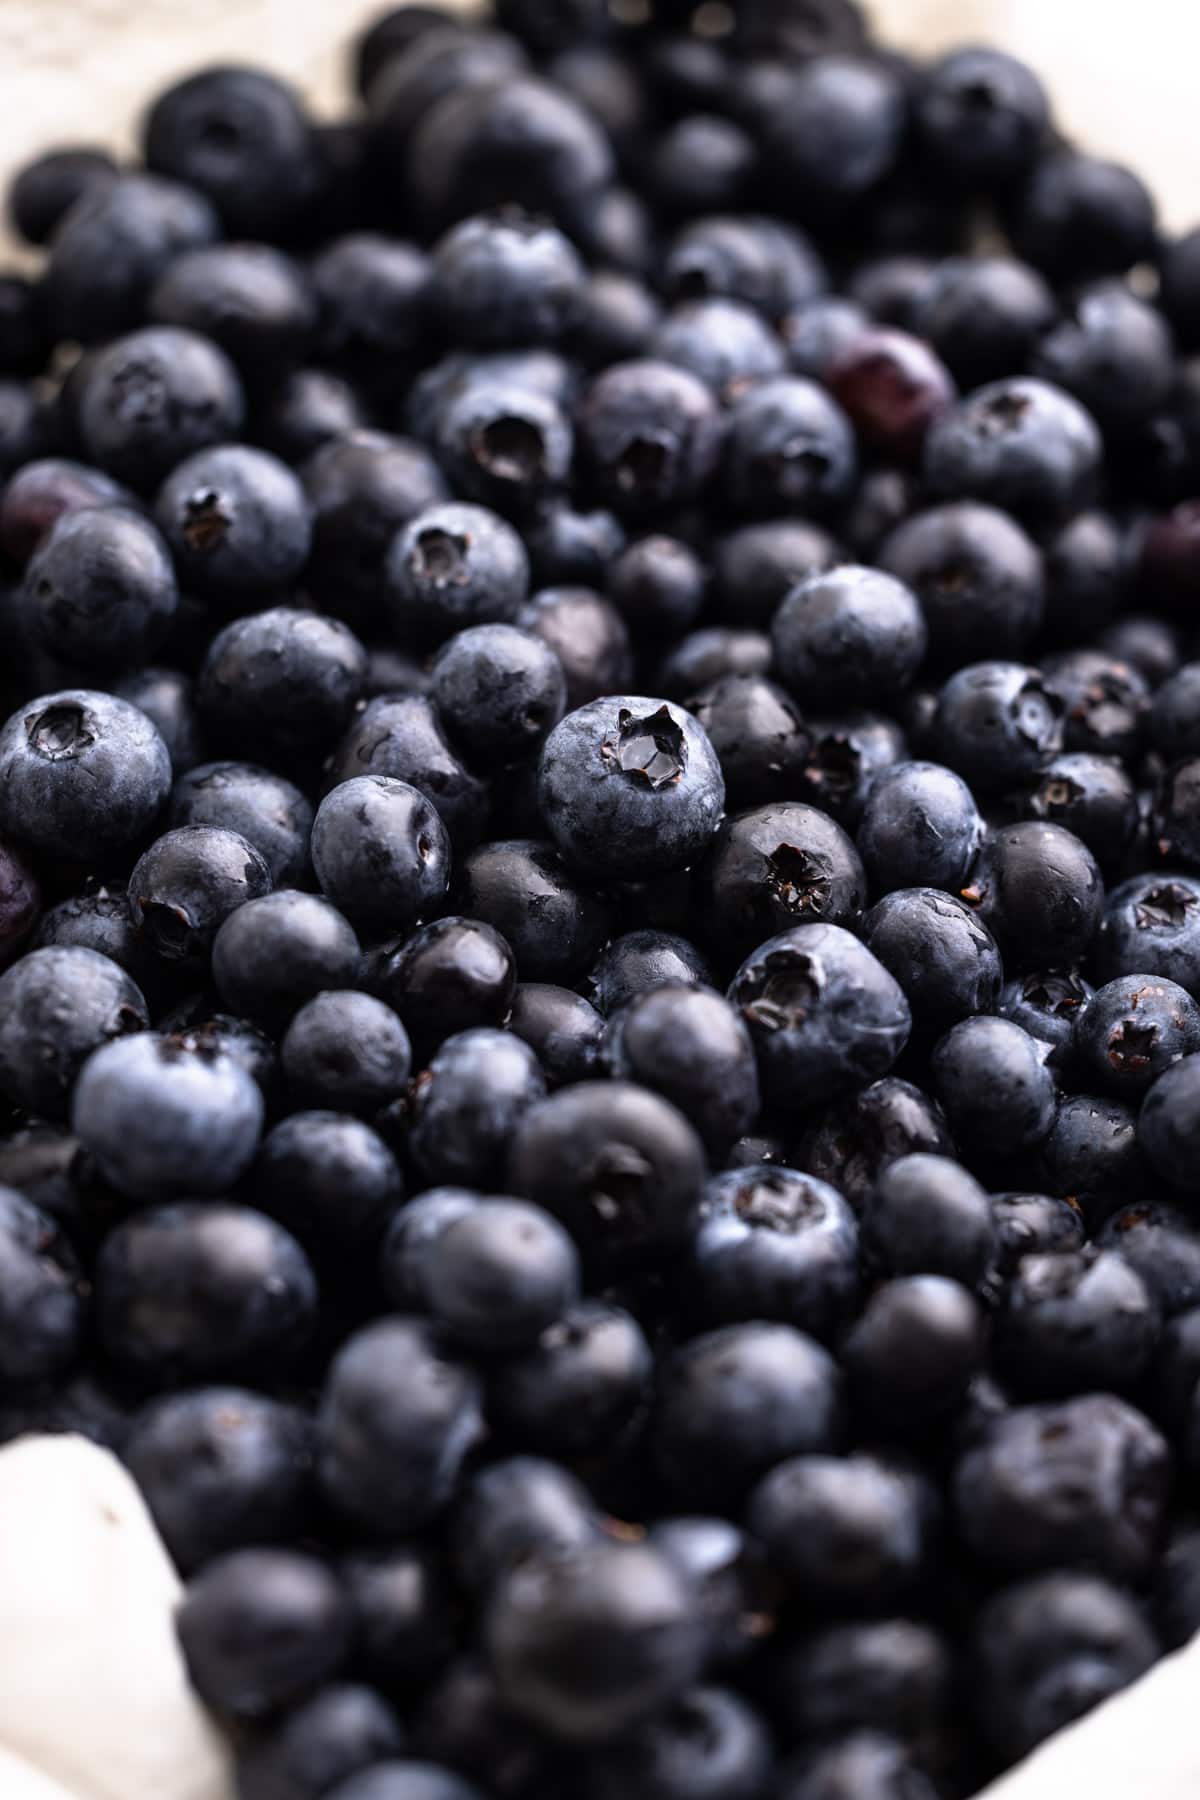
- blueberries
- mascarpone
- heavy cream
- butter
- granulated sugar
- cornstarch
- cinnamon
- vanilla
- salt
Substitutions
Mascarpone: If you can't find or don't want to use mascarpone, you can substitute it with cream cheese.
Blueberries: Use fresh or frozen blueberries
Cinnamon: Don't want to add cinnamon? You can omit it.
Graham crackers: The beauty of icebox cakes is that you can substitute another cookie to create a different flavor here. Feel free to use another cookie like a vanilla wafer or a biscoff cookie in place of graham crackers.
Tools Needed
- electric mixer
- off-set spatula
- 9" square straight-sided cake pan (see below for more on this)
- baking basics: small pot, bowls, whisk
Type of Pan Needed
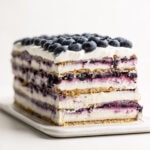
Let's take a minute to talk about the type of pan used to create this dessert. An icebox cake really doesn't need to have any special type of shape, but I really love the idea of having a long and tall cake for this dessert. It makes it look spectacular and makes a simple dish look extravagant.
To achieve this, I made the cake in a square container, then cut the dessert in half and stacked the two halves on top of each other. This allowed for less time spent layering the dessert while still accomplishing the towering outcome.
I have a special no-bake square pan that has collapsible sides to make this, but just a standard square pan will work just fine. Laying parchment paper inside the tin will be helpful in getting it out.
If you don't have a square baking tin, you can make this dessert in a loaf pan!
Or, simply leave it as a flat cake. Either way, it's going to be super delicious.
Don't spend too much time thinking about what vessel you'll assemble the cake in; just use what you have.
How to Make an Ice Box Cake
Traditionally, these cakes don't involve much more than assembling the ingredients. For this Blueberry Icebox Cake, the recipe calls for making a quick blueberry pie filling, whipping the mascarpone filling, and then assembling.
And as stated above, the recipe calls for making the dessert in a square baking dish, then cutting and stacking the cake to make for a tall and long impressive cake.


Here are the layers of the cake:
- graham crackers
- no-bake mascarpone cheesecake
- blueberry pie filling
- graham crackers
- no-bake mascarpone cheesecake
- blueberry pie filling
- half graham cracker layer (because it will be sliced and stacked after chilling)
- finally, slice in half and stack for a 13 layer cake
Here are some tips for making it:
- Let the blueberry pie filling chill before using it. If the pie filling is hot, it will deflate the cream. It's easy to make the blueberry filling a day ahead. Or to speed up the cooling time, you can place the pie filling spread out on a sheetpan in the refrigerator to chill while assembling the rest of the ingredients.
- Don't overwhip or under whip the cream! You want the cream to be just right: stiff enough that it's going to lighten the mascarpone mixture, but not so stiff that it starts to curdle. You'll still be able to taste that slightly curdled cream in the final dish, so pay attention while whipping the cream. Want more information on whipping cream? Check out this post all about Whipping Cream.
- Make sure to tightly layer in the graham crackers, leaving little to no space between each cracker. The graham crackers are what makes this recipe cake-like, so don't skip out on them. Use a knife to slice them cleanly to fit into the space of your container.
- Don't skip the chilling time! Chilling the cake in the refrigerator overnight transforms this dish from a crunchy graham cracker layer dessert to an icebox cake!
- Similarly, don't skip out on the freezing time before assembling. Slightly freezing this cake directly before assembling makes it easier to handle when you are removing the icebox cake from the tin, and when you are going in to cut it and decorate it.
Freezer Vs. Refrigerator
This recipe initially calls for chilling the icebox cake in the refrigerator, preferably overnight, and then briefly chilling the cake in the freezer before assembling and serving.
Letting the cake chill in the refrigerator transforms this dessert from a crunchy graham cracker layered dessert to a cake, as the crackers soak up the cream and soften. If you immediately transfer the icebox cake to the freezer, instead of soaking up the cream, it freezes, so when you defrost it, it will still be a bit crunchy.
This recipe calls for a quick chill in the freezer before assembling because having the cake chilled makes it sturdier to cut in half, stack, and garnish. This step is optional, as you don't even have to stack the cake if you don't want to, but this trick makes it easier to handle the dessert.
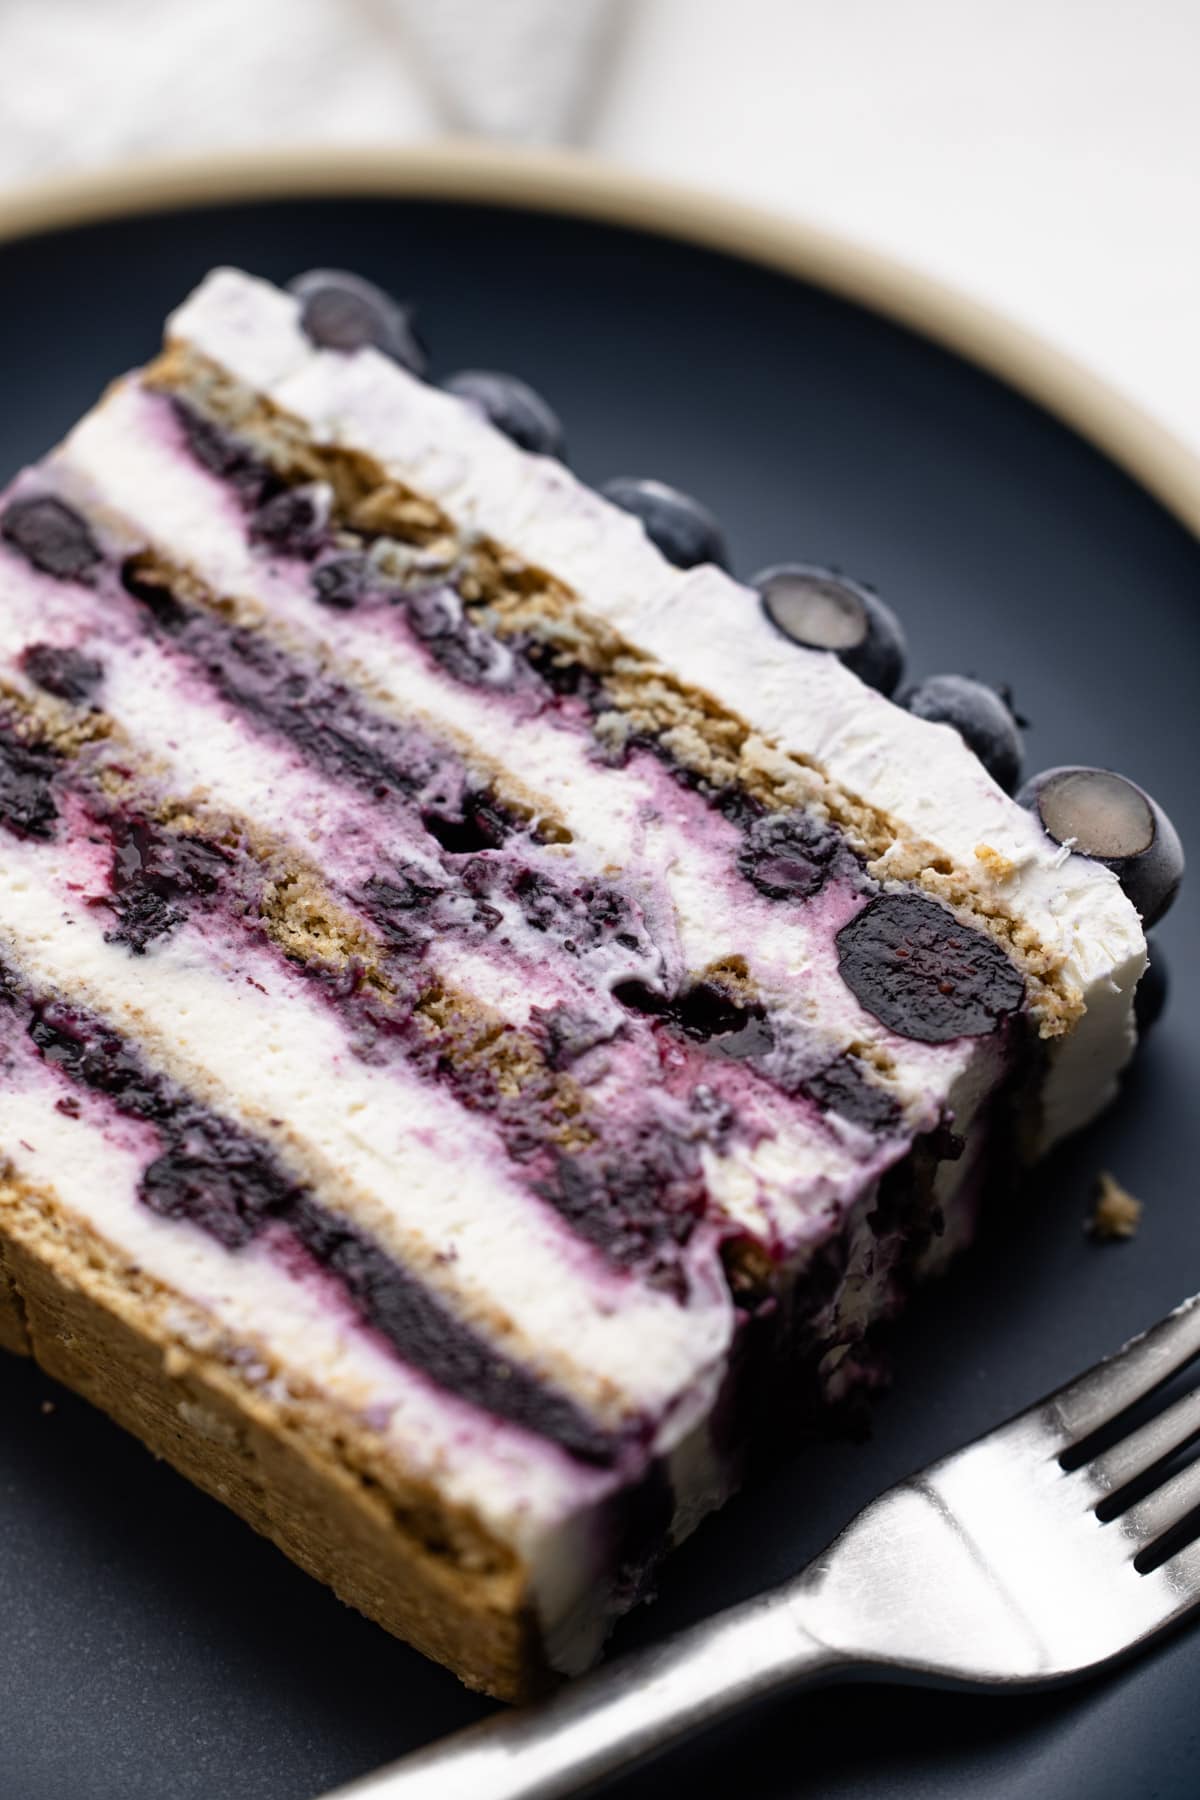
How to Decorate It
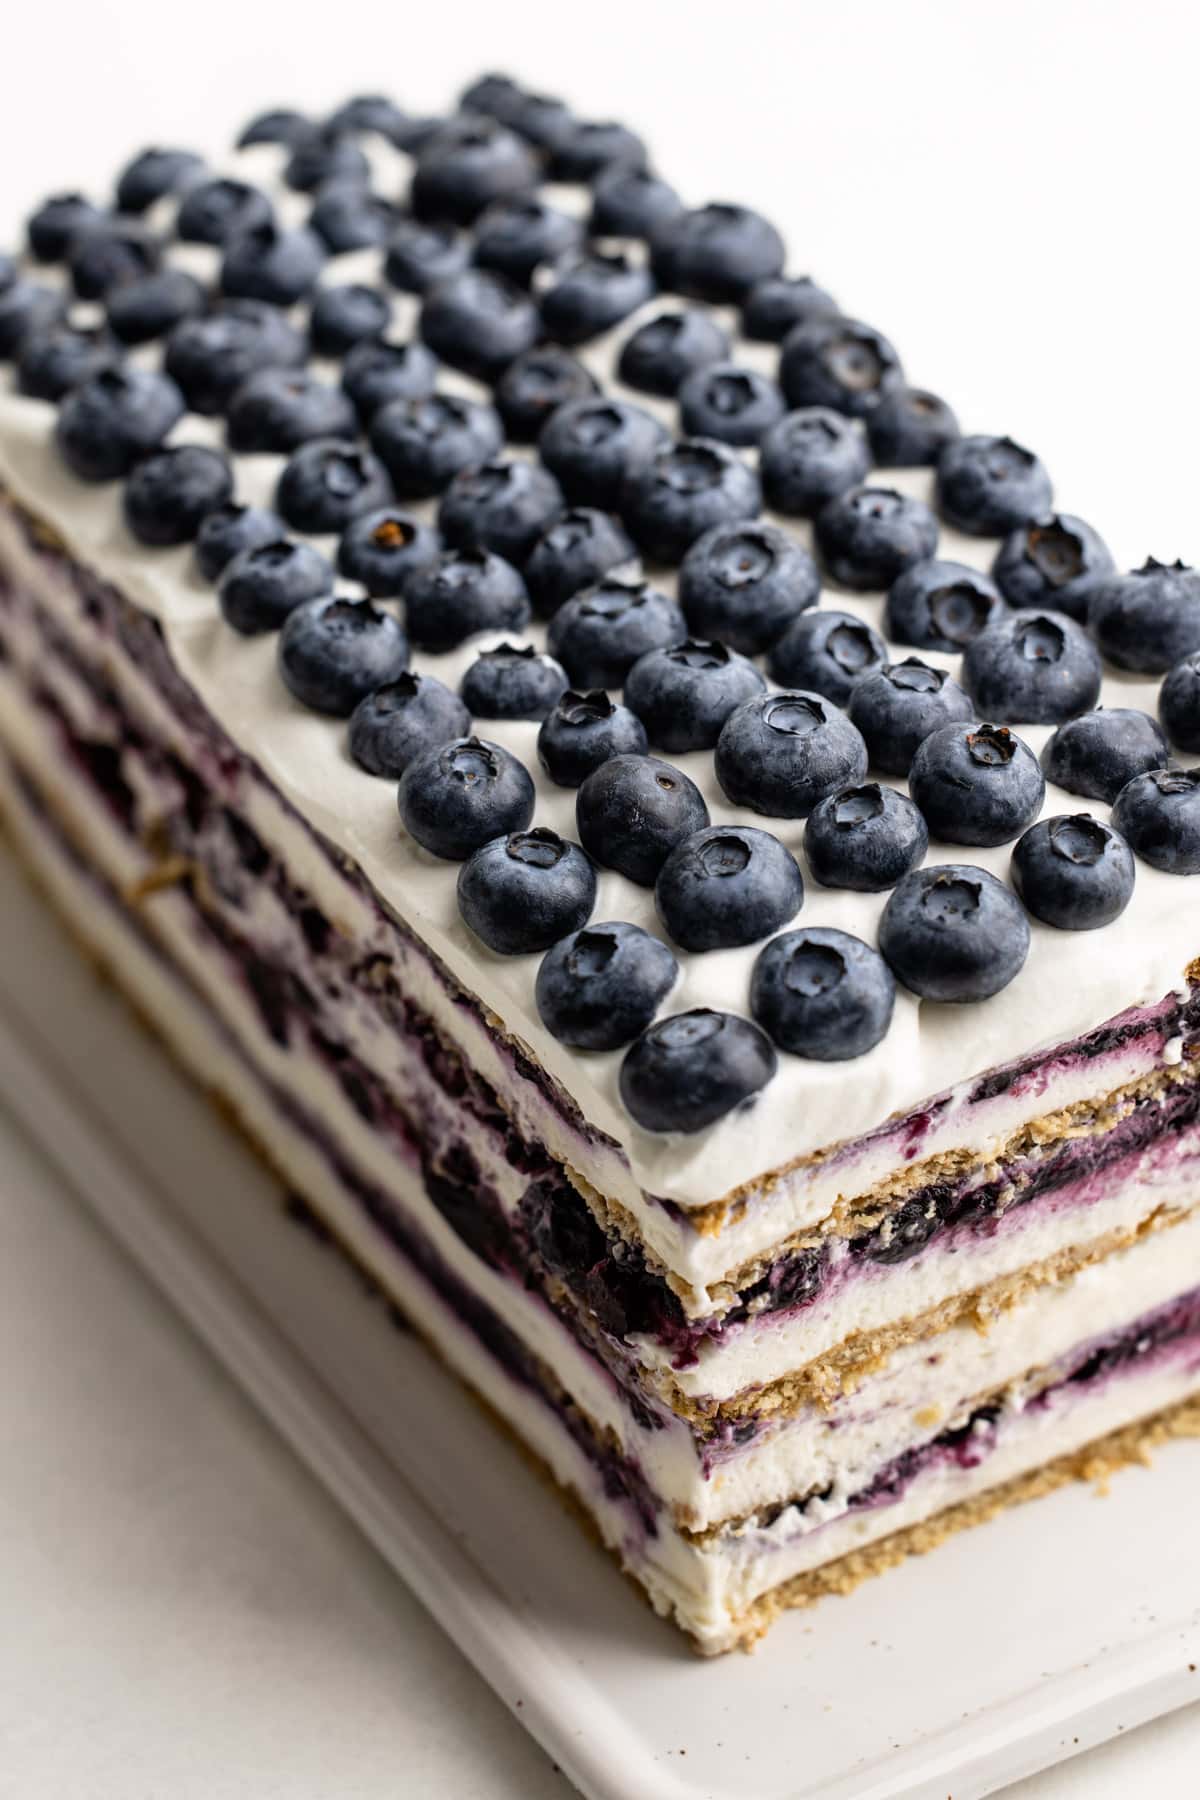
The recipe calls for reserving one cup of the whipped mascarpone filling in a separate container. This is meant to spread on the top of the cake before serving. In addition to this, I recommend garnishing the top with fresh blueberries. It adds a nice effect to the final dish.
How to Serve and Store an Ice Box Cake
Once the icebox cake has softened overnight, it is best served within 1-2 days. Simply slice, serve, and enjoy.
However, this cake freezes exceptionally well without the garnish on top. Once it has softened, you can freeze this entire cake or freeze it in slices in an airtight container for up to 1 month. To defrost, simply leave at room temperature for about 30 minutes, or let it sit overnight in the refrigerator.
Frequently Asked Questions
Do I have to use a square baking container?
No! You can truly assemble this cake in any baking tin you have. You can change the shape. You'll just modify the recipe by changing the number of layers you have.
Do I need to stack this cake to make a long and tall layer cake?
No! Just like you can use any vessel to assemble this, you do not need to stack it. I choose to stack it because it looks good. But you can slice and serve straight from the container.
Do I need to freeze it before serving?
You can skip that step if you want, but it makes it easier to handle. The most important chilling aspect is ensuring it rests in the refrigerator to allow the cookies to soften.
More No-Bake Recipes
I am so honored when you make a recipe from my site! If you make this Mascarpone Blueberry Icebox Cake, please leave a comment and a star rating with your experience! If you have any questions about this recipe, feel free to comment here, too!
Full Recipe
Blueberry Icebox Cake
An easy no-bake treat, this Blueberry Icebox Cake is made up of layers of graham crackers, sweet mascarpone cream, and a delicious blueberry pie filling.
- Prep Time: 00:20
- Cook Time: 00:10
- Total Time: 08:30
- Yield: Serves 8-10
- Method: No-Bake
Ingredients
Blueberry Filling:
- 3 cups (420) blueberries (fresh or frozen)
- ⅓ cup (70 grams) granulated sugar
- 1 tablespoon cornstarch
- Pinch cinnamon
- Pinch salt
Cake:
- 1–½ cup (340 grams) heavy cream, cold
- 8 ounces (230 grams) mascarpone
- ½ cup (100 grams) granulated sugar
- 1 teaspoon vanilla
- ⅛ teaspoon ground cinnamon
- Pinch of salt
- 12–14 graham crackers (about 3 sleeves)
- Fresh blueberries, for decorating
Instructions
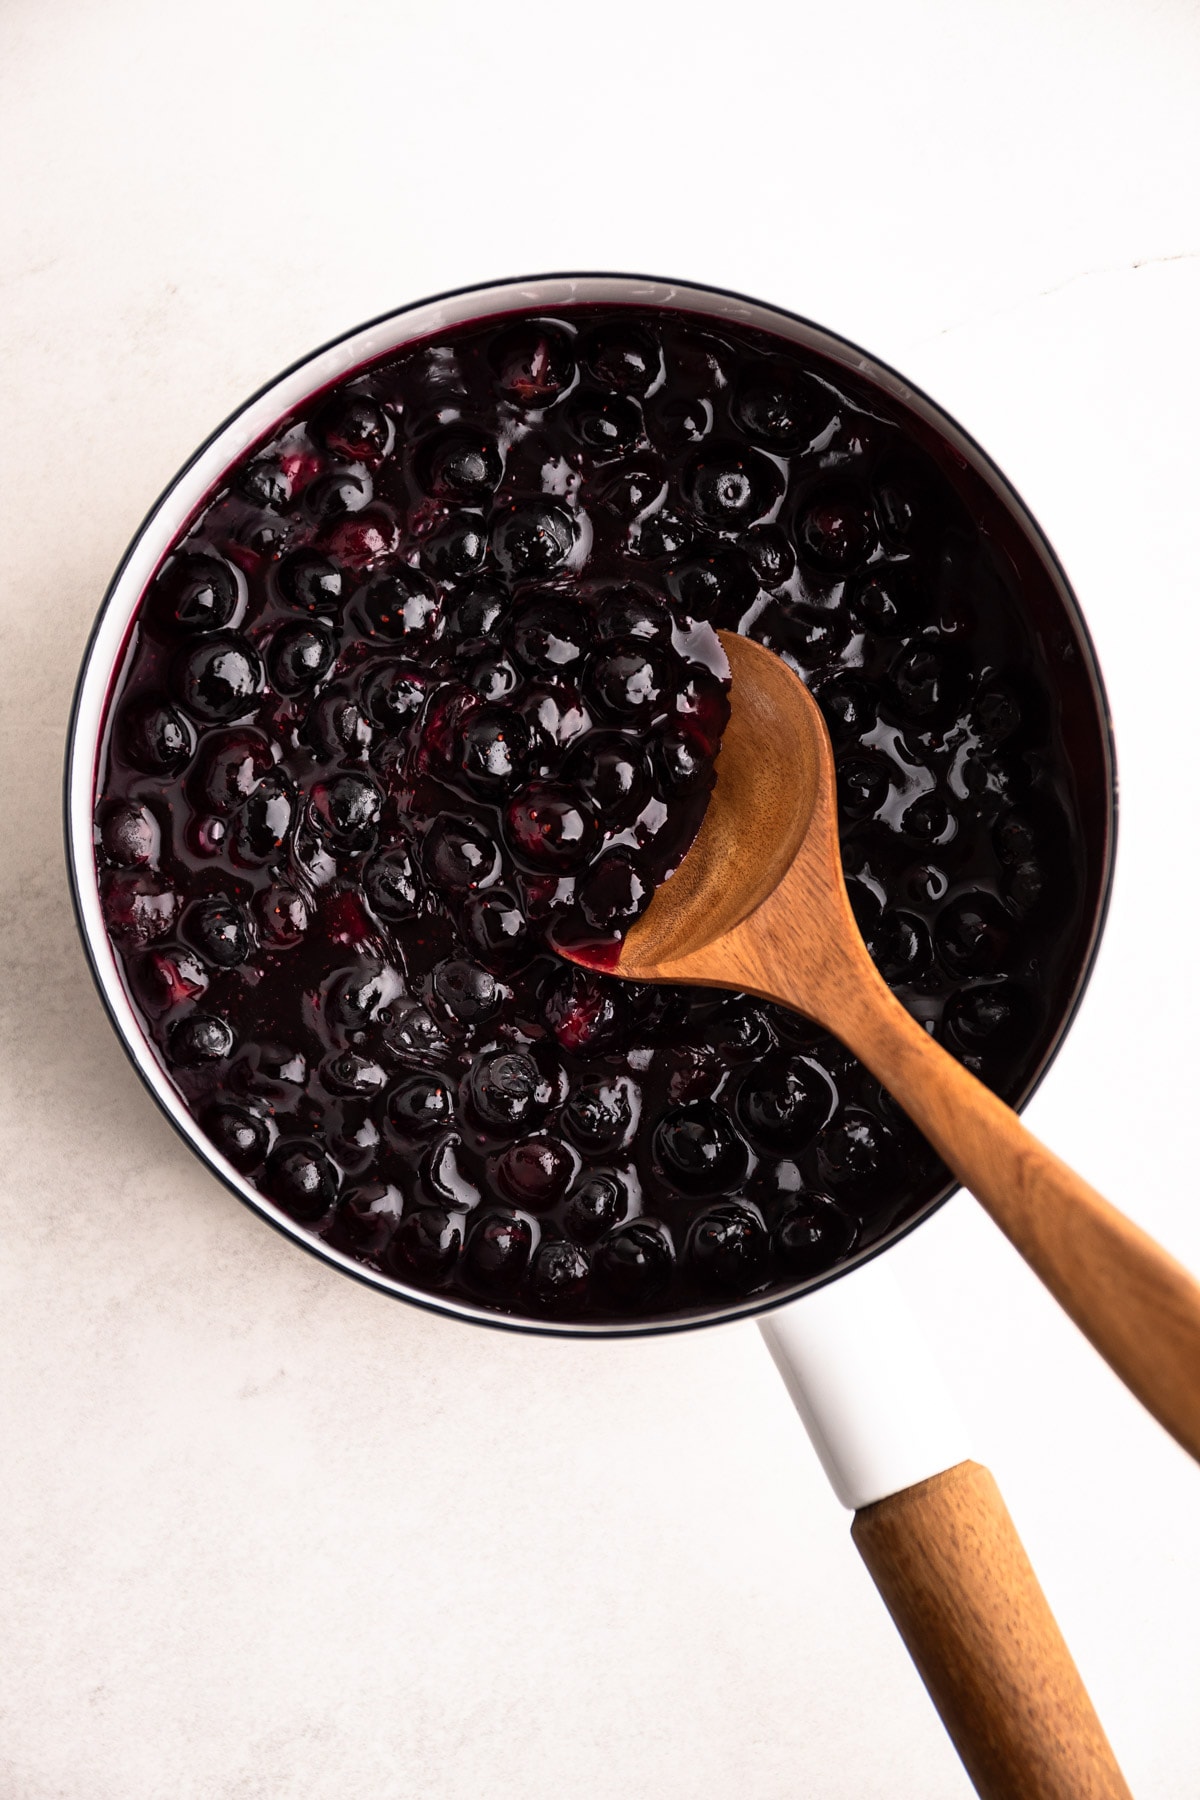
Make the Pie Filling:
- Add blueberries, sugar, cornstarch, cinnamon and salt to a medium pot and mix together until combined.
- Turn the heat on to medium and cook, stirring frequently until the filling is bubbling throughout, about 5-8 minutes.
- Remove from the heat, and transfer to a heat proof container to cool down to room temperature.
Make Cream Filling:
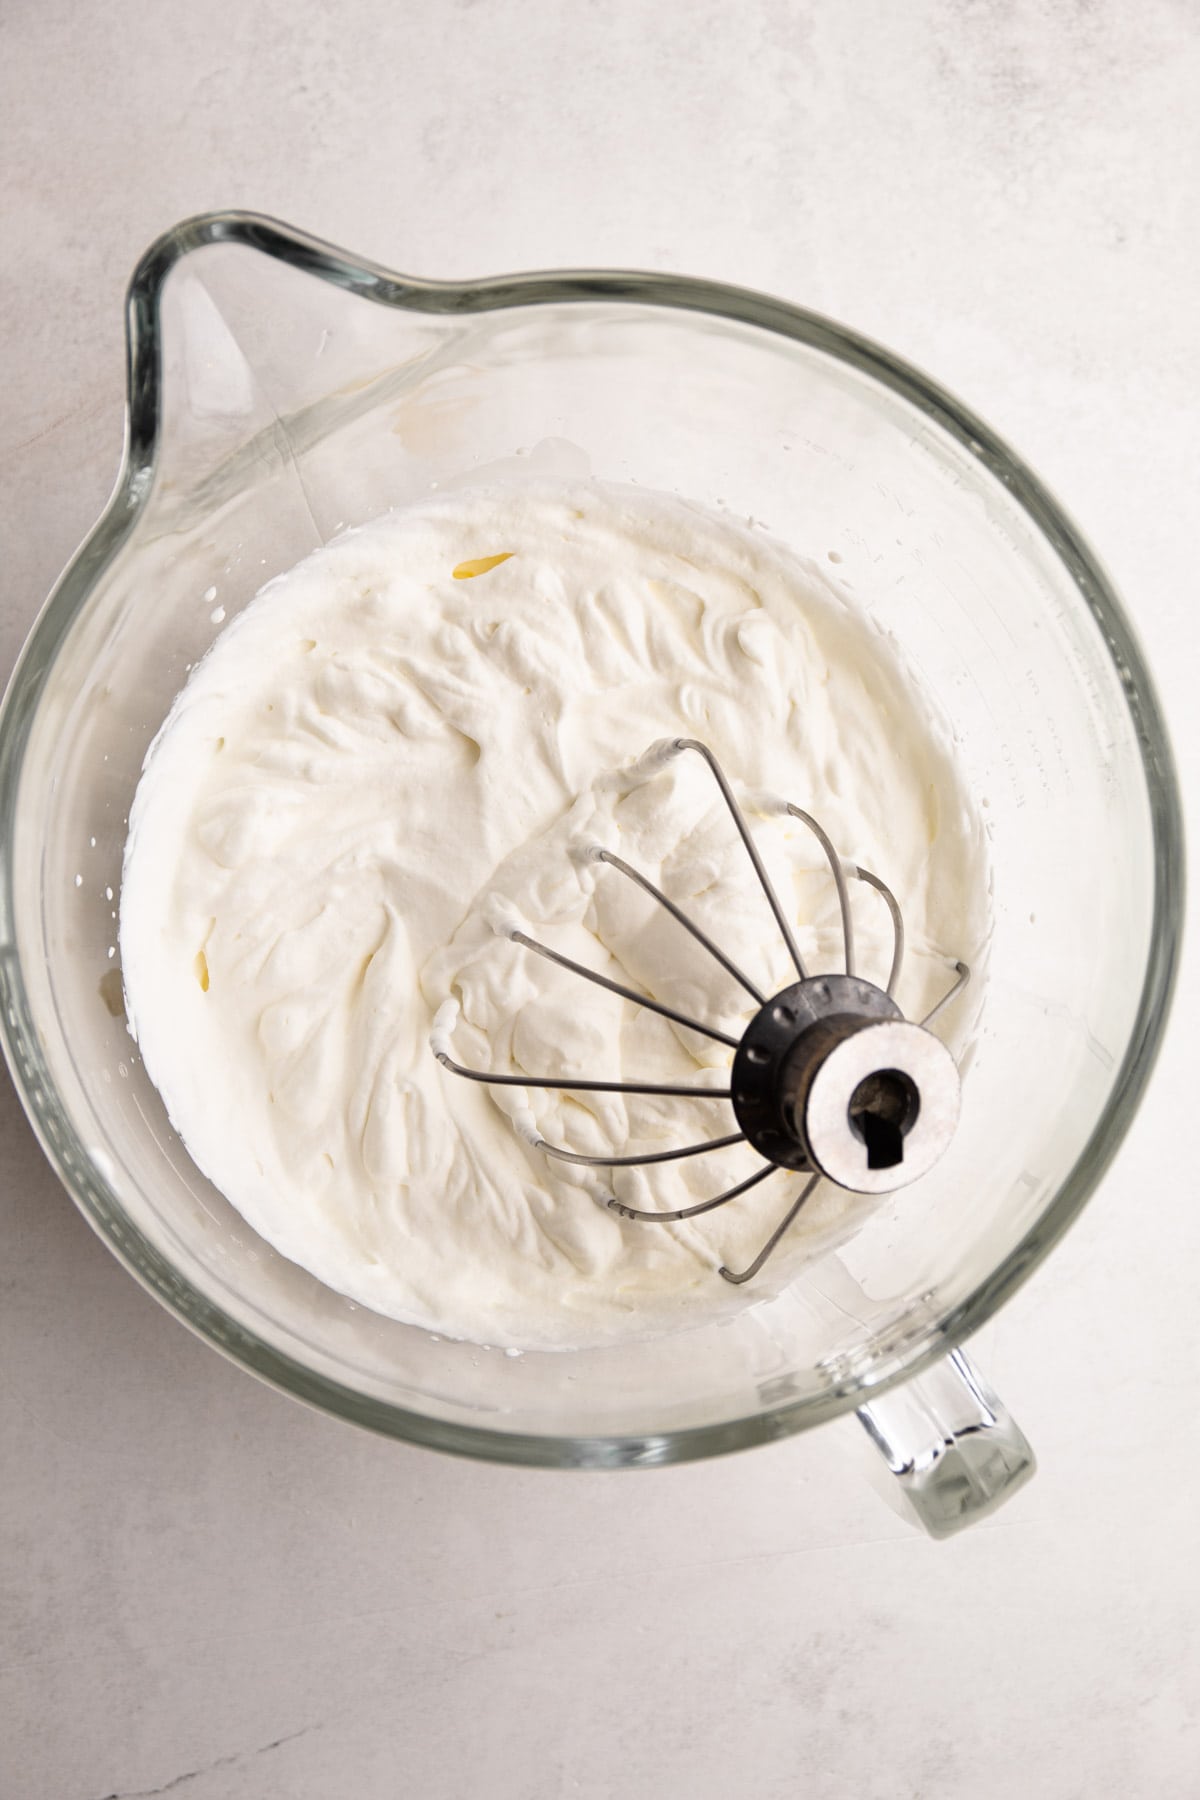
- With an electric mixer using the whisk attachment, whip the heavy cream until medium-stiff peaks form, about 3 minutes. Remove the whipped cream from the bowl and set aside in a separate bowl.
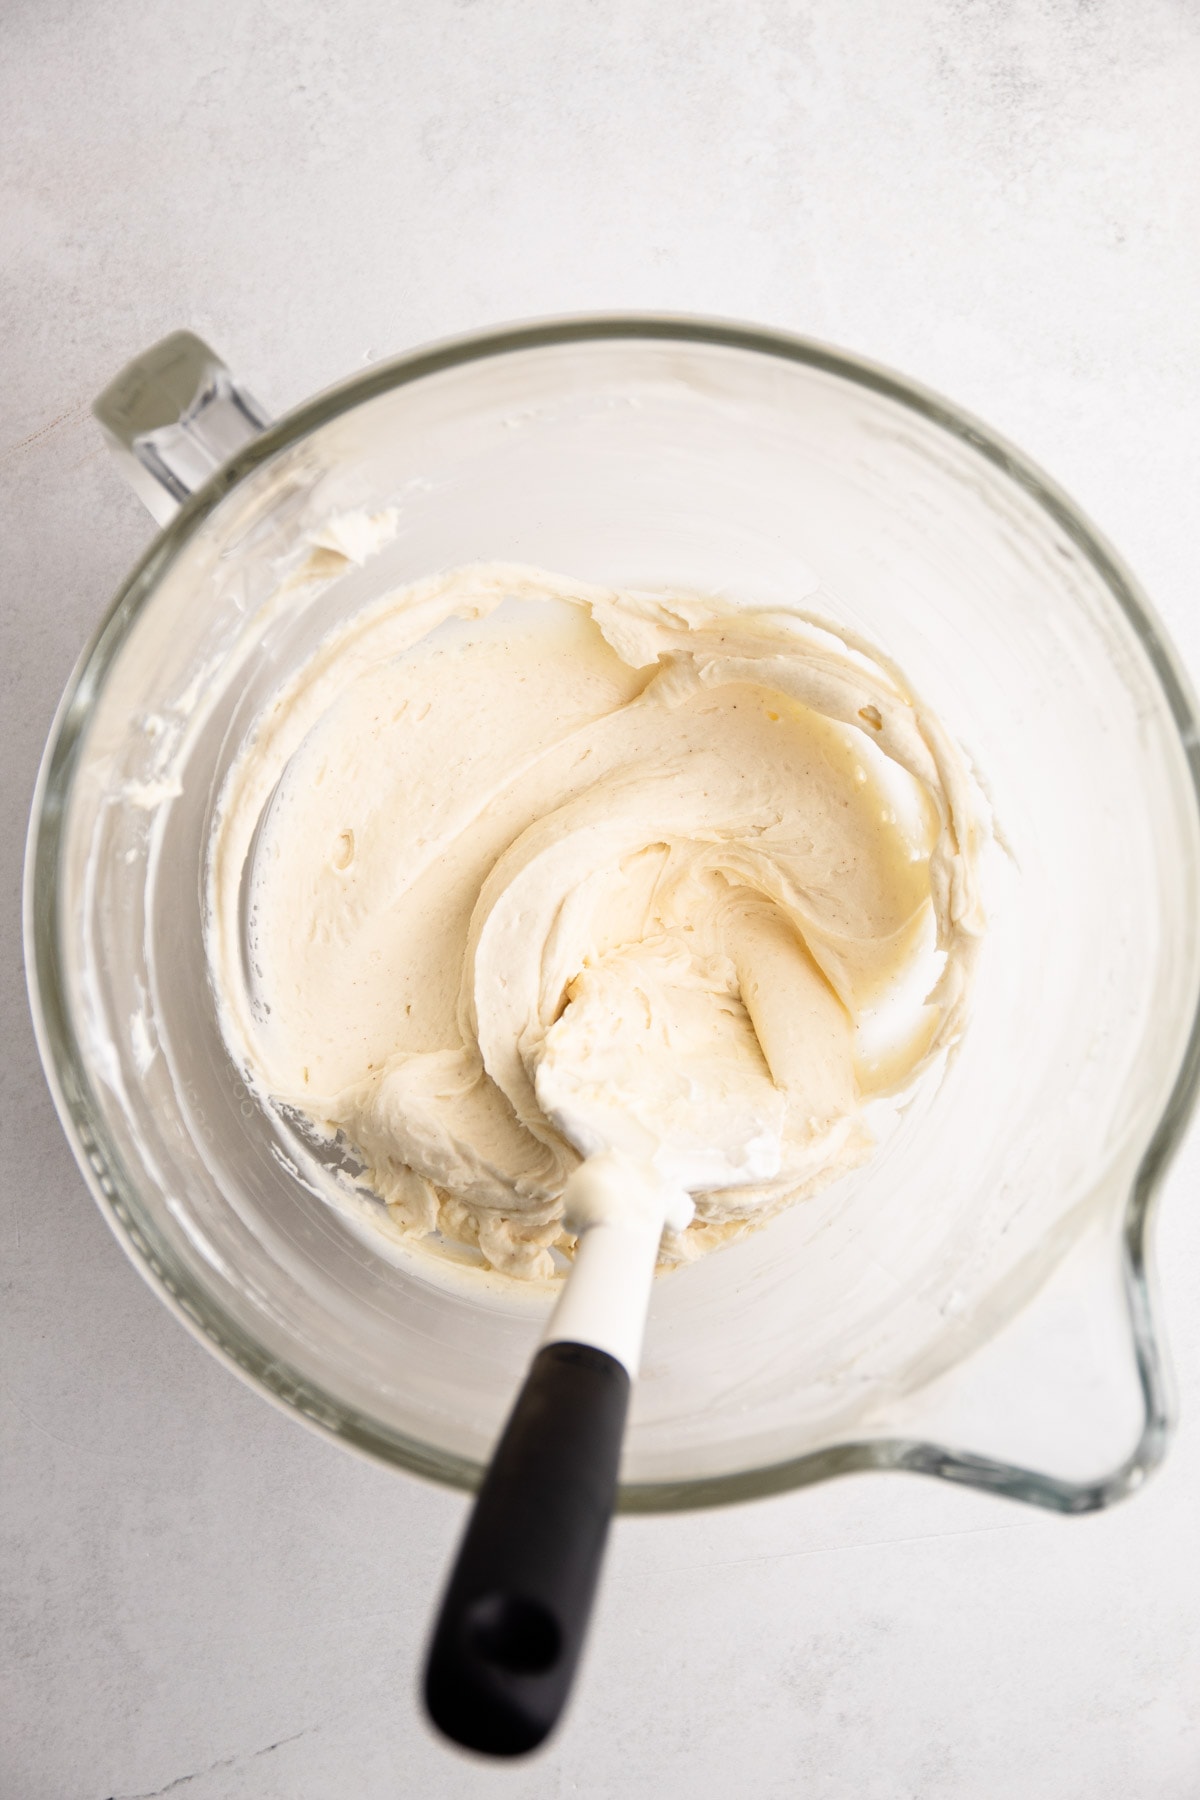
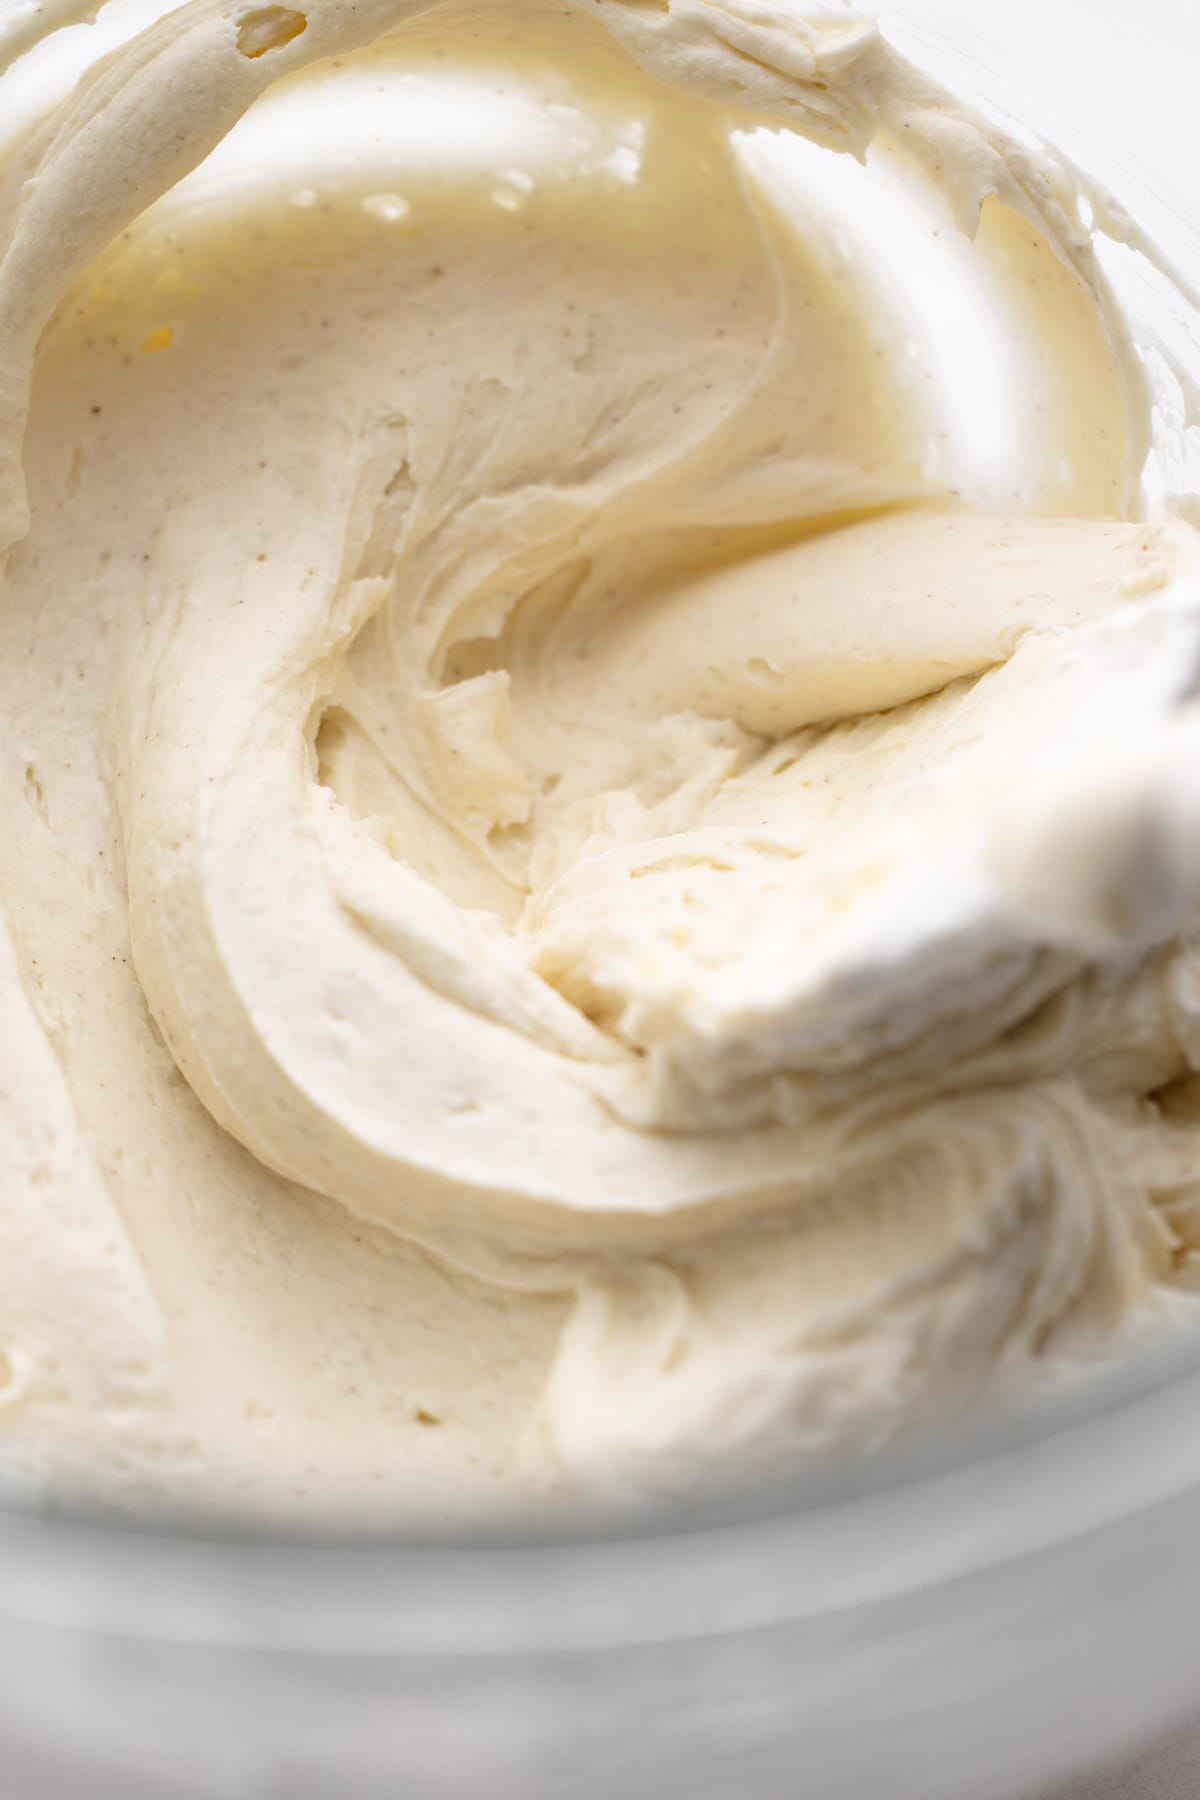
- Place the mascarpone in the now empty mixing bowl, along with the sugar, vanilla, cinnamon, and salt. Whip on medium speed until completely smooth, about 2 minutes, scraping down the bowl halfway though.
- Fold in ⅓ of the whipped cream to the mascarpone mixture with a rubber spatula until it is completely combined.
- Add the remaining whipped cream to the bowl and gently fold it in, being careful not to deflate it. Transfer about 1 cup of the mascarpone filling to an airtight container and place in the refrigerator until the cake is ready to be served. It will be used for decorating the top of the cake.
Assemble:
- Line a 9” square baking dish (see note about other containers) with 2 pieces of parchment paper to create a sling to remove the finished cake. Make sure to leave some overhang to easily pull up and release the cake later.
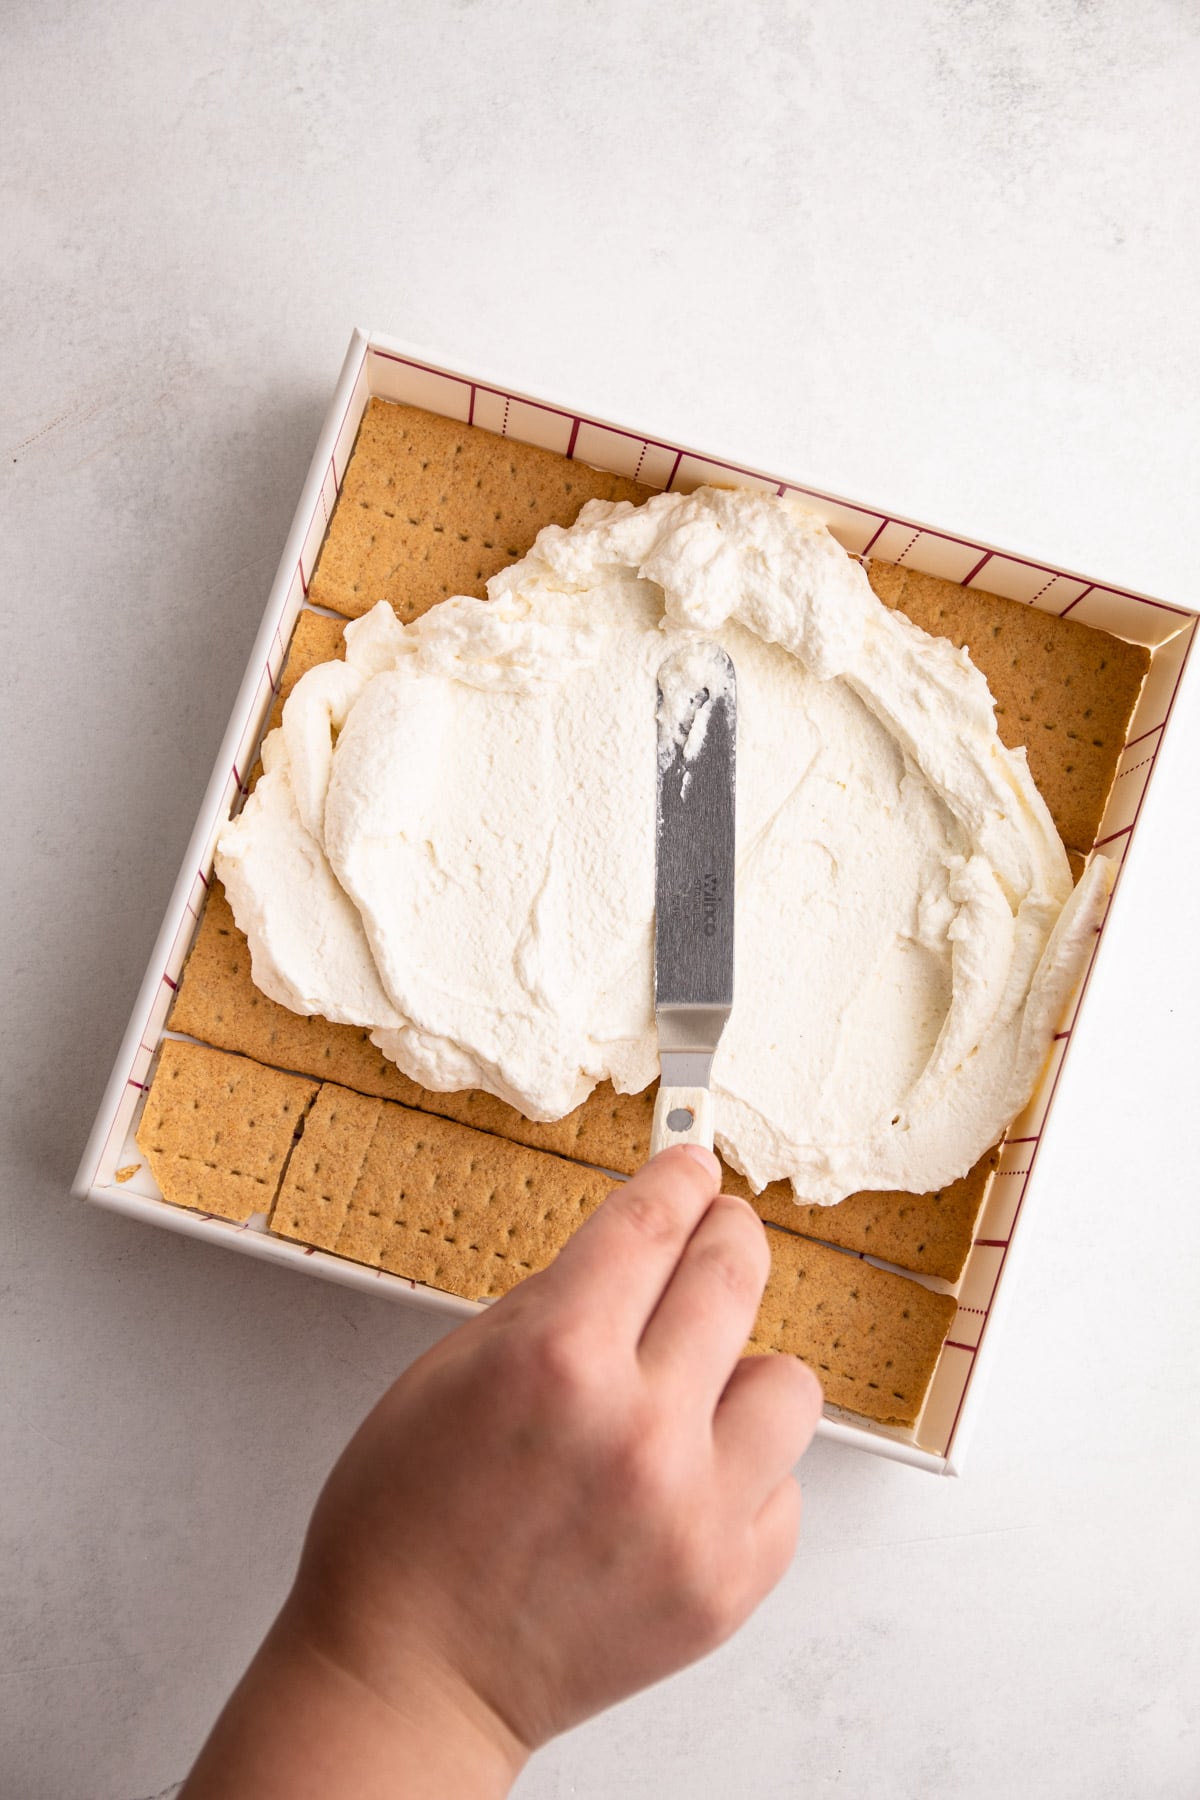
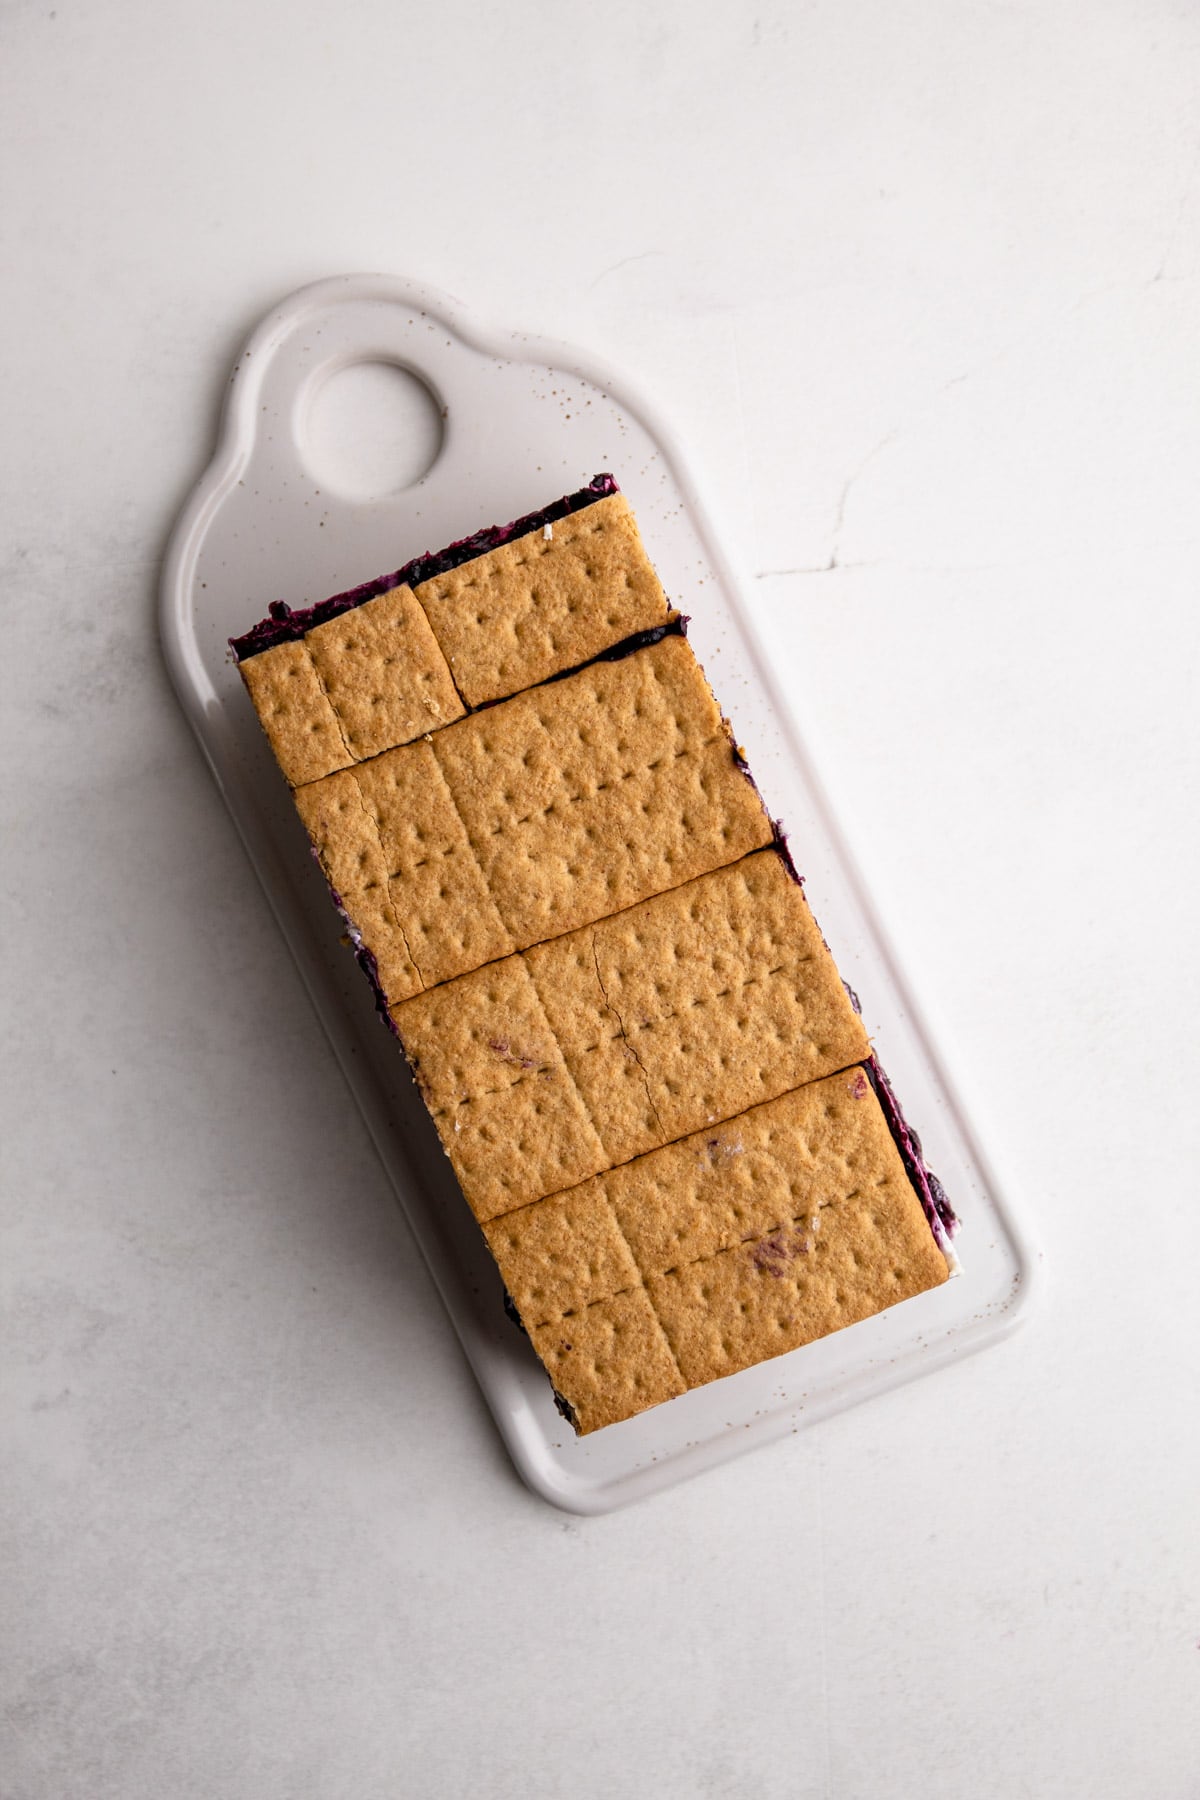
- Line the entire bottom of the prepared pan with graham crackers, cutting any crackers as needed so they fit snuggly in one layer.
- Spread half of the mascarpone filling evenly on top of the graham crackers.
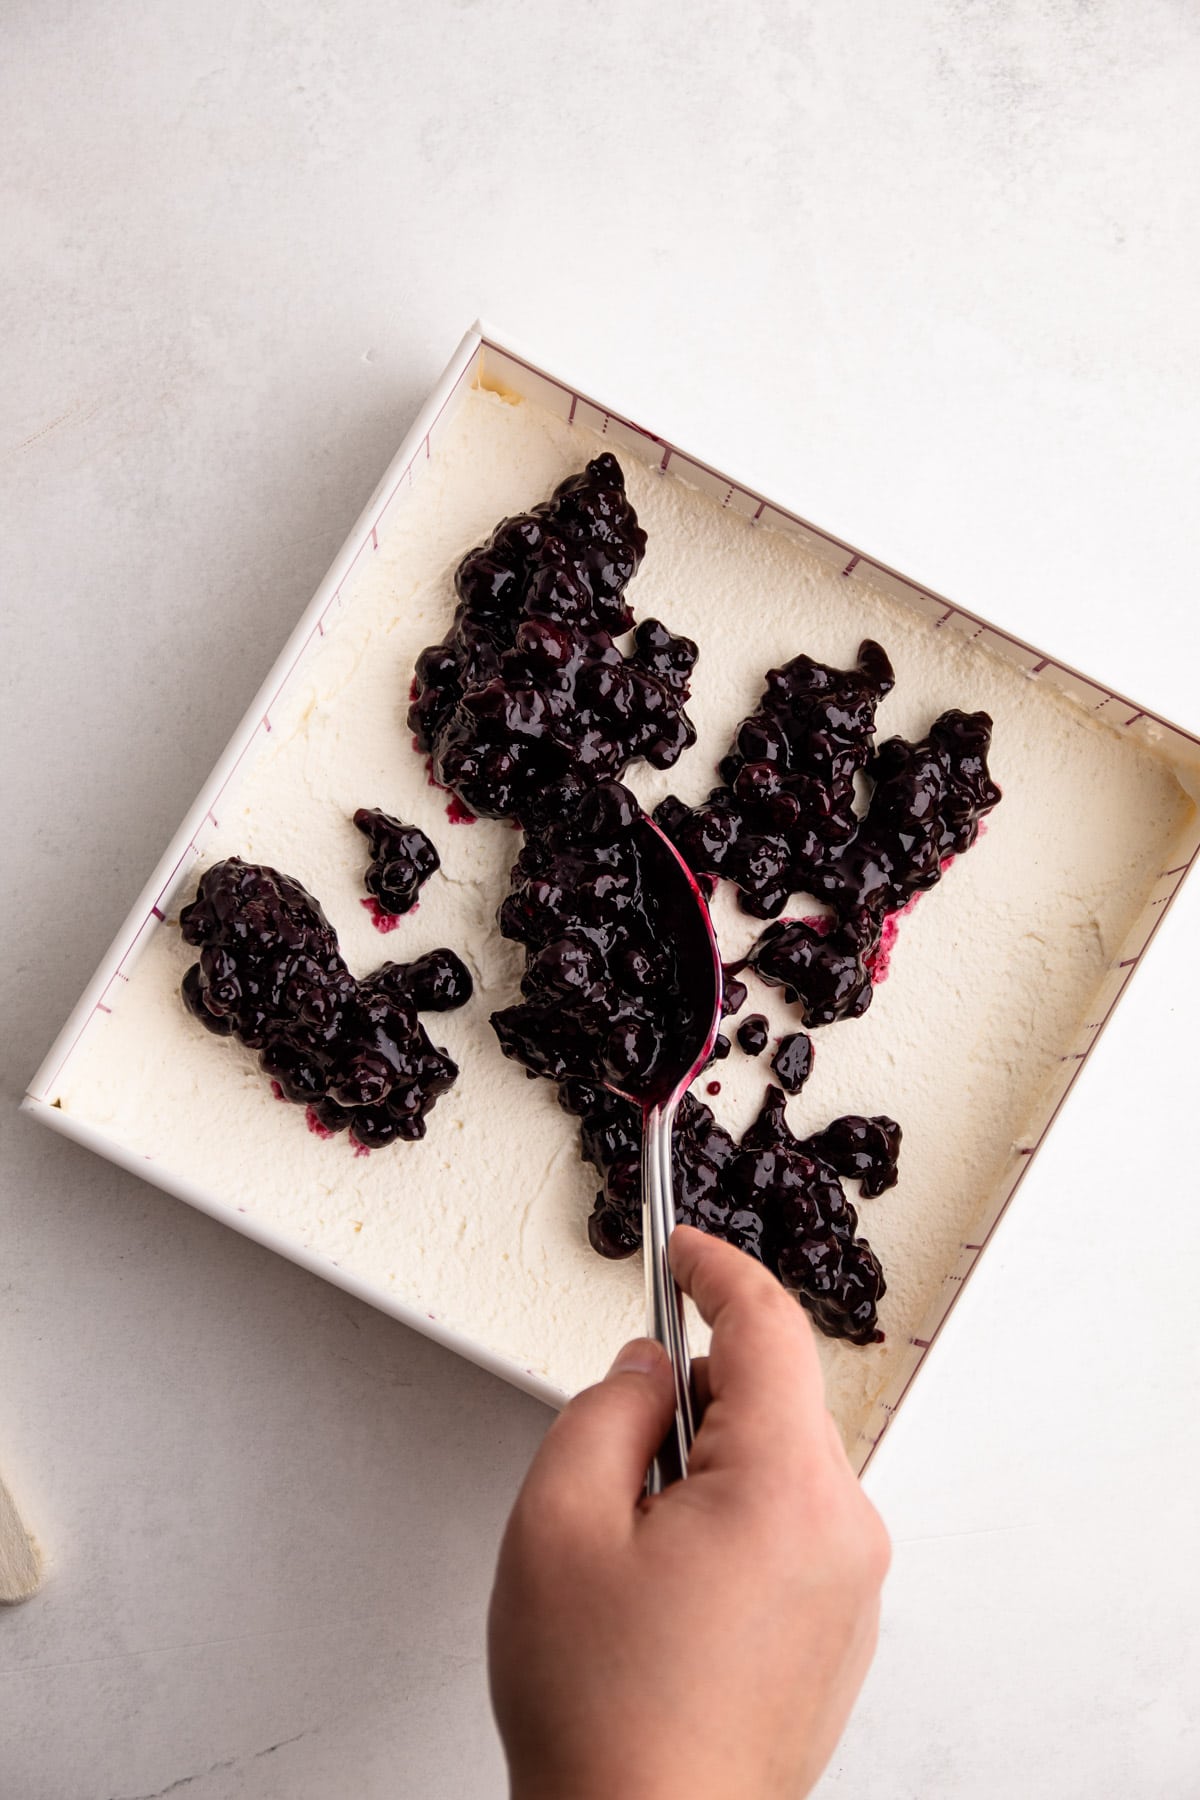
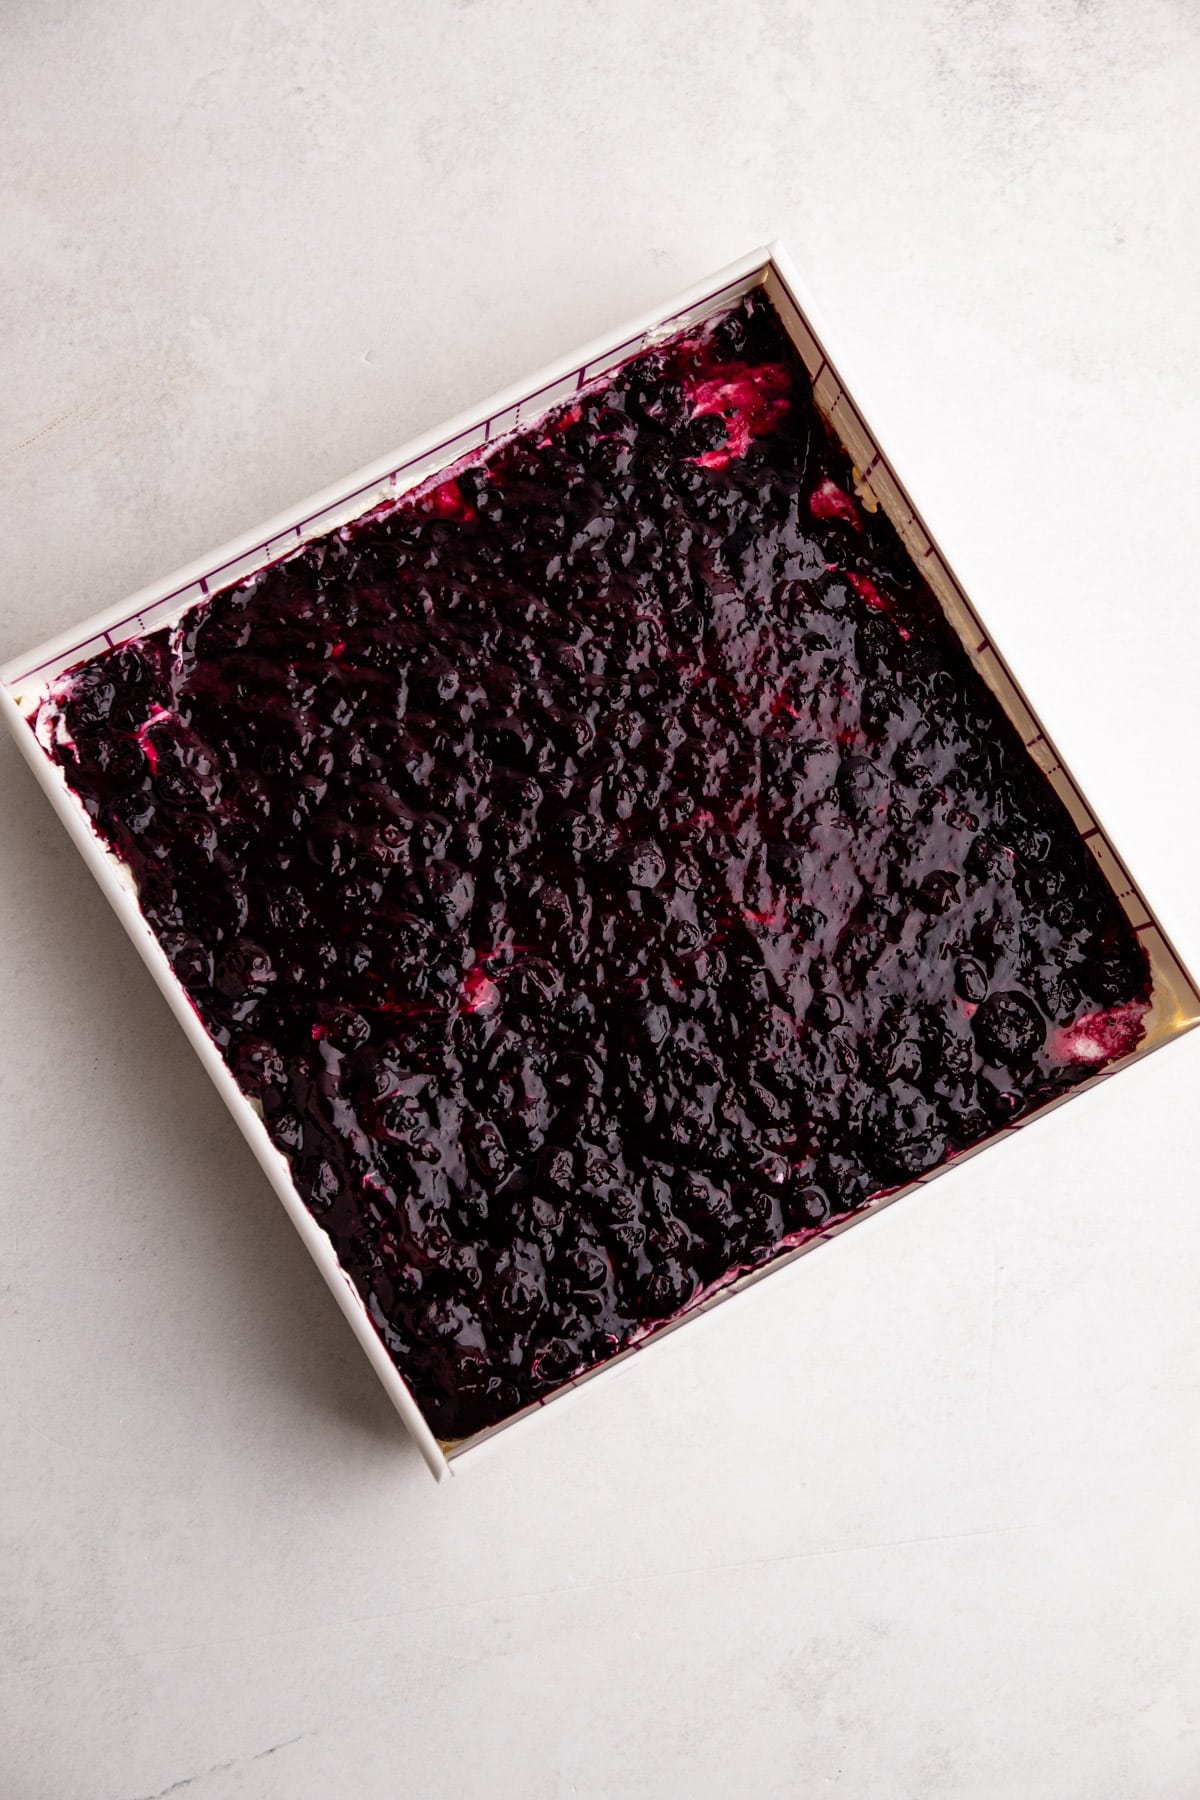
- Spread half of the cooled blueberry pie filling evenly on top of the mascarpone.
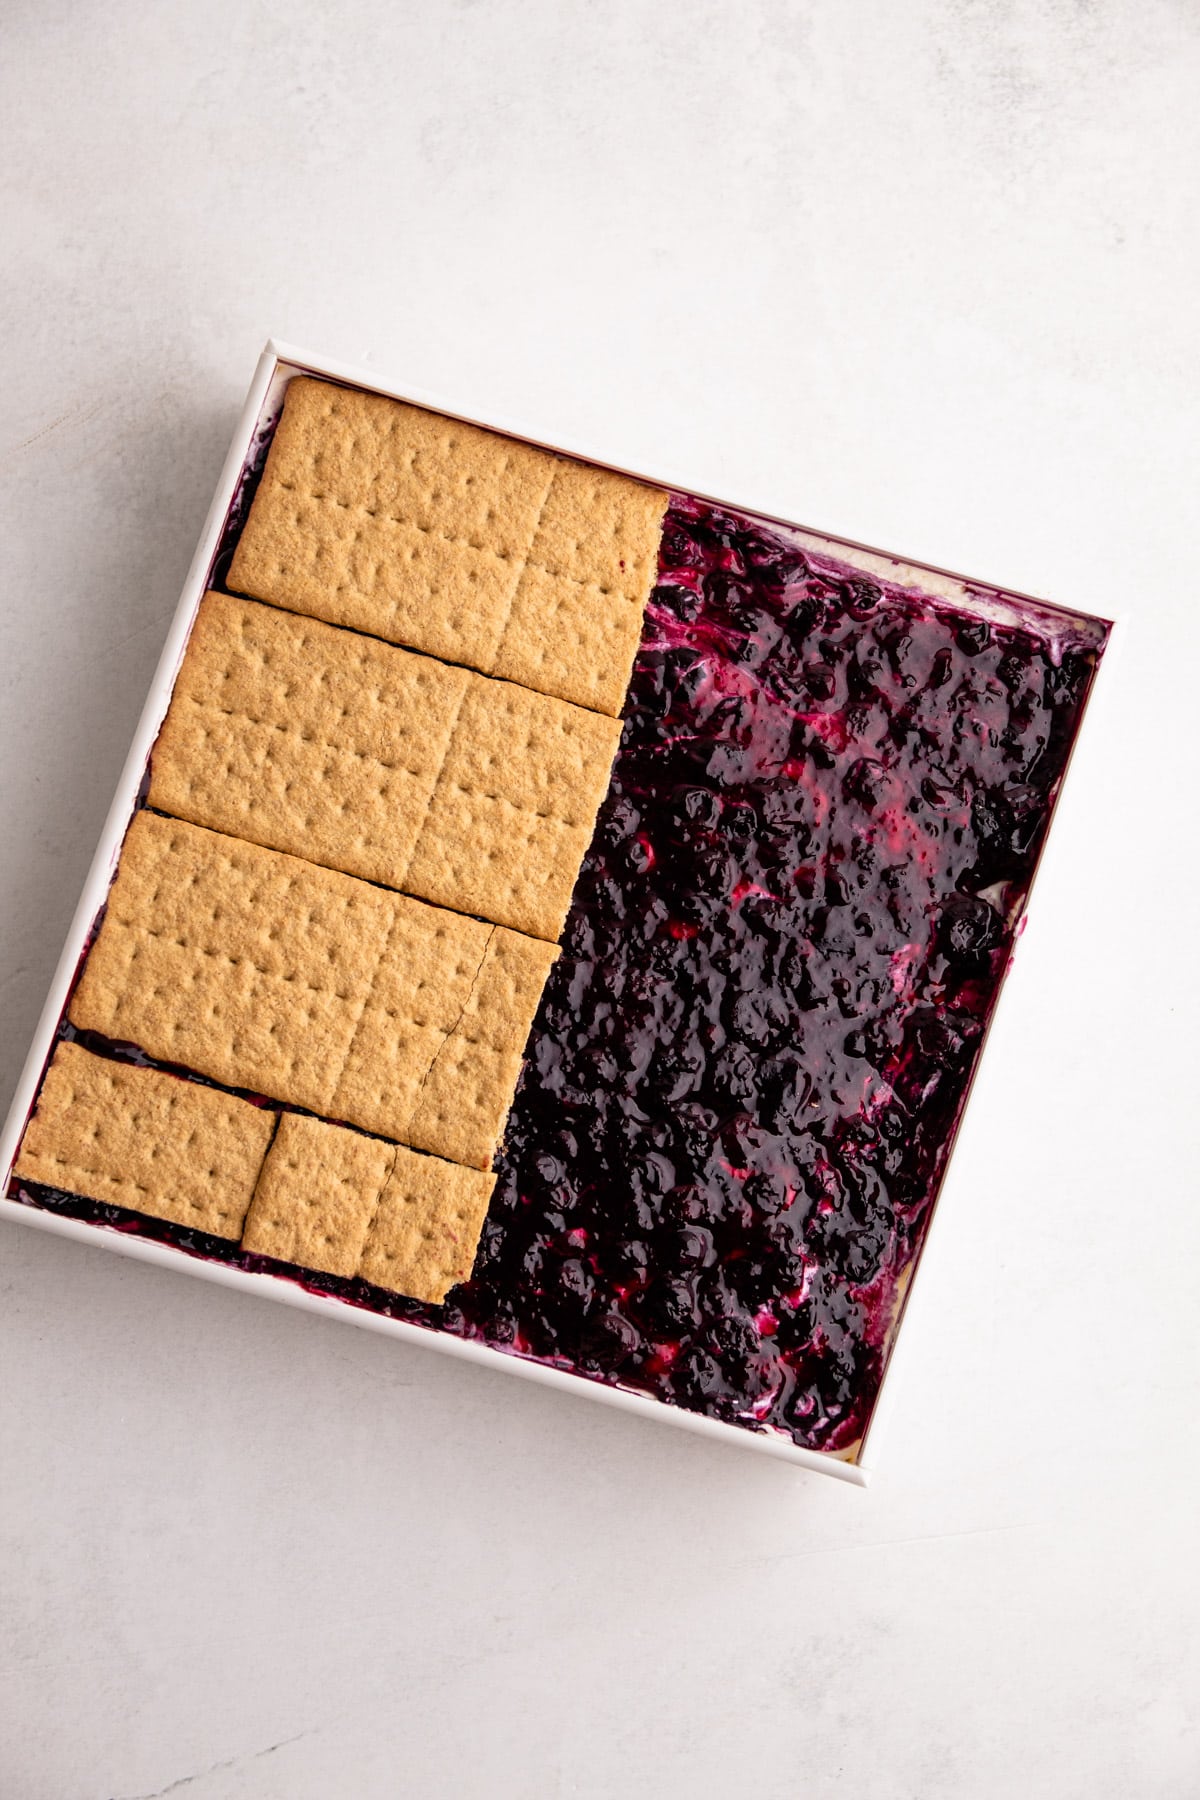
- Place another layer of graham crackers on top of the blueberries.
- Repeat the process with one more layer of mascarpone, and blueberry pie filling.
- Place the final half layer of graham crackers on top of the blueberry filling. It is only half so the cake can be cut in half and stacked later. If you don’t plan to stack the cake, you can put graham crackers to cover.
- Cover the dish and let rest in the refrigerator for 8-12 hours.
- Transfer the dish to the freezer to let chill for at least 1 hour before ready to assemble.
- Once ready to assemble, remove from the freezer. Run a hot and dry butter knife along the edges of the cake, to help release the sides from the pan. Then carefully lift the cake out of the pan.
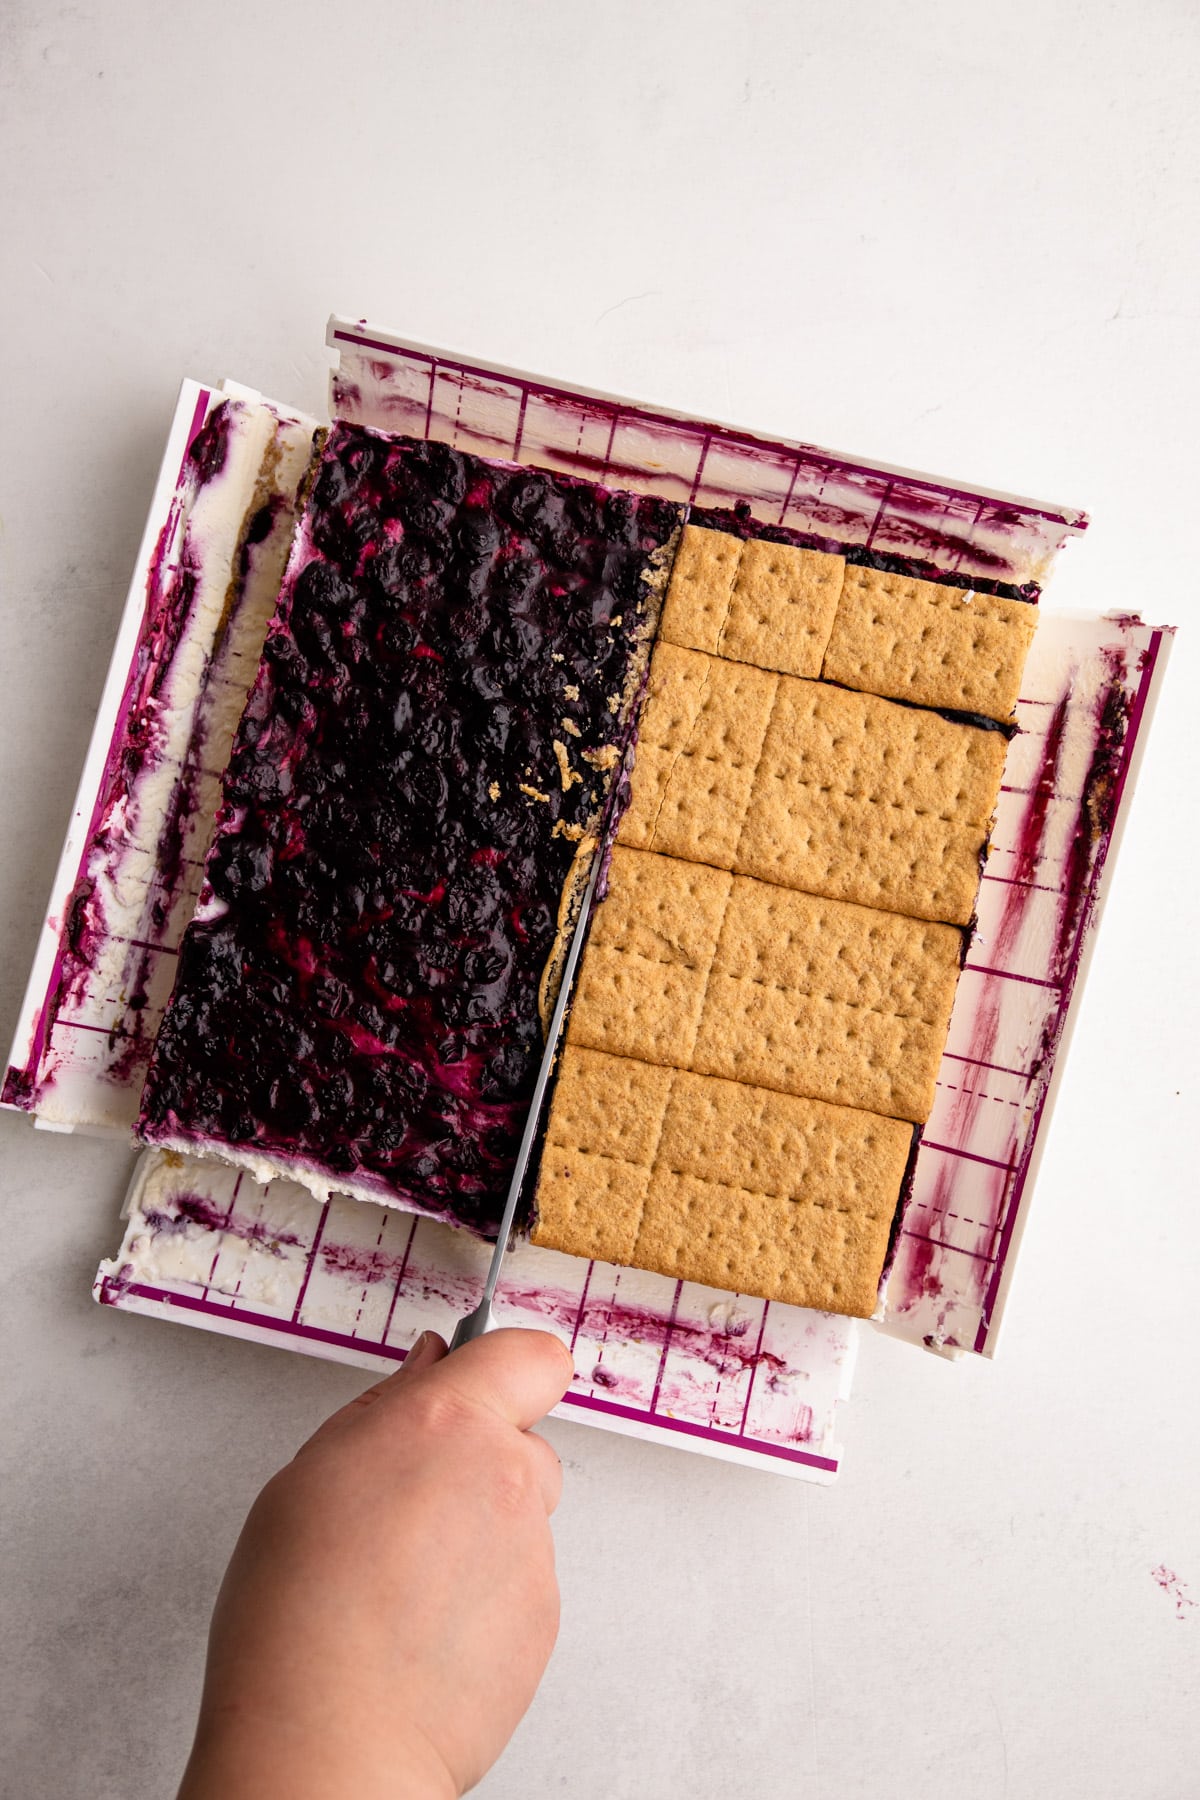
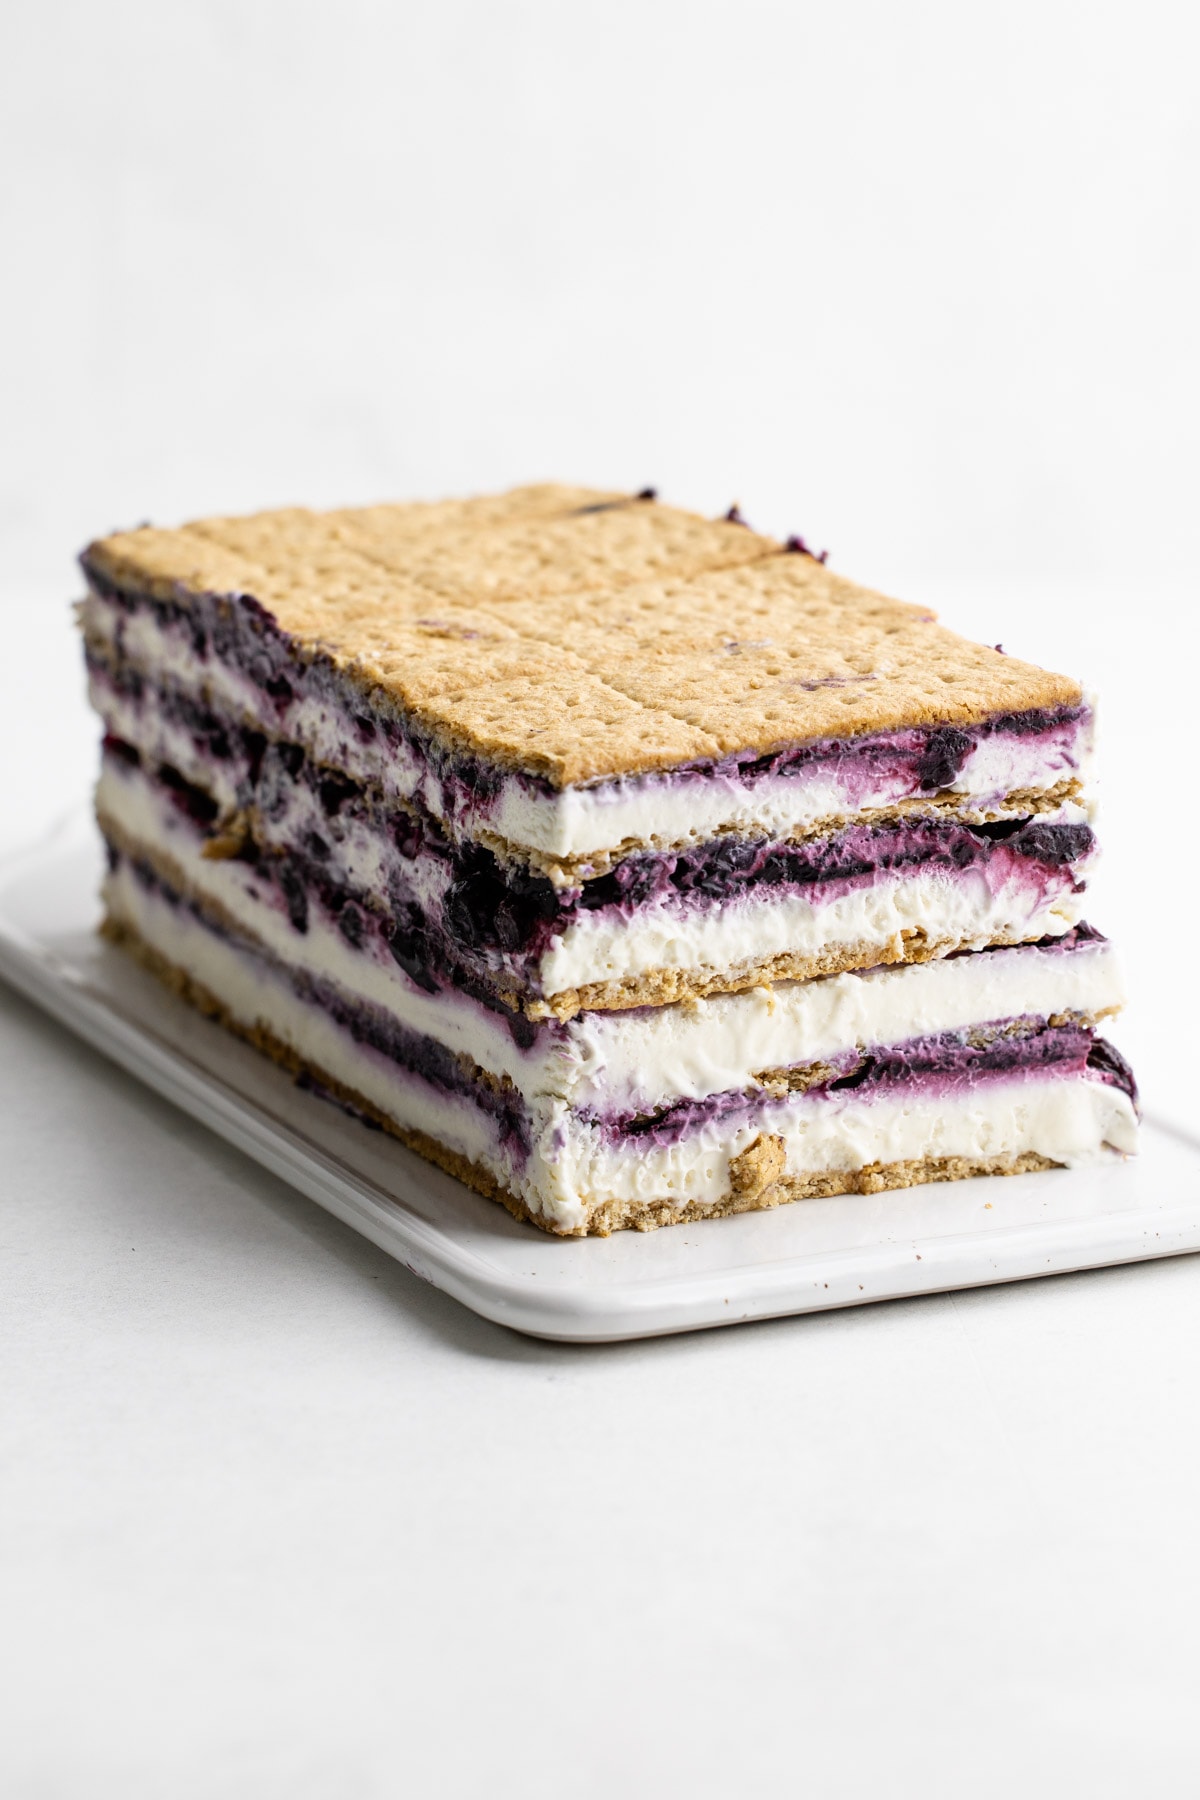
- Place cake on a cutting board and cut in half along the edge of the graham crackers. Carefully place the half with the graham cracker on top of the layer with the blueberry filling so you have tall loaf cake.
- Place the cake on a platter and spread the reserved mascarpone filling on the top layer. Decorate as desired with fresh blueberries.
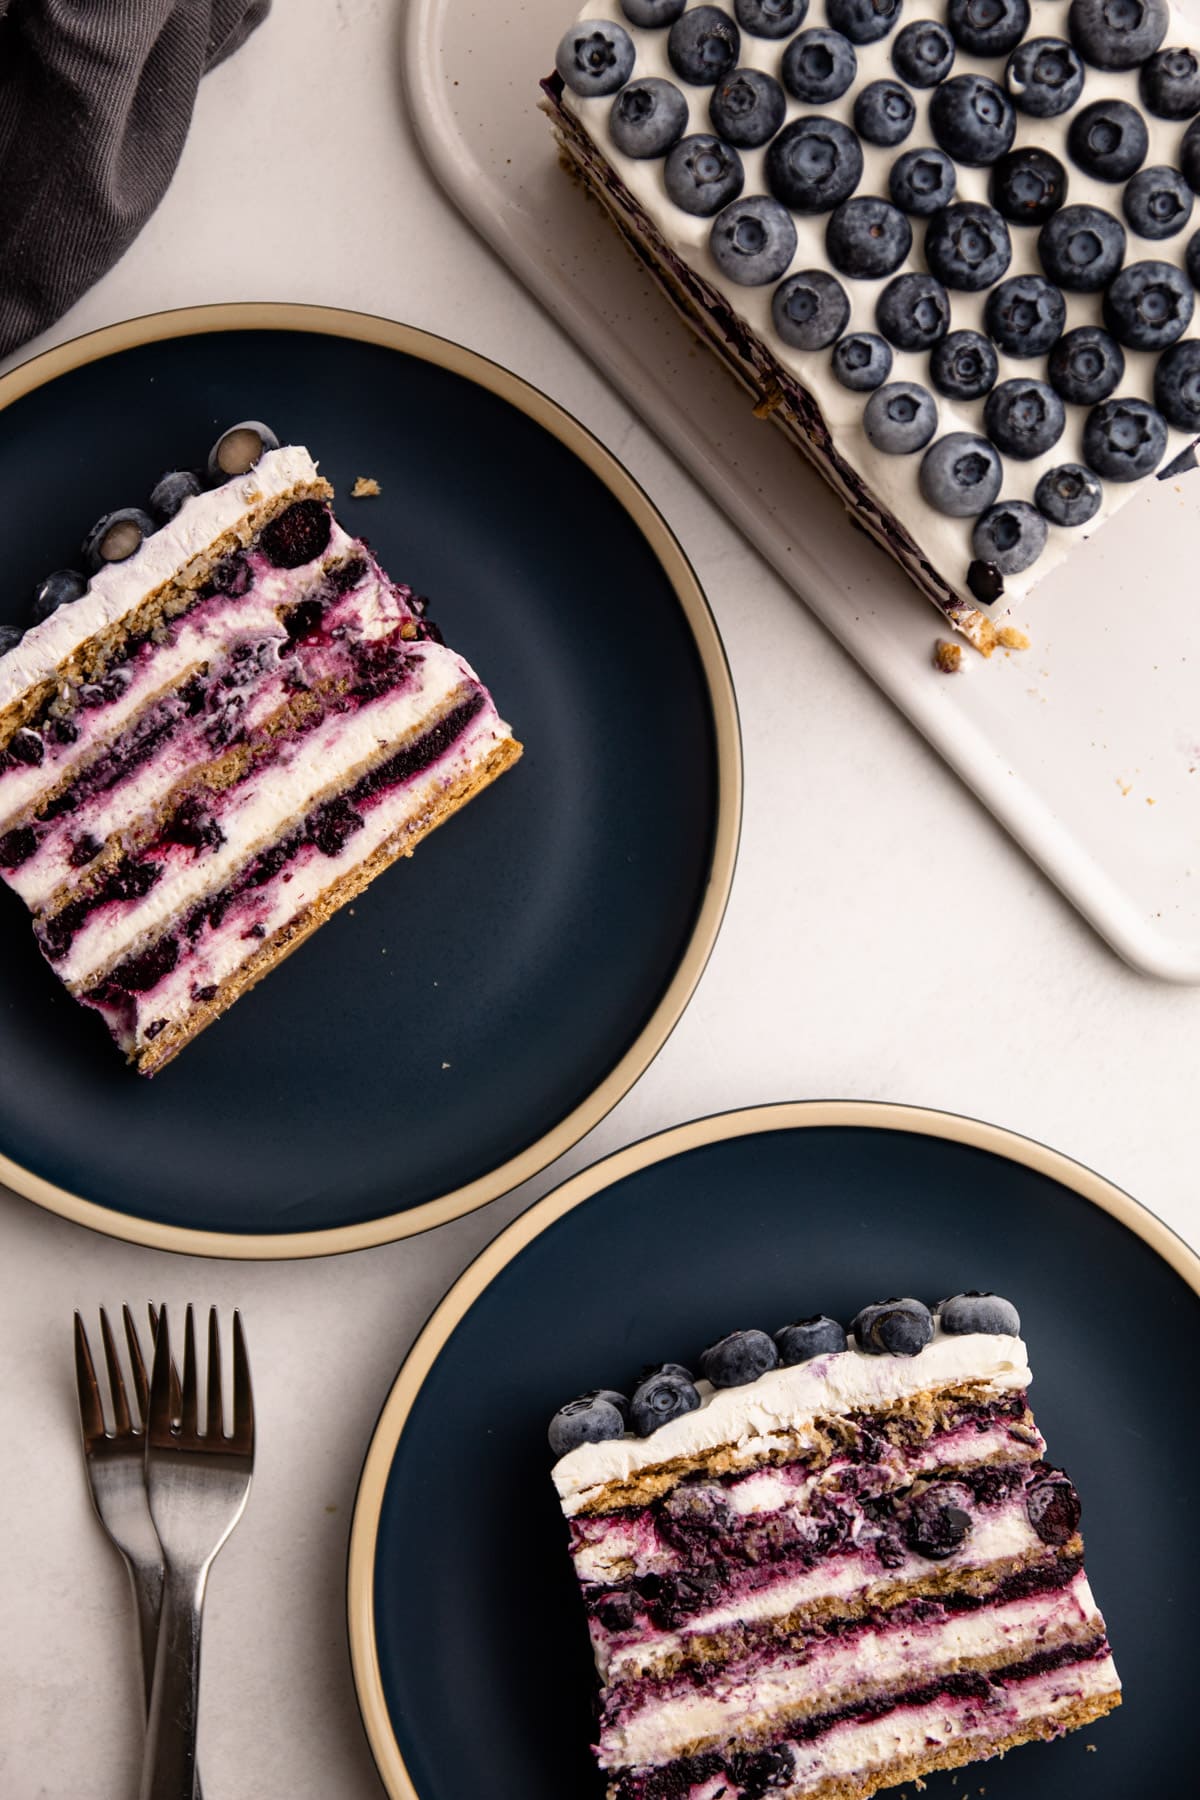
- Let the cake sit for 5-10 minutes to soften up, and then slice and serve. Or, place in the refrigerator until ready to serve.
Notes
Have a question or looking for tips? The text written above the recipe is always a great first place to start! This Blueberry Icebox Cake was developed with love, and I always include loads of explanations, tips, step-by-step photos and technical advice before the recipe.
You do not need to use a straight-sided square baking container to make this. You can truly assemble this cake in any baking tin you have. You can change the shape. You'll just modify the recipe by changing the number of layers you have. Either way, it's still going to be super delicious, so don't spend too much time thinking about what vessel you'll assemble the cake in, and just use what you have. See the note in the text above about different baking vessels.
Letting the cake chill in the refrigerator transforms this dessert from a crunchy graham cracker layered dessert to a cake as the crackers soak up the cream and soften. The recipe then calls for a quick chill in the freezer before serving because slightly frozen cake makes it sturdier to cut in half, stack, and garnish. This step is optional, as you don't even have to stack them if you don't want to, but this trick makes it easier to handle the dessert.
Once the icebox cake has softened overnight, it is best served within 1-2 days. Simply slice and serve! However, this cake freezes exceptionally well. Once it has softened, you can freeze this entire cake, or freeze it in slices in an airtight container for up to 1 month. To defrost, simply leave at room temperature for about 30 minutes, or let it sit overnight in the refrigerator.
Some of the links on this page may be affiliate links. Everyday Pie is a participant in the Amazon Associates Program. As an Amazon Associate I earn from qualifying purchases, at no extra cost to you.
MB
THANK YOU, Kelli!! it was so beautiful and easy to prepare - thank you for all the detailed tips !
as always an Everyday Pie wonder!
topped mine with pansies!
Alice Gauding
I'm unable to stand for very long and have very little room in my kitchen, so I have a question. Could I make this (more like something similar to this) using premade cheesecake filling mixed with thawed whipped topping and canned blueberry pie filling with some defrosted blueberries added? I would definitely put fresh blueberries on top.
Kelli Avila
Hi Alice! Sure, why not! Hope you enjoy! -Kelli
Louise
Hi! If I have a choice of making it 2 days in advance or 2 hours in advance - which would you choose? Thanks!
Kelli Avila
2 days!
Bubbles
Hello! Has anyone tried graham cracker crusts instead? Seems like it might be a firmer layer and tastier.
Tequila
My family loves this! All the ingredients go so good together! Thanks for sharing!
Nettie
GREAT recipe and instructions. I made this for my 5yo’s early August birthday because what could be better for a sweltering summer celebration? Rave reviews all around and I will be definitely be making this again and again. The family agreed on a minor adjustment for next time to suit our tastes, which is to omit the cinnamon in the mascarpone cream but keep that hint of it in the blueberry filling. I’ve also made the strawberry icebox cake on this site and didn’t enjoy it quite as much (it was more work / less reward for me and a bit sloppy when serving) but this blueberry version is *near* perfection in every way. Highly recommended using Wyman’s frozen wild blueberries for the filling. Make it!!
Louise Jacowitz Allen
This recipe is amazing! So delicious and also refreshing in the heat of summer. I'm usually a freshness freak with baked goods so it's nice to something that has to be made the day ahead!
Sandra
This is a go to, in the past I've made exactly the way u did, just used cinnamon graham crackers... Also used chocolate grahams( hard to find, but Target has them),and I've used Chessman cookies too( being from Baltimore I've been using Chessman instead of vanilla wafers in homemade banana pudding past 20 yrs, omg u'll never use wafers again )
Love how u explain to folks don't focus on the baking container, and how to substitute easily certain ingredients.
Martha
I've been scanning icebox cake recipes, and this is the first of them I've made.
I used the recipe more as a guideline than an instruction manual.
Made 4 single servings.
Subbed ginger snaps for Graham crackers (left some whole, others I crushed to fill in gaps). Used nutmeg in blueberry compote; might cook with a strip of lemon zest next time. Added limoncello to mascarpone since I love lemon with blueberries.
I had to try one after it sat for only an hour. Light and delicious. Ginger snaps have more body than graham crackers, and are going to make a nice crust This one is a winner, and amenable to endless variations.
Pauline
Can you use strawberries instead of blueberries?
Kelli Avila
Hi Pauline--I have a dedicated recipe to a strawberry version: Strawberry Icebox Cake or if you want, you can just sub in strawberries for this version. Enjoy! -Kelli
Lisa
Do you think it could be made with alternating layers with blueberries and raspberries?
Kelli Avila
Definitely!
Louise
I made this today in quantity! I 6 - times the recipe and made it in 3 half sheet hotel pans for a large group of 30 people. They went crazy! Just got an email from one person who said "that icebox cake was just beyond... ❤️" It was so easy and so good. I also liked that it is made the day before freeing up my time for the day of the event. I did make one change - for cost savings I used cream cheese instead of mascarpone and it was still delicious and creamy. Do not leave out the cinnamon! This is a perfect hot weather desert - where I live it is always hot - so it's just a perfect dessert!
Kelli Avila
Awesome Louise! Can't believe you made a 6x batch! You are amazing!
Henriette
Hpw many grams of blueberries is needed??
Kelli Avila
420
Marvin
I'm fixing on making this for my wife. I am hoping she will appreciate the effort and come back home. Larry is no good for her.
Lynn
This looked delicious so I just had to make it. It WAS delicious only mine hardly looked as beautiful as Kelli’s, haha!!! I feel like it took me a bit longer to prep and cook but regardless, it was creamy, light, and enjoyed by all! Thank you, Kelli!