
Utilizing a food processor is, without a doubt, the quickest and most foolproof method for making pie dough. This guide will take you through the step-by-step process of How to Make Pie Crust in the Food Processor, complete with essential tips and a video to demonstrate the process.
Want to save this recipe?
Enter your email & I'll send it to your inbox. Plus, get weekly updates from me!
Food Processor Pie Crust
Making pie crust can be an intimidating task for a lot of bakers. Oftentimes, people can be daunted by all the "rules" associated with making pie crusts and that stress leads them to opt for store-bought crusts instead. So I've made it my professional mission to change that narrative and help people understand that making good pie dough from scratch is achievable. And the results are always going to be worth the effort.
I talk about pie dough in so many different articles on this website, I wanted to dedicate one to making pie crust in the food processor, especially for those bakers afraid to make it themselves. After over a decade of dedicating my professional life to baking pies, I can say that the food processor is my preferred method of making pie dough. It isn't the flakiest method, but it results in tender pie dough that is simple to make with just the push of a button. The dough hydrates easily so you won't have to add any extra water and it's not as messy as making it by hand.
So, let's get to making it, shall we? The article below is jam-packed full of useful information. You can jump around using the menu below, or skip to the end of the article for the full recipe.
Jump to:
A Very Short Primer on Pie Pastry
At its heart, good pie dough is a balance of three key ingredients: flour, butter, and water. The water interacts with the flour to form the gluten that creates the structure of the dough. You want to develop just enough gluten that the pastry has some strength to hold its shape but not so much that it's tough. The butter coats the flour, helping to inhibit excess gluten formation, but it also creates pockets of steam as it melts, creating that flakiness we all love.
For this article, I'm sharing a super basic pie crust recipe to demonstrate how to make it in the food processor. It's as stripped down as possible (aside from maybe this 3-ingredient pie crust.) If you are looking for the My Favorite Butter Pie Crust recipe, it's slightly different than the one shared here, with a bit more butter and the addition of cornstarch to lighten it up.
Ingredients Needed
This is an overview of the ingredients, as well as an explanation behind them. For the full recipe, scroll down to the end of the article.

- All Purpose Flour: Generally speaking pastry flour is the best flour for making pastry because it has a lower protein content. But most people don't keep it in their kitchen, so this recipe it calls for all-purpose flour. If you do have pastry flour, feel free to use that instead.
- Salt: This recipe was tested using Diamond Crystal coarse kosher salt. If you use Morton's kosher salt or fine salt, decrease by about half for volume, or use the same amount by weight.
- Unsalted butter: Make sure you use good quality butter here! I like unsalted that way you can control the amount of added salted.
- Apple cider vinegar: This helps make the dough tender by inhibiting too much gluten formation and it brings a nice subtle hint of tang to the crust that keeps it nicely balanced.
- Ice water: Water brings the whole thing together, but it should be cold to help keep the temperature of the dough as chill as possible. Honestly, when I don't have ice laying around I'll just let the tap run for 30 seconds to get water cold and use that.
Step-by-Step Overview
This overview is to demonstrate how to make flaky American-style pie dough. See the section "How to Make Other Types of Pie Dough" for additional information.
The flaky pie dough is first assembled inside the food processor.
Step 1: Pulse the dry ingredients.
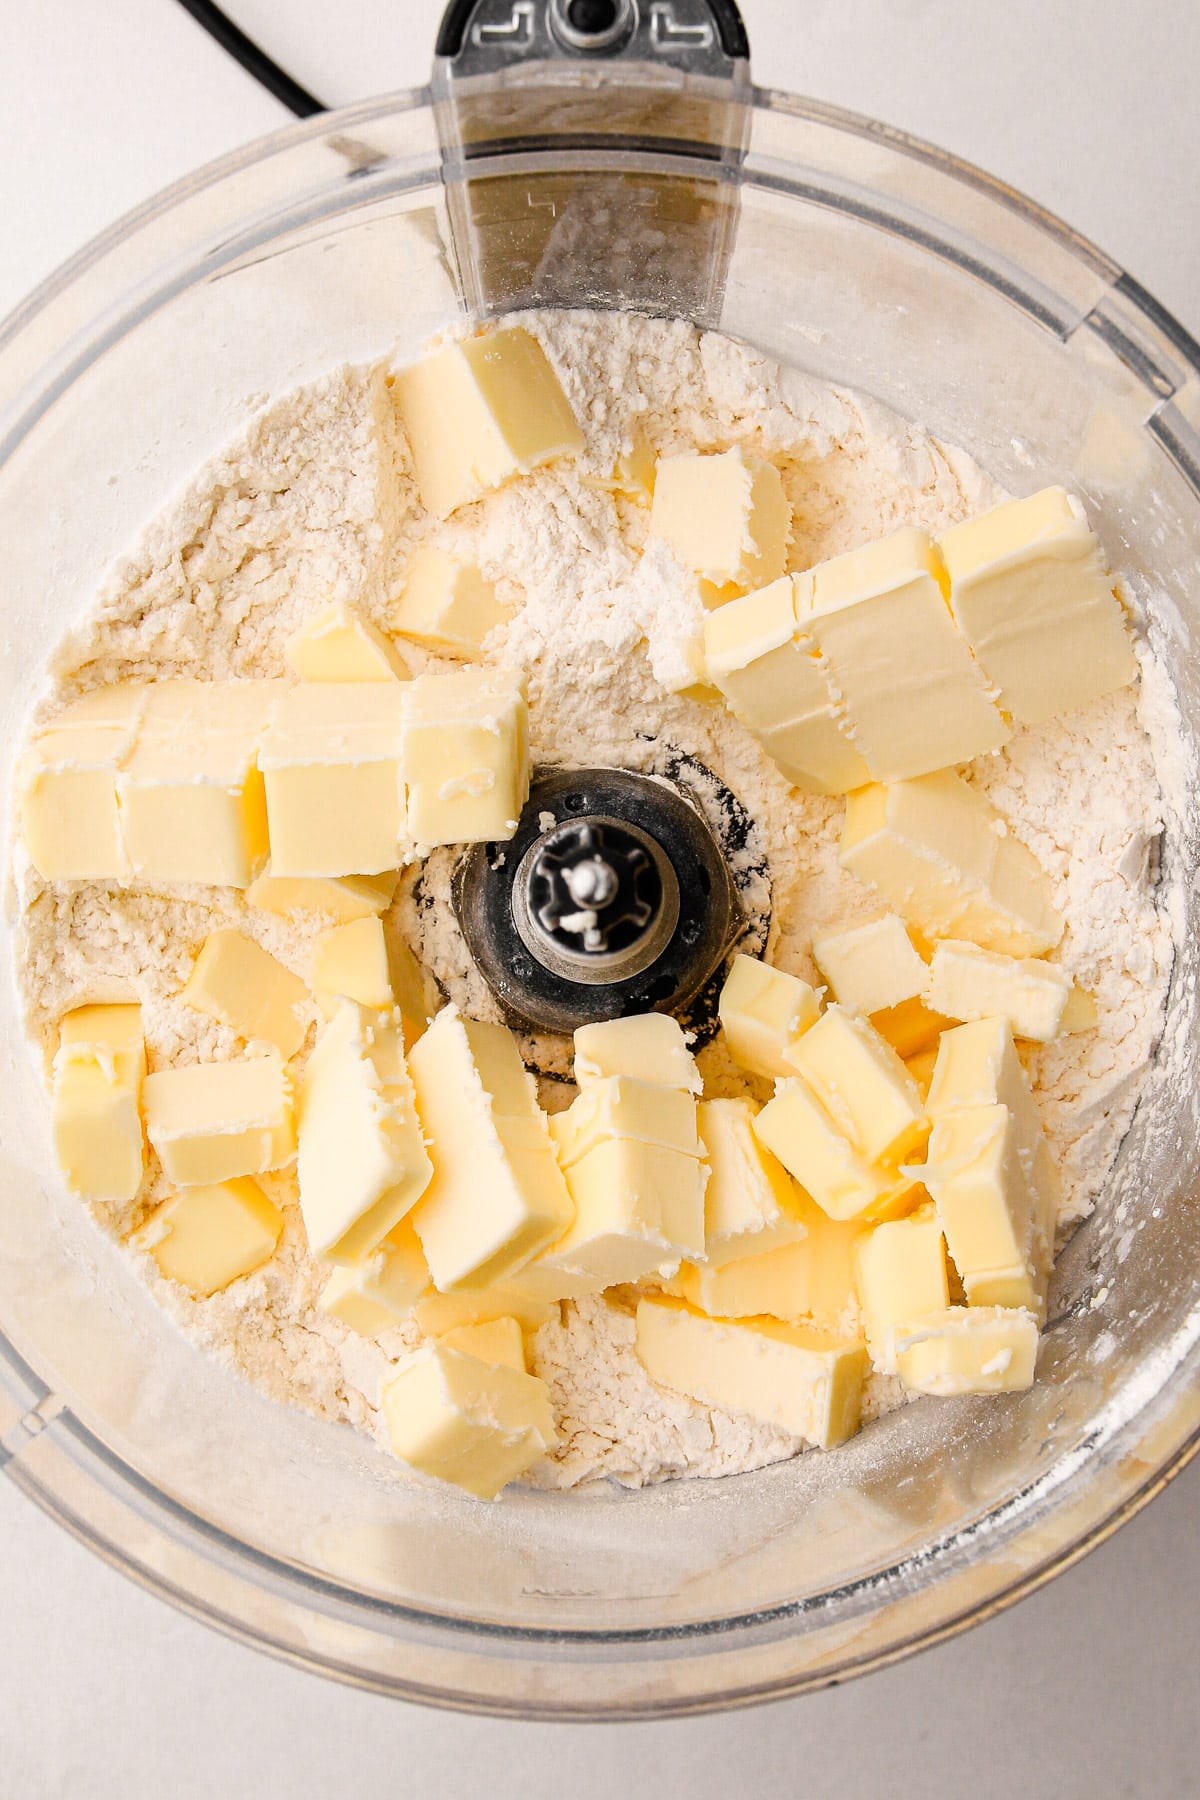
Step 2: Add in the cold butter.
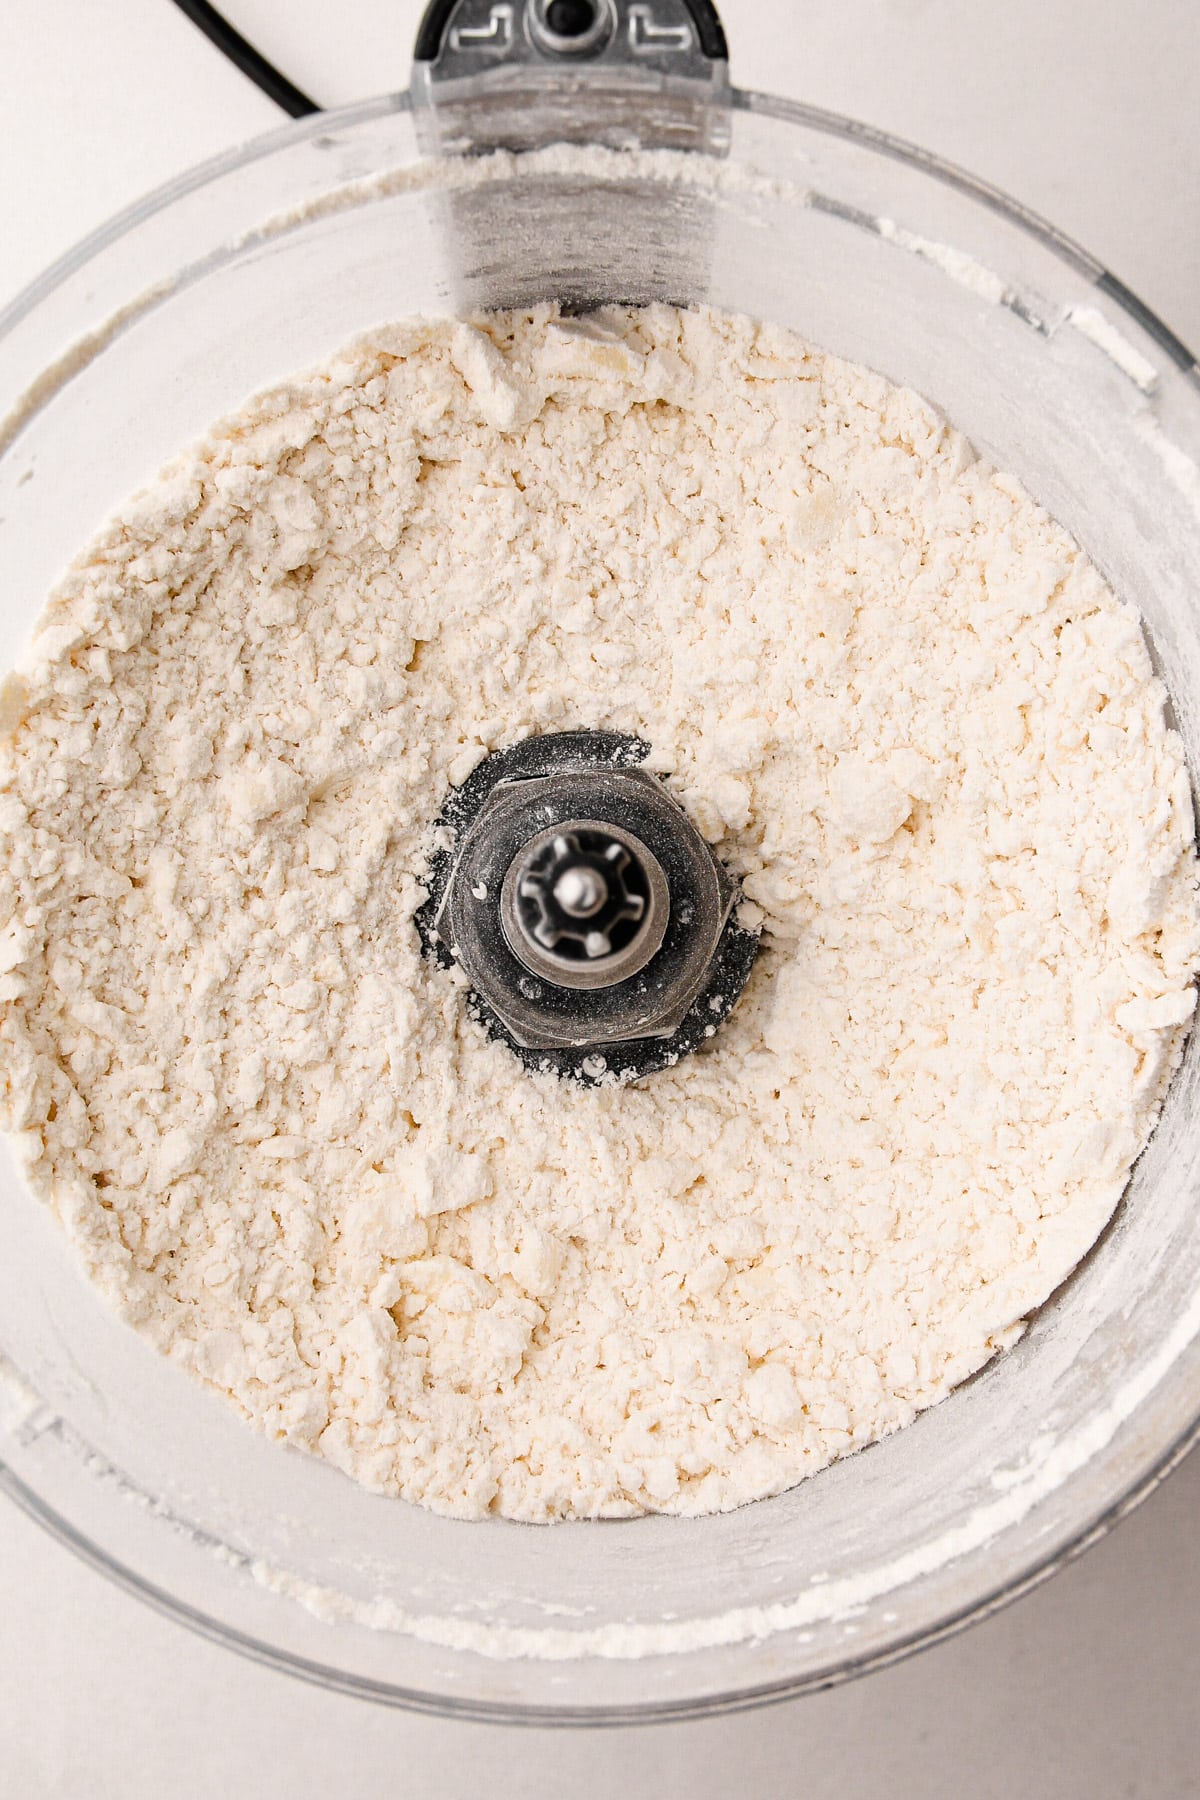
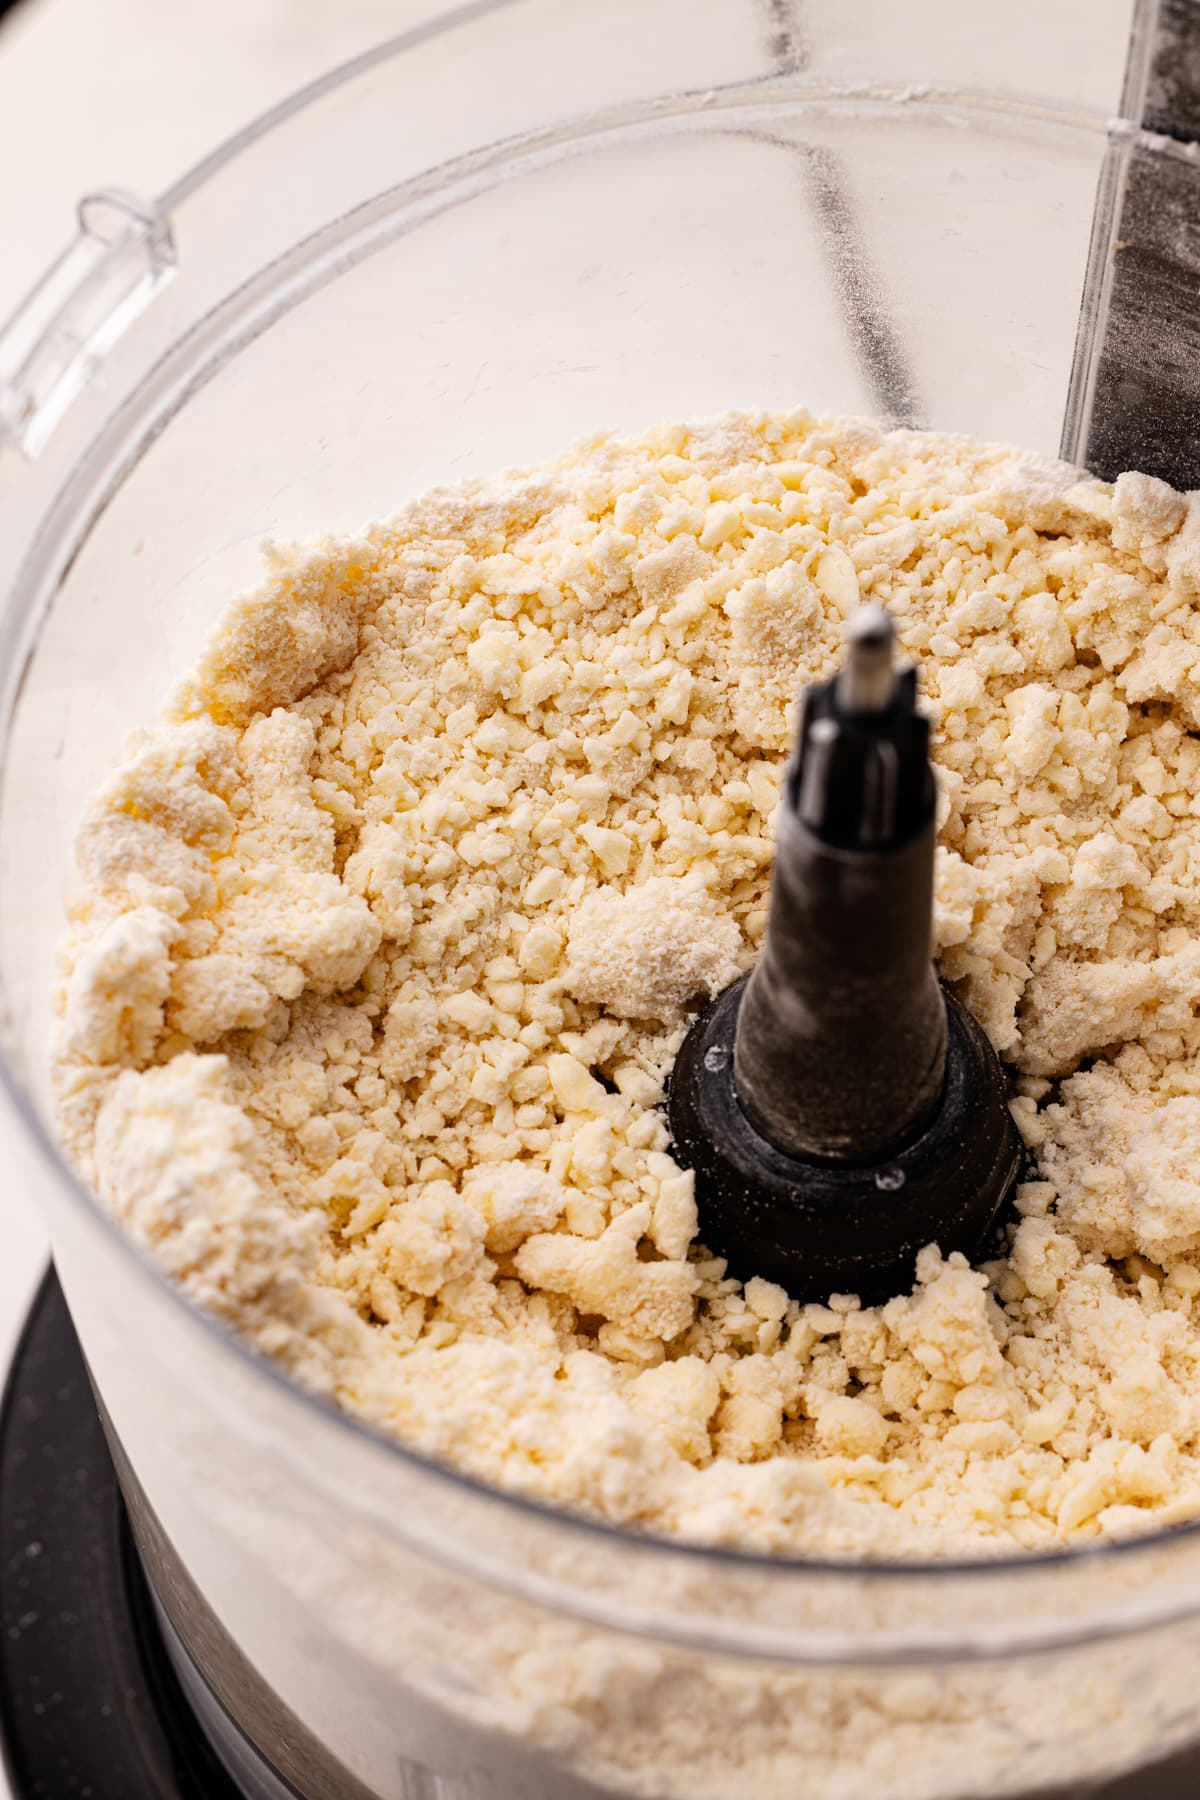
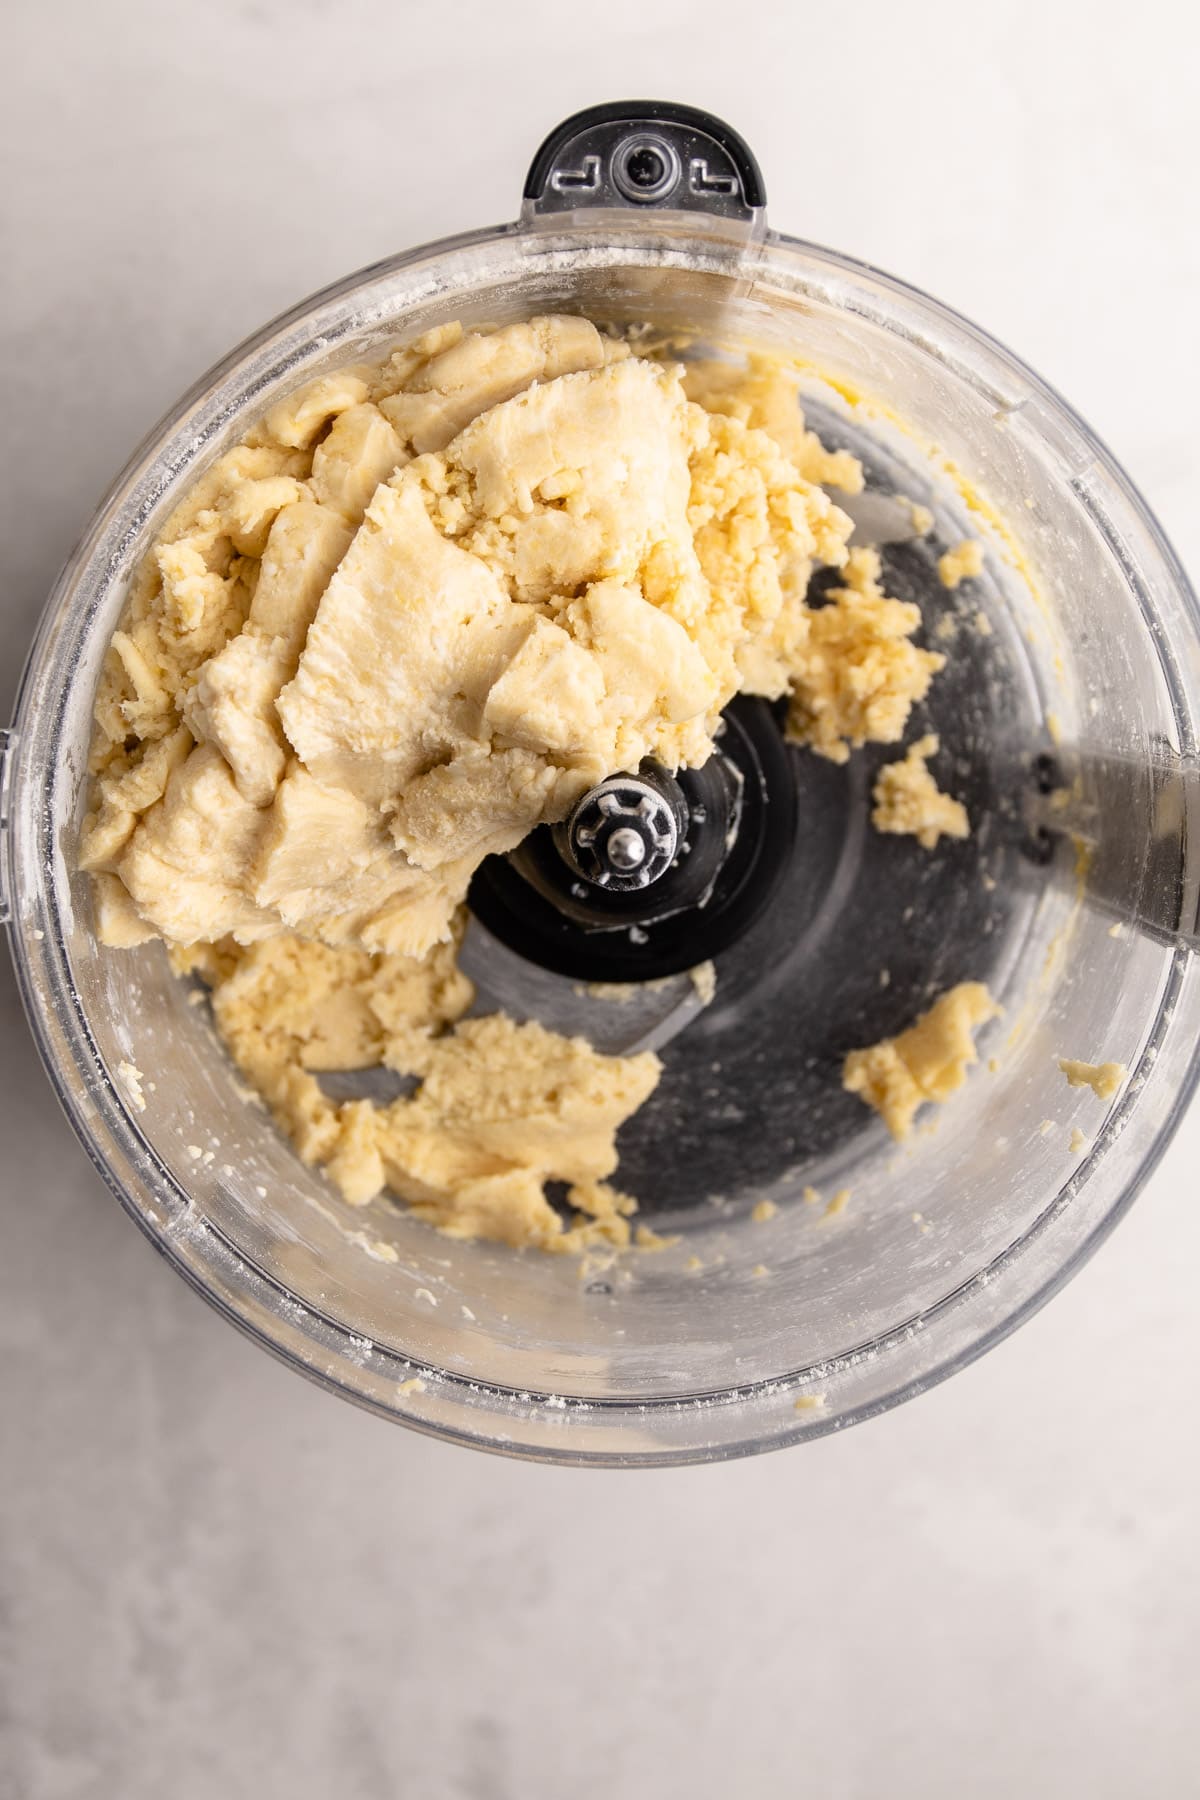
Step 3: Pulse, roughly 5-7 times until the butter is in small pieces, about the size of a pea with some larger pieces remaining.
Step 4: Drizzle in the water and vinegar, and then stop. Do not process until it comes together in a ball.
How to Tell if It's Properly Hydrated
Then the pie dough is dumped out onto a work surface and it is brought together. This is also the correct time to ensure the dough is properly hydrated.
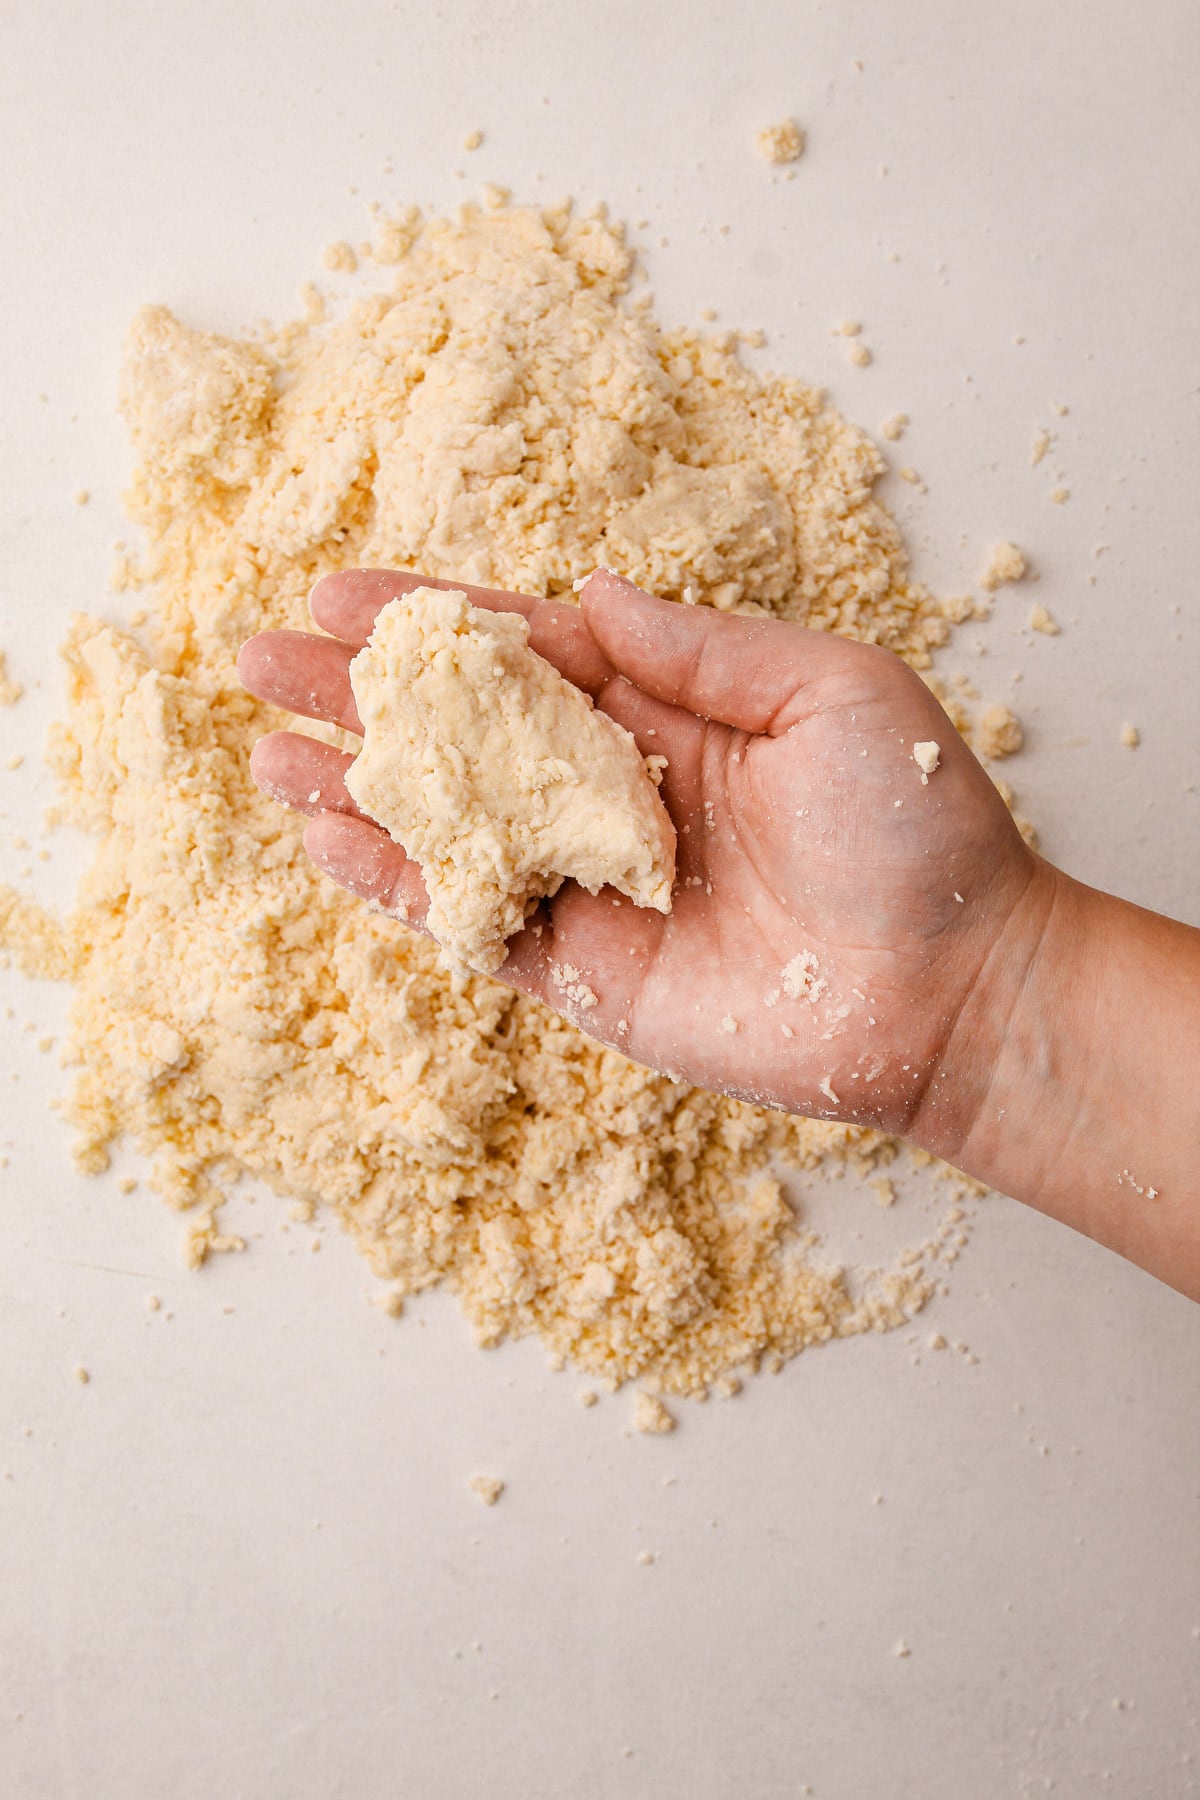
Properly hydrated dough should not have any white powdery spots, and it should easily clump together when squeezed.
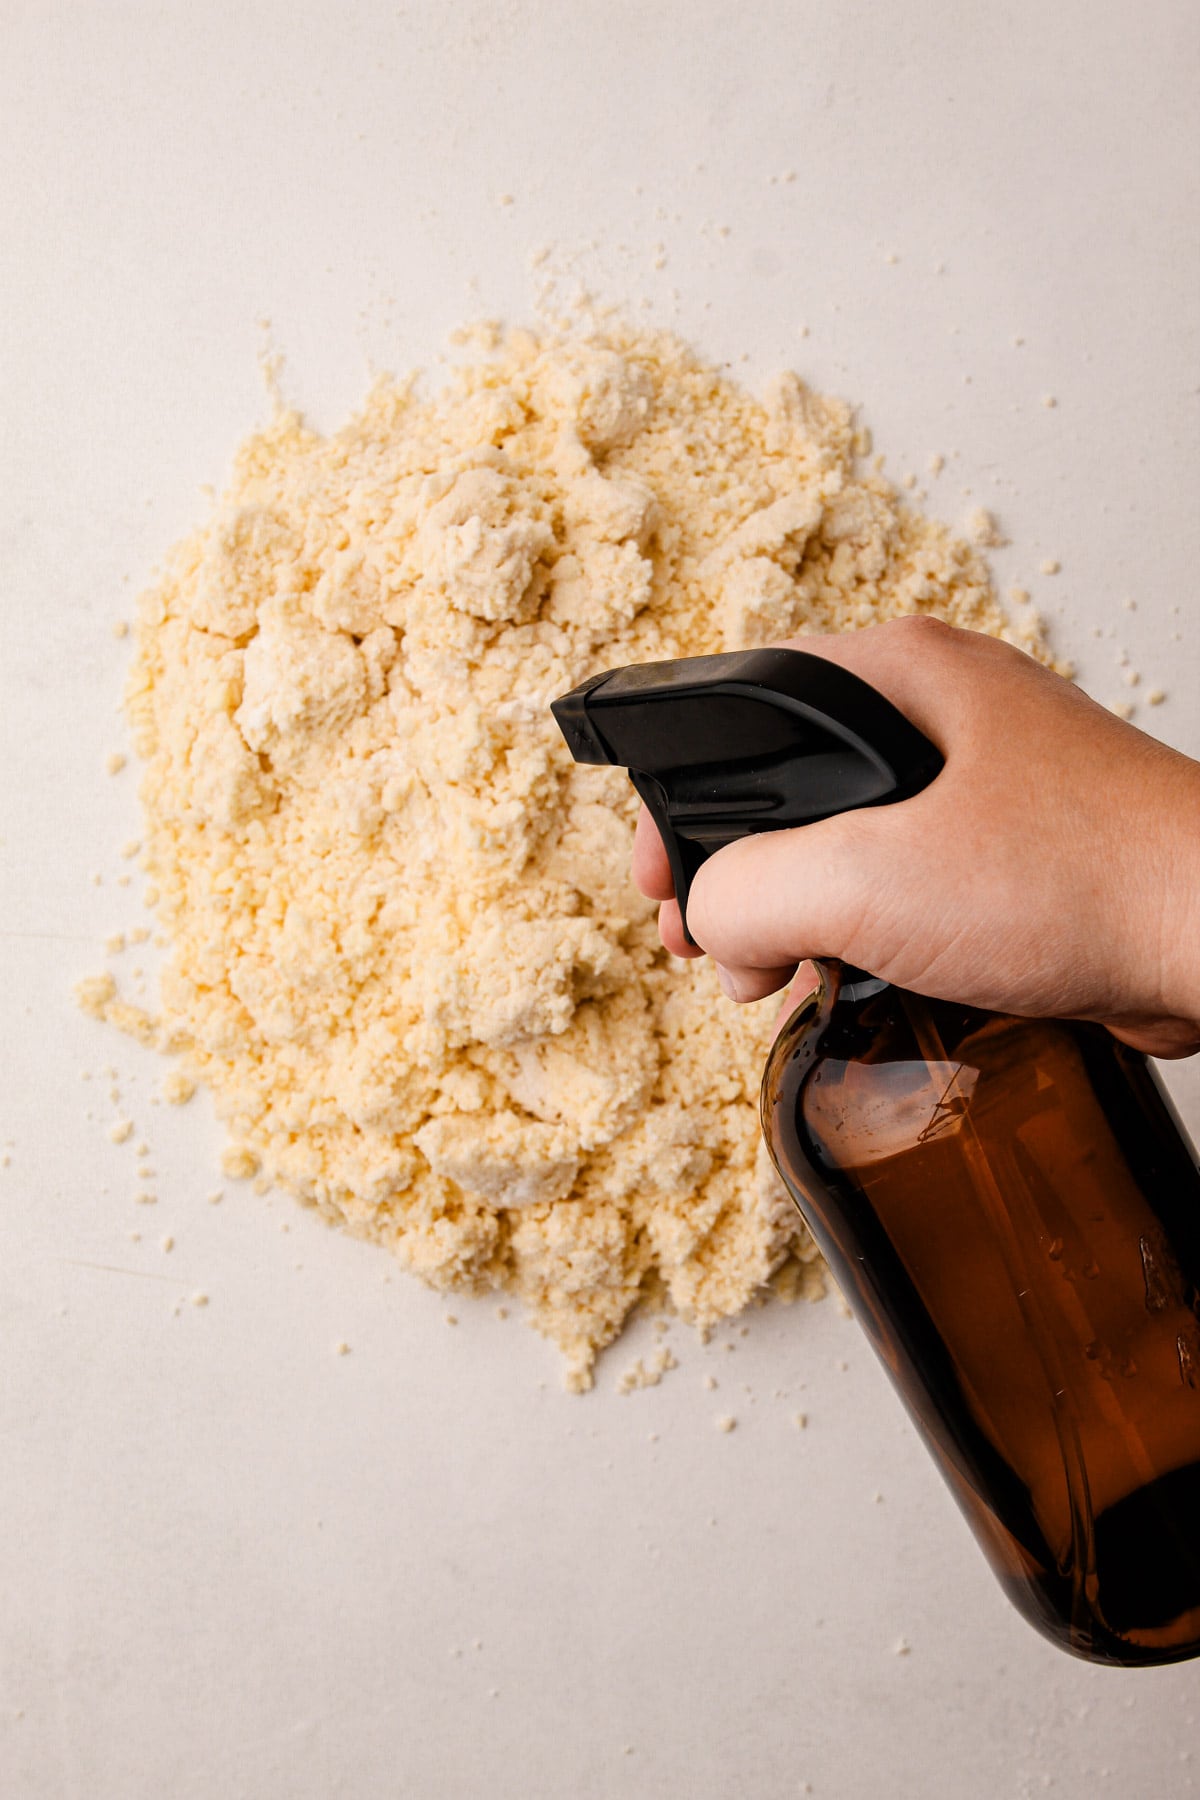
Step 5: Spritz or drizzle water on any dry spots, if needed.
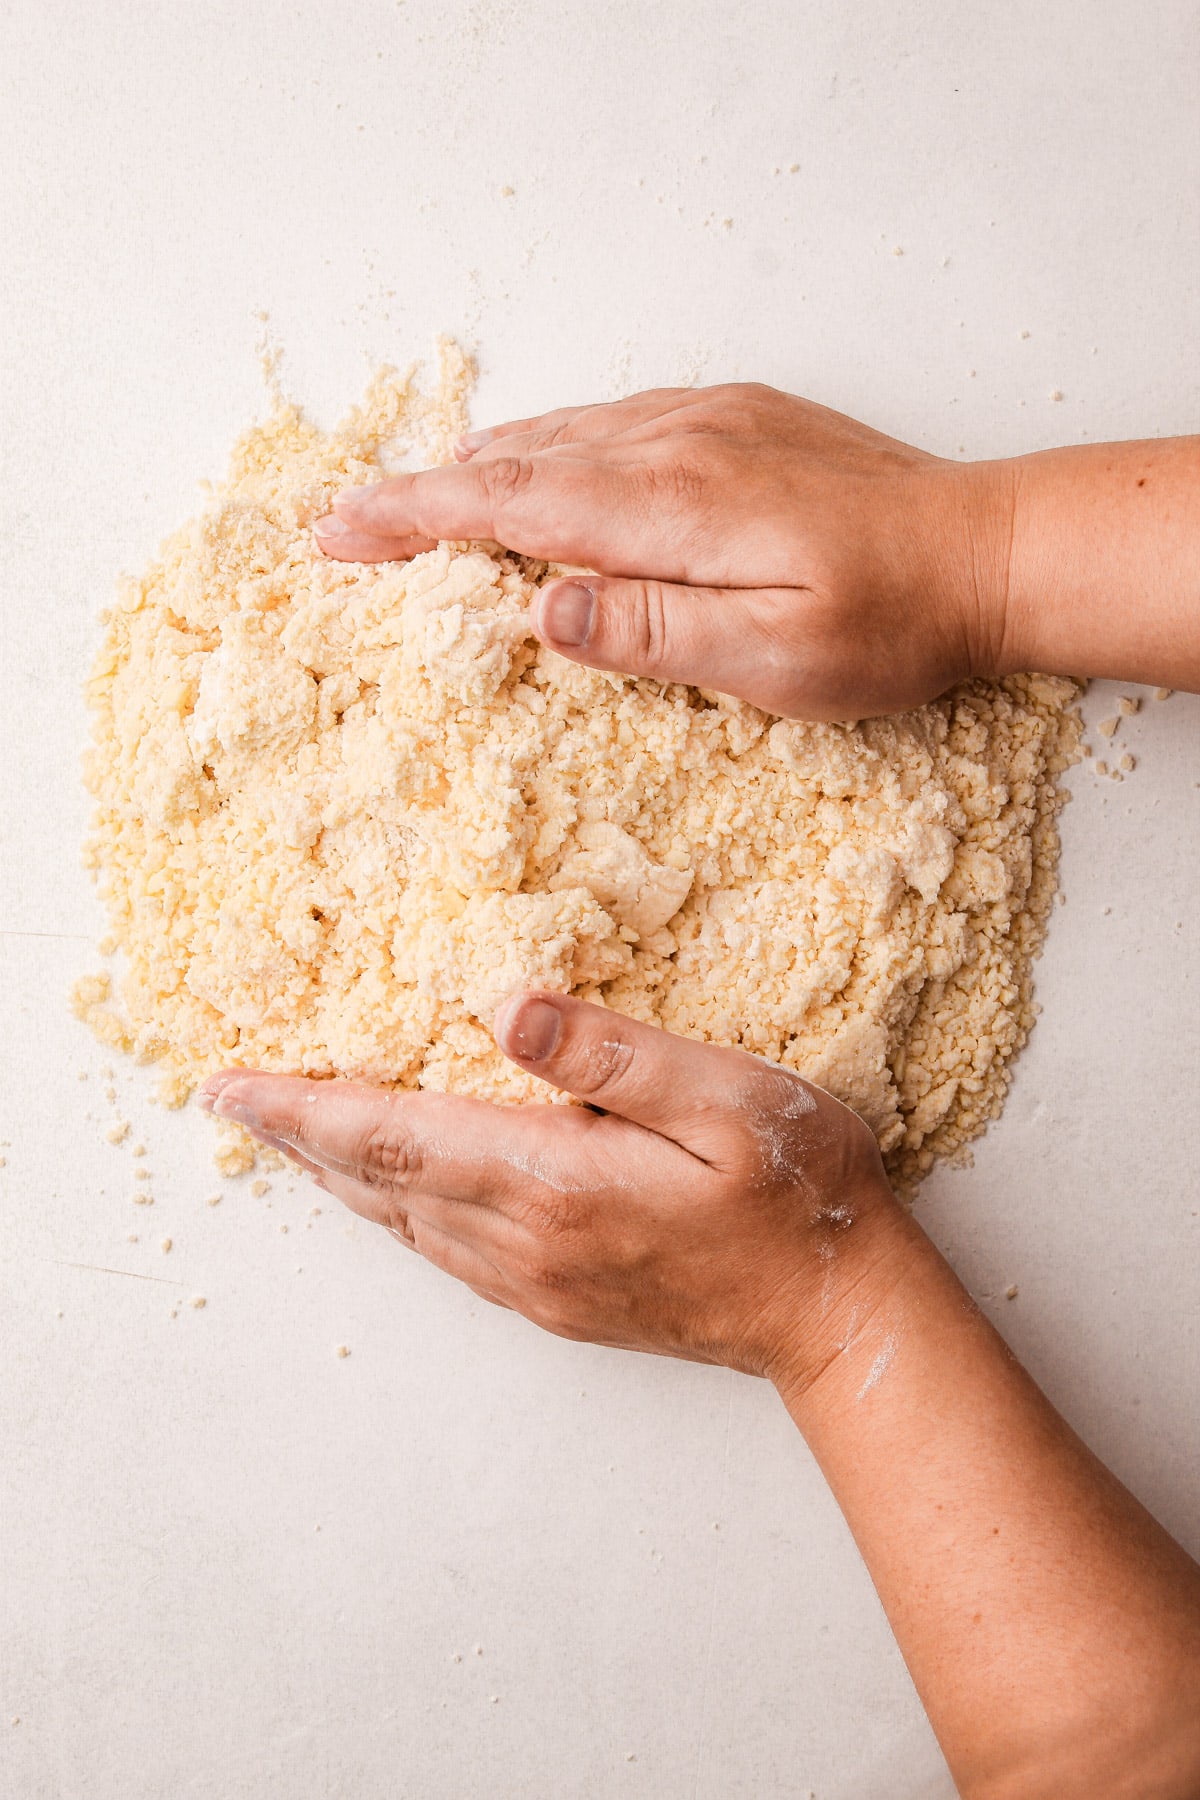
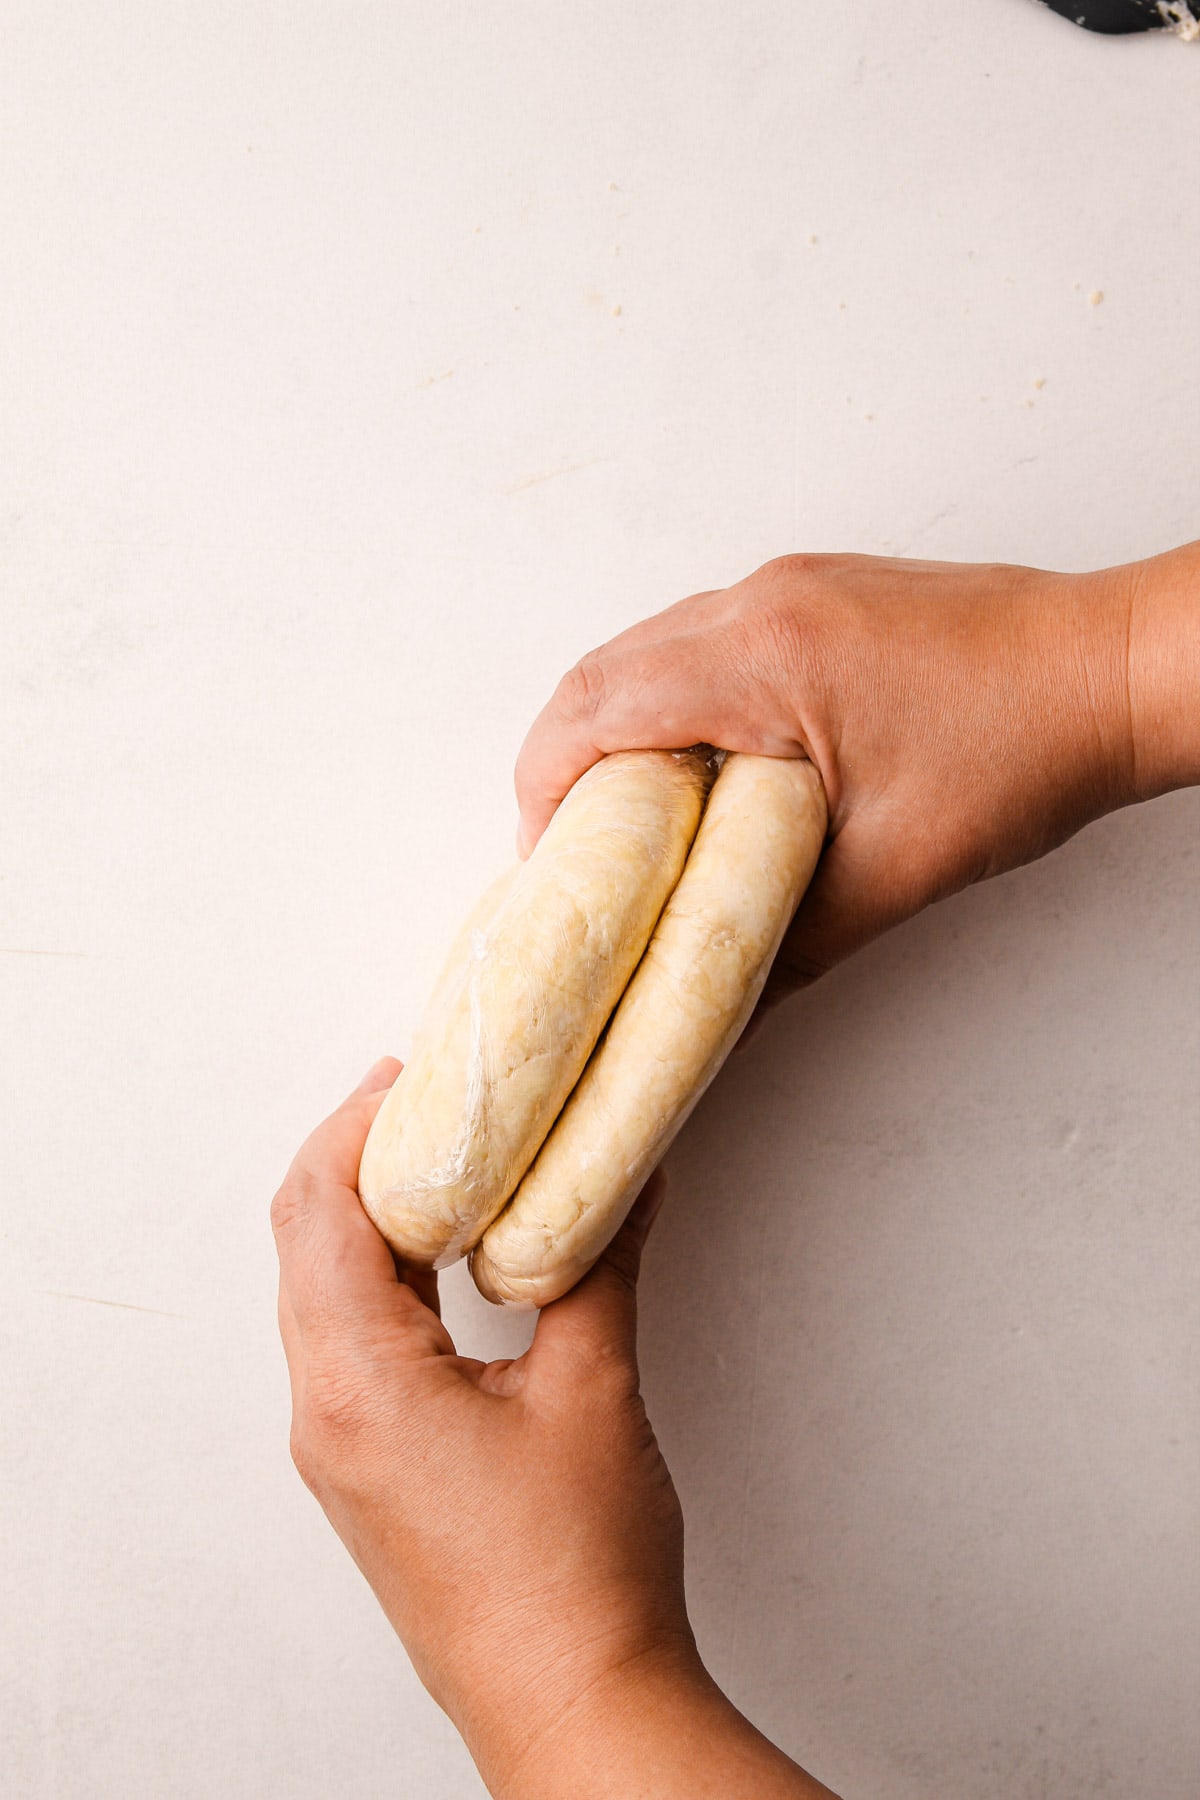
Step 6: Bring the dough together.

Step 7: Divide the dough in half (you can do this by eye, or by weight)
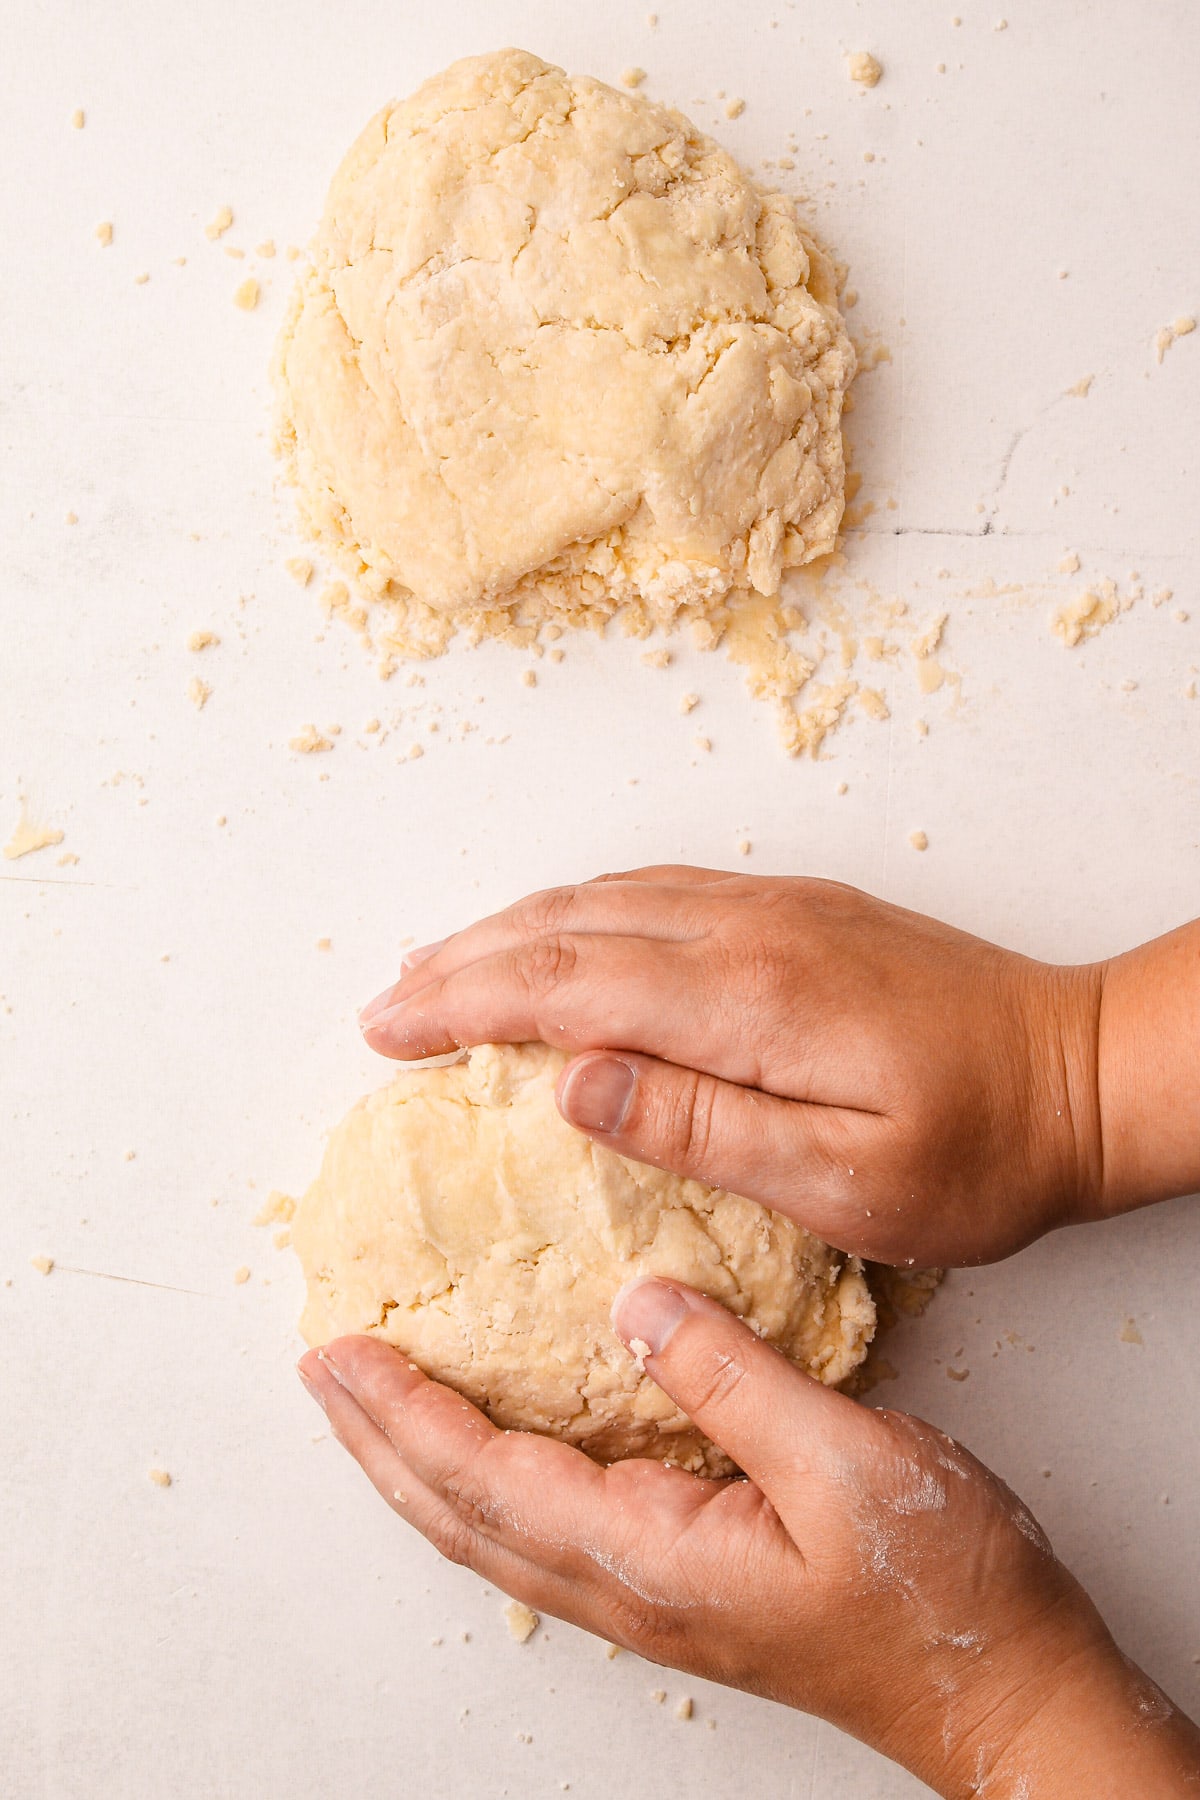
Step 8: Shape each piece of dough into a round disk.
Storing It
Making pie dough the same day it needs to be rolled out or baked is not recommended! If possible, plan to make pie dough ahead of time by at least one day. Pie dough keeps really well either in the refrigerator or the freezer. But first, you need to wrap it well!

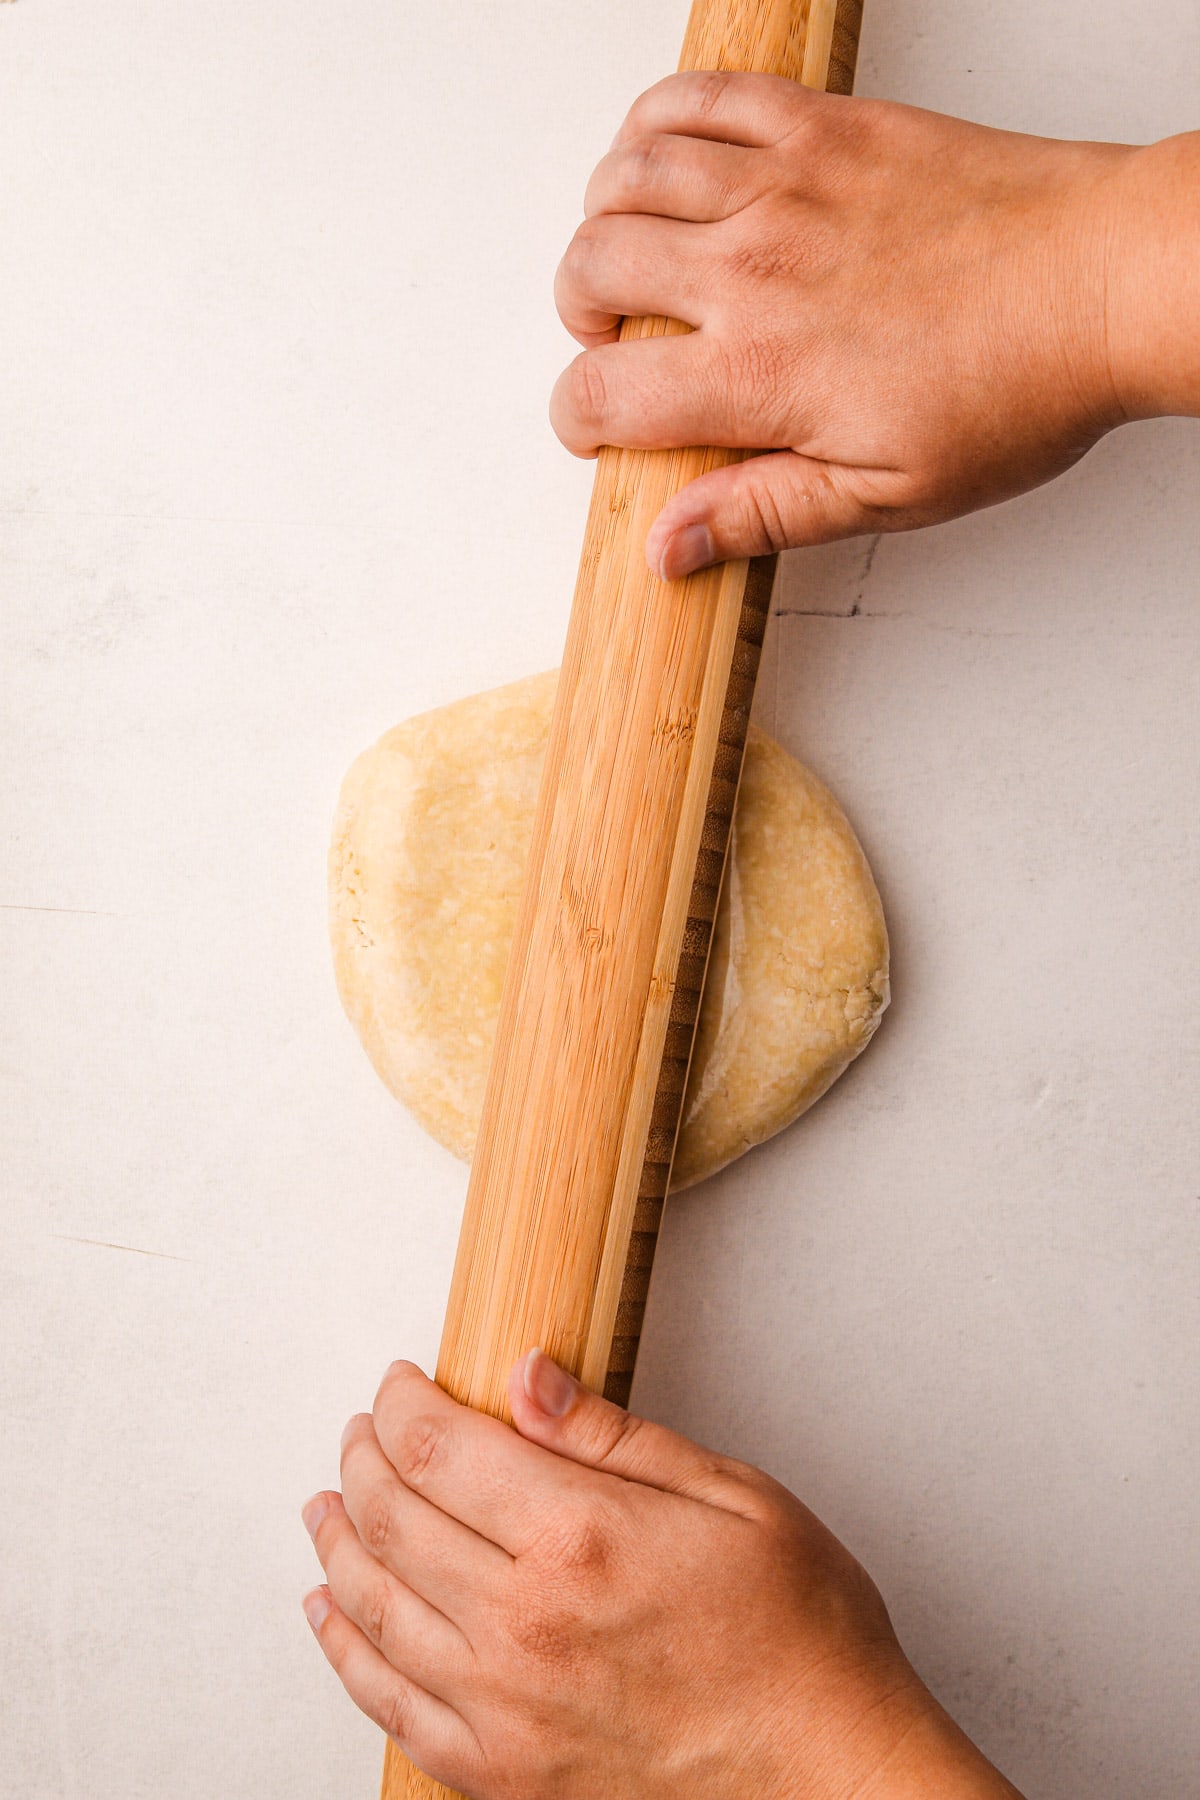
Wrap the pie dough as tightly as you can, and then use a rolling pin to roll out the pie disk and flatten it so it fills any empty space and essentially makes an airtight seal with the plastic wrap. This helps prevent it from oxidizing (or turning a muddled gray color).
You can store it in the refrigerator for 2-4 days or the freezer for up to 3 months. If you plan to store it for an extended period of time then wrap it up twice!
Kelli's Best Tips
- Let the dough rest. I never advise making dough the same day you plan to bake it. It's essential for the dough to hydrate properly and so the dough should rest at least overnight.
- Weigh your ingredients! An electronic kitchen scale is not a huge investment. You can get one for around $25. I can't recommend enough that if you want to get good at baking, get a scale.
- Use high quality butter and flour. Both of these ingredients can vary wildly in quality. Poor quality butter will have a higher water content and less fat. Lower-quality flour can vary in the amount of protein, and that can affect your final pie crust. In the end, I'd still choose a homemade pie crust made with cheap butter and flour over anything store-bought, but if you are looking for a really amazing pie crust, buying quality ingredients will help.
- If you kitchen is hotter than 70 degrees you'll need to move quickly! Melted butter is the enemy here. If the kitchen is hot, utilize the freezer or refrigerator through the dough making process to ensure the butter doesn't turn soft. If you are taking more than 10 minutes to make the dough, your butter is in danger of melting into the dough.
- Hydrate your dough: Many bakers tend to be overly cautious with water, resulting in under-hydrated dough. Given the choice, I prefer slightly over-hydrated pie dough over under-hydrated. In fact, I often add more water than most recipes recommend to ease rolling out the dough. Make sure there are no dry spots; they won't disappear even with resting. The dough should easily hold together when squeezed, and any dry areas can be moistened with a few drops of water or my favorite tool: a kitchen-safe spray bottle of water.
Making Other Types of Pie Dough in a Food Processor
There are so many other types of pie dough other than the American Classic Flaky Pie Dough, such as Pâte Brisée (Shortcrust Pastry), Pâte Sablée (Sweet Tart Dough), Chocolate Pie Crust or Pasta Frolla (Italian Shortcut Pastry). And I make almost all of them in a food processor as well. Generally speaking, non-flaky pie dough can be referred to as shortcrust pastry (or sometimes as mealy pastry).
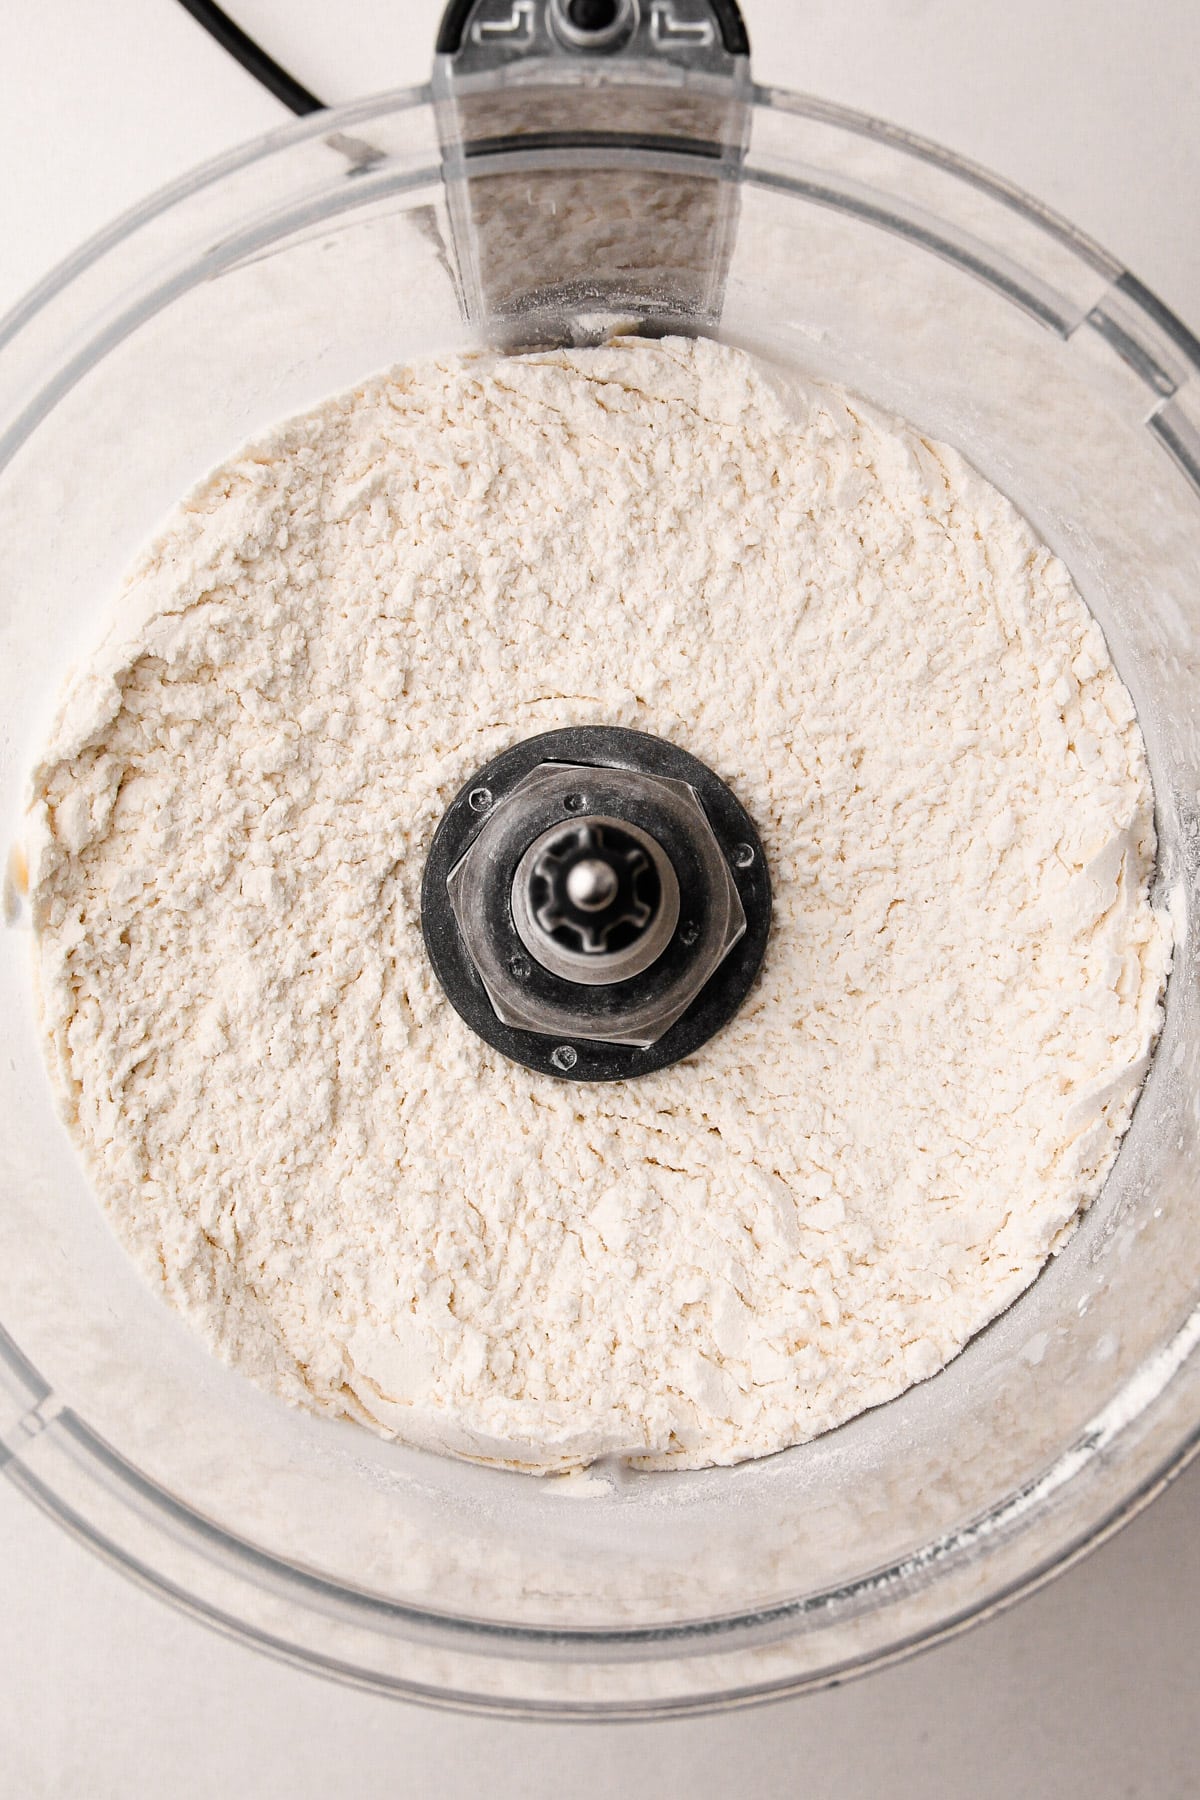
The assembly to make shortcut pastry is a bit different in that the instructions usually call for the dough to gather in a ball around the blade.
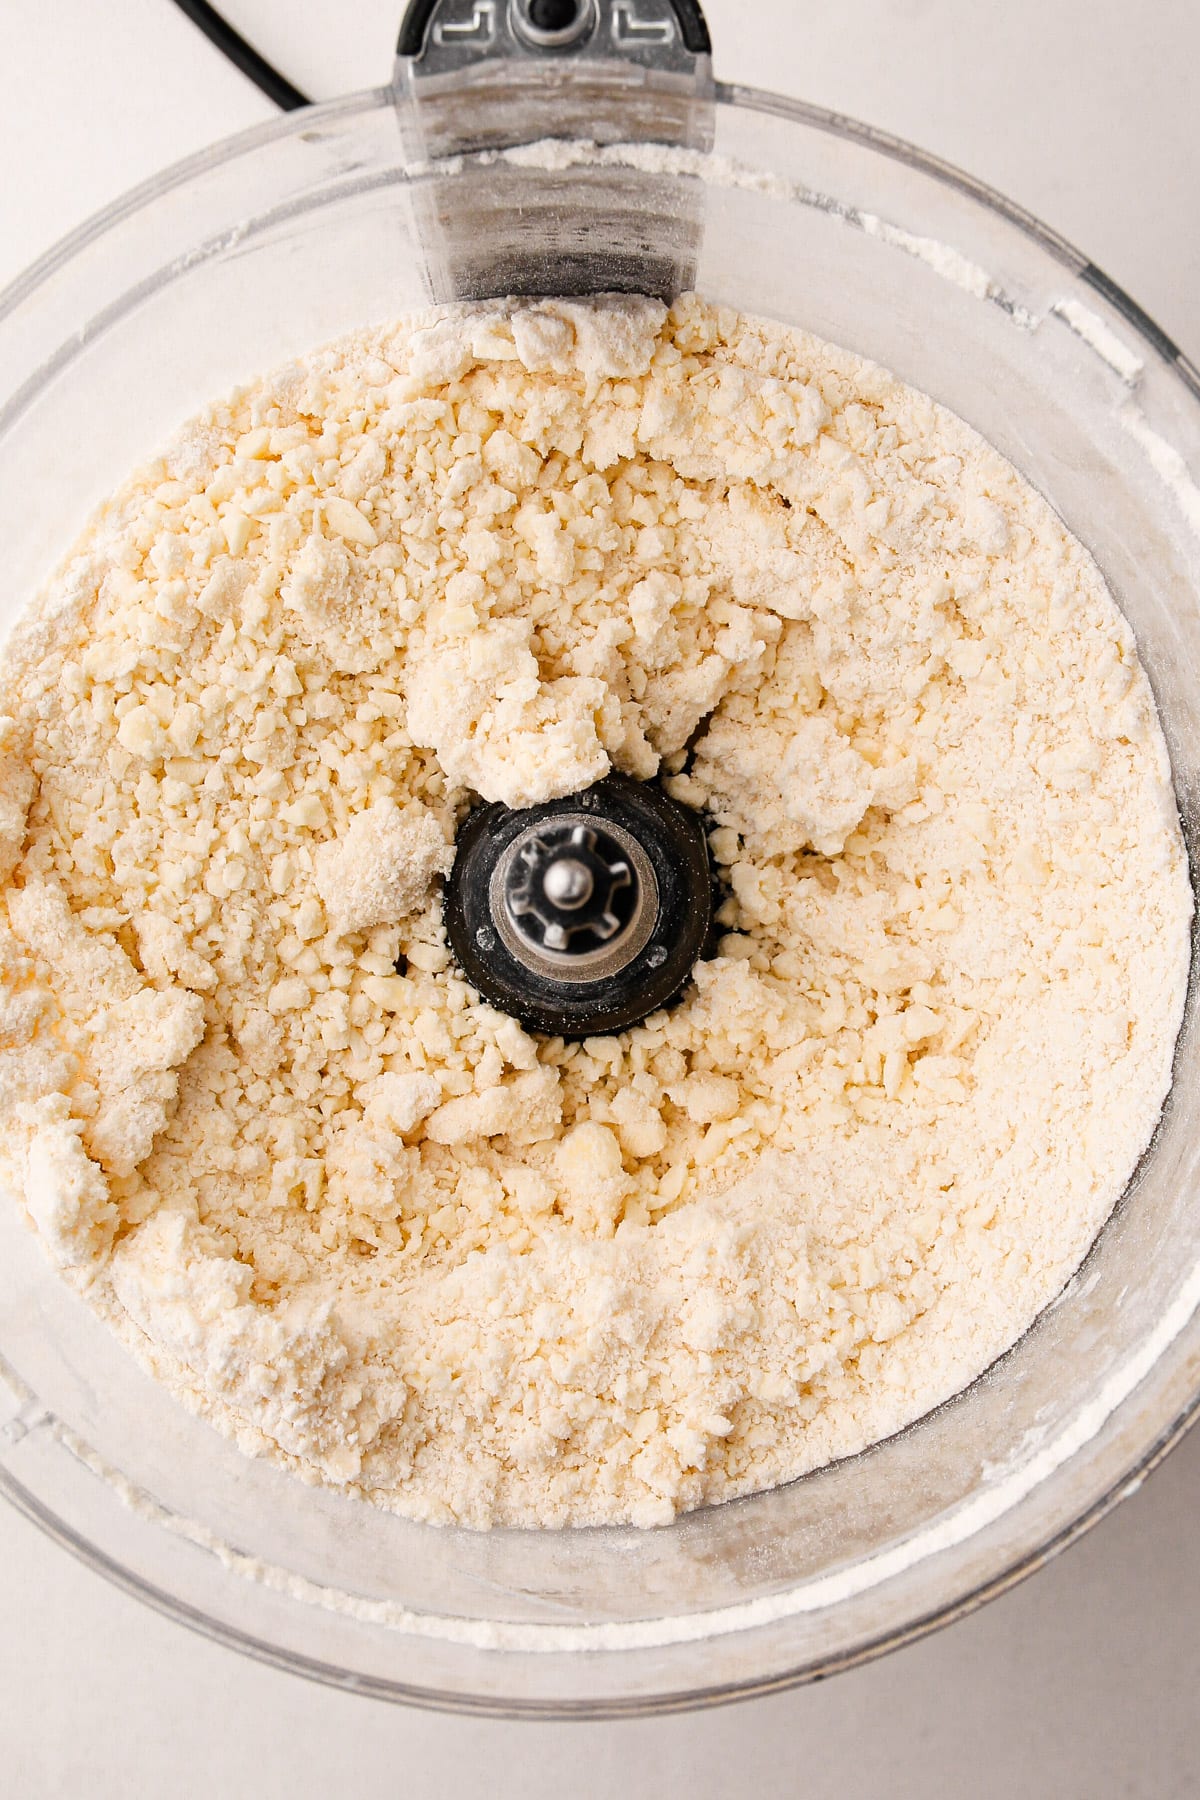
Flaky pastry correctly made in a food processor should still be crumbly.
Shortcut pastry correctly made in a food processor should gather around the blade.
The difference in these two methods is in the amount that the butter has been worked into the flour. Processing the pie dough until it gathers in a ball around the blade will result in butter that is more finely worked into the dough.
The bottom line is that you should follow the recipe instructions for your pie dough because the preparation for making pie dough in the food processor could change depending on the type of dough!
Video
More Resources
For more reading and resources, check out these recipes and tutorials:
- How to Blind Bake Pie Crust
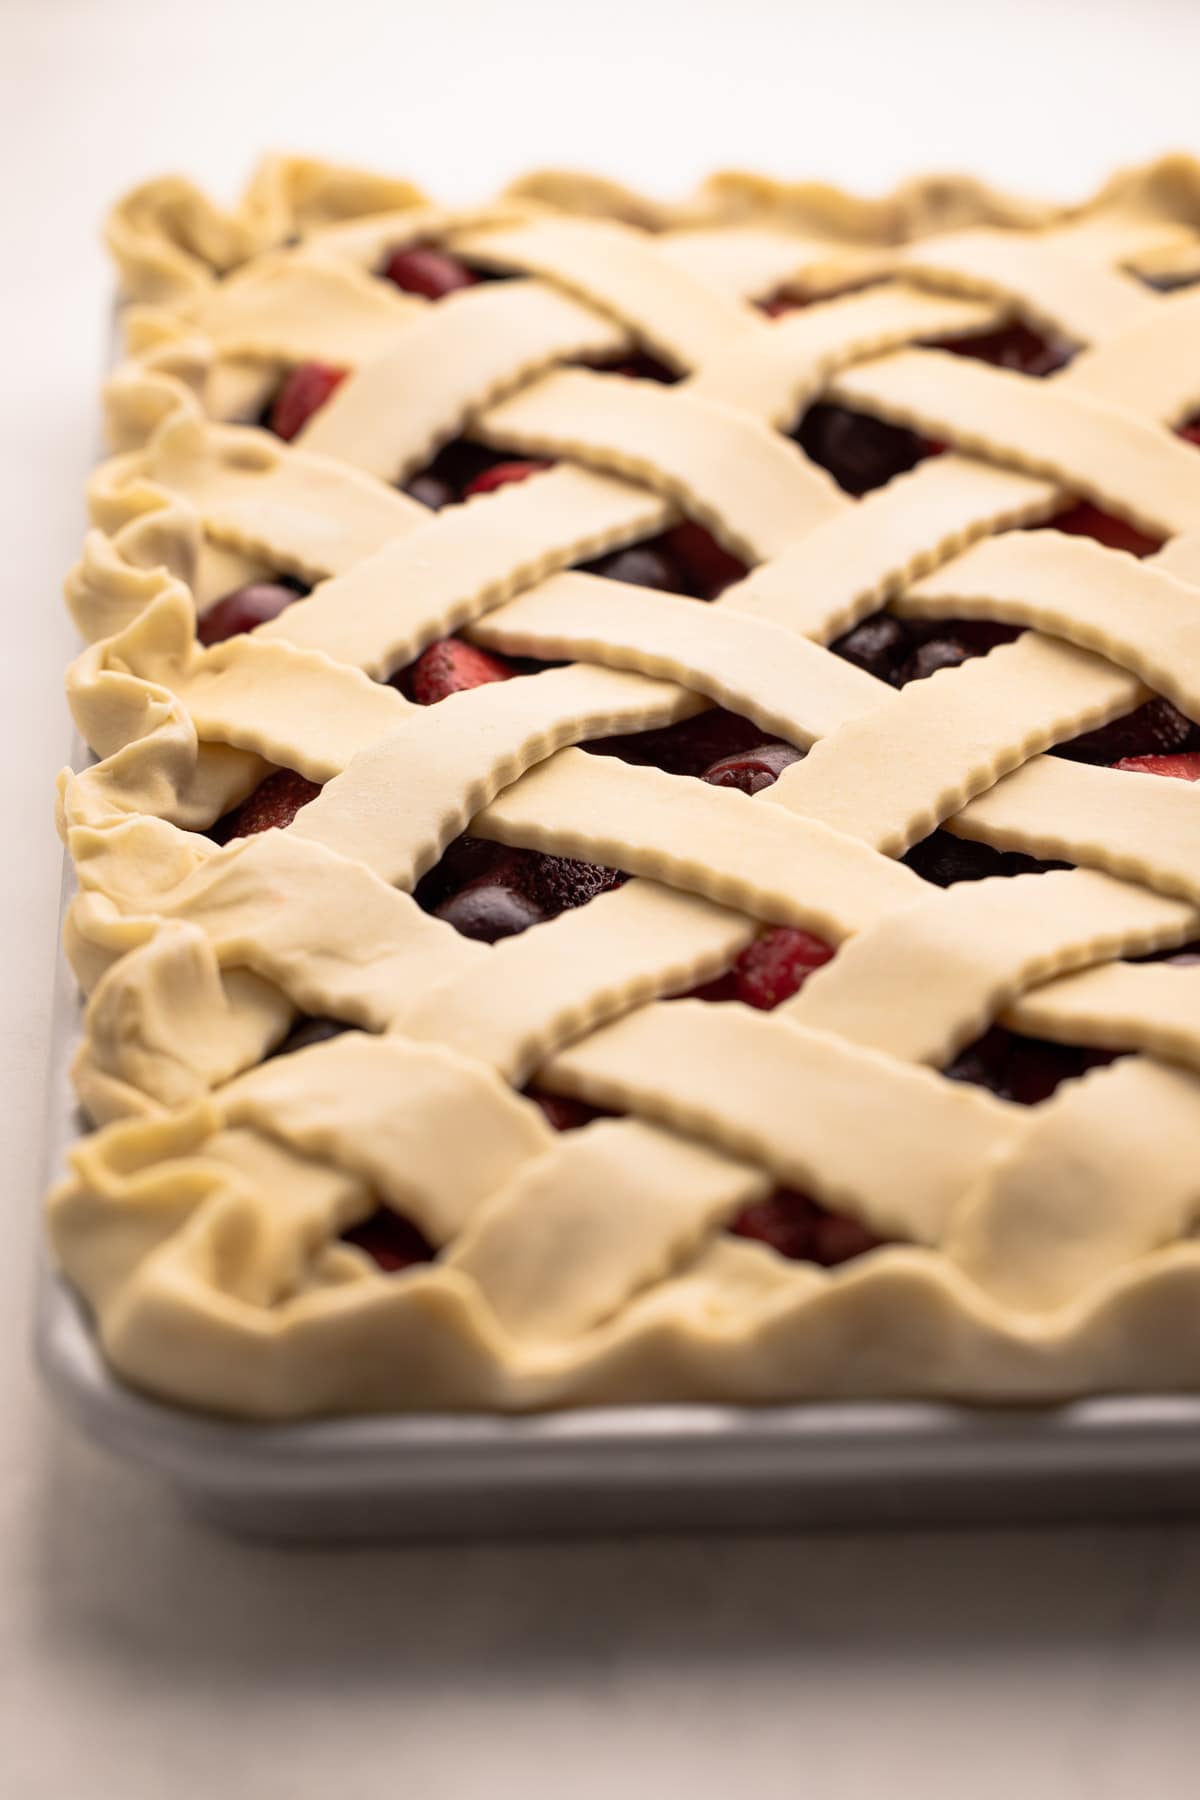
- How to Make a Lattice Pie Crust
- How to Make (and Use) an Egg Wash
- How to Bake a Double Crust Pie
- How to Bake a Frozen Pie
- Leftover Pie Crust Cookies
Other Pie Crust Recipes
- Chocolate Pie Crust
- Flaky Pie Crust
- Pâte Brisée (Shortcrust Pastry)
- Pâte Sablée (Sweet Tart Dough)
- Cream Cheese Pie Crust
- Whole Wheat Pie Crust
- Spelt Pie Crust
- Pâte Sucrée (Sweet Pie Crust)
I am so honored when you make a recipe from my site! If you use this Food Processor Pie Crust guide, please leave a star ⭐️⭐️⭐️⭐️⭐️ rating with your experience! If you have any questions about this recipe, feel free to comment here, and tag me on instagram!
Full Recipe
How to Make Pie Crust in the Food Processor
Utilizing a food processor is, without a doubt, the quickest and most foolproof method for making pie dough. Check out the step-by-step process photos above this article, along with tons of tips, and a video demonstration of how to do it.
- Prep Time: 00:05
- Total Time: 5 minutes
- Yield: 2 (9") pie crusts
- Category: Pie Crust
- Method: Food Processor
Ingredients
- 3 cups (360 grams) all-purpose flour
- 1 teaspoon (4 grams) Diamond Crystal kosher salt (see note for other)
- 16 tablespoons (227 grams) unsalted butter, chilled and cut into 1" pieces
- 1 tablespoon (15 grams) apple cider vinegar
- ½ cup (115 grams) ice water, more as needed
Instructions
- Add the flour and salt to the bowl of a food processor.
- Pulse 2-3 times until combined.
- Add in the butter and pulse 5 times.
- Add the vinegar to the water. With the motor running, slowly pour the water into the flour. The dough should be crumbly and it should hold together when squeezed.
- Empty the flour mixture onto a work surface. If there are any dry spots, drip (or spray) a bit more water on them and knead together.
- Divide the dough into two piles. Quickly form each pile together. Place each in a piece of plastic wrap and wrap tightly.
- Using a rolling pin, roll the dough out until it stretches to the corner of the plastic wrap.
- Refrigerate for at least 2 hours, but preferably overnight.
- Use as directed in pie recipe.
Notes
Weighing your flour is the most accurate way to measure. If you aren't going to weigh it, make sure to spoon it into the cup, and then level it off. If you scoop the flour out with the measuring cup and then level, it could change the outcome of the final product.
This recipe was tested using Diamond Crystal coarse kosher salt. If you use Morton's kosher salt or fine salt decrease by about half for volume, or use the same amount by weight.
Some of the links on this page may be affiliate links. Everyday Pie is a participant in the Amazon Associates Program. As an Amazon Associate I earn from qualifying purchases, at no extra cost to you.
Cheryl
Can you use shortening in place of butter?
Kelli Avila
I actually don't have any experience using shortening, sorry! Let us know if you try though!
Deb F
The 1/2 cup of water should convert to 115 ml (not grams) .
I'm sure many folks already know that, but I was a little confused by it... I've just recently started using a scale for recipes.
Kelli Avila
Hi Deb----I don't do conversions in my recipe testing, I stick to using a scale across the board. I measure ingredients—including liquids—by volume, using standard cups or spoons, then weigh that amount and write down the gram measurement. So what you see in the recipe is already tested and listed in grams, which means you can just use your scale without switching between volume and weight. It keeps things consistent and accurate, and it also saves you from dirtying a bunch of extra measuring cups. I can’t speak for how other sites do it, but this is what works best here. I wrote a blog post about using a kitchen scale if you want to read up on that: How to Use a Kitchen Scale
Rachel
ALL of your crust recipes are total winners! Thanks for this one that is impossibly fast and delectable. ^_^
Kelli Avila
Love hearing about your baking success! –Kelli
Karen
What is the purpose of using vinegar in your pie crust dough.
Kelli Avila
Hi Karen. I almost always discuss the ingredients in the article above my recipes. Here is the excerpt from that: [the vinegar] helps make the dough tender by inhibiting too much gluten formation and it brings a nice subtle hint of tang to the crust that keeps it nicely balanced.
Jeanette Davis
Which food processor and blade is recommended for making pie dough?
Kelli Avila
I don't have a specific brand of food processor but at a minimum it should be at least 7 cups. The regular metal blade should be used. I've not tried it with anything else.
Janet
I really wanna try this piecrust with a food processor, but I am really not sure what type of food processor to use?
Kelli Avila
A food processor like the one pictured or linked.
Jeanette
My FP is an 11 qt Cuisinart that is 40 years old. Yep, 40 years, and it still runs like a top with tons of power. So anxious to try this recipe!
Jeanette from Comfort in the Texas Hill Country
Erin Thompson
Used this technique for Thanksgiving and it was super easy and the crusts on my pies were delicious and beautiful!
Peg Medford
Perfect this year. Including the rollout. Thanks Kelli!
Peggy Medford
My second time trying. I had my ingredients ready. I used my scale. I worked quickly. My dough is chilling in the fridge, ready for tomorrow. They look almost as good as yours do!! Fingers crossed that tomorrow the rollout will be successful. I must admit that last time I had trouble, but per your suggestion, I’ll let them sit for 10 minutes before I give the rollout a go.
Thank you Kelli for meticulous instructions and lots of encouragement. Happy Thanksgiving to you and your family.