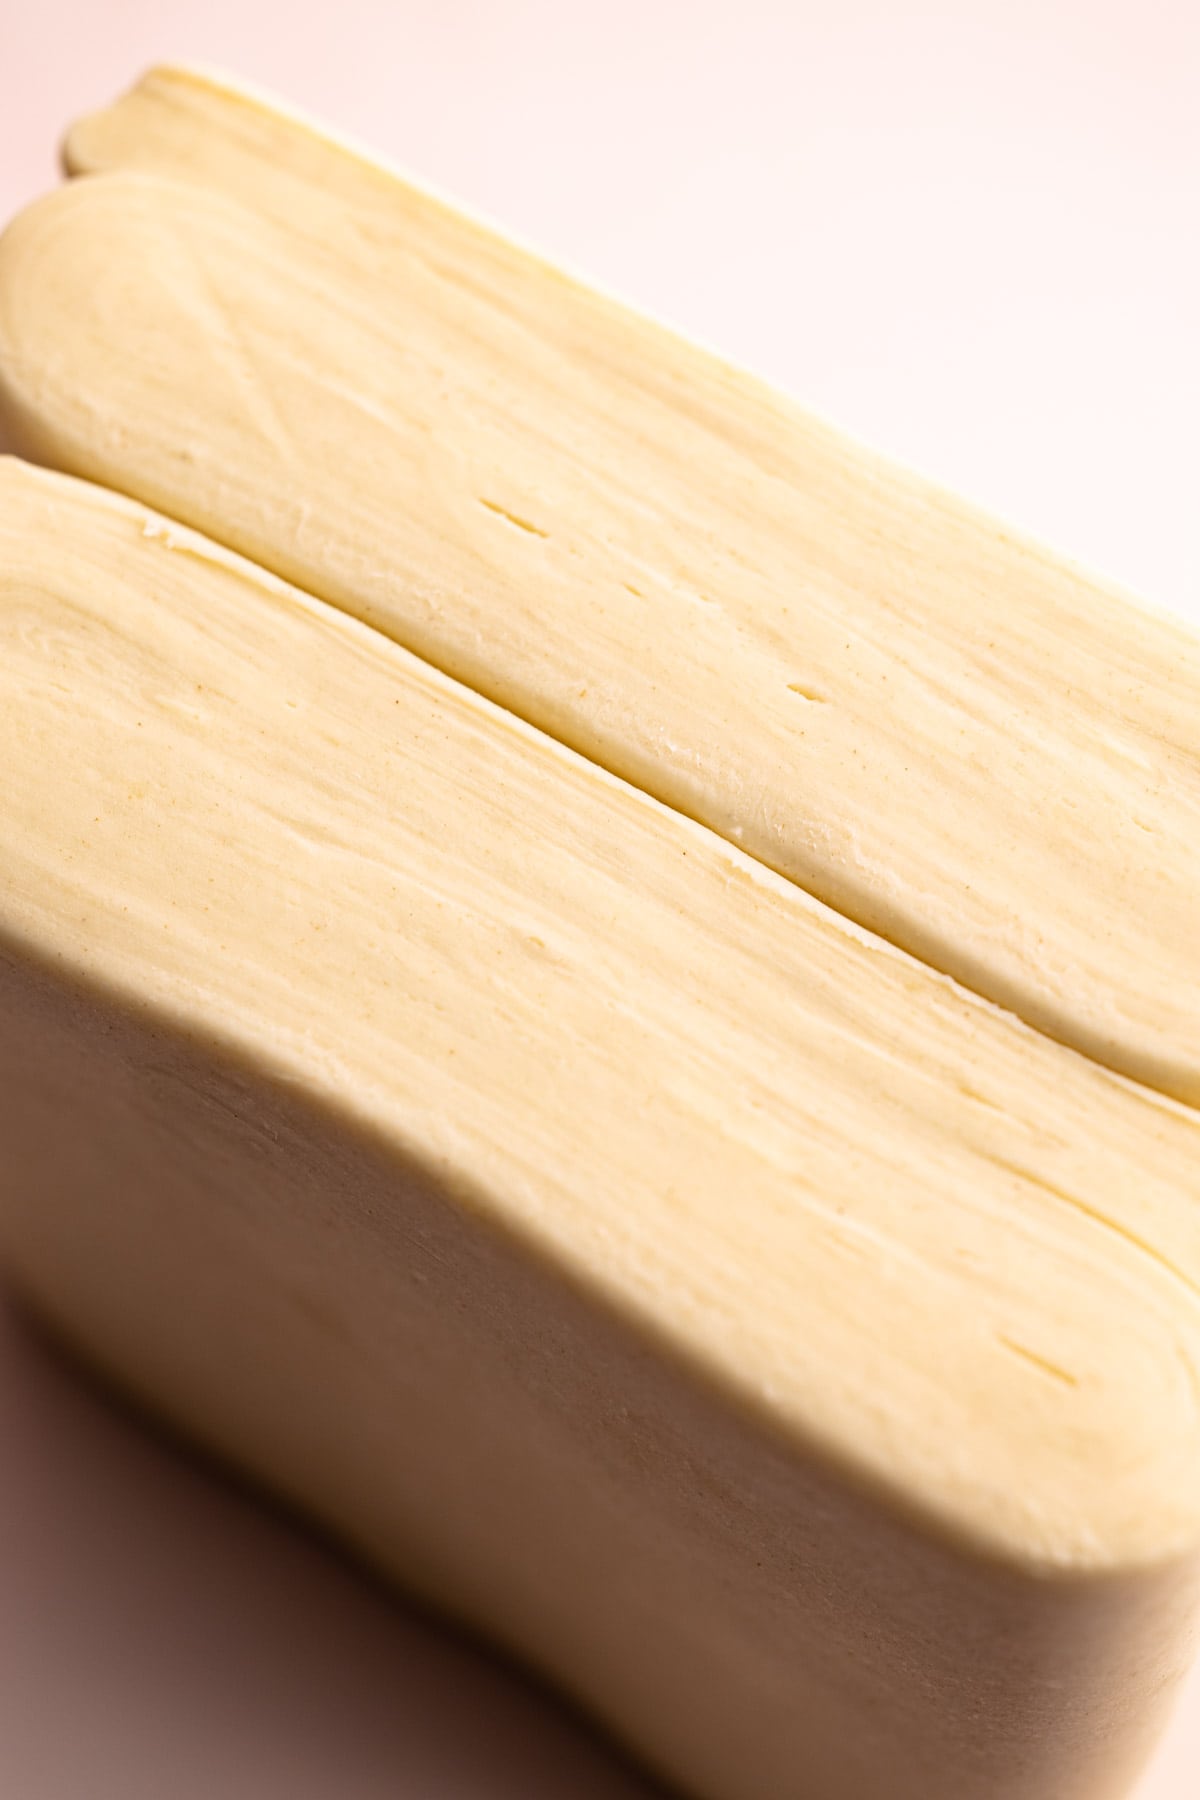
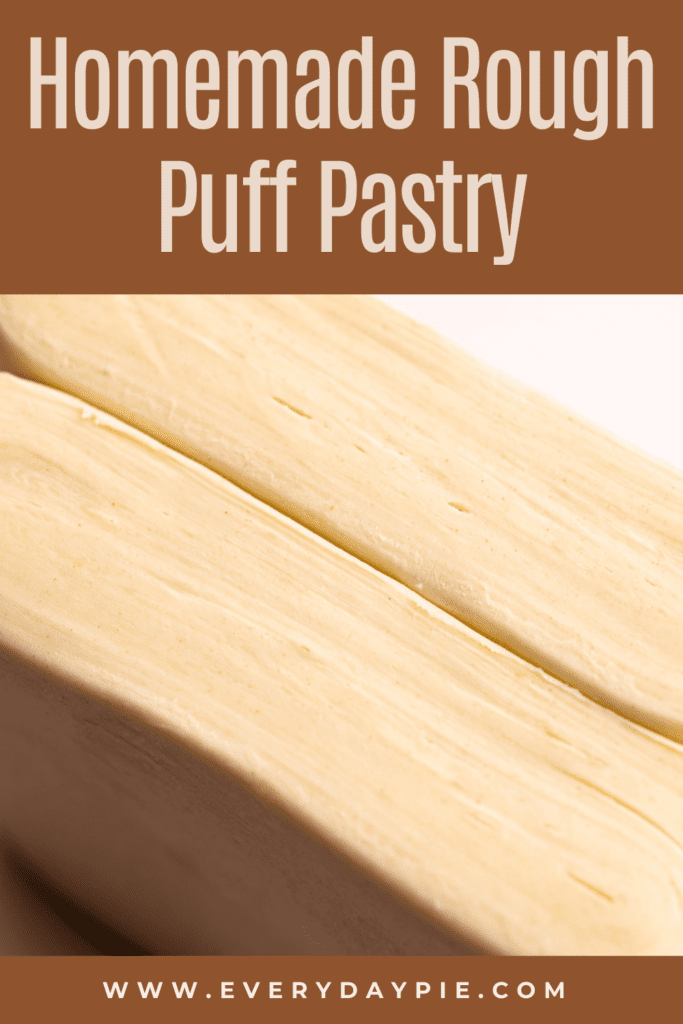
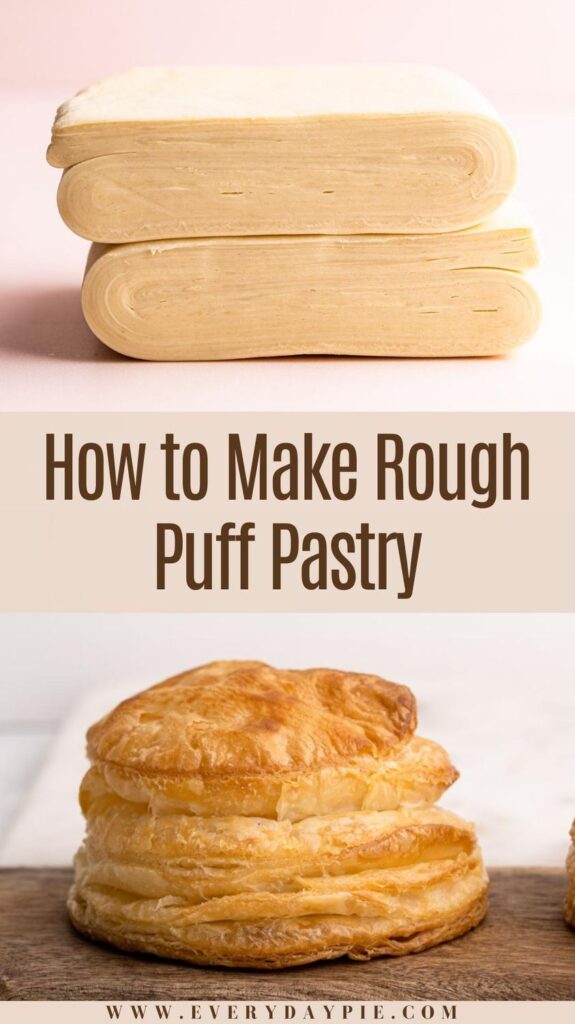
Rough Puff Pastry, also known as Blitz Puff Pastry is a more streamlined and less fussy version of the classic French pastry dough. Used for so many different desserts, this flaky layered and buttery pastry is easier to make than you think! This extensive tutorial walks through all the steps on how to make this shortcut rough puff with step-by-step photos, video and lots of tips!
Want to save this recipe?
Enter your email & I'll send it to your inbox. Plus, get weekly updates from me!
Rough Puff Recipe
When made well, Rough Puff is nearly indistinguishable from the "real" thing. It's light, crispy and so buttery. Perfect to encase a sweet fruit filling (like these Apple Turnovers) or a savory one (hello Caramelized Onion Tarts). The uses for rough puff pastry result in the most gorgeous desserts (like this Apple Tarte Tatin), but it also can be used to make shortcut recipes (like these Puff Pastry Cinnamon Rolls). The uses are truly endless.
Rough puff is made by laminating (or layering) an enriched butter dough. This process of making it is similar to pie dough, except that it's rolled and folded quite a bit.
After reading through this tutorial, you'll be equipped with all the knowledge you need to make it.
Can you buy it at the store? You absolutely can. But, the quality that you can make at home is unmatched, and it's a lot less expensive.
So, let's get to making it, shall we? The text below offers tons of tips and helpful notes, or you can scroll to the bottom to grab the recipe and get started!
What is Rough Puff Pastry?
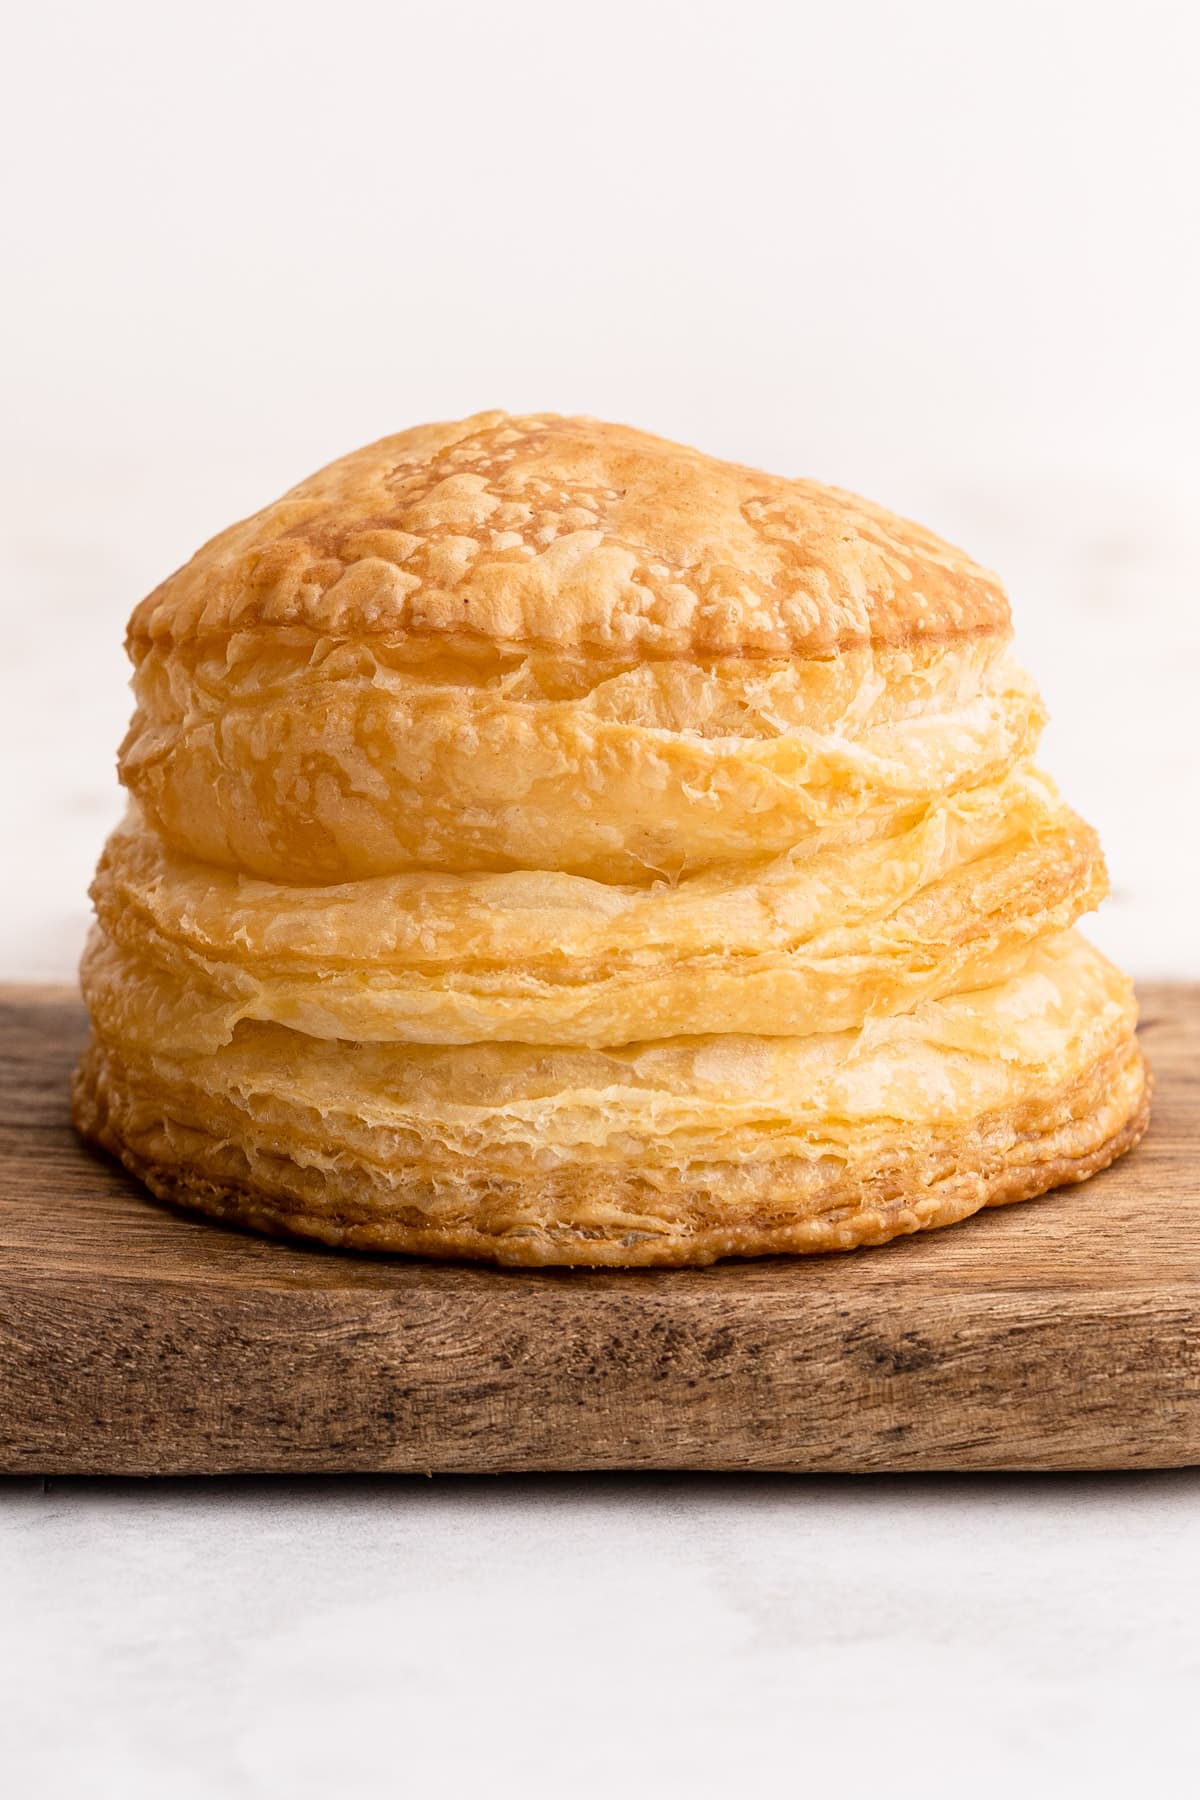
Puff pastry is a classic french pastry (called Pâte Feuilletée) made by laminating butter in a dough repeatedly until the final pastry has many hundreds of alternating layers of butter and dough. Rough puff is a more streamlined version of it, that is less fussy but with extremely similar results. Some people even prefer rough puff to classic puff pastry because it tends to be more tender since the dough isn't worked as much.
How Rough Puff Differs from Classic Puff Pastry
Classic, or full puff pastry is made by laminating (or layering) a block of butter in between dough. Rough puff pastry is made by laminating (or layering) a butter enriched dough. It's more akin to pie dough that has been rolled out and sandwiched together.
Classic puff pastry is a time-intensive process that requires precise rolling techniques and careful considerations of the ambient room temperature and the dough's temperature.
Rough puff pastry is a less precise version, usually requiring less effort and time.
When baked, these two puff pastry versions look rather similar. The main difference is that the rough puff pastry isn't as even in its rise as full puff pastry. But what it lacks in its evenness, it makes up for by being more tender since it is laminated a little bit less than full puff pastry, according to this particular recipe that is! My recipe for puff pastry is laminated just a little bit less than full puff and isn't laminated all at once, which means the gluten can relax in between rolling out the dough.
Ingredients Needed
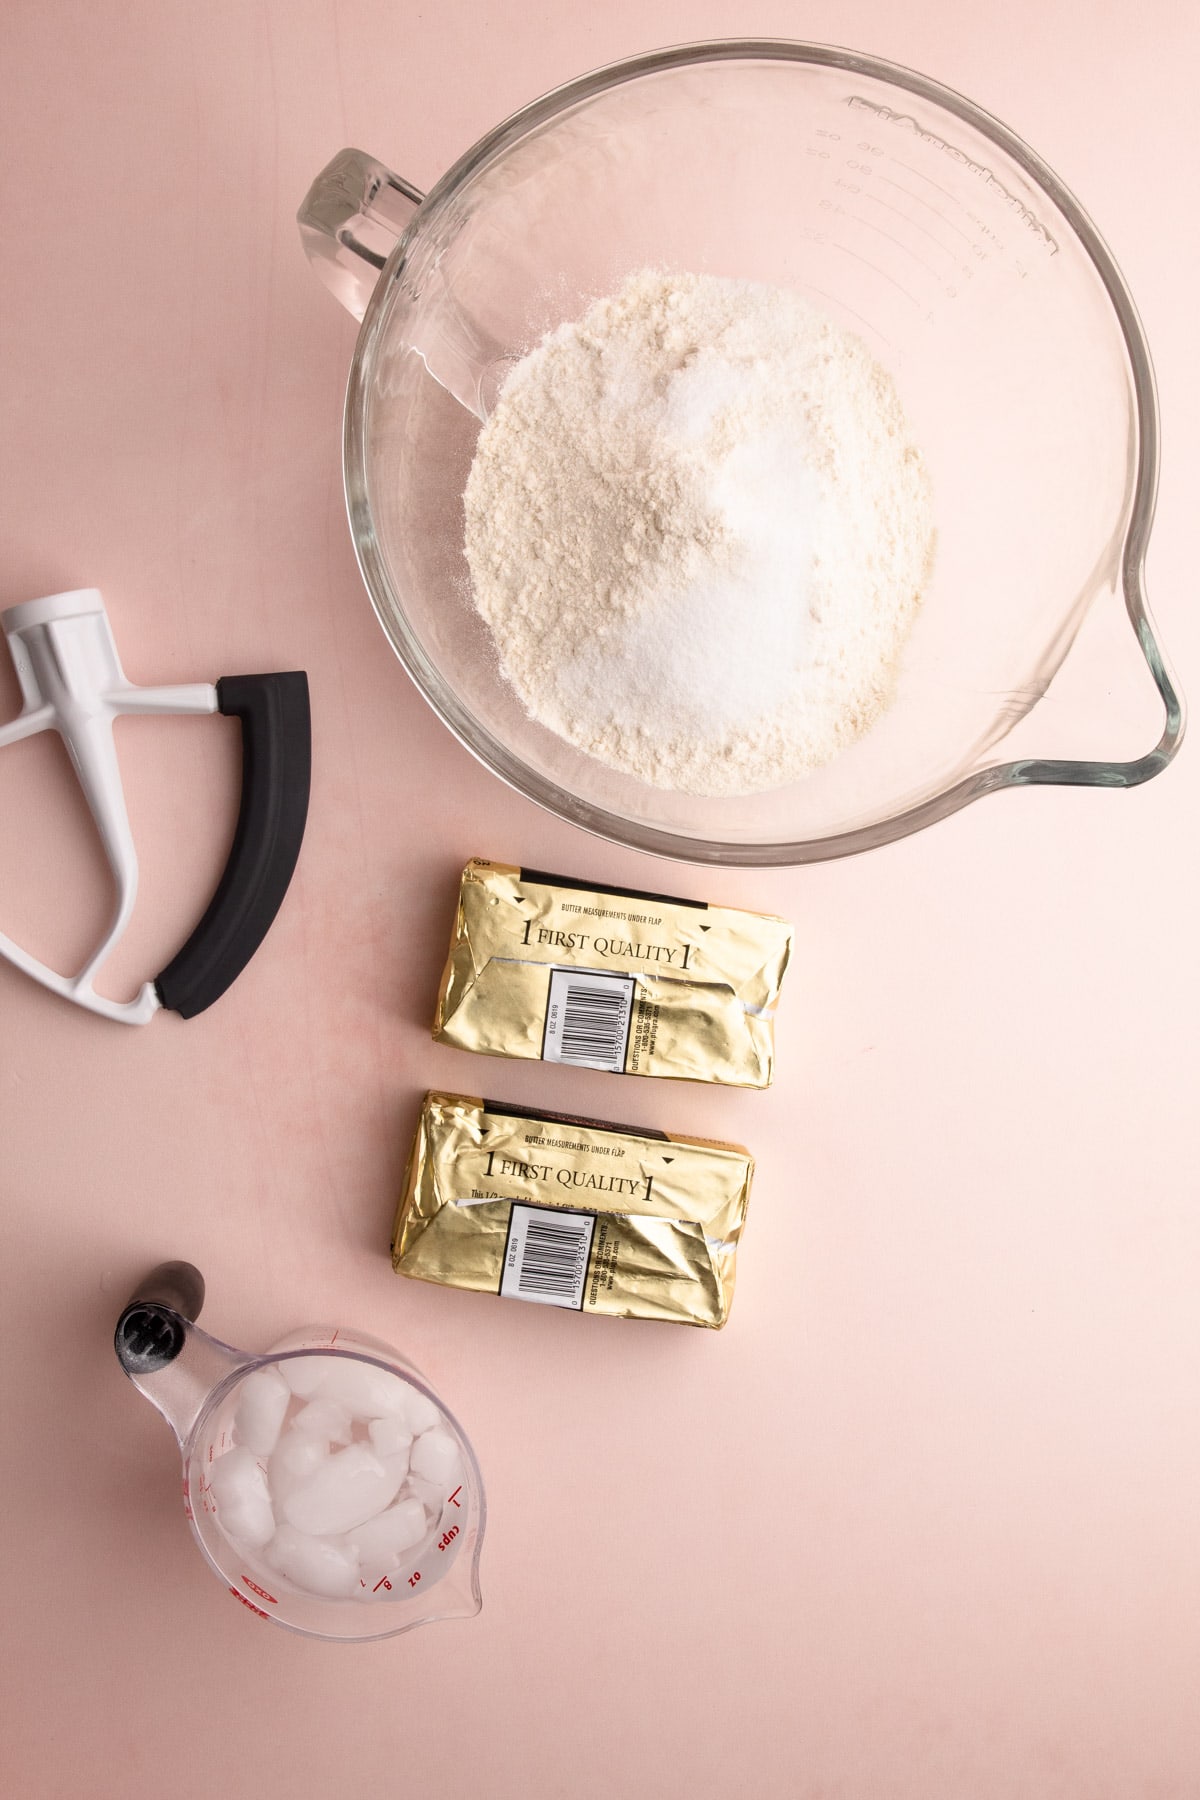
Here is an overview of the ingredients needed for this recipe. The full recipe is listed below in greater detail.
- unsalted butter (it's highly recommended you use a good-quality European butter here, since they have a higher fat content, which means it is easier to roll and is extra yummy)
- all-purpose flour
- granulated sugar (this is just a small amount, to help improve flavor and color)
- kosher salt
- ice water
Tools Needed
Here is a list of some of the primary tools I used in this recipe. You won't necessarily choose to use them all, but they are precisely what I used here. The links may contain affiliate links.
- Stand Mixer (The instructions call for using a stand mixer to put together both the dough and the butter block. I have not made puff pastry any other way so I cannot advise how to make it without an electric stand mixer)
- Plastic wrap: I know some people are averse to plastic, but I really suggest using it here. It keeps the moisture in the dough during all the resting time in the refrigerator, and it helps the dough keep its shape during the lamination process. You could use parchment paper instead, but I find it trickier.
- Rolling pin: there are many different styles out there. Use the one you are most comfortable with. I actually use two rolling pins nearly every time I roll anything out, one tapered french dowel rolling pin and one straight dowel rolling pin.
- Tape: This is used to give a general marker of where to roll out your dough. It is very helpful, but not essential.
- Bench scraper: This helps keep your dough in the correct shape, but it’s not absolutely essential.
- Ruler: Useful for ensuring your dough is rolled out to the proper amounts. If possible, one longer than 12 inches since the dough should be rolled out to 14 inches.
- Pastry wheel: This is helpful for using with puff pastry in general, but I use it hear to clean up the edges of the dough while I’m laminating.
- Dry pastry brush: To get any excess flour off the dough.
- A sheet tray: For holding the dough in the refrigerator while it rests.
- An instant-read thermometer: I used a thermometer in the beginning when I was learning what was an ok temperature for the dough to be rolled out. However, this is really just an extra.
Do you need all those tools? Well, I suppose at the end of the day, all you really need is a rolling pin and a bowl. However, using the above-mentioned tools (which is everything I use when making puff pastry) makes making puff pastry easier.
Overview of Steps
There are quite a few steps needed to make this recipe. While they are listed in very full detail below in the recipe, I thought it would be helpful to give a brief overview of what is needed to complete this full puff pastry recipe.
- Make the butter-enriched dough in the stand mixer.
- Rest/chill the dough in the refrigerator.
- Roll out the dough two times, clean up the edges of the pastry then make one more fold (for a total of 3).
- Rest/chill the dough in the freezer for 15 minutes and refrigerator for 20 minutes to an hour.
- Roll out and complete 4th and 5th (final lamination).
- Rest/chill the dough at least 2 hours in the refrigerator (then the dough is ready to use!)
There is some flexibility in the length of time between steps. Sometimes I've needed to carry over the process a day, but I don't recommend going more than 24 hours between steps. Please see the sections on chilling and temperature below for more information.
Temperature Matters
The ambient temperature of your home, as well as the temperature of your butter/dough, is critical when it comes to making rough puff pastry.
One of the keys to keeping that lamination intact is to make sure the butter doesn't melt. If it melts or gets too soft, it will be incorporated into the dough, as opposed to staying as a thin layer in the dough.
If your house is very hot, you may need to chill your dough longer than called for in the recipe between lamination.
The best temperature for rolling out the dough was somewhere around 40ºF - 50ºF. Better if it's closer to 40 than 50, but within that range works best. Once you understand what the dough feels like at that temperature, you won't need to use the thermometer anymore.
Don't have an instant-read thermometer? One trick I found over time was that if you held out the chilled block of dough flat on your hand, and it stayed stiff, it was chilled enough. If you held it out flat and it bends down towards your palm, then it is too warm.
How to Laminate Rough Puff
If you don't already know, pastry lamination refers to the technique of layering butter and dough together. It is achieved through rolling the dough thin--as neat as possible--and then folding it over itself several times. Each time the dough is rolled out and folded is referred to as a turn. The traditional puff pastry has 6 turns, but this rough puff version has 5.
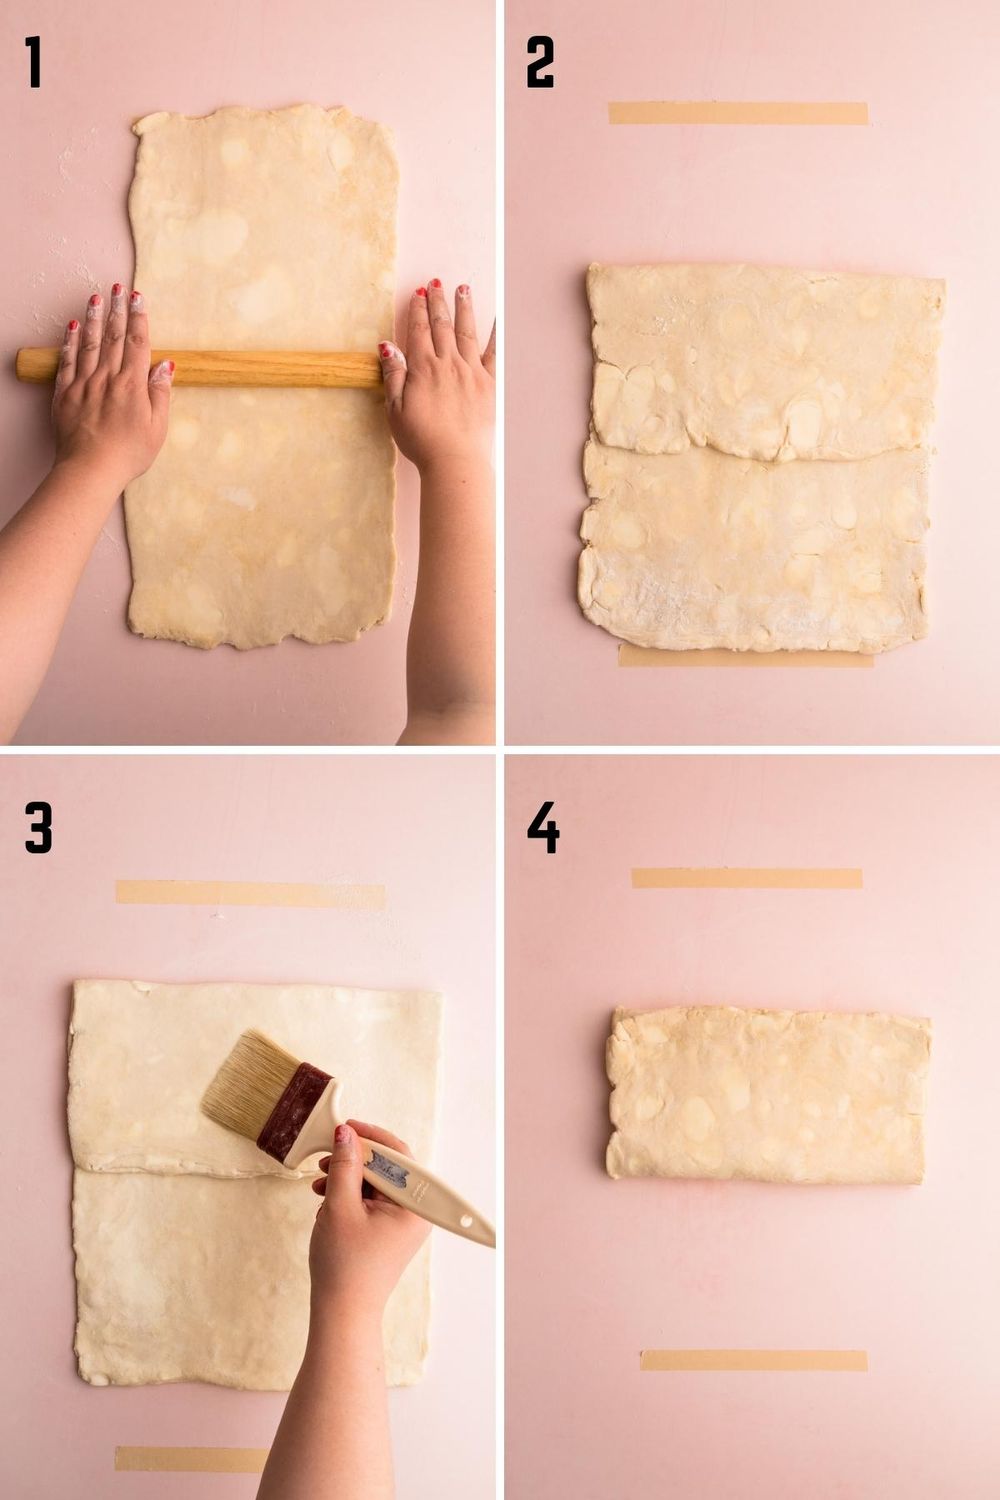
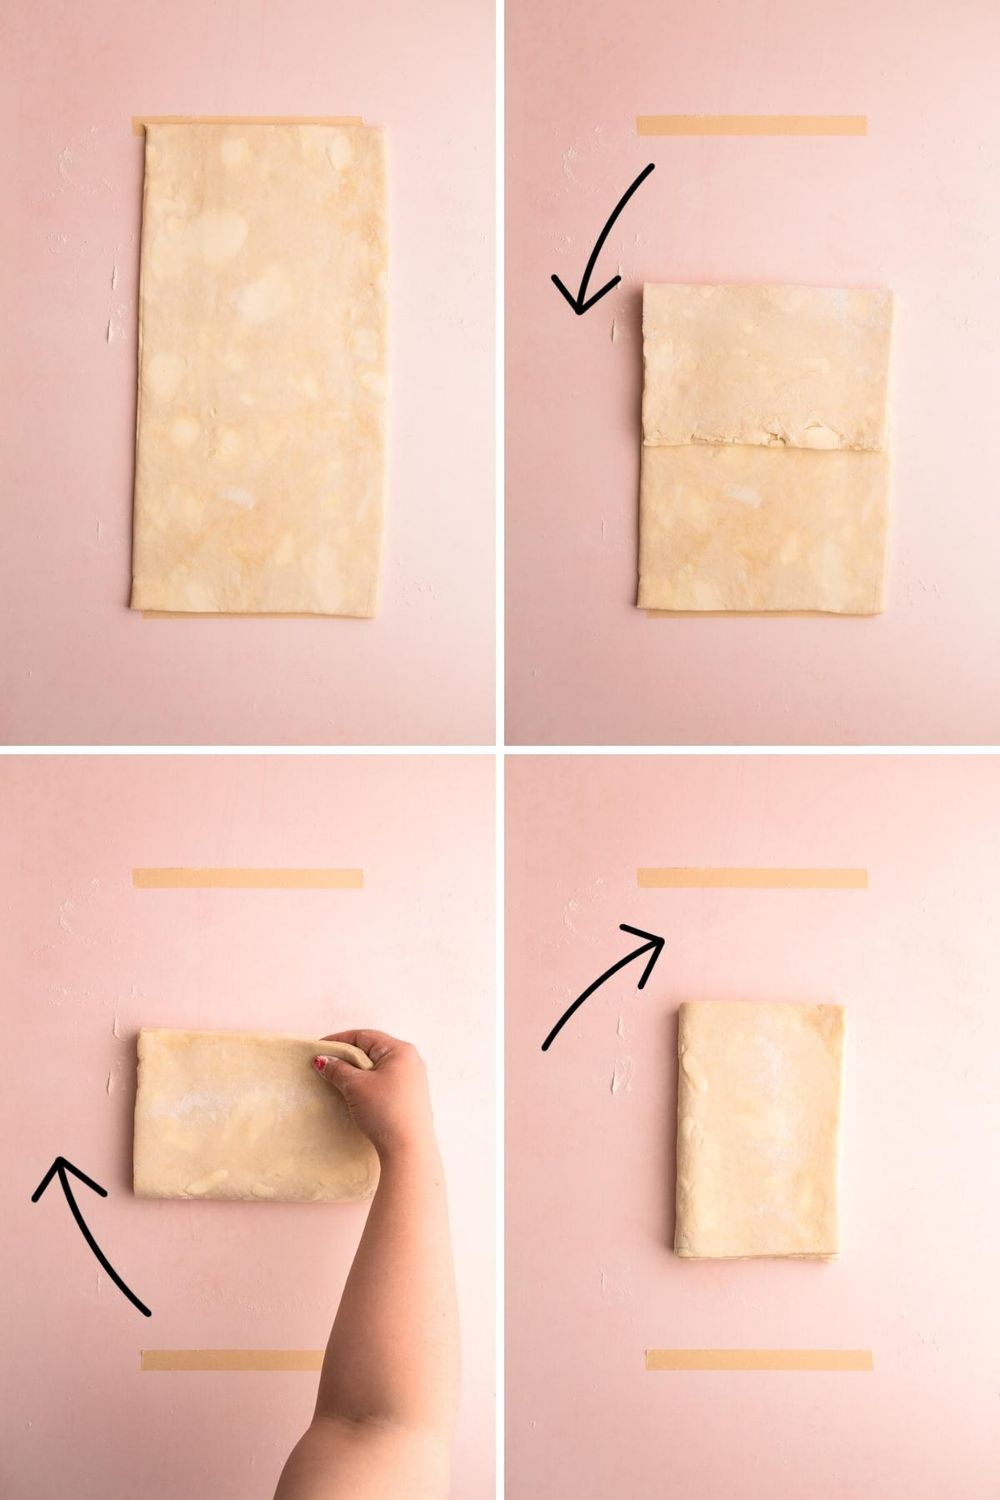
There are several different ways to achieve lamination. This recipe uses the three-fold technique (or business letter technique) when the top ⅓ of the dough is pulled down towards the center, followed by the bottom ⅓ of the dough towards the middle.
Rolling out pastry is a skill you get better at over time with practice. Find a rolling pin that feels comfortable to you. I prefer a dowel rolling pin, as opposed to one with handles, but the type of rolling pin doesn't matter; what matters most is you can direct the dough properly with it. Because this is rough puff, it isn't as critical to keep the dough super neat like if you are making classic puff pastry, but I do find it's best to keep it as neat as possible.
Lamination and Resting Schedule
When it is your first time making rough puff pastry, the lamination schedule can feel overwhelming (or maybe it's just me?)...Here is a quick reference guide for an overview:
- Make the dough (this is technically the first lamination as the butter is incorpated into the dough)
- Rest for 1-2 hours
- 1st turn
- 2nd turn
- 3rd turn
- Rest 15 minutes in the freezer plus 1 hour in the refrigerator
- 4th turn
- 5th turn
- Rest 4 hours in the refrigerator
- Use as desired, or freeze
Tips for Rolling Out Pastry
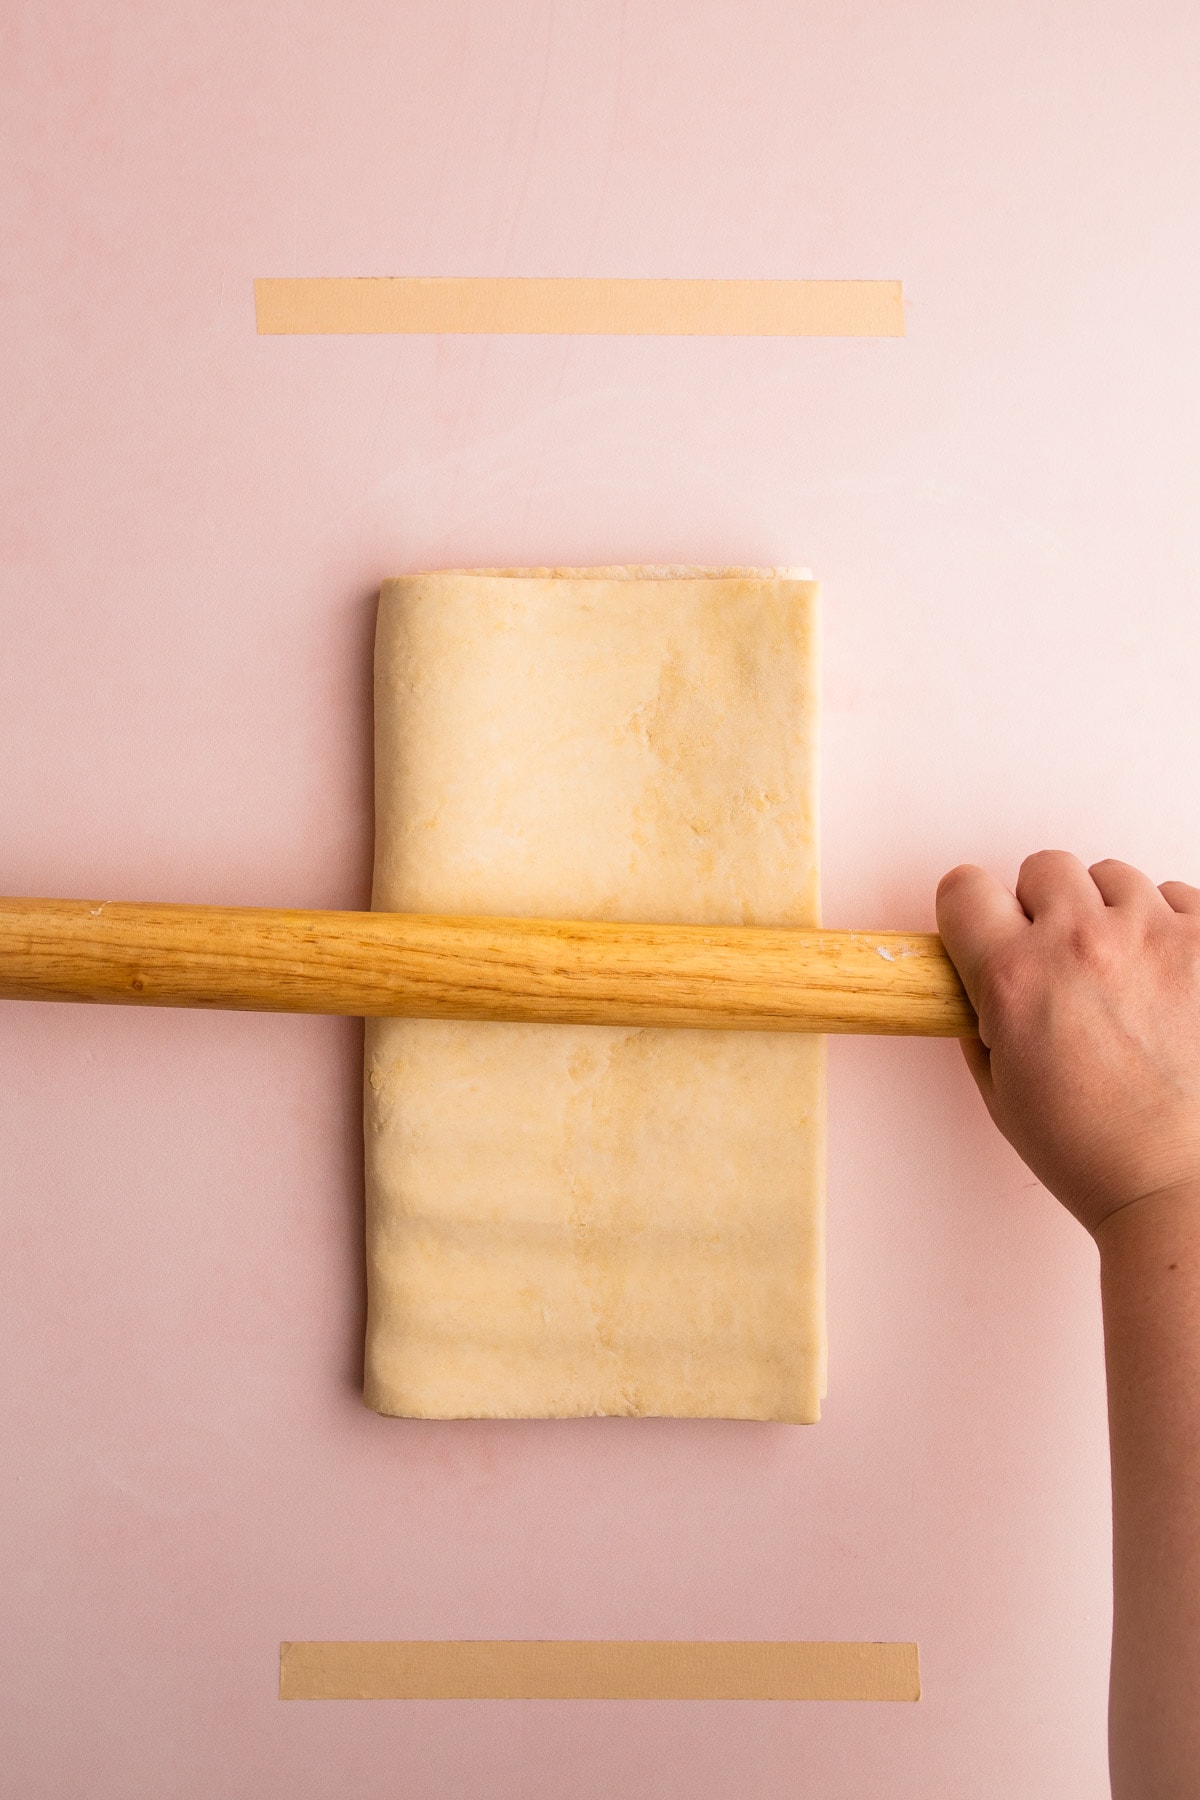
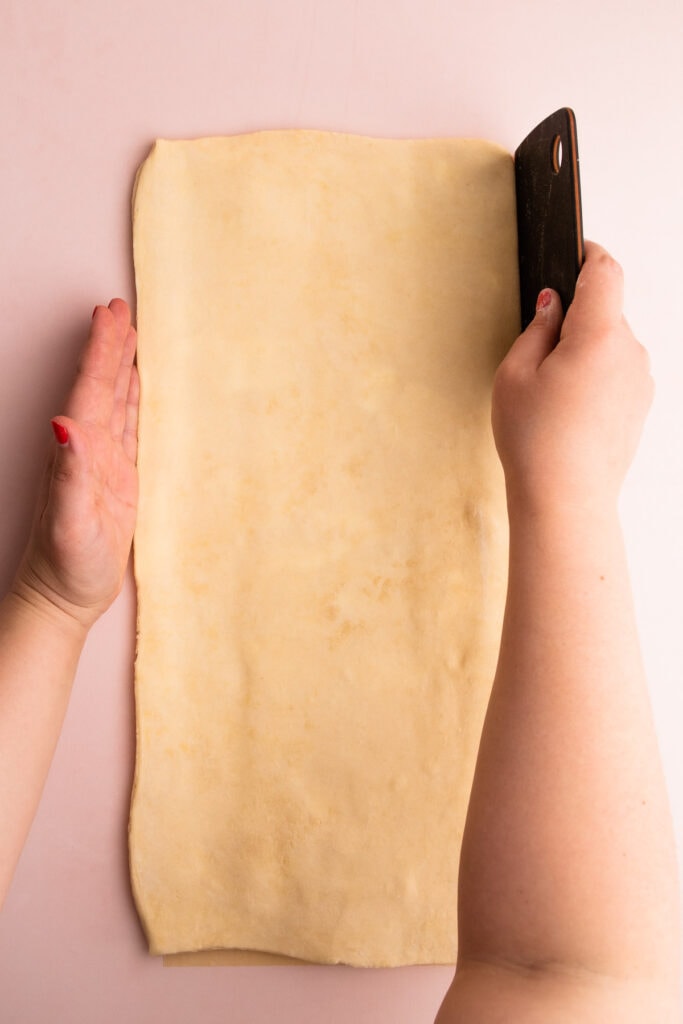
- Ideally, when the dough is rolled out, it is done so with even strokes away from you and the pin, as opposed to pushing downward.
- Make sure the dough is at the proper temperature. If it's too soft, it becomes easy to compress and smush the butter while you are rolling it. And of course, warm butter will absorb into the dough. If it's too hard, well then it's just a pain in the neck. It should be around 40ºF - 50ºF.
- Flour the work surface. If your pastry sticks to your work surface, it's going to mess up the lamination. You can always (and should always) brush off any excess with a dry pastry brush.
- Occasionally flip the laminated dough over when rolling to ensure it doesn't stick and to help get even layers.
- Before beginning a turn, use the rolling pin to "get the dough ready to roll" by lightly pressing the rolling pin perpendicular to the dough all along the surface to lengthen and flatten it. This helps keep the rectangle by conditioning the dough to keep its shape. Please reference the video to see this in action.
Why Resting Matters
One of the pivotal aspects of this recipe is the resting time. While I know some rough puff recipes don't call for any resting time, this one calls for three. I'm always a proponent of letting pastry rest, even with pie dough, and this rough puff is no exception. Bottom line, I do think it's essential for the best product. I played around with eliminating some of the resting times and it produces inferior results, so this recipe is precise with the minimum resting times to make for the best rough puff.
Resting the dough ensures the butter maintains the proper chilled temperature, but it also allows some of the built-up gluten to relax. Gluten develops naturally when the dough is handled and rolled out. Allowing the dough to rest makes it easier to roll out during lamination, and it prevents it from shrinking too much when baked.
You will notice that it's harder to roll out the dough on the last turn than it is compared to the first turn. That is totally fine. It's best not to force it if the dough is contracting a lot, and instead, just roll it out in a smaller rectangle if you need to.
Storing Rough Puff
Rough puff can be stored in the refrigerator for one (or at the very most two) days, but for any significant length of time, it should be stored in the freezer. This is because the dough becomes very wet and sticky as it sits in the refrigerator, causing you to have to add more flour to the dough once it's handled.
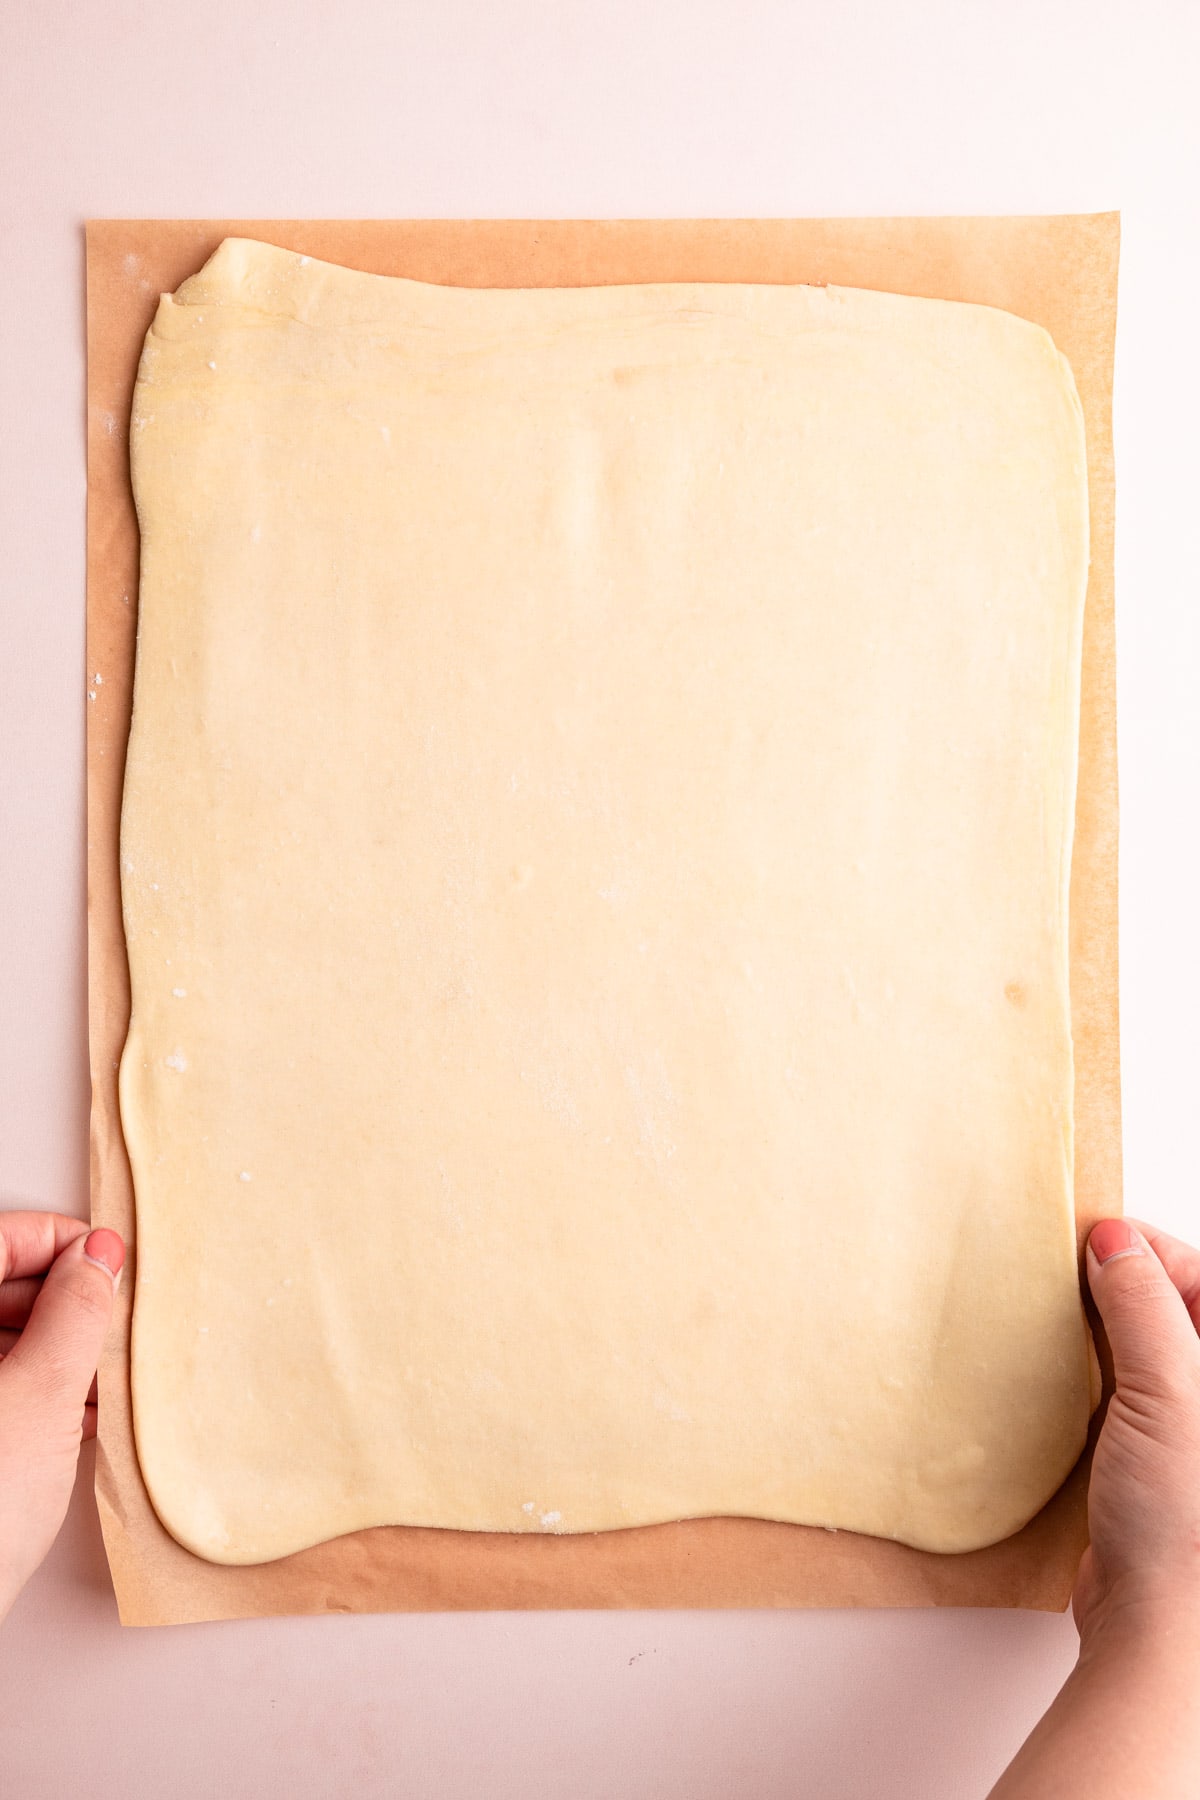
There are two ways I recommend storing it in the freezer. This recipe makes 2 batches of rough puff. Once the dough is fully laminated, slice the dough in half. The dough can be stored as it is, for up to one day in the refrigerator or 3-6 months in the freezer.
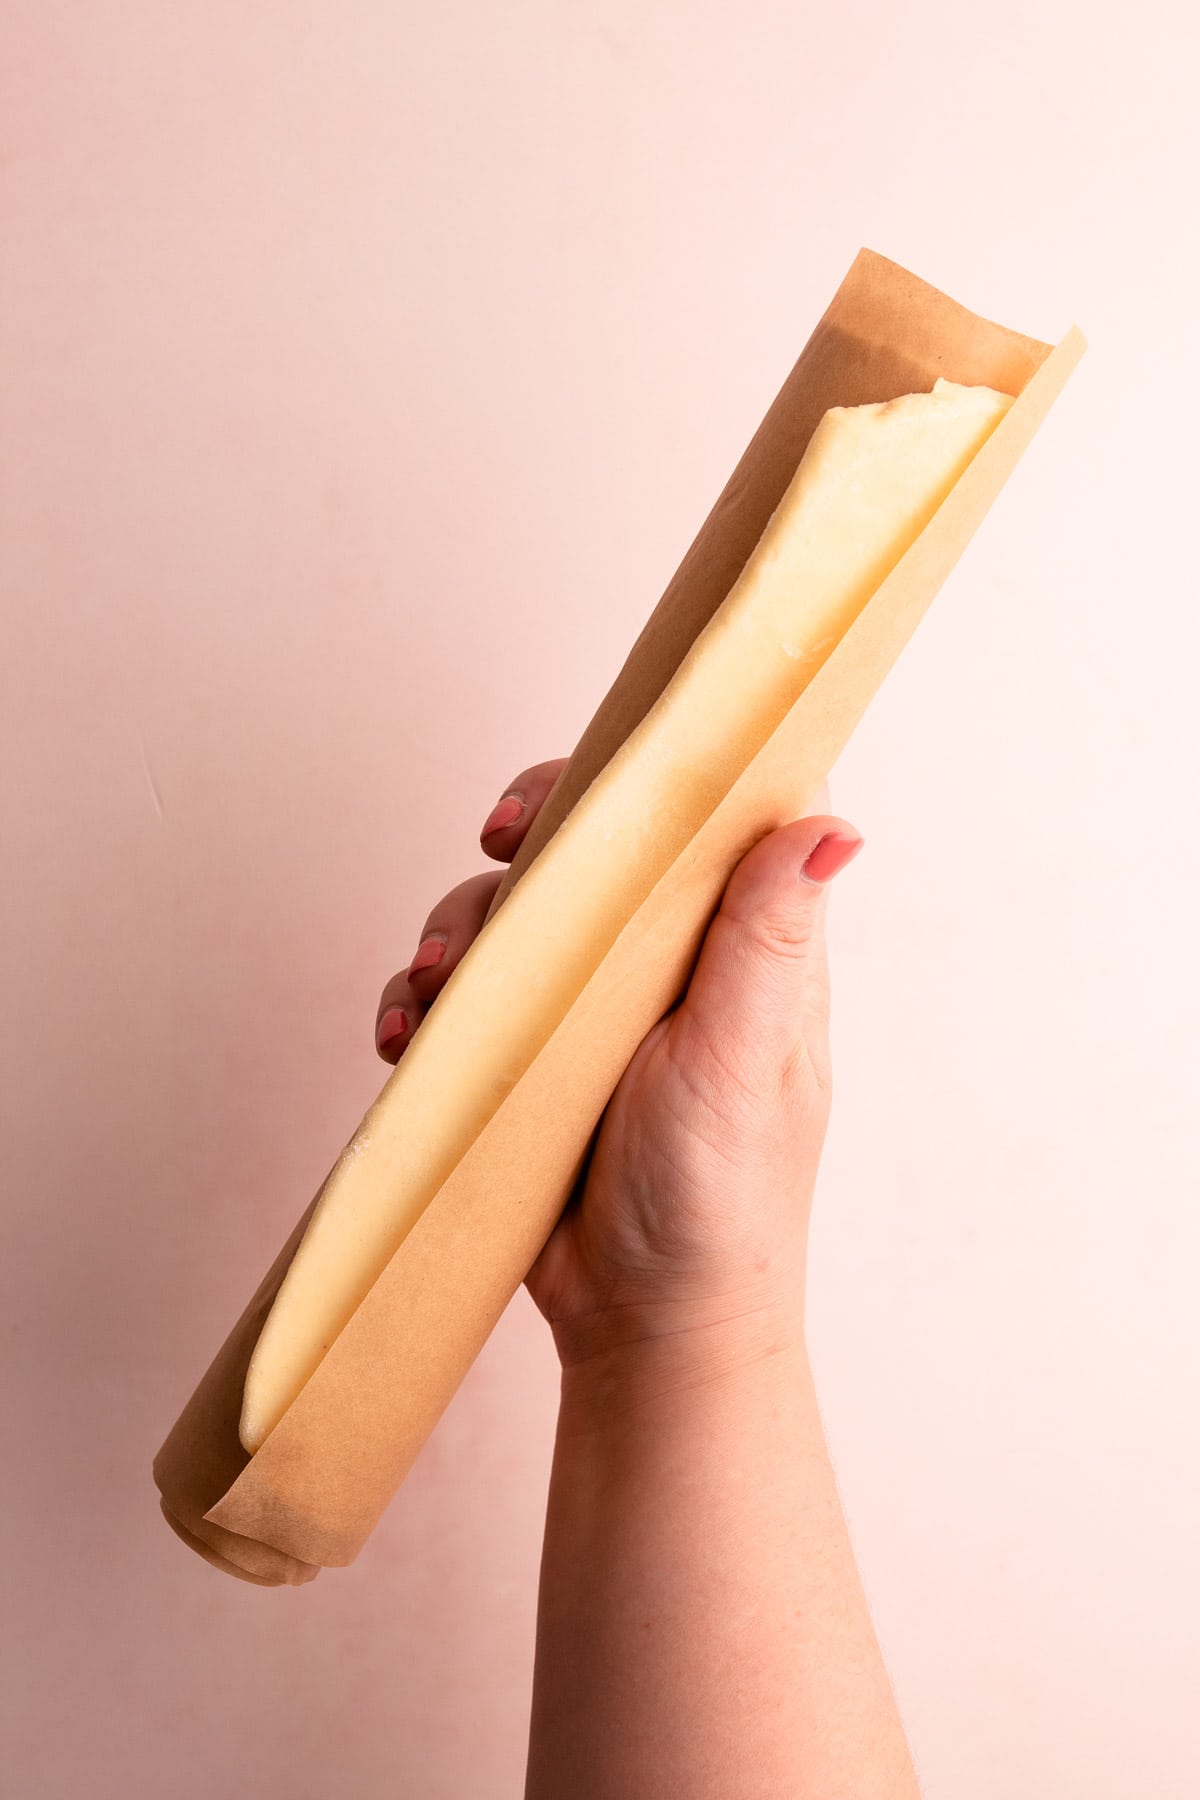
Or, you can store it rolled out. Roll the dough out to a ¼" thickness and place it on a piece of parchment. It's most ideal to store it flat like this way because then, it can be removed from the refrigerator and freezer and formed however you plan to use it. Or, if you don't have the space to store a flat piece of puff pastry in your freezer, you can roll the puff pastry up in the parchment and store it like that. If you are storing it in a freezer, it should be defrosted in the refrigerator before attempting to unroll it.
If you are in a hurry, a rough puff can be defrosted at room temperature, but be sure to chill it again before baking to firm up the butter.

What to Make with Rough Puff
There are virtually endless ways to use rough puff pastry.
- In place of pie crust for pie recipes.
- Savory or sweet tarts
- Cheese straws
- Puff Pastry Hot Dogs
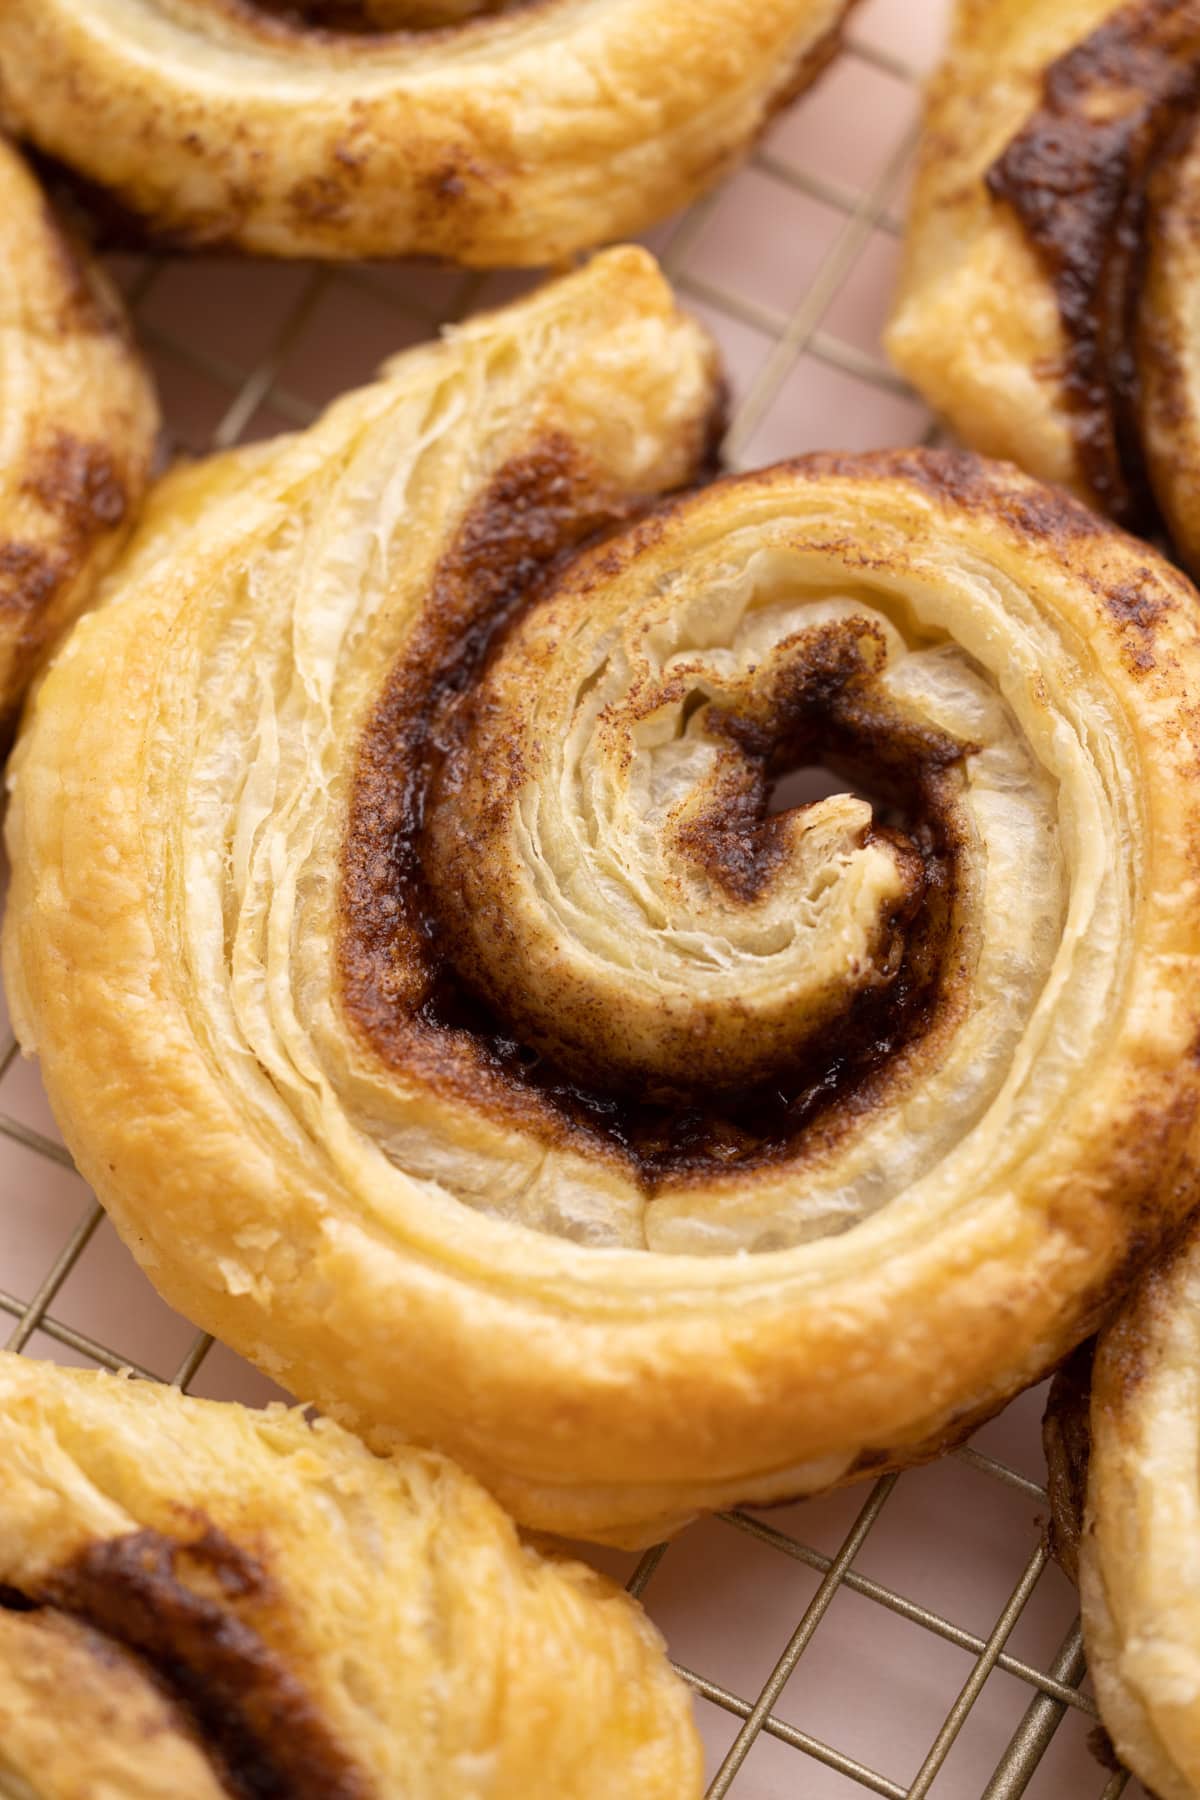
- Cinnamon twists
- Turnovers
- As the top for pot pies (like Chicken Pot Pie or Beef Pot Pie)
- Appetizers (such as spinach puffs or caramelized onion tarts)
- Cinnamon rolls
Generally speaking, puff pastry should be rolled out to a thickness of ¼". Once rolled, it can be formed into whatever shape the instructions call for.
Most of the time, it should be baked at 400ºF on the middle rack until the pastry is golden. However, it's always best to consult the baking instructions of the individual recipe you plan to make.
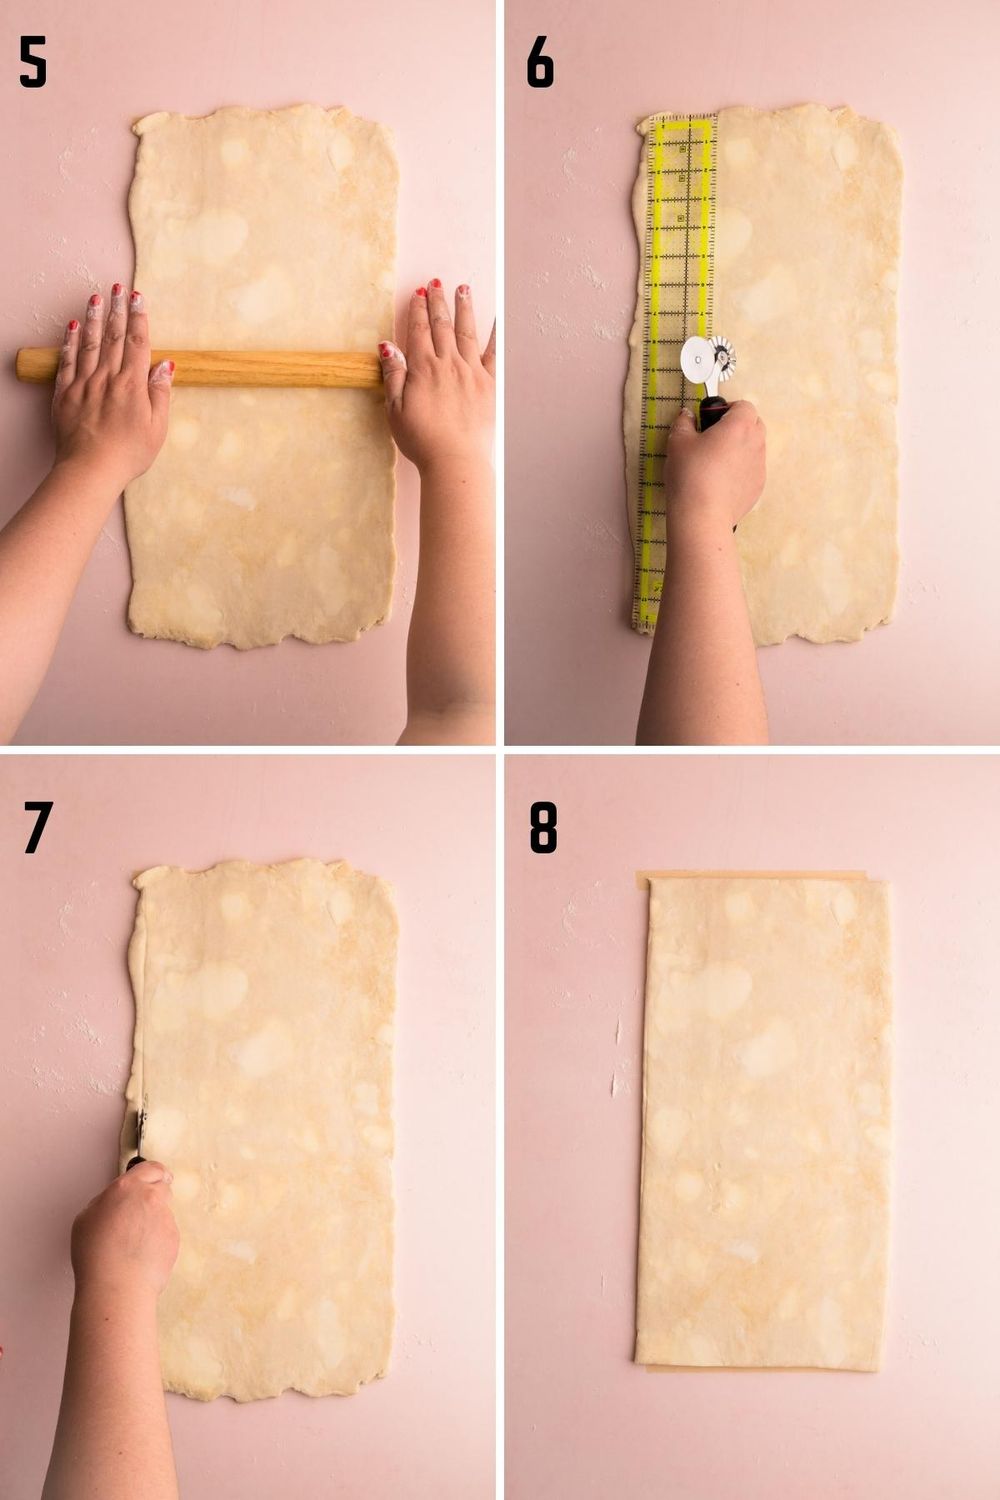
One critical component to baking up beautiful rough puff is not to compress the edges of the pastry before baking. That means all edges of the pastry should be cut with a sharp knife or a sharp pastry wheel. Also, it's fine to egg wash the tops of puff pastry, but never egg wash the cut sides. It will prevent the pastry from puffing up properly.
Watch It: How to Make Rough Puff
More Pastry Recipes
Want to check off some more bakes on your baking bucket list? Check out this list!
- How to Make Choux Pastry
- Classic Puff Pastry (Full Puff Pastry)
- Classic Cream Puffs
- Classic Fruit Tart
- Easy Pastry Cream
I am so honored when you make a recipe from my site! If you make this Rough Puff Recipe, please leave a comment and a star rating with your experience! If you have any questions about this recipe, feel free to comment here, too!
Full Recipe
Rough Puff Pastry
Rough Puff Pastry, also known as Blitz Puff Pastry is a more streamlined and less fussy version of the classic French pastry dough. Used for so many different desserts, this layered flaky and buttery pastry is easier to make than you think! This extensive tutorial walks through all the steps on how to make this shortcut rough puff with step-by-step photos, video and lots of tips! Be sure to read through the entire post if you are new or new-ish at making rough puff.
- Prep Time: 00:30
- Resting / Chilling Time: 04:15
- Total Time: 4 hours 45 minutes
- Yield: (2) 18 ounce puff pastry blocks
- Category: Pastry
- Method: Lamination
- Cuisine: Modern French
Ingredients
- 4 cups (480g) all-purpose flour (see note)
- 1 teaspoon kosher salt
- 1 tablespoon (13 grams) granulated sugar
- 2 cups (450 grams) unsalted European butter
- 1 cup (227 grams) ice water
Instructions
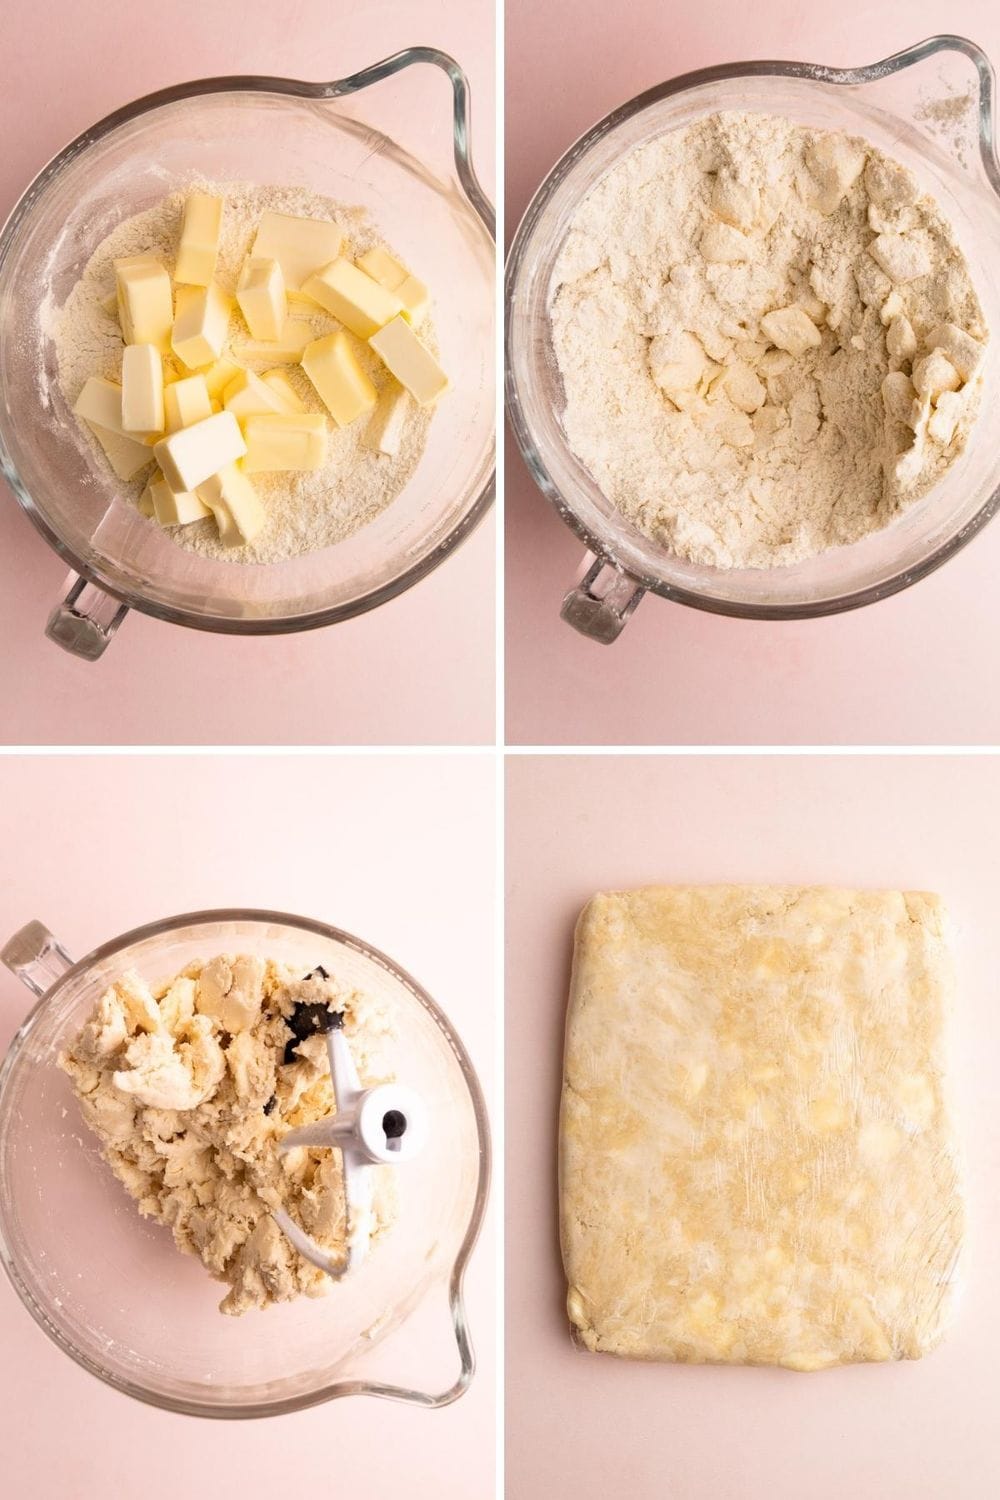
- In the bowl of a stand mixer fitted with a paddle attachment, combine the flour, sugar, and salt on low speed.
- Dice the cold butter into large chunks (one stick should be cut into 8 pieces). Add in the butter, and turn the mixer on low (cover the bowl with a towel if flour starts to spill out). Let the paddle cut the butter into the flour for about 1 minute. There should still be large chunks of butter, with most of them being the size of a walnut, in the flour.
- With the mixer running, slowly stream ¾ cup cold water into the dough. Mix until most of the dough comes together around the paddle. If there are any dry patches, stream the remaining ¼ cup water in, a tablespoon at a time, until the dough is fully hydrated with no dry patches. Shut off the mixer. Scrape together the dough and transfer it to a work surface. The dough should hold together easily when it is picked up. Quickly shape the dough in a rough 10x8” rectangle and wrap in plastic.
- Transfer to the refrigerator and let it rest for 1-2 hours, or until the dough is about 50 degrees. If your kitchen is hotter, it may take longer for the dough to cool down.
- On a lightly floured work surface, roll the dough, dusting with flour if necessary, until 14 inches long, and 10 inches wide. The dough will be quite rough at this point, with butter pieces potentially sticking out of the sides. Brush off any flour with a dry pastry brush from the surface of the dough.
- Grab the top short side of the dough rectangle and fold the dough ⅓ of the way down. Repeat with the bottom short side like a business letter. This is a simple turn. Gently press down on the layers with a rolling pin so the layers stick together.
- Rotate the dough rectangle clockwise 90 degrees so the longer edge is now vertical and facing your right (reference the video or step-by-step photos to see this in action). Repeat the process as before to make 1 more simple turn.
- Repeat the folding steps a third time, stopping before folding the dough into thirds. Clean up the edges of the dough using a pastry wheel or a long, sharp knife. The goal after this third fold is to create a straight even rectangle of dough. Finish the turn by folding the dough into a business letter, as done before.
- Wrap tightly in plastic again and freeze for 15 minutes, then refrigerate for 1 hour.
- Repeat this process two more times (removing the dough from the refrigerator, completing two turns, chilling the dough again as instructed, and then repeating with two final turns) for a total of 5 turns.
- Cut the dough in half and wrap each piece of finished puff pastry blocks in plastic wrap and let it rest for a total of 2 hours. After this point it is now ready to use.
- When ready to use, roll out one block of pastry to a thickness of about ¼” to ⅛”, and use as desired or directed in a recipe. See notes in the post for more information about how to store it, freeze it, use it and bake it!
Notes
Have a question or looking for tips? The text written above the recipe is always a great first place to start! There are always loads of explanations, tips and technical advice shared before the recipe.
Weighing your flour is the most accurate way to measure. If you aren't going to weigh it, make sure to spoon it into the cup, and then level it off. If you scoop the flour out with the measuring cup and then level, it could change the outcome of the final product.
I used a thermometer in the beginning when I was learning what was an ok temperature for the dough to be rolled out. If your house is very hot, you may need to chill your dough for longer in between. One trick I noticed was that if you held out the block of dough flat on your hand, if it was soft enough to weep down, then it is too warm. If it held firm and stayed flat, then it is likely cold enough to start rolling out.
Some of the links on this page may be affiliate links. Everyday Pie is a participant in the Amazon Associates Program. As an Amazon Associate I earn from qualifying purchases, at no extra cost to you.



Savanah Belanger
This is the best rough puff recipe I’ve ever tried. Incredibly light, flaky and tender. I cut the recipe in half and made savory hand pies for dinner. I wish I had gone ahead and made the full batch so I could do a sweet version. I’ll have to make another batch soon. Thank you very much for sharing your expertise with all of us
Bea
I love your regular puff pastry but was looking for the rough puff too so that I could whip up something a bit faster for a favor a friend asked me to do. This is perfect for what I needed & was actually almost as good as the regular! Thank you so much..
Andrew
I can't see a video, or a link for a video anywhere, so I can't follow the video. If there is a video, there is no link for it. I've checked on three different browsers.
Tula Gianni
Hi Andrew; yes there is a video just under the 'swirls with jam'
enjoy;
Jody
Hi Kell,
I'm new to your blog and love the detalied instructions. I have tried rough puff a couple of years ago and it was a big fail so I am excited and nervous to try again. I was wondering if I could cut the recipe in half and still have succsess...hopefully. (The thought of wasting that much butter makes me sad.) Thank you so much!
Kelli Avila
Hi! I'm so glad you found my site! Yes, you can cut it in half. I hope you find success with my recipe!
Pip
Have made this once and it turned out beautifully! I can’t buy all butter pastry in the small town I live in here in NZ, so this will become my go to. Thanks so much for sharing this recipe, and all the extra details as well.
MT
Fantastic recipe! This was my first time attempting a rough puff, I think I let my butter chunks go a bit too long in my mixer— ANYWAY… it still came out great, mostly due to the wonderful tips and tricks you provided. Actually way easier than I imagined it to be. I froze 1/2 the dough two weeks ago and was able to make delicious easy treats for a pumpkin carving party! Thanks!!
Bret M
I love this method so much. I have made a batch each week for the past month and I find it so therapeutic! I didn’t mind putting the butter block in the quart bag the first three times but I just tried just laying in parchment paper and using the baggy to keep the size seemed to work too! thank you for this beautiful detailed recipe!
Kelli Avila
How wonderful! I'm so glad you enjoyed!
Antoni
Is there a video on this?
Kelli Avila
Yes, it's towards the bottom of the post.
Nicole
Hello Kelli,
Your site is wonderful, full of delicious pie and crust recipes! However, I also cannot find the video link for the rough puff. I have searched the bottom of the post and also under the swirl jam picture. It says "Watch it: how to make rough puff" but there is no link. Hope this can be fixed and not sure if it is a browser issue although the person above tried with 3 different browsers.
Thank you for your time.