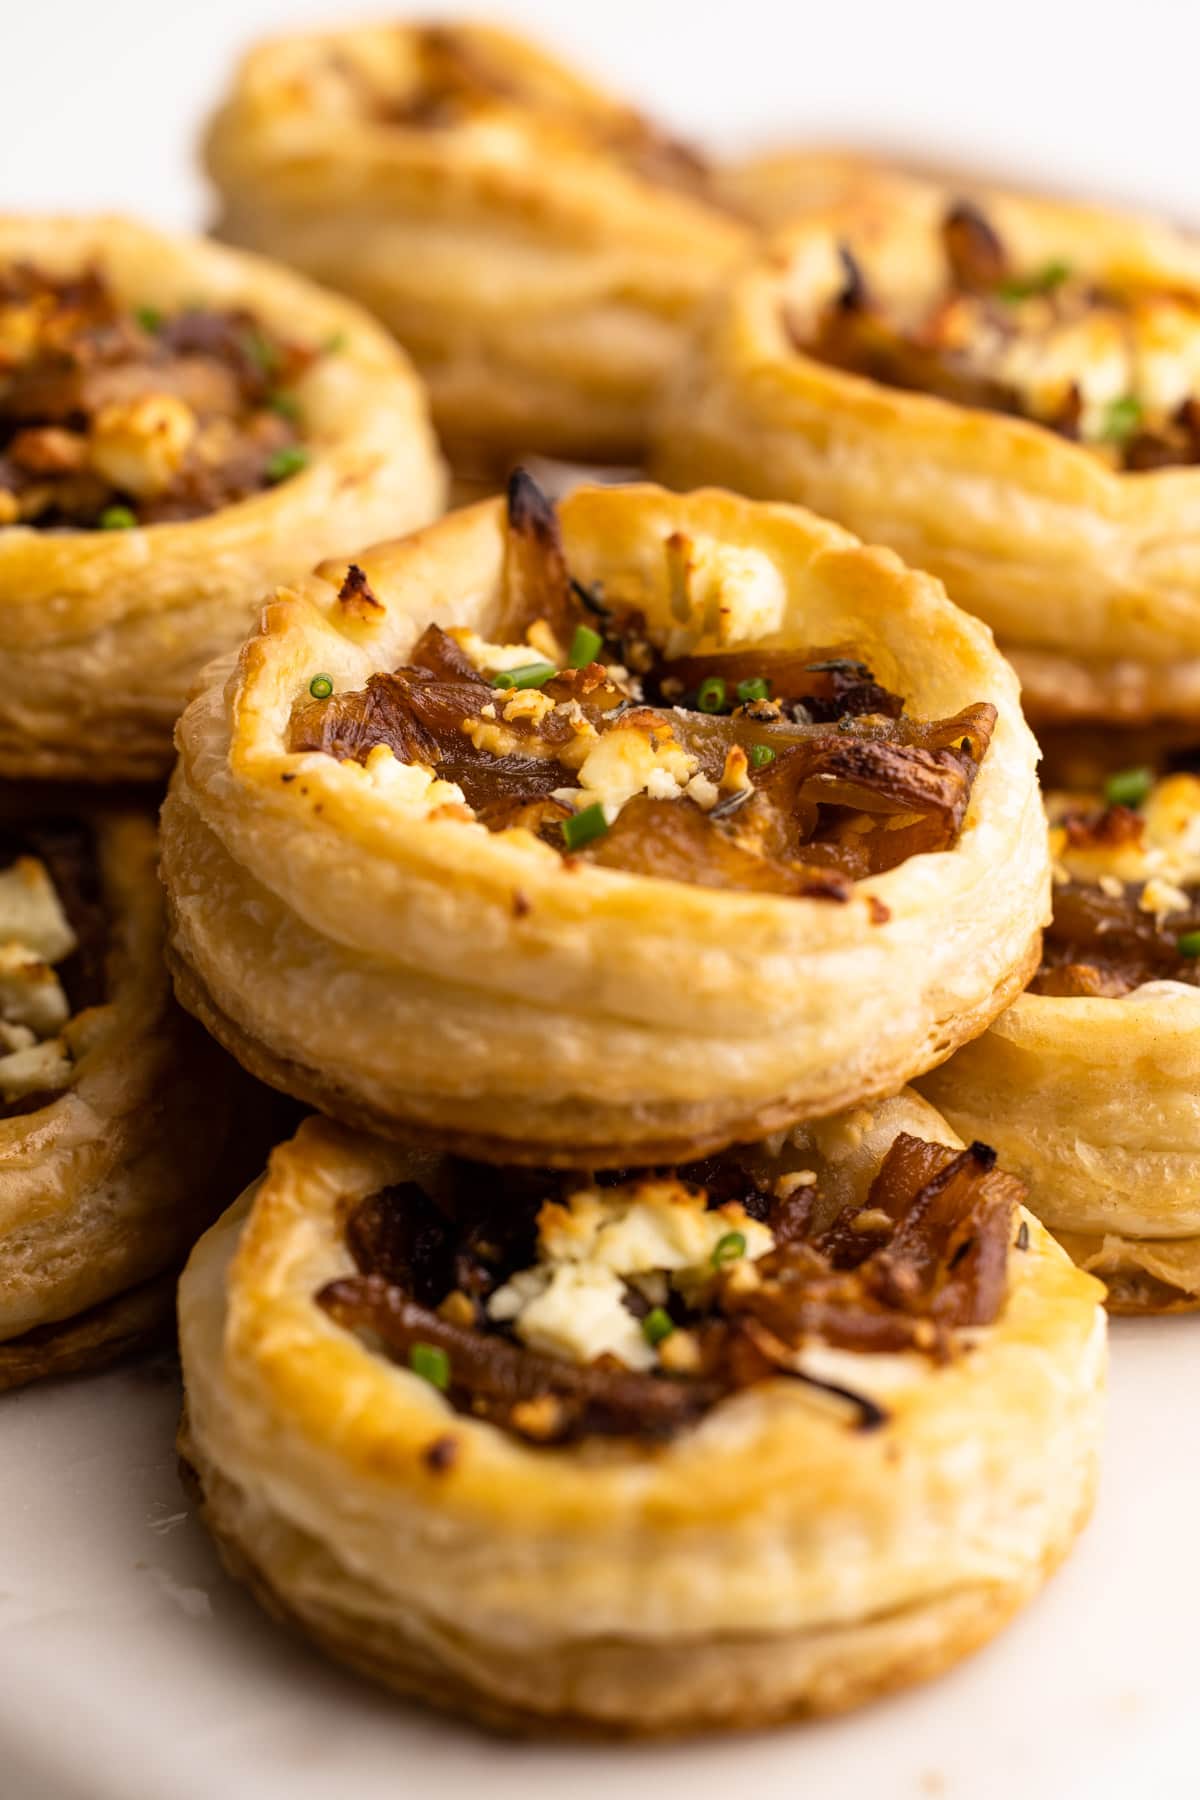
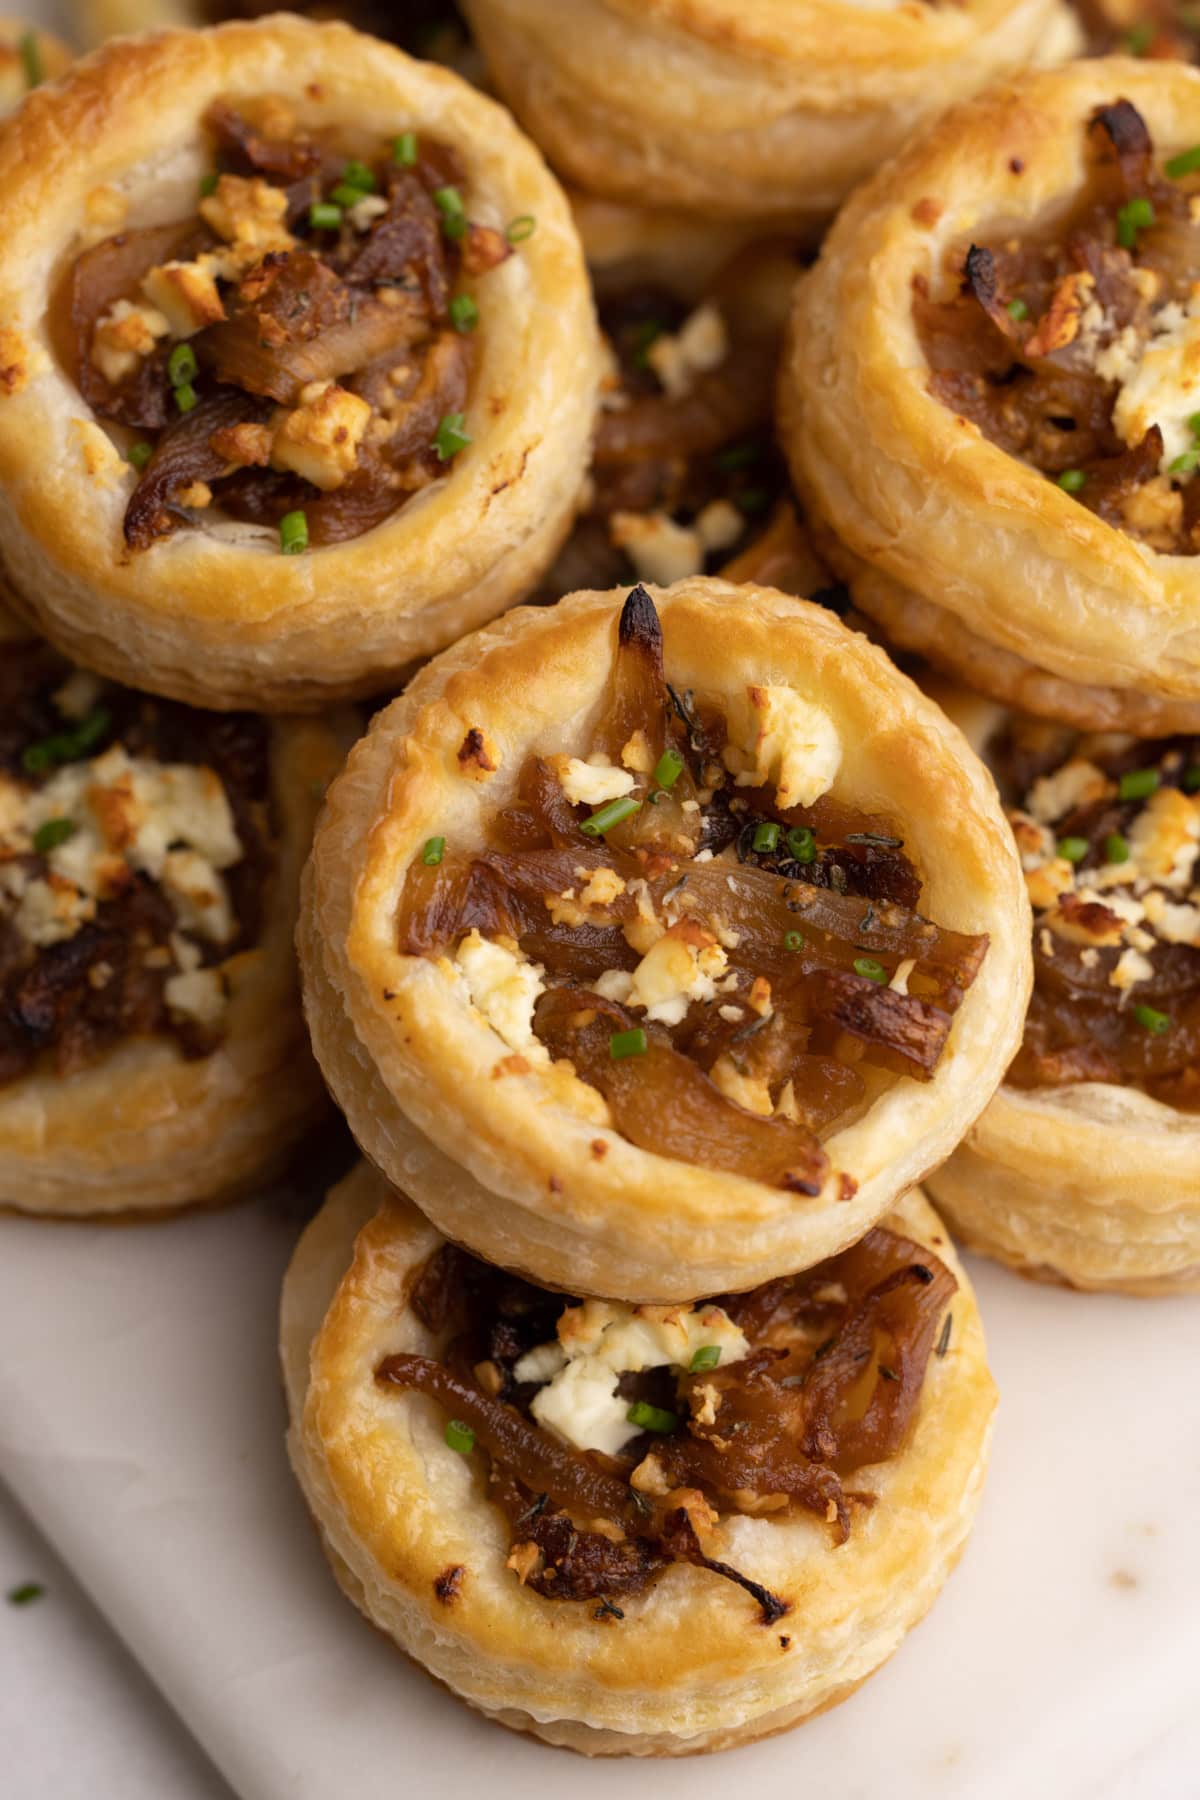
Salty, sweet, crunchy, and so delicious, these Caramelized Onion Tarts made with puff pastry are the perfect celebratory appetizer or snack.
Want to save this recipe?
Enter your email & I'll send it to your inbox. Plus, get weekly updates from me!
Puff Pastry Caramelized Onion and Feta Tarts
Admittedly I am a big fan of putting together caramelized onions and feta (as evidenced with this Caramelized Onion Quiche and Butternut Squash, Caramelized Onion and Feta Pie). Add in puff pastryand it just really bumps the deliciousness to a whole other level. These Caramelized Onion Tarts (similar to these Brie and Jam Bites and Goat Cheese and Fig Bites) are the perfect appetizer for a celebration and couldn't be easier to make. These mini puff pastry tarts have a little bit of sweet, a lot of salty umami flavor and the crunch factor is spot on.
The biggest question you'll need to ask yourself if whether or not you are willing to make the puff pastry from scratch. I highly recommend it, but if you prefer, you can also use store-bought puff pastry with similar success.
So, let's get to making it, shall we? The text below offers tons of tips and helpful notes, or you can scroll to the bottom to grab the recipe and get started!
Ingredients Needed
Here is an overview of the ingredients needed for this recipe. The full recipe is listed below in greater detail.
Useful Tools to Make This Recipe
Here is a list of some of the primary tools I use in this recipe. You won't necessarily choose to use them all, but they are exactly what I used. Any links may contain affiliate links.
- stand mixer (only if you are making the puff pastry)
- 13"x18" sheet pan (also known as a half sheet pan)
- rolling pin
- pastry brush
- round cutters (I recommend a 2" and 3" circle cutter)
- ruler and pastry wheel or sharp knife (to cut the pastry)
- kitchen essentials: baking scale, bowls, measuring cups and measuring spoons, rubber spatula
Overview of Steps
The number of steps needed to make this recipe depends on if you plan to make your puff pastry from scratch. More on this is below.
- Make the puff pastry, and chill it (or skip the step if you use store-bought).
- Make the caramelized onions and mix the filling together.
- Roll out pastry, cut circles and assemble tarts.
- Bake!
Let's Talk Puff Pastry
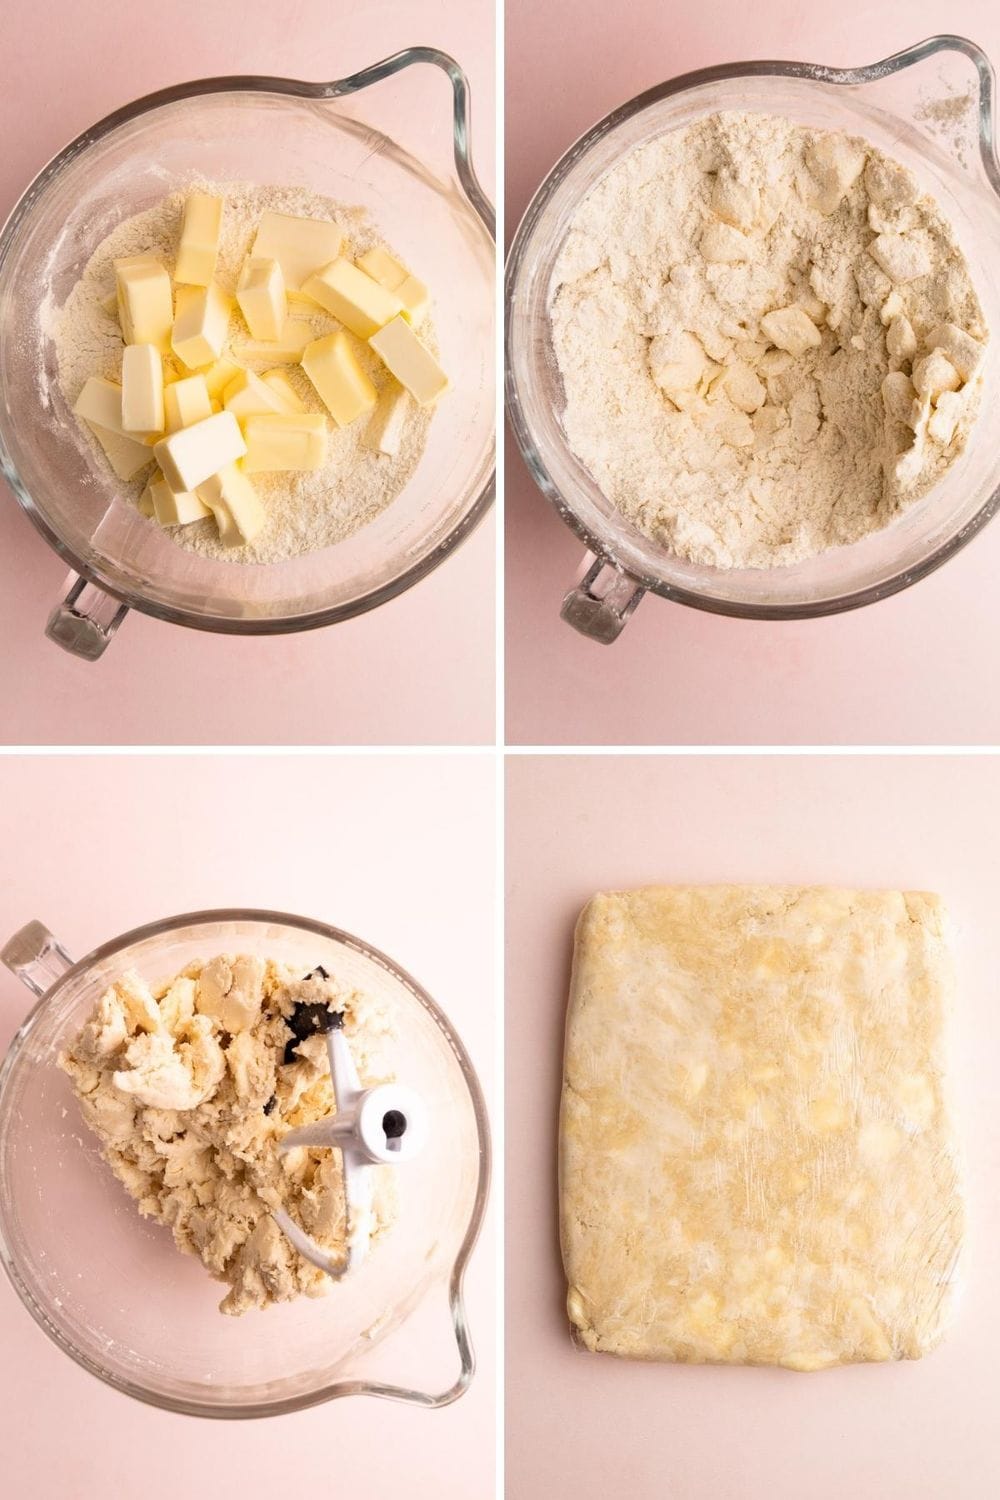
Puff pastry is a classic french pastry made by laminating butter in a dough repeatedly until the final pastry has many hundreds of alternating layers of butter and dough. Rough puff is a more streamlined version of it that is less fussy but with highly similar results.
This tart recipe calls for my homemade rough puff, but if you wanted to make the classic puff pastry, you certainly could! This recipe yields about 12-14 tarts and uses only half the batch of the rough puff recipe (which is about 18 ounces of dough). Save the other half for another pastry, or you can even double the batch and make 24 tarts.
Can you buy puff pastry at the store? You absolutely can. However, depending on the type of puff pastry you buy and the size of the cutters you use, the exact tart yield might differ.
All About the Onions
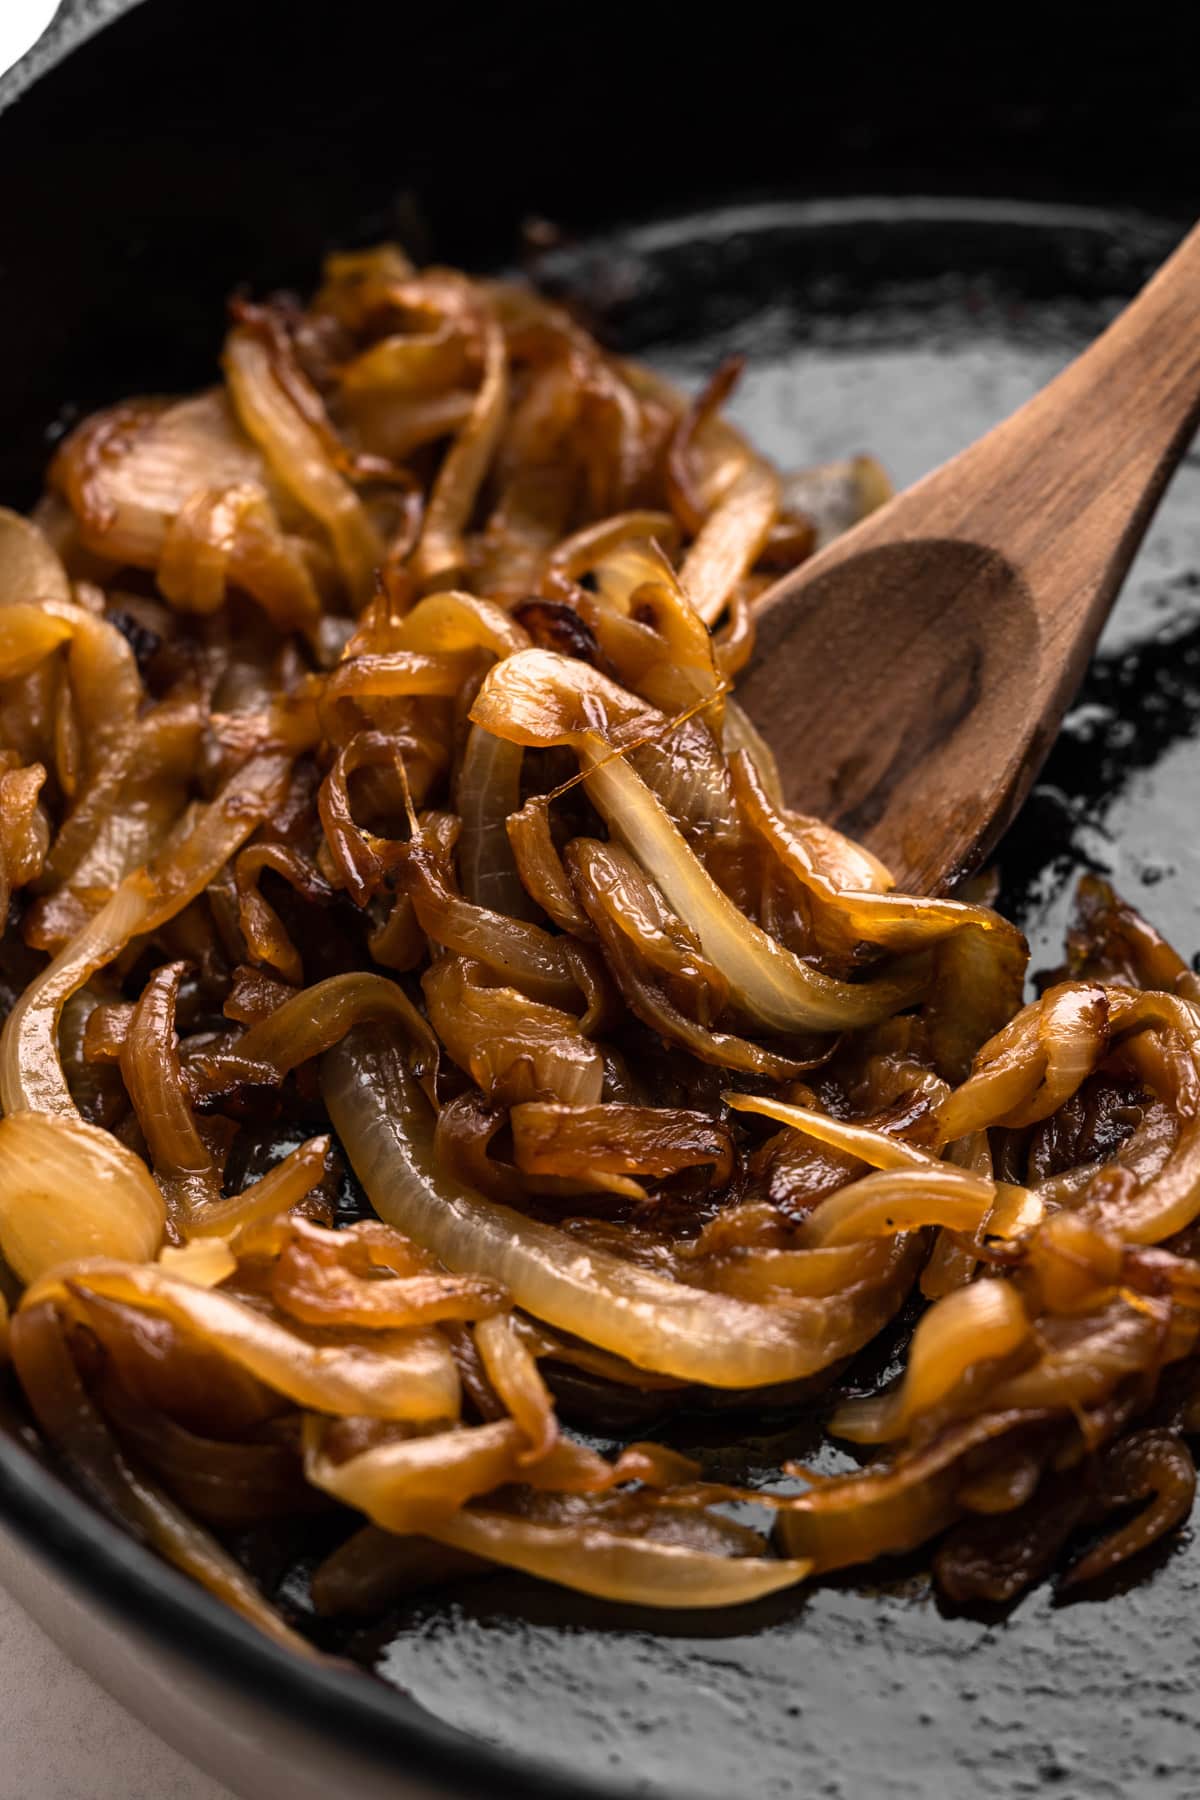
Caramelized onions are a sweet/savory ingredient element with somewhat addicting qualities. When you cook onions slowly, the moisture is released and cooked off, leaving behind the concentrated sugars of the onion. While it does take a long period of time for this to happen (about 45 minutes), the process itself is quite simple: The longer you cook your onions, the sweeter and jammier they get.
This recipe includes the addition of some balsamic vinegar toward the end of cooking. This inclusion serves a few purposes. The first is that it gives a touch of acid, which helps balance out the sweet and savory flavors. The other benefit is that it adds a touch of liquid to the pan, which helps get up some of the fond that has formed on the bottom of the pot. You don't want to leave behind any flavor! And the vinegar itself helps build up that umami flavor.
Depending on the size of your onions, you may have more caramelized onions than you need for the tarts, so any leftovers you can set aside for another use. They keep for a few days in the refrigerator or freeze for a few months.
Want to dive deeper into learning about caramelized onions? Check out this Caramelized Onion recipe.
Preparing the Tarts
Let me just start this off by sharing the golden rule when it comes to working with puff pastry: if at any point your pastry is getting too warm, simply place it in the refrigerator or freezer to chill. Warm puff pastry is not only sticky and tricky to work with, but letting the butter melt will result in stodgy flat-baked pastry.
Now that we got that out of the way, making these tarts are not difficult or fussy. If you are using the homemade puff, then it needs to be rolled out. If you are using store-bought, then simply remove it from the package according to the instructions.
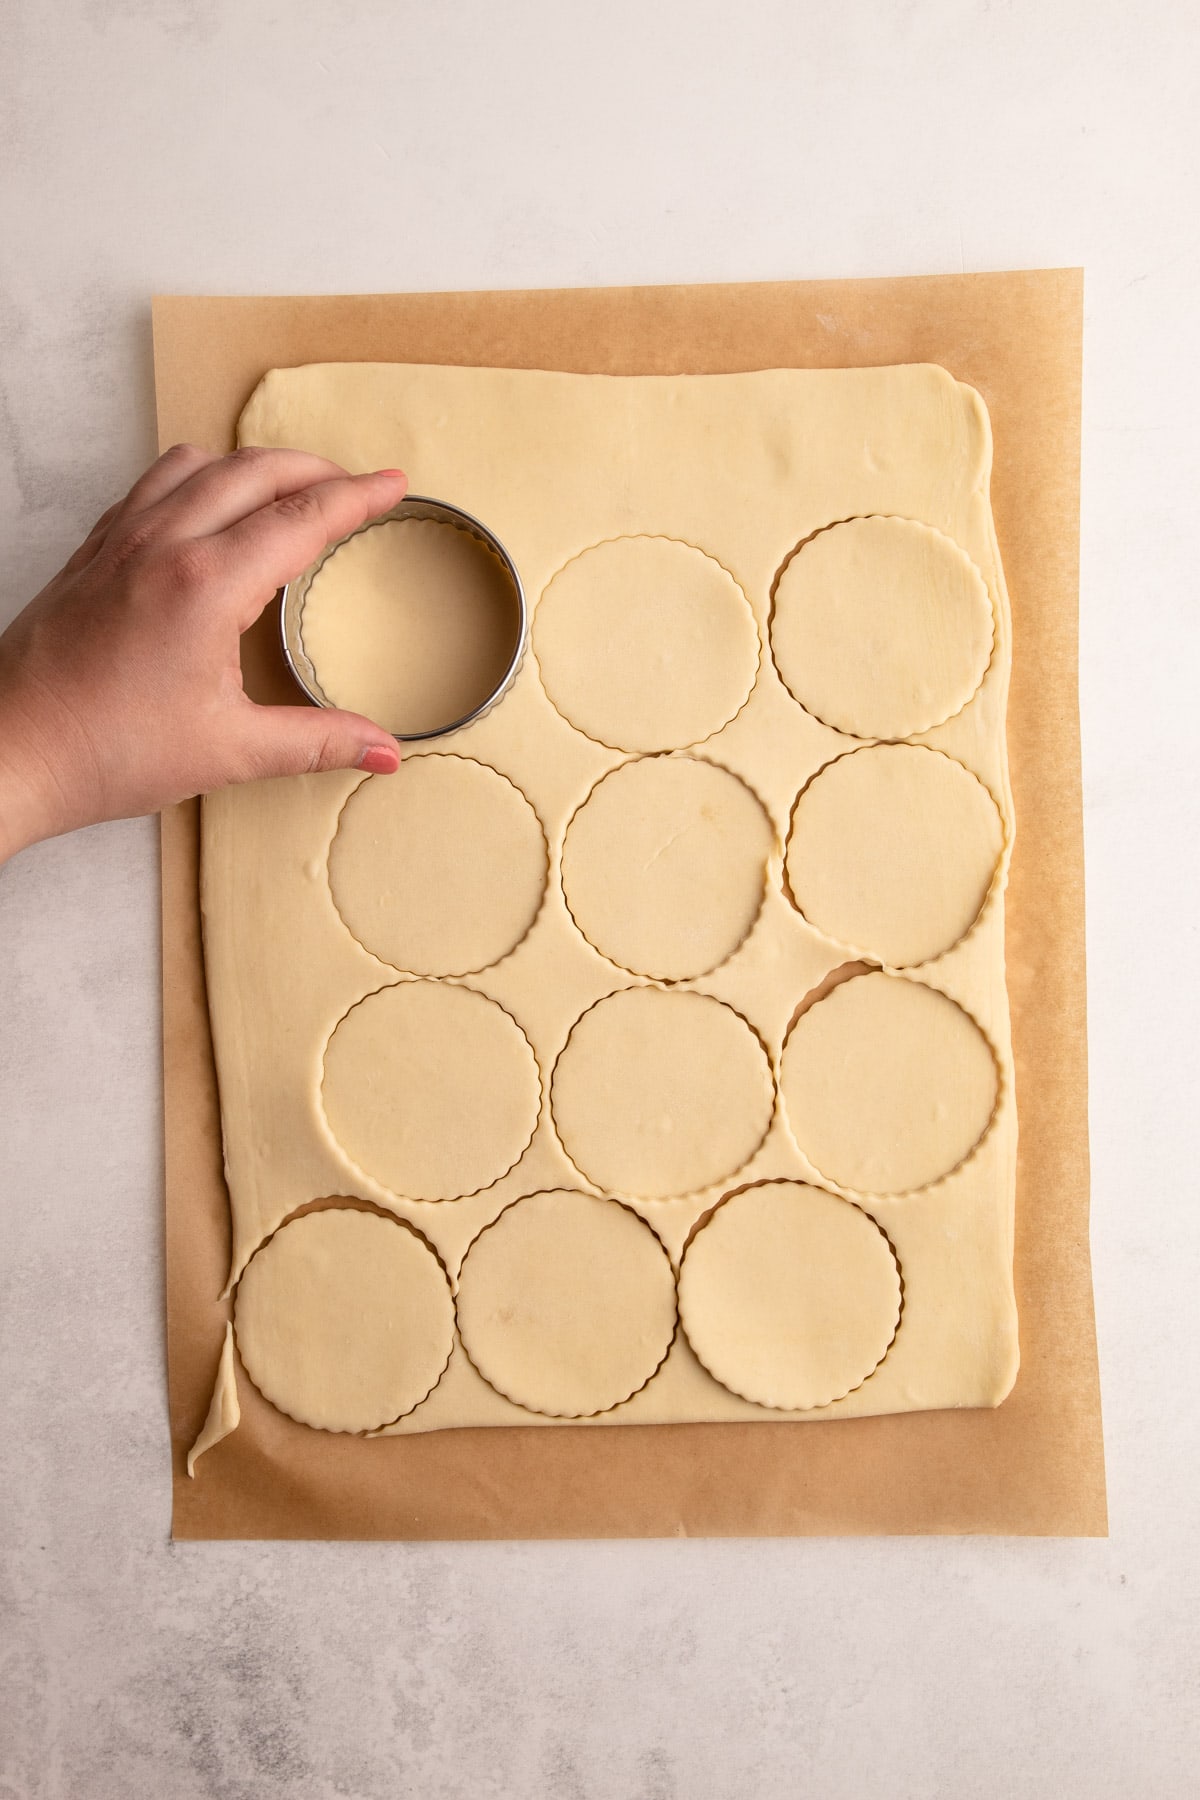
Then, stamp out the tarts. I suggest using a 3" circle cutter, but if you don't have that exact size, something similar will work, though it will yield different quantities depending on the size.
How to Get the Pastry to Puff Up Around the Filling
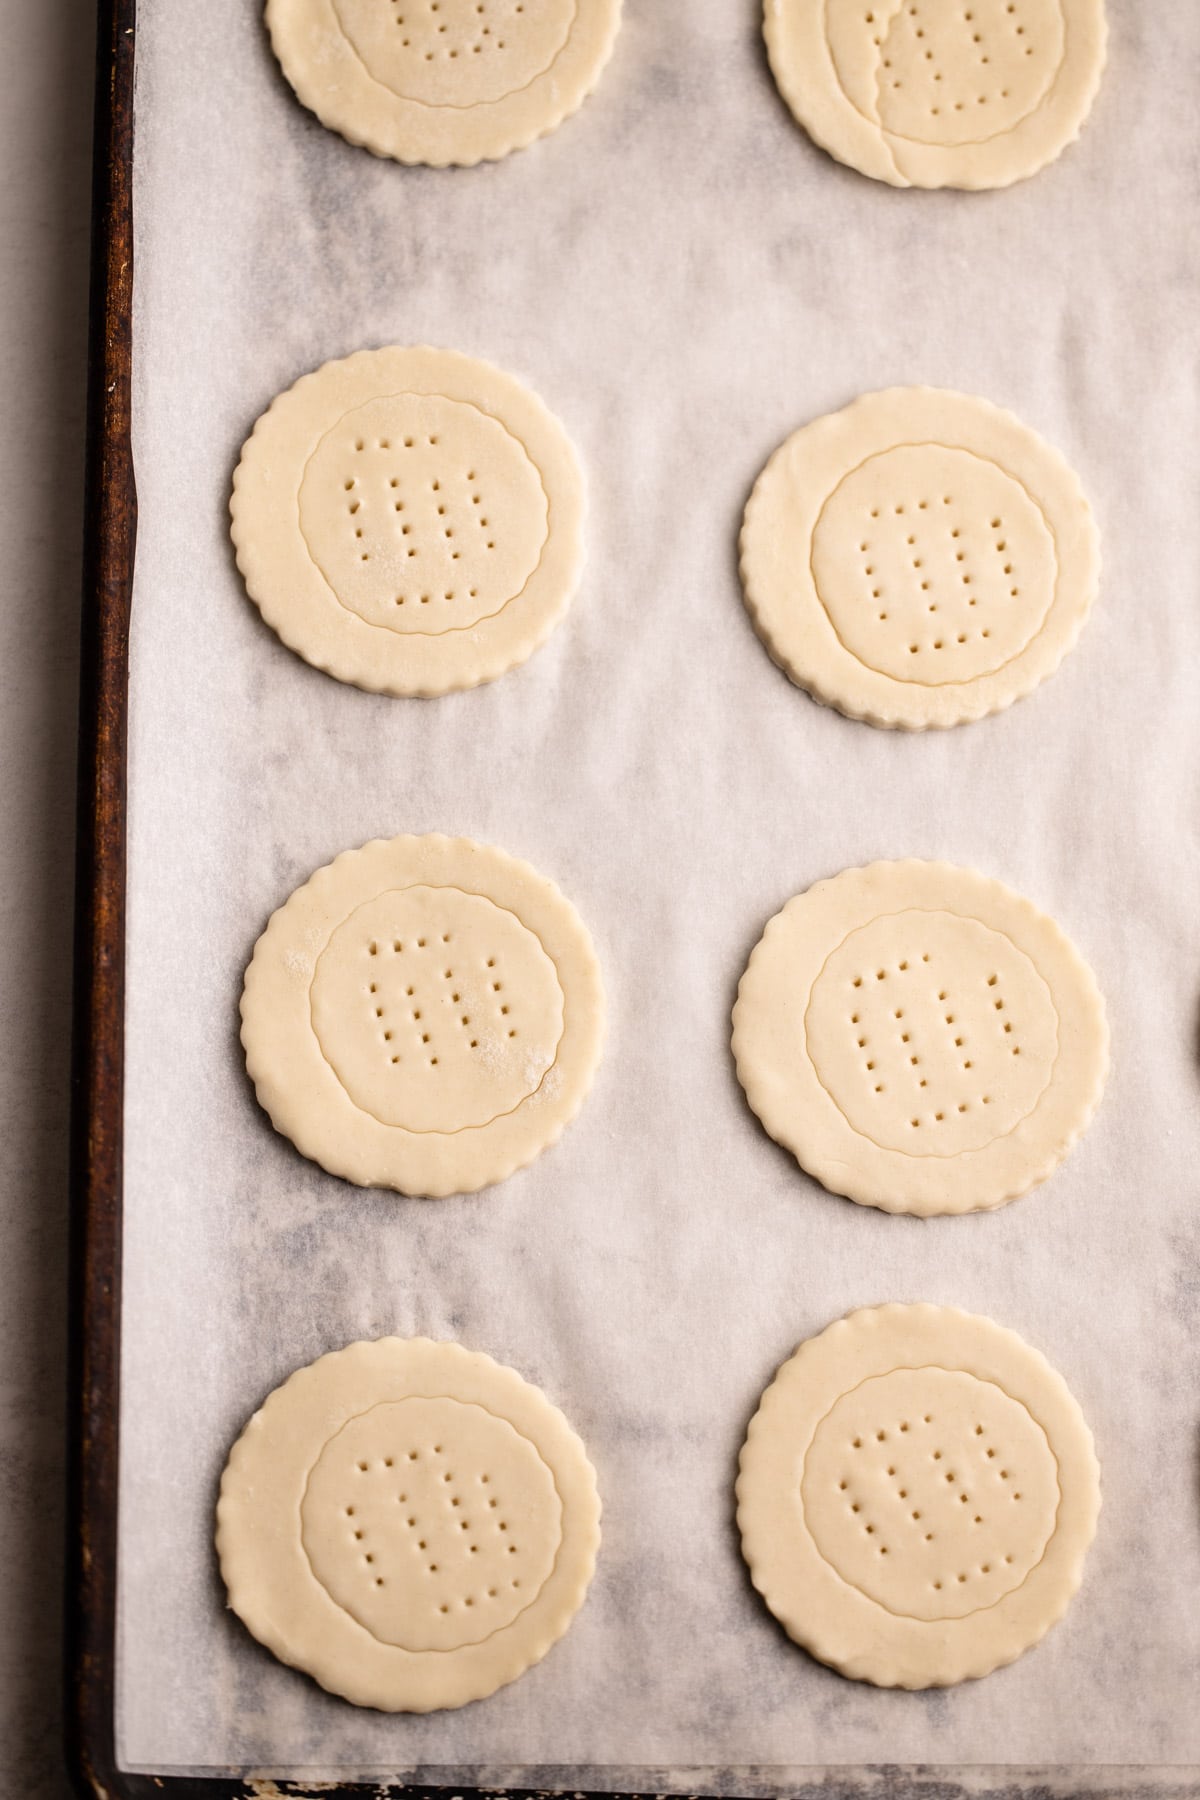
You'll need a smaller circle cutter to "dock" the puff pastry. This will help it puff up around the filling to create a crust. If you don't have a smaller cutter than you could use a knife to draw on the circle in the middle. Please reference the photos for a visual guide of how to dock the crust.
To dock it, press the smaller cutter into the middle of the circle pastry until it makes an indentation. Just be sure not to press it all the way in. Then, use a fork to stamp into the center of pastry to create steam holes. Both of these steps directs the pastry where to puff up.
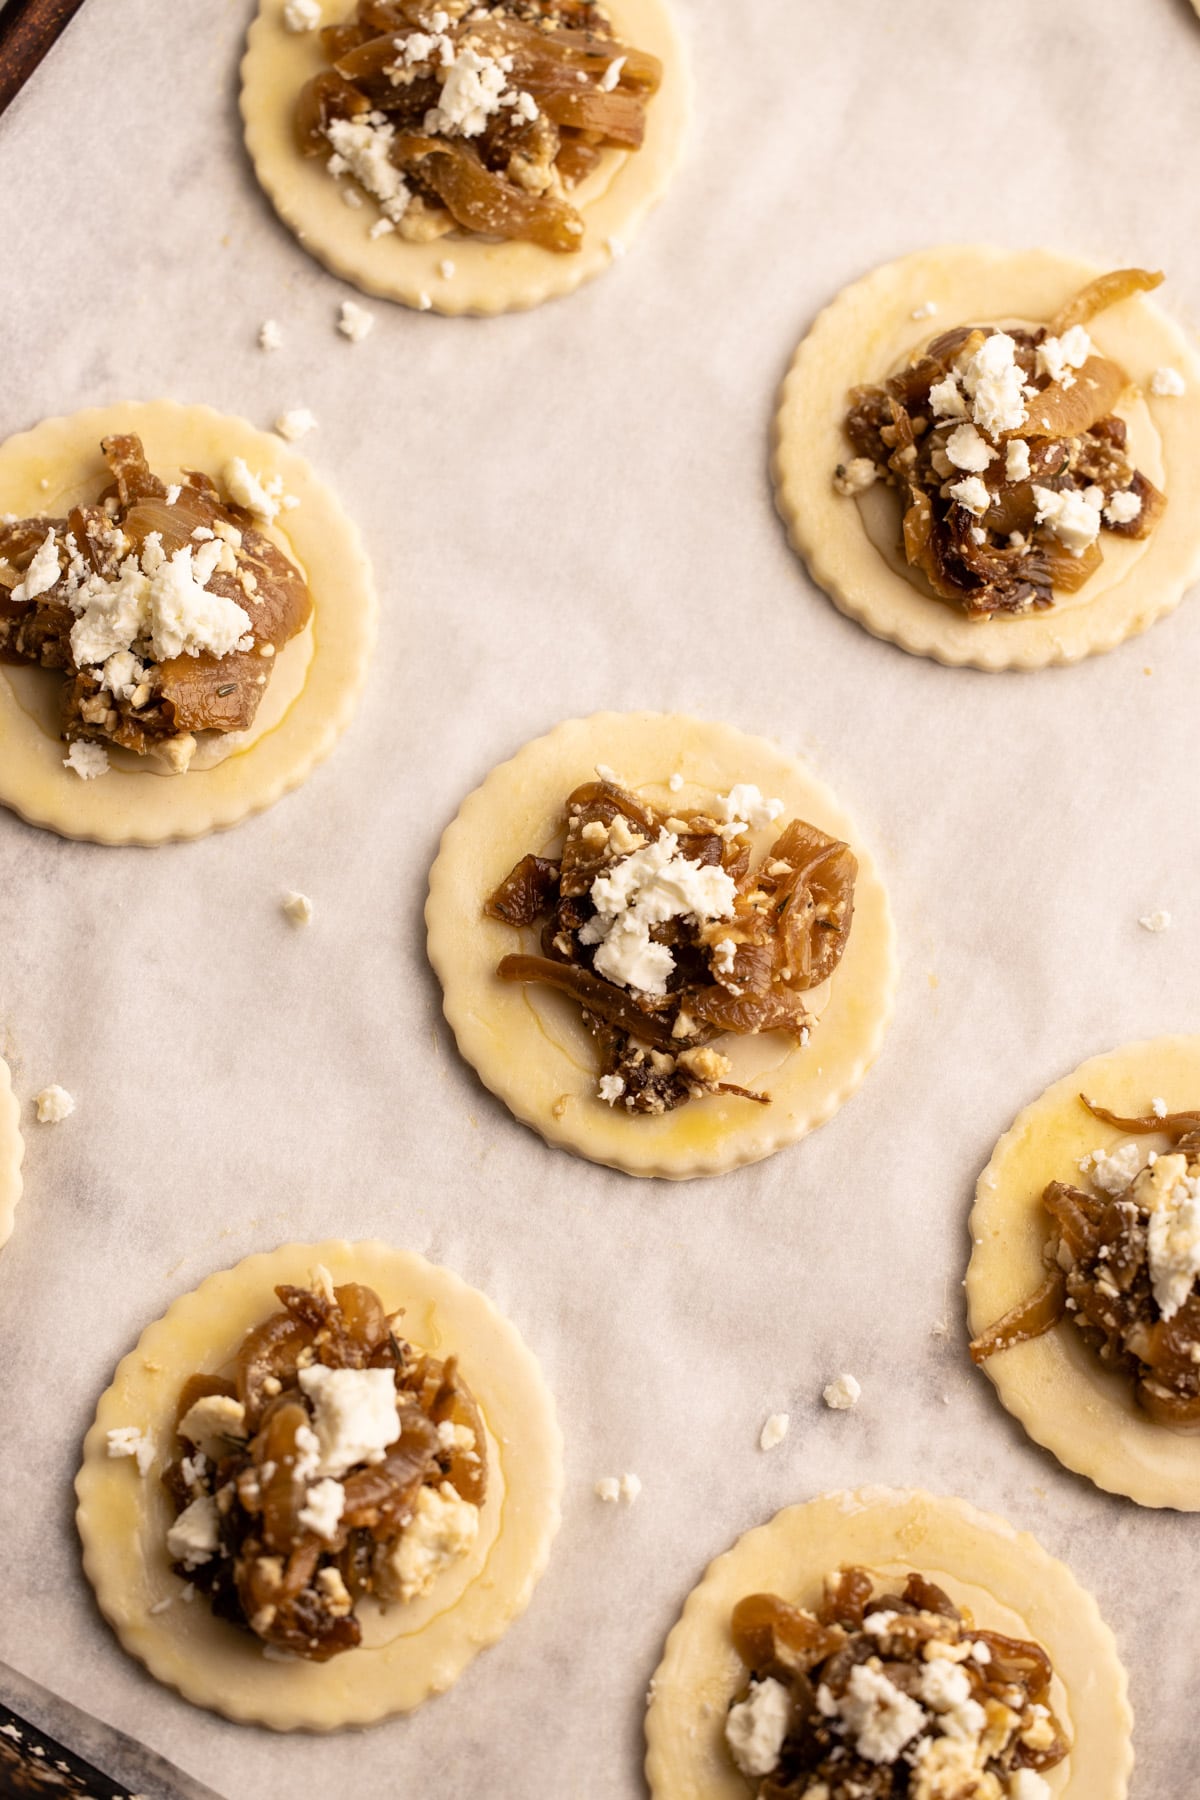
Once the pastry is ready, place it on a sheet pan, brush the edges with egg wash and place the filling directly in the center of the pastry, and bake!
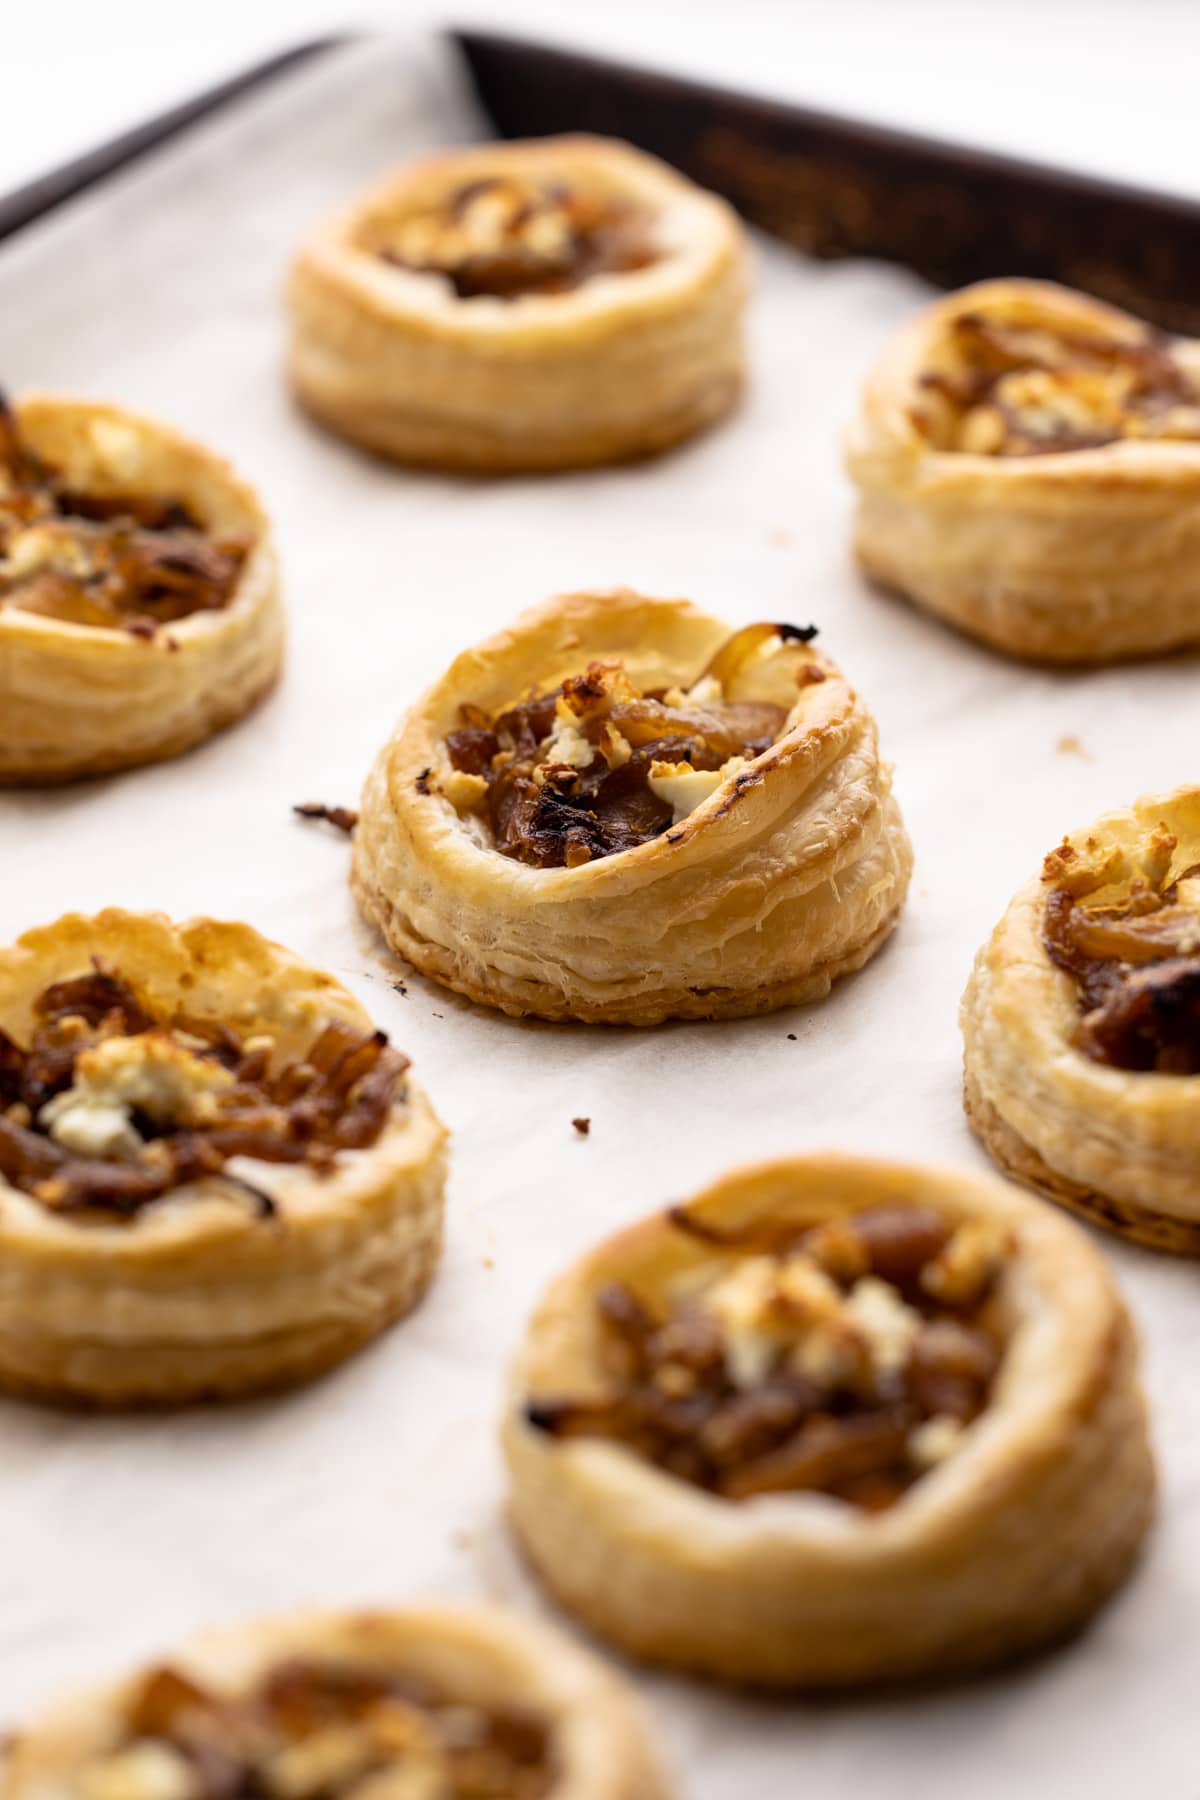
Baking Tips
Want your tarts to bake up nicely? As I mentioned in the above paragraph, you'll want to chill them before baking! This is totally optional, but it's a step I always take before baking puff pastry. Chilling the pastry before baking makes the puff pastry bake up higher.
To bake, preheat the oven to 400ºF and set a rack in the middle position in the oven. This small step of baking it in the middle rack will ensure the puff pastry bakes throughout but doesn't brown too much on the bottom.
The tarts are done when they have puffed up and are lightly golden all over.
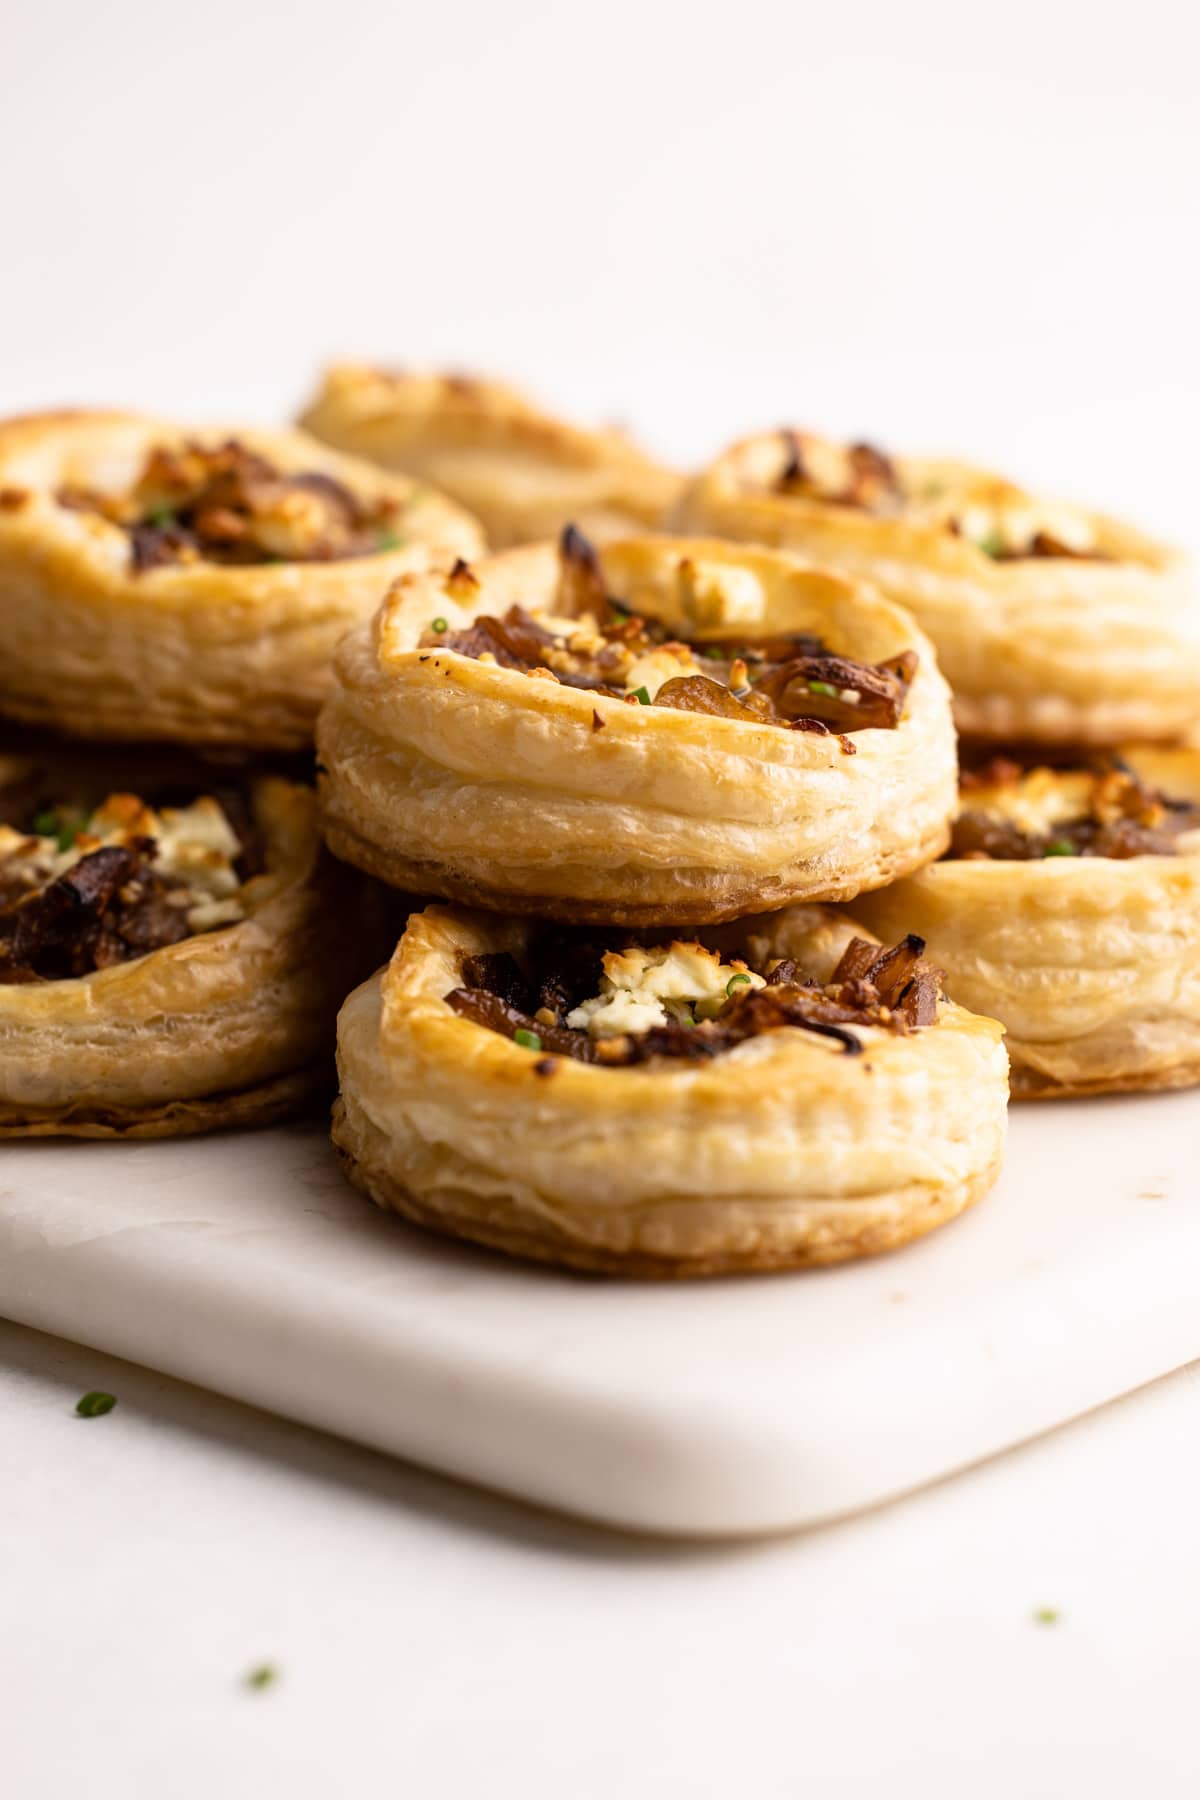
How to Store Them
These tarts are best eaten on the day they are made. However, they can be stored in an air-tight container in the refrigerator for about two days. They will get stale as time goes on. If desired, they can be re-warmed for a few minutes to get that fresh baked taste.
I have frozen them during the development of this recipe, and while they don't taste as best as the fresh ones once defrosted and reheated, they still taste pretty good! I had success toasting them from frozen, and defrosting and then toasting.
More Puff Pastry Recipes
More Caramelized Onion Recipes
- Caramelized Onion Quiche
- How to Make Caramelized Onions
- Butternut Squash, Caramelized Onion and Feta Pie
I am so honored when you make a recipe from my site! If you make these Caramelized Onion Tarts, please leave a comment and a star rating with your experience! If you have any questions about this recipe, feel free to comment here, too!
PrintFull Recipe
Caramelized Onion Tarts
Salty, sweet, crunchy, and so delicious, these Caramelized Onion Tarts made with puff pastry are the perfect celebratory appetizer or snack.
- Prep Time: 00:20
- Cook Time: 01:00
- Total Time: 1 hour 20 minutes
- Yield: 12 Tarts
- Category: Pastry
- Method: Bake
Ingredients
- ½ batch rough puff pastry or classic puff pastry (or store-bought, see notes)
- 3 large onions, sliced thin
- 2 tablespoons olive oil
- ¼ teaspoon salt
- 1 tablespoon balsamic vinegar
- 3 ounces crumbled feta (about ¾ cup)
- egg wash (1 egg whisked with a teaspoon of water)
- 1 small bunch of chives, sliced fine
Instructions
- Prepare rough puff pastry or defrost frozen puff pastry. If you make it, you will only need half a batch. The remaining half can be frozen. Or you can double the filling for this recipe, and make 24 tarts.
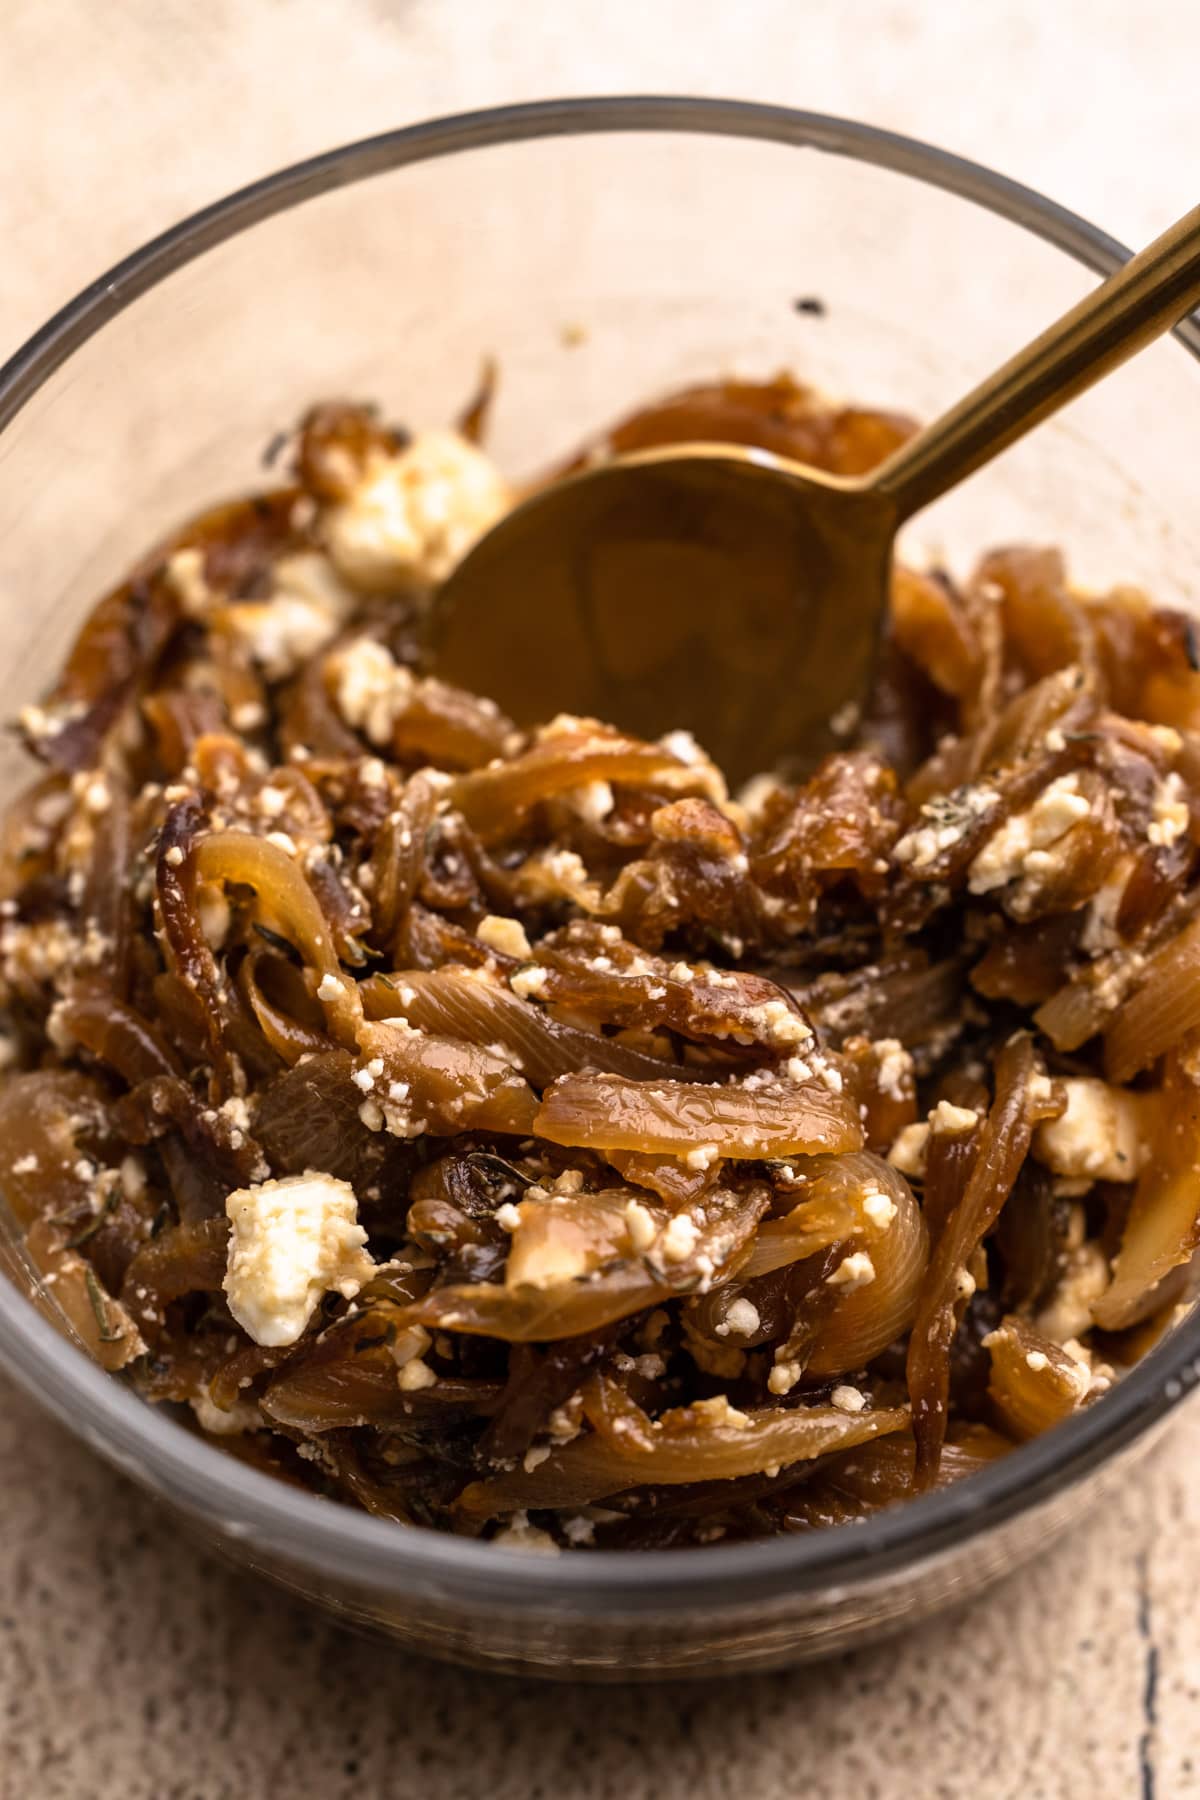
- Make the caramelized onions: Heat oil in a wide, heavy-bottomed pan on medium heat. Add onions and cook for 10 minutes, stirring a few times to make sure all of the onions get contact with the pan and start to soften. Add pinch of salt and stir to combine. Lower the heat to medium low and let onions sit undisturbed for 20 minutes. Continue to cook for 15 more minutes at this point, stirring the pan every 5 minutes for a total of 3 times. Stir in balsamic vinegar and cook for about 5 more minutes. This is the point where the onions have the optimum texture and taste. If you’d like your onions to be completely reduced and jammy, cook for another 10-15 minutes, but this is optional! Let the onions cool to room temperature.
- In a small bowl mix together the onions and feta and set aside.
- Line a 13x18” sheet pan with a piece of parchment and preheat the oven to 400ºF.
- Roll out the puff pastry on a floured surface (remember, you are only using half of the batch if you've made this rough puff recipe) to about ⅛” thickness, or about a 10” by 14” rectangle. Or if you are using store-bought, then simply remove it from the package according to the instructions and lay it out on a lightly floured surface so the puff doesn’t stick to the counter.
- Using a 3-inch circle cutter (or similar), stamp out the pastry. You should be able to stamp out at least 12 circles or more. I don't recommend re-rolling the scraps for this purpose, but you can save them for something else.
- Now dock the pastry: Using a 2” cutter (or similar) make an indentation in the center of the circle of pastry, but make sure not to press all the way through. Repeat with all of the pastry. And finally, take a fork and dock the middle of the pastry to prevent the dough from rising too much during baking.
- Place the pastry on the sheet pan evenly spaced apart. Brush the edges with an egg wash.
- Place a heaping tablespoon of onion and feta mixture in the center circle.
- Bake on the middle rack for 15-18 minutes, or until the pastry is puffed and lightly golden.
- Remove the tarts from the oven, and let them cool slightly before transferring to a cooling rack.
- Sprinkle with sliced chives and serve warm or room temperature.
Notes
As a baking site, I'm always going to say homemade puff pastry is better than store-bought. But it's also ok to use store-bought too! Different brands come in various quantities, so you may have more or fewer tarts depending on your brand and your size cutter. But the spirit of the recipe is the same no matter what.
Leftover caramelized onions will keep for a few days in the refrigerator or a few months in the freezer.
The size of the tarts can vary, depending on the quantities you wish to bake up. If you want more tarts, you can use a smaller cutter. During testing, I made as few as 12, listed here, and as many as 24 in a single recipe by using a smaller cutter. The baking time will vary slightly, though not by a lot.
Have a question or looking for tips? The text written above the recipe is always a great first place to start! These Caramelized Onion Tarts were developed with love, and I always include loads of explanations, tips, step-by-step photos and technical advice shared before the recipe.
These tarts are best eaten on the day they are made. However, they can be stored in an air-tight container in the refrigerator for about two days. They will get stale as time goes on. If desired, they can be re-warmed for a few minutes to get that fresh baked taste. I have frozen them during the development of this recipe, and while they don't taste as best as fresh once defrosted and reheated, they still tasted pretty good! I had success toasting them from frozen, defrosting and then toasting.
The total time to make this recipe depends on whether or not you make your own puff pastry, so keep that in mind.
Some of the links on this page may be affiliate links. Everyday Pie is a participant in the Amazon Associates Program. As an Amazon Associate I earn from qualifying purchases, at no extra cost to you.


Leave a Reply