
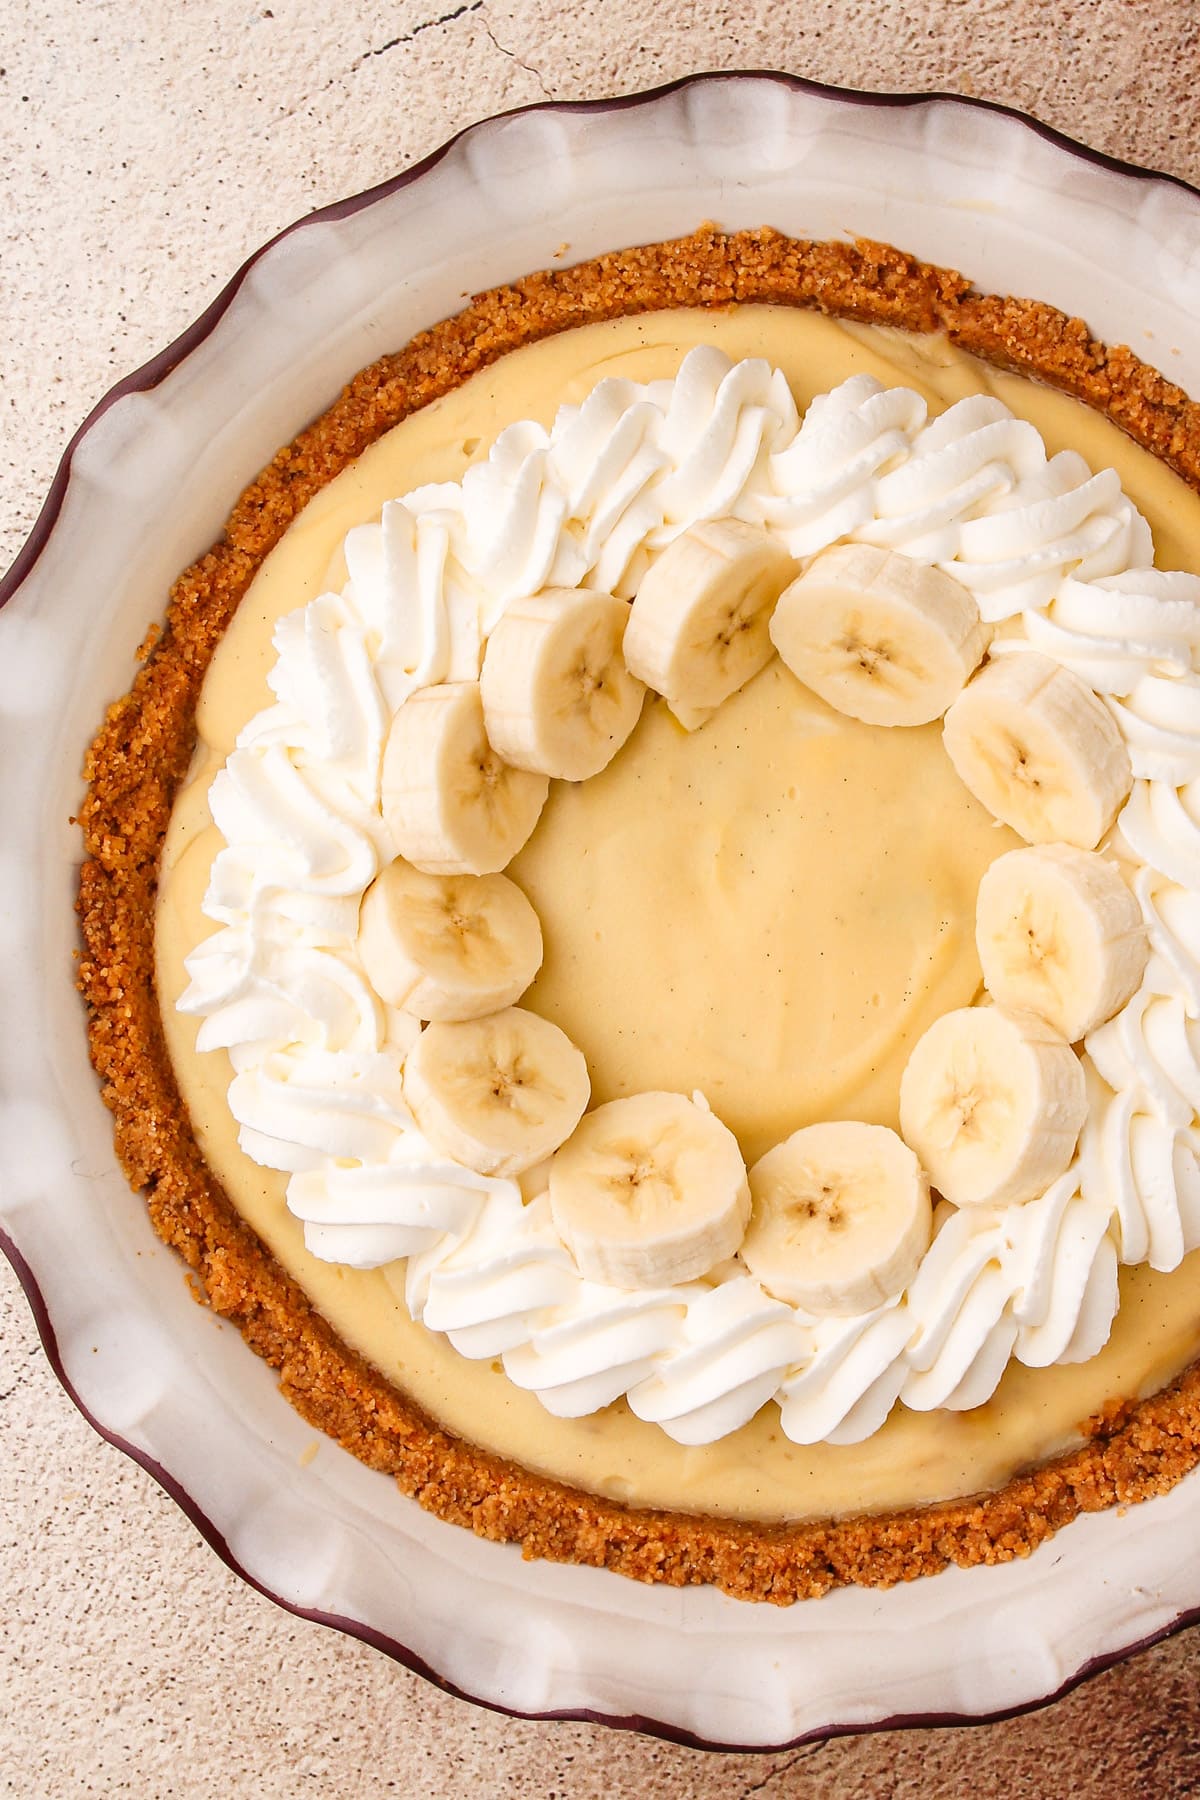
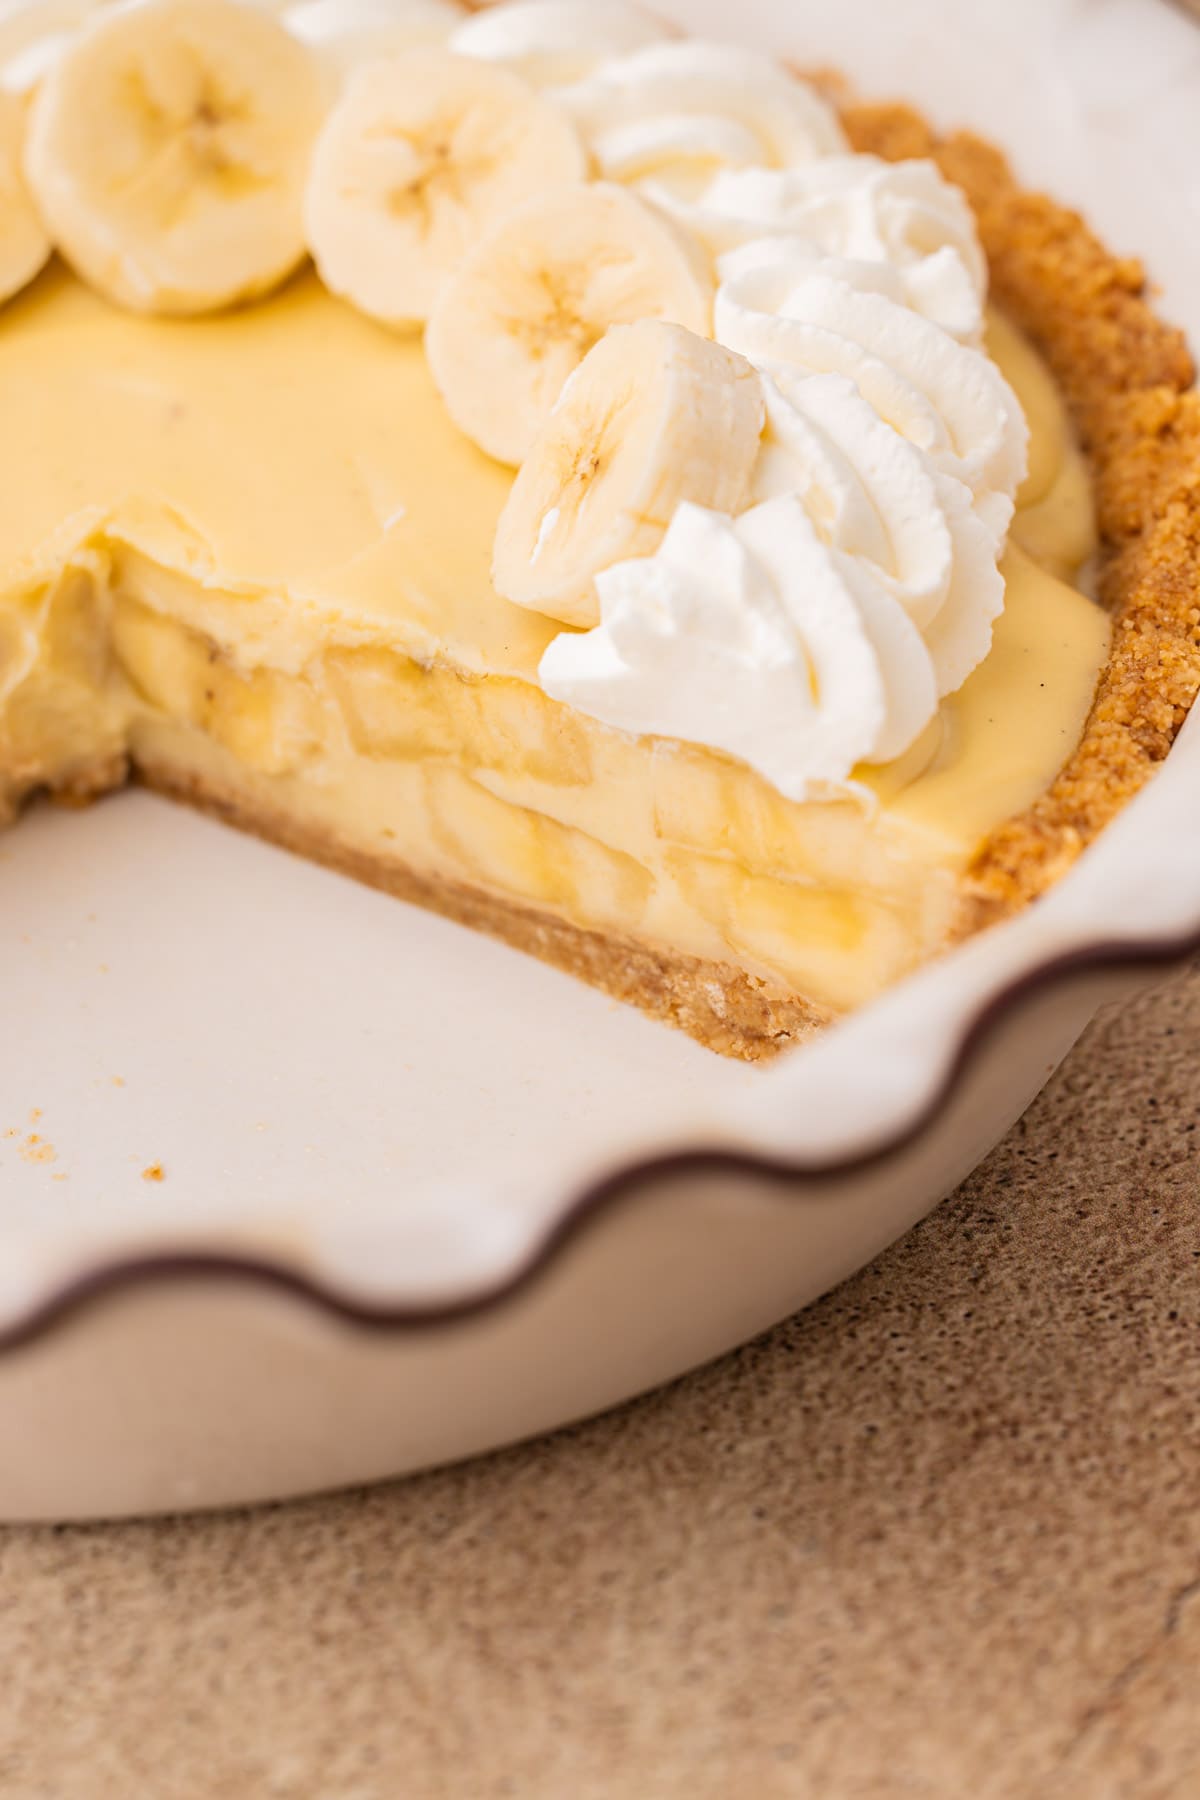
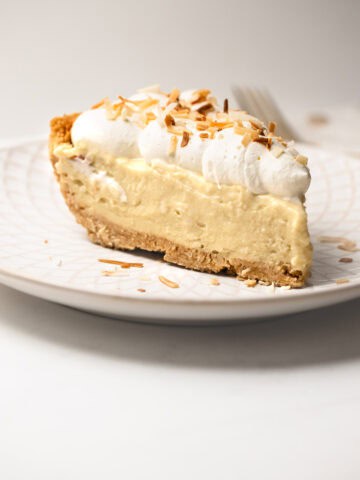
A perfect Banana Cream Pie has homemade vanilla pudding studded with fresh bananas, topped with silky whipped cream and tucked inside a crunchy and sweet graham cracker crust. This classic pie is a must-make.
Want to save this recipe?
Enter your email & I'll send it to your inbox. Plus, get weekly updates from me!
Everyone needs to know how to make a Banana Cream Pie, because everyone deserves to eat a Banana Cream Pie. It's the epitome of comfort food: between the contrasting textures (crunchy and creamy) and the flavors (nostalgic vanilla, sweet banana, and a hint of brown sugar and honey from the grahams), this pie is just what is called for when you want to be wrapped up in the security of something delicious.
And truly, it's not that hard to make, either. Yes, there are three components to put together--the crust, the pudding and the whipped cream--but the end result is worth that little bit of extra effort!
I'm all for shortcuts (like...ahem, shortcut croissants or rough puff pastry) when they make sense, but not here. Homemade pudding is in a league of its own compared to anything from a box. This pudding is incredibly silky, generously speckled with fresh bananas, and topped with mounds of whipped cream and more fresh bananas – the result is nothing short of amazing.
So, let's get to making it, shall we? The article below is jam-packed full of useful information. You can jump around using the menu below, or skip to the end of the article for the full recipe.
Jump to:
Ingredients Needed
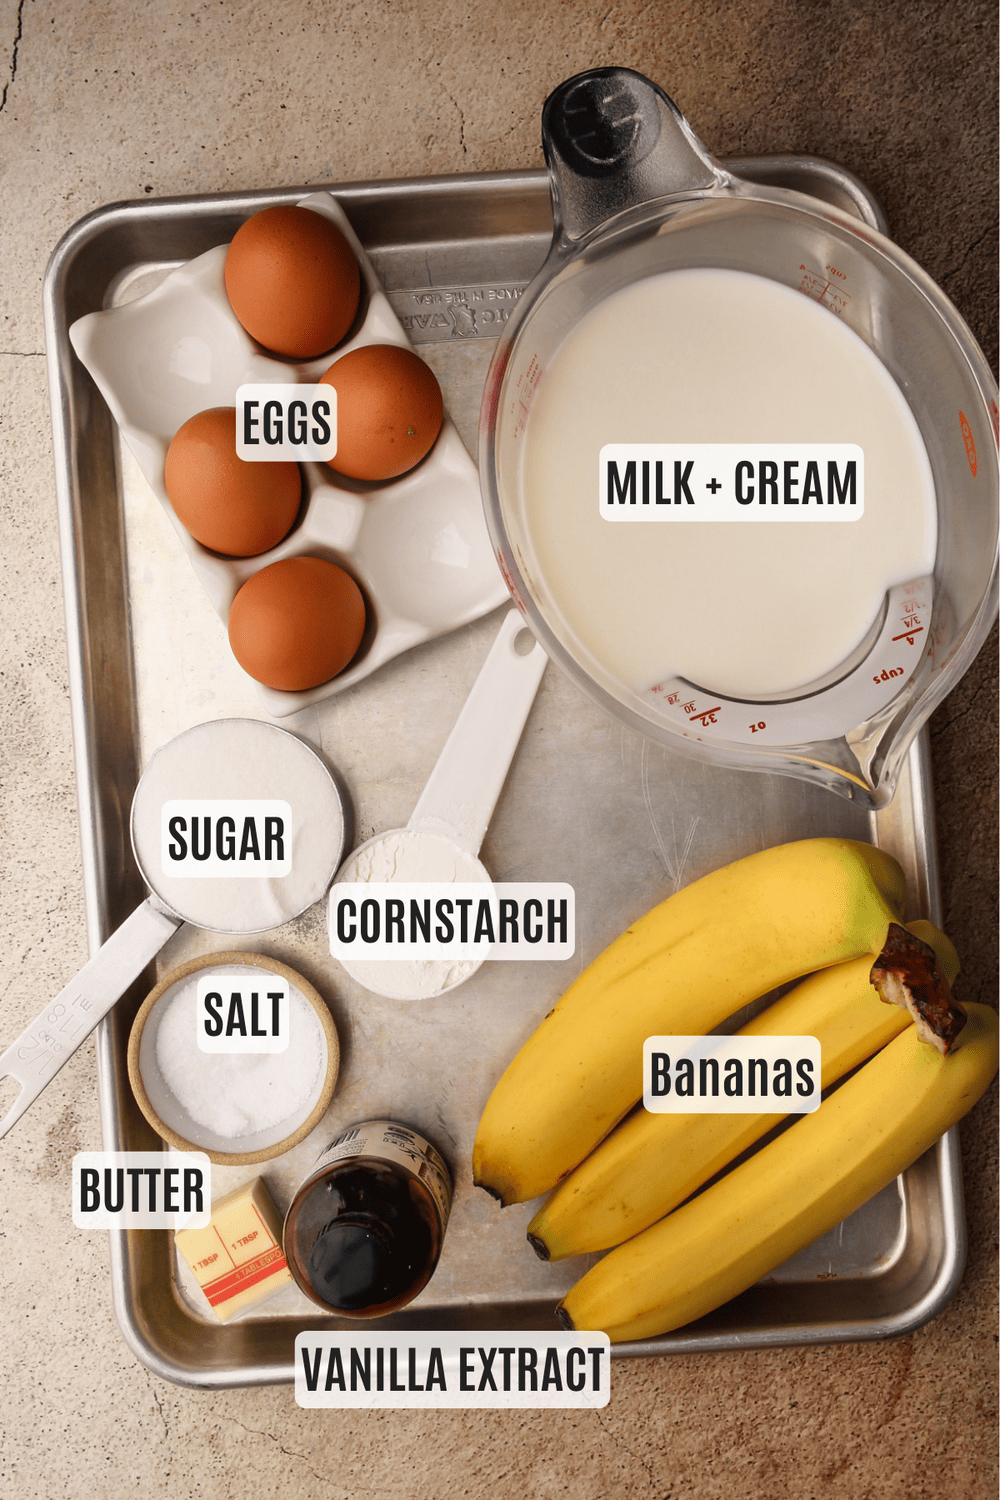
Here is an overview of the ingredients needed for this recipe. The full recipe is listed below in greater detail.
- bananas (use firm but ripe, yellow bananas)
- sugar
- cornstarch
- kosher salt
- eggs
- whole milk
- vanilla extract
- unsalted butter
- crumb pie crust (see more on this below!)
- whipped cream
Pie Crust Options
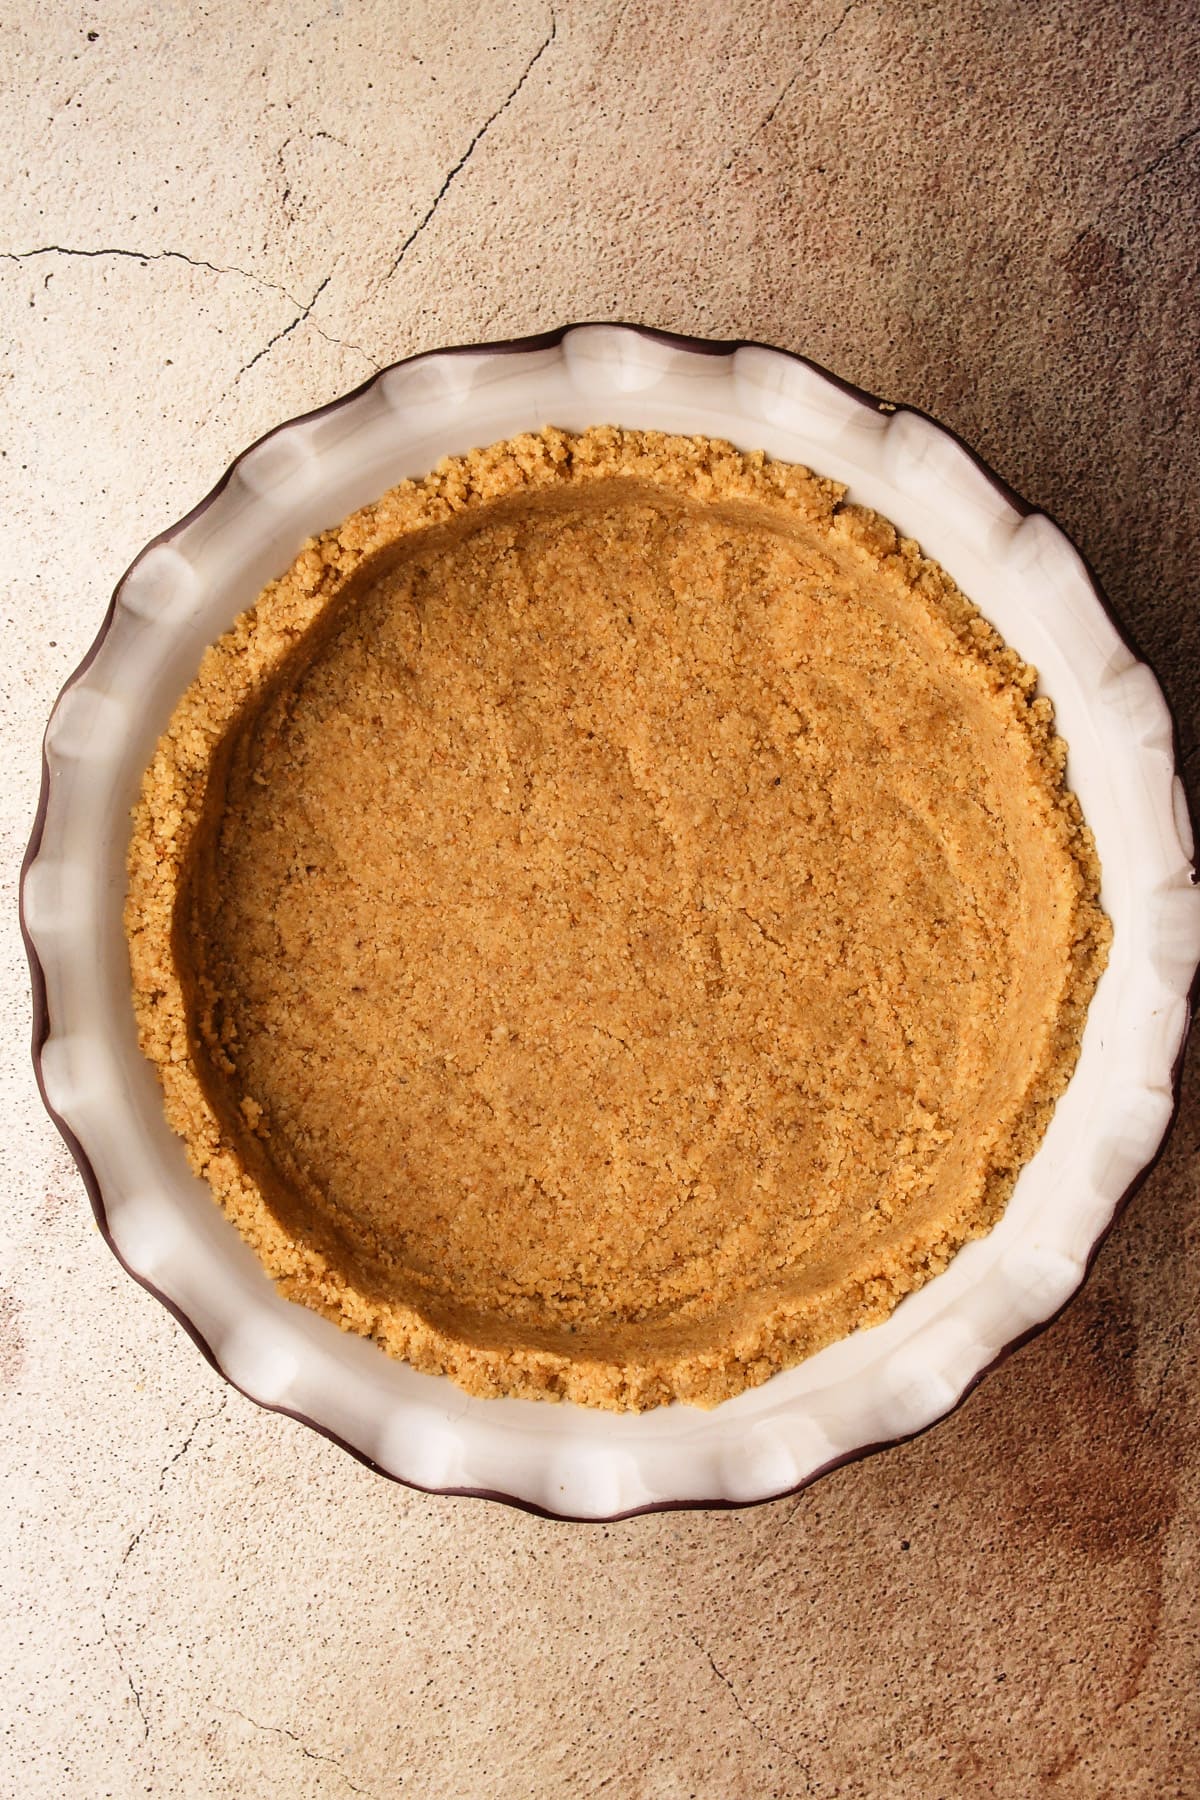
There are a few crust options for this pie. My first choice for this is a Graham Cracker Crumb Crust. It's classic, simple to make, and tastes great with this cream pie filling.
Another crumb crust option is a Vanilla Wafer and Nut Crumb Crust. It's so delicious and makes this pie taste like a cross between banana cream pie and banana pudding.
A Pâte Sucrée is a just sweet pie crust that is very stable and is also a great choice for this pie. If you are looking for a really neat slice, choose this one.
Need this to be gluten-free? Make this basic gluten-free butter pie crust. Just be sure to fully blind-bake the crust before adding the filling.
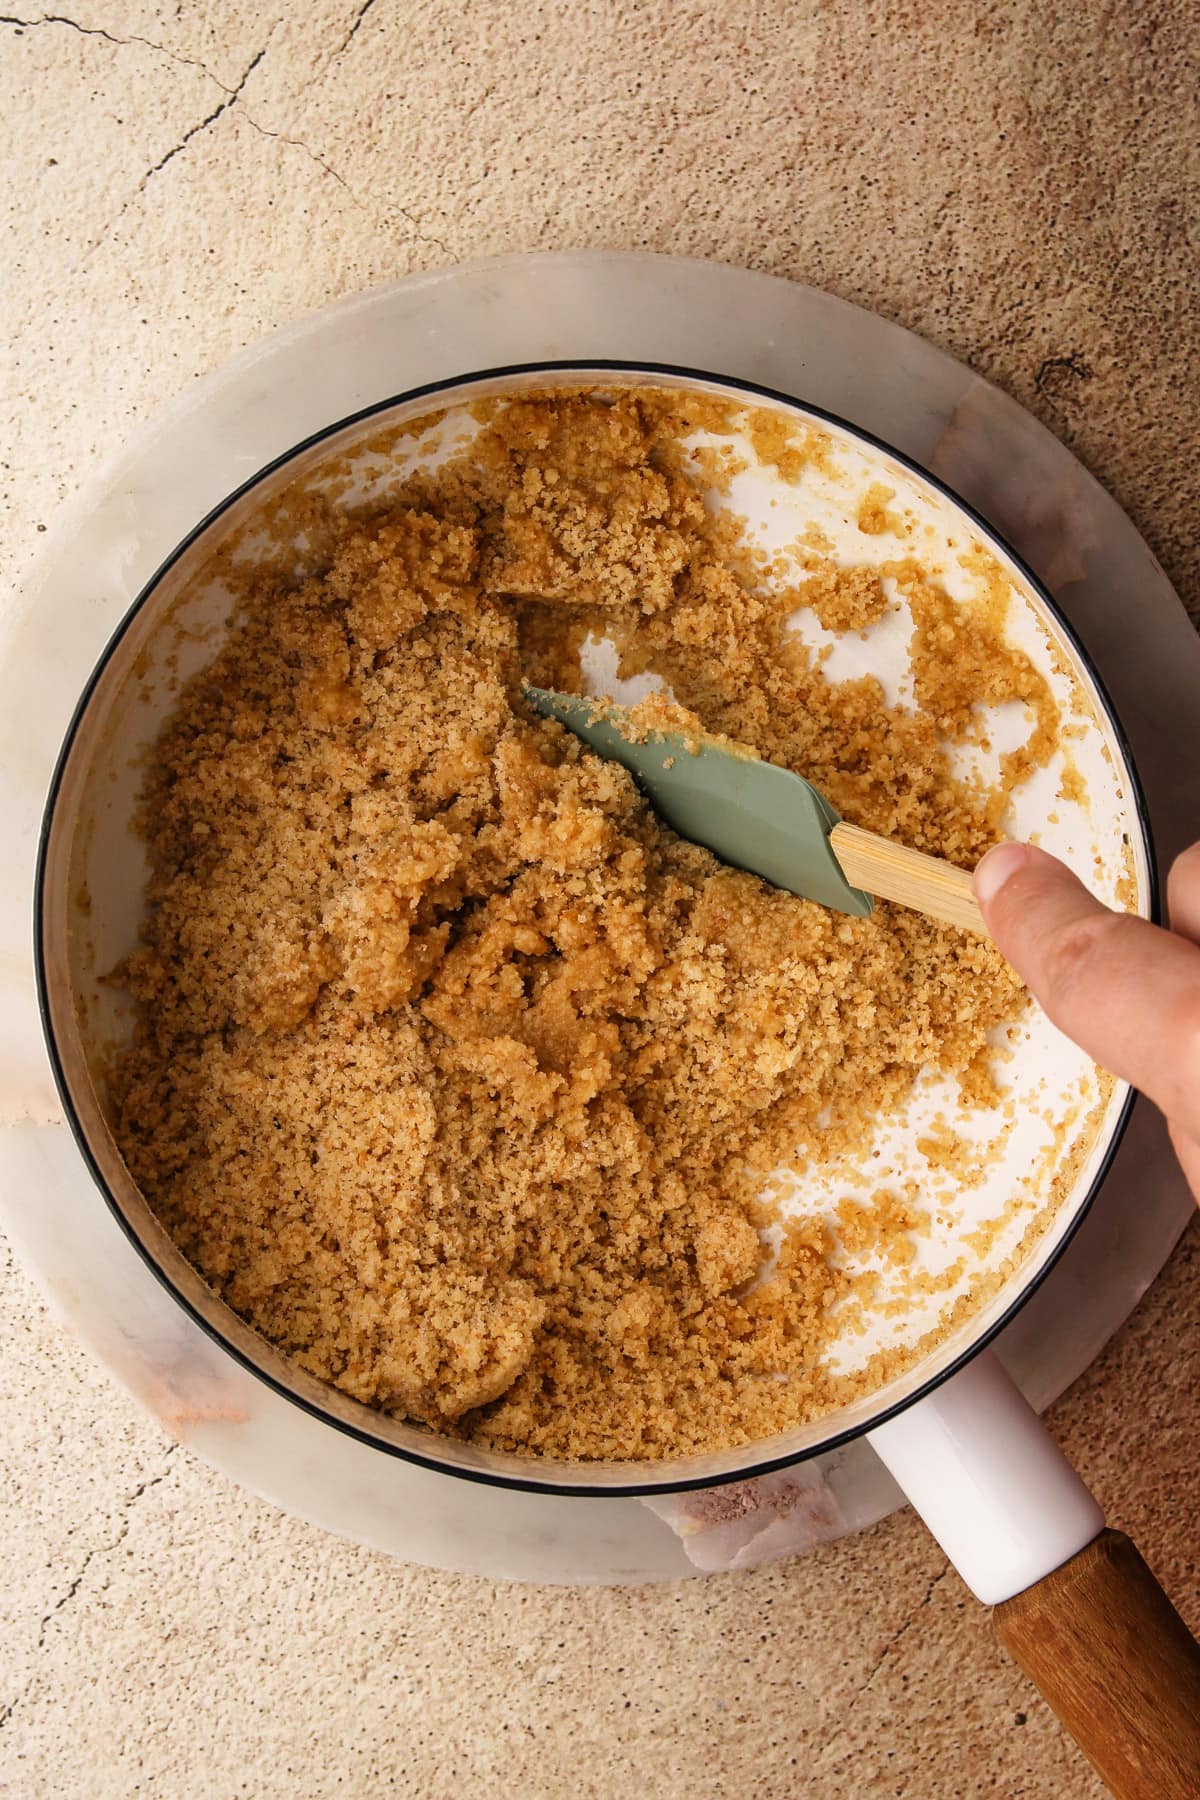
Step 1: The crumb crust is mixed together (either right in the pot with melted butter or a bowl).
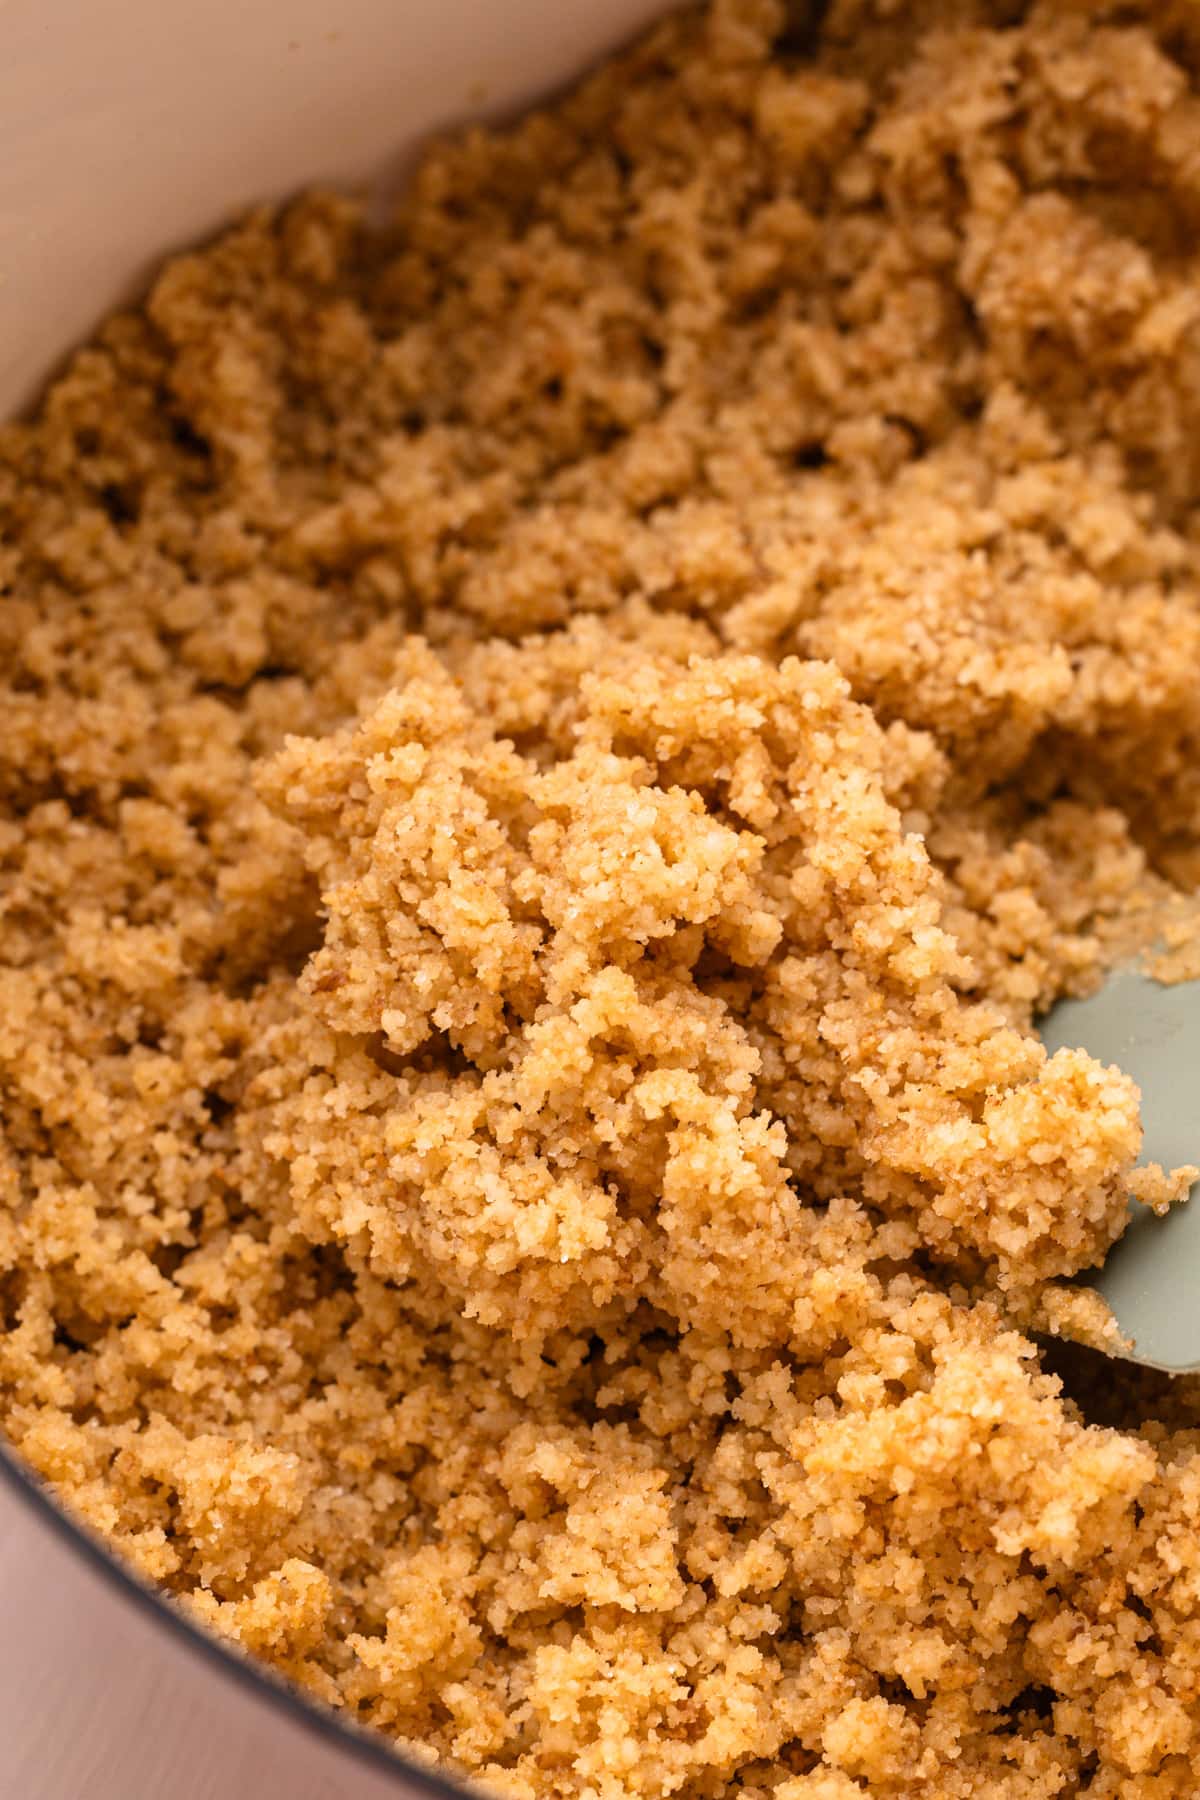
The mixture should resemble "wet sand." If it's too dry, add more butter, and if it's too wet, add more cookie crumbs.
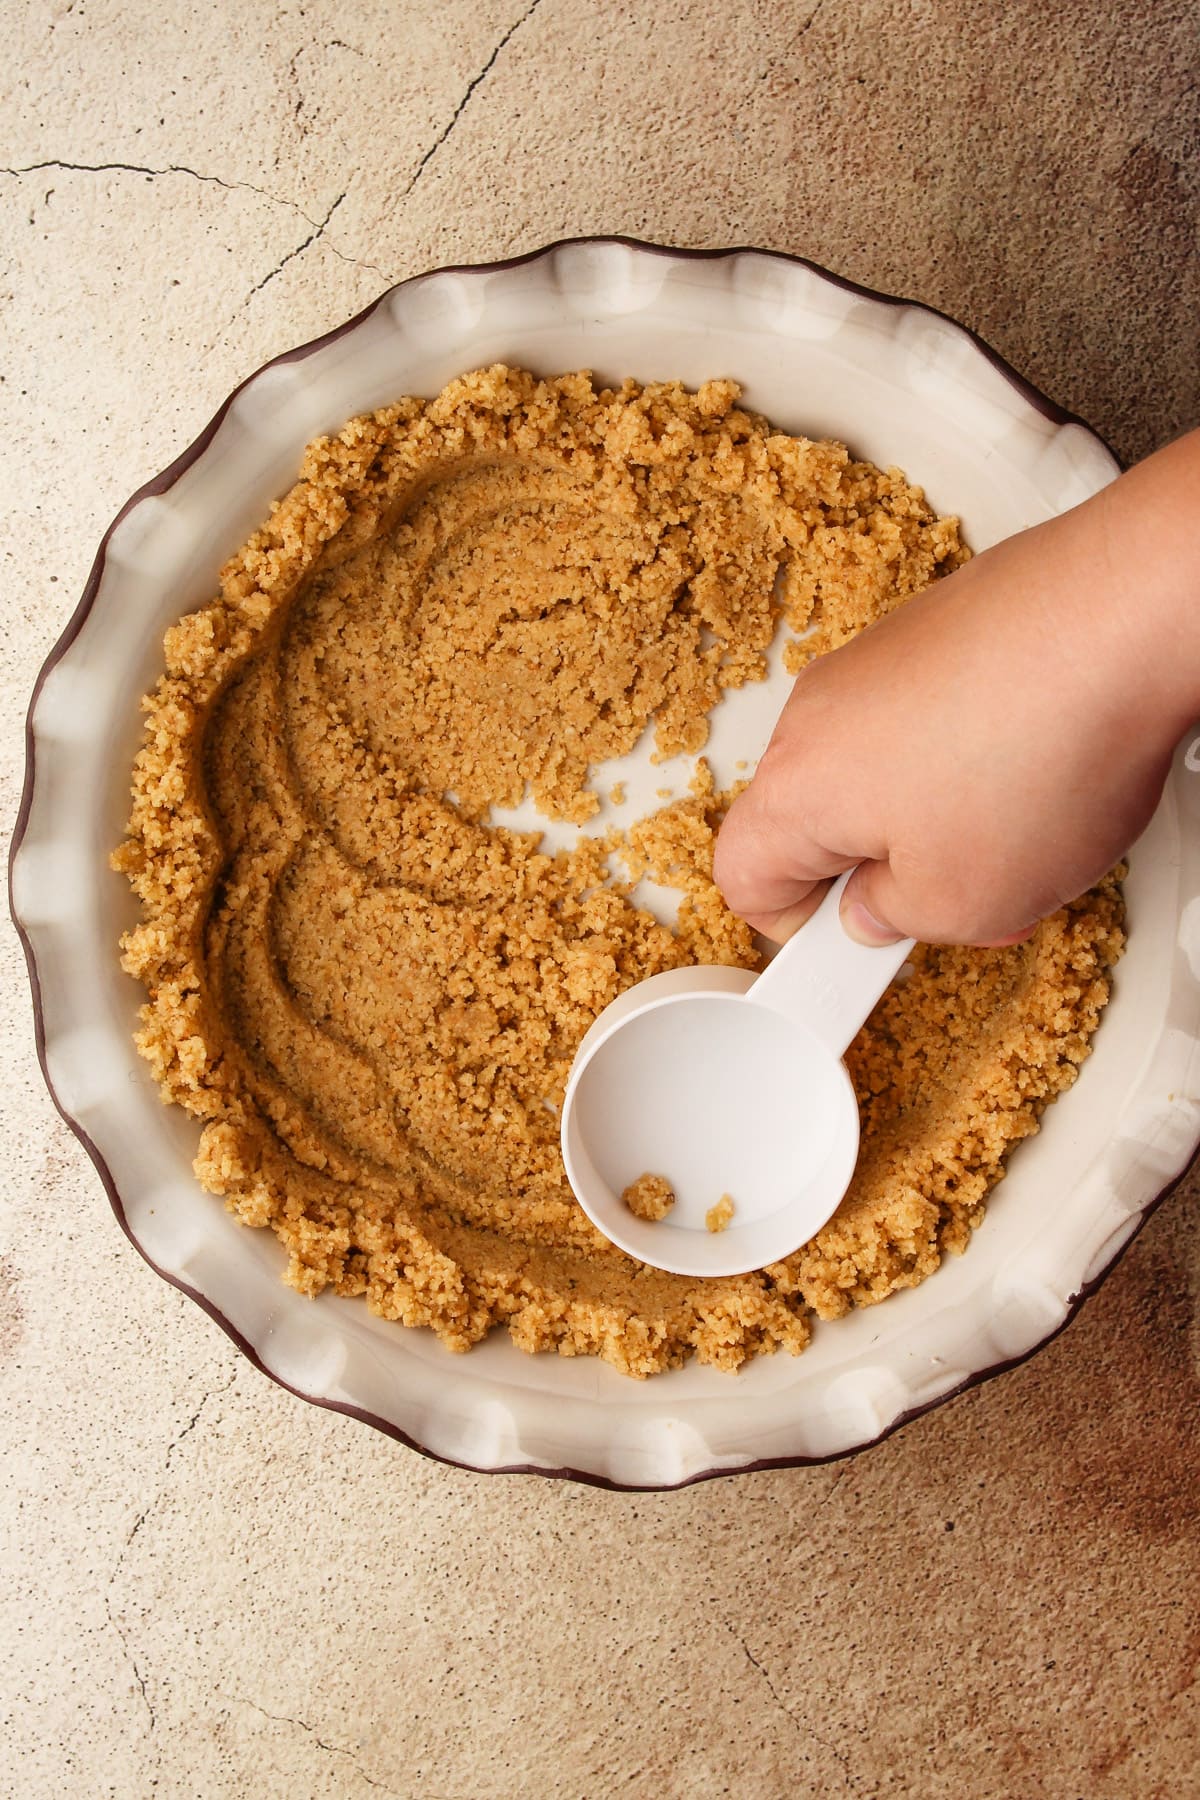
Step 2: Press the crumb mixture up the sides of pan, then work the crumbs down towards the middle.
The crust can be baked for more stability and a toasty flavor, or frozen for a no-bake option.
Crumb Crust Troubleshooting Tips
Not all store-bought graham crackers (or any other cookies you might use) are created equal. For that reason, it's important to pay attention to the consistency of your crumb crust mix before starting to form it. It should be the consistency of wet sand.
If your crumb crust is extremely dry, you can add more melted butter, 1 tablespoon at a time, to the crumbs until they are evenly moistened. Alternatively, if your mixture is too wet and it is hard to work with, add more cookie crumbs until it is pliable.
The mixture should easily hold together when squeezed in your palm of your hand, without an excess amount of butter seeping out.
How to Make the Vanilla Pudding
Homemade vanilla pudding is the backbone of this recipe! And, if you’ve never made pudding from scratch before, I'm here to tell you that it is really simple and so delicious. The pudding is made all in one pot and doesn’t require the hassle of tempering of the eggs.
Though many similar recipes suggest tempering, it isn't necessary here, because the eggs are gently heated alongside all the other ingredients in the pot, preventing them from scrambling. In addition, the inclusion of cornstarch not only thickens the pudding but also adds an extra layer of stability to the egg mixture.
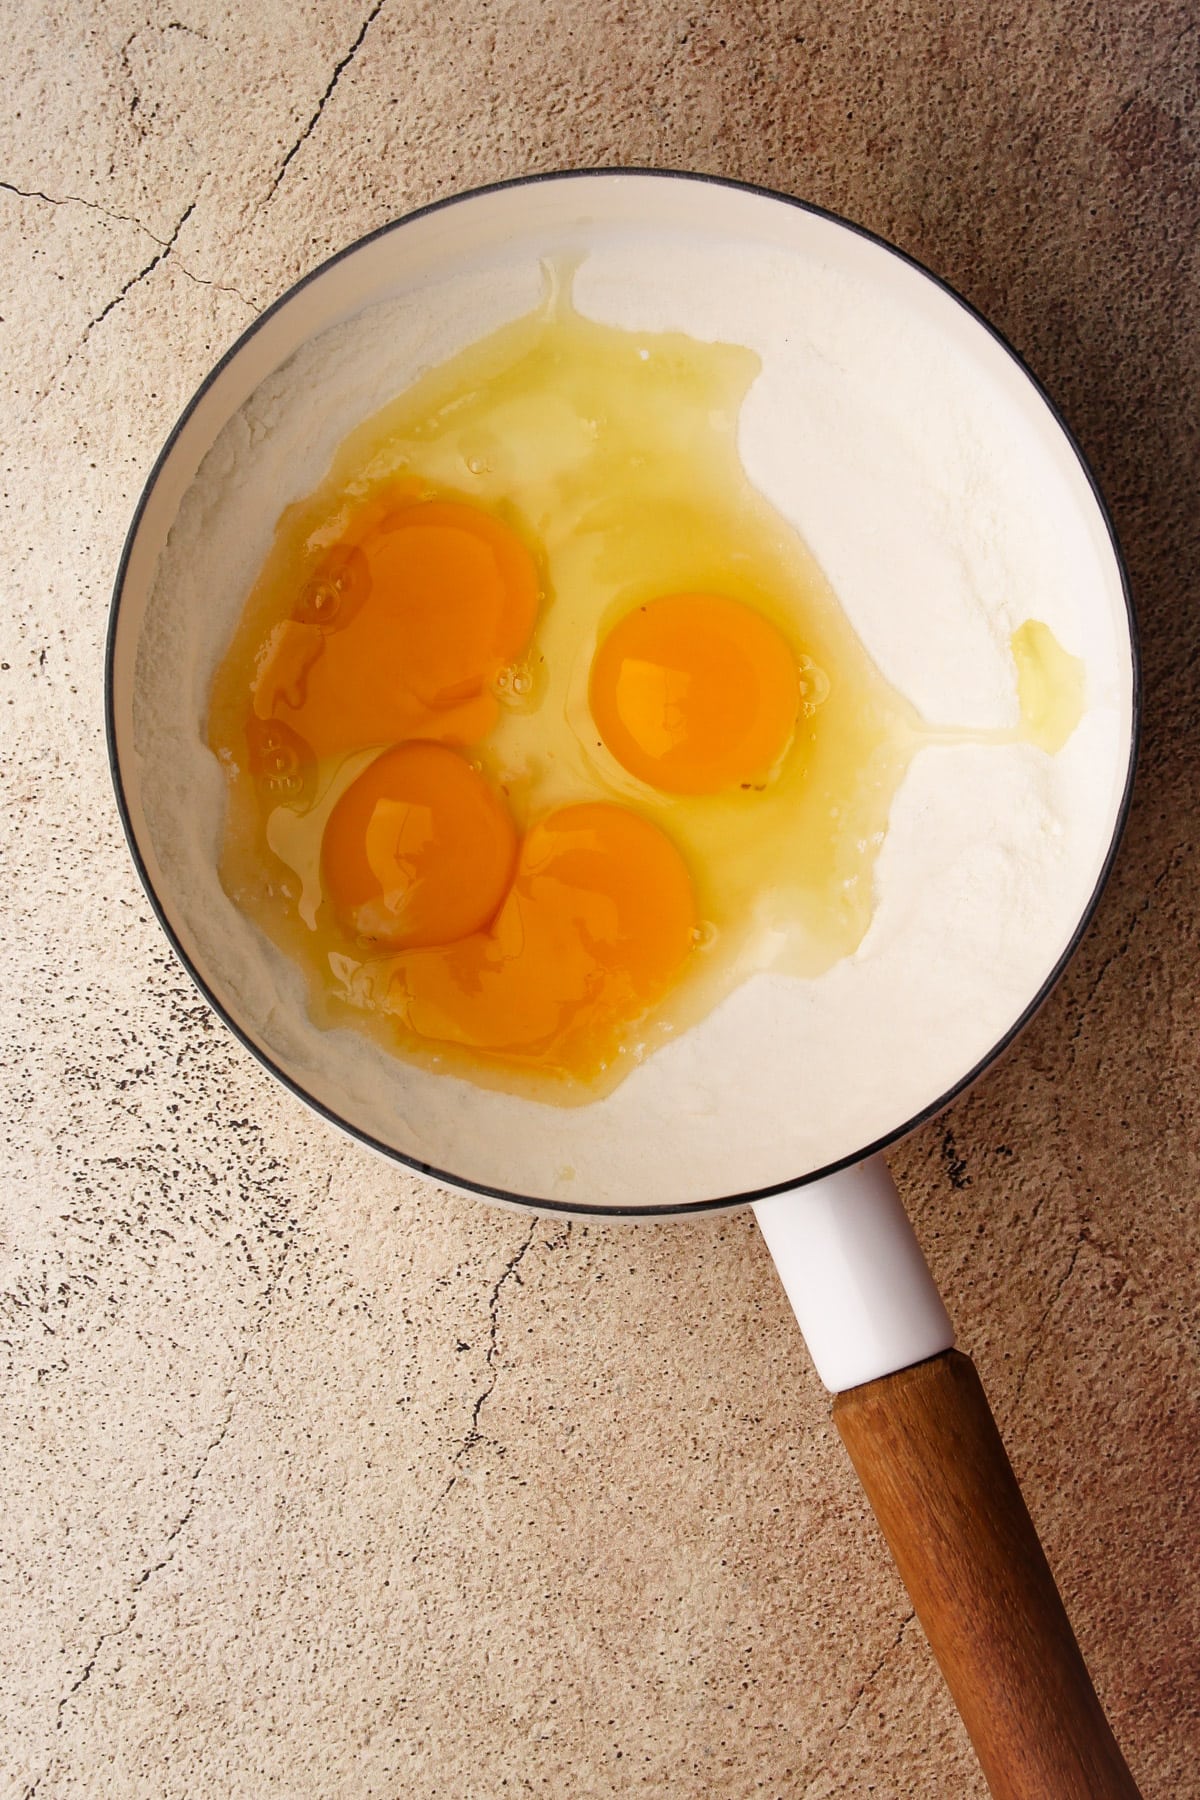
Step 1: Whisk together the dry ingredients and eggs right in the pot.
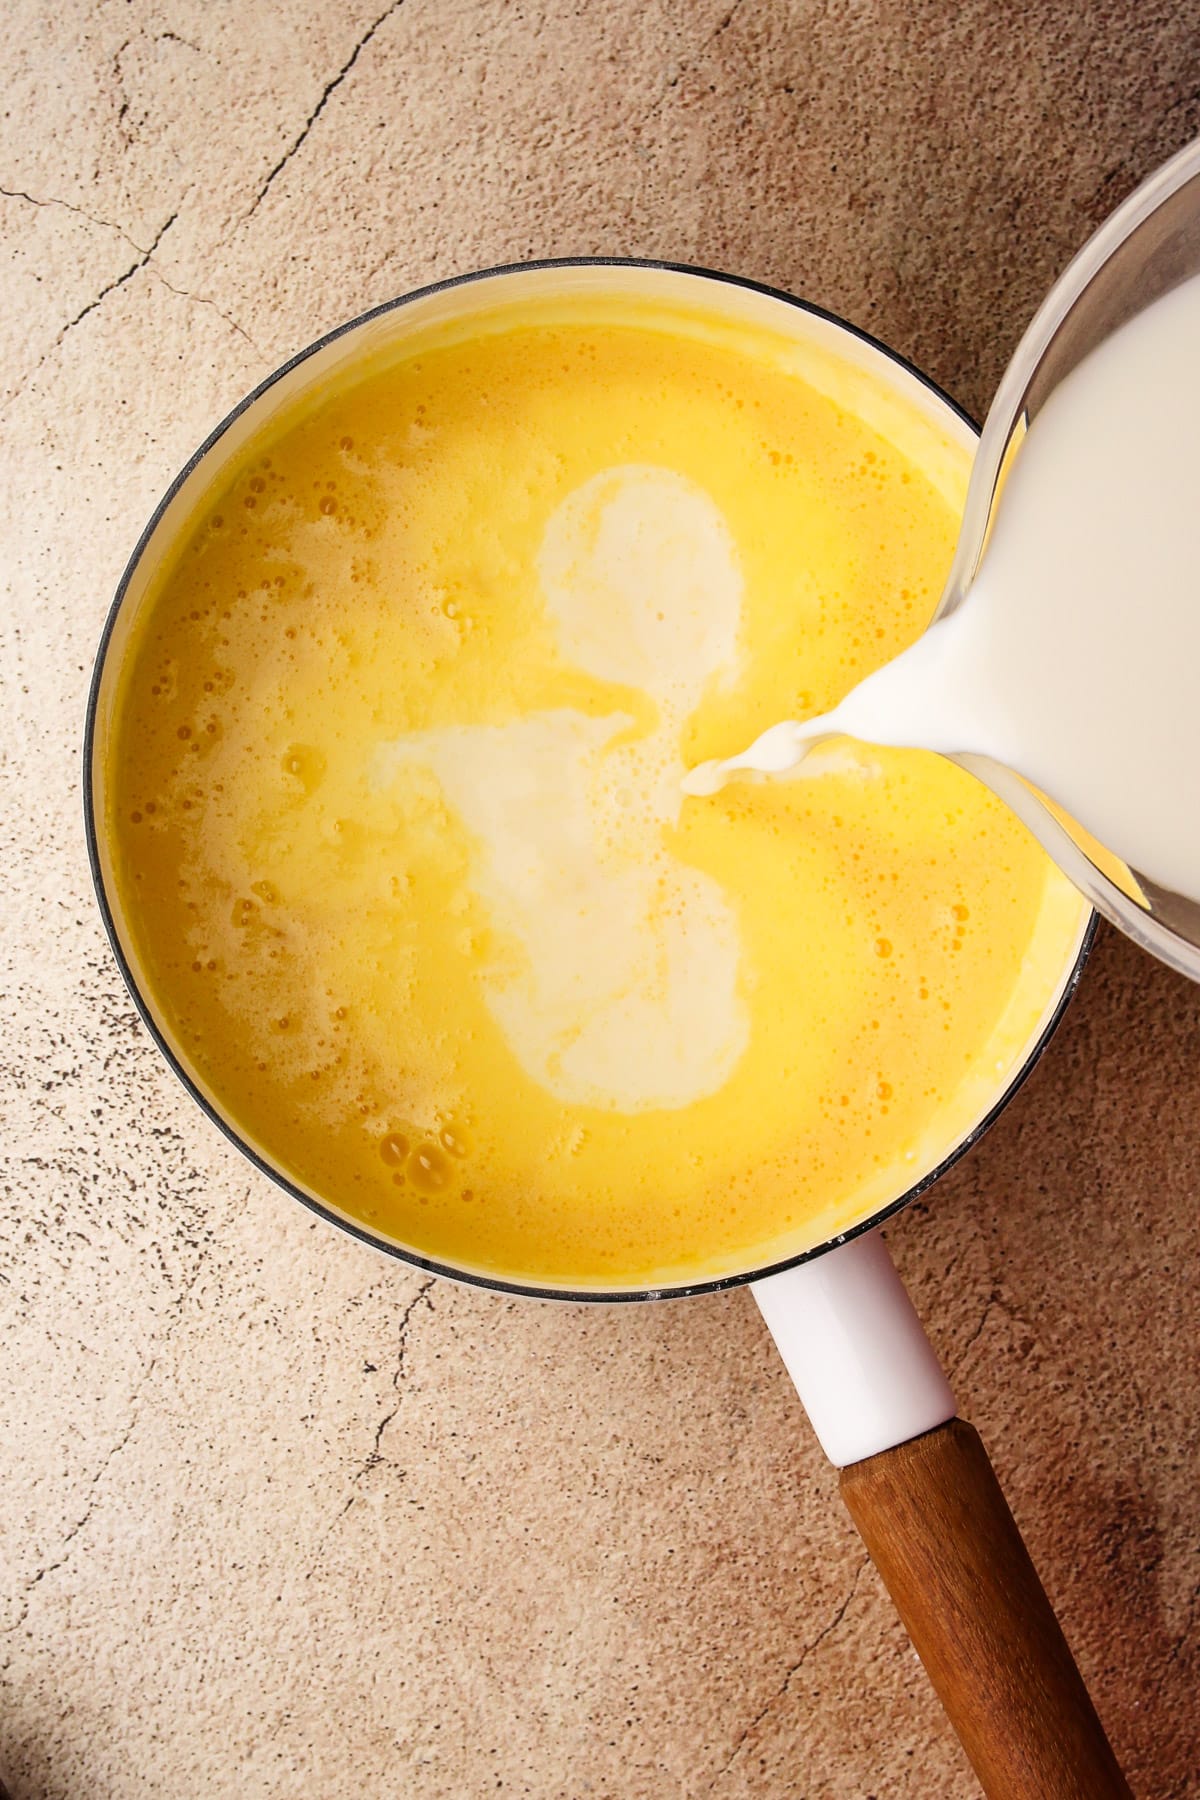
Step 2: Add in the milk.
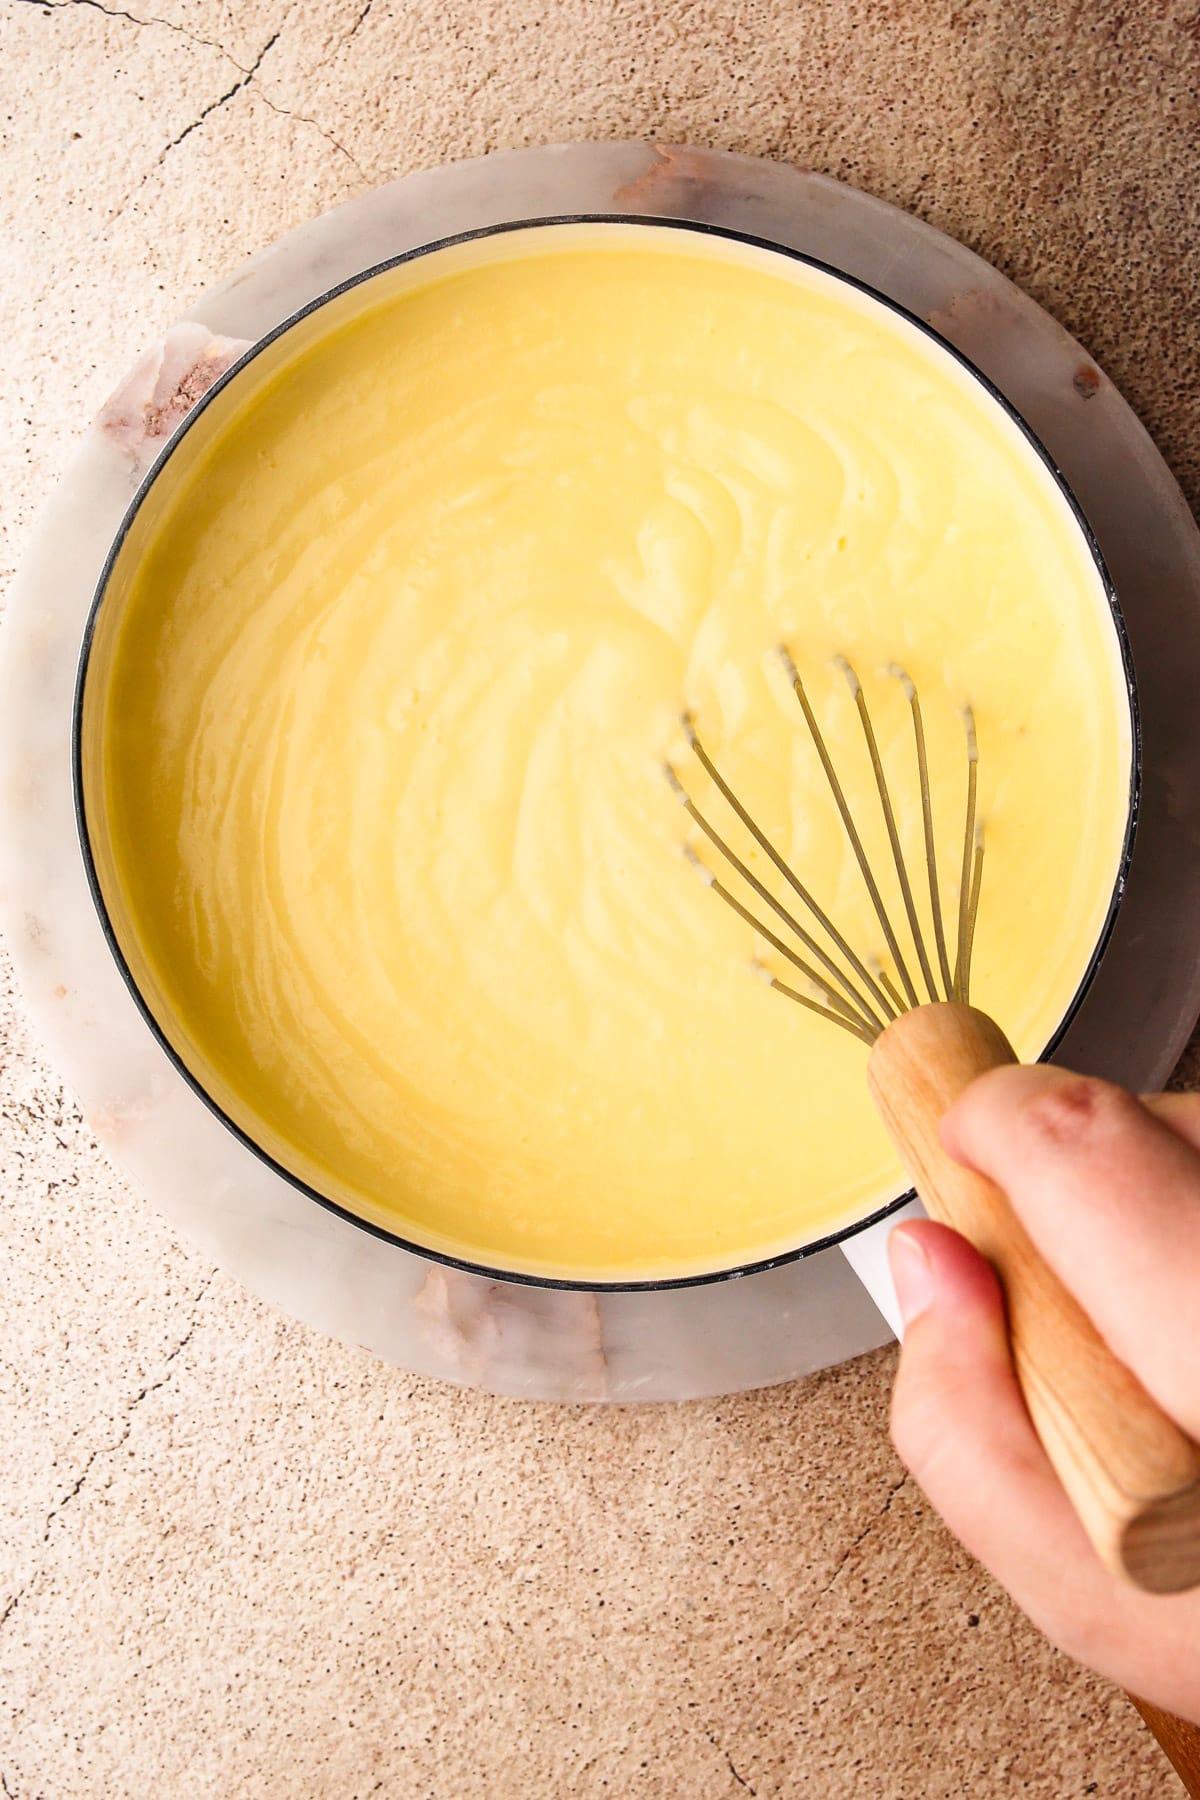
Step 3: Cook, while stirring constantly, until the mixture is thickened and bubbles are forming throughout.
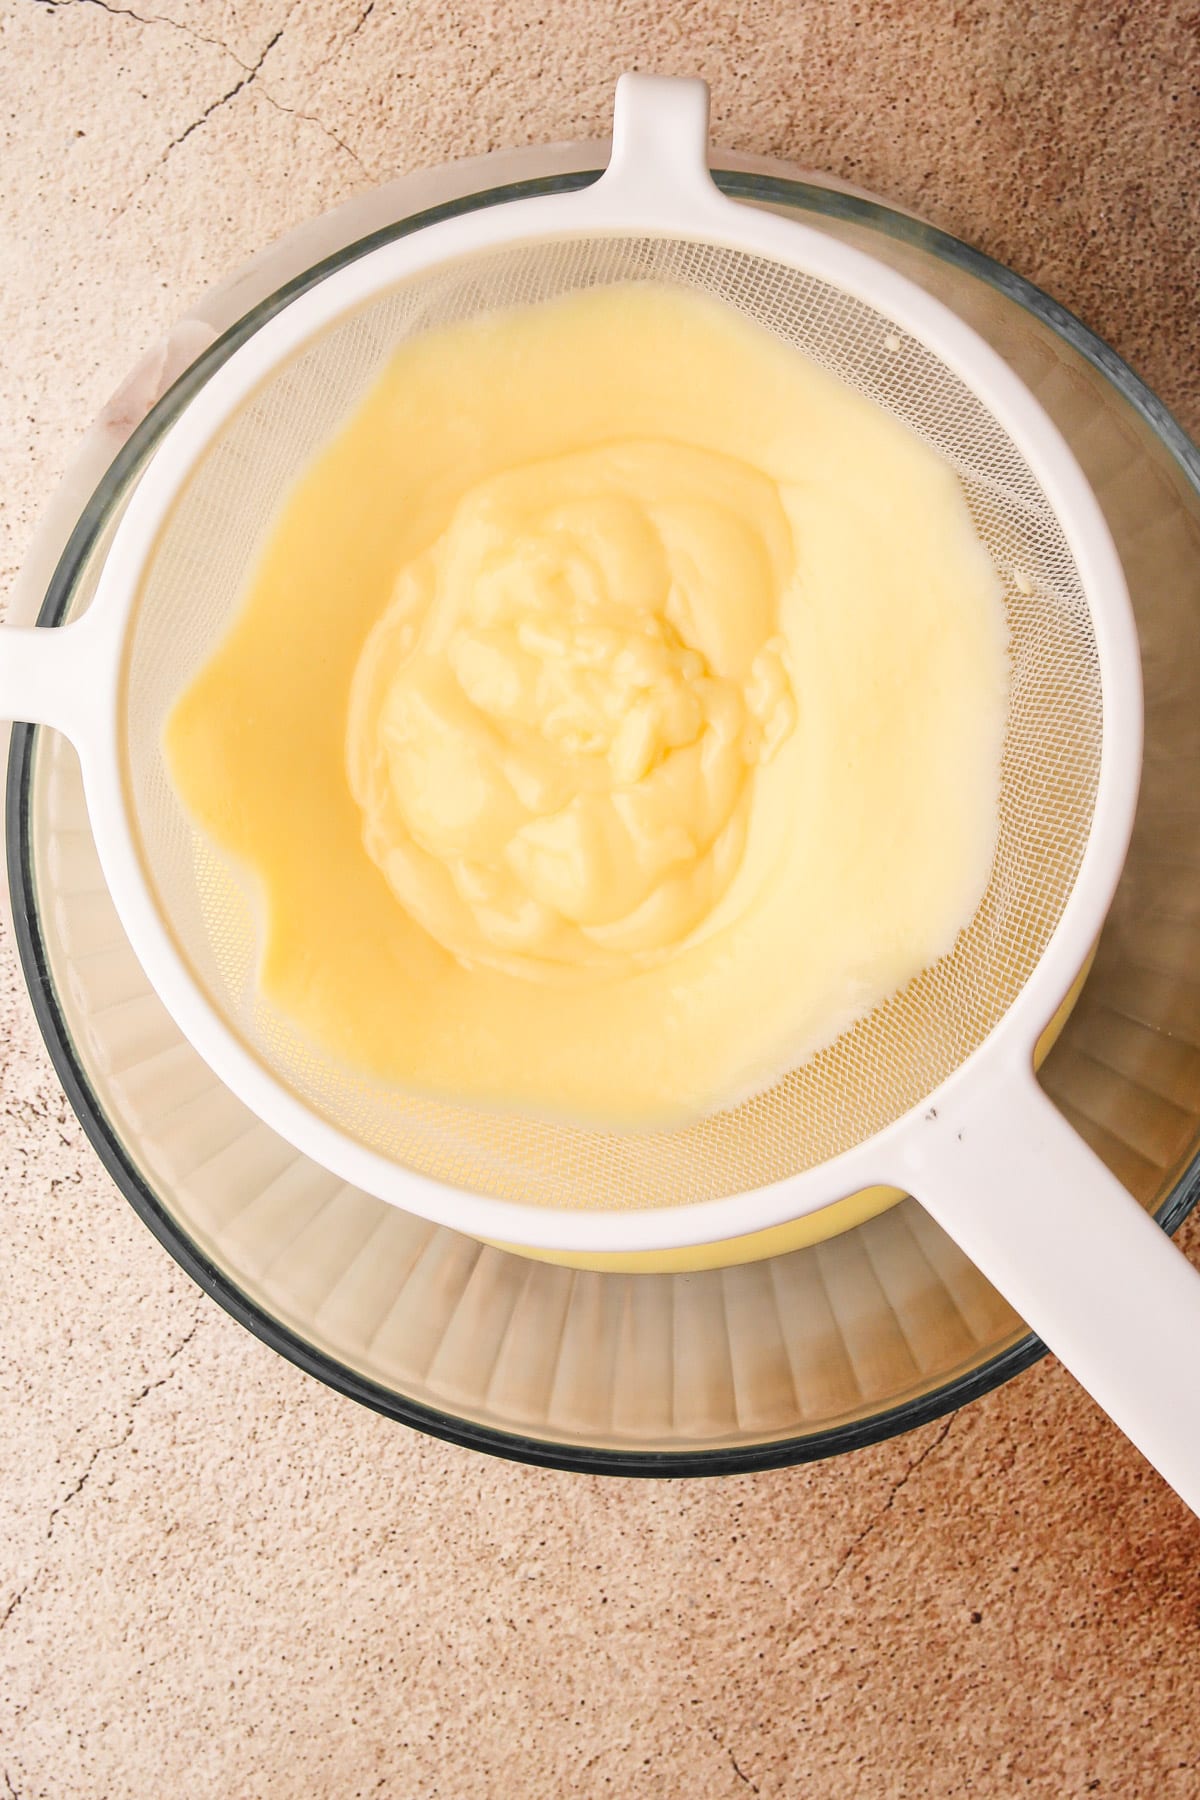
Step 4: Strain the pudding through a fine-mesh strainer.
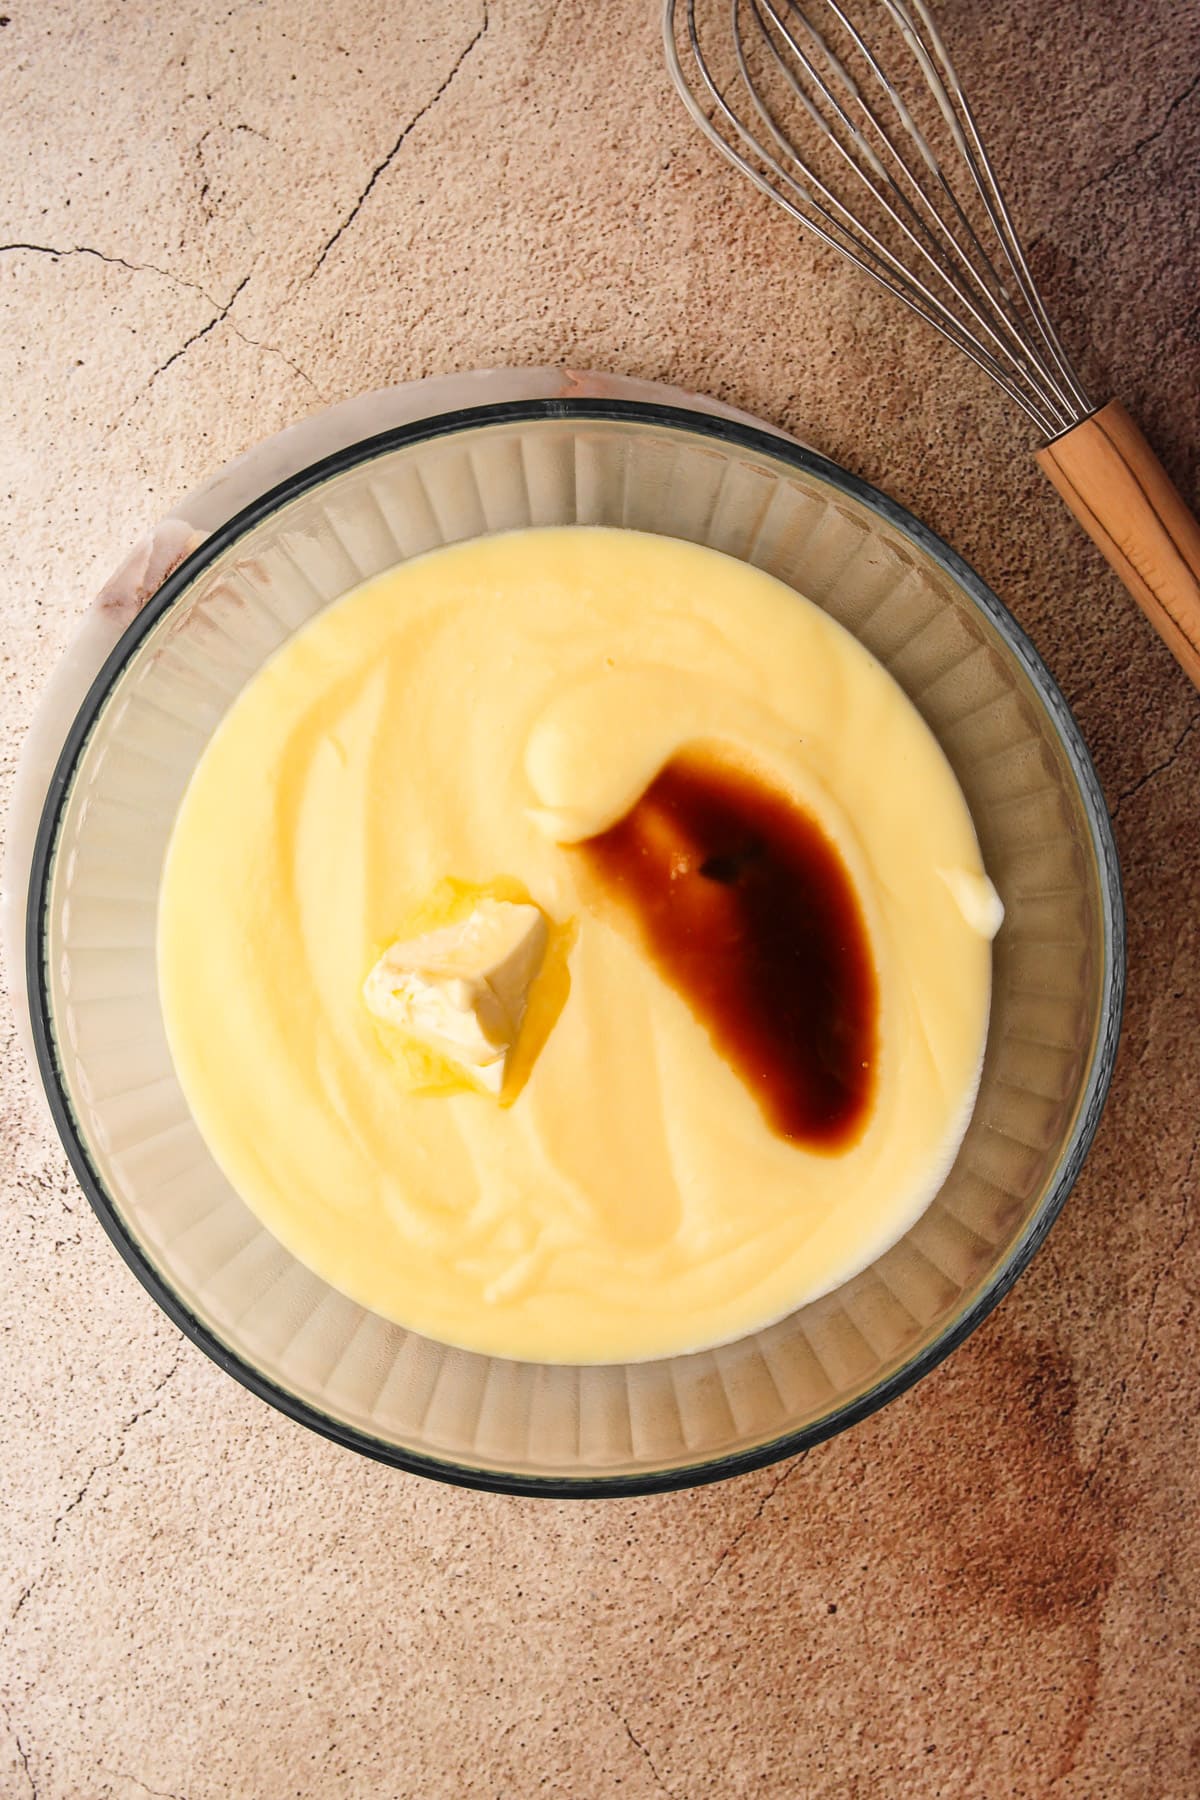
Step 5: Add the butter and the vanilla.

Step 6: Whisk together until the butter is melted and well combined.
Tips for Pudding Success:
- Be sure to have a rubber spatula and a whisk handy. I use both to make sure the mixture cooks evenly. I swap between using them while I’m cooking the pudding, using the spatula to ensure I’m getting all the mixture out of the crevices of the pot and the whisk to ensure even cooking.
- Don’t walk away from the pudding. It takes no more than 10 minutes to cook. Also, it’s super essential to stir almost constantly in the beginning to ensure no eggs get stuck to the bottom of the pot and scramble.
- Strain the pudding to eliminate any small bits of cooked eggs you might have. It makes the final pudding ultra-smooth.
- Don't let the finished pudding sit for too long, as a skin will form. Move through the steps (more on that below) quickly to get the pudding into the prepared pie crust.
Assembling the Pie
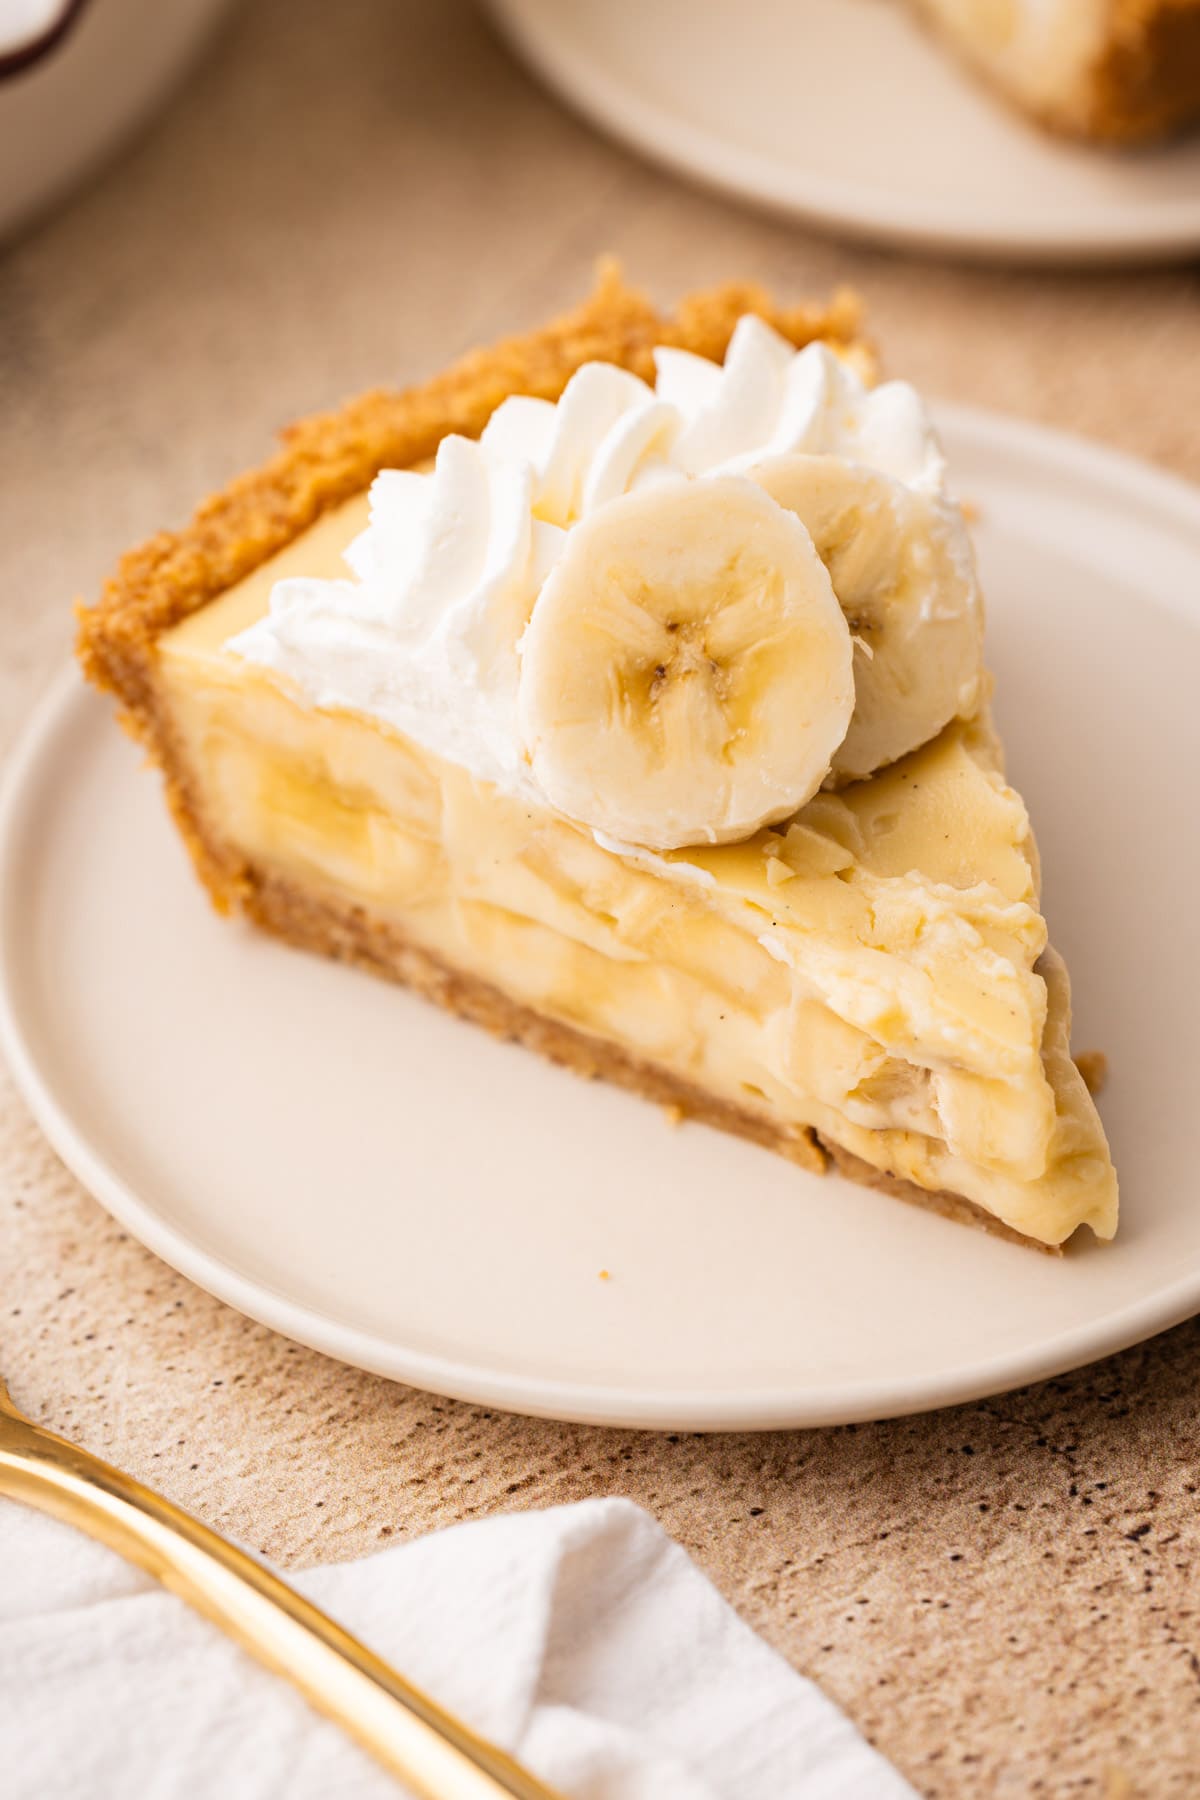
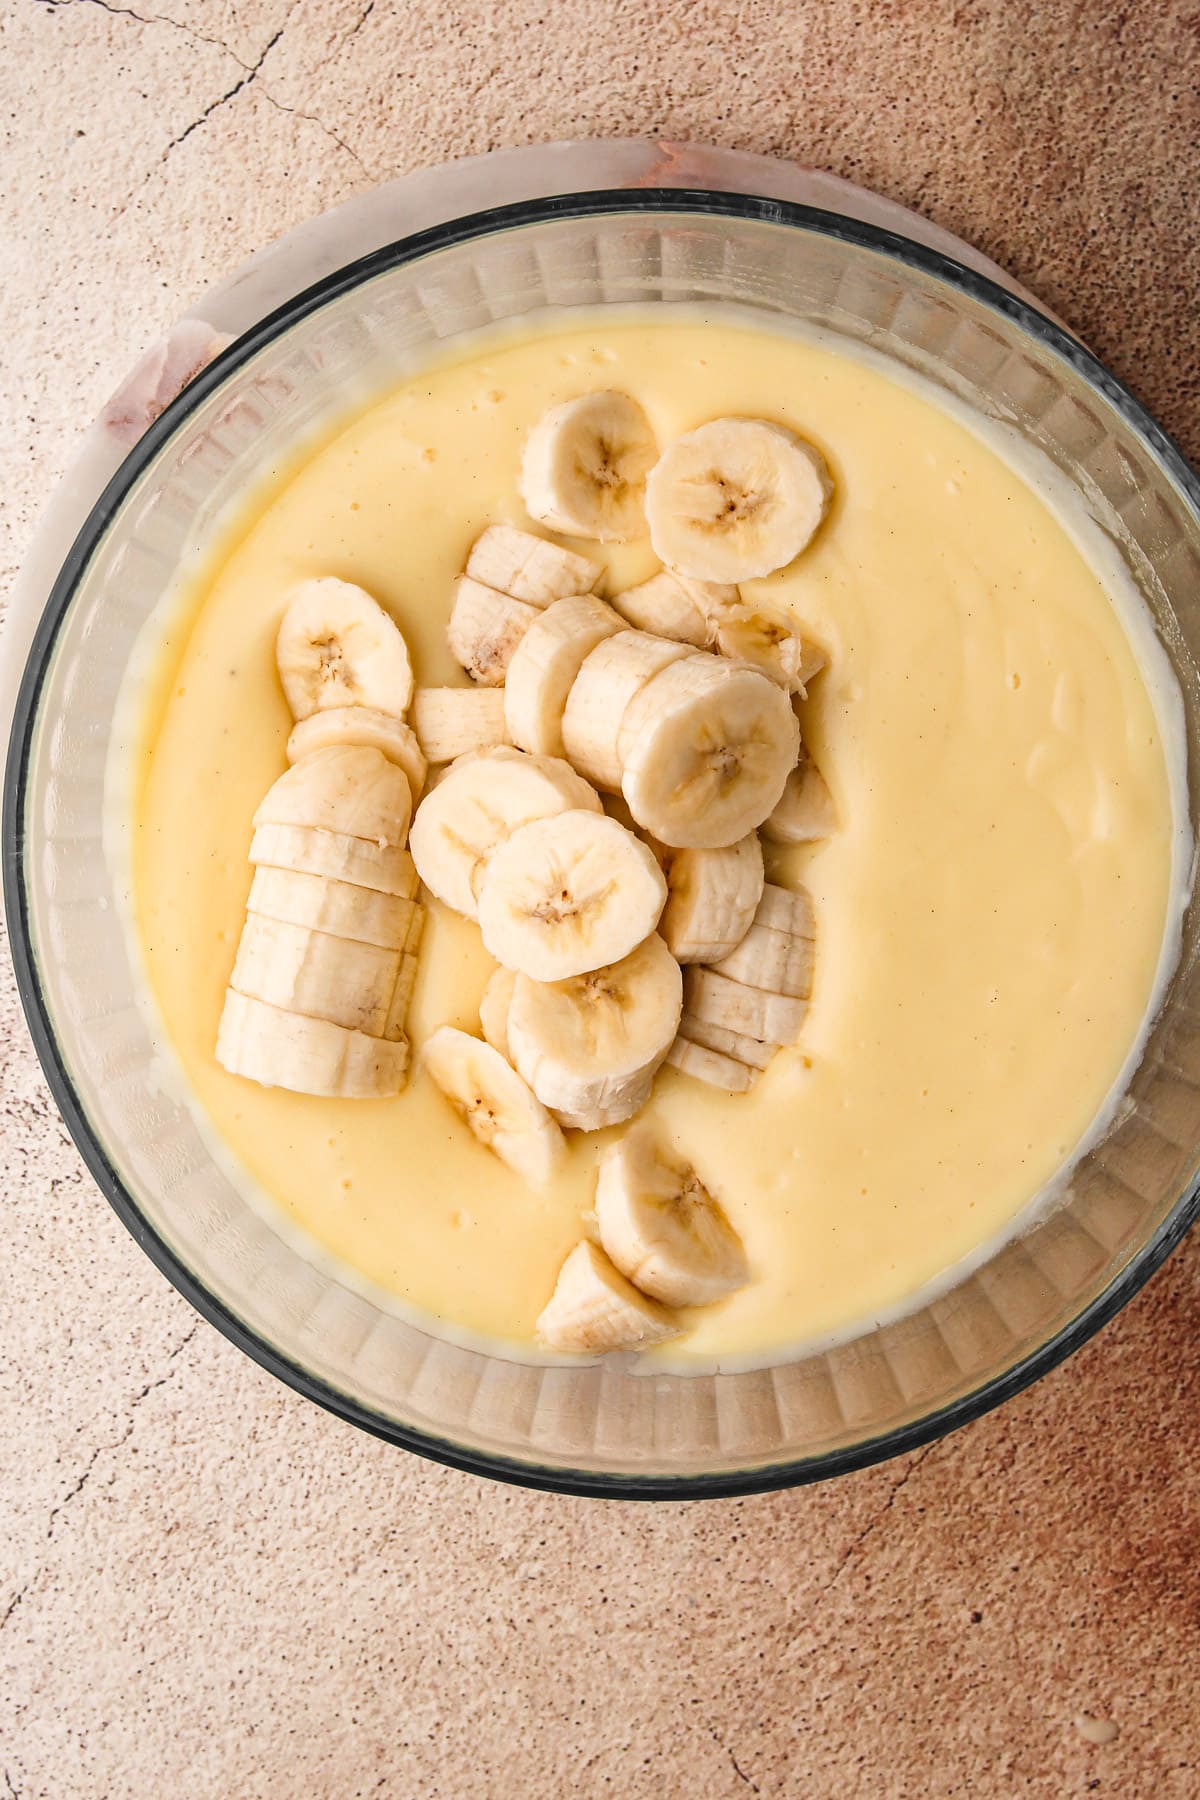
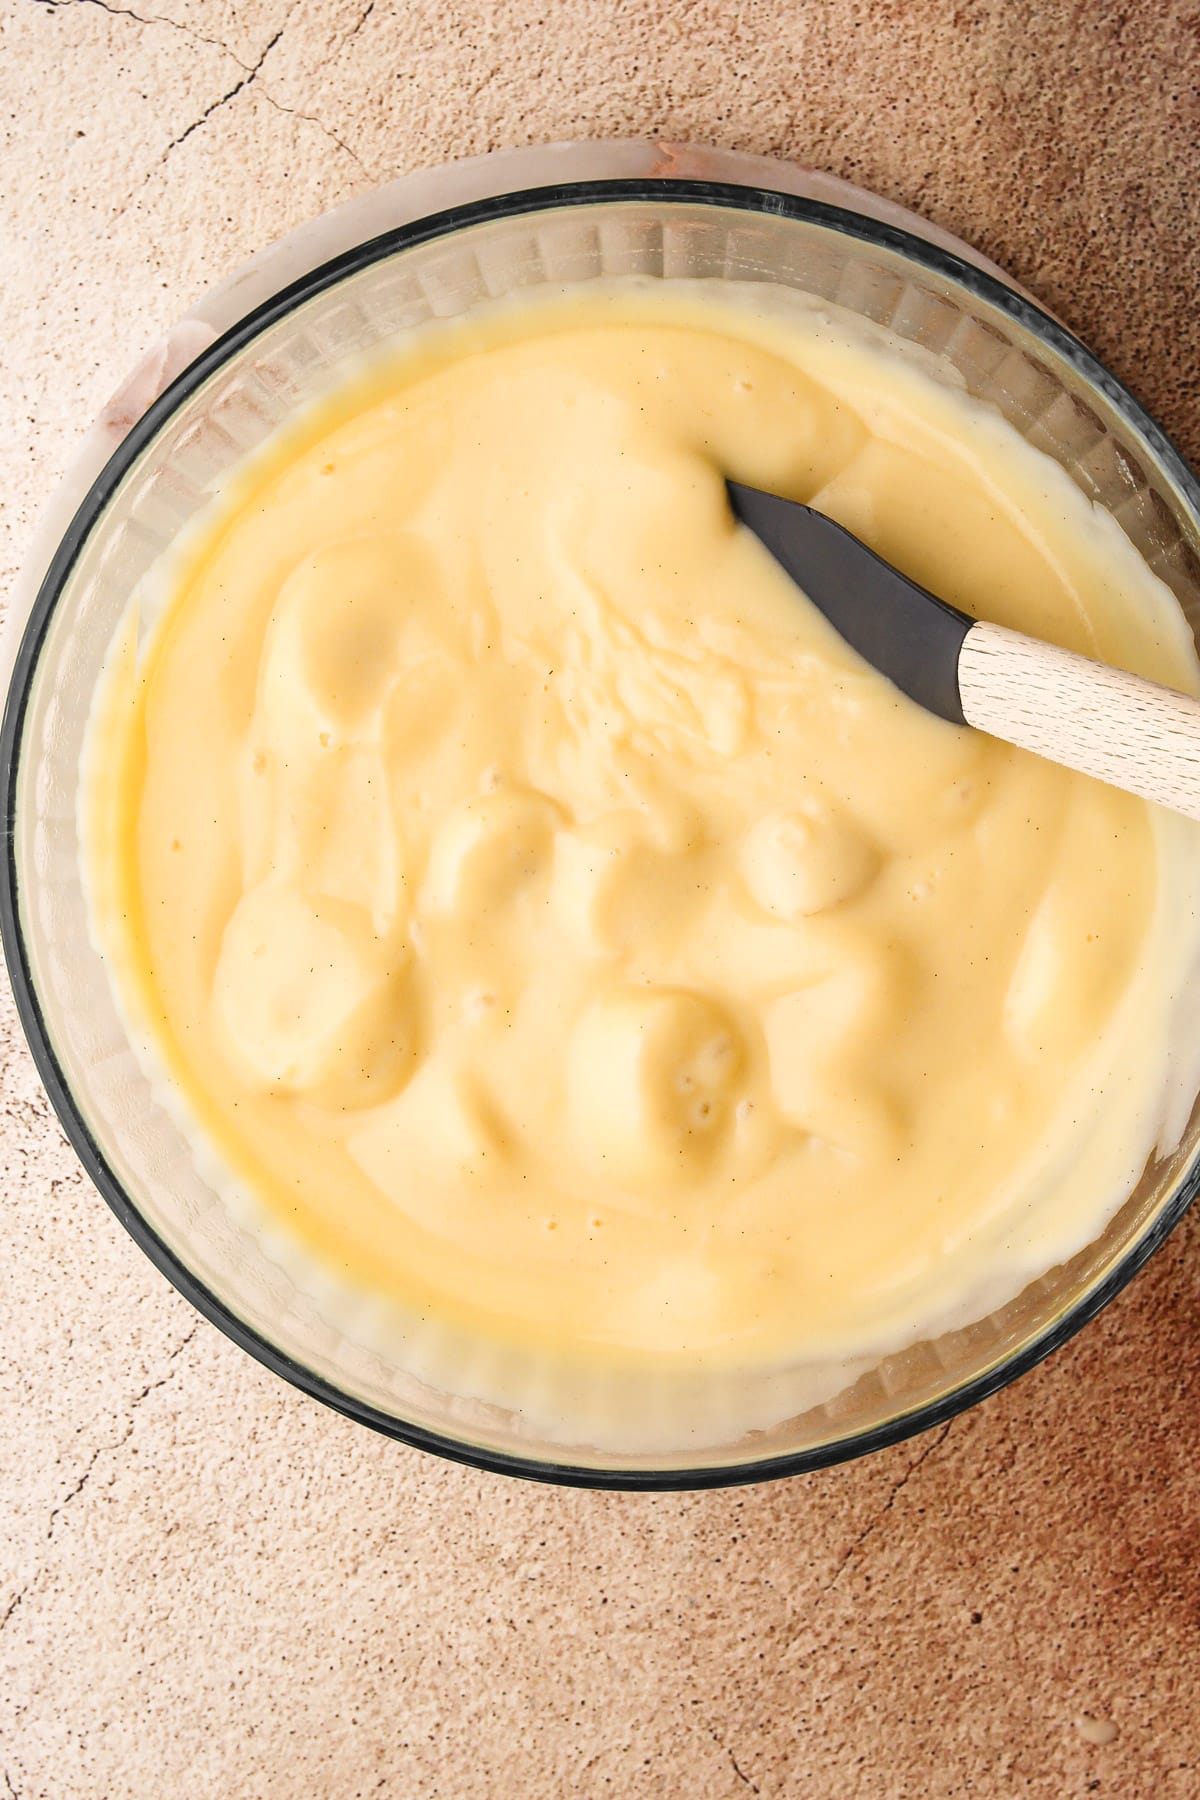
Once the pudding is made, the bananas are immediately folded into the warm pudding mixture and placed directly into the pie crust.
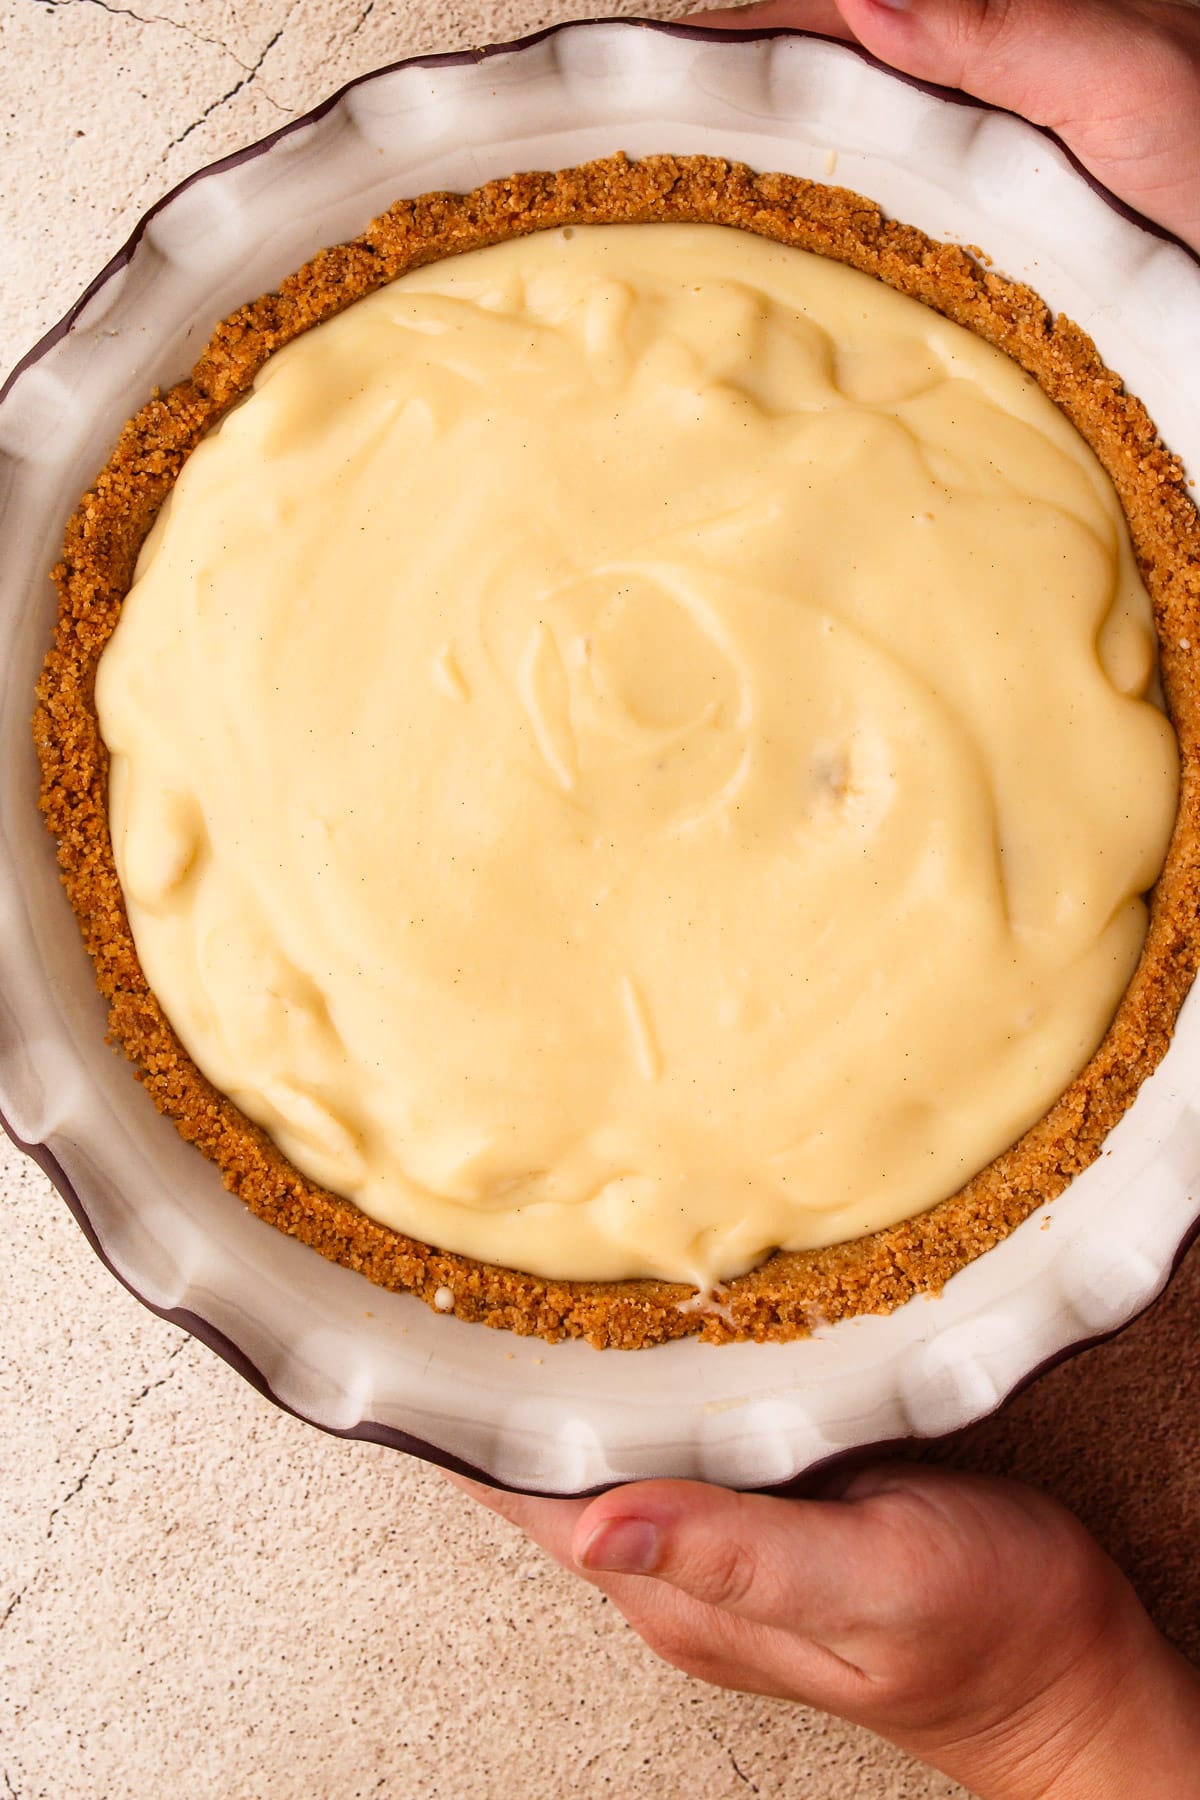
Then, the pie has to cool and chill. It must be cooled completely before topping it with whipped cream.
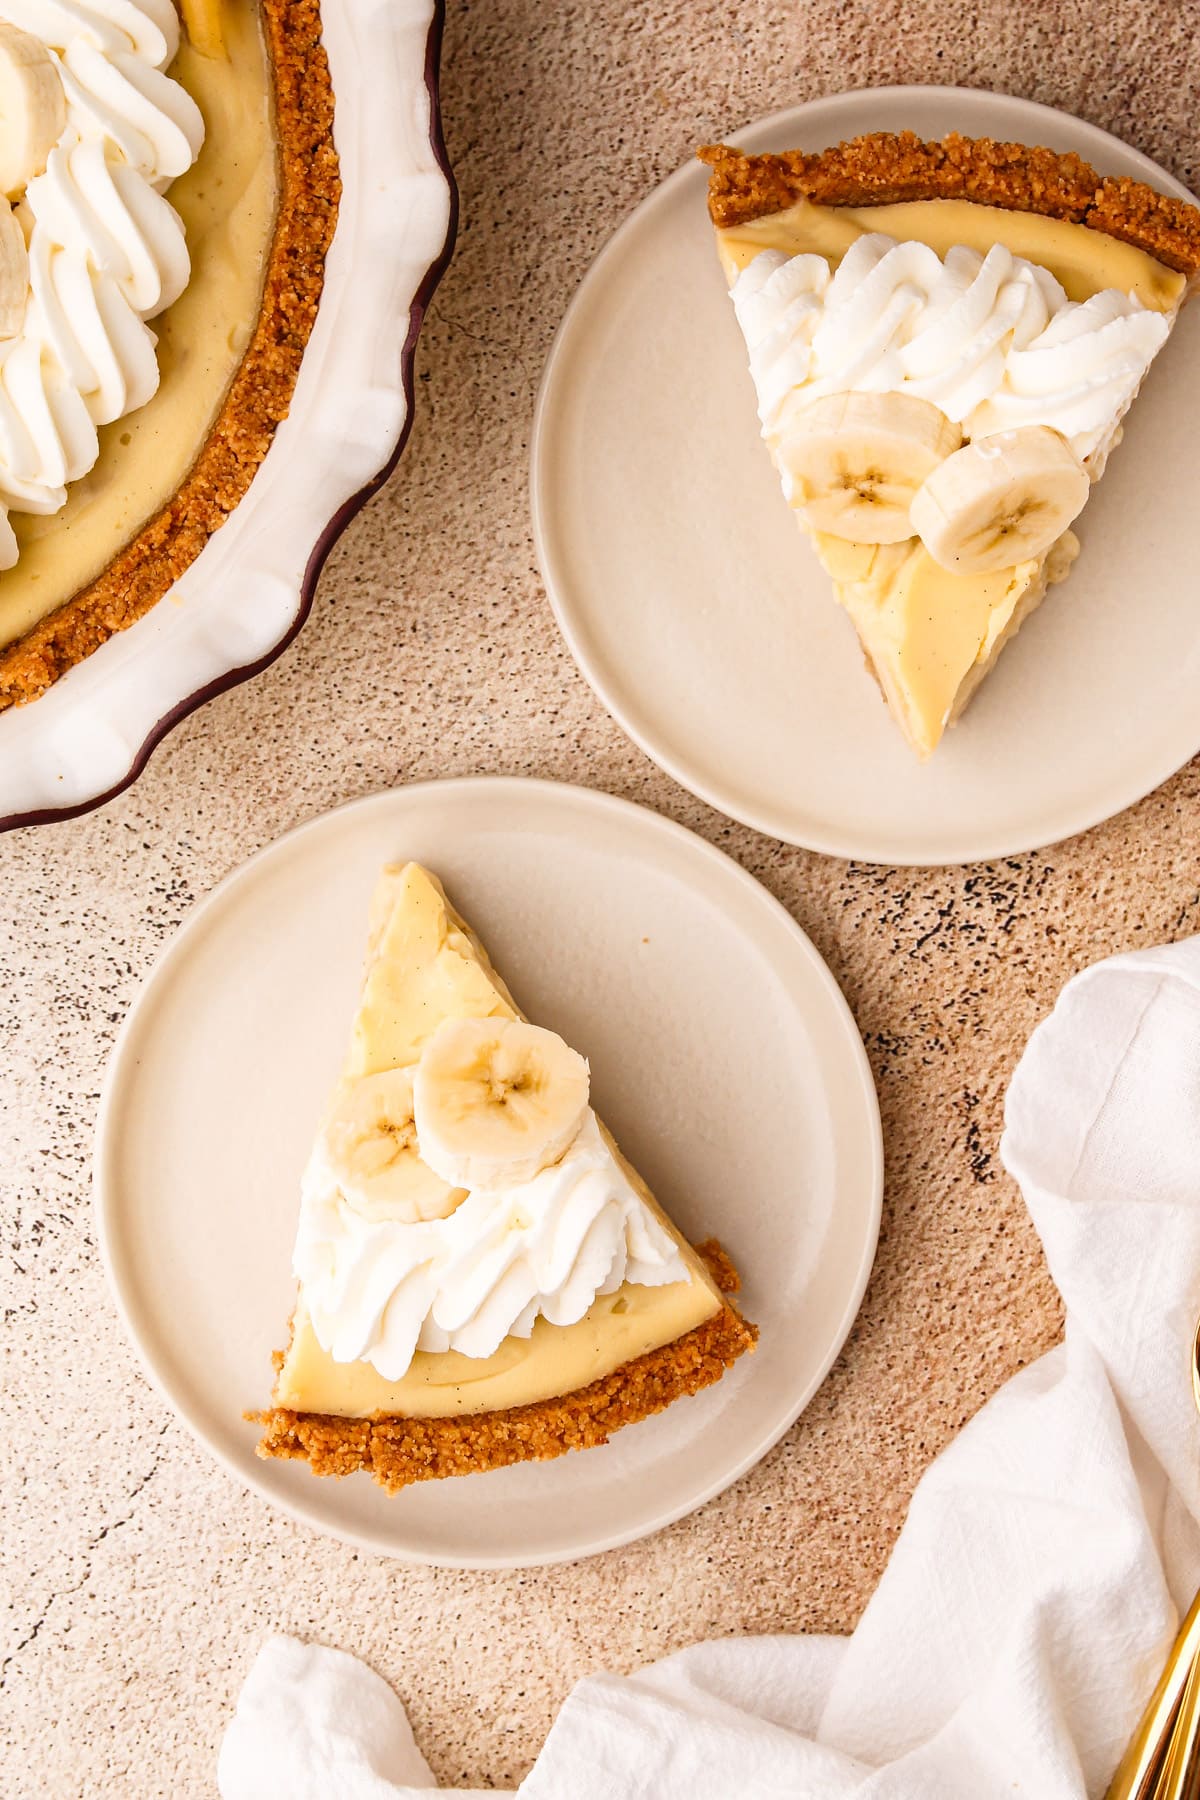
Once it has chilled, go ahead and get creative when topping it with whipped cream! You can dollop it on top, or you can pipe it or swirl it on! You can also decorate with additional sliced bananas; just be sure to only place them on right before serving, as they will brown quickly.
Serving and Storing
Serve this pie cold from the fridge. It should slice up very easily.
Because of the bananas, this pie does not keep well. It's best served within one day of assembling and chilling. The longer it sits, the firmer the pudding sets up and the browner the bananas get.
If you do have leftovers, try to consume within 2 days.
More Cream Pie Recipes
I am so honored when you make a recipe from my site! If you make this Banana Cream Pie, please leave a star ⭐️⭐️⭐️⭐️⭐️ rating with your experience! If you have any questions about this recipe, feel free to comment here, and tag me on Instagram!
Full Recipe
Banana Cream Pie

A perfect Banana Cream Pie has homemade vanilla pudding studded with fresh bananas, topped with silky whipped cream and tucked inside a crunchy and sweet graham cracker crust. This classic pie is a must-make.
- Prep Time: 00:25
- Cook Time: 00:30
- Total Time: 55 minutes
- Yield: 8-10 servings
- Category: Sweet Pie
- Method: Stovetop
- Cuisine: American
Ingredients
For Graham Cracker Crust:
- 1-½ cups (6 ounces) graham cracker crumbs (about 11 sheets)
- 6 tablespoons unsalted butter, melted (more as needed, see note)
- ⅓ cup (70 grams) granulated sugar or brown sugar
- pinch salt
For Banana Filling:
- ½ cup (100 grams) granulated sugar
- ¼ cup (30 grams) cornstarch
- pinch salt
- 2 large eggs
- 2 large egg yolks
- 3 cups (680 grams) whole milk
- 2 tablespoons (30 grams) unsalted butter, cold
- 2 teaspoons vanilla extract
- 3 firm yellow bananas
For Stabilized Whipped Cream:
- 2 tablespoons (30 grams) cream cheese, softened
- 1 tablespoon granulated sugar
- ¼ teaspoon vanilla extract (optional)
- 1 cup (230 grams) heavy cream
- Extra banana slices (optional)
Instructions
Make the Crust:
- Preheat the oven to 350ºF (see note about no-bake option).
- Place graham crackers in a food processor and process until fine crumbs form.
- Melt butter in a medium pot. Add crumbs, sugar, and salt to the pot and mix together until completely combined.
- Pour the crumbs into a 9-inch pie plate and press the ingredients up the sides to form the edges first. Once the edges are formed, work the crumbs down to evenly distribute into the bottom of the pie plate and pack it down into an even layer.
- Bake in the preheated oven for 10 minutes, until lightly golden and fragrant.
Make the Filling:
- In a medium saucepan, whisk together the sugar, cornstarch, and salt. Whisk in the eggs and yolks and then the milk.
- Cook the mixture over medium heat, whisking constantly and occasionally using a rubber spatula to scrape up any thickened pudding from the edges of the pan, until the pudding has completely thickened and large bubbles are forming and popping throughout, about 8 minutes.
- Remove from heat; immediately pour through a fine mesh strainer into bowl, using the spatula to push all the pudding through the strainer while leaving behind any bits of cooked egg.
- Whisk in the chilled butter and the vanilla.
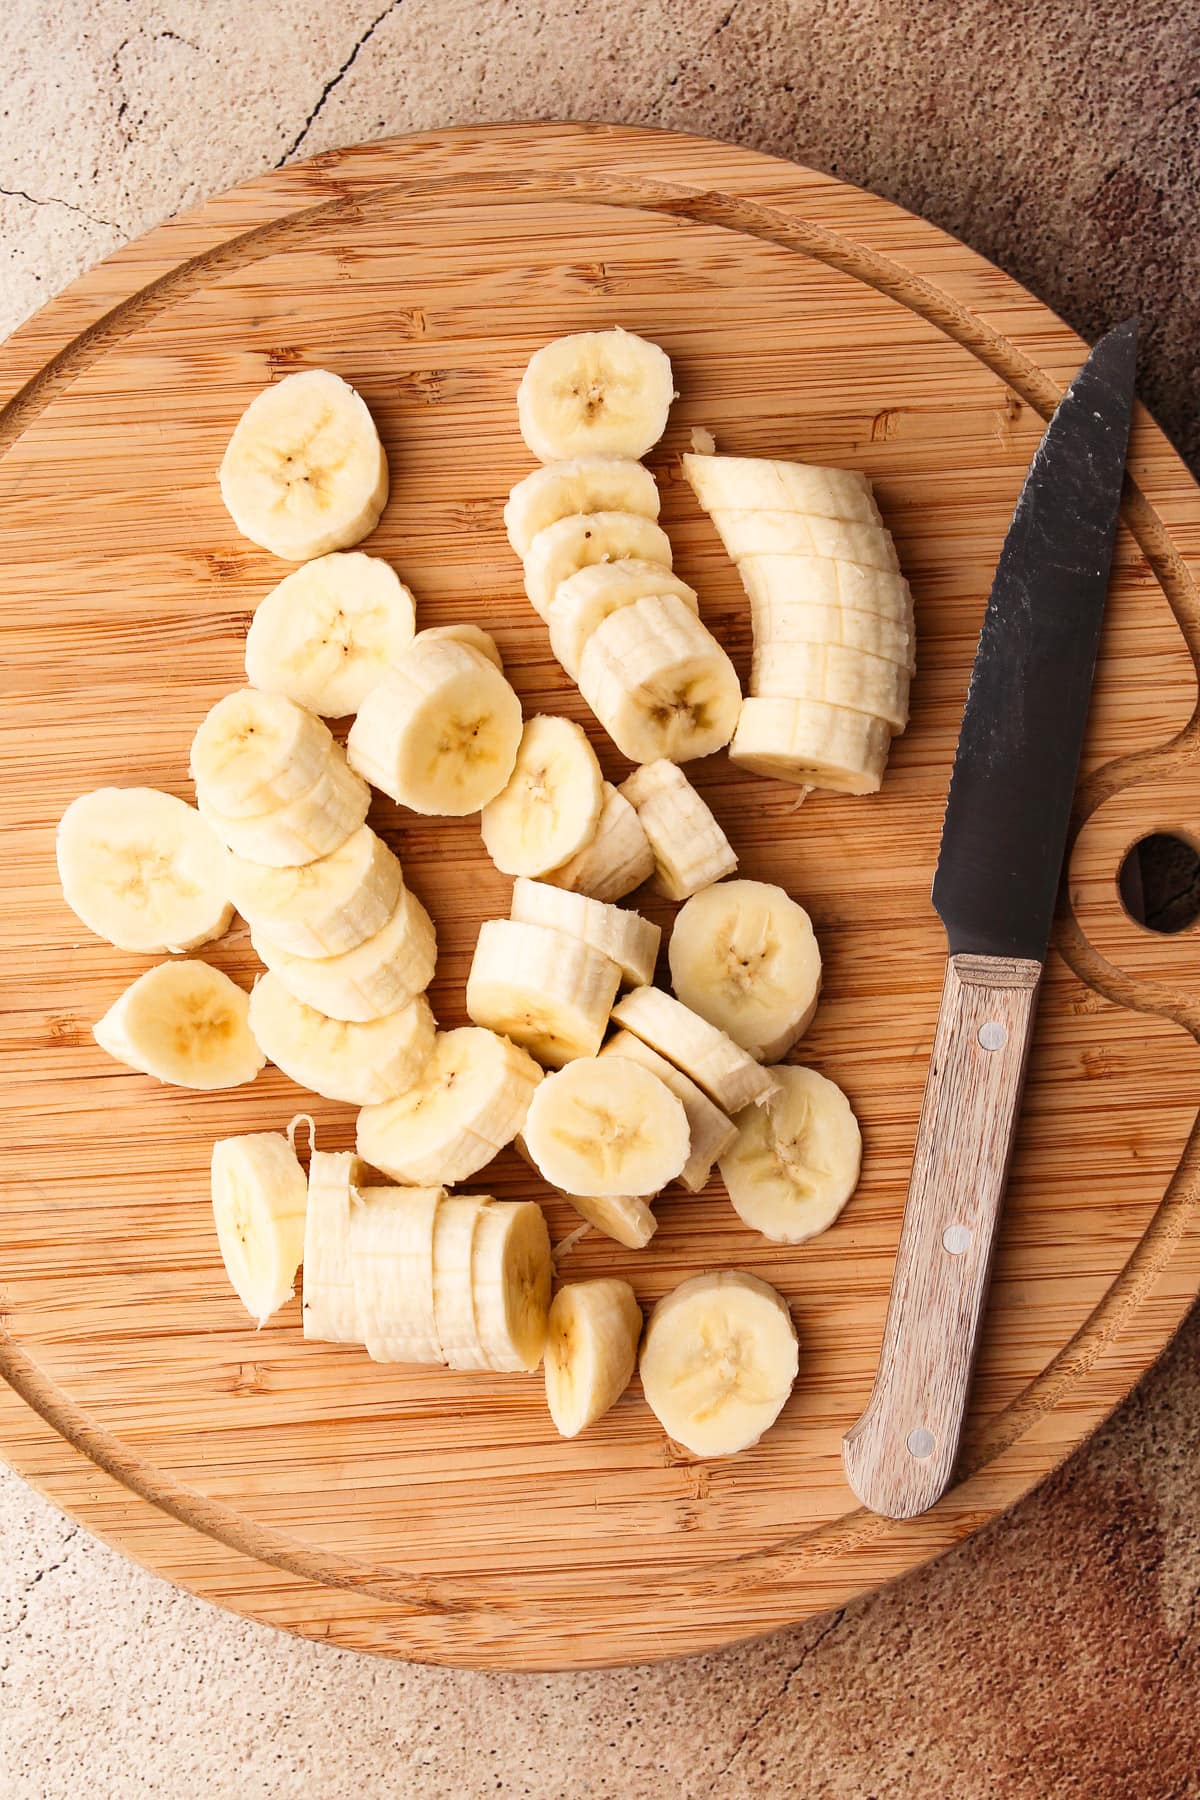
- Peel the bananas and cut them into ½-inch pieces. Stir in the sliced bananas to the warm pudding.
- Transfer the banana pudding into the prepared pie crust and smooth over the top. Let cool at room temperature before chilling in the refrigerator for at least 3 hours or overnight. If desired, place a piece of plastic wrap or parchment on top of the pudding to prevent a film from forming.
Garnish the Pie and Serve:
- Using an electric mixer, whip the cream cheese, sugar, and vanilla (if using) together until lightened. Add the heavy cream and whip until medium soft peaks have formed, scraping down the bowl as needed.
- Pipe the whipped cream on top of the chilled pie, or simply add it on and smooth it over as desired. Garnish the pie with additional banana slices, if desired.
- Serve immediately or keep chilled until ready to serve, up to 1 day.
Notes
A Graham Cracker Crumb Crust is great with this recipe, but some other options are a Vanilla Wafer and Nut Crumb Crust or a Biscoff Cookie Crust. If you are looking for a butter crust, this Pâte Sablée (Sweet Tart Dough) or Pâte Sucrée (Sweet Pie Crust) would also be nice!
If for any reason your crumb crust is extremely dry, you can add more melted butter, 1tablespoon at a time, to the crumbs until they are evenly moistened. Alternatively, if your mixture is too wet and it is hard to work with, add more cookie crumbs until it is pliable.
Because of the bananas, this pie does not keep well. It's best served within one day of assembling and chilling. The longer it sits, the firmer the pudding sets up and the browner the bananas get. If you do have leftovers, try to consume them within 2 days.
Some of the links on this page may be affiliate links. Everyday Pie is a participant in the Amazon Associates Program. As an Amazon Associate I earn from qualifying purchases, at no extra cost to you.
Kate Wilkinson
Everyone in my family loves banana cream pies, and this one is one of the best I've ever had - maybe THE best! I opted to use a pâte sucrée as my mother is not a fan of graham crackers, but the filling was incredible and the directions were very easy to follow. Highly recommend!
Kelli Avila
So glad you and your family enjoyed this one! It's a favorite on my house too!
Jeanie Manser
This pie sounds SO good! I've been wanting to make something special for my kids since they've been so stinkin patient and helpful while we've had some big home renovations.They only had banana creme pie a handful of times but they love banana anything, so I'll definitely be trying this out cause I know they'll love it! Thanks for sharing!
Emily
This is my family’s favorite pie. I make it for most special occasions. I follow the recipe exactly and it comes out perfect every time. The custard sets up firm really quickly so be ready to put it in the crust asap.
I find that a rest overnight really develops the flavor.
Ronald Chapman
Would you recomend strainer for straining the banana pudding after removing it from the heat?
Thank you for your time and recipe
Kelli Avila
Hi Ronald, any fine mesh strainer will work. Here is the one I use: https://www.amazon.com/Winco-MS3A-8S-Strainer-Single-Diameter/dp/B001VZ5E40/ref=sr_1_13?crid=1999215D473AQ&keywords=fine+mesh+strainer&qid=1640319084&sprefix=fine+mesh%2Caps%2C174&sr=8-13
Allison W
I cannot even begin to tell you how amazing this pie is and for SO. MANY. REASONS. First, the crust. As much as I love pie, I am not a fan of a graham cracker crust. Give me all the pastry crust, haha. But this....this vanilla wafer and walnut crust? To die for. And now since I have a box of nilla wafers that need to be used, there will be more of these pie crusts 🙂 Second....who knew making pudding from scratch was so easy and so yummy? I did not. Lastly, while the end result was not nearly as gorgeous as Kelli's, it made me feel like a pastry chef. It looked beautiful, smelled glorious, and if I haven't been clear enough already, it IS FAN-FLIPPING-TASTICALLY delicious. I had to stop myself from having some for breakfast. Make it and make it now, folks.
Kelli Avila
Thanks so much for trying my recipe and coming back and sharing! I'm so glad you enjoyed!