This Mile High Apple Pie is made with almost 5-½ pounds of apples, just the right amount of cinnamon and surrounded by the most perfect, buttery pie crust. Trying to pack in all that apple proved can be a bit tricky; however, with a few simple tips, this mile-high pie is sure to be a showstopper at your next party or holiday meal.
Want to save this recipe?
Enter your email & I'll send it to your inbox. Plus, get weekly updates from me!
Deep Dish Apple Pie
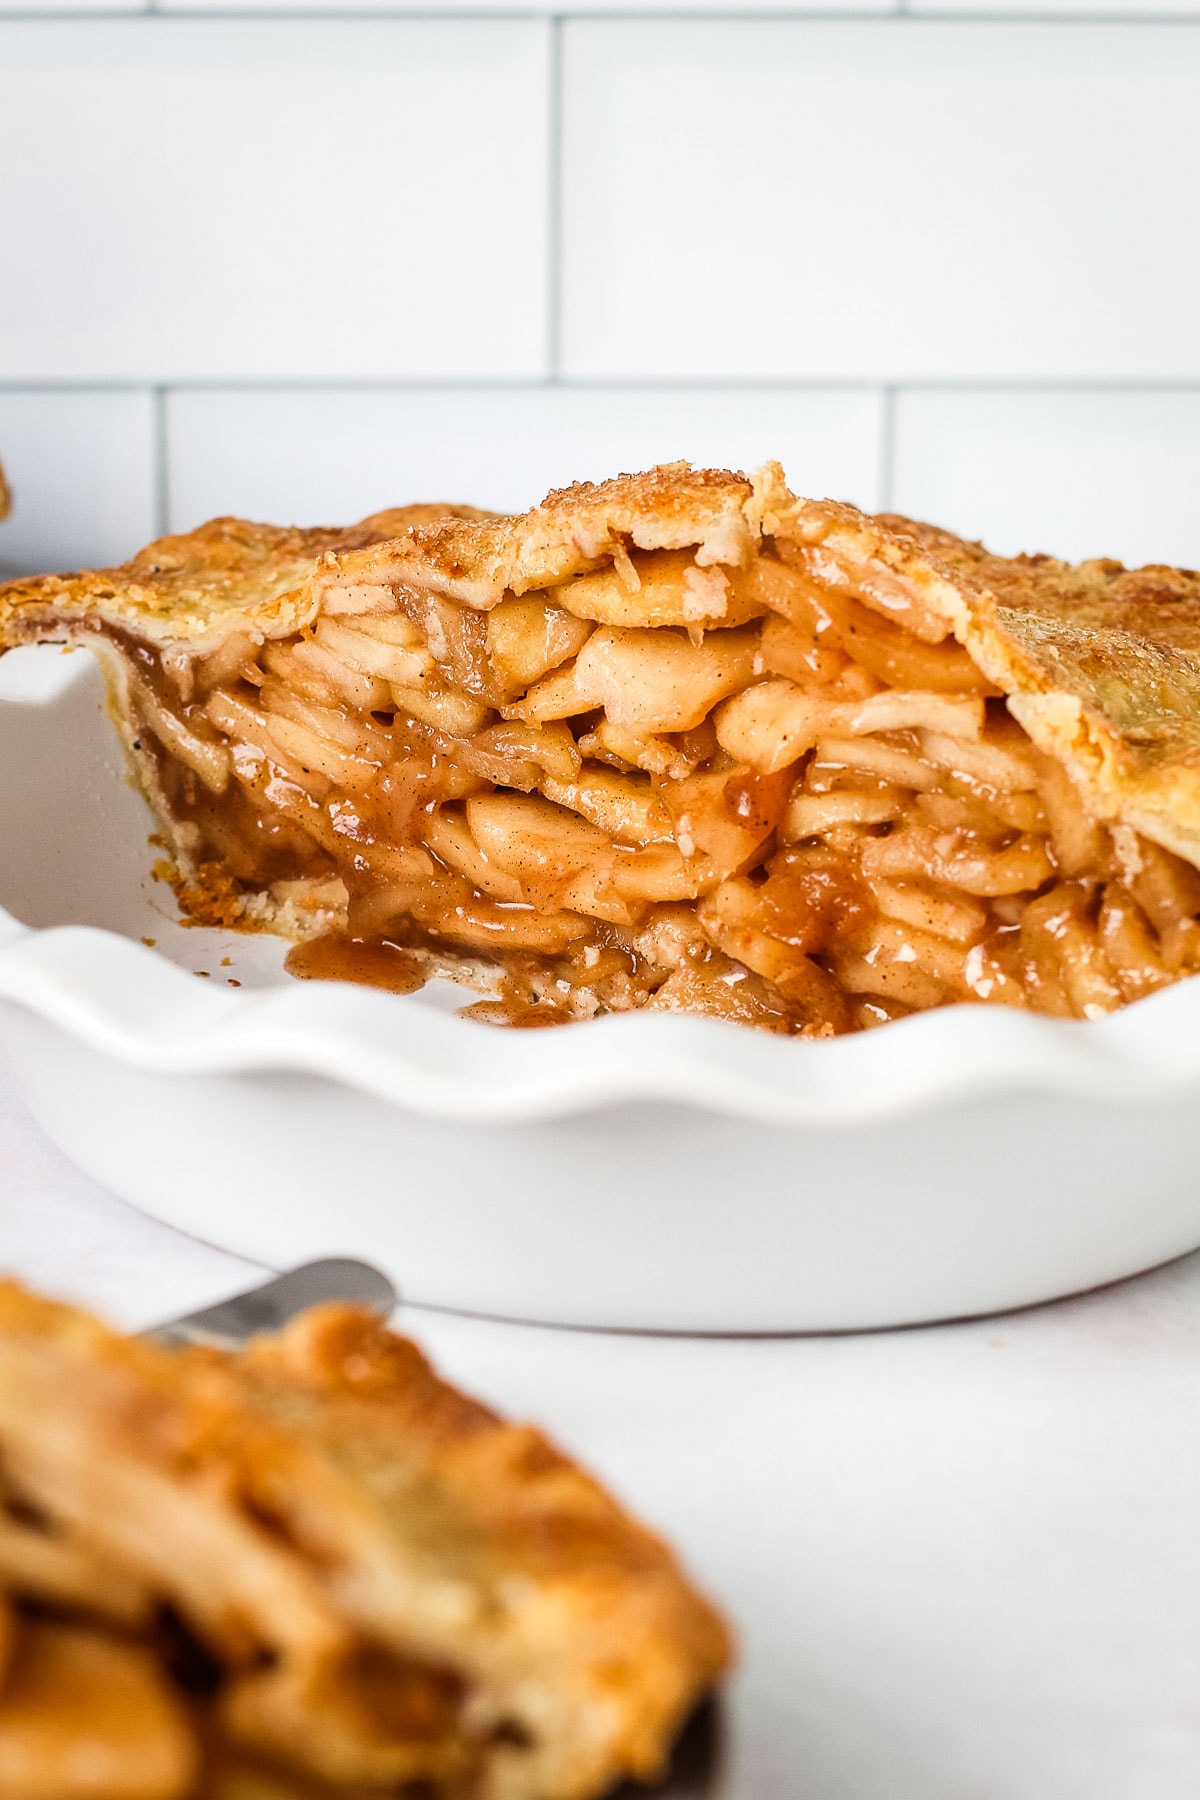
This Mile High Apple Pie packs a huge wow factor. This pie contains 5-½ pounds of apples and a boost from fresh apple cider. Classic warm spices like cinnamon and nutmeg cling to the juicy filling, and a flaky buttery crust ties it all together. If you prefer a higher filling-to-crust ratio, you have stumbled upon the right recipe.
I went through about 30 pounds of apples during the testing of this pie. My vision was to have a true Mile High Apple Pie, full of deep apple flavor, without any misleading crust height. I wanted to avoid creating a recipe attached to a photo that makes it appear that there is a boat load of apples inside, when in reality, there is a huge gap in between the crust and the actual apple filling.
Of course, I ran into set backs along the way. For example, the massive weight of the apple filling pushed through the edges of the pastry and halfway fell apart in the oven. I needed to adjust my expectations about how high this pie actually is (and add an oven cleaning to my to-do list). I ended up redistributing the weight of the filling into a deep dish pie plate so it didn't compromise the crust. The final pie had a height of about 5 inches.
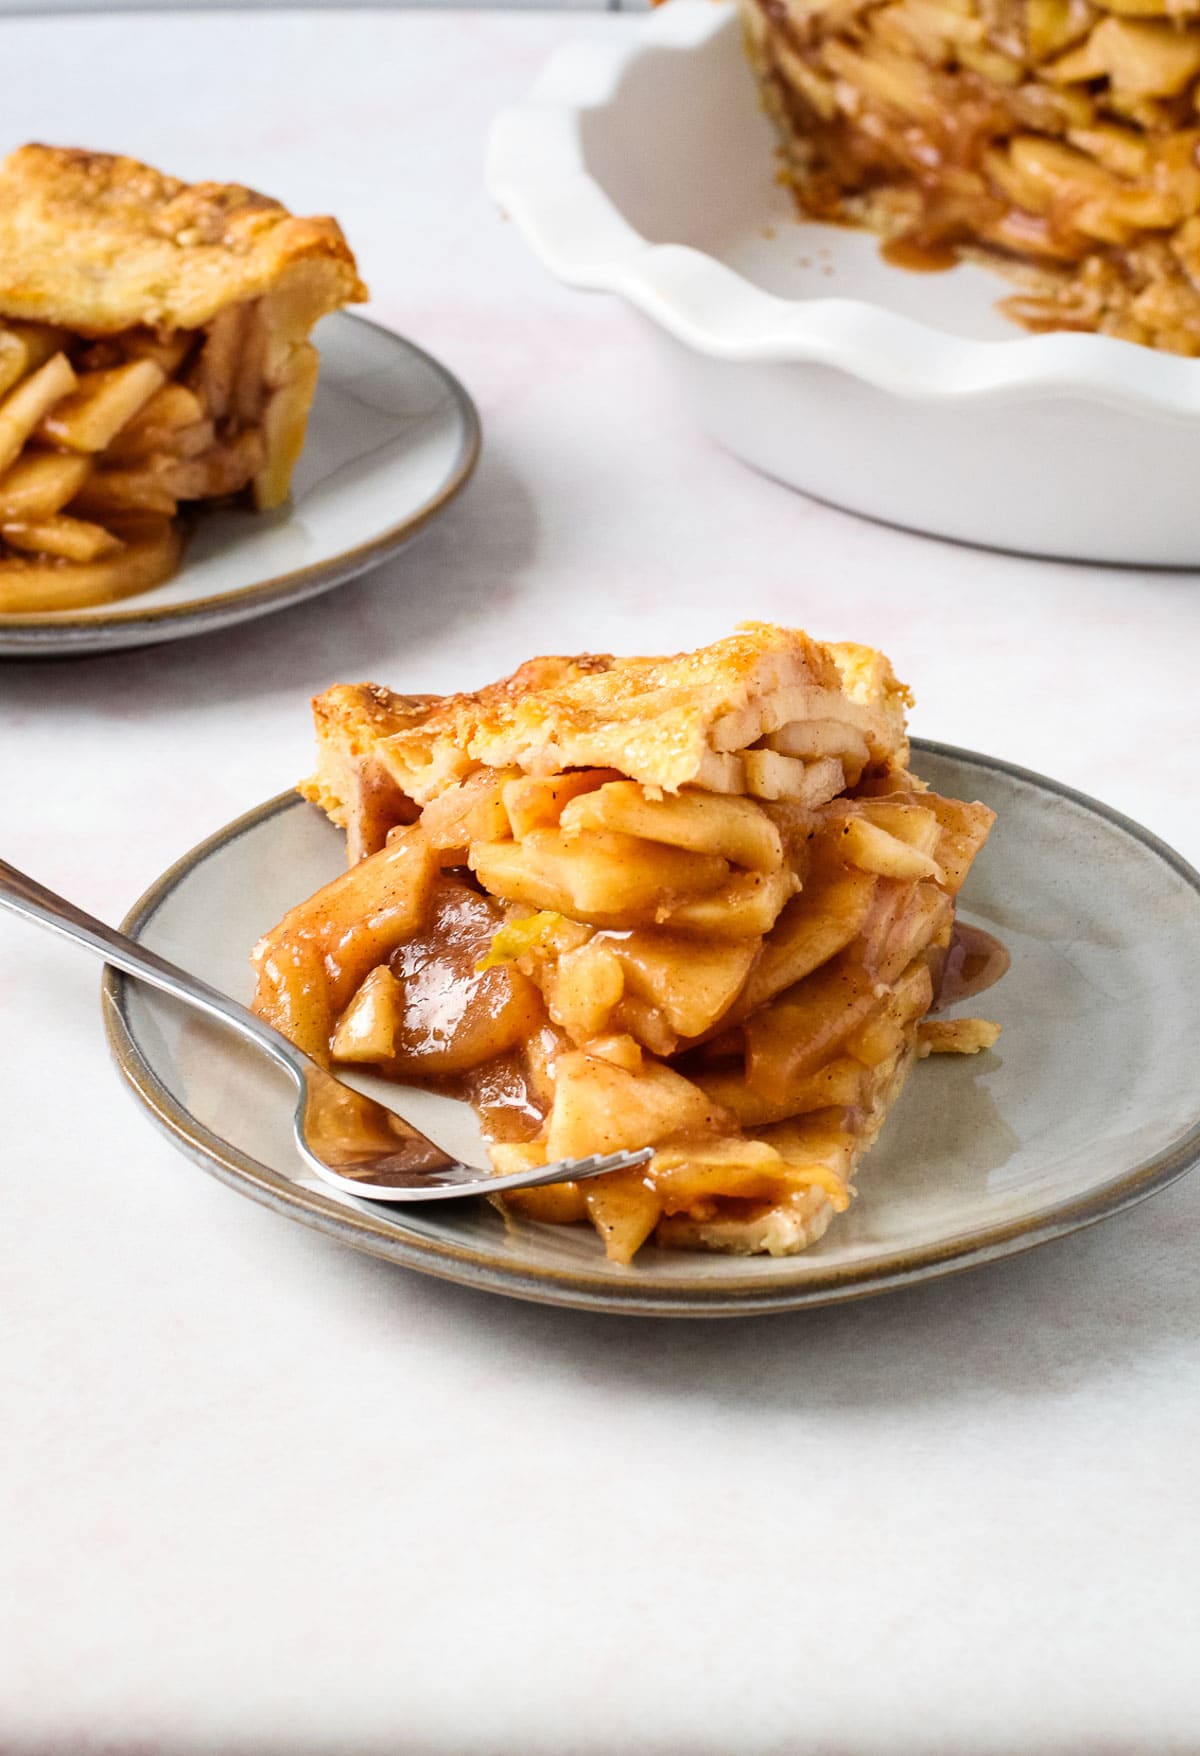
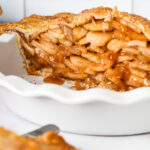
The filling does contain a massive amount of apples, so don't expect a very clean slice when you cut the pie; it will certainly be a little messy--yet delightful--with apples tumbling out of the crust.

Mile-High Apple Pie Ingredients
- baking apples (see below for my recommendations)
- flour
- butter
- brown sugar + white sugar
- fresh apple cider (absolutely do not use apple cider vinegar, fresh apple cider is unfiltered apple juice...not vinegar)
- cinnamon + nutmeg
- lemon juice
- salt
- vanilla extract
Tools Needed
Here is a list of some of the primary tools I use in this recipe. You won't necessarily choose to use them all, but they are exactly what I used. Any links may contain affiliate links.
- food processor
- rolling pin
- pastry brush
- pie dish (use a deep dish 9" ceramic pie plate)
- apple peeler
- baking basics: bowl, spatula, sheet tray, measuring cups
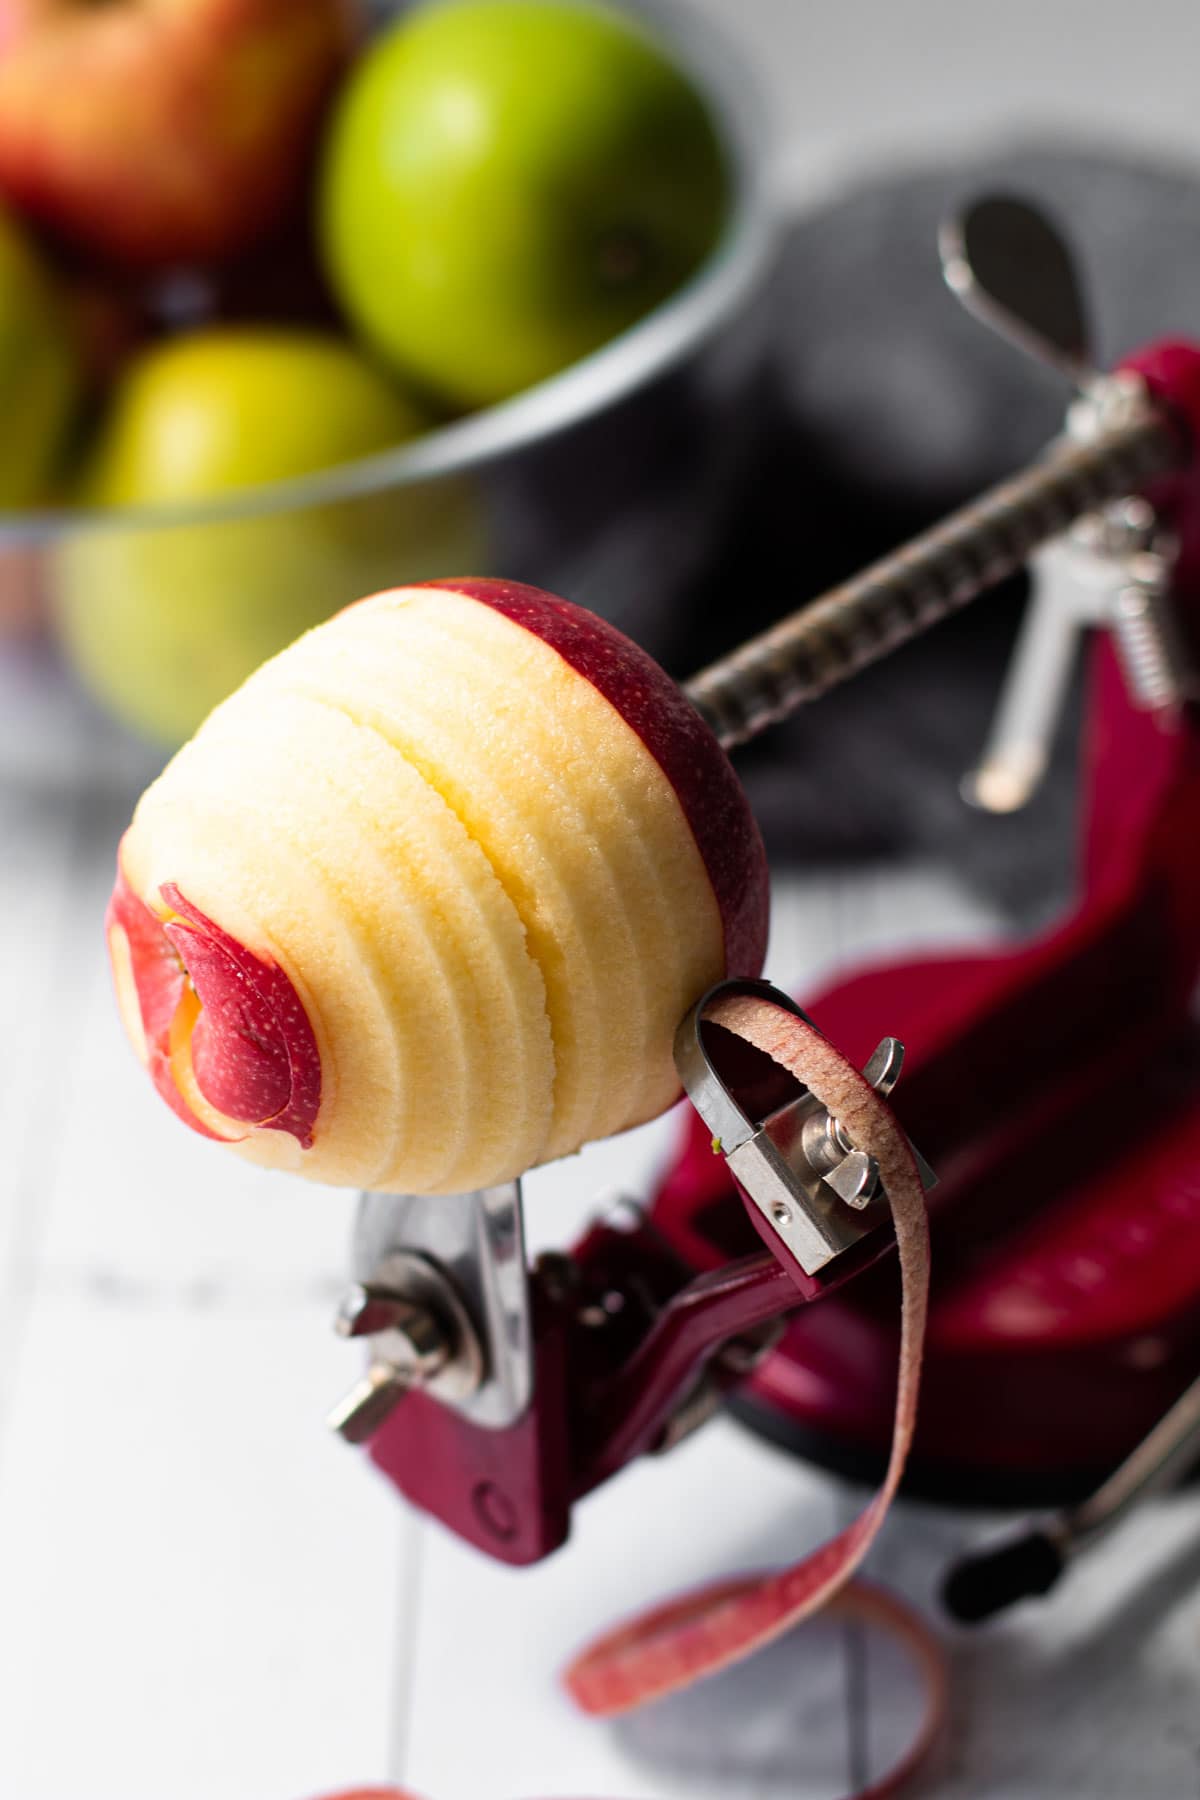
Best Apple Peeler
While some may not be bothered by peeling and slicing apples, I certainly am. I do not enjoy the task at all! So, years ago I purchased an inexpensive (affiliate link) apple peeler to make the job go by quickly. It has served me well for many years. Though it does take up space in your kitchen, I find it so worth it come the fall months when I'm often making apple recipes! And because this pie uses 5 and a half pounds of apples, this peeler will come in handy.
The only downside is that you can't control the size that the apples are sliced to. So if you needed your apples to be sliced a different width, you'd just use the peeling function, and slice them by hand.
What type of pan to use for Mile High Apple Pie
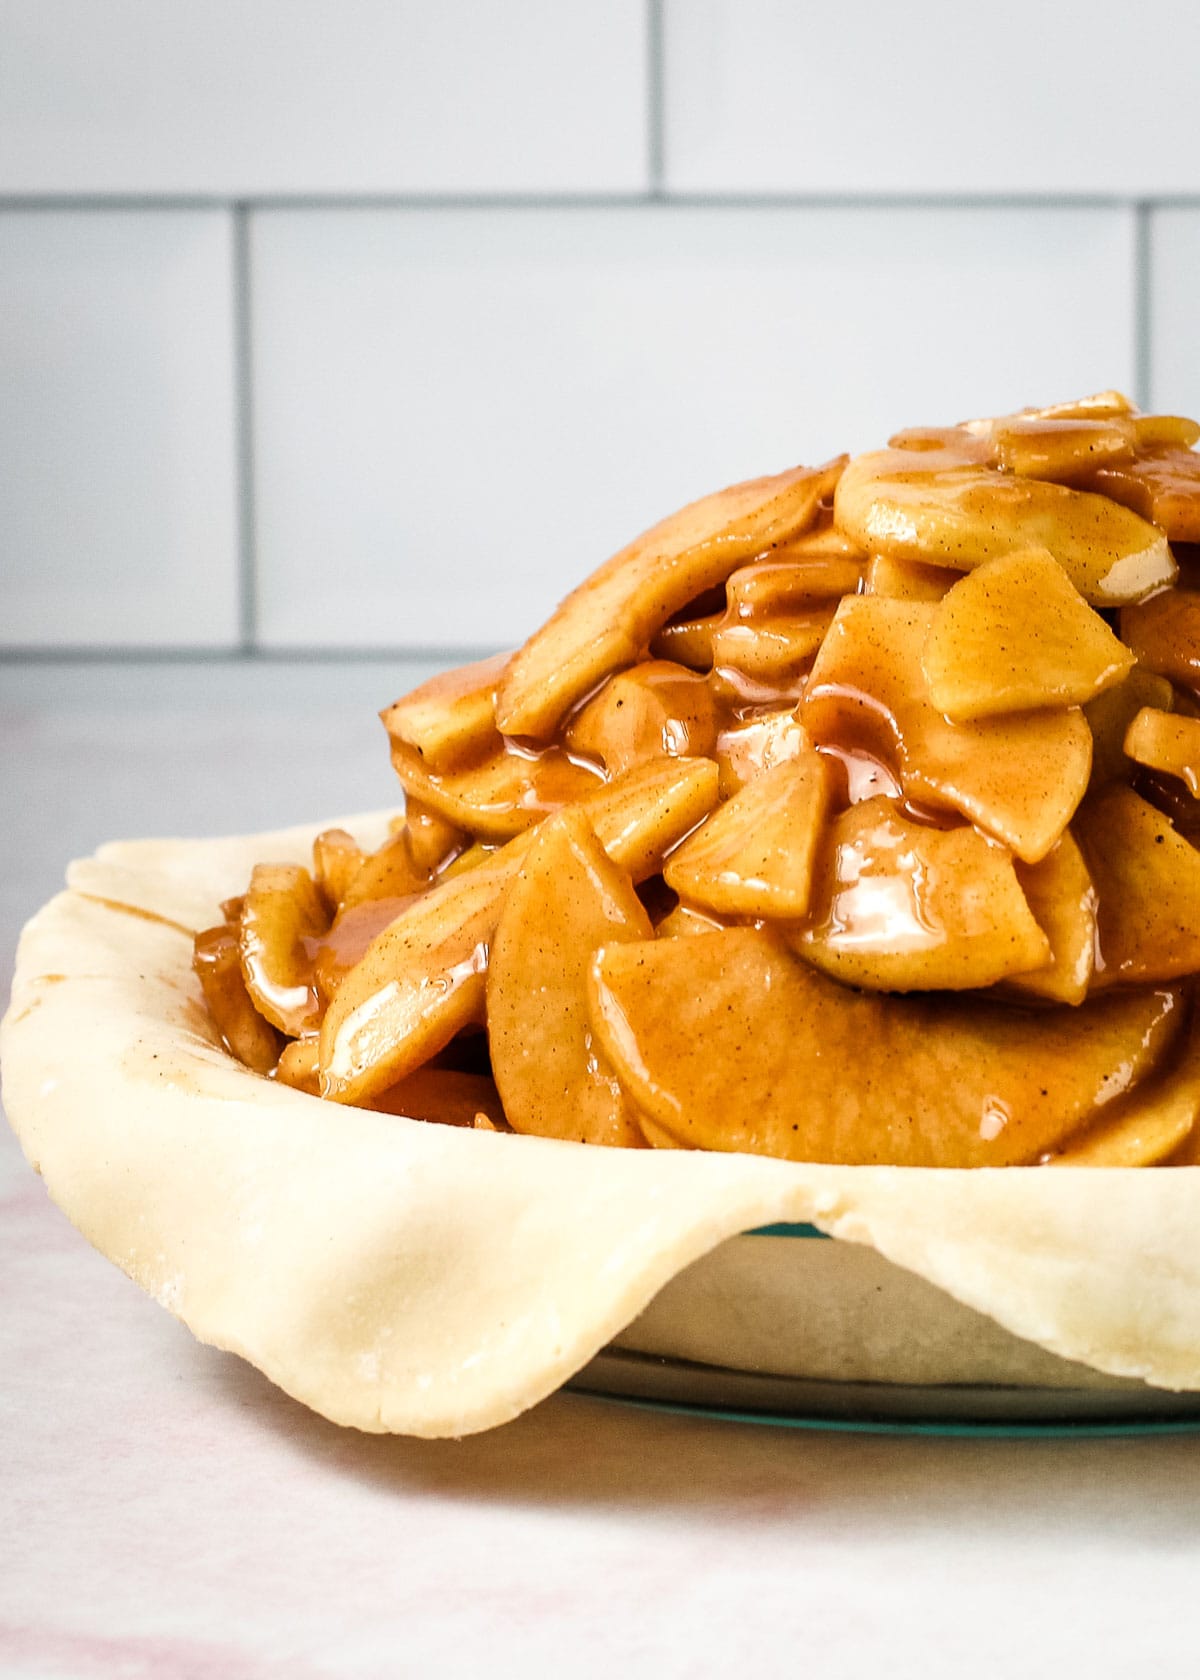
It's best to use a 9" deep dish ceramic pie plate for this pie, like this one or this one. While using a deep dish plate won't make for the tallest mile high apple pie, it will certainly make for a more sturdy apple pie. The first two times I tried fitting 5-½ pounds of cooked apples in a pie, strategically piled up nice and tall (like the above photo), the weight of the apples eventually broke the pastry apart and my crust edges fell off. While this isn't guaranteed to happen, you run more of a risk if you use a regular 9" pie plate. It's a better option, if possible, to use a deep dish ceramic plate which holds more of the apple filling inside of the walls of the pie plate, instead of just inside the walls of the pastry. Picture the pie plate as the armor to the pastry. Protect that pie!
If you don't have a deep dish pie plate, and you are planning to make this in a regular pie plate, don't skip the step of freezing the assembled pie for 30 minutes before baking.
Best Pie Apples
For a pie, you want to have an apple that can hold its shape, has a nuanced flavor, and a slight tartness to break up the sweetness of the sugar. Using a combination of apples is helpful because it introduces a few different types of flavors and textures to the pie. Gala and Granny Smith apples are both good choices for this deep dish apple pie for two reasons. Both apples hold their shape well after a cook on the stove top, and once again when baked in the oven.
Here are some additional options for baking apples:
- Cortland
- Yellow Delicious
- Braeburn
- Pink Lady
- Ginger Gold
- Jonagold
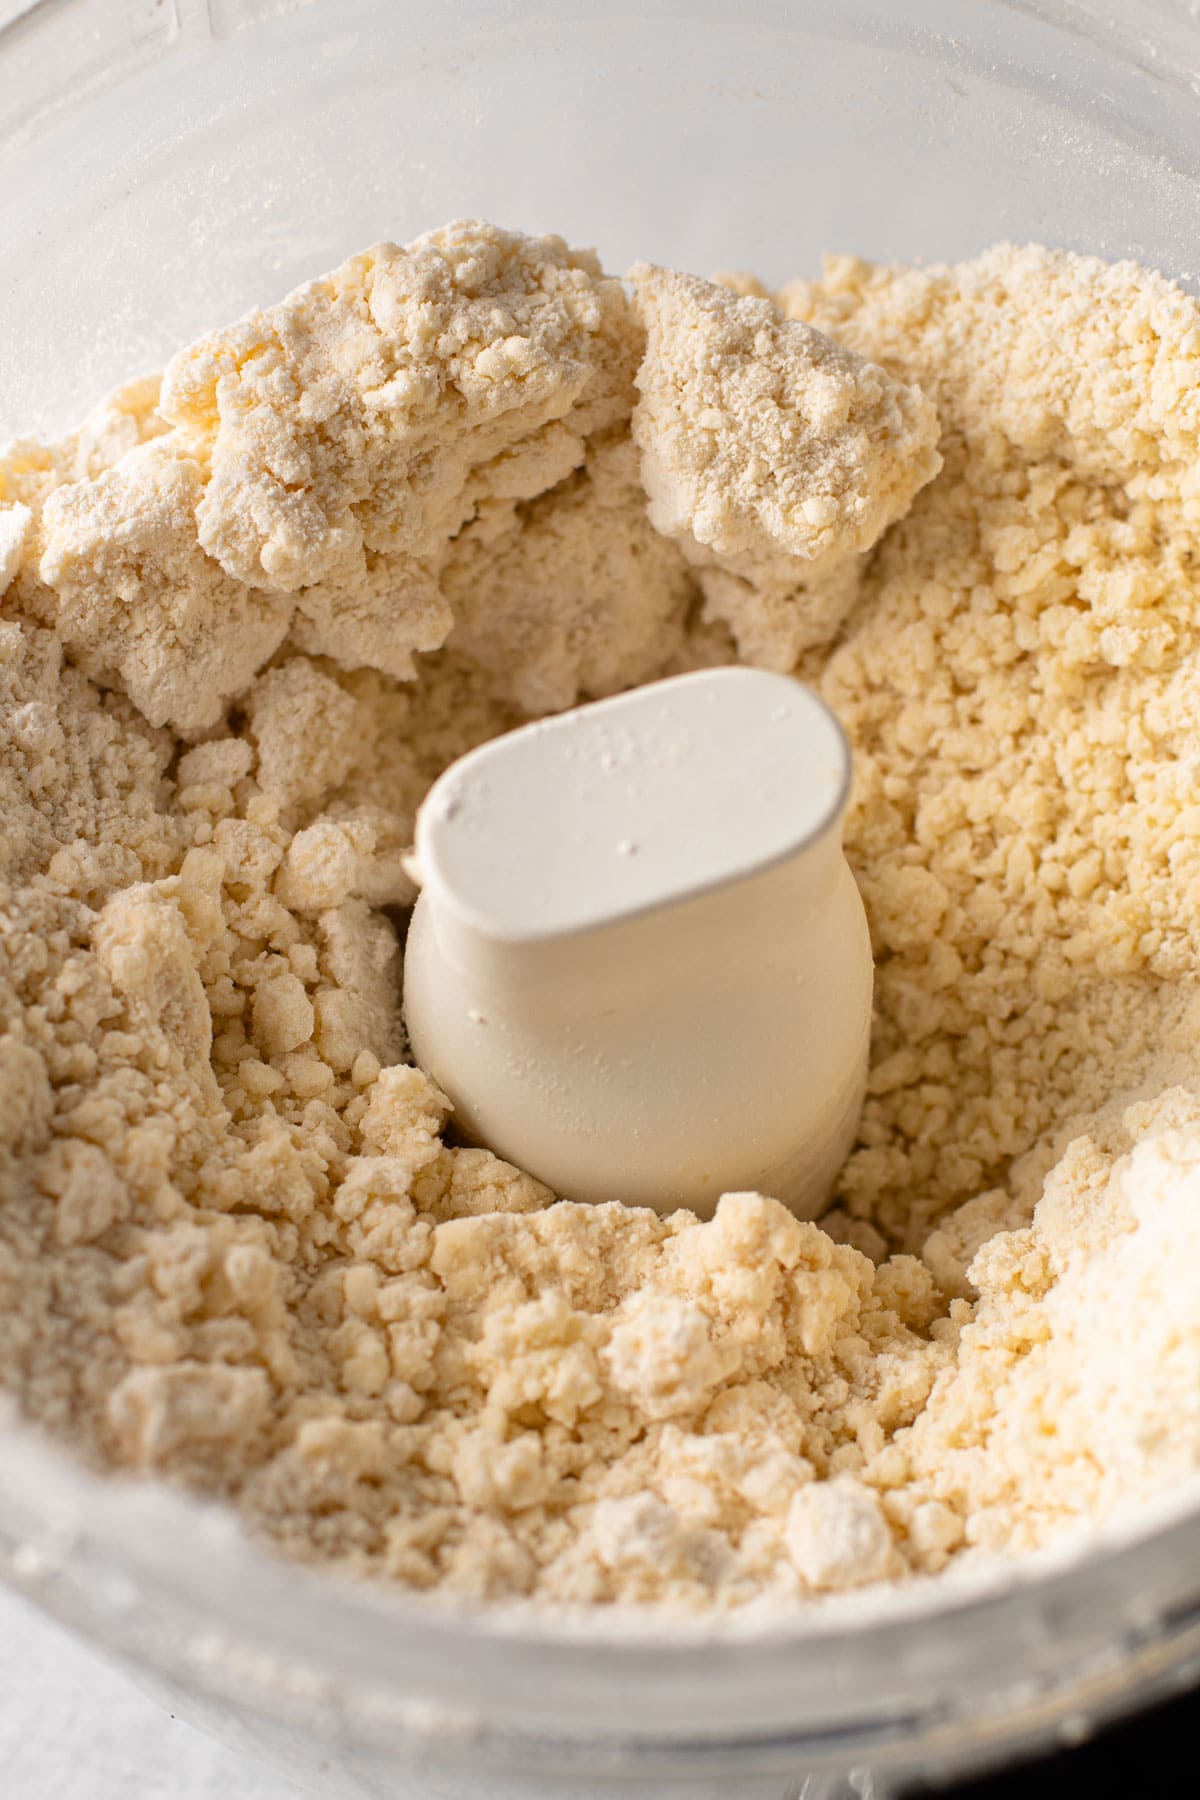
Tips for Making the Pie Dough
This pie is a double crust pie and will need two pie pastries. New to making pie crust? The recipe links to the Everyday Pie Basic Butter Crust and it is jam packed with tips. However, here is an overview.
- Let the dough rest. I never advise making dough the same day you plan to bake it. It gives the dough less time to hydrate, and makes it harder to roll out. However, in a pinch, if you aren't a pie crust novice, you can make it work.
- Weigh your ingredients! Always weigh your dry ingredients, especially when it comes to baking. Check out this post on using a kitchen scale if you are new to weighing ingredients. If you absolutely refuse to weigh them, I recommend for my recipes (which use a standard 120 grams of flour per cup) that you spoon in the flour into your measuring cup, and sweep away once it's filled. If you scoop and sweep, your cup of flour will have much more than mine does. This can mess with the recipe.
- Work quickly. Especially if your kitchen is hotter than 70 degrees. Melted butter is the enemy here. If the kitchen is hot, utilize the freezer or refrigerator through the dough-making process to ensure the butter doesn't turn soft.
- The bigger the butter chunks, the flakier your pie will be. If you love the look of super flaky dough, that almost looks like puff pastry, leave at least some of your butter chunks the size of a marble. Though there is a limit for how big to leave your butter pieces, so take care to only leave a few pieces the size of a marble.
What causes pie filling to separate from pie crust?
Apples have a ton of moisture. When the apples are cooked, they release their moisture and then shrink. When you bake an apple pie, the pastry will bake and set before the apples have cooked through, causing a large gap in between where the pastry baked at and where the apples end up reducing. Once you cut into the pie, you'll see a large gap in between the cooked filling and the set crust.
To avoid this, there are a few different things you can do. First, you can macerate the fruit before you begin to bake. Macerating the fruit in sugar helps draw out the moisture from the fruit, causing the fruit to soften and shrink. This step alone will drastically reduce any gap between the crust and the filling with the fruit. For this pie, you'll take it one step further and completely cook the apple pie filling before placing it in the pie dough.
Why Precooking Apple Pie Filling is Smart
Precooking the filling ensures that the apples are properly cooked, with the correct added thickener amount. This not only helps prevent any large gap between the crust and the filling, but it also reduces the actual baking time of the pie.
Without precooking the filling, it might take close to 1-½ to 2 hours to fully bake this apple pie to the correct temperature. By precooking the filling, you are making it so that the actual bake in the oven is only to cook the pie crust. Because the apples are already cooked, the only thing you need to be concerned with during the bake in the oven is that the top and the bottom crust are fully browned and baked.
Make Ahead Tips
As with most pies, there are a few steps you need to complete to get to the finished product. A lot of these components can be broken down into steps and done ahead of time. You can (and should) make the pie dough ahead of time. Gluten free? I suggest using this pie crust, here.
You can prepare the dough up to 2 days ahead, and it can be stored up to 3 months in the freezer. You can roll out the pastry up to 1 day ahead of time. Roll out the bottom crust and place it in a pie pan. Keep in the refrigerator, covered completely, until you are ready to make the pie. Keep the top pie crust flat, if possible, and completely covered if rolled out ahead of time.
You can make the apple filling up to 1 day ahead of time.
How to Freeze this Pie Unbaked
Fruit pies are perfect to prepare ahead of time in totality, up until the point of baking. To freeze this pie, place the pie on a baking sheet pan and slide the sheet pan into the freezer. Once frozen (at least 12 hours), wrap the whole pie in plastic wrap very tightly (twice for good measure), and then cover with aluminum foil. Don’t forget to label it and date it!
It's best to cook any frozen pie within 3 months. The longer the pie is stored in the freezer, the less pronounced the flavor is. However, you can wait as long as about 1 year, if preserved properly (as mentioned above). You can absolutely bake a fruit pie directly from the freezer. In my opinion, doing this is EVEN BETTER than a fruit pie baked from fresh. The logic behind this notion is the crust has a chance to cook first, before the filling does. This method will ensure you have a beautifully crisp crust and perfectly cooked filling.
Storing Deep Dish Apple Pie
An apple pie can be baked up to 1 day ahead of time and kept covered, at room temperature. If storing longer than 1 day, store in the refrigerator. You can warm up this pie at 350ºF, until the pastry is crispy and a thin knife inserted in the middle comes out slightly warm, or until the pie registers about 125ºF with an instant read thermometer.
Serve as is, a la mode with ice cream, or with whipped cream.
More Apple Pie Recipes:
I am so honored when you make a recipe from my site! If you make this Mile-High Apple Pie, please leave a comment and a star rating with your experience! If you have any questions about this recipe, feel free to comment here, too!
Full Recipe
Mile-High Apple Pie
This is a deep dish Apple Pie, heavy on the apples for sure. It's best to bake this pie in a deep dish 9" pie plate, preferably a ceramic pie plate (the text above gives recommendations). While your pie won't look as tall as it would in a regular 9" pie plate, the deep dish pie plate will help ensure your pastry holds all that apple in without the weight of them breaking the seal during baking. Make sure your apples are completely cooled before filling your pie, and if possible, let the assembled pie chill in the freezer for 30 minutes or so before baking. The apples are basically fully cooked before being placed in the unbaked pastry, so your only job in terms of baking the pie is to ensure the bottom and top crusts are properly cooked. Cooking the pie on the lowest rack will help brown the bottom crust. Just make sure you don't burn your crust edges by covering them with foil after the first 20 minutes or so of baking time. If you find your top crust isn't as brown as you'd like after about an hour of baking you can move the pie to the upper part of the oven. The heat will reflect off the top of the oven and brown the top crust more quickly.
- Prep Time: 00:40
- Cook Time: 01:10
- Total Time: 1 hour 50 minutes
- Yield: 10-12 servings
- Category: Sweet Pie
- Method: Bake
Ingredients
For Pastry:
- 1 batch Butter Pie Crust (makes 2 pie crusts, you'll need both)
For Filling:
- 5-½ pounds baking apples, peeled, cored and sliced thinly (about 10-12 large apples)
- 1 tablespoon lemon juice
- 1 teaspoon lemon zest
- ½ cup (110 grams) packed light brown sugar
- ½ cup (100 grams) granulated sugar
- 1-½ teaspoon ground cinnamon
- 1 teaspoon salt
- ¼ teaspoon grated nutmeg
- 3 tablespoons (21 grams) cornstarch (or ¼ cup flour)
- ½ cup + 2 tablespoon fresh apple cider (see note)
- 2 teaspoon vanilla extract
- 2 tablespoons unsalted butter
For Egg-wash:
- 1 large egg
- 1 teaspoon water
- Coarse sugar or raw sugar
Instructions
- Prepare the pastry, let rest overnight.
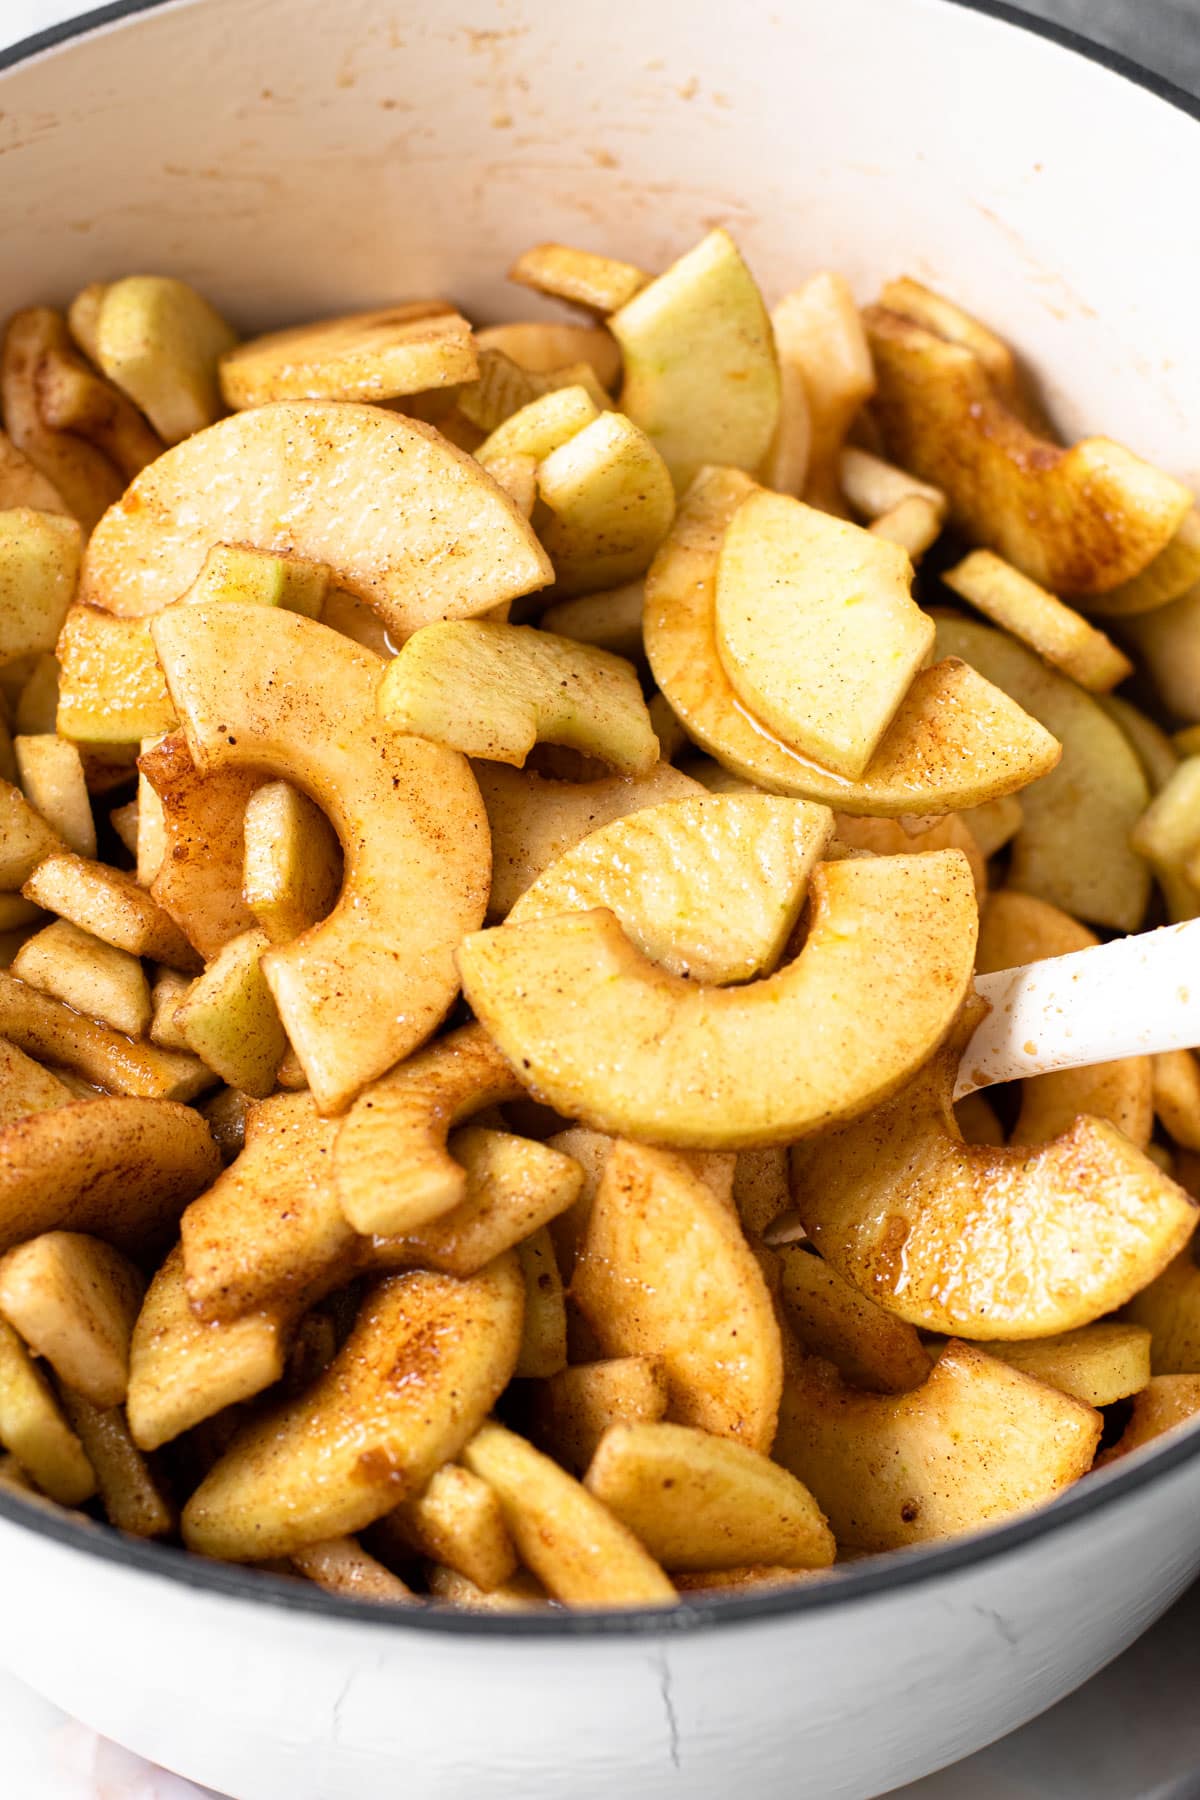
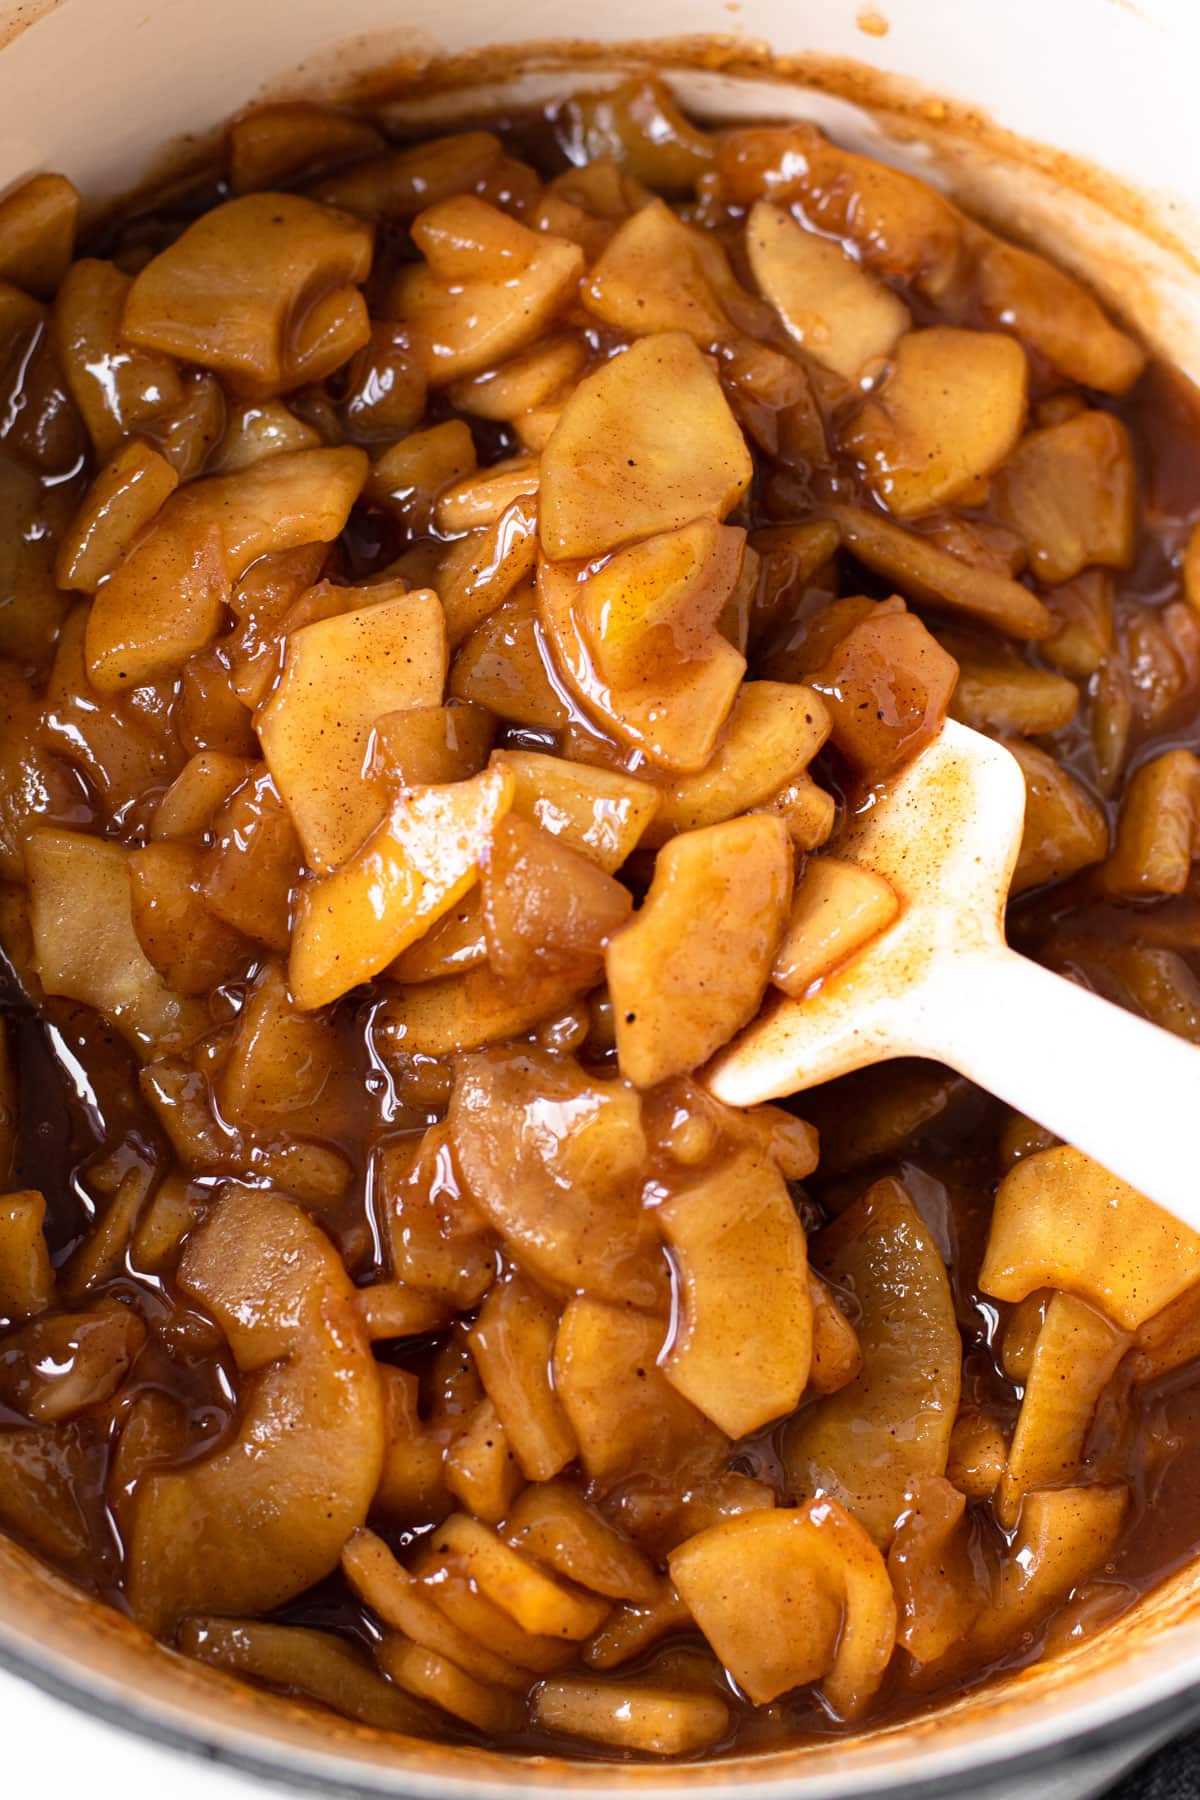
Cook the Apple Filling:
- Add apples, lemon juice and zest, brown sugar, granulated sugar, cinnamon, salt, nutmeg and ½ cup apple cider to a large heavy-bottomed pot. Combine and let macerate at room temperature for at least 30 minutes or up to 1 hour.
- Stir the apples one more time then cover the pot, turn the heat to medium-high and begin to cook the apples. Cook for 5 minutes and then stir the apples to make sure the apples on the top are now on the bottom. Return the cover to the pot and cook for 5 more minutes.
- Create a slurry: Place cornstarch in a bowl and add in remaining 2 tablespoons apple cider and whisk until completely combined.
- Remove the lid from the pot, while mixing add the cornstarch slurry to the apples and stir until dissolved. Continue cooking until the mixture is thickened, about 3 minutes.
- Remove from heat and stir in the butter and vanilla. Place apples in a shallow dish and let apples cool completely to room temperature, or overnight in the refrigerator.
To Assemble and Bake:
- Preheat oven to 425ºF and place an oven rack in the lower part of the oven when ready to bake. Roll out the pastry: Roll out 2 pie pastry disks to an 13″ circle. Fit 1 pastry in a deep dish ceramic 9” pie plate, making sure to press the pastry into the sides and the bottom.
- Place the completely cooled apple filling inside of the pie, taking care to layer the apples, leaving very little space in between the apple pieces. Pour any remaining apple juices inside of the pie pastry. Top with rolled out pie dough, seal and crimp edges.
- If possible, place entire pie in freezer for 30 minutes to ensure very chilled pastry.
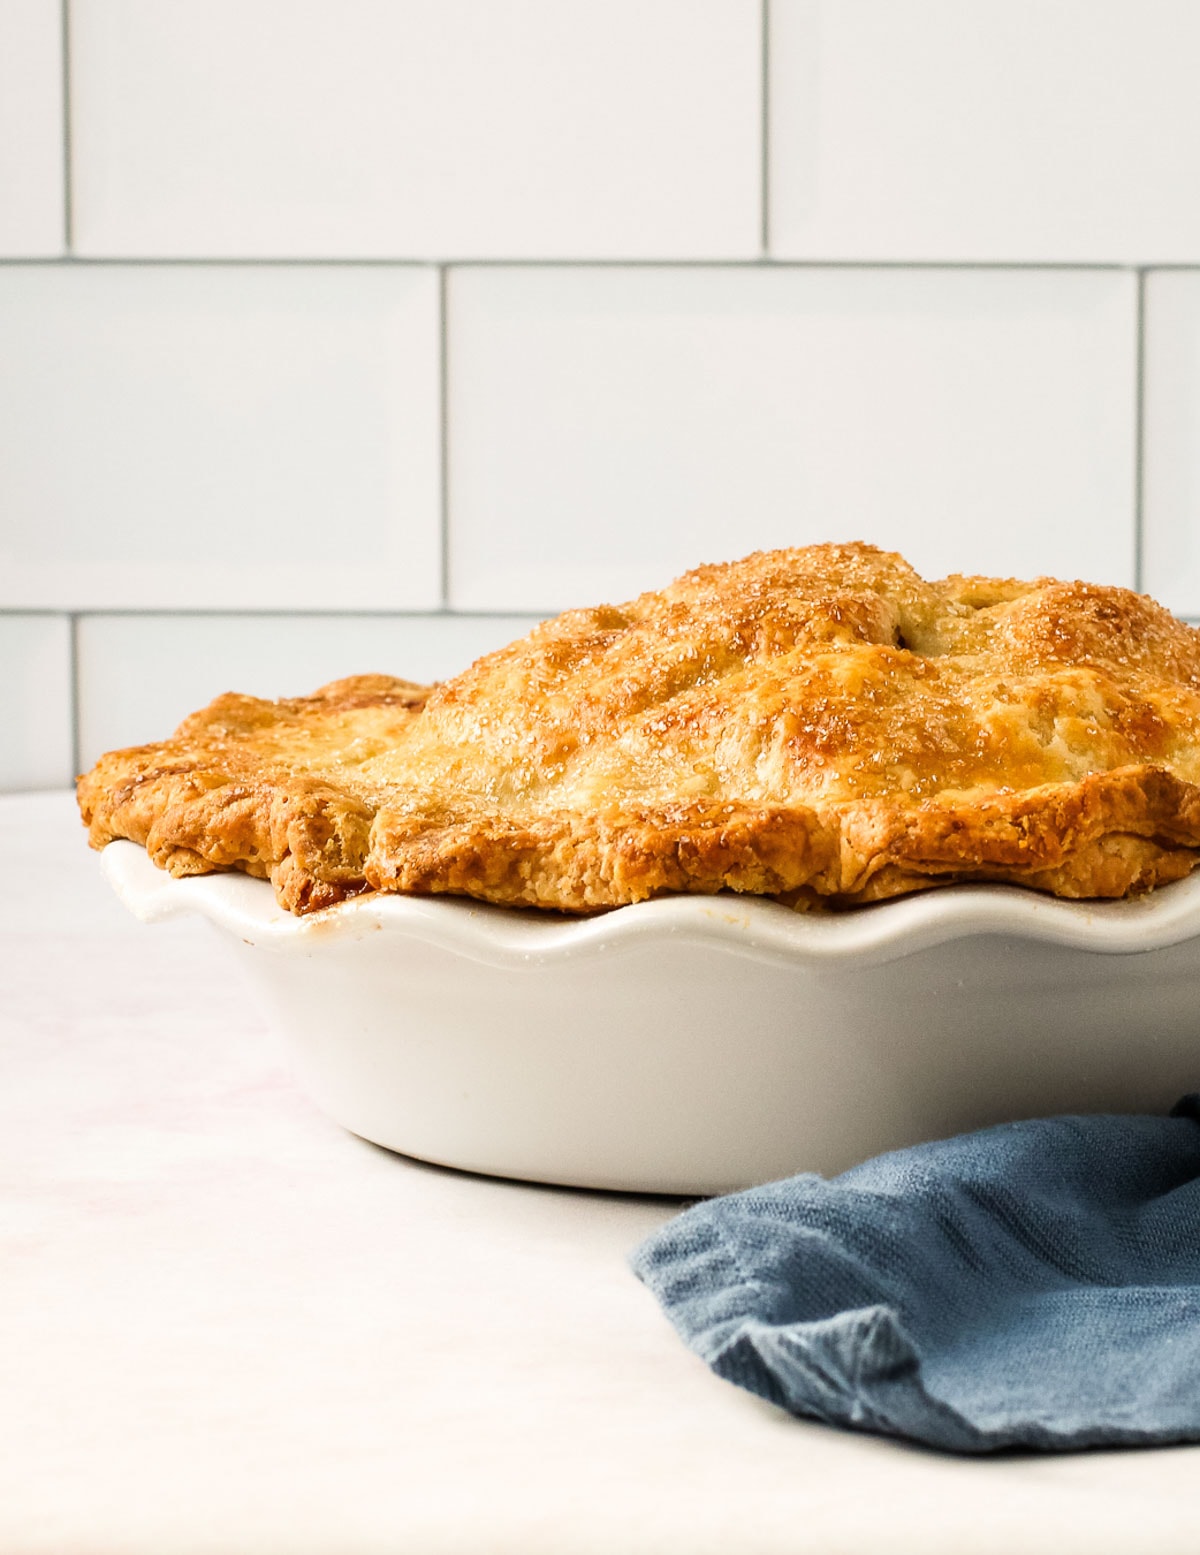
- Make egg wash by whisking egg and water. Brush on the top of pie and sprinkle with coarse sugar, if desired. Pierce the pie with knife to create 4 steam vents.
- Bake in the preheated oven on the lowest rack for 20 minutes. Cover the edges of the crust with aluminum foil, then return to the oven and continue to bake for 30 to 40 minutes or until crust is golden brown.
- Let rest for at least 6 hours before serving.
Notes
Gala and Granny Smiths apples are the perfect combination of apples to use for this pie.
Do not mistake fresh apple cider (which is unfiltered apple juice) for apple cider vinegar.
This recipe uses a lot of apples. You might find it difficult to evenly combine the apples in the pot so go ahead and get in there with your hands when you are mixing them all up together.
Have a question or looking for tips? The text written above the recipe is always a great first place to start! There are always loads of explanations, tips and technical advice shared before the recipe.
Some of the links on this page may be affiliate links. Everyday Pie is a participant in the Amazon Associates Program. As an Amazon Associate I earn from qualifying purchases, at no extra cost to you.
Amie
Hello! I plan on making this pie recipe with your crust recipe for this upcoming Thanksgiving. I planned on making it with a lattice crust top. Do you think it's too high with apples to make that work? Too top heavy already?
Kelli Avila
I think you can make a lattice crust work here. Maybe not too thin though, make the lattice strips wide so they are sturdy.
Alexandre
Hi! Doing this recipe now. Looking good.
Can you tell me how you weighed your apples? I used about 20-30 apples, medium size, and got 3 pounds of slices. And that looks like way more than will fit in my 9" pie.
Did you weigh your apples before cutting them?
Kelli Avila
The apples are weighed before they are sliced. Here is what the recipe says: 5-½ pounds baking apples, peeled, cored and sliced thinly (about 10-12 large apples). The comma in an ingredient list indicates the sequence of actions. Instructions following the comma should be carried out after measuring the whole ingredient. This ensures accurate measurements and prevents errors in preparation.
For example: “1 pound apples, peeled, cored and sliced” means that the apples should be weighed to equal 1 pound first, then peeled, then cored, then sliced “1 pound peeled, cored and sliced apples”, by contrast, means the apples should be peeled, cored, and sliced first, then weighed to equal 1 pound.
The difference in volume of these two different preparations can be great enough to change the outcome of a recipe.
Antoinette Grippo
I have made this pie 30 times always comes out perfect.
I use any apples I have on hand, works with all.
Thank you
Patti Mondschein
Sorry. I just reread your notes at bottom of the page and see that it's cider. Thank you
Patti Mondschein
Do I use fresh apple cider or apple cider vinegar. I'm confused about the footnote on this
James Croft
I was responsible for my daughter’s sweet table at her wedding. Among the many desserts I made, she wanted the center piece to be a perfect apple pie that they could cut and represent it as their very own personalized “wedding cake”.
I came across your recipe and decided to give it a go. The only thing I changed was the amount of apples (I went with 4 1/2 lbs), as I am not as brave as you. I also used the scrap dough to put their names on it.
Let me tell you, this pie was an absolute hit! I was one proud Papa that night! I have you to thank for such a success.
Thanks VERY much, James.
Elizabeth A McDonald
Hi
I used about 12 large apples but I think thats only about 4 lbs of apples according to internet. Should I have used more apples? I'm worried pie will be too sweet tho I added a bit more of lemon juice to help that.
Kelli Avila
Hi Elizabeth--I always weigh out my apples, and that is reflected in the instructions on my recipes. Apple size can really vary. How did your pie end up coming out?
Frances Chevalier
I have never see such a wonderful compilation of recipes and tricks of the trade as this. Absolutely amazing! I applaud your commitment to your trade. You could sell this information but you SHARE IT. Very impressive.
Kelli Avila
Thank you for the kind words!
Joy
In the first informal ingredient list you list "oats", but I do not see them used in the recipe?
Kelli Avila
Hi Joy! Thanks for catching that error, it's updated!
Elly McCue
Will this recipe work with pyrex 9.5 inch pie plate?
Thanks!
Kelli Avila
Is it a deep dish?
Eileen Godfrey
I cant wait to try this!
Theresa
3 questions...and I am sorry if they were already answered in the comments.
1. How much does this recipe make? Quart?
2. By how much do you reduce a pie's baking time if using filling?
3. How full do you fill the pie with the filling?
Thanks!
Kelli Avila
Hi Theresa. Are these questions in regards to the Apple Pie Filling recipe? As it shows the questions are in regards to Mile High Apple Pie. The apple pie filling recipe makes a little over a quart, or enough to make 1 pie. If you are using a precooked filling, you can reduce the baking time about 10-15 minutes, though you want to make sure to bake it at 400 or 425 on the bottom rack until the crust is golden...usually about 40-50 minutes.
Cindy
New favorite apple pie recipe! I thought the apples might get too mushy, but they turned out perfect! Great flavor and love how many apples are packed into each pie slice.
Michael
Best instructions for baking a pie from frozen! I was always so scared to do this, but loved the detailed instructions! Thank you!!
Stephanie
Made this for Xmas last year and it was a hit with everyone! I made a cinnamon roll crust (based on one of Kelli's insta posts before she had the recipe up) and it was to die for. Such a great combo. Can't wait to actually try her cinnamon roll apple pie recipe!
Kelli Avila
I remember that photo last year! It looked amazing!!
Annie
Just a question about freezing entire pies beforehand... do you still bake at 425? And how do you tell when it’s done? I would likely just go by sight on the crust and take an internal temp. Any tips there?
Kelli Avila
Hi Annie! Yes, still bake at the same temperature for frozen pies. Just let the pie sit out at room temperature before baking until the dough starts to feel tacky, about 10-15 minutes. For the mile-high apple pie, you basically just want to make sure the crust is completely cooked. Look for the crispness and light browning throughout, since the filling is 100 percent cooked beforehand. Generally speaking baking from frozen takes about 10-15 minutes longer than from fresh, though that depends on how cold your freezer is. You want that internal temperature of this one to be at least 160 degrees. For other pies that are baked from from frozen but do not have the precooked filling, you need the temperature to come to at least 200 degrees.
Nina
I forgot to rate this post with my comment, 10 stars it deserves!
Nina
Kelli,
You have given me all the tips I’ve been needing to correct so many mistakes I’ve had in my apple pies! I stopped making them because of the huge gap between the filling and crust I always had. Can’t wait to try it!
Nina