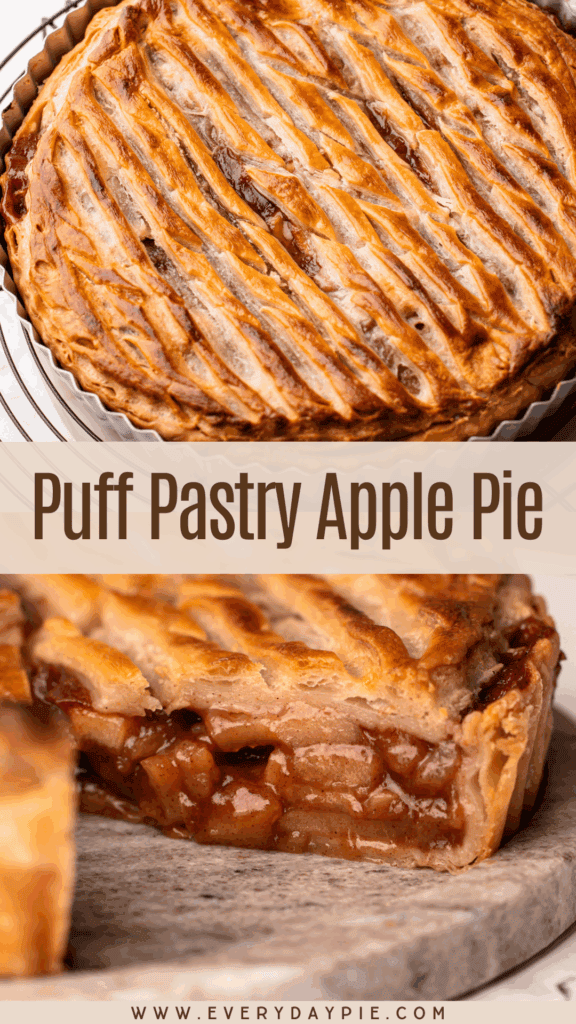
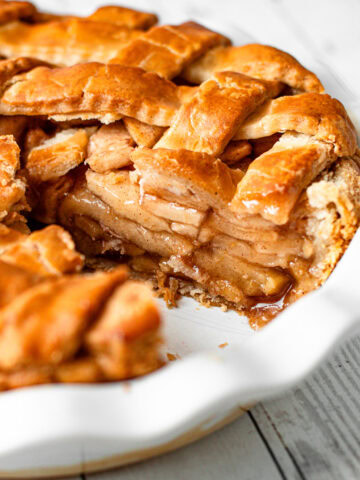
This easy Apple Pie made with puff pastry is a beginner-friendly recipe that uses store-bought pastry and a homemade, pre-cooked filling. It's easy to assemble and bakes perfectly every time.
Want to save this recipe?
Enter your email & I'll send it to your inbox. Plus, get weekly updates from me!
Apple pie is so familiar and well-loved that it is often the first recipe a new pie baker tries. It is just apples and a crust...what can be so hard, right? But what a new pie maker might not realize is that apple pie is actually one of the more difficult pies to get right. It took me many years to learn how to bake a really good one, and even more time after that to develop my Ultimate Apple Pie recipe. That recipe is the best-tasting apple pie on my website, but it is not an easy recipe, as it involves many steps and more intricate techniques.
But what if there were a really good-tasting, beautiful apple pie that felt more approachable to make? That is what this Puff Pastry Apple Pie is all about. This recipe simplifies the process in a few key ways. Instead of traditional pie dough, it uses store-bought puff pastry, which is generally reliable and straightforward to bake. The apple filling is cooked ahead of time, so it is already soft and thickened before it goes into the oven, removing much of the guesswork around the baking process. The pie is baked in a 9-inch tart pan rather than a standard pie plate, which makes it smaller and, in many ways, easier to handle, and makes it more likely to bake up into something beautiful, so there isn't much fussing with the design. Together, these choices create an apple pie that feels approachable to make but still delivers the familiar textures and flavors people expect.
Jump to:
What Kind of Apples to Use
For just about any apple dessert, you want to use an apple that can hold its shape, has a nuanced flavor, and a slight tartness to break up the sweetness of the sugar. My two favorite apples to use for baking are Gala and Granny Smith. Check out this guide to baking apples if you are looking for further information on choosing the right type of apple for you.
Why the Filling Is Pre-Cooked
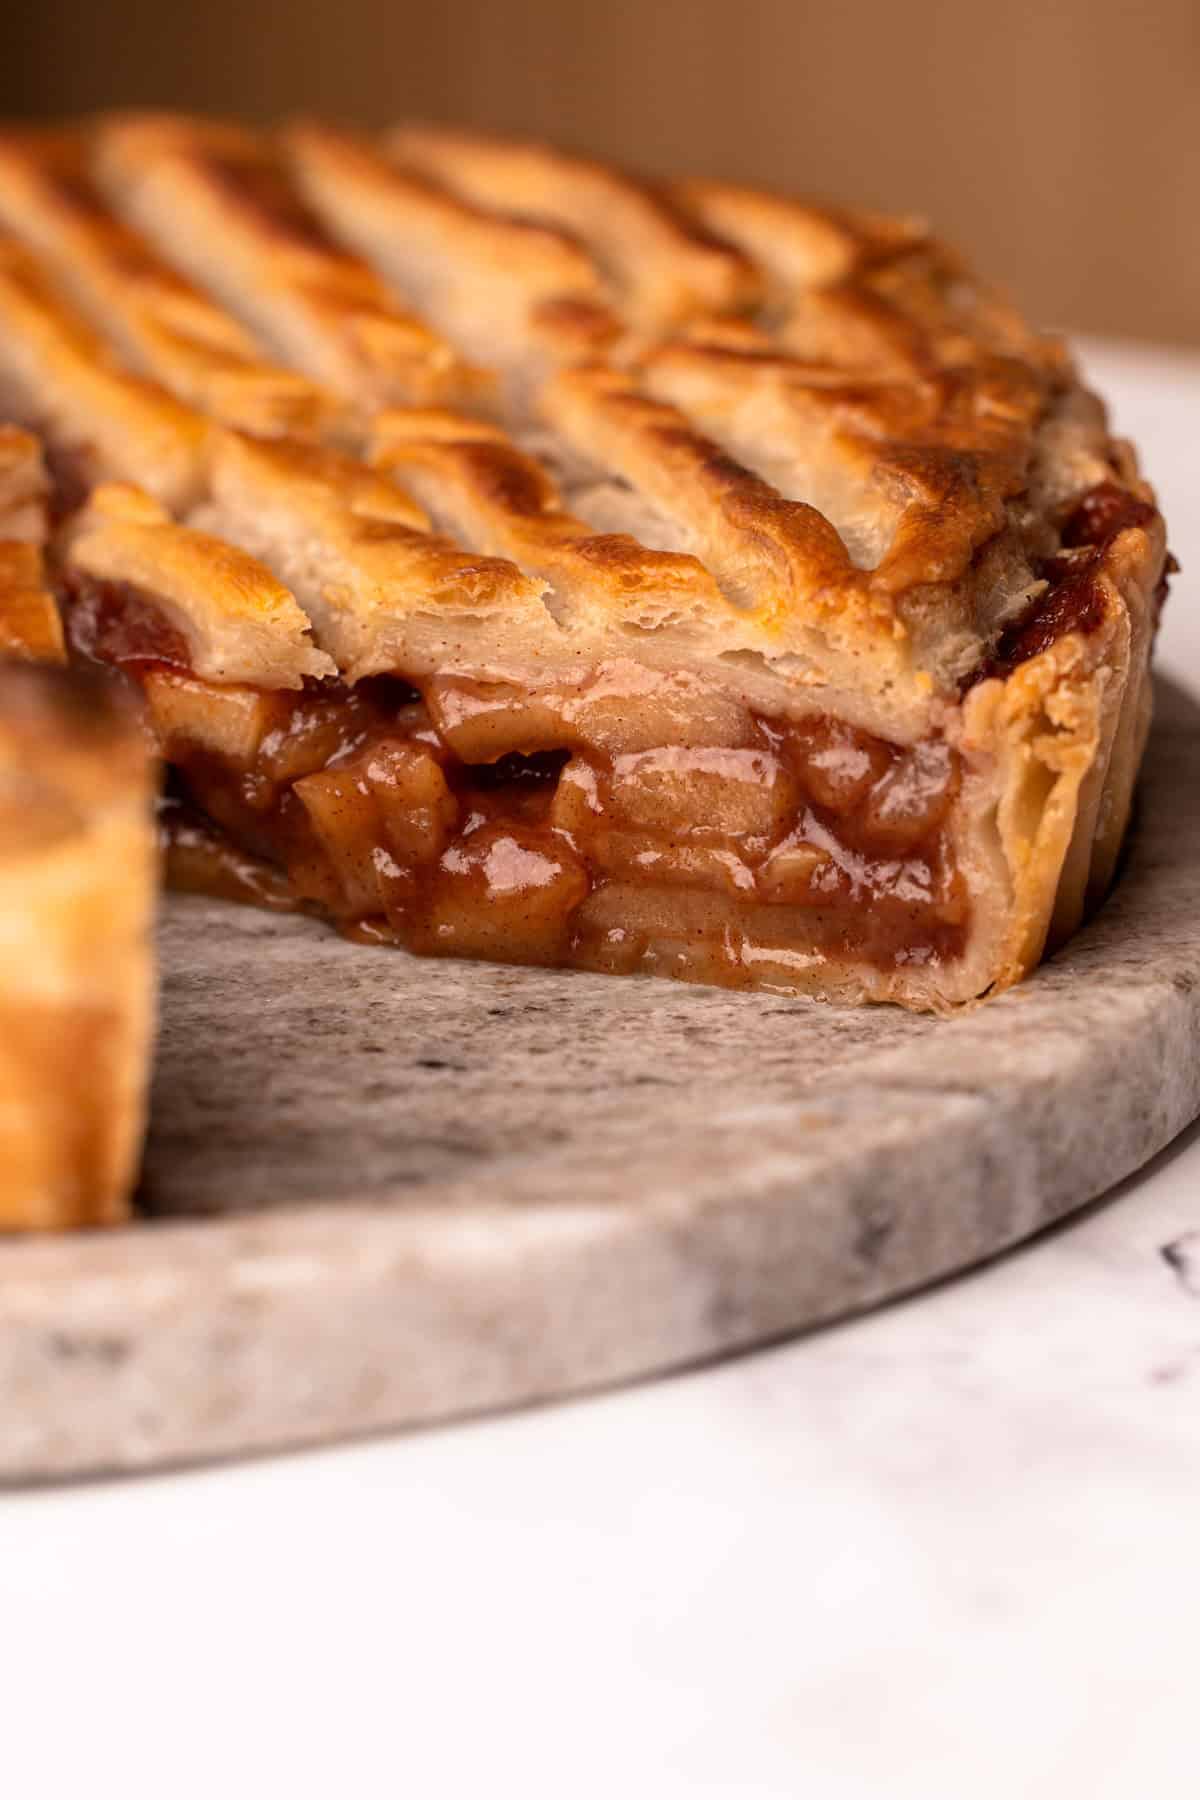
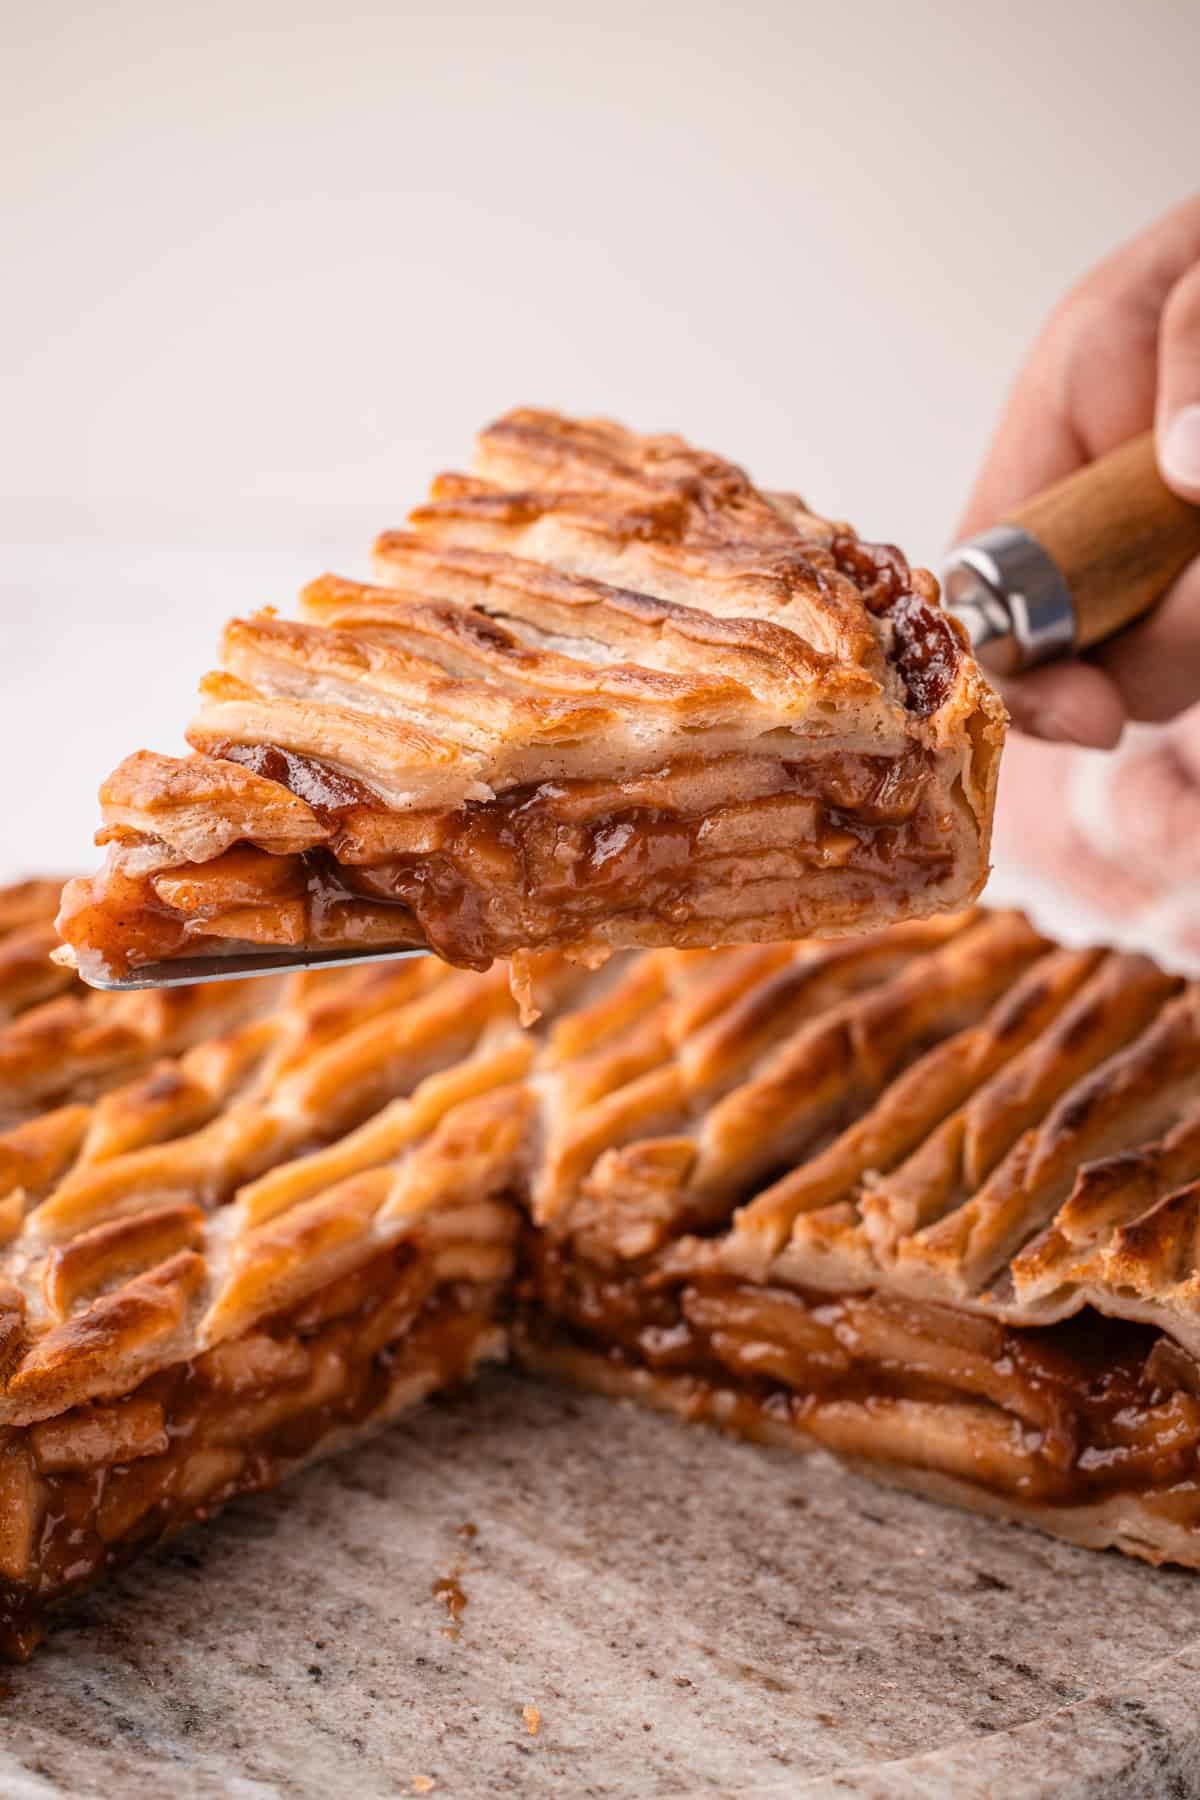
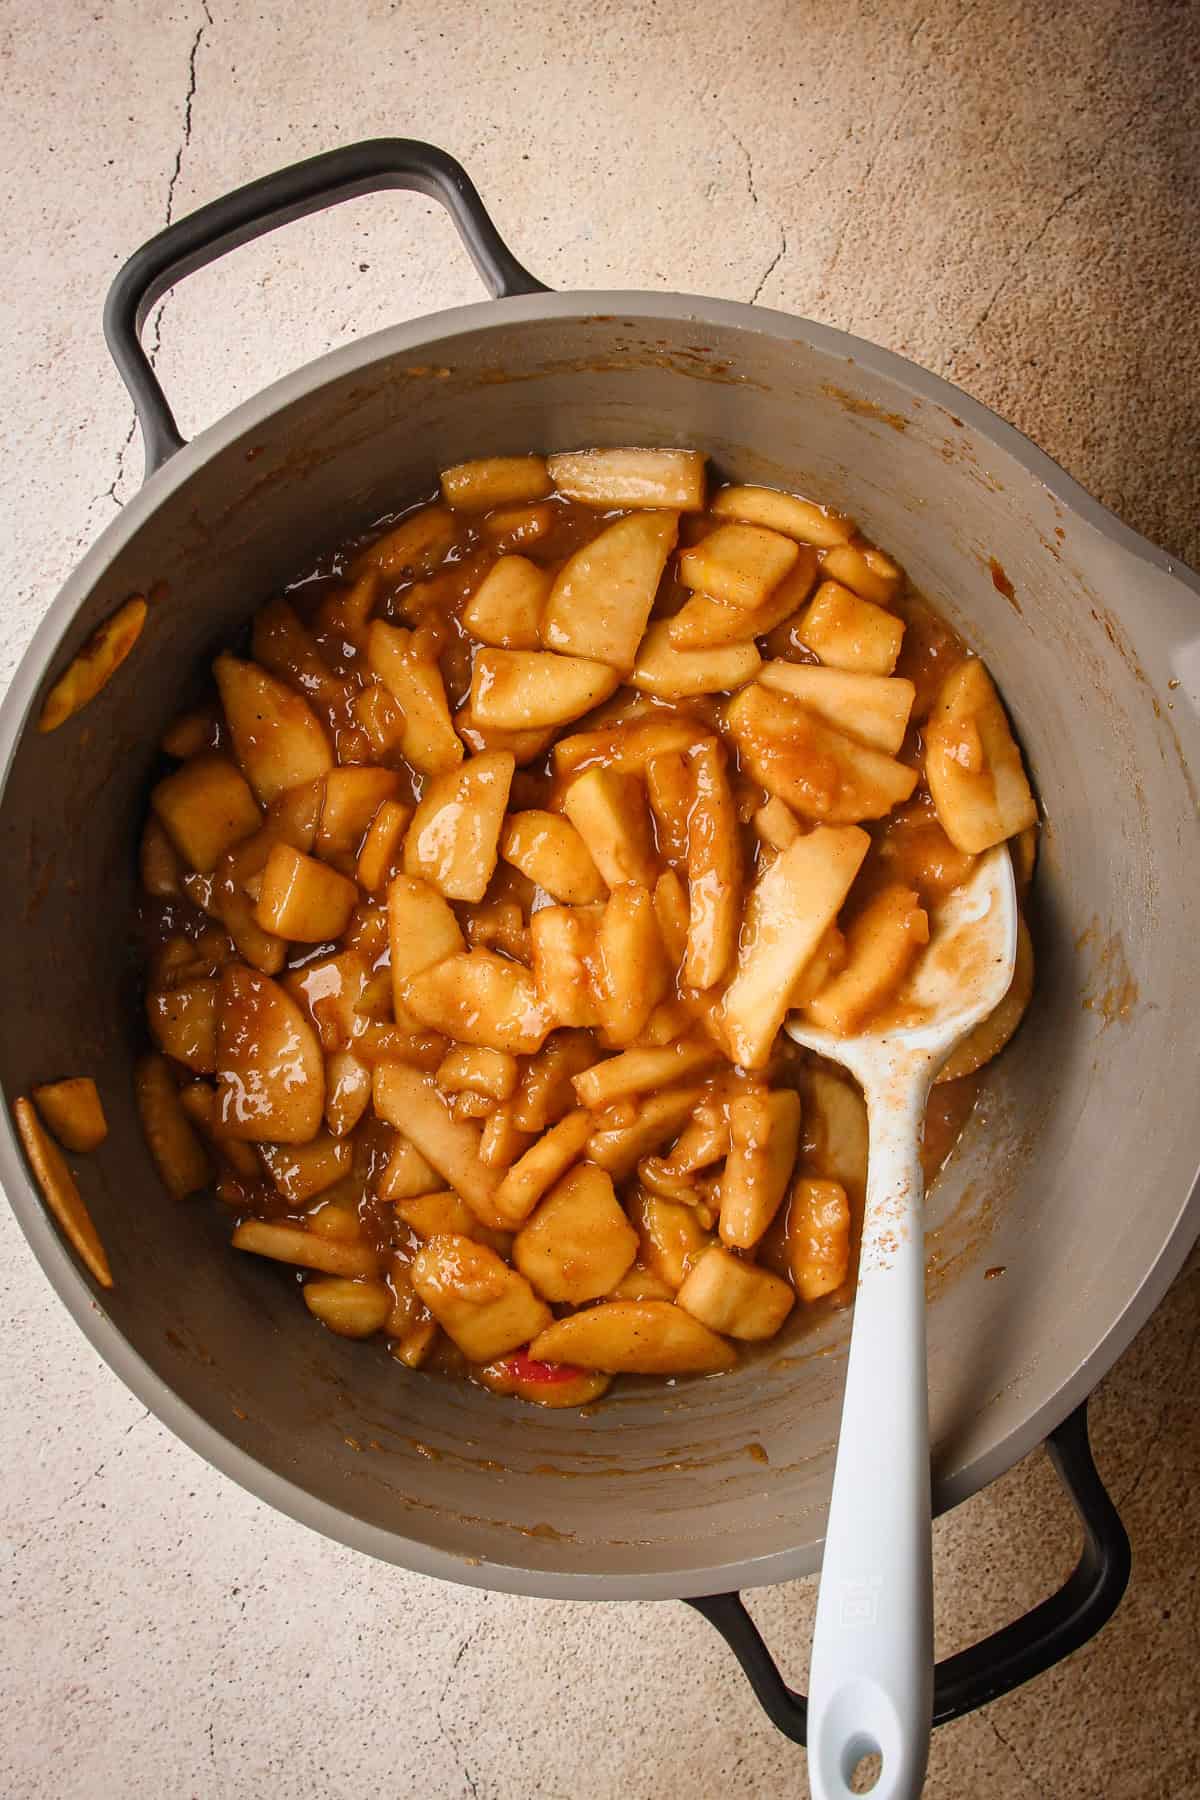
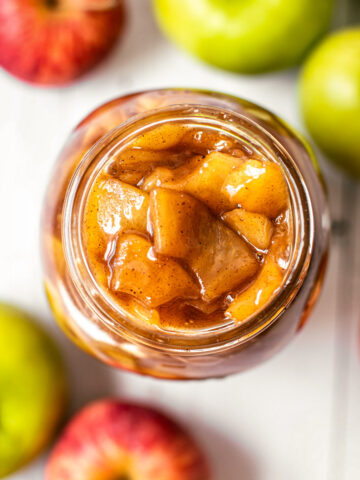
Apple pie fillings are typically made one of two ways: some recipes add the apples to the pastry raw, while others cook the filling ahead of time. Both approaches can work, but they behave differently in the oven. In this recipe, the apple filling is cooked before baking. Pre-cooking removes much of the guesswork, since the apples are already softened and the juices thickened before the pie goes into the oven. This shortens the bake time and reduces the risk of the crust pulling away from the filling as the apples shrink.
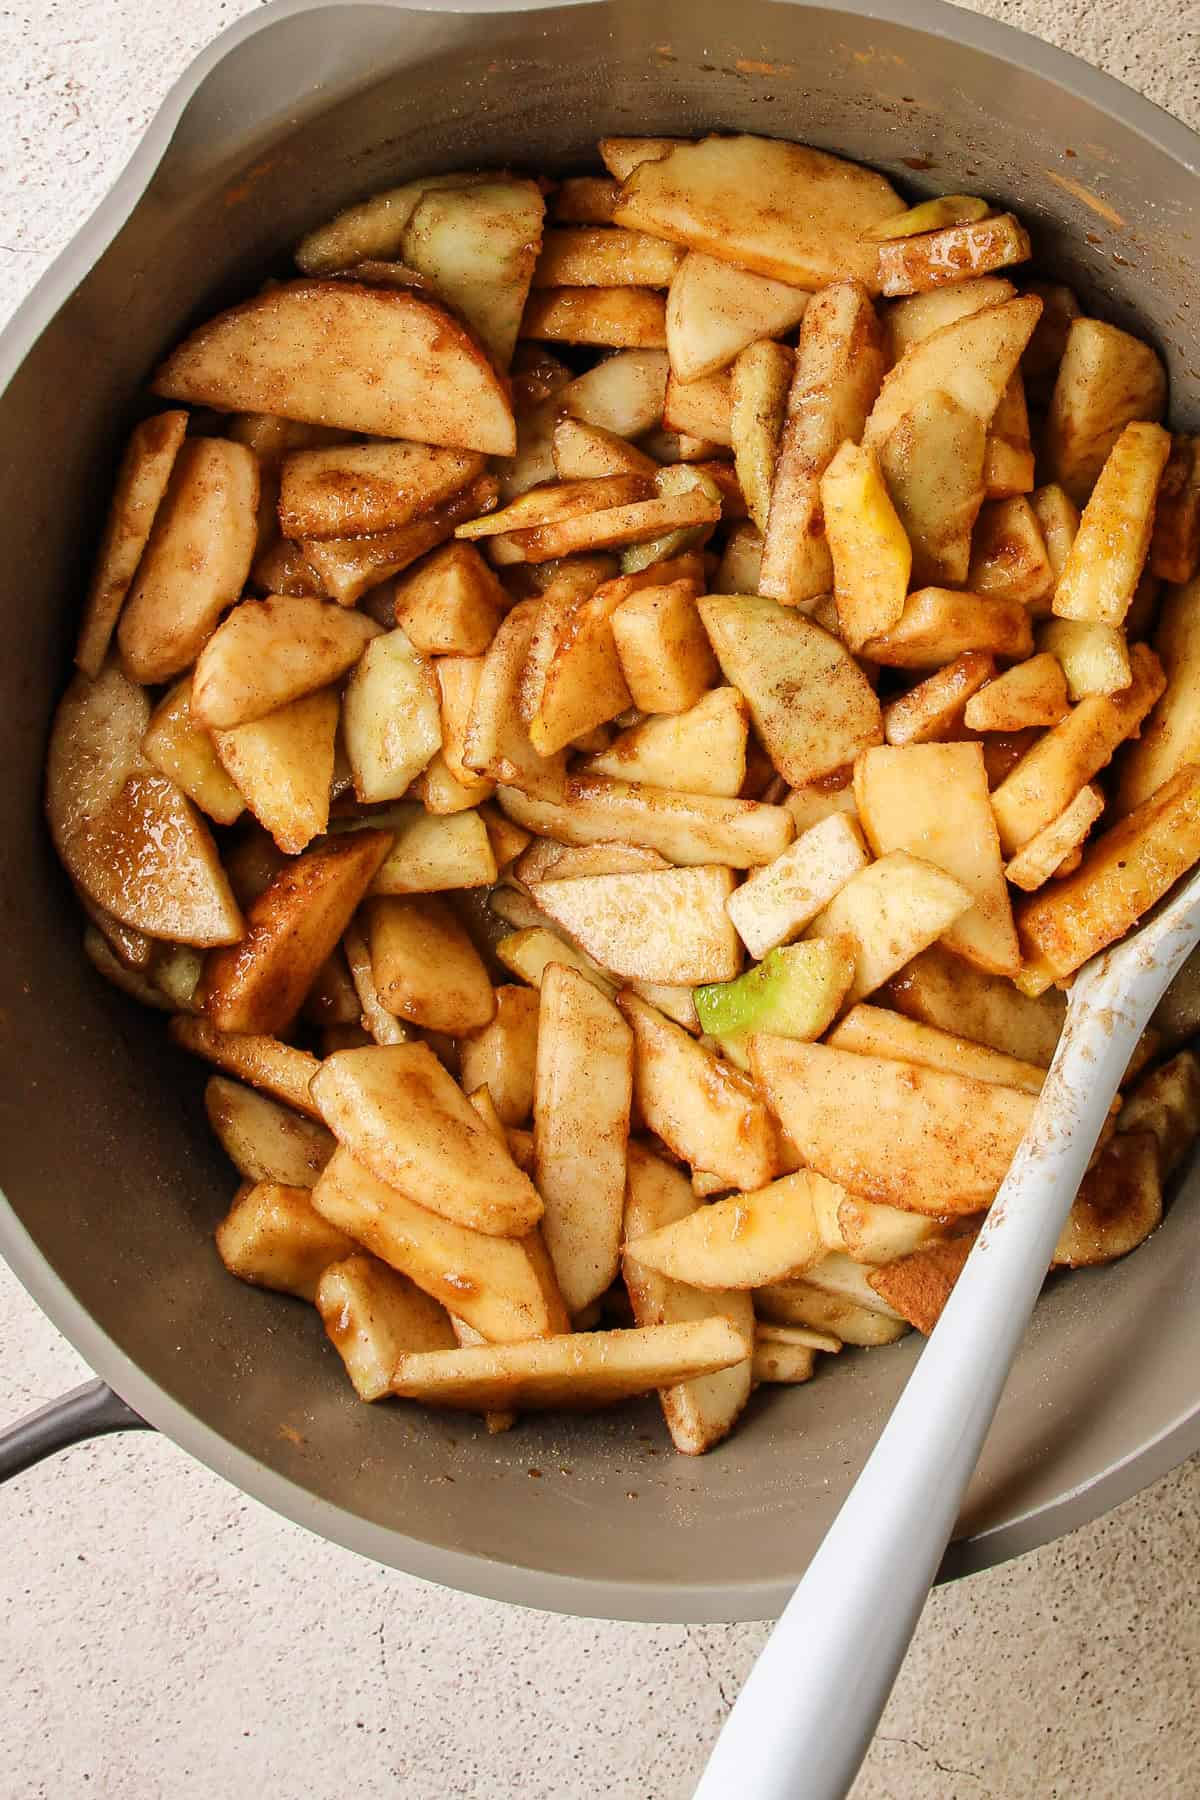
The filling itself is simple to make. The apples are peeled and sliced, cooked on the stove until tender, and thickened with a cornstarch slurry before being added to the pastry.
Getting the Puff Pastry into the Tart Pan
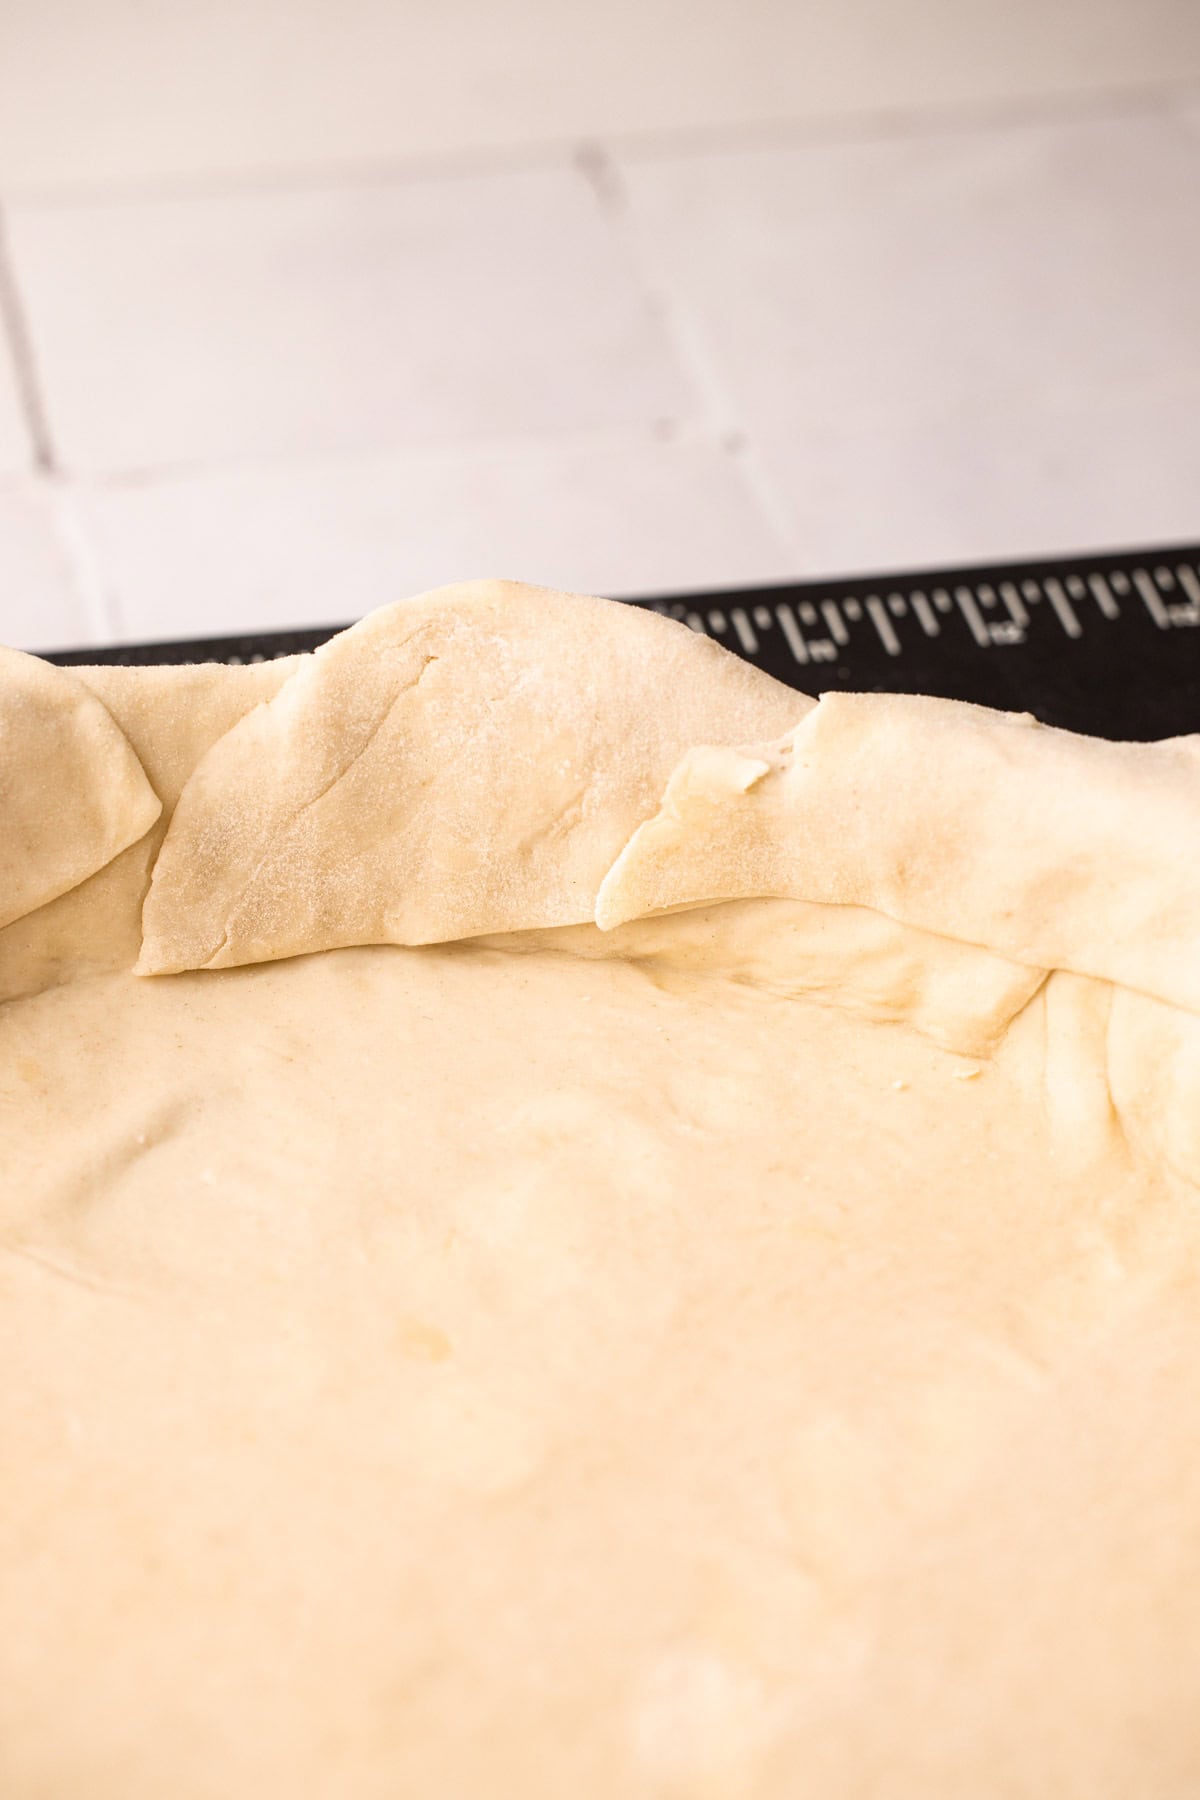
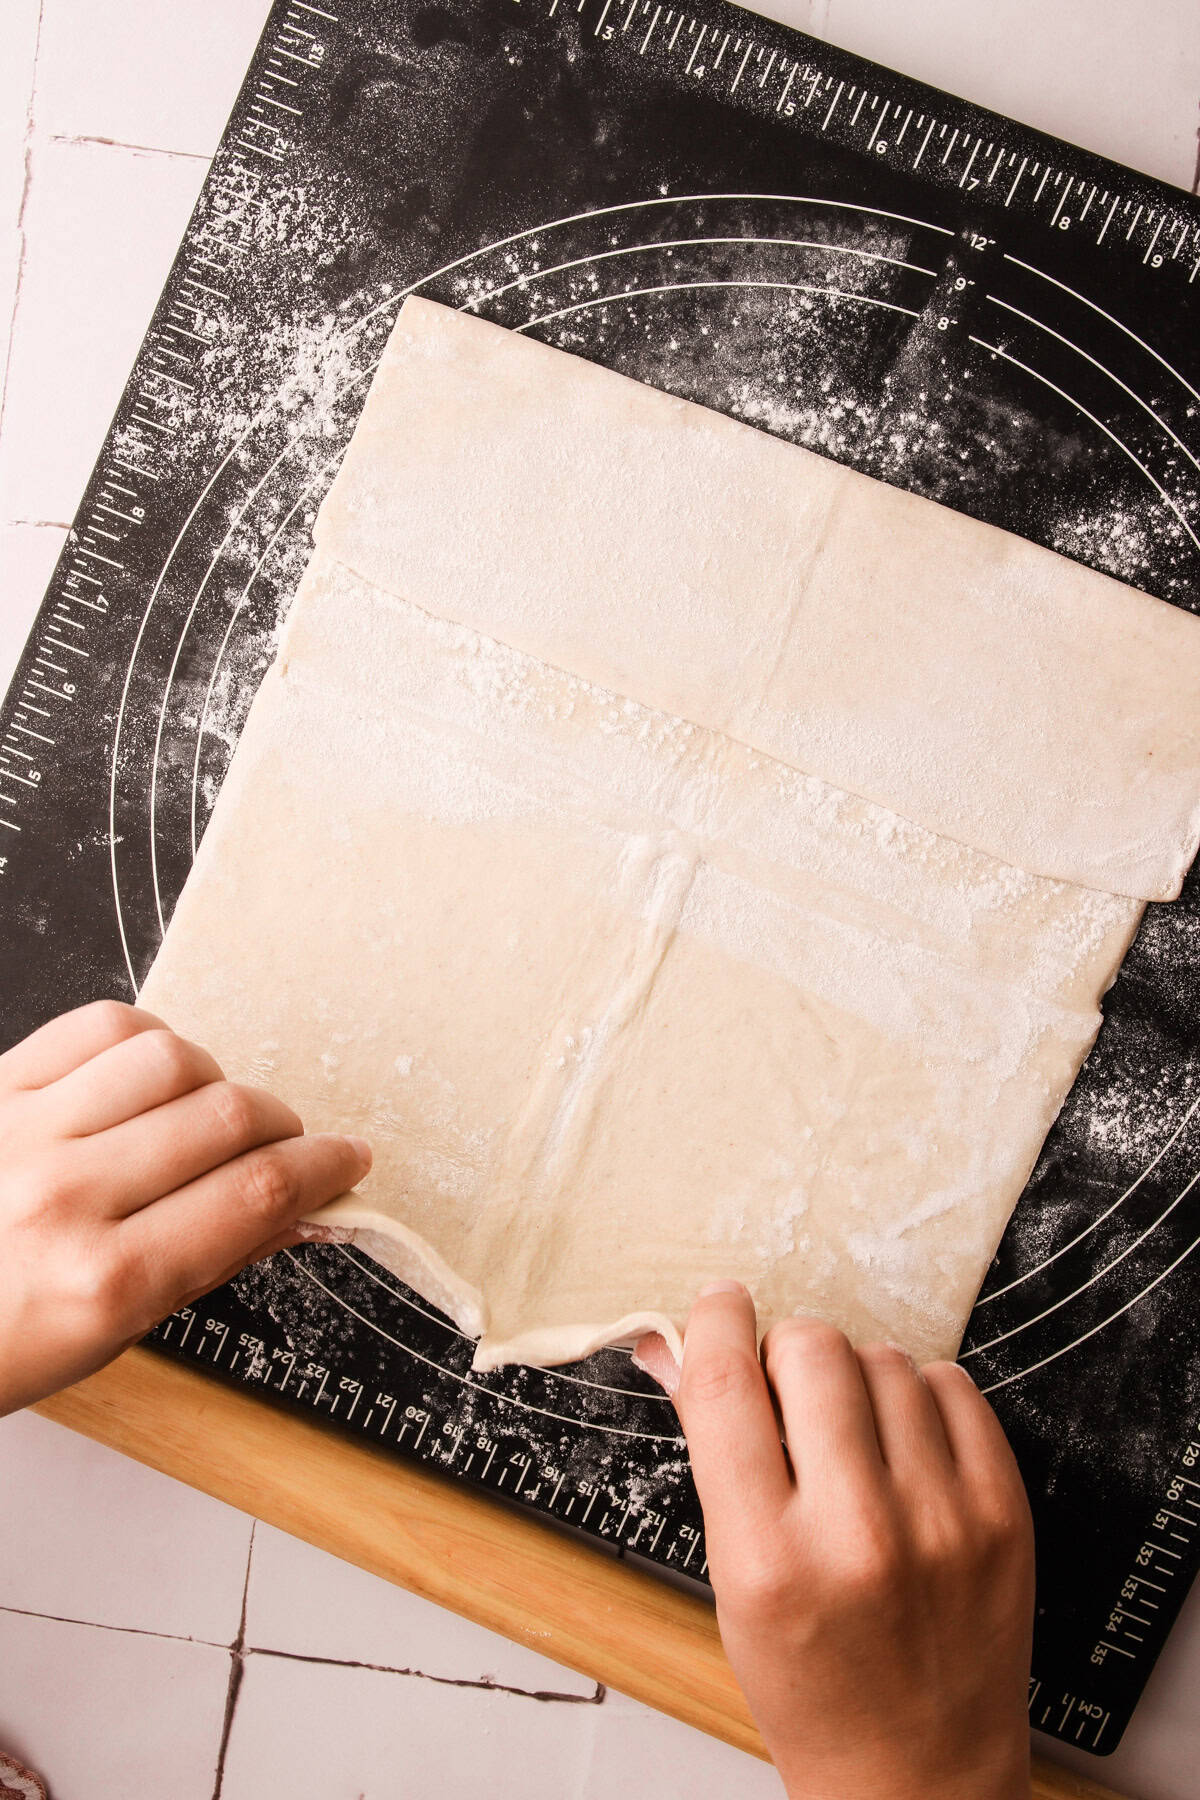
Assembling this pie is very similar whether you are using traditional pie dough or puff pastry, and in many ways, puff pastry is easier to work with. Where things are less predictable is in how different store-bought brands are packaged. Some brands include one large sheet, while others contain two smaller sheets, which can affect how the pastry fits into the tart pan.
If your puff pastry comes in two sheets, you can cut and patch them together to create one large piece large enough for the pan. Start by joining the pieces to form a rough 11 to 12-inch piece of dough. It does not need to be perfect. The goal is coverage, not precision, so cut and patch the pastry only as much as needed so it fits in the 9-inch tart pan.
Once the pieces are joined, roll the pastry gently just enough to smooth the surface and help everything adhere. Rolling here is not about stretching the dough thin or forcing it to fit. If there is excess pastry, it can be trimmed away. If there are small gaps, patching them with scraps works just as well. Puff pastry is very forgiving in this way, and everything will bake together in the oven.
How to Assemble and Bake
Step 1: Cut and patch together the store-bought puff pastry to create a rough 11 to 12-inch piece of dough.
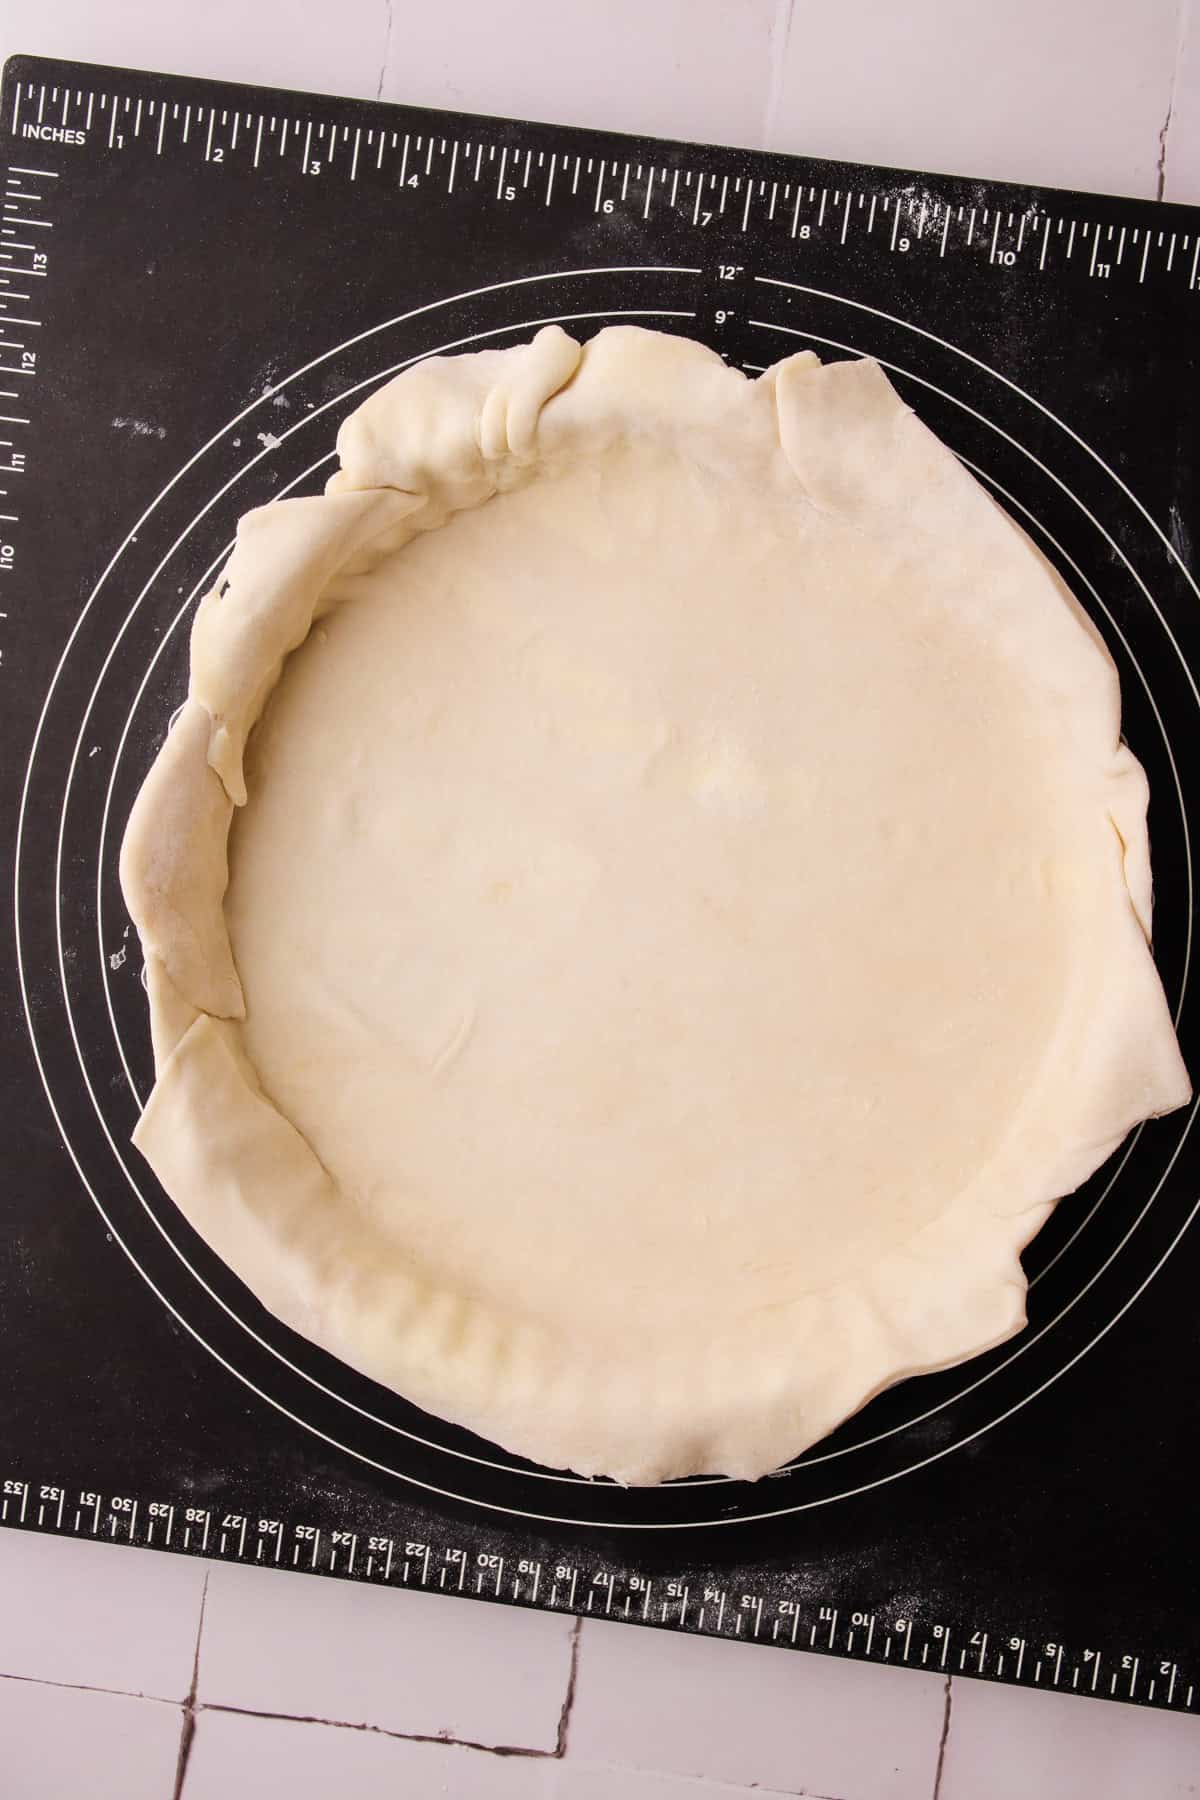
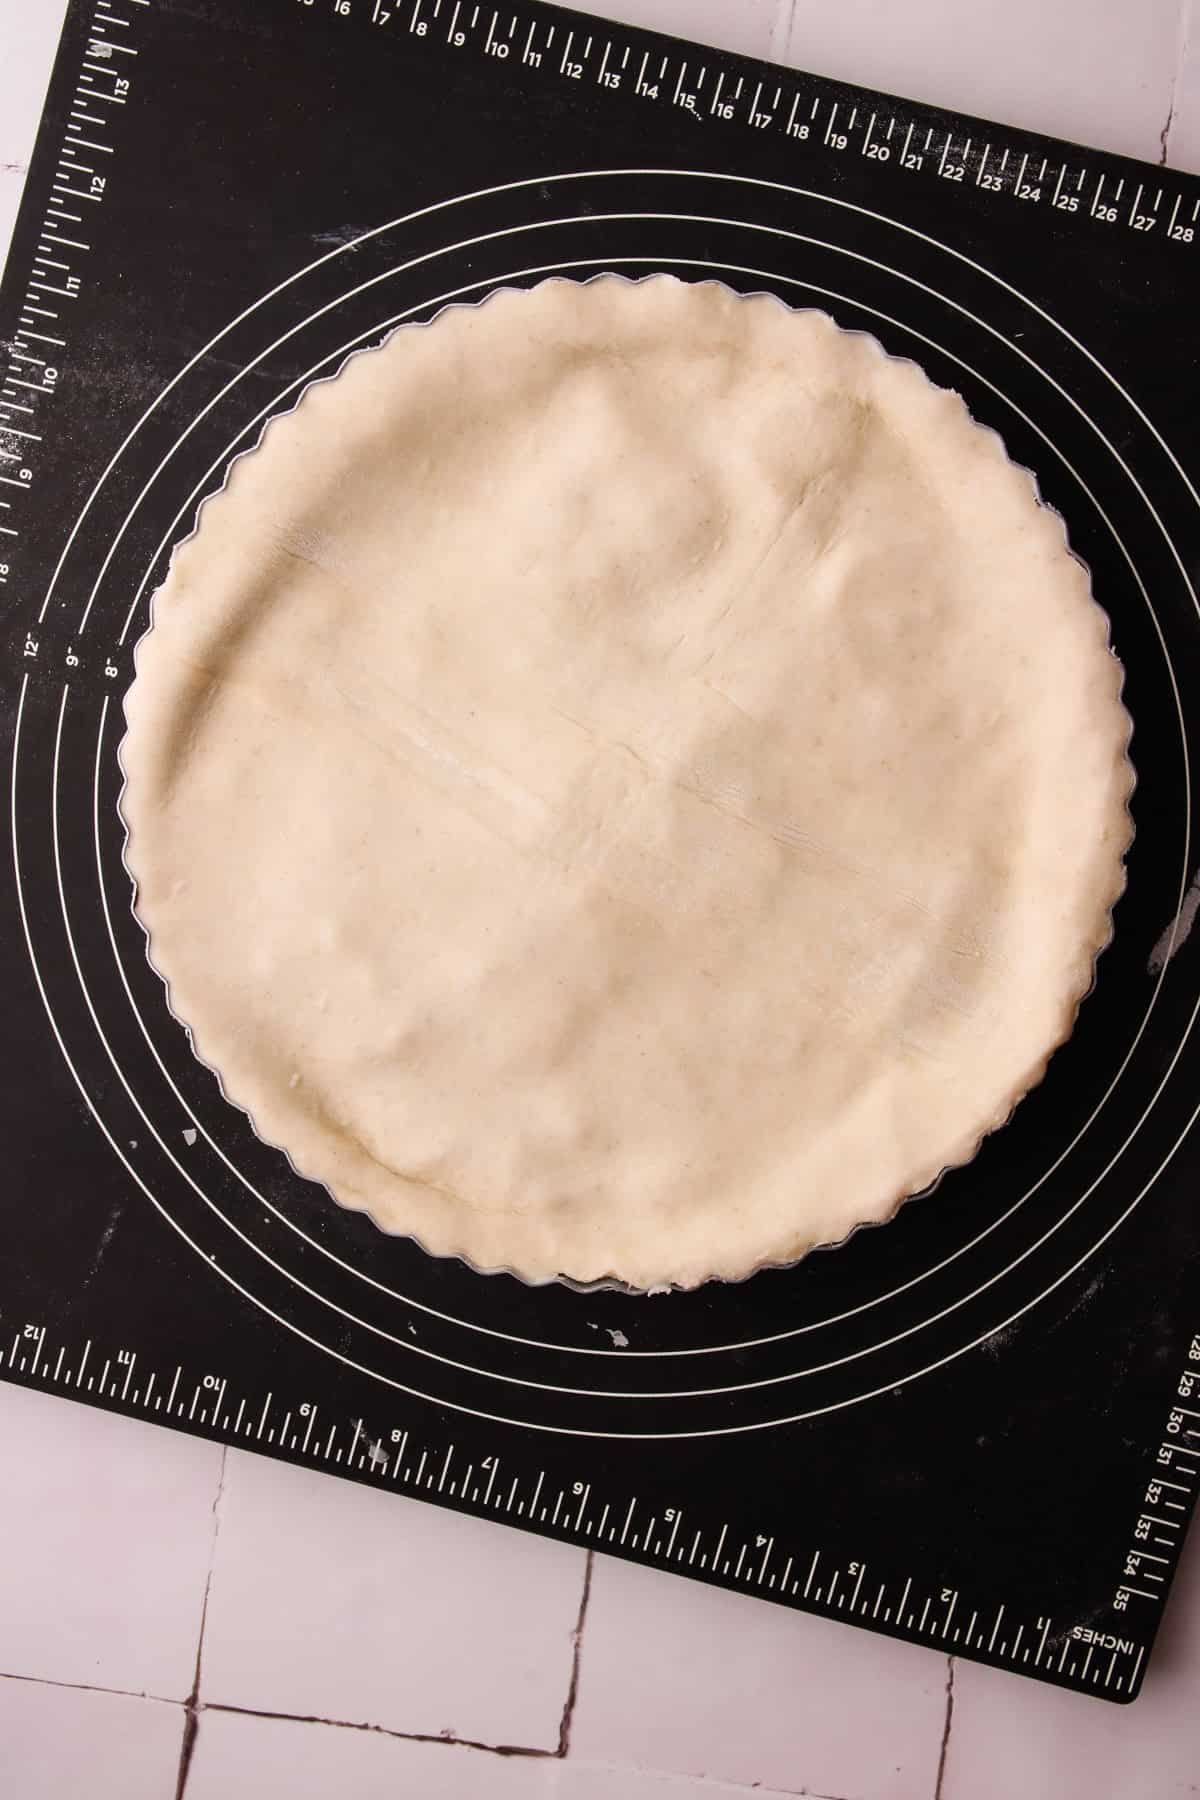
Step 2: Place the puff pastry into a 9- inch tart pan, trimming away any excess. Use the scraps to patch any gaps or thin spots as needed.
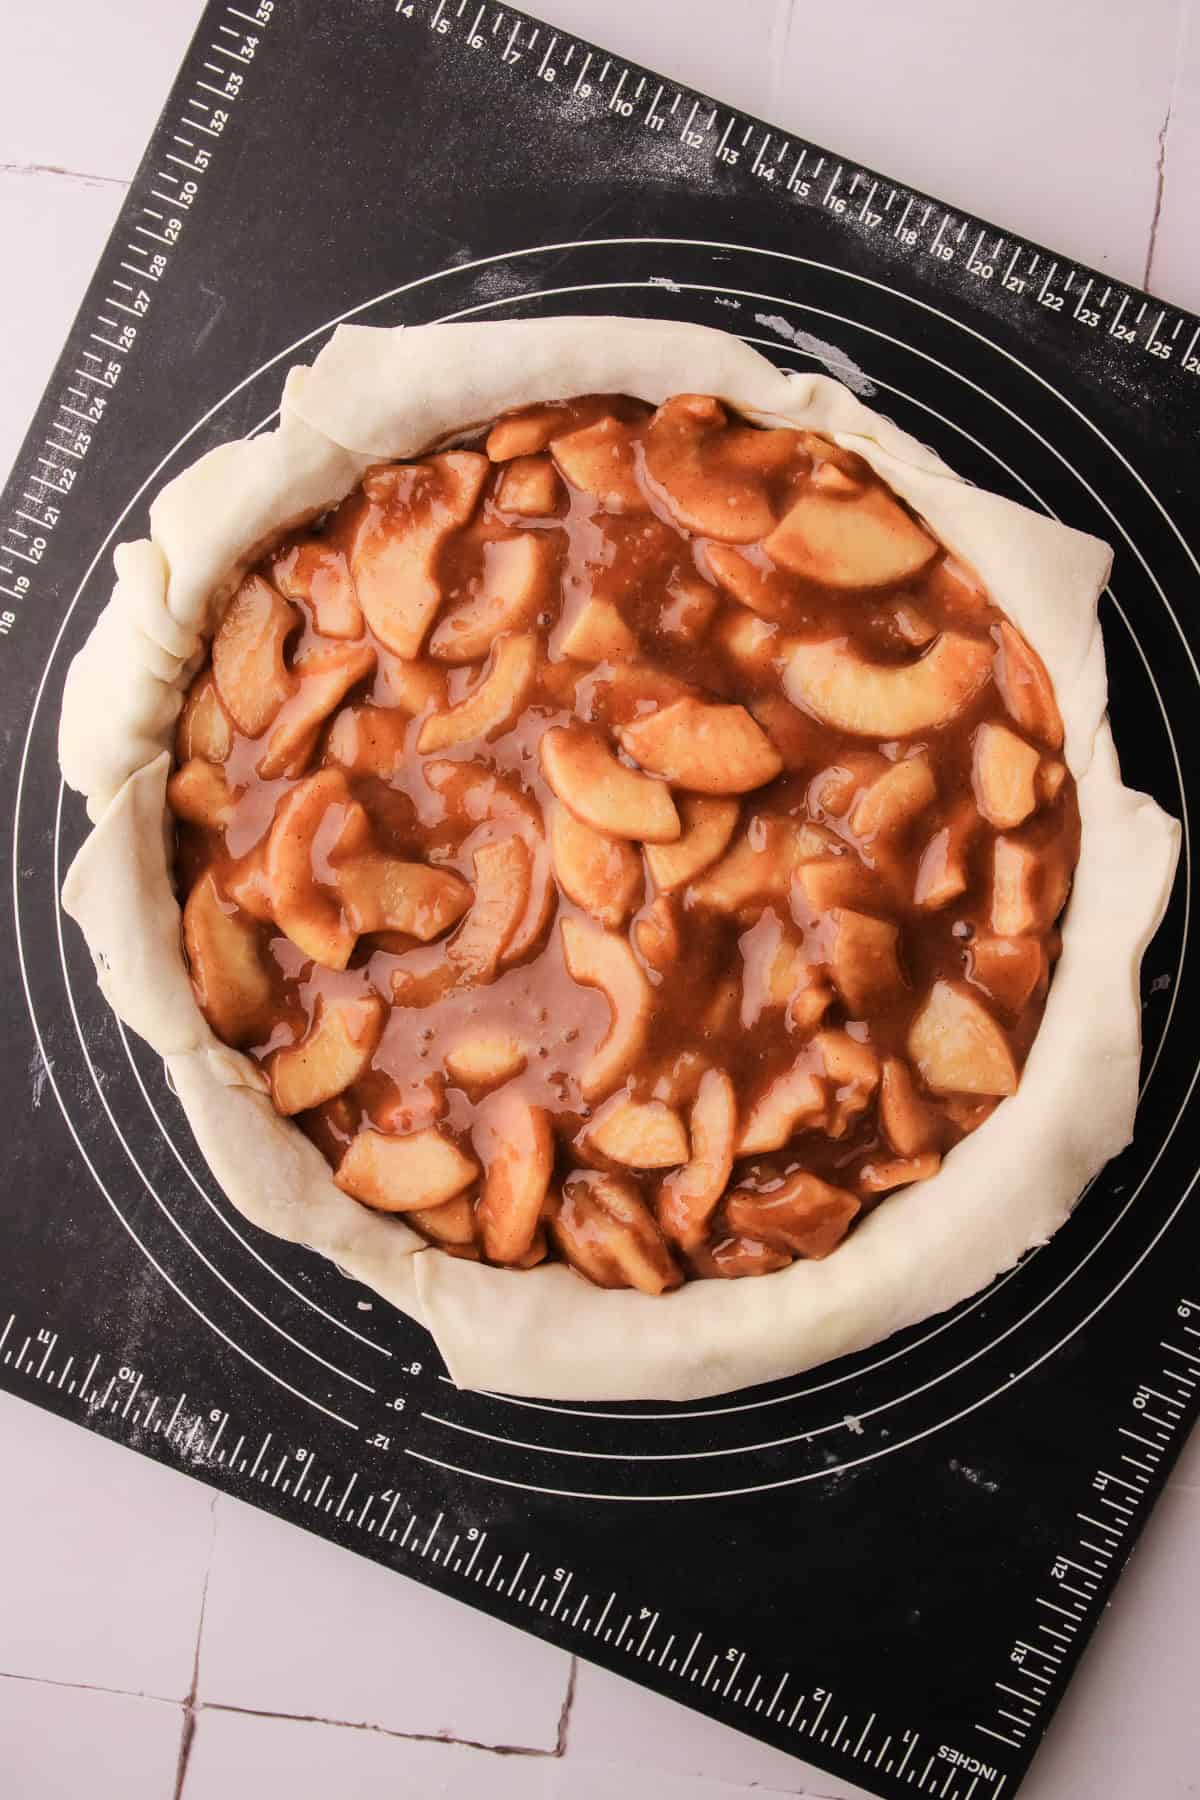
Step 3: Place the cooled apple filling into the pastry-lined tart pan.
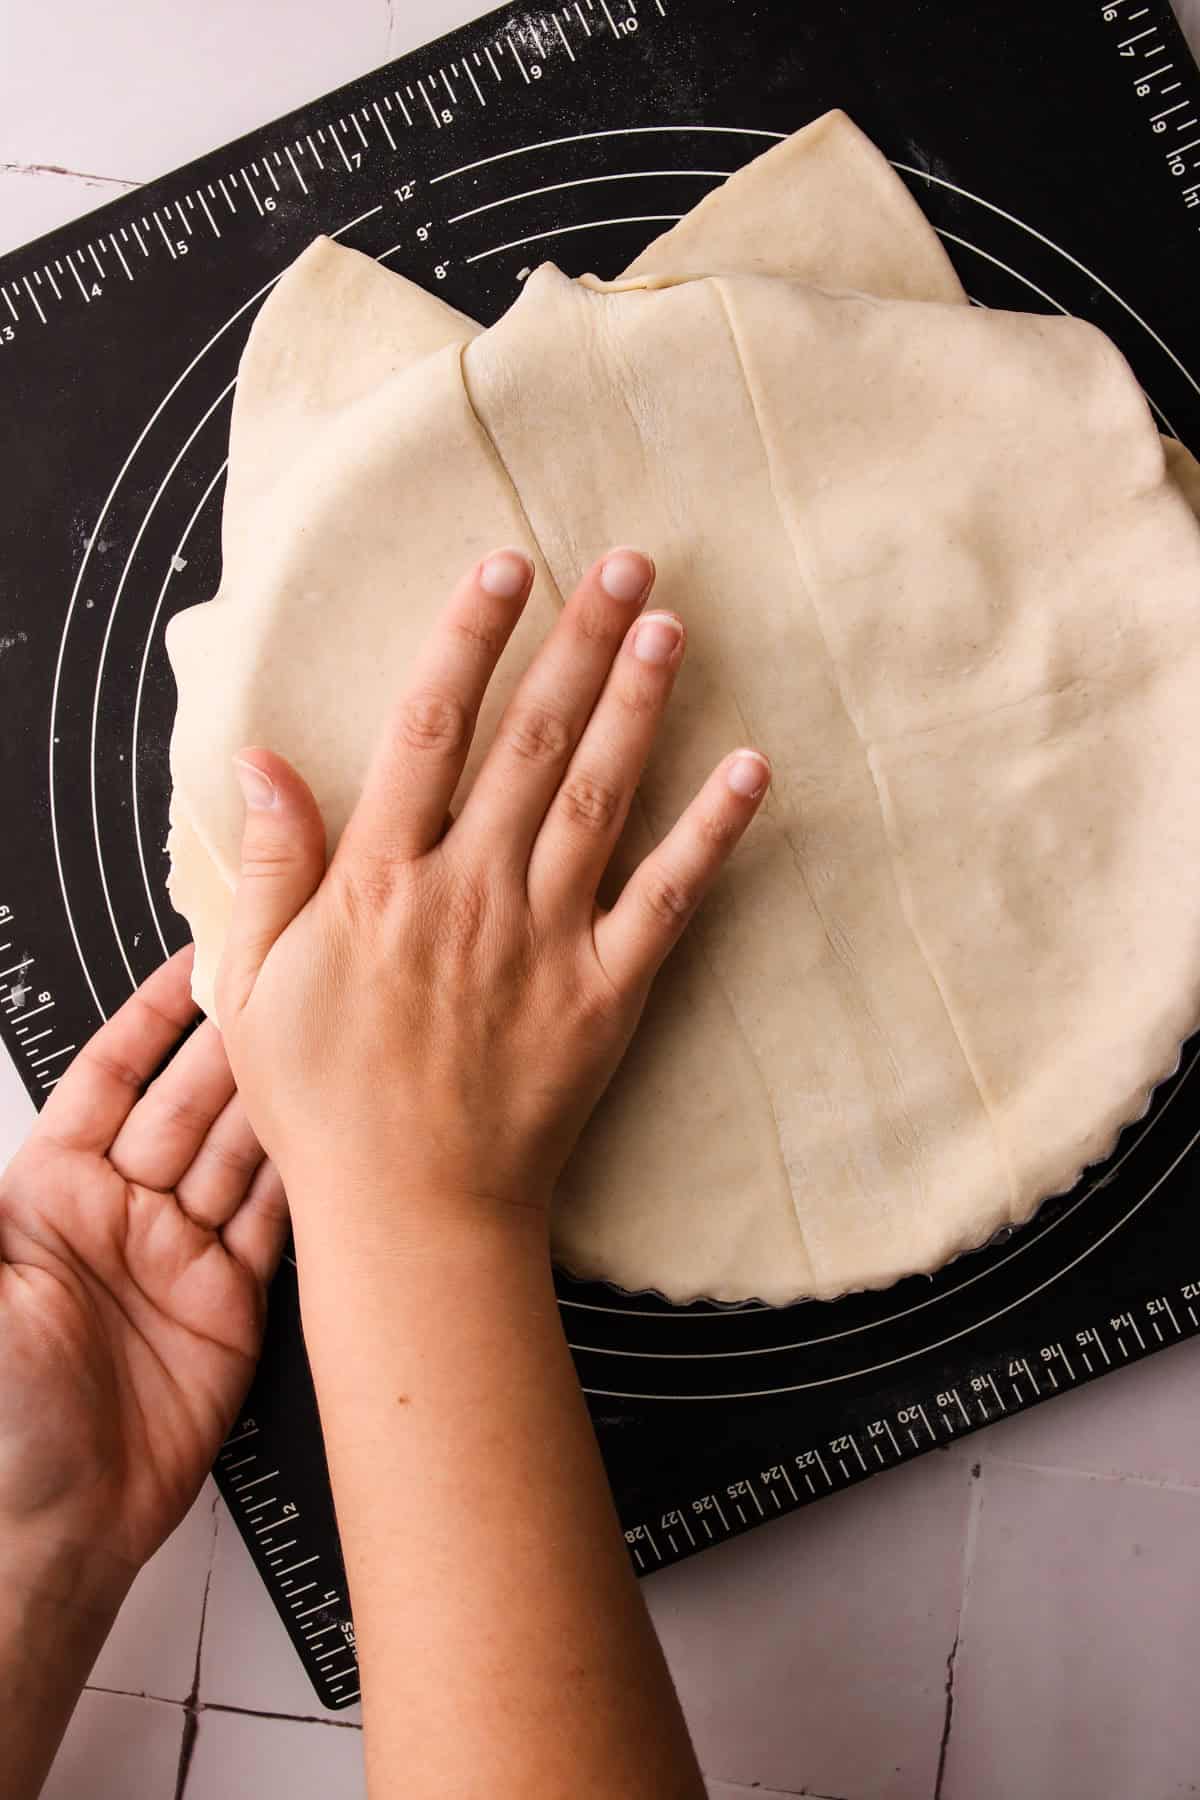
Step 4: Place the second piece of puff pastry on top of the filling, then press the edges of the dough together and push them down on the edge of the tart pan to press off the excess pastry. This helps seal the dough together.
Step 5: Score a few small vents in the top to allow steam to escape, or add any decorative details you like. Brush the top of the pastry with egg wash.
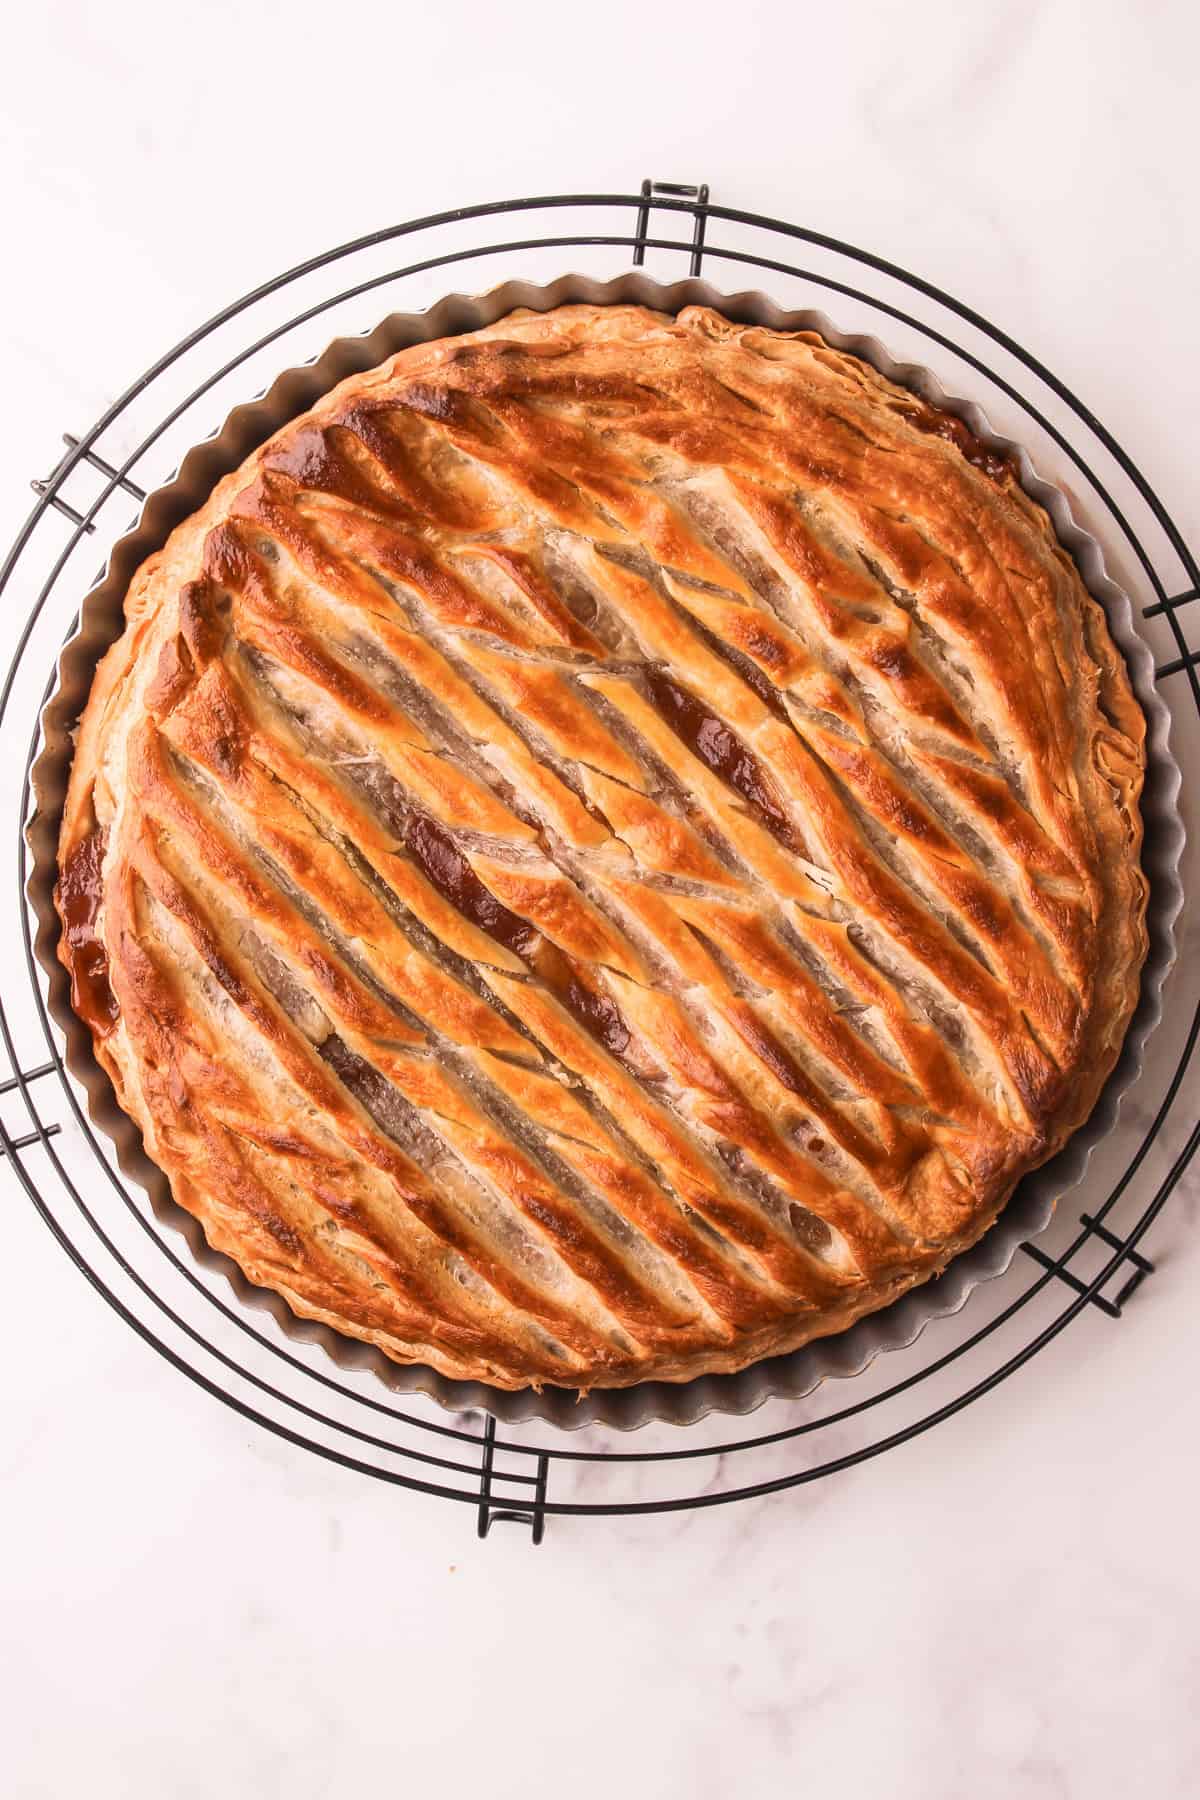
Step 6: Bake until the pastry is deeply golden brown and puffed.
Kelli's Best Tips
This recipe is less about technical skill and more about being forgiving, especially when it comes to assembly. Don't stress about small imperfections of the puff pastry; it will likely bake up beautifully regardless.
- If the pastry becomes too warm at any point, transfer it to the refrigerator or freezer and chill until it is firm and easy to work with.
- Because the filling is already cooked, just the pastry needs to be cooked through. The best way to ensure this happens is to preheat your oven and bake the pie on the lower rack closest to the heat source. Don't forget to bake it on a sheet pan to catch any drips.
- The photos here show the pie with more decorative scoring, but this pie bakes up just as well with a single small vent in the center or with the pastry cut into a simple lattice. I have baked it so many ways, and each version came out beautiful and delicious. The most important thing is simply getting the top crust on and pressing the edges of the top and bottom pastry together as directed.

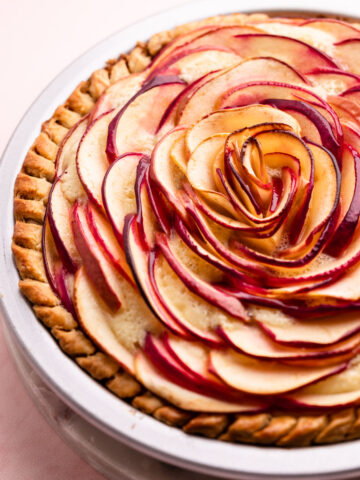
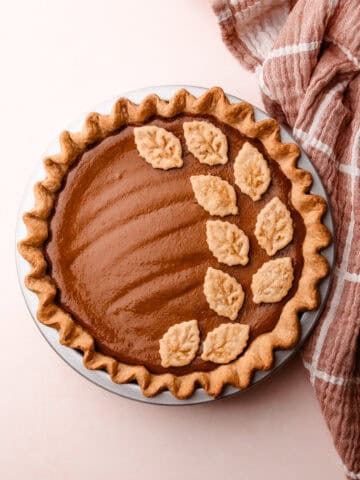
More Apple Recipes:
I am so honored when you make a recipe from my site! If you make this Puff Pastry Apple Pie, please leave a star ⭐️⭐️⭐️⭐️⭐️ rating with your experience! If you have any questions about this recipe, feel free to comment here, and tag me on instagram!
Full Recipe
Puff Pastry Apple Pie

This apple pie leans on puff pastry and a pre-cooked filling to remove much of the guesswork that can make pie baking intimidating. Baking it in a (9-½ x 1-½) tart pan helps the pastry bake evenly while giving the finished pie a clean, structured look. The result is a dependable, flaky apple pie that delivers classic flavor with far less stress.
- Prep Time: 00:25
- Chilling Time: 02:00
- Cook Time: 00:60
- Total Time: 01:25 plus chilling time
- Yield: 8-10 servings
- Method: Bake
Ingredients
- 3 pounds (about 8 large) baking apples, peeled, cored and thinly sliced
- ½ cup (100 grams) packed light brown sugar
- ¼ cup (50 grams) granulated sugar
- 1 tablespoon lemon juice
- 1 teaspoon ground cinnamon
- ½ teaspoon coarse kosher salt (see note)
- ¼ teaspoon grated nutmeg
- 2 tablespoons plus 2 tablespoons fresh apple cider, divided, plus more as needed
- 1 teaspoon vanilla extract
- 2 tablespoons (20 grams) cornstarch
- 2 (14-ounce) boxes frozen puff pastry, thawed in the refrigerator overnight
- All-purpose flour, for the work surface
- Egg wash (optional)
Instructions
- In a large pot, mix together the apples, 2 tablespoons (30 grams) of apple cider juice, lemon juice, brown sugar, granulated sugar, cinnamon, salt, and nutmeg. Let the mixture sit at room temperature for about 15 minutes, allowing the apples to release some of their juices.
- Cook the apples over medium heat, stirring occasionally, until they begin to soften, about 10 minutes. Monitor the liquid to ensure it doesn’t completely evaporate. Add more juice as needed. The apples should be tender but still hold their shape, with visible liquid remaining in the pot.
- In a small bowl, whisk together the cornstarch with the remaining 2 tablespoons (30 grams) of apple cider juice to make a slurry. Pour the slurry into the pot and stir to combine. Continue cooking for 2 to 3 minutes, until the filling thickens and coats the apples. Remove from the heat and stir in the vanilla extract and butter. Transfer the filling to a shallow container and allow the apple mixture to cool completely, either at room temperature for at least 2 hours or overnight in the refrigerator.
- Preheat the oven to 400ºF and place a rack in the lower part of the oven.
- If your puff pastry comes in a single large rectangular sheet, place it on a lightly floured surface with the long side facing you. Cut two narrow strips from the short ends of the rectangle, and patch them onto the longer sides to widen it. Press gently to adhere, brushing a light layer of water along the seams if needed, until you have an 11- to 12-inch cohesive piece of dough that fits the tart pan. Roll the pastry only as needed to help the patched pieces come together.
- If your puff pastry comes in two square sheets, cut and patch the sheets together to create a cohesive 11 to 12-inch piece of dough. Brush a light layer of water along the seams if needed to help the pastry stick together, until you have an 11 to 12-inch cohesive piece of dough that will fit the tart pan. Roll the pastry only as needed to help the patched pieces come together.
- Line the tart pan with the puff pastry, patching any pieces as needed. Make sure the pastry is one cohesive piece.
- Spoon the cooled apple filling evenly into the pastry-lined tart pan. Do not overfill it. Set aside leftover apple pie filling for another use.
- Unfold the second sheet of puff pastry (or adhere the remaining two square sheets as before) and roll it out until slightly larger than the pan. Place it on top of the filling. Using your finger, press the edges of the dough together, then push them down along the edge of the tart pan to press off the excess pastry. Use a sharp knife to cut a few small vents in the top to allow steam to escape. Set aside any puff pastry scraps for another project. Egg wash the top of the pastry.
- Place the tart pan on a rimmed baking sheet. Bake on the lower rack until the pastry is deeply golden brown and puffed, 45 to 50 minutes. If the edges brown too quickly, tent them loosely with foil.
- Transfer to a wire rack to cool. Let the pie cool for at least 2 hours before serving.

Notes
This recipe was tested using Diamond Crystal coarse kosher salt. If you use Morton's kosher salt or fine salt, decrease the volume by half. See this Salt Guide for more information about how salt affects your cooking and baking.
Puff pastry works best when kept cold. If it starts to feel soft during assembly, return it to the refrigerator for 10 to 15 minutes before continuing.
Store-bought puff pastry is typically sold as either one folded 14-ounce sheet or two folded 8-ounce sheets. Both work for this recipe. Patch pieces together first to create the size you need, then roll gently only to help the dough adhere and even out the surface.
The apple filling can be made a few days in advance and refrigerated until ready to use.
This pie can be frozen unbaked for up to 3 months. When ready to bake, follow the recipe as written, adding 10 to 15 minutes to the total baking time.
Some of the links on this page may be affiliate links. Everyday Pie is a participant in the Amazon Associates Program. As an Amazon Associate I earn from qualifying purchases, at no extra cost to you.
Leave a Reply