Certainly one of the most festive holiday desserts, this Candy Cane Pie starts with a crunchy chocolate cookie crust, filled with a creamy no-bake peppermint filling and finished with a salted white chocolate ganache. It's easy to make and a refreshing, sweet finish to any holiday feast.

Want to save this recipe?
Enter your email & I'll send it to your inbox. Plus, get weekly updates from me!
No Bake Candy Cane Pie Recipe
Truth be told: Candy Cane Pie is somewhat of a hybrid of a Peppermint Bark Pie, as this recipe shares many of the same ingredients. With flavors such as peppermint, white chocolate, and chocolate cookies, this no-bake cheesecake-style pie tastes just like the holidays should: festive and indulgent.
This Candy Cane Pie can be assembled quickly by combining whipped cream and cream cheese along with some crushed candy canes and peppermint extract. Also, it's made in an easy peasy Oreo Cookie Crust for a truly no-bake dessert.
This pie is easily made ahead of time and stashed away in the freezer for whenever you are ready to serve it, which makes it the perfect holiday pie.
So, let's get to making it, shall we? The text below offers tons of tips and helpful notes, or you can scroll to the bottom to grab the recipe and get started!

Candy Cane Pie Ingredients
Here is an overview of the ingredients needed for this recipe. The full recipe is listed below in greater detail.
- candy canes
- oreos
- white chocolate
- cream cheese
- heavy cream
- peppermint extract
- granulated sugar
- butter
- natural red dye (optional: this is to create some color in the white pie filling)
Tools Needed
Here is a list of some of the primary tools I use in this recipe. You won't necessarily choose to use them all, but they are exactly what I used. Any links may contain affiliate links.
- food processor
- electric mixer
- off-set spatula
- pie plate
- kitchen essentials: measuring cups, measuring spoons, bowl, rubber spatula, etc.



How to Easily Make the Pie Crust
In general, crumb crusts are awesome because they don't require much work to put together. They are also a great option because of the contrasting textures they lend to the pie, particularly when it comes to this creamy peppermint filling.
There is a whole post dedicated to making an Oreo Cookie Crust, so check that out if you aren't familiar with making one. However, all the instructions you need are listed here in this recipe below.
You have two options for preparing this crust. You can par-bake it or freeze it.
Freezing the crust works because the melted butter becomes solidified and bonds the crust together. While freezing the crust is undoubtedly easier than having to preheat an oven and par-bake the crust, it is not as sturdy as the baked version. I only recommend freezing the crust if you will be serving your pie when very cold. Otherwise, you’ll just find your crumb crust to be very crumbly! This isn't the end of the world, but it's worth mentioning.
Baking the crust will result in a crisper bite with a slightly deeper flavor. I always par-bake my crumb crusts, even for no-bake pies such as this one. However, it does require turning on the oven for 10 minutes, so it's understandable if you want to avoid this.

A Note on Crushing the Candy Canes
This recipe calls for crushed candy canes both in the pie filling and sprinkled over the top of the white chocolate ganache.
The first time I made this pie, I crushed the candy canes by hand by placing them in a bag and smashing them with a rolling pin. I found that the candy canes didn't break down evenly or easily, and I ended up with some bigger chunks of candy cane in the pie filling. The problem with this was that some people might not want to bite into a large piece of a candy cane!
Because of this, I recommend either making sure you do a thorough job of crushing up the candy canes, to avoid large chunks ending up in the filling, or using a food processor to crush them up to save yourself the trouble of hand smashing them.


Steps to Make Candy Cane Pie
Start by making the crumb crust. You have the choice of either par-baking the pie crust for 10 minutes in the oven, or you can freeze it to firm it up.
Next, get started on the filling. This no-bake pie uses cream that has been whipped to stiff peaks to act as the stabilizer, as opposed to using gelatin or egg whites. This is my preferred method for making these types of no-bake pies because it has just the right texture and flavor.
To begin, whip the cream until stiff peaks form. "Stiff peaks" have formed when you pick up the whisk and the whipped cream holds a peak without it moving at all. Once you've whipped the cream, remove it from the bowl and set it aside. In the now-empty bowl whip the cream cheese, sugar and extract until it's completely smooth.
Next, fold the whipped cream into the cream cheese mixture. Then, add the remaining whipped cream to the bowl and gently fold it in, being careful not to deflate it. Lastly, fold in the crushed candy canes.
Finally, place the candy cane filling in the prepared pie crust. I opted to add a naturally dyed faux-candy cane swirl to the white filling to really make it look like a candy cane pie, but this is completely optional. See below for instructions on adding a decorative swirl of color.
The assembled pie needs to be chilled, either in the refrigerator, or the freezer to set up. It needs at least 4 hours of chilling time, but the overnight method is recommended for the perfect texture.


Making a Faux-Candy Cane Swirl
Just to make this pie a bit more festive, I swirled some natural red dye into the stark white filling. It's totally optional but lends an artistic touch to your finished product to really let people know what this pie is all about.
To do it:
- Transfer ⅓ of the candy cane filling to the oreo crust. Smooth over the top. Squeeze about 8-12 drops of liquid natural red dye over the top of the filling. Using a small offset spatula, swirl the dye.
- Transfer ⅓ more of the filling on top of the swirls, and smooth over the top. Repeat with the red dye.
- Place the remaining candy cane filling on top of the red swirls and smooth over the top.
This will give you two layers of swirls. Feel free to play around with the step to make it look the way you desire.

Decorating the Pie
The Candy Cane Pie is garnished with a salted white chocolate ganache and crushed candy canes.
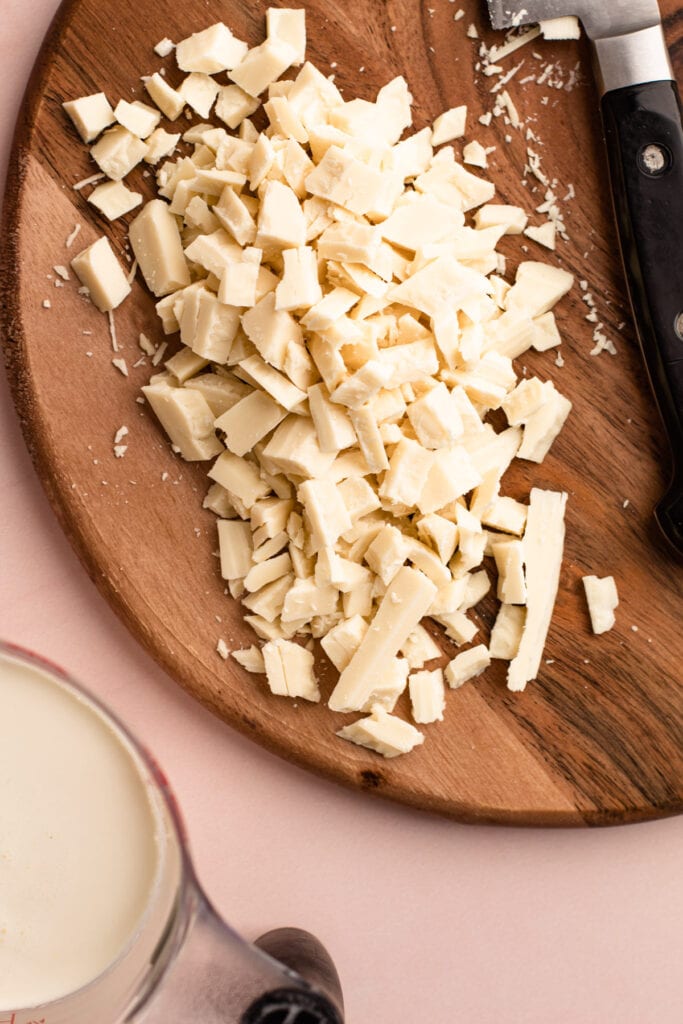
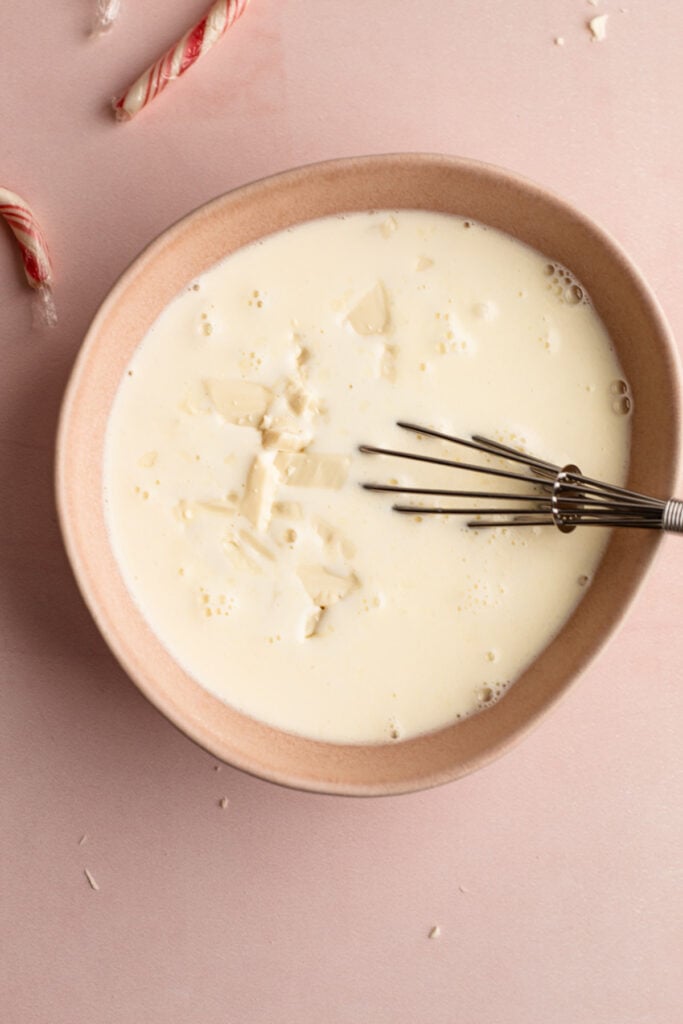
A ganache is pretty easy to make: Simply heat the cream and pour it over chopped white chocolate or white chocolate chips.
A typical ganache uses a 1-1 ratio of one part cream to one part chocolate. However, white chocolate is a rather soft type of chocolate, so this recipe calls for slightly less cream than usual. This ensures the final ganache isn't too soft.
Troubleshooting White Chocolate Ganache
Because the chocolate to cream ratio is rather high, depending on how warm you get the cream you might have trouble melting the chocolate. If that happens, you can either gently (10 seconds at a time) heat the ganache in the microwave until it's fully melted and smooth, or stick the ganache in a double boiler (the ganache goes in a heatproof bowl over a small pot of simmering water) and melt together until smooth.
It is worth noting that the ganache will look rather yellow when it is warm. While it won't ever be bright white, it will whiten up more once it is cooled in the refrigerator or freezer.
The pie is then topped with crushed candy canes, but you should wait to top them until just before serving. This is because the candy canes will slowly start to dissolve once they come into contact with the white chocolate.

How to Serve It
This pie should be served very chilled. It can be made up to 1 day ahead of time if stored in the refrigerator, or up to 1 month if frozen. Do not top it with the candy canes until just before serving.
If serving from the refrigerator, I recommend placing the pie in the freezer for 30 – 60 minutes before slicing it, though it’s not essential. It just makes it easier to get neat-looking slices.
To serve from the freezer, let the pie sit at room temperature until it’s easy to slice it, about 15-30 minutes, depending on how warm your kitchen is.
Do note the suggestion to slice this pie into 12 servings. It's a rather sweet pie between the cookie crust, filling, ganache, and candy canes. So start with a small slice!

More Holiday Pie Recipes:
- Eggnog Pie (with Gingerbread Crust)
- Cranberry Custard Pie
- Cranberry Pear Pie Minis
- Perfect Pumpkin Pie
More No-Bake Pie Recipes:
- Creamy No-Bake Lemon Pie
- No Bake Pumpkin Pie
- No Bake Oreo Pie
- Icebox Cherry Pie
I am so honored when you make a recipe from my site! If you make this Candy Cane Pie, please leave a comment and a star rating with your experience! If you have any questions about this recipe, feel free to comment here, too!
PrintFull Recipe
Candy Cane Pie
Certainly one of the most festive holiday desserts, this Candy Cane Pie starts with a crunchy chocolate cookie crust, filled with a creamy no-bake peppermint filling and finished with a salted white chocolate ganache. It's easy to make and a refreshing, sweet finish to any holiday feast.
- Prep Time: 00:20
- Cook Time: 00:10
- Total Time: 30 minutes
- Yield: 12 Servings
- Category: Sweet Pie
Ingredients
For Chocolate Cookie Crust:
- 2 cups (290 grams) oreo cookie crumbs (about 19 whole chocolate sandwich cookies)
- 3 tablespoons (35 grams) unsalted butter, melted
For Candy Cane Filling:
- ¾ cup (170 grams) heavy cream
- 6 ounces (170 grams) cream cheese, softened
- 1 teaspoon pure peppermint extract
- ½ cup (100 grams) granulated sugar
- ½ cup crushed candy canes, plus more for garnish (see note)
- Natural red food dye (optional)
For White Chocolate Ganache:
- ⅓ cup (75 grams) heavy cream
- 1 cup (170 grams) white chocolate chips or chopped white chocolate
- ¼ teaspoon kosher salt
Instructions
For Pie Crust:
- Mix together the oreo crumbs and the butter.
- Pour the crumbs into a 9” pie plate and start pressing the ingredients up the sides of the pie plate to form the edges first. Once the edges are formed, work the crumbs down to evenly distribute them into the bottom of the pie plate. Using a flat bottomed measuring cup, pack the crumbs down tightly into an even layer.
- If baking: Bake in a preheated 350º for 10 minutes. If freezing: freeze for 30 minutes for a no-bake pie option. (See the text above for pros and cons of each).
For Filling:
- With a hand mixer or a stand mixer fitted with a whisk attachment, whip the heavy cream until stiff peaks form. Set aside in a separate bowl.
- To the now-empty bowl add the cream cheese, sugar, and peppermint extract. Beat on medium speed until completely smooth, about 2 minutes.
- Add ⅓ of the whipped cream to the cream cheese mixture and fold it in with a rubber spatula by hand until it is completely combined.
- Add the remaining whipped cream to the bowl and gently fold it in, being careful not to deflate the whipped cream.
- Add ½ cup crushed candy canes to the cream mixture and fold them in.
- Transfer ⅓ of the candy cane filling to the oreo crust. Smooth over the top. Squeeze 8-12 drops of liquid natural red dye over the top of the filling. Using a small offset spatula, swirl the dye.
- Transfer ⅓ more of the filling on top of the swirls, and smooth over the top. Repeat with the red dye.
- Place the remaining candy cane filling on top of the swirls and smooth over the top. Alternatively, you can skip the red swirls.
- Place the pie in the freezer to set for 15 minutes.
- Meanwhile, make the ganache: Heat the cream (either in a small pot or in the microwave) until steaming. Place the white chocolate in a small bowl. Pour the hot cream on top of the white chocolate. Make sure all the white chocolate is covered. Let it sit for 5 minutes. Whisk together the chocolate ganache. Let it cool down for 10 minutes. (see notes for troubleshooting tips)
- Once it’s slightly cool, carefully pour the ganache over the pie filling, making sure to cover the candy cane filling entirely.
- Place the assembled pie in the refrigerate to set up. It needs at least 4 hours of chilling time, but preferably overnight (12 hours).
- Right before serving, place in the freezer for about 30 - 60 minutes for perfect slices of pie. When ready to serve, sprinkle crushed candy cane pieces over the top of the pie.
Notes
Have a question or looking for tips? The text written above the recipe is always a great first place to start! There are always loads of explanations, tips and technical advice shared before the recipe.
To make crushed candy canes: unwrap about 5 ounces (1 standard box) of candy canes and place inside of a food processor. Pulse until the candy canes are small pieces, about the size of a pea or smaller. Alternatively, you can place the candy canes in a bag and smash with a rolling pin, but this method is harder to get even pieces of candy cane.
Because the chocolate to cream ratio is rather high, depending on how warm you get the cream you might have trouble melting the chocolate. If that happens, you can either gently (10 seconds at a time) heat the ganache in the microwave until it's fully melted and smooth, or stick the ganache in a double boiler (the ganache goes in a heatproof bowl over a small pot of simmering water) and melt together until smooth.
This pie should be served very chilled. It can be made up to 1 day ahead of time, if stored in the refrigerator, or up to 1 month if frozen. If serving from the refrigerator, I recommend placing the pie in the freezer for 30 – 60 minutes before serving, though it’s not essential. To serve from the freezer, let the pie sit at room temperature until it’s easy to cut into it, about 15-30 minutes, depending on how warm your kitchen is.
Some of the links on this page may be affiliate links. Everyday Pie is a participant in the Amazon Associates Program. As an Amazon Associate I earn from qualifying purchases, at no extra cost to you.



KBC
When I saw this on Instagram, I knew I had to make it. Made this last night, and the whole family loved it! I switched the peppermint extract for vanilla extract (because we have some peppermint haters in the family) and it was delicious. Even the ones who don’t like peppermint wanted more! I baked the oreo crust and used a food processor for the candy cane as suggested. So easy and so tasty! Thank you!
Kelli Avila
So happy you and your family of peppermint haters (LOL) loved it! Thanks for sharing your experience and hope you had a lovely holiday!
Dana
I’m a loyal follower of everyday pie and was so excited to make this recipe! It was very easy to make. I will admit I used a store bought Oreo cookie crust for the pie for time’s sake. Next time I will definitely make her Oreo crust recipe. However the rest of the pie was super easy to make and assemble. And it tasted great! It was a big hit at Christmas and I plan on making it again soon! It reminded me of peppermint stick ice cream which is just such a nostalgic flavor for me.
Kelli Avila
Ohhhh just thinking of this as peppermint stick ice cream makes me crave a slice of the pie! Perfect analogy! And I'm so glad you enjoyed it! Thanks for sharing, Dana! -Kelli