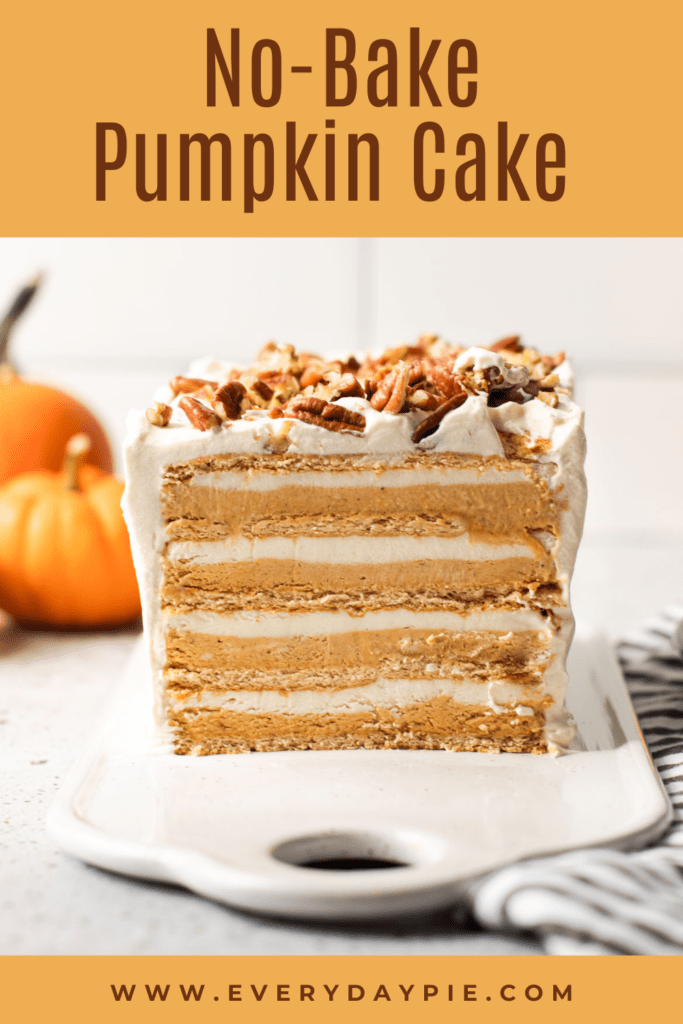
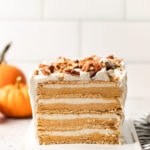
An easy Autumn dessert, this Pumpkin Icebox Cake features layers of no-bake pumpkin cream, marshmallow cream, and graham crackers. Top it all off with maple whipped cream and chopped pecans for a dessert that doesn't require you to turn on the oven!
Want to save this recipe?
Enter your email & I'll send it to your inbox. Plus, get weekly updates from me!
No Bake Pumpkin Cake
Imagine a dessert that is one part cake, one part Meringue topped Pumpkin Pie and one part cheesecake and you can figure out what this No-Bake Pumpkin Cake tastes like. This simple fall treat is a mouth-watering mash-up of all those flavors made into an easy-to-make dessert that can be made ahead of time.
But first, what is an icebox cake?
An icebox cake is a no-bake dessert made from a few simple ingredients. Often times, icebox cakes have graham crackers or some other cookie element that is layered with cream and other ingredients. The dessert rests in the freezer or the refrigerator for a period of time, which allows the graham crackers to soften as they soak up the sweet cream. It truly makes this dessert taste and feel like a cake, thanks to the texture and feel of the ingredients perfectly coming together.
Ingredients Needed
Here is an overview of the ingredients needed for this recipe. The full recipe is listed below in greater detail.
- graham crackers
- marshmallow fluff
- pumpkin puree
- heavy cream
- cream cheese
- granulated sugar
- brown sugar
- vanilla extract
- cinnamon + nutmeg
- pecans
- maple syrup
Tools Needed
Here is a list of some of the primary tools I use in this recipe. You won't necessarily choose to use them all, but they are exactly what I used. Any links may contain affiliate links.
- electric mixer
- off-set spatula
- 9″ square straight-sided cake pan
- baking basics: bowls, whisk and spatulas
Type of Pan Needed to Make an Icebox Cake
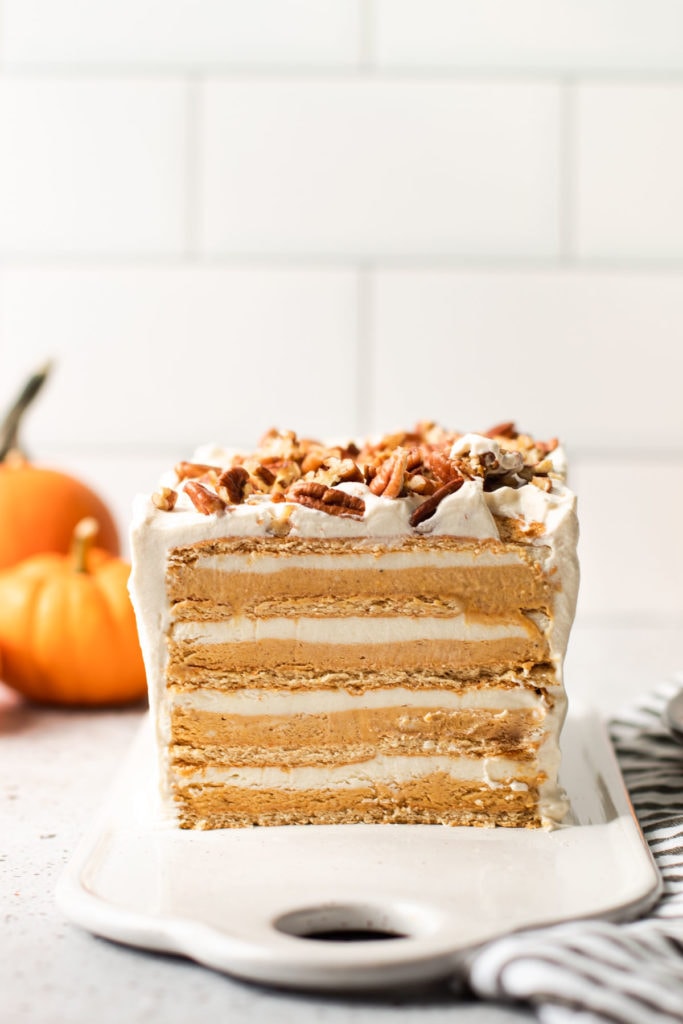
Let’s take a minute to talk about the type of pan used to create this cake. Icebox cake really doesn’t need to have any special type of shape, but I really love the idea of having a long and tall cake for this dessert. It makes it look spectacular and turns this simple dish into something that looks extravagant.
To achieve this shape, I made the cake in a square container, and then cut the dessert in half and stacked the two halves on top of one other. This allowed for less time spent layering the dessert while still accomplishing the towering outcome. I have a special no-bake square pan that has collapsible sides to make this, but just a standard square pan will work just fine if you line it with parchment to easily remove the stacked cake.
If you don’t have a square baking tin, you can also make this dessert in a loaf pan! Or, simply leave it as a flat cake. Either way, it’s going to be super delicious. Don’t spend too much time thinking about what vessel you’ll assemble the cake in, and just use what you have.
How to Make It
Traditionally, these cakes don’t involve much more than assembling the ingredients. For this no-bake pumpkin version, the recipe calls for making a no-bake pumpkin cheesecake filling and a no-bake marshmallow filling, and then assembling. This recipe is pretty simple to make, but you will have to dirty a few dishes. You'll need to use in total three bowls to make the two fillings, plus a bowl the next day for the maple whipped cream.
Here are the layers of the cake:
- graham crackers
- pumpkin filling
- marshmallow filling
- graham crackers
- pumpkin filling
- marshmallow filling
- half graham cracker layer (because it will be sliced and stacked after chilling)
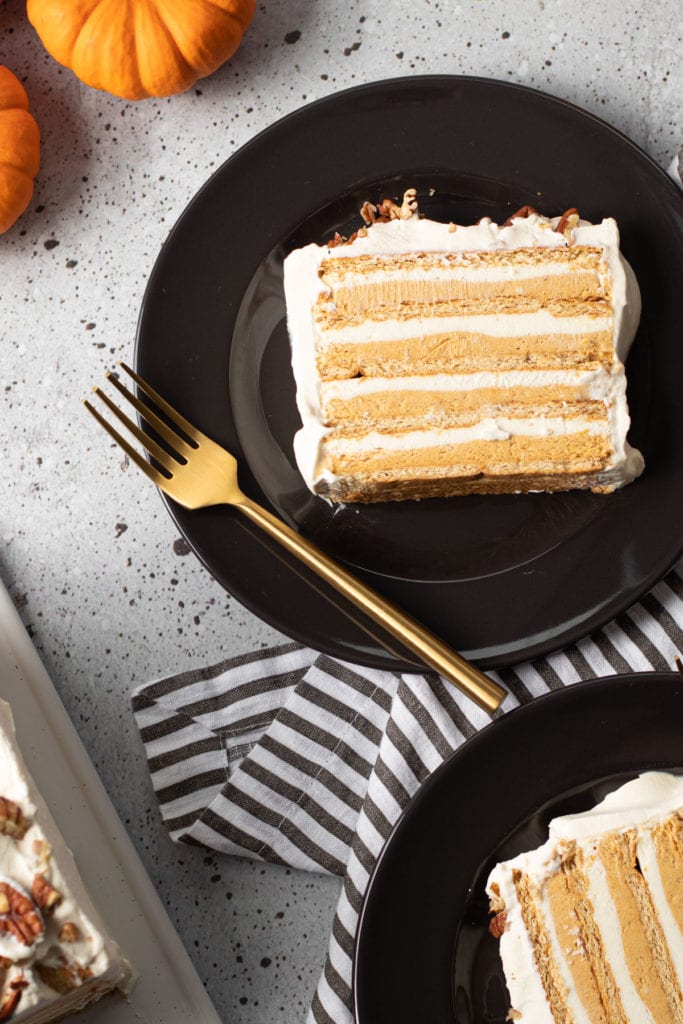
- finally, slice in half and stack for a 13 layer cake
Here are some tips for making it:
- Don’t overwhip or under whip the cream! You want the cream to be just right: stiff enough that it’s going to lighten the cream cheese and fluff mixture, but not so stiff that it starts to curdle. You’ll still be able to taste that slightly curdled cream in the final dish, so pay attention during the whipping of the cream. Want more information on whipping cream? Check out this post all about Whipping Cream.
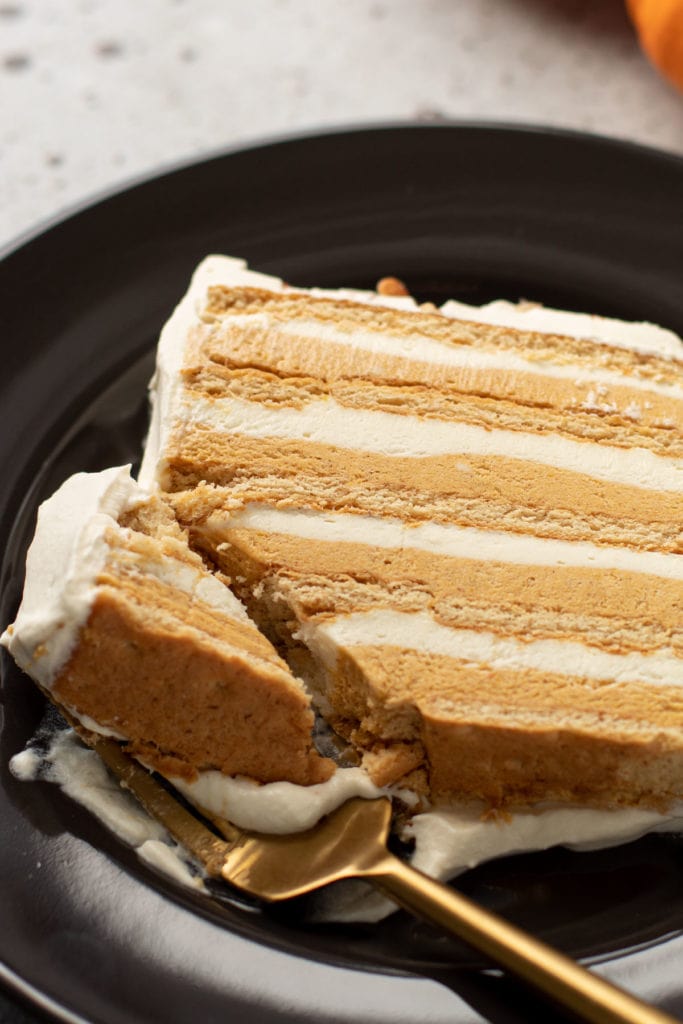
- For extra distinct layers, you can freeze the dessert between the spreading of the marshmallow and pumpkin mixtures, though this isn’t necessary.
- Make sure to tightly layer in the graham crackers, leaving little to no space between each cracker. The graham crackers are what makes this recipe cake-like, so don’t skimp out on them. Use a knife to slice them cleanly to fit into all the space of your container.
- Don’t skip the chilling time! Chilling the cake in the refrigerator overnight is what transforms this dish from a crunch graham cracker layer dessert to an icebox cake!
- Similarly, don’t skip out on the freezing time before serving. Slightly freezing this cake directly before serving makes it easier to handle when you are removing the icebox cake from the tin, and when you are going in to cut it and decorate it.
The Most Important Step: Chilling
This recipe initially calls for chilling the icebox cake in the refrigerator, preferably overnight, and then briefly chilling the cake in the freezer before serving. While a little bit fussy, this step is important, and should not be skipped, as it will compromise the texture of the dessert.
Letting the cake chill in the refrigerator transforms this dessert from a crunchy graham cracker layered dessert to a cake, as the crackers soak up the cream and soften. If you immediately transfer the icebox cake the freezer, instead of soaking up the cream, it freezes, and so when you defrost it, it will still be a bit crunchy.
The reason this recipe calls for a quick chill in the freezer before serving is because having the cake chilled makes it sturdier to cut in half, stack, and garnish. This step is optional, as you don’t even have to stack them if you don’t want to, but this is a trick that makes it easier to handle the dessert.
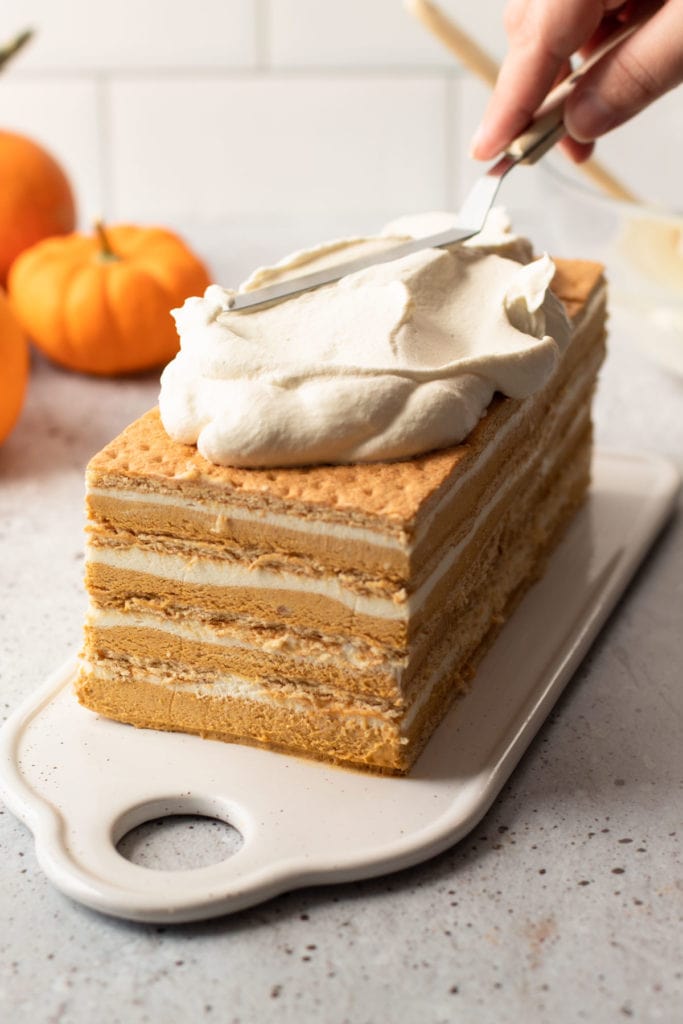
How to Garnish It
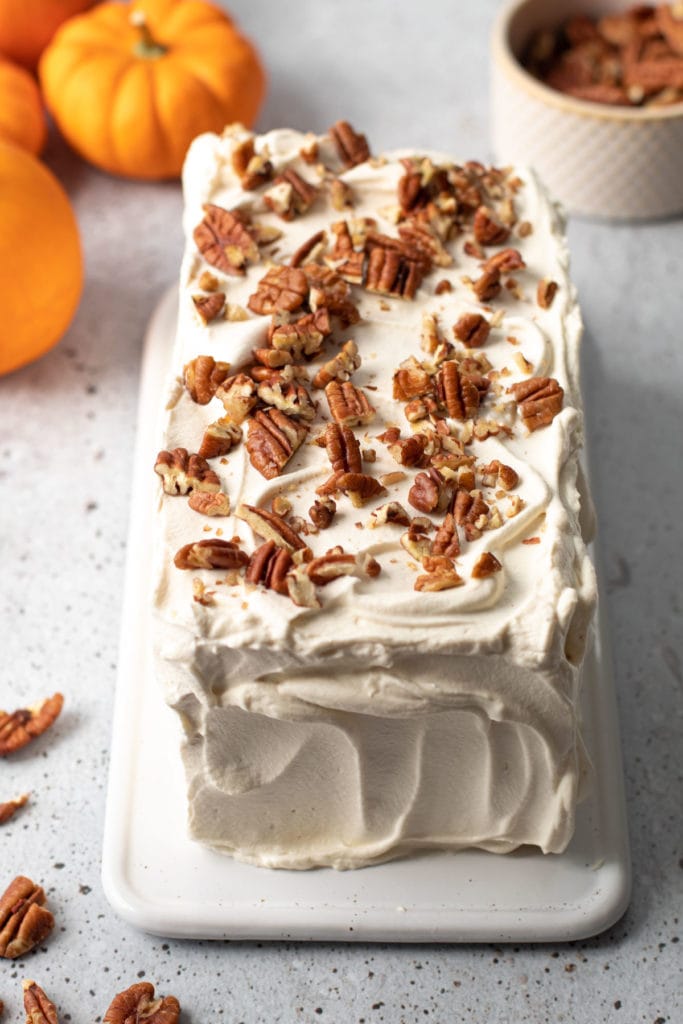
This recipe is "frosted" with a simple maple whipped cream and garnished with chopped pecans! The pecans add a nice crunch to the dessert. That maple whipped cream is added to the icebox cake right before serving.
How to Serve and Store It
The icebox cake is best served within 1-2 days. Simply slice, serve, and enjoy.
However, this cake freezes exceptionally well. Once it has softened, you can freeze this entire cake. However, I recommend waiting to add the outside whipped cream until right before serving.
To defrost the frozen cake, simply leave at room temperature for about 30 minutes, or let it sit overnight in the refrigerator.
Frequently Asked Questions
No! You can truly assemble this cake in any baking tin you have. You can change the shape. You’ll just modify the recipe by changing the amount of layers you have.
No! Just like you can use any vessel to assemble this, you do not need to stack it. I choose to stack it because it is aesthetically pleasing.
Yes, if you really want to. In fact, I have a recipe for Swiss Meringue that will work perfectly here. But I do think this recipe works best with marshmallow fluff for this recipe.
You can skip that step if you want, but it makes it easier to handle. The most important chilling aspect is making sure it rests in the refrigerator to allow the cookies to soften.
More No-Bake Recipes:
Full Recipe
Pumpkin Icebox Cake
An easy Autumn dessert, this Pumpkin Icebox Cake features layers of no-bake pumpkin cream, marshmallow cream, and graham crackers. Top it all off with maple whipped cream and chopped pecans for a dessert that doesn't require you to turn on the oven!
- Prep Time: 00:25
- Total Time: 09:25
- Yield: Serves 8-10
- Category: Cake
- Method: No-Bake
- Cuisine: Sweet
Ingredients
For Pumpkin Cake:
- 1–½ cup (340 grams) heavy cream, cold
- 8 ounces (230 grams) cream cheese, softened
- 2 tablespoons (25 grams) granulated sugar
- 1 teaspoon vanilla
- 1 cup (90 grams) marshmallow fluff
- ¾ cup (170 grams) pumpkin puree
- ½ cup (100 grams) dark brown sugar, packed
- 1 teaspoon cinnamon
- ¼ teaspoon ground nutmeg
- Pinch of salt
- 12–14 graham crackers (about 3 sleeves)
For Maple Whipped Cream:
- ½ cup (115 grams) heavy cream, cold
- 2 tablespoons (40 grams) maple syrup
- ½ cup (60 grams) pecans, chopped
Instructions
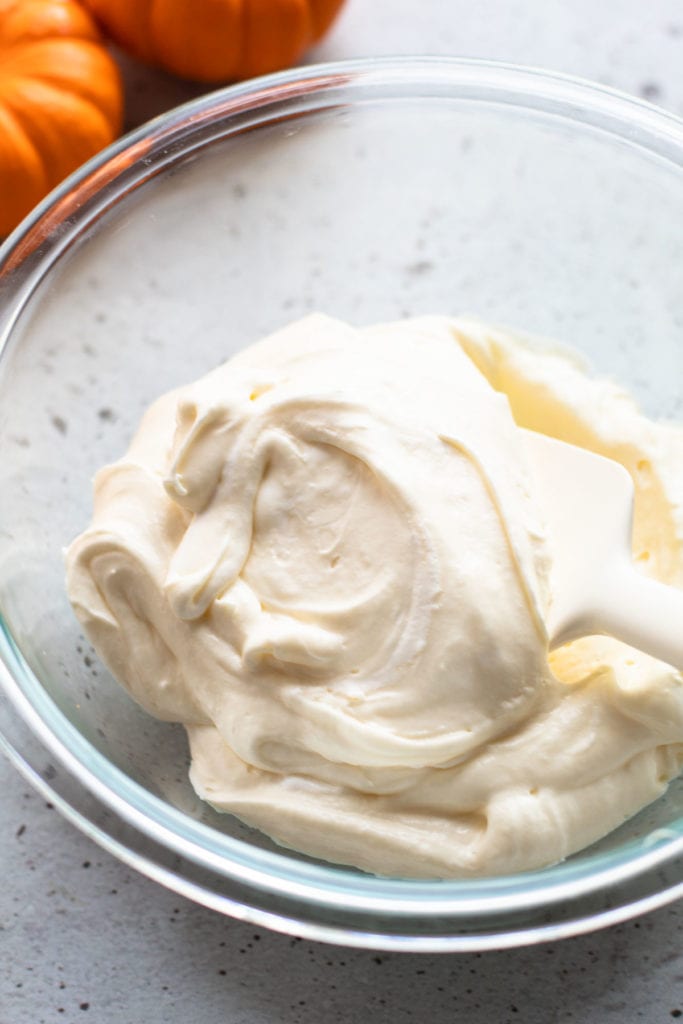
- Add heavy cream to the bowl of an electric mixer with a whisk attachment. Whip on medium-high speed until medium-stiff peaks form, about 3 minutes. Remove the whipped cream and place in a separate bowl and set aside.
- Place the cream cheese, granulated sugar, and vanilla in the now-empty mixing bowl. Whip on medium speed until completely smooth, about 2 minutes, scraping down the bowl halfway through.
- Transfer half of the cream cheese mixture to a separate bowl. Add marshmallow fluff to cream cheese in the bowl and fold it in. Then, add half of the set aside whipped cream to the fluff mixture and gently fold it in until just combined. Set aside.
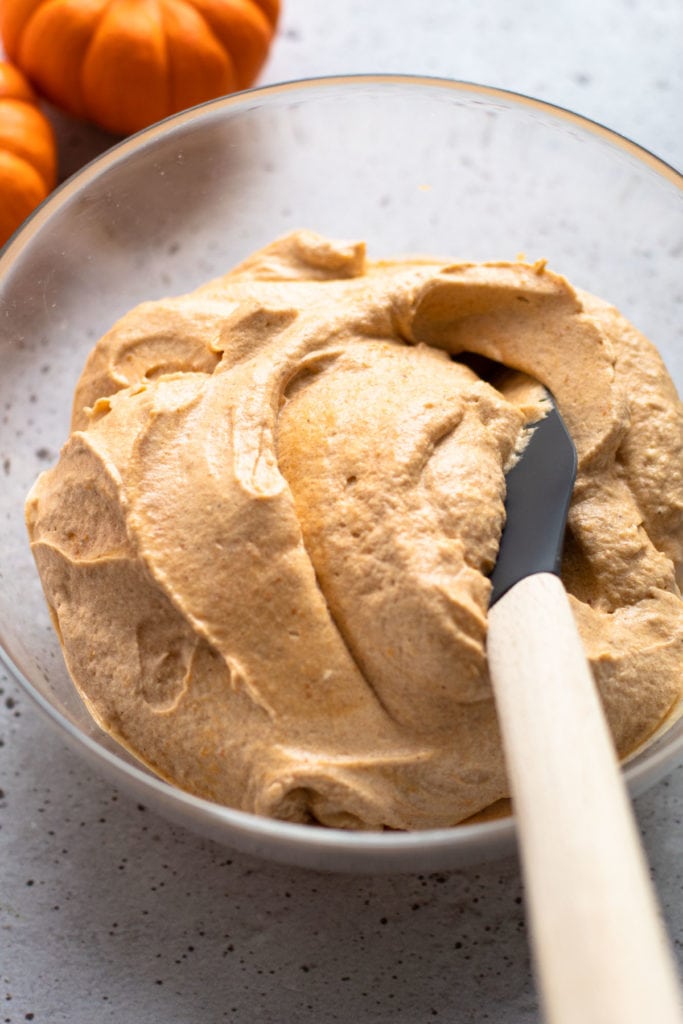
- Return to the remaining cream cheese in the electric mixing bowl, and add the pumpkin puree, brown sugar, cinnamon, nutmeg and salt. Whip together until smooth, about 1 minute. Fold in the remaining set aside whipped cream, until just combined.
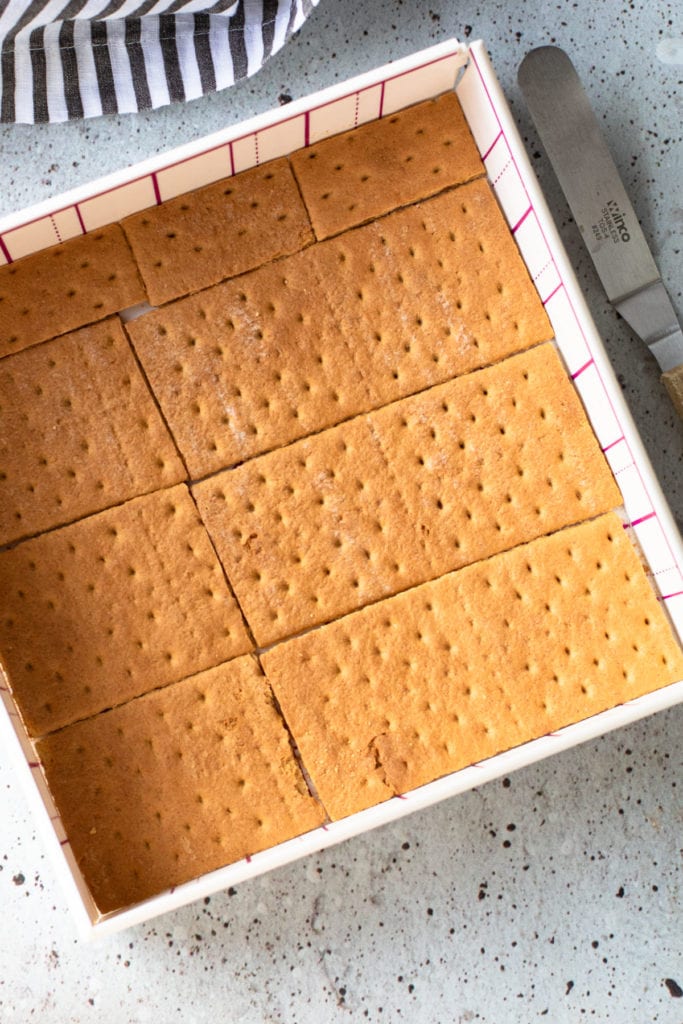
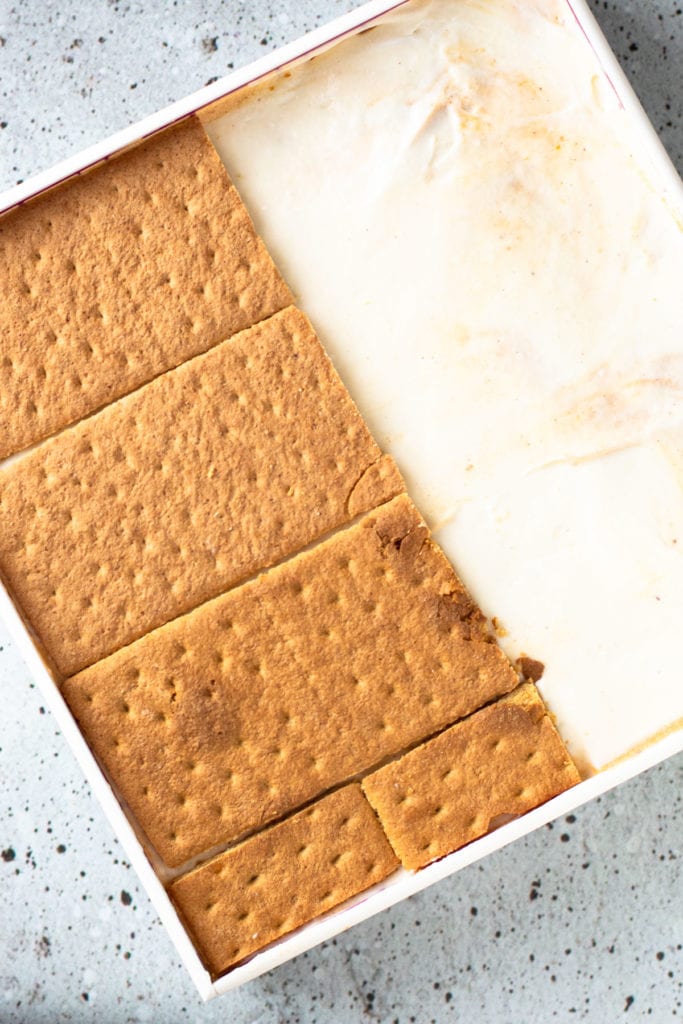
- Line a 9” square baking dish (see note about other containers) with 1 long piece of plastic wrap or parchment paper so that it covers the bottom and up 2 of the sides, and it leaves some overhang. This will help release the cake later.
- Line the entire bottom with graham crackers, cutting any crackers as needed so the bottom is covered completely.
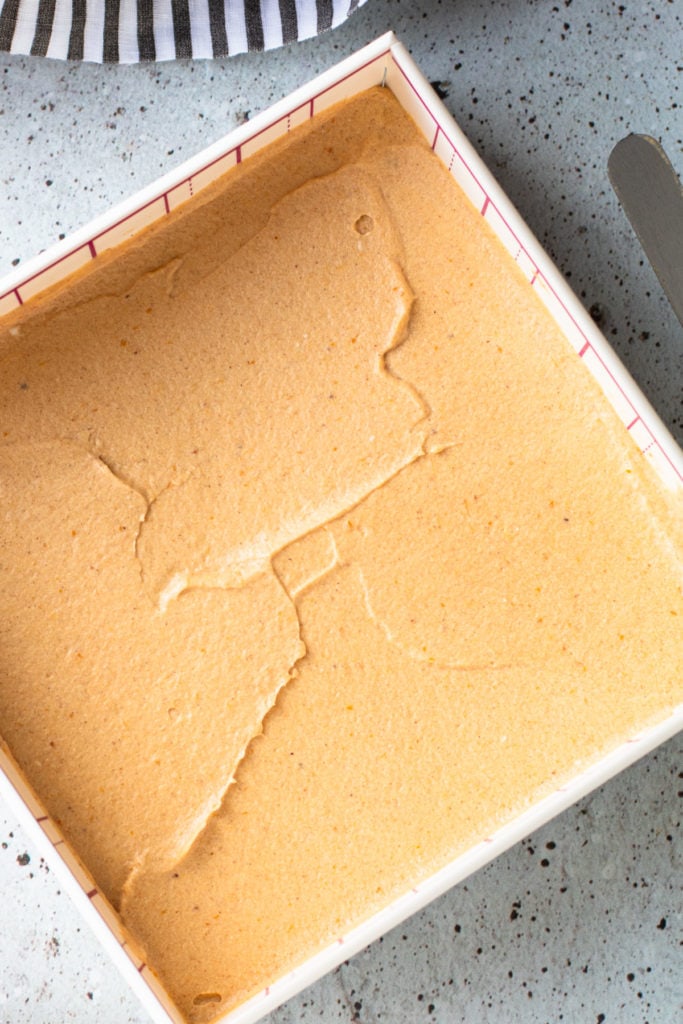
- Spread half of the pumpkin cream filling evenly on top of the graham crackers.
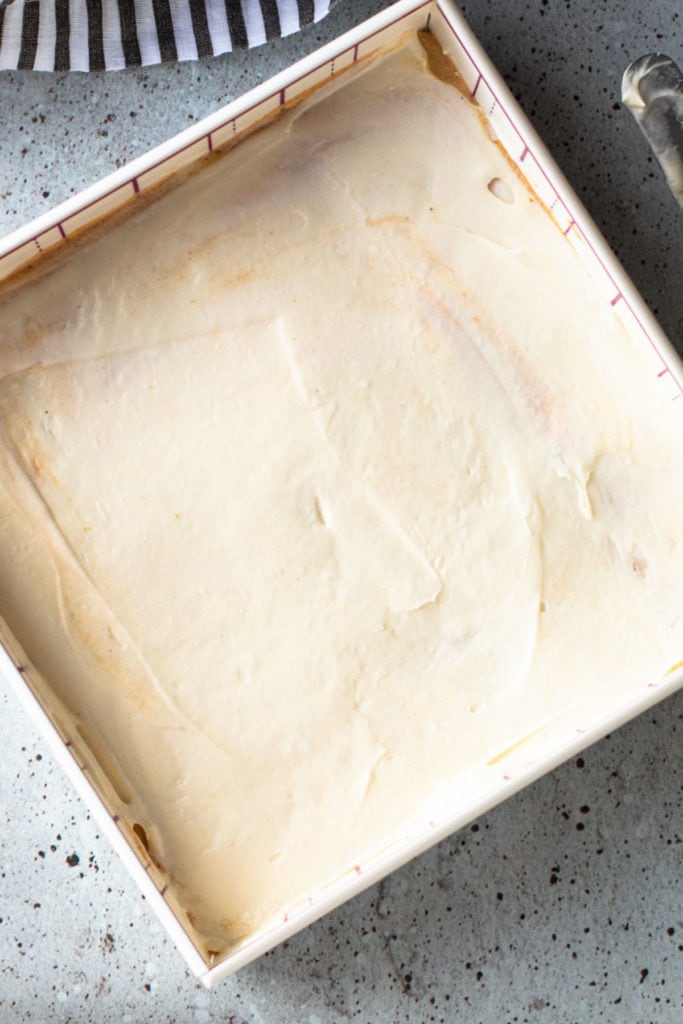
- Spread half of the marshmallow cream filling evenly on top of the pumpkin filling.
- Place another layer of graham crackers on top.
- Repeat the process with one more layer of pumpkin cream, and marshmallow cream.
- Then cover only half of the marshmallow with the final layer of the graham crackers.
- Cover the dish and let chill in the refrigerator for 8-12 hours.
- Transfer the dish to the freezer to let chill for at least 1 hour before ready to serve.
- Once ready to serve, remove from the freezer. Run a dull butter knife under hot water and dry it. Carefully run it along the outside edges of the cake, to help release the sides from the pan. Then lift the cake out of the pan.
- Place cake on a cutting board and cut in half along the edge of the graham crackers. Place the half with the graham cracker on top of the layer with the marshmallow so you have tall loaf cake.
- When ready to serve, combine heavy cream, and maple syrup in a bowl of an electric mixer. Beat on medium-high until soft peaks form, about 2 minutes.
- Place whipped cream on top of the cake and using an offset spatula or spoon, spread the whipped cream down the sides. Sprinkle the top of the cake with pecans.
- Let the cake sit for 5-10 minutes to soften up, and then slice and serve.
Notes
You do not need to use a straight-sided square baking container to make this. You can truly assemble this cake in any baking tin you have. You can change the shape. You’ll just modify the recipe by changing the number of layers you have. Either way, it’s still going to be super delicious, so don’t spend too much time thinking about what vessel you’ll assemble the cake in, and just use what you have.
Letting the cake chill in the refrigerator transforms this dessert from a crunchy graham cracker layered dessert to a cake as the crackers soak up the cream and soften. The reason the recipe then calls for a quick chill in the freezer before serving is that having the cake slightly frozen makes it sturdier to cut in half, stack, and garnish. This step is optional, as you don’t even have to stack them if you don’t want to, but this is a trick that makes it easier to handle the dessert.
Letting the cake chill in the refrigerator transforms this dessert from a crunchy graham cracker layered dessert to a cake as the crackers soak up the cream and soften. The reason the recipe then calls for a quick chill in the freezer before serving is that having the cake slightly frozen makes it sturdier to cut in half, stack, and garnish. This step is optional, as you don’t even have to stack them if you don’t want to, but this is a trick that makes it easier to handle the dessert.
Some of the links on this page may be affiliate links. Everyday Pie is a participant in the Amazon Associates Program. As an Amazon Associate I earn from qualifying purchases, at no extra cost to you.
Kim
Would it be possible to substitute the graham crackers with baked puff pastry sheets? I’m just thinking of using less sugar is all.
Kelli Avila
I think you can, but it won't necessarily be an icebox cake. It would be more like a mille fuille.
Ingrid Castro
Hi Kelly , Soy tu Nueva Alumna , Eres Toda una Super Chef 👌✨ Saludos desde Colombia 🇨🇴🌟
Kelli Avila
¡Gracias, Ingrid! Qué alegría tenerte aquí. Saludos hasta Colombia.
Rebecca
Thorough instructions that are easy to follow if you do one step at a time. Super tasty. My family all enjoyed it, and it was a great way to use up some leftover pumpkin I had.
Melissa
Delicious! A new family favorite to replace pumpkin pie at thanksgiving. Just nice to have something a little different since there tends to be a lot of pies.
Lynn
Kelli, I am definitely trying this recipe for Thanksgiving! Seems like a delightful alternative to the traditional pies. Can you tell me where to get the collapsible sided pan. I'm intrigued and I'm sure I need to add this to my kitchen 😂
Kelli Avila
Hi Lynn! I think you'll love this recipe. Unfortunately, I haven't been able to find it again myself! It was made by Chicago Metallics and I bought it at Whole Foods a few years ago. I love that pan and I'm sad I can't find it anywhere. I've successfully made this recipe though in a straight sided metal square cake pan. I line it with parchment slings on both sides to easily pull it out.
val
Can you freeze this?
Kelli Avila
Yes! There are more directions for freezing in the article above the recipe 🙂
Kat H
I doubled for a 9 x 12 pan with two layers and it was perfect! So delicious
Kelli Avila
Thanks for stopping by and sharing, Kat! Enjoy!
Donya
This recipe sounds delicious and I know my family will love it, therefore I have to ask can it be doubled for like a 9x13 and have 2 layers of everything. That's my delema.. slices would have to be bigger and it would definitely be taken to work. I have 2 men in my house and they love desserts. Lol thank you
Kelli Avila
Donya--increasing the recipe is just fine! I do wonder though if the recipe will need to be tripled to fit into a 9x13? I'd suggest starting with doubling it, and building up the layers, and then if you do need more you could always whip up more of the cream? Let us know how it goes!