
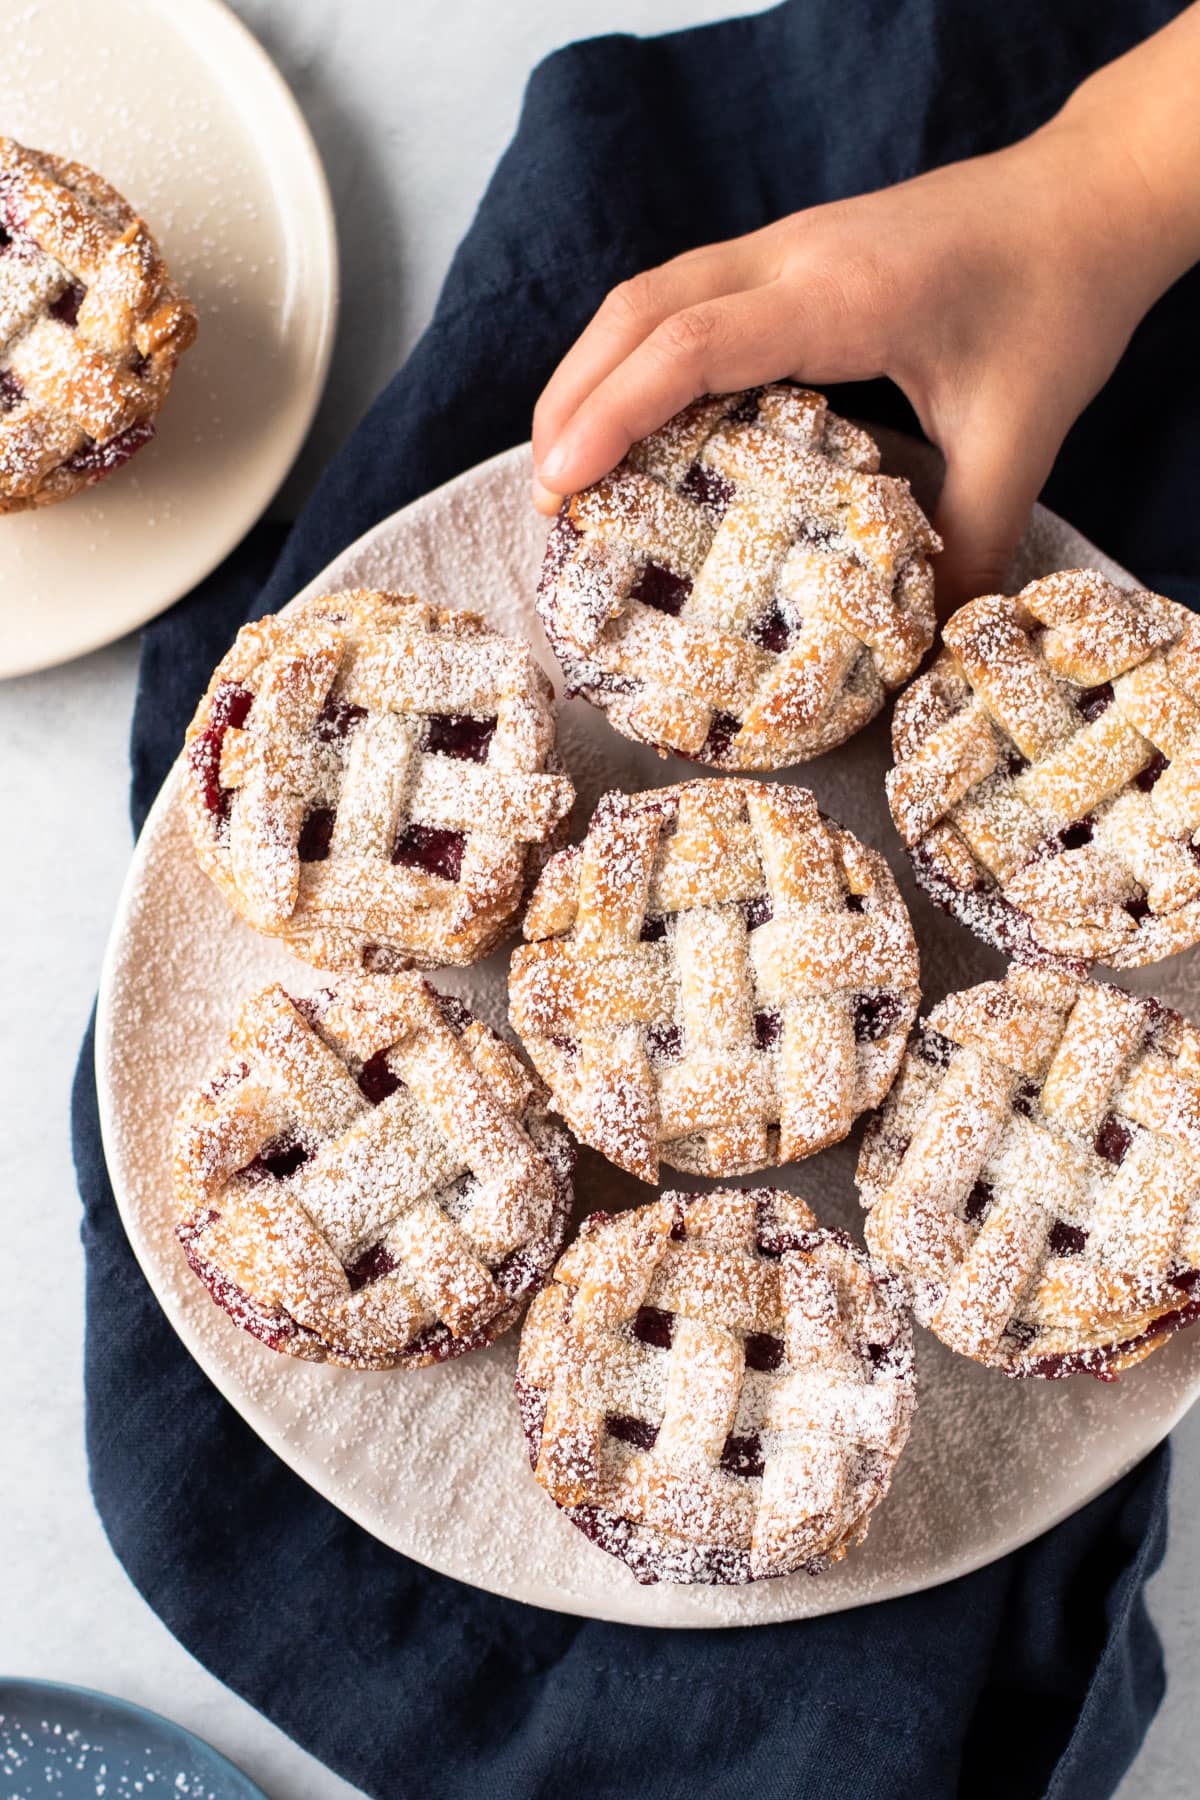
A tart and sweet cranberry pear filling is tucked inside of flaky pastry, topped with a lattice and baked in a muffin tin to create the cutest mini pies. These Cranberry Pear Pie Minis are both festive and functional to serve during the holiday season!
Want to save this recipe?
Enter your email & I'll send it to your inbox. Plus, get weekly updates from me!
The combination of cranberry and pear together in the late fall is divine. Juicy sweet pear paired with tart bright cranberry is the perfect holiday flavor, especially when packed into a cute, little, pastry package.
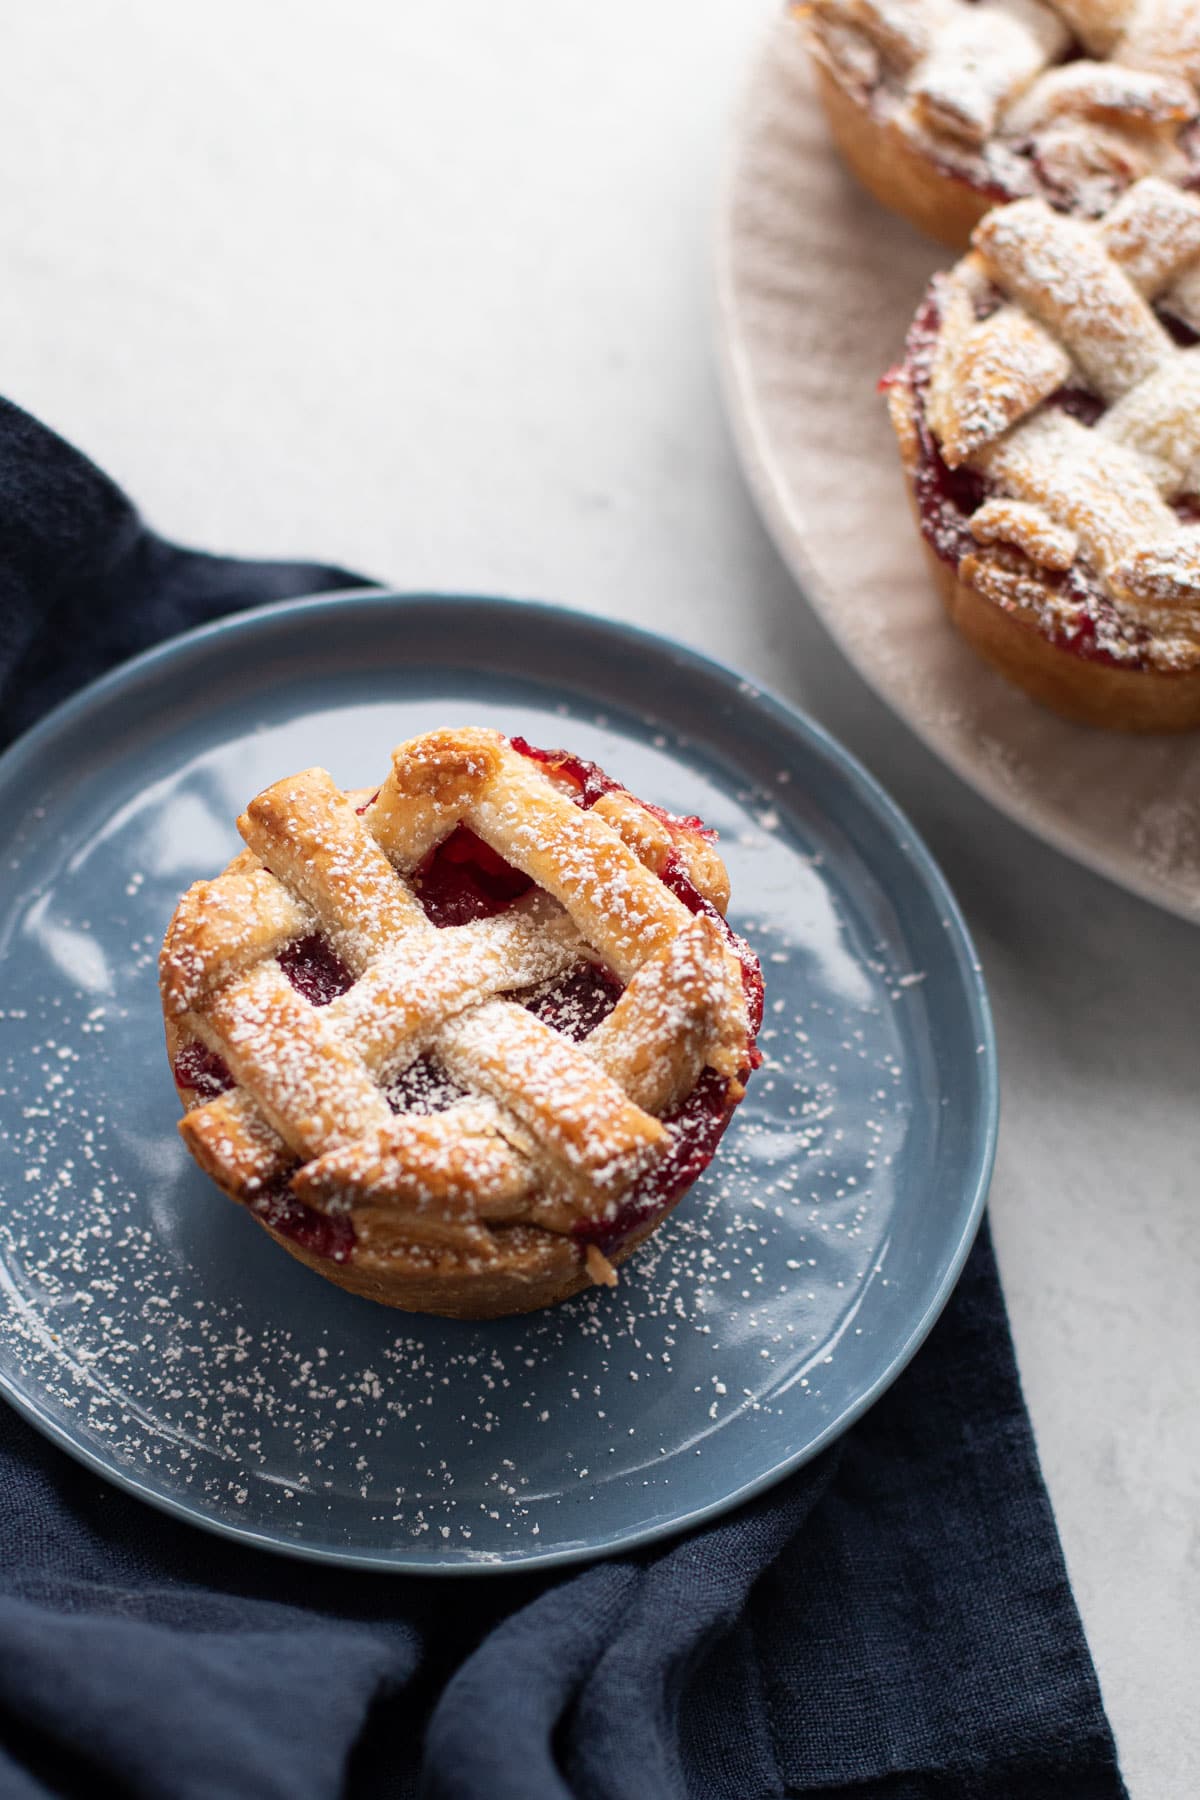
Mini pies require a little more work up front, in terms of shaping each individual pie, but that extra work certainly pays off later when it comes time to serve the pie; there is no need for slicing! Plus they're simply adorable.
The ratio of crust to filling on these Mini Cranberry Pear Pies are just about equal, making this a pie everybody can get behind. Single-serving pies for everyone!
Let's get to baking them, shall we?
Ingredients Needed
Here is an overview of the ingredients needed for this recipe. The full recipe is listed below in greater detail.
- double crust pie dough
- semi-ripe pears (buy either D'Anjou, Bartlett or Comice)
- granulated sugar
- freshly squeezed orange juice
- spices: ground ginger + cinnamon
- vanilla extract
- cornstarch
- egg wash
Tools Needed for Mini Pies
Here is a list of some of the primary tools I use in this recipe. You won't necessarily choose to use them all, but they are exactly what I used. Any links may contain affiliate links.
- food processor (to make the dough)
- muffin tin
- circle cutters
- Christmas cookie cutters or Fall cookie cutters
- rolling pin
- ruler (to make the lattice)
- pastry wheel or pizza cutter or sharp knife
- pastry brush (for applying egg wash)
How to Make Mini Pies
There is some finesse of technique needed to make mini pies, but it's mostly up to you how elaborate you would like to get with your design.
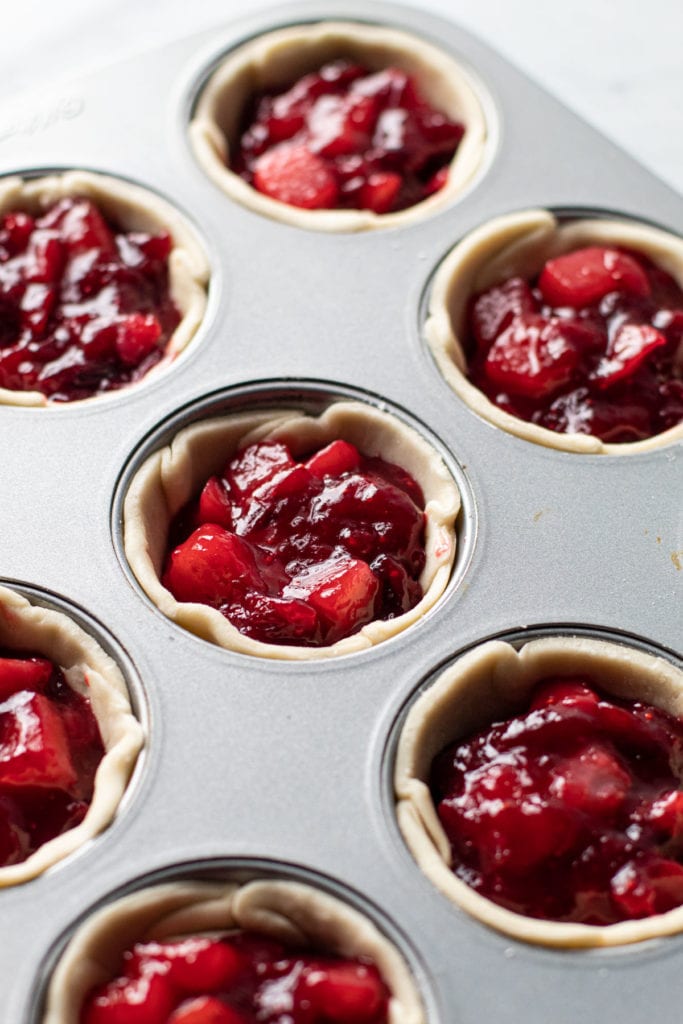
At it's very basic, this mini pie recipe involves stamping or cutting out circles of dough and placing them into a muffin tin. The filling is first cooked on the stovetop. However, it must be fully cooled before being placed in the dough.
The filling is then placed in the tin, nearly to the top, and lastly, topped with either another circle of dough or a lattice.
After the pie has been filled, it should be chilled in the freezer for 15 minutes before heading into the oven.
I recommend using a nonstick muffin tin for baking the pies, as it helps in the release of the pie. The mini pies should be removed from the pan about 15 minutes after they are baked. They should be chilled just enough so that they aren't molten lava hot, but not so chilled that any spilled pie filling is set, which can cause the pie to stick to the tin.
Tips for Making a Decorated Mini Pie Lattice
Because these pies are mini, it can make working with any lattice a bit tricky. Here are some tips that are helpful:
- Make sure everything is cold. Roll out and cut the lattice pieces first and then let it chill for 20 minutes before you go to form them.
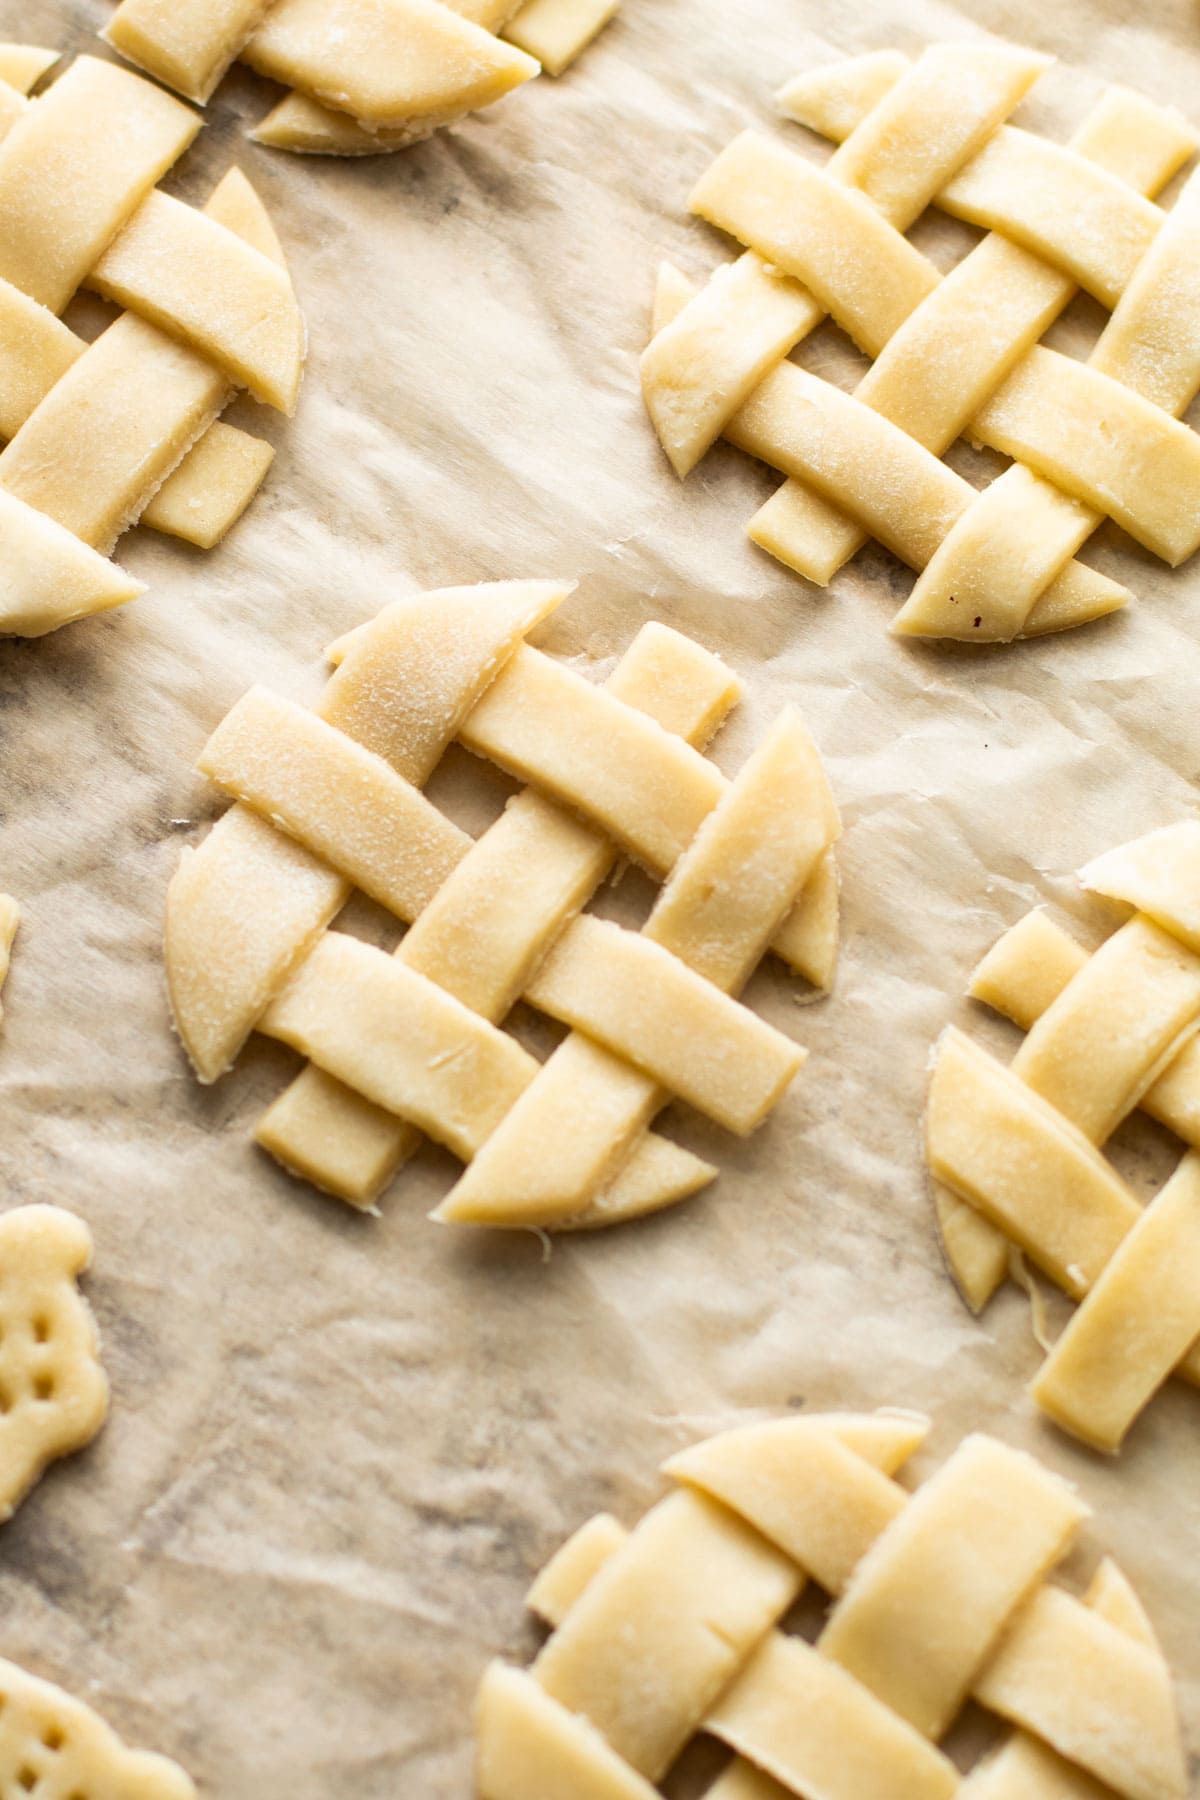
- Weave the lattices on a sheet tray first. This was much easier to do than weaving them directly on top of the mini pie. After the lattice is made, use a circle cutter to cut them into the exact size of the top of your mini pie. See the list of tools I used above.
- Chill the lattices again, before transferring them to the top of the pie. At this point, you may be noticing a pattern of "chilling" the pie dough. While this may seem annoying and finicky, it's just the reality of what it takes to make a neat looking pie. All of these steps are completely optional, but it's a trick that does work if you find it difficult to work with the pie dough. When it doubt, chill it out!
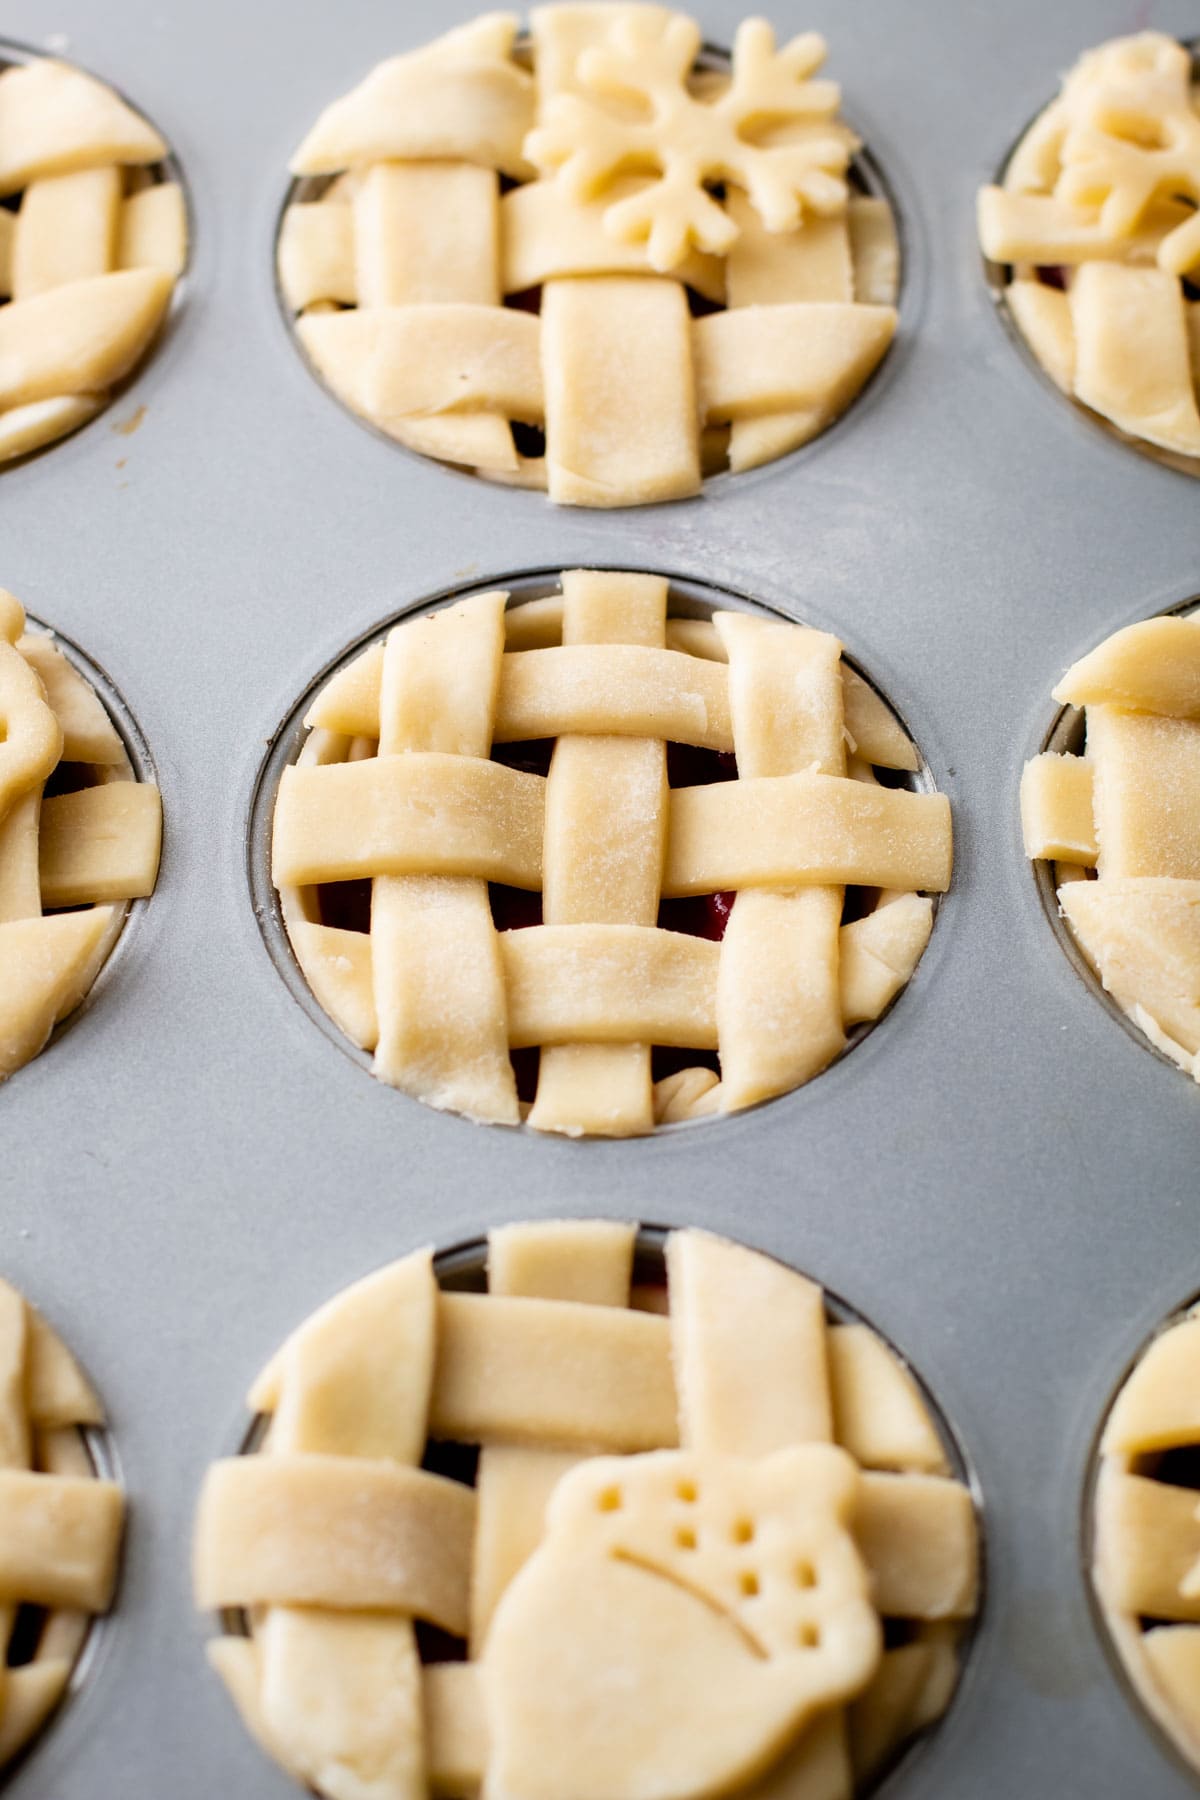
- Bake the decorative cutouts separately. Again, another extra step here, but baking the decorative cut out pieces separate ensures they cook properly and maintain their shape. Bake them in the oven on a different rack with the mini pies for about 10 minutes, or until golden brown. When ready to serve, place the decorative piece on the mini pie. You can also bake them directly on the pie if you choose.
Baking and Freezing Options
As with all fruit pies--whether mini or not--they can be baked the day they are made, or frozen to be baked another day (or baked AND frozen to be served another day). Fruit pies are very versatile and are a great make-ahead option when you're pressed for time during the holiday hustle.
To bake them immediately, follow the directions in the recipe below.
To freeze them for another day, wrap the entire tray in plastic wrap twice. Just make sure not to egg wash them yet. Place on a flat surface and freeze for up to 3 months. When ready to bake, remove from the freezer and let it sit at room temperature until the dough is tacky. Then bake as directed, likely for an additional 15 minutes. You'll still look for the pie dough to be golden brown and the filling to be bubbling.
To freeze after baking, let the mini pies fully cool outside of the muffin tray. Then, place in an airtight storage container and freeze for up to 1 month. Defrost overnight and, if desired, warm up the pie in a 300ºF until warmed through.
Make Ahead Steps
As with most pies, there are a few steps you need to make these minis. A lot of these components can be broken down into steps and done ahead of time. I encourage you to make the pastry and roll it out beforehand. The more time you give the gluten to chill out, the better your pie will be.
Make ahead options:
- Make the pie dough ahead of time. This recipe makes 2 pie crusts, which is exactly what you will need. You can make it up to 2 days ahead, stored in the refrigerator, or even up to 3 months in the freezer.
- Make the filling. It can be done up to 3 days ahead of baking. I find it's best to make the filling on the same day you make the pie crust.
- Roll out the pastry. This can be done 1 day ahead of time. Roll out the pastry and cut out the circles and place in the muffin tin. Roll out the second piece of pastry and cut the lattice pieces and lay them flat on a baking sheet. Cover both well with plastic wrap to prevent them from drying out. Store in the refrigerator up to 1 day before assembling the mini pies.
- Assemble the minis: the minis can be assembled and frozen before being ready to bake. See above for more information on how to do this.

More Fruit Pie Recipes:
Full Recipe
Cranberry Pear Pie Minis
A tart and sweet cranberry pear filling is tucked inside of flaky pastry, topped with a lattice and baked in a muffin tin to create the cutest mini pies. These Cranberry Pear Pie Minis are both festive and functional to serve during the holiday season!
- Prep Time: 00:25
- Cook Time: 00:30
- Total Time: 55 minutes
- Yield: 9 Mini Pies
- Category: Dessert
- Method: Bake
- Cuisine: Sweet
Ingredients
- 1 Batch Pie Crust (makes 2, you'll need both)
- 2 cups (230 grams) cranberries, fresh or frozen
- 3 semi-ripe pears, peeled, stems and seeds removed and diced into ½” pieces (see note)
- ½ cup (100 grams) granulated sugar
- ¼ cup (60 grams) fresh-squeezed orange juice, plus 1 tablespoon, divided
- ½ teaspoon ground ginger
- ½ teaspoon cinnamon
- Pinch of salt
- 1 teaspoon vanilla extract
- 1 tablespoon cornstarch
- Egg wash
- Powdered sugar (for dusting)
Instructions
- Prepare the pastry, let rest overnight, if possible.
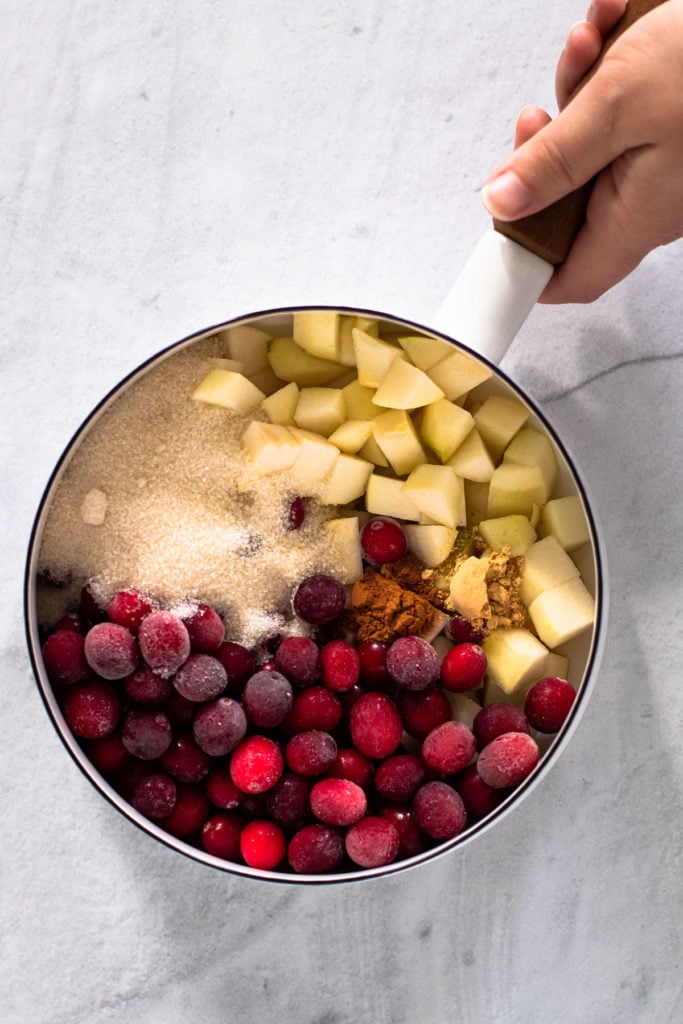
- Make the filling: Add cranberries, pears, sugar, orange juice, ginger, cinnamon and a pinch of salt to a medium pot. Stir together. Cook over medium-low heat, stirring often, until the pears have softened and the cranberries have burst, about 10 minutes. In a small bowl, whisk together 2 teaspoons cornstarch and 1 tablespoon remaining orange juice. Stir it into the cranberry filling and cook until it has thickened. Stir in the vanilla extract. Shut off the heat and transfer the filling to a container to cool. For faster cooling, transfer to a shallow container.
- Preheat oven to 425ºF and place an oven rack in the lower part of the oven. Set aside a muffin tin.
- Roll out the pastry: Roll out one pie pastry to a thickness of ⅛”. Cut or stamp out nine 4.25” circles, rerolling the pastry once, if needed.
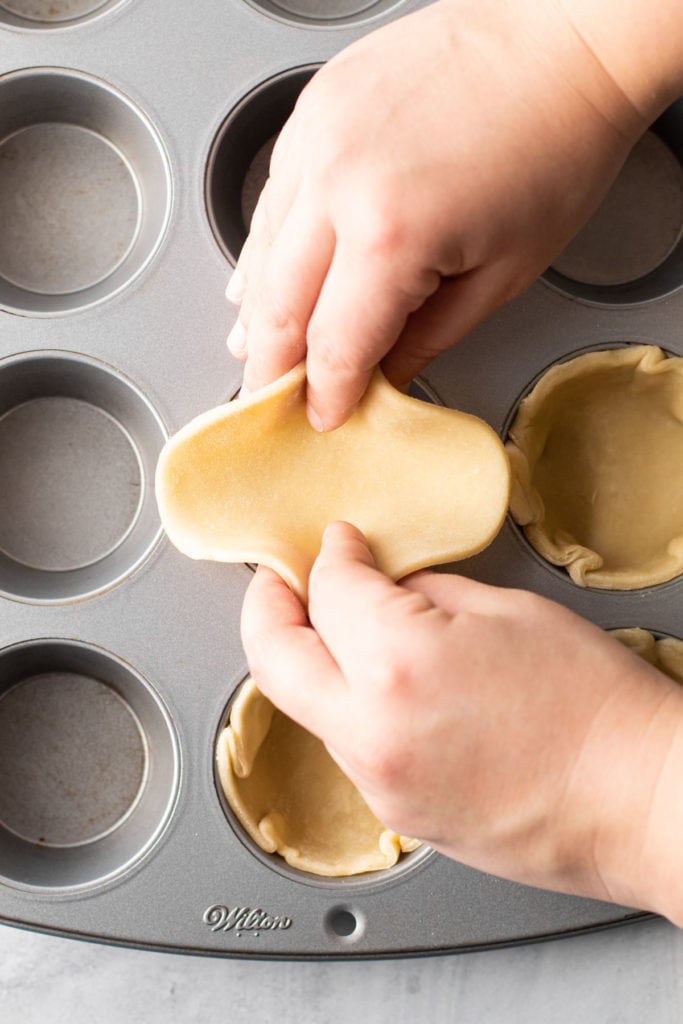
- Place the pastry inside of the muffin tins, taking care to press the pastry into the sides and the bottom.
- Roll out the second pastry to a rectangle about ⅛” thick and slice strips to make a lattice, if desired. Use any leftover dough to stamp out decorative pieces. Form 9 lattices on a sheet tray, and cut them with an 3” circle cutter. If at any point the dough has warmed and it is difficult to work with, transfer to the refrigerator to chill for 15 minutes.
- Place a scant ¼ cup of filling into the muffin tins. Do not overfill them. They should be just below the top of the dough. Transfer the lattice to the tops of the pie, and gently press together the pieces of pastry.
- Freeze the assembled pies for 15 minutes.
- Brush with an egg wash, if desired.
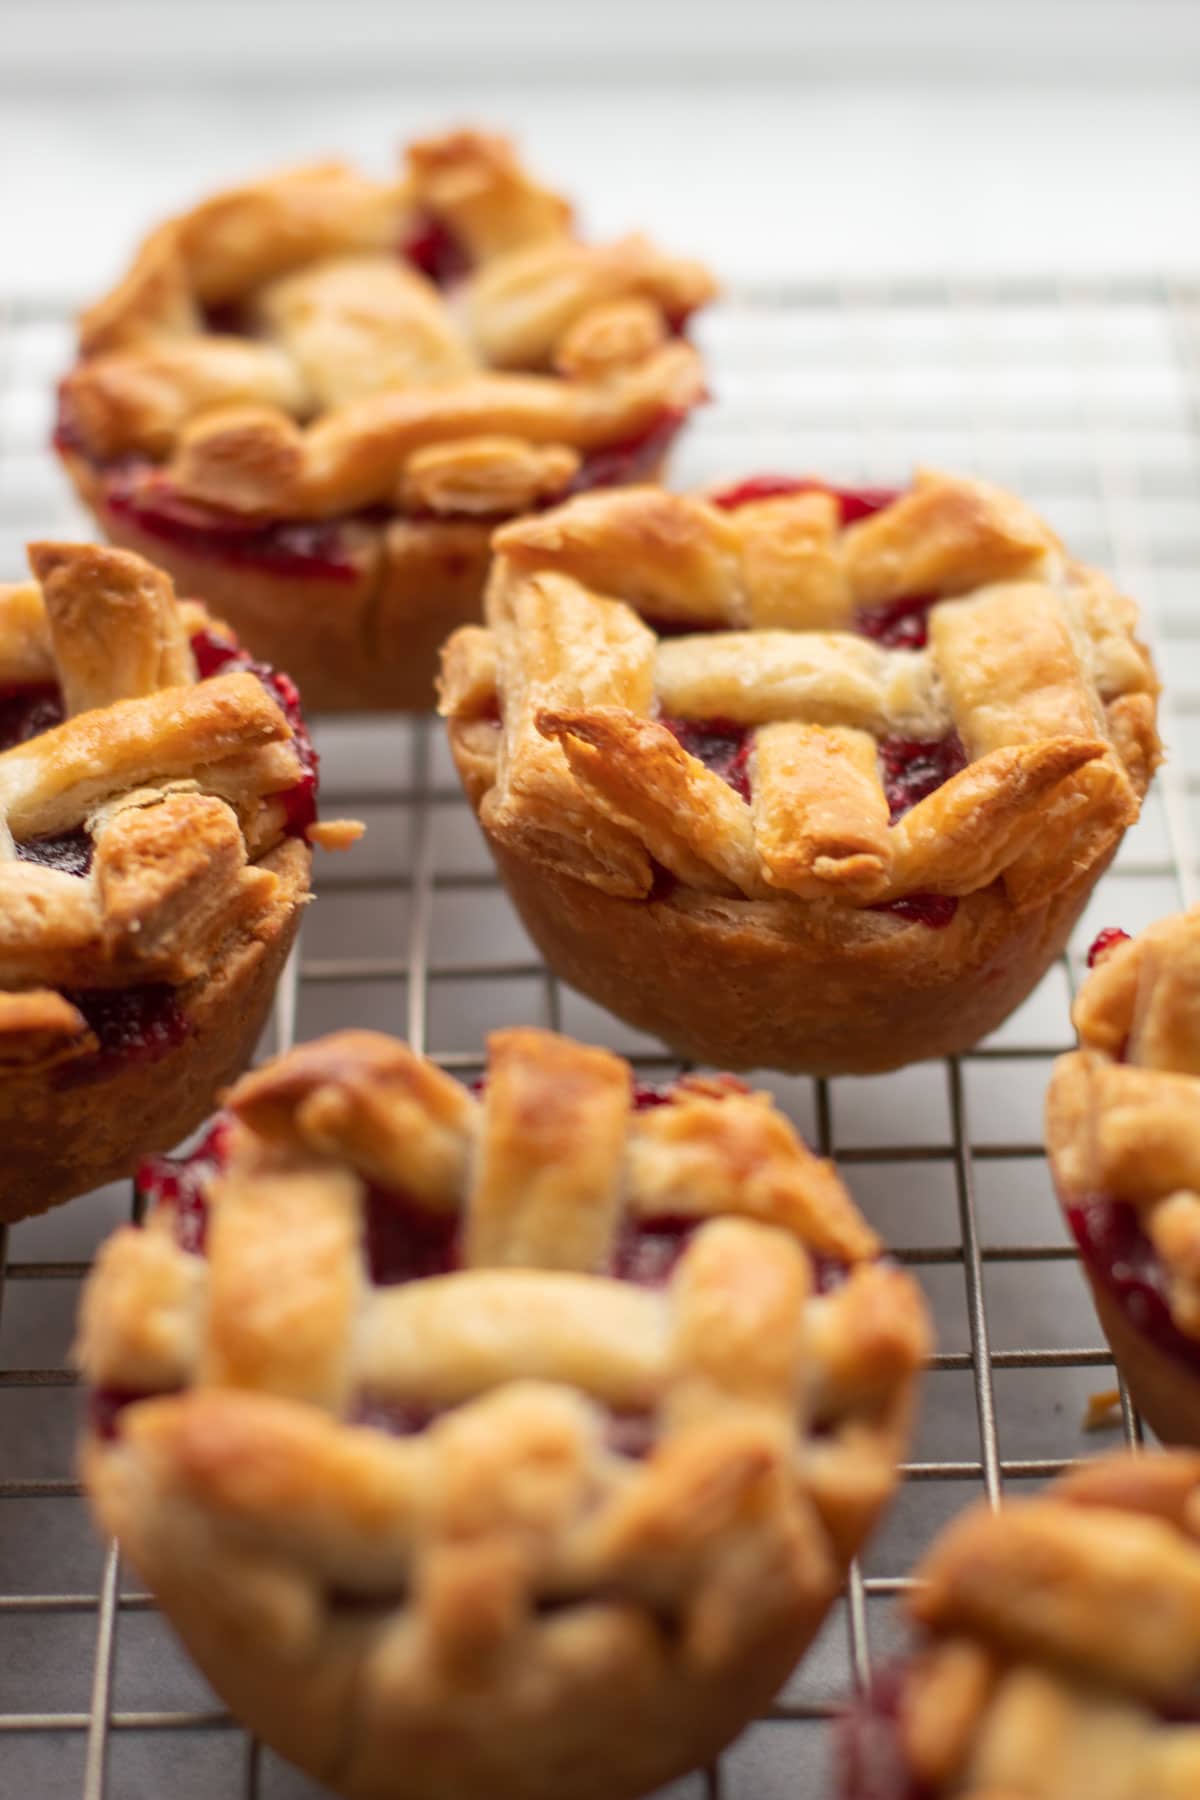
- Bake on the lowest rack until the pie crust is golden and the filling is bubbling, about 25-30 minutes.
- Let the pies cool for 15 minutes. While still warm, take a thin knife and run it around the edges of the pie to make sure it is loose enough. Then take the knife and gently lift the pie out from the tin. Transfer to a baking rack to finish cooling.
- When ready to serve, dust with powdered sugar, if desired.
Notes
The best pies for this recipe are Bartlett, D’Anjou or Comice pears. Choose semi-ripe but still firm pears. If they are too ripe, they can disintegrate after the bake.
If you are making decorative cutouts for the pie, bake them separately on a parchment-lined baking sheet for about 10 minutes, or until light and golden. You can cook them directly on the pie, but they don’t bake up as pretty.
Some of the links on this page may be affiliate links. Everyday Pie is a participant in the Amazon Associates Program. As an Amazon Associate I earn from qualifying purchases, at no extra cost to you.
Elizabeth
Made this again recently - made two small (7 inch diameter) lattice topped tarts with the filling recipe. Pears were a bit too ripe so I cooked cranberries alone first just adding pears with cornstarch. Turned out perfectly. RAVE reviews from all!
Elizabeth
Excellent filling! I made vegan version with a shortening pastry recipe and it was big hit over the holidays!
McKenna
Instead of making mini pies, I made this in a 9” pie plate and added a little bit of everything to make sure I ended up with enough filling (4 pears and about 275g of cranberries). It was SO GOOD! Everyone loved it! For my own taste, I’ll bump up the cinnamon and ginger, but dang! This was amazing! It has officially been added the holiday season lineup in my family!
Debra Keizer
Could these mini pies be made without a top crust?
Kelli Avila
Maybe? I think a streusel might be better though than without the top crust. If you experiment, let me know how it goes!
Sally Ijams
These little pies were a showstopper last Christmas, can't wait to make them for Thanksgiving this year. I'd never made such a little lattice before which had me a little nervous, but the instructions walked me through it step-by-step. Highly recommended!
Lindy
Made these in my gluten free pie crust and they tasted just like Christmas. Perfect sweet tart balance, just juicy enough, all the good warming spices. Delicious!
Kelli Avila
So happy you enjoyed Lindy! -Kelli
Michele Dollar
Would the filling work for a while pie if I didn't want to do individuals minis?
Kelli Avila
I've not tried it, but I believe it should be the correct amount. You might have to add another pear or two, but the thickener should be enough for that. If you try, let us know how it goes! - Kelli
Helen Smith
Can I use dried cranberries for this recipe?
Kelli Avila
Unfortunately no.
Tina
I made these last year and they were a hit! I am wondering if you've made these ahead and frozen them entirely before baking. Would you happen to have any tips for baking ahead?
Kelli Avila
Hi Tina! I'd say you can either bake them entirely ahead of time and then freeze them. Defrost at room temperature overnight, and then warm up in the oven to crisp the crust so it tastes fresh! Or you can freeze them assembled but unbaked, and bake from frozen. Let them sit at room temperature for 10 minutes while you preheat the oven, then bake as instructed, adding on any extra time you need to fully baked them through (likely about 5-10 minutes more).
Stephanie
I made these mini pies to deliver to family and friends for Thanksgiving. They we're loved by all! So easy to make and Kelli always has the best directions and tips. The filling is absolutely divine! I used Kelli's gluten free pie crust instead and they came out great! I saved the little bit of the leftover filling to put over ice cream. I will be making more of these for Christmas deliveries!
Kelli Avila
So impressive you made these with the gluten-free crust!