
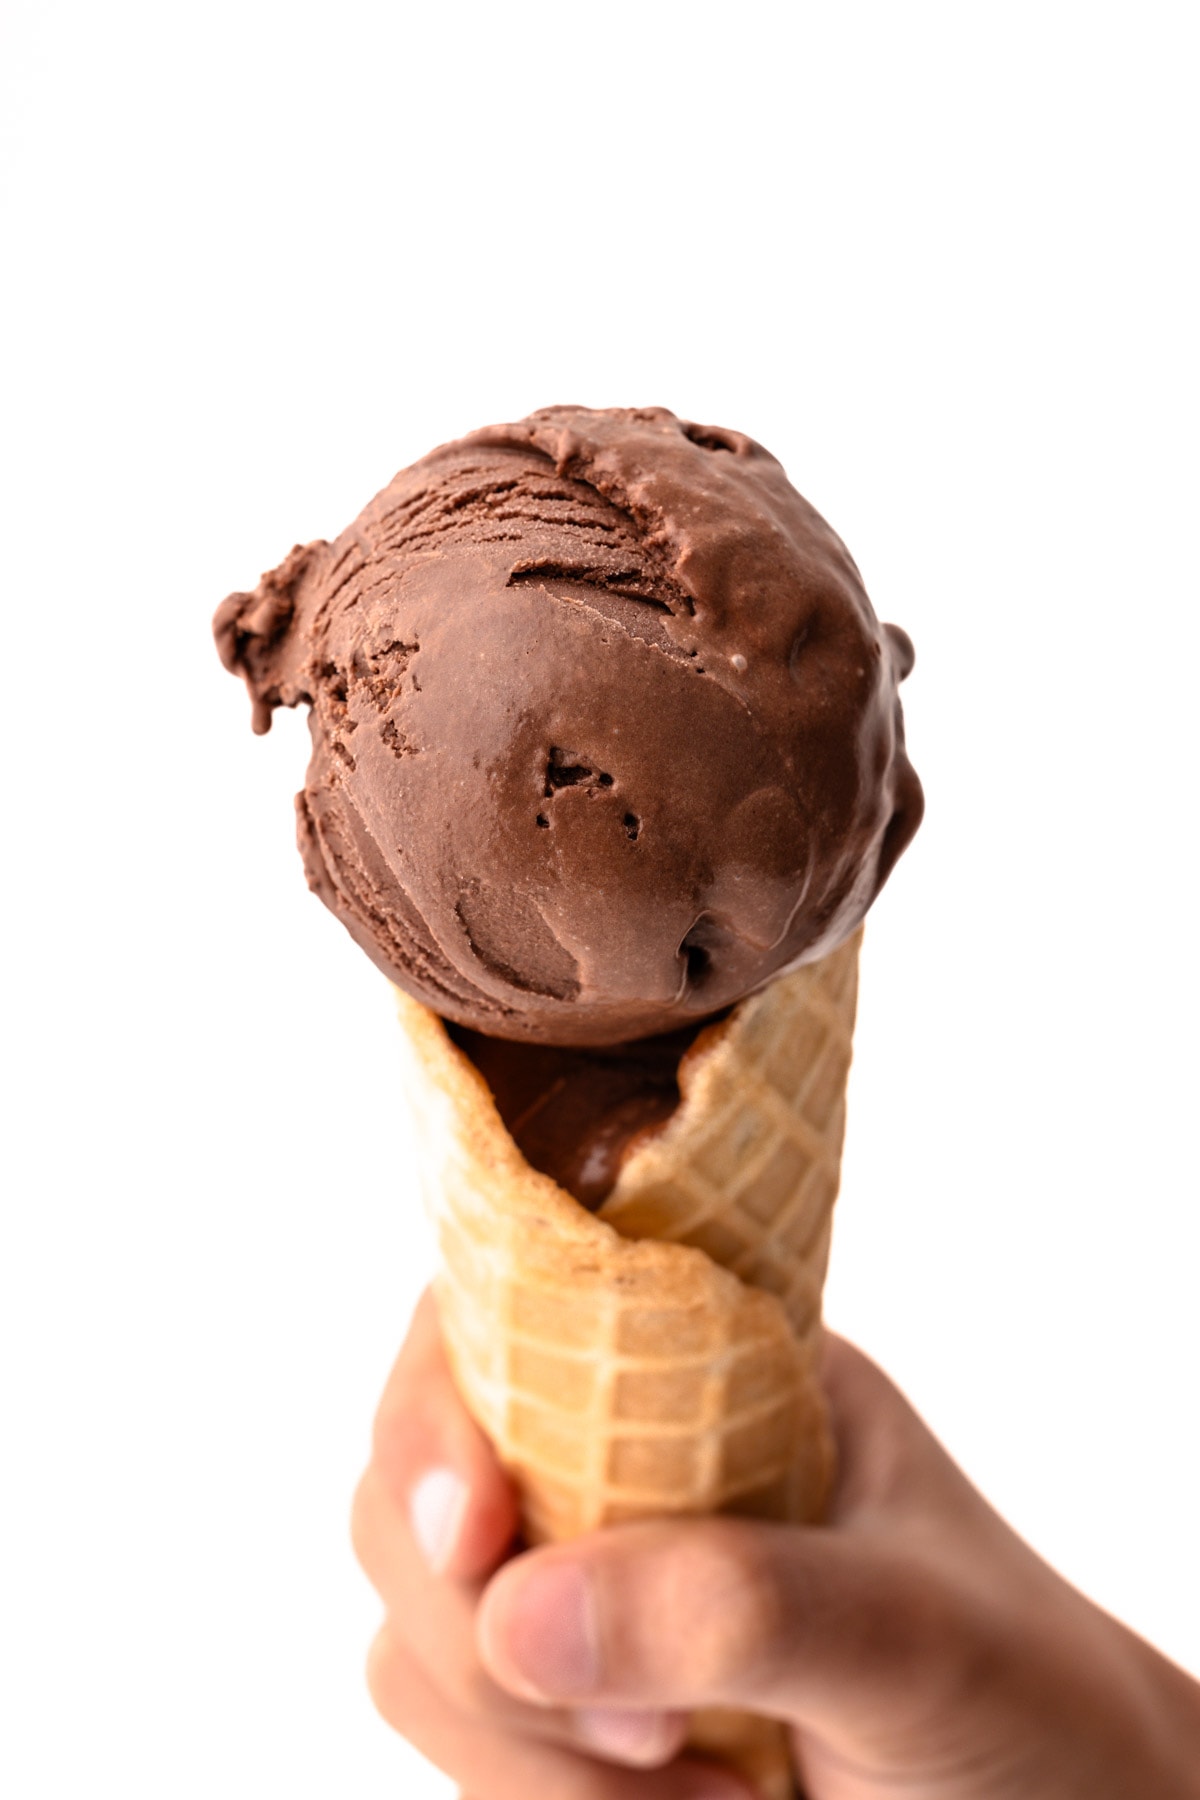
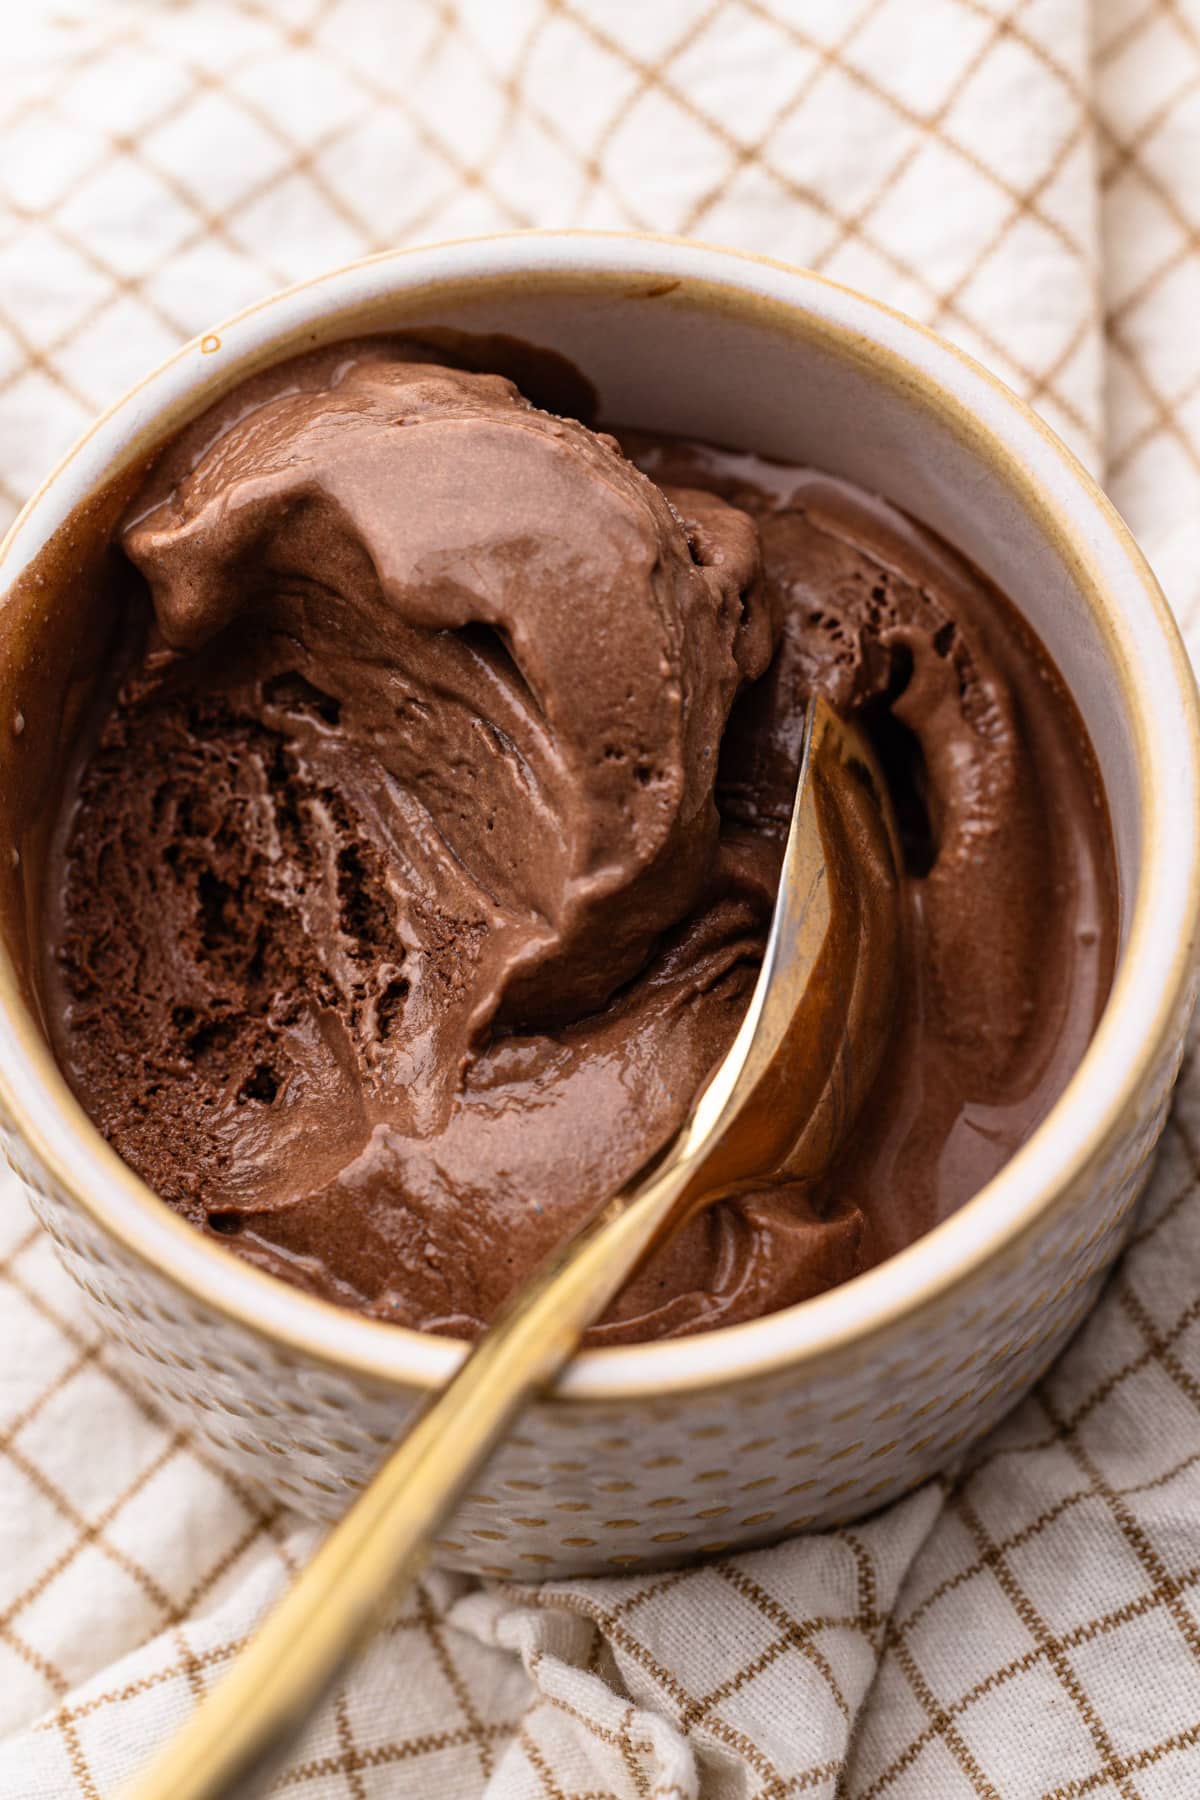
This is the actual best homemade chocolate ice cream recipe. It's super rich and ultra creamy with a deep chocolate flavor. This old-fashioned churned recipe doesn't require eggs and is simple to make.
Want to save this recipe?
Enter your email & I'll send it to your inbox. Plus, get weekly updates from me!
Jump to:
If you've never had homemade chocolate ice cream, let me be the first to tell you that you'll need to prepare for a rush of big chocolate flavor with this recipe. Store-bought ice cream often (always?) lacks the depth of rich chocolate flavor that's worthy of satisfying a craving. But this recipe? It is all about it.
And we have to talk about the texture of this chocolate ice cream. Last semester, as part of my Master's degree program, I took a food science course, and one recurring topic was ice cream. The concept of ice cream's "chew" was frequently brought up by our professor, but I didn't quite understand it until I tried this chocolate ice cream for the first time. Its chewy texture and mouthfeel was a pleasant surprise, and one I didn't know I'd crave until I'd tried it for the first time.
Plus, preparing this recipe is a breeze. While an ice cream spinner is necessary for churning, the egg-free chocolate base comes together effortlessly through simple heating and blending, following the Philadelphia-style method (explained further below).
So, let's get to making it, shall we? The text below offers tons of tips and helpful notes, or you can scroll to the bottom to grab the recipe and get started!
Homemade Ice Cream vs. Store-Bought
I've already briefly touched on this above, but it truly must be said that homemade ice cream is worlds away from anything you can buy commercially-produced in large batches at a store, for a few reasons.
The first is because of the quality of the ingredients. Making ice cream on a small scale at home allows for better quality ingredients, obviously. This is especially true regarding the chocolate for this recipe, which we will discuss below.
The second is due to the ingredient choice or lack of certain ingredients. Despite what most people think, ice cream doesn’t have that long of a shelf life, due to the formation of ice crystals over time. Most (but not all) store-bought ice creams contain stabilizers and preservatives. These additives serve to keep the ice cream creamy and smooth, even if it experiences temperature changes during shipping.
When comparing homemade ice cream without stabilizers to standard store-bought ice cream, the difference is undeniable. Homemade ice cream allows the natural flavors to shine with a much superior texture and mouthfeel.
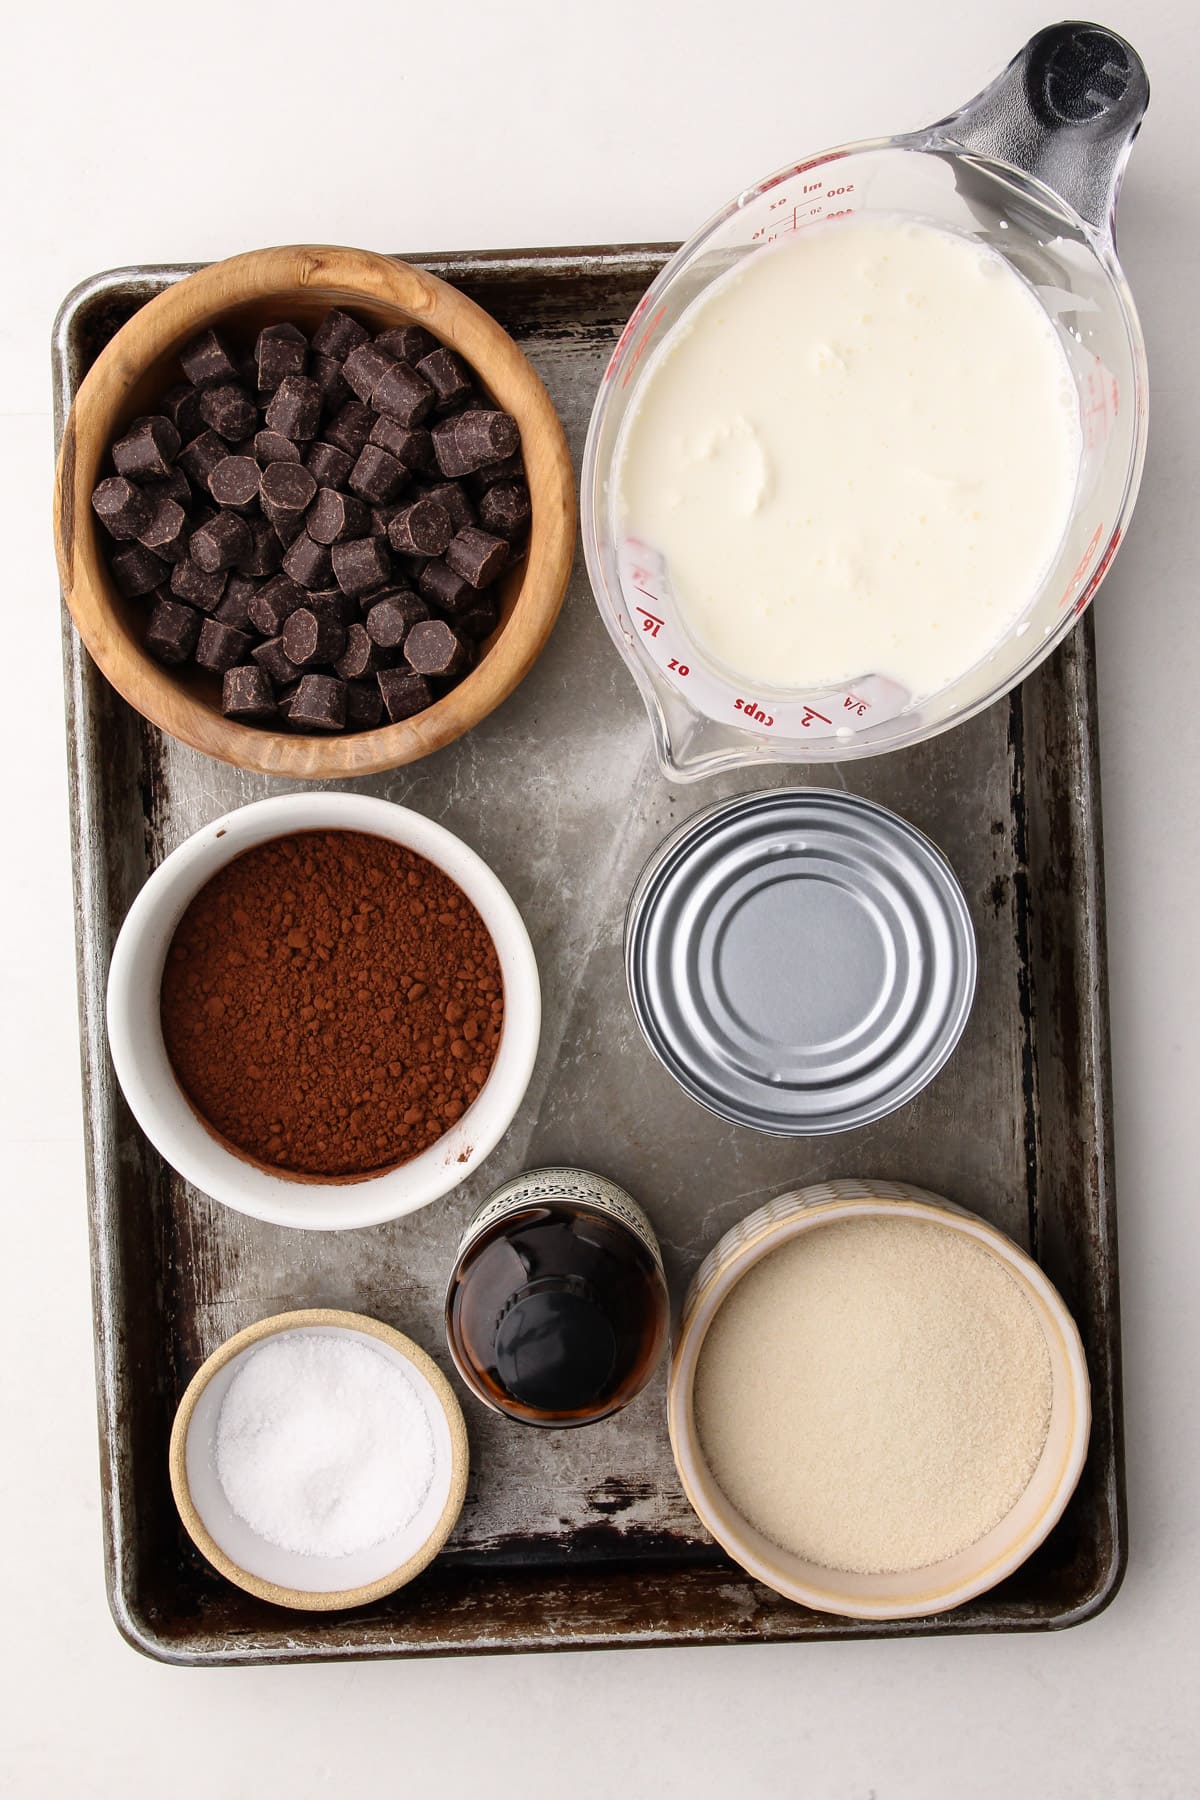
Ingredients Needed
Here is an overview of the ingredients needed for this recipe. The full recipe is listed below in greater detail. Given the small quantity of ingredients in this recipe, I want to go into some detail about their quality below this list.
- evaporated milk
- granulated sugar
- good quality dark chocolate
- dutch cocoa powder
- eggs
- coarse kosher salt
- heavy cream
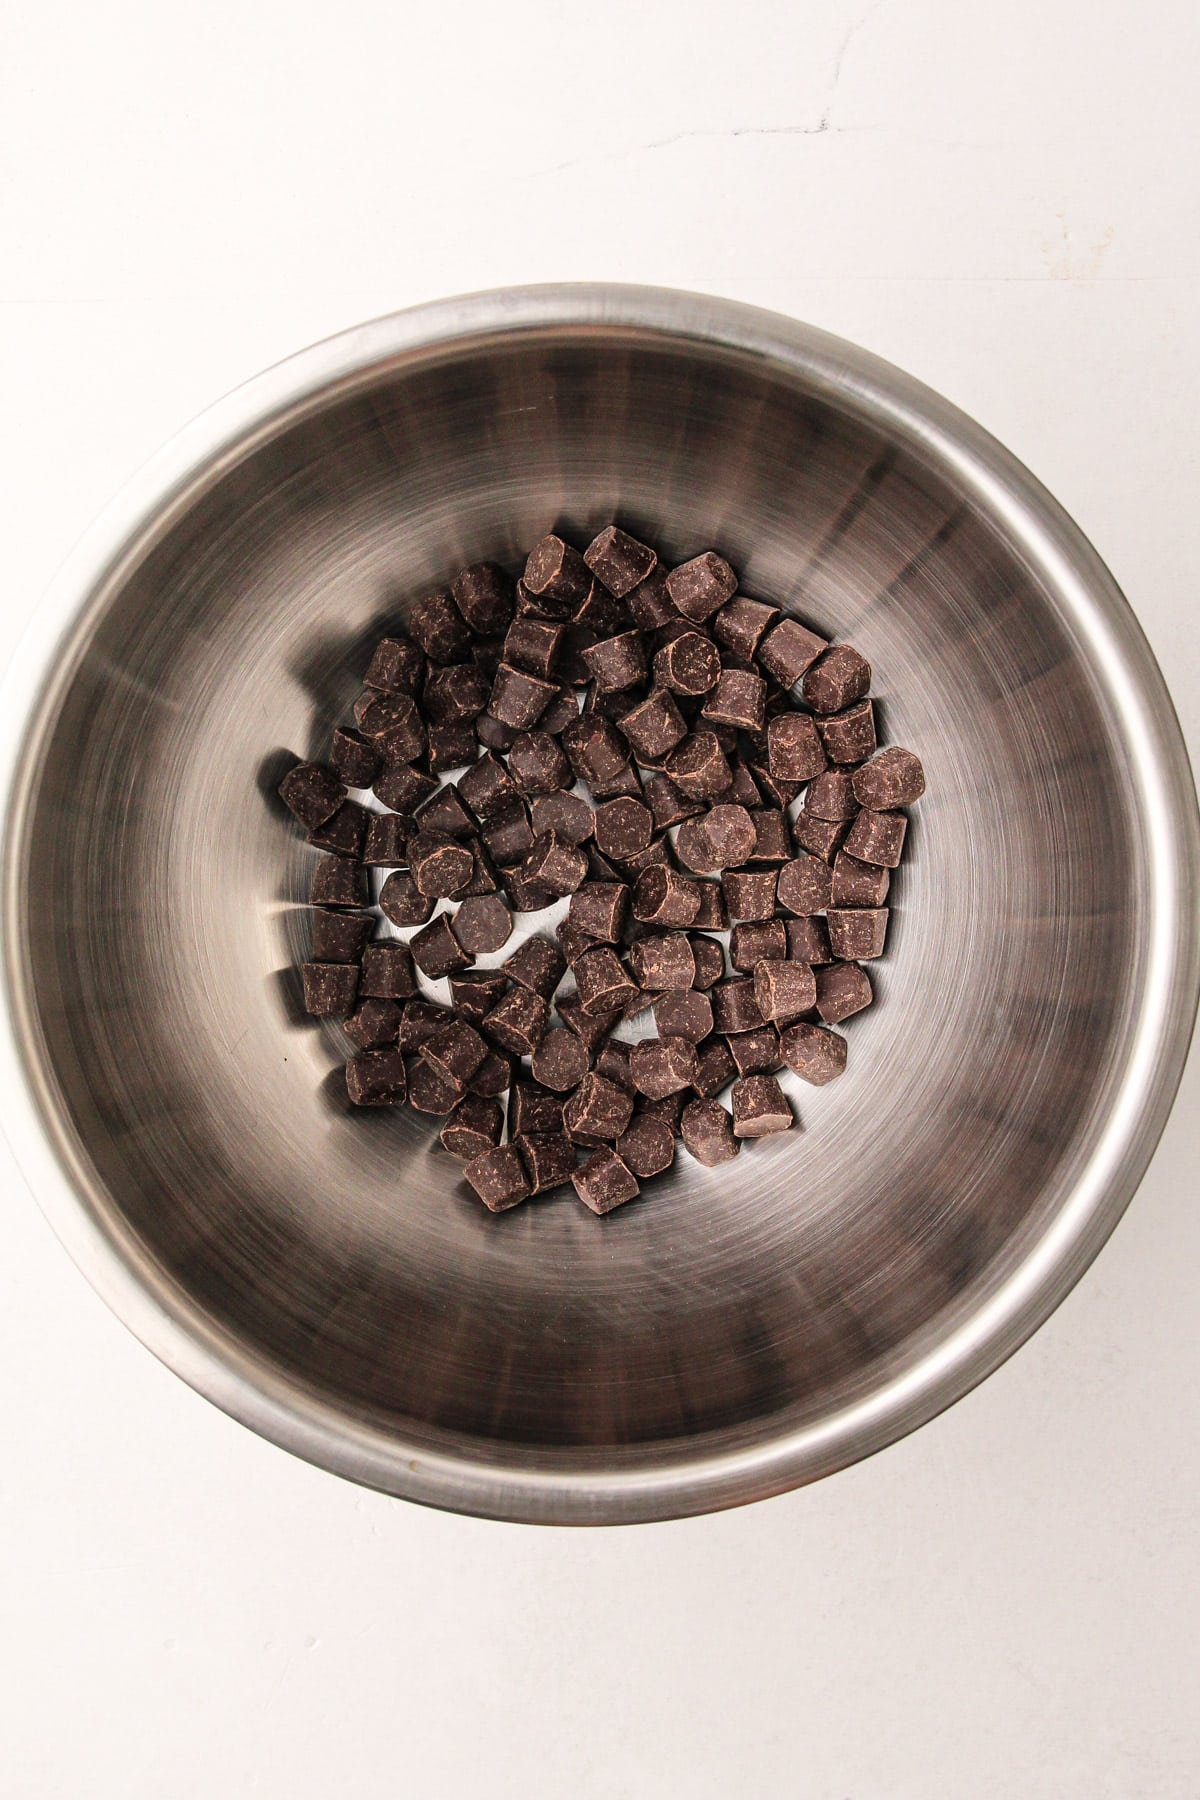
Let's Talk Chocolate
This ice cream recipe can only be as good as the quality of the chocolate and cocoa powder that you use. And that is the magic of making homemade ice cream: you get to choose the ingredients to make a quality product.
I tested this recipe with multiple brands and types of chocolate, but I made sure they were all either couverture or very limited-ingredient chocolate.
Couverture chocolate (such as Callebaut Couverture Callets or Valrhona Couverture Feves) is the highest quality chocolate you can use. I buy it either on Amazon or at Whole Foods, but there are plenty of other places it is available as well. Couverture chocolate contains a higher percentage of cocoa butter compared to regular chocolate, making it perfect for melting, which results in a smooth, glossy texture. And, of course, a superior flavor.
I also tried out this recipe with high-quality non-couverture chocolate such as a Guittard Baking Chocolate that I chopped up, as well as Hu Chocolate Gems (which is photographed in this article).
The exact cacao quantity is less important, though I recommend sticking to the "semi-sweet" to "dark chocolate" range (around 54% to 70% cacao). Use what you think tastes good to your palate.
My favorite chocolate to use for this ice cream was the Recipe No. 811 Callebaut Callets. This is my favorite chocolate to use for nearly anything, so it's no surprise I love it in this ice cream, too. I purchase a bag on Amazon and it lasts me several months.
As far as cocoa powder goes, again, the same is true: the higher the quality, the better the result. I preferred the taste of Dutch-processed cocoa powder, but natural cocoa will work fine, too, with a more bitter undernote.
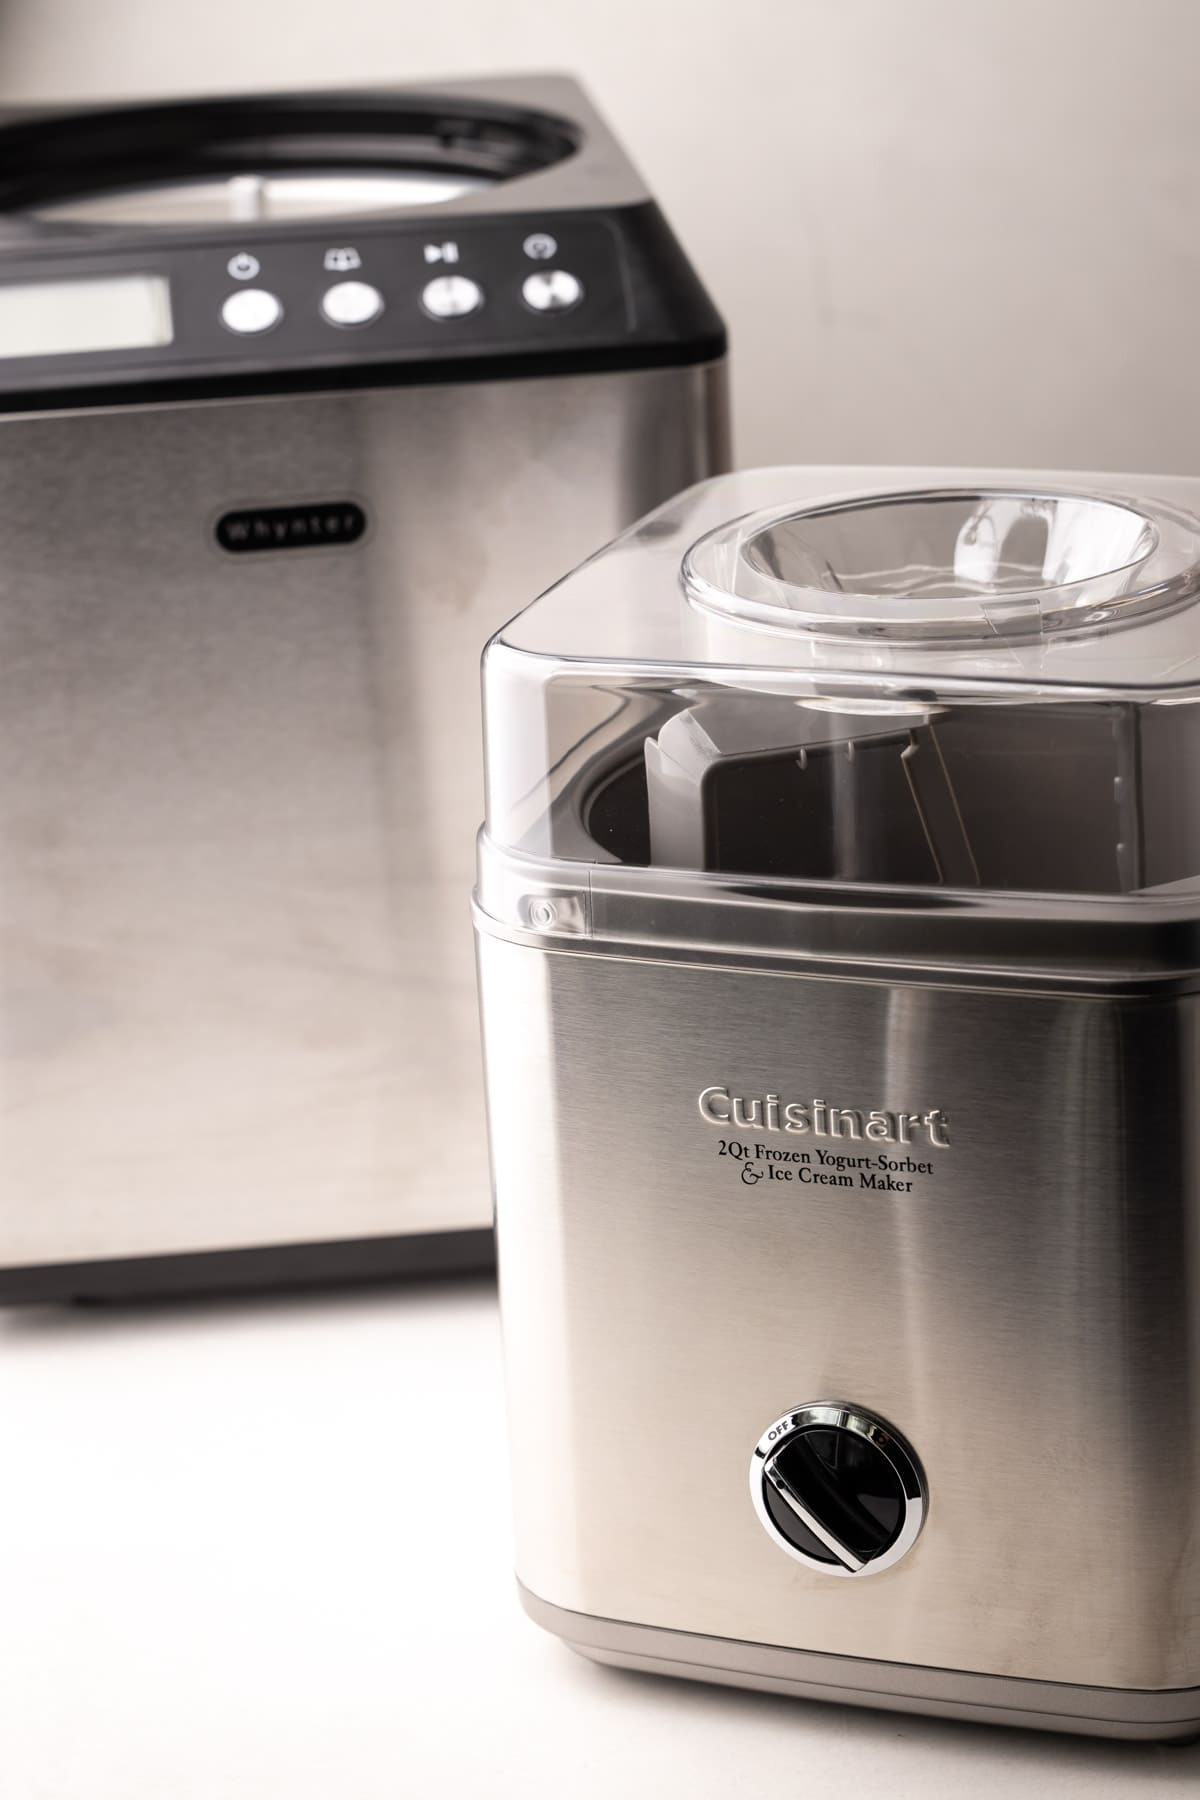
Useful Tools to Make This Recipe
Here is a list of some of the primary tools I use in this recipe. You won't necessarily choose to use them all, but they are exactly what I used. Any links may contain affiliate links.
- medium heavy-bottomed saucepan
- one large metal bowl, one medium metal bowl
- immersion blender (this is highly recommended, but optional)
- whisk and spatula
- ice cream maker
- containers to store ice cream
- kitchen essentials: measuring utensils
Custard Vs. Philadelphia Style Ice Cream
There are two distinct styles of ice cream: custard (or French-style) and no-heat (or Philadelphia-style).
Custard-style ice cream is cooked on the stovetop with eggs, and Philadelphia-style ice cream is prepared by simply mixing the ingredients without eggs and chilling them.
Typically, I lean towards custard-style ice cream. However, when I initially experimented with making this chocolate version as a custard, it turned out to be excessively rich. It resembled a frozen ganache, which is certainly appealing, but my goal was to enjoy more than just a single bite of this ice cream, which is all that could be eaten when it was made as a custard.
Adding the cocoa powder and the chocolate provides stability, smoothness, and the body to make this ice cream fantastic without needing a custard base.
And there is one more ingredient I added to enhance this Philadelphia-style base: evaporated milk.
Evaporated milk is essentially concentrated milk produced by heating it to eliminate a significant portion of its water content. During this process, the milk proteins denature and coagulate, resulting in a denser, creamier liquid that boasts a slightly more intricate flavor profile than regular milk.
The inclusion of evaporated milk is what accounts for the creamy, dreamy texture of the ice cream and that amazing "chewy" quality of it when it is cold.
Overview of Steps
Here is a shortened overview of the recipe. For the full recipe, scroll down to the end of this article.
- Freeze the ice cream machine canister (if necessary).
- Heat all the ingredients, except the chocolate, on the stovetop.
- Strain into a bowl with the chocolate. Let it sit for a few minutes, then use an immersion blender to combine.
- Chill the ice cream base overnight.
- Churn the ice cream base to a soft-serve consistency
- Harden the ice cream to desired consistency in the freezer
- Scoop and enjoy!
A Few Tips for Success
This recipe is relatively straightforward. However, there are a few key points I learned throughout my testing process I wanted to share:
- As mentioned above, use high-quality chocolate that you like the taste of. It will reflect in the final product.
- Let the mixture heat up until it's nearly boiling, and then pour it over the chocolate to melt it. Ensuring the chocolate is fully melted is important for smooth ice cream.
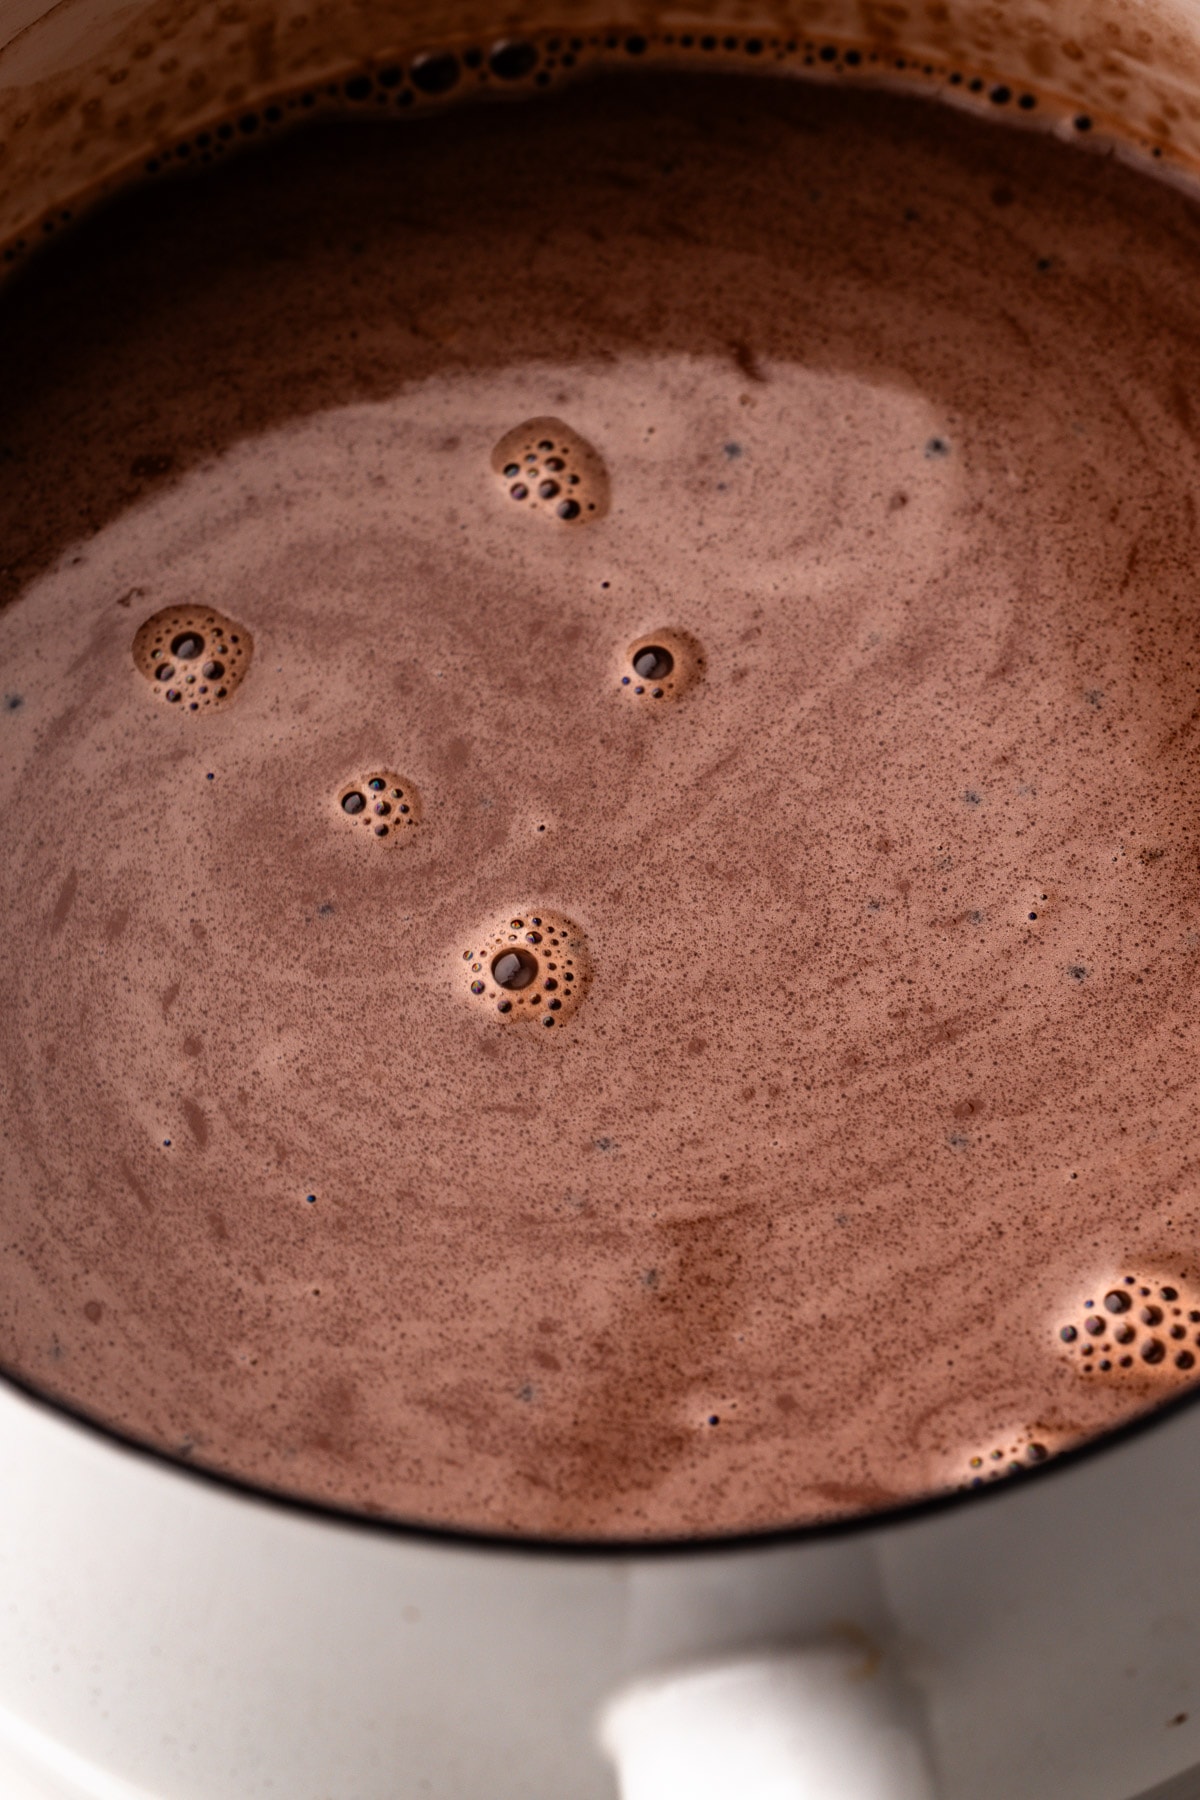
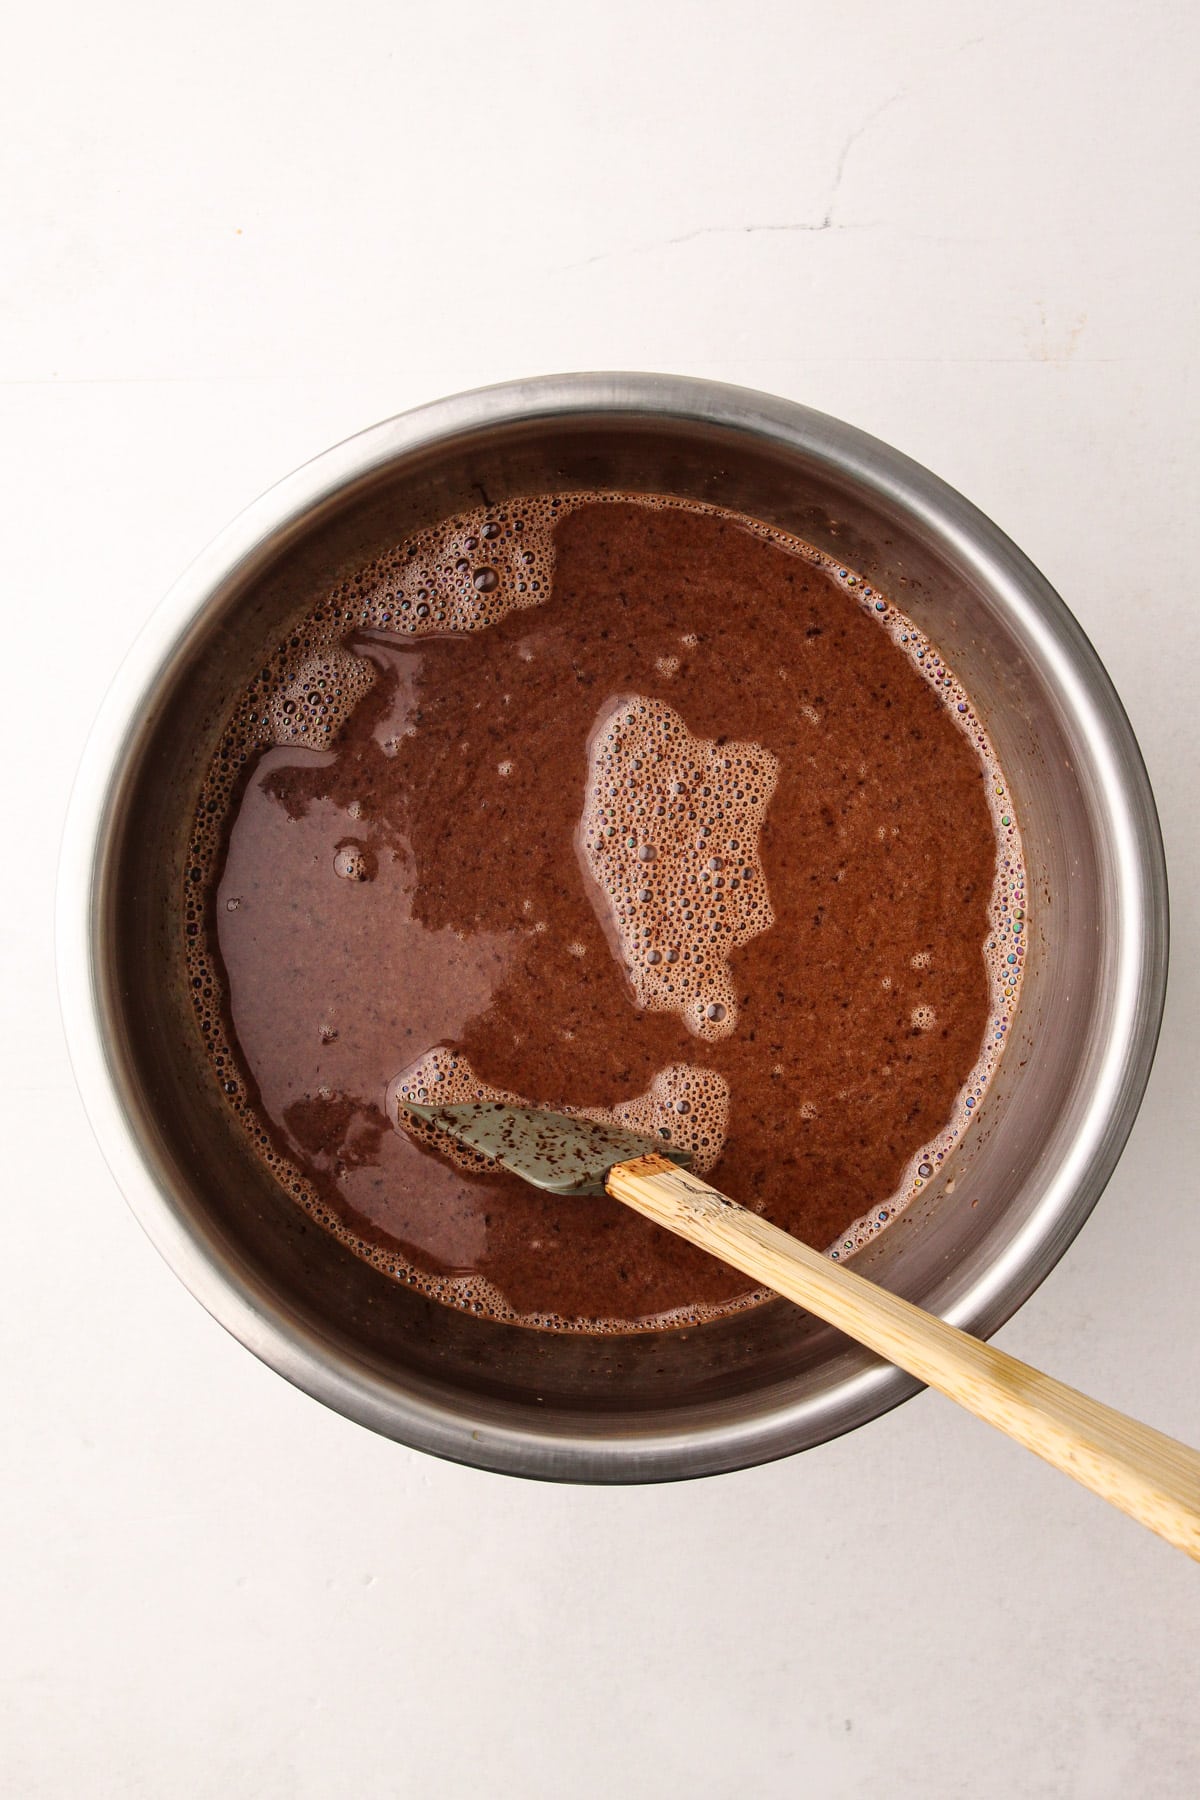
- Similarly, use an immersion blender, if you can, to emulsify the chocolate into the milk mixture. Ice cream is ultimately an emulsion, with fats being emulsified into the liquid. When you also add cocoa butter to the mix, it's best to ensure you have an excellent emulsion with the help of an immersion blender. If you don't have one, whisk the mixture with a balloon whisk until it looks smooth and creamy. You can see in the photo above this text that the chocolate wasn't quite blended in enough yet. That photo was taken before the immersion blender did its job.
- Don't skimp on the salt; it helps bring the chocolate flavor through.
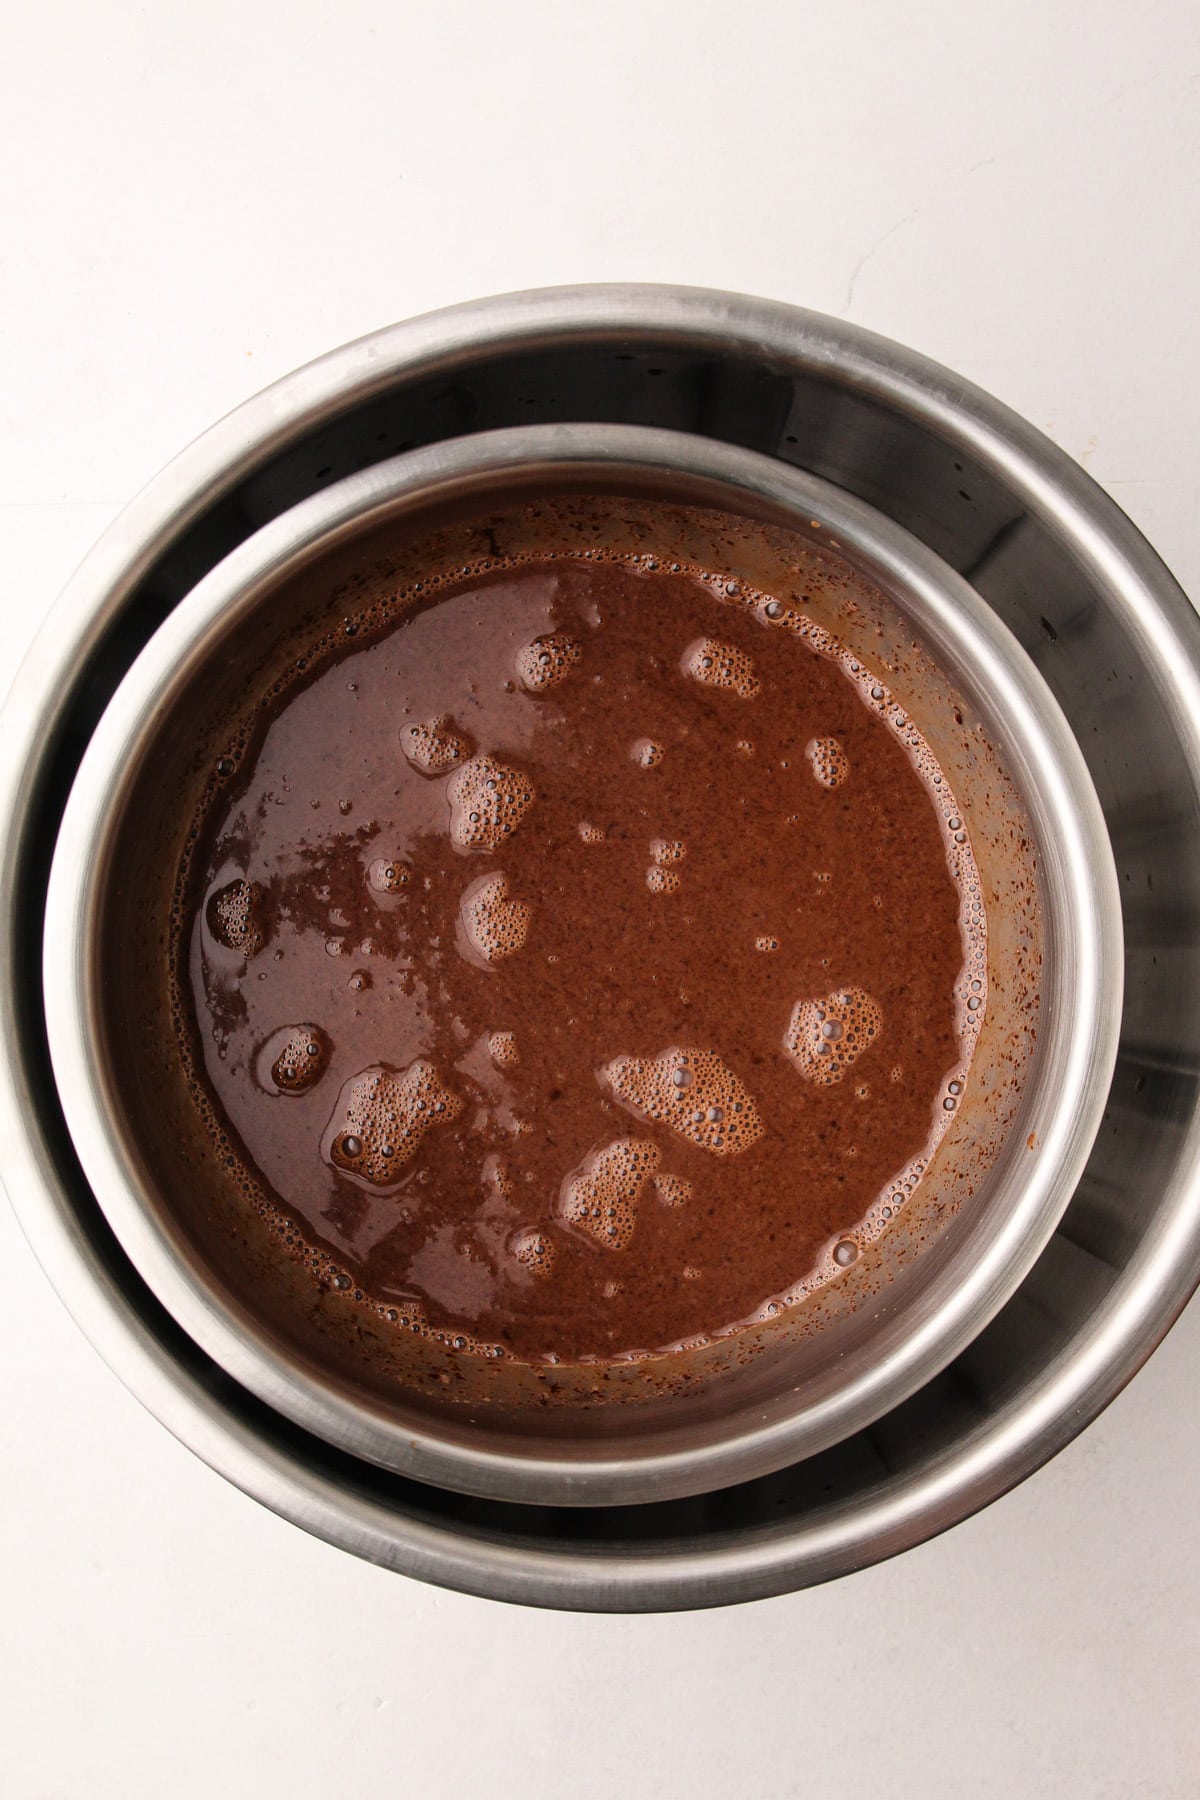
How to Make an Ice Bath
It isn't as essential to rapidly cool down this chocolate ice cream base as it is when you are making a custard ice cream base, but it's still good practice to aid the mixture in cooling more quickly, and an ice bath is your best bet.
An ice bath involves placing the bowl of chocolate ice cream mix in a larger bowl filled with ice and cold water.
Using metal for an ice bath is important because it’s the most efficient material for heat exchange. Ensure your ice bath has a bit of water in it as well as ice, as water is a more efficient conductor of heat than air. Just be sure that none of the ice water spills into the chocolate base, and be sure to stir the base occasionally as it cools, which also helps speed up the process.
Once the chocolate base is cool, immediately transfer it to airtight container to let it “ripen” or chill, preferably overnight, or at a minimum until it's 40ºF.
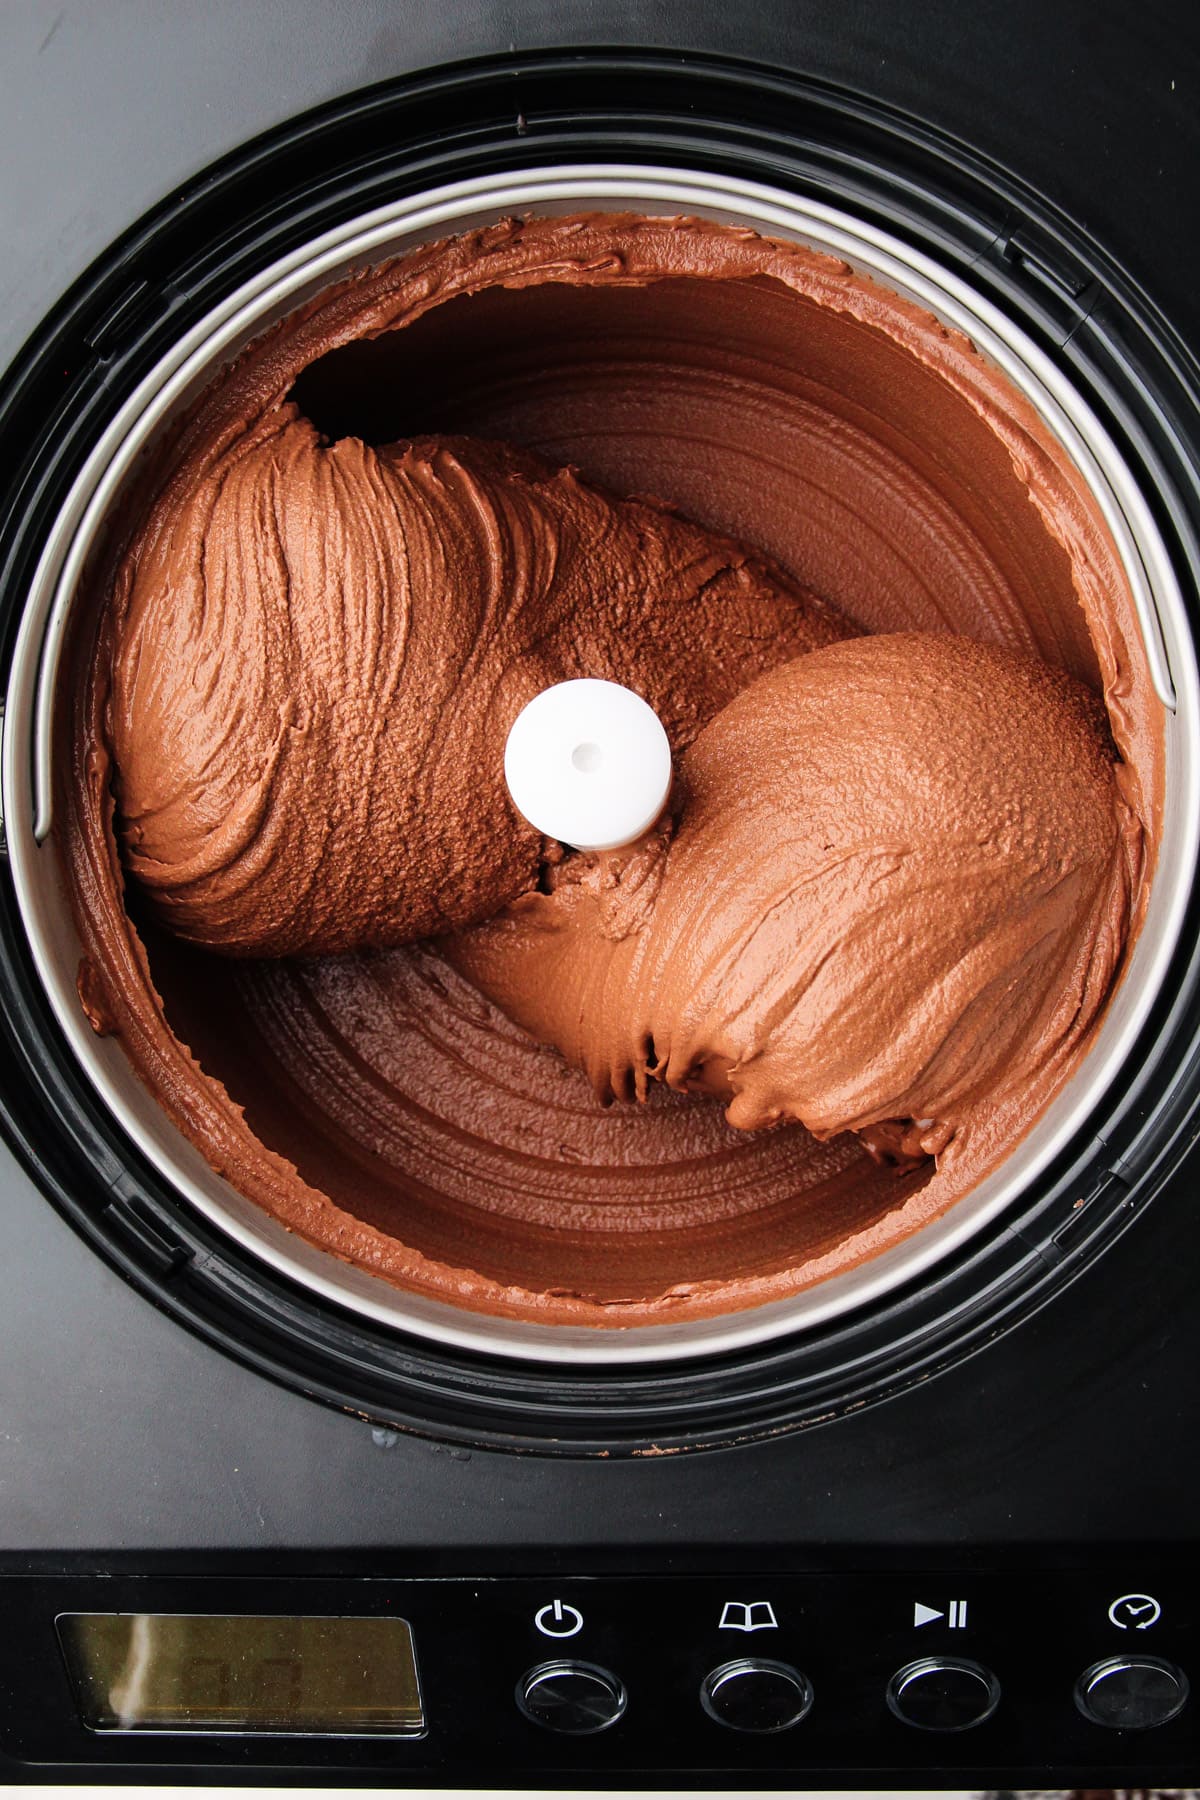
Churning the Ice Cream
Now it’s time for the magic!
Before freezing, keep two things in mind: the ice cream base must be very cold (below 40ºF is a must, but the lower the better) and if your ice cream machine canister needs to be frozen, it should be in the freezer for at least 24 hours before you churn.
The freezing rate of the ice cream base during churning determines the final texture. If either the ice cream base or the machine is not sufficiently cold, the freezing process can slow down, leading to the formation of large ice crystals, resulting in gritty ice cream.
When you churn the ice cream, several important processes occur simultaneously. Churning helps to maintain the emulsion, limit ice crystallization, and incorporate air, all of which are essential for creating smooth and creamy ice cream.
Churning is accomplished by rapidly cooling the mixture while simultaneously agitating it as it freezes.
This process incorporates air (also known as overrun), breaks up ice crystals as they form, and stabilizes the fat emulsion, all to create the perfect texture we know and love for ice cream.
To achieve optimal results, it is recommended to follow the instructions provided by the ice cream maker manufacturer and monitor the churning process closely. Avoid excessive churning and ensure the mixture maintains a consistent and controlled temperature to achieve the desired texture in the final ice cream.
Generally speaking, churn until the ice cream reaches the soft serve stage. In my machine, I notice a change in the noise it makes when the ice cream is ready.
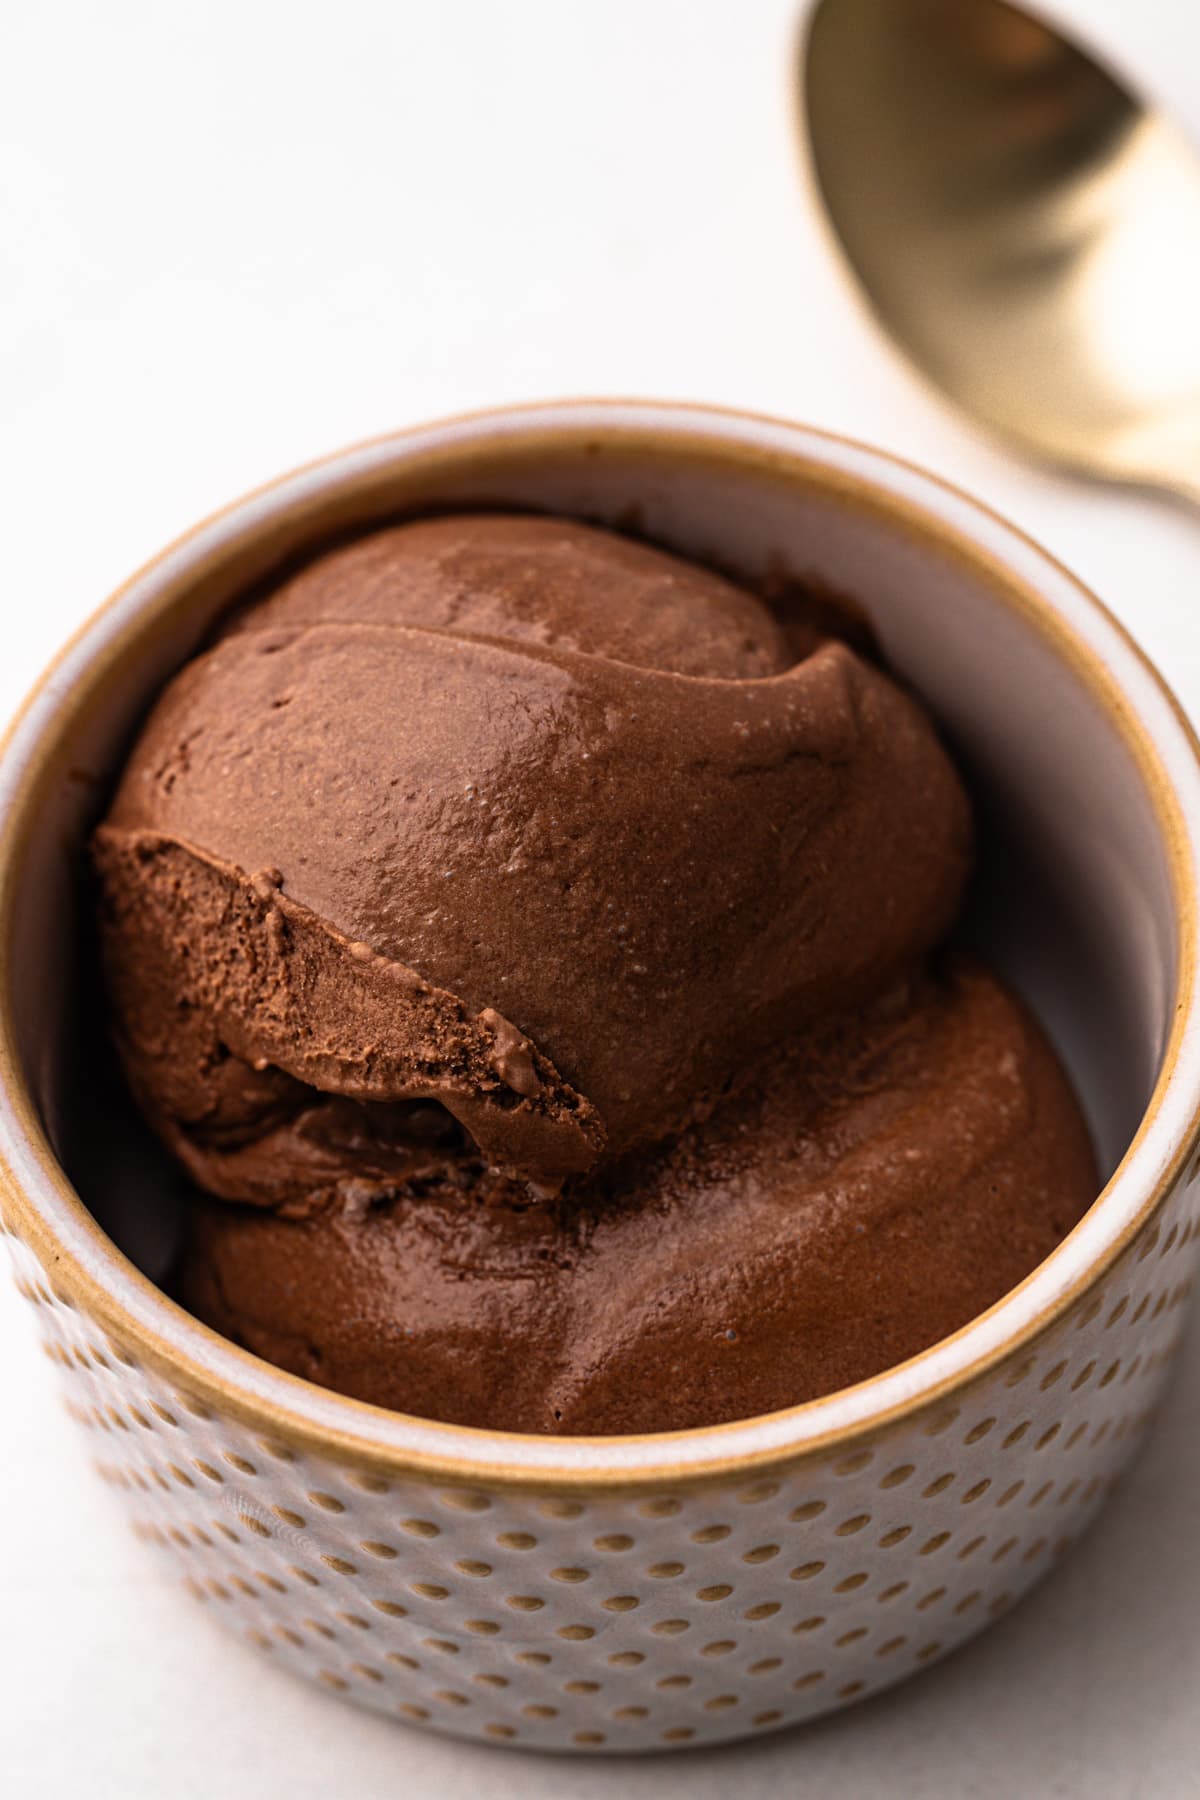
Storing Ice Cream
The last step in making homemade ice cream is to store it properly. After the ice cream has been churned and frozen, it needs to “harden” in the freezer for a period of time. This chilling period fully sets up the ice cream to the correct consistency.
The faster it hardens, the smaller the ice crystals, the smoother the ice cream.
You can harden the ice cream in one large container or multiple small containers. While dedicated ice cream containers are convenient for frequent ice cream making, any container available in your home can be used.
Here are some things to consider in terms of storage:
- It should be a container with a tight-fitting lid to help prevent air from entering and ice crystals from forming.
- It should be a container that is safe to freeze, of course! Some plastic or glass containers might not be freezer-safe.
- A shallow or small container is best because it allows the ice cream to freeze and harden more evenly and quickly.
My favorite option is disposable pint containers designed specifically for ice cream that I purchase on Amazon or at a restaurant supply store. They freeze the ice cream in small batches and make it easy to scoop. They also do a great job of preventing ice crystal formation because the lids fit tightly. These containers are inexpensive to buy, but keep in mind they are not reusable.
A few other factors to point out:
- Place a piece of parchment paper on the surface of the ice cream to minimize air exposure from the ice cream.
- Freeze promptly and thoroughly: Place the sealed container of ice cream in the coldest part of your freezer as soon as possible. Ensure that your freezer is set to the appropriate temperature for freezing ice cream, typically around 0°F (-18°C) or lower.
- Allow enough space around the container for proper airflow and to avoid crushing or squishing the ice cream.
How Long Will Ice Cream Keep?
Homemade ice cream doesn’t keep as long as you might suspect because it doesn’t have any stabilizers or preservatives added to it.
Homemade ice cream is best consumed within a week or two of making it. Different factors can affect this timeline, including how cold your freezer is, what type of ice cream it is, what container it is kept in, and if it has thawed at any point in the freezing process.
Over time, ice cream will develop freezer burn and will change in taste and texture, so for the best possible ice cream, consume it sooner rather than later.
To store homemade ice cream properly, follow these guidelines: Transfer it to an airtight container, press parchment paper onto the surface, use shallow containers, freeze promptly and thoroughly, avoid temperature fluctuations, and consume within 1-2 weeks for the best texture and quality.
More Ice Cream Recipes
More Chocolate Recipes
I am so honored when you make a recipe from my site! If you make this Chocolate Ice Cream, please leave a comment and a star rating with your experience! If you have any questions about this recipe, feel free to comment here, too!
PrintFull Recipe
Best Ever Chocolate Ice Cream

This is the actual best homemade chocolate ice cream recipe. It's super rich, ultra creamy with a deep chocolate flavor. This old-fashioned churned recipe uses an egg-free chocolate base that is simple to make.
- Prep Time: 00:10
- Churning Time: 00:30
- Total Time: 00:40 + chilling time
- Yield: 2 Pints
- Category: Ice Cream
- Method: Churn
Ingredients
- 5 ounces (about 1 cup) finely chopped high-quality dark chocolate (see notes)
- 1 teaspoon vanilla extract
- ¾ cup (150 grams) granulated sugar
- 4 tablespoons (28 grams) Dutch-processed cocoa powder
- 1 teaspoon (3 grams) Diamond Crystal kosher salt (see note)
- 1 (12-ounce) can evaporated milk
- 1-½ cups (340 grams) heavy cream
Instructions
- Set up an ice bath with two nesting metal bowls, but don't put the inner bowl into the bath yet.
- Add the chocolate and vanilla to the inner bowl that does not have the ice. Set it aside.
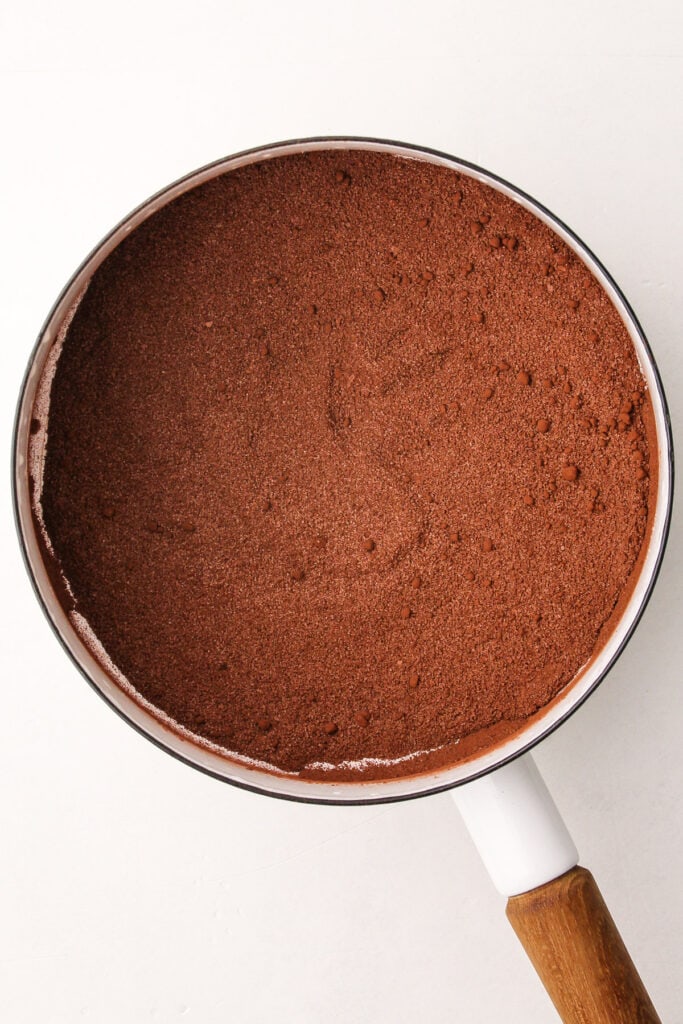
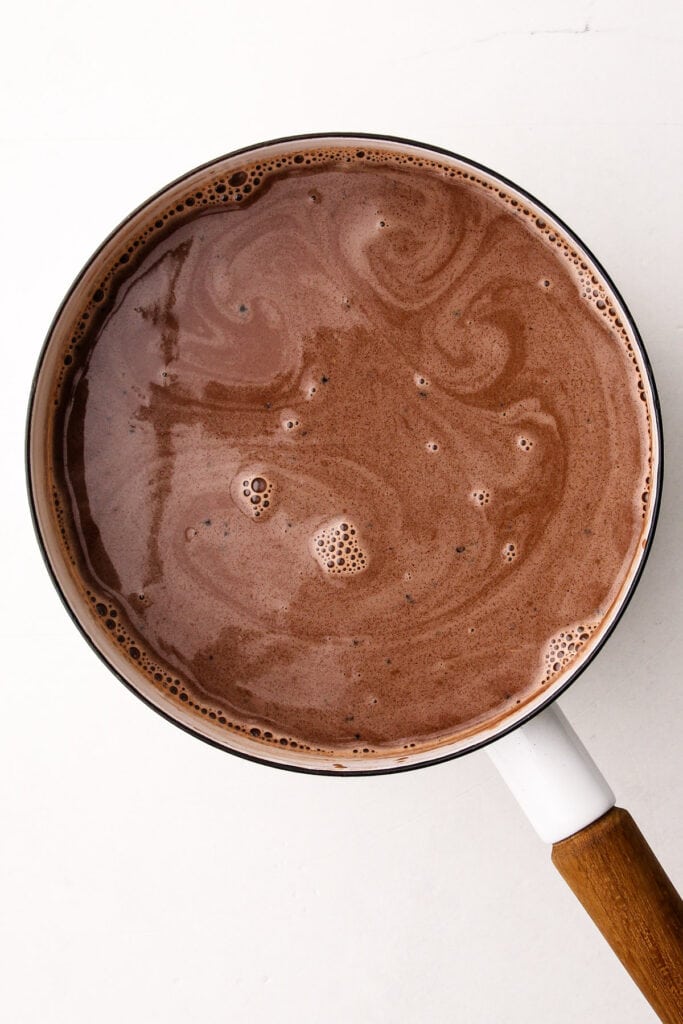
- In a medium heavy-bottomed saucepan, whisk together the sugar, cocoa powder, and salt, ensuring no lumps remain. Whisk in the evaporated milk and heavy cream.
- Warm over medium heat until the mixture is steaming and close to the boiling point, around 180ºF.
- Pour the mixture over the chocolate, and let it sit undisturbed for 3-5 minutes.
- Using an immersion blender, carefully blend the chocolate mixture together until smooth and creamy.
- Place the bowl inside the ice bath. Cool the chocolate mix in the ice bath to room temperature, stirring occasionally. Then, transfer it to the refrigerator and chill until at least 40ºF, preferably overnight.
- Churn the ice cream base according to the manufacturer's recommended instructions for your ice cream maker, until the ice cream has reached a soft-serve consistency.
- Transfer the ice cream to one or more airtight containers. Place a piece of parchment on the surface to prevent any freezer burn. Freeze until firm, at least a few hours.
Notes
Have a question or looking for tips? The text written above the recipe is always a great first place to start! This Chocolate Ice Cream was developed with love, and I always include loads of explanations, tips, step-by-step photos and technical advice shared before the recipe.
This recipe was tested using Diamond Crystal coarse kosher salt. If you use Morton's kosher salt or fine salt decrease by about half for volume, or use the same amount by weight.
I preferred using Callebeut Recipe No. 811 Callets for this recipe, and my second choice was Hu Dark Chocolate Gems.
Some of the links on this page may be affiliate links. Everyday Pie is a participant in the Amazon Associates Program. As an Amazon Associate I earn from qualifying purchases, at no extra cost to you.
Danielle
Decided to try this recipe as a first attempt at making homemade ice cream. We were blown away at how good it is! The instructions were straightforward and the end result was the best ice cream we’ve ever had in taste in texture. Can’t wait to try one of the custard style recipes now!
Kelli Avila
Love hearing that it turned out well! Appreciate you taking the time to comment. –Kelli
Mikhaila Arguto
I can no longer order chocolate ice cream from the ice cream shop cause mine is better lol. By FAR the best chocolate ice cream I have ever had and will continue to make 🙂 thank you so much I can't wait to try them all now!!! 🙂
Micki Mouse
Hi Kelly,
I really appreciate that you are a professional cook!
I also like it that you explain things about the ingredients!!
I am busy experimenting with ice cream at the moment because I had some DELICIOUS ice creams while traveling.
So I recently made a Safron ice cream that turned out VERY good!!
My next project will be Black Sesame Ice-cream.
I will also start experimenting with Mastik = Mastika, the sap of a spruce that grows in the Mediterranean and Levant, and Saleb = Sahleb = Salab - the powder from the ground root of an orchid.
There also is this Ice float from Persia/ Iran where Rosewater ice cream or Safron icecream is floating in carrot juice, and those ice cream sandwiches…
Can you also start experimenting and giving us some delicious recipes please😋?
After all you are a professional cook, I am only playing around…
Sheila
So chocolate and delicious! Easy to make, great texture, and tastes perfect. I definitely recommend if you're a chocolate ice cream fan
Kelli Avila
Thanks for sharing your experience, Sheila! So glad you enjoyed it!
May
Everyone in our family agrees that this is indeed the best chocolate ice cream ever. It has a complex flavor that isn't just sweet, and the texture is unparalleled. My teenage daughter and I made it together and it was a fun activity thanks to Kelli's thorough directions--we strongly recommend it!
Kelli Avila
May! Thanks for taking the time to share your experience. I'm so glad you and the family enjoyed this recipe!
Alyssa
Holy smokes! If you’re looking for the ultimate chocolate ice cream recipe that’s easy you found it. Always trust Kelly’s recipes and she never lets me down. It’s like the best hot chocolate in ice cream form. I threw some mini marshmallows on top and it was awesome.
Kelli Avila
Thanks Alyssa! So glad you liked it!
Lane
Extremely simple to make. Deep, rich chocolate flavor without being overly decadent. Texture is outstanding too: super creamy and velvety.
Kelli Avila
Thank you for stopping by and sharing the review! Happy you enjoyed!