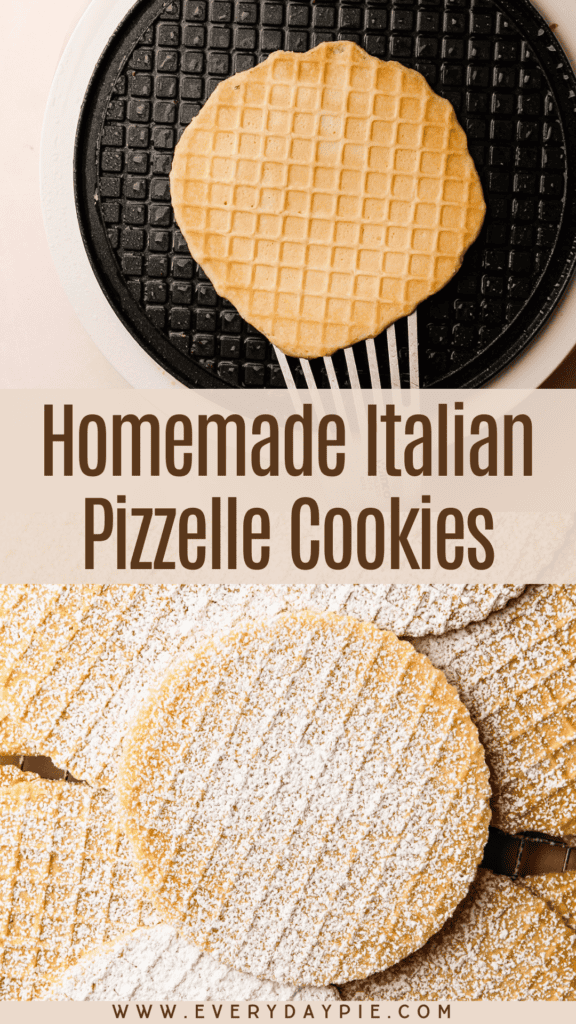
Make Perfect Italian Pizzelles at home with this easy-to-make recipe, flavored with vanilla, anise and a touch of citrus. These crisp cookies are perfect for the everydays and the holidays.

Want to save this recipe?
Enter your email & I'll send it to your inbox. Plus, get weekly updates from me!
Growing up in an Italian-American family, there was one sweet that was at nearly every family party, every holiday, every gathering—the pizzelle. While I’d heard stories of the days when my great-grandmother made them from scratch, that was before my time. Instead, I knew them as the ones stacked in clear bakery packaging, often brought by multiple family members, because you could never have too many.
A pizzelle is a thin, crisp Italian waffle cookie, made with a simple batter of basic pantry ingredients. They get their signature look from a special pizzelle iron that stamps them with an intricate design (more on that later). The traditional flavor is anise, but vanilla, almond, or even a citrus variations are common too.
Now that I'm the one throwing the parties, I had to make sure my kids had a taste of these iconic Italian cookies (and also Anise Cookies)—but from scratch, just like my great-grandmother made them. They’re perfect for the dessert table but also a great cookie to package up and give as gifts during any holiday.
Ingredients Needed
Here is an overview of the ingredients needed for this recipe. The full recipe is listed below in greater detail.
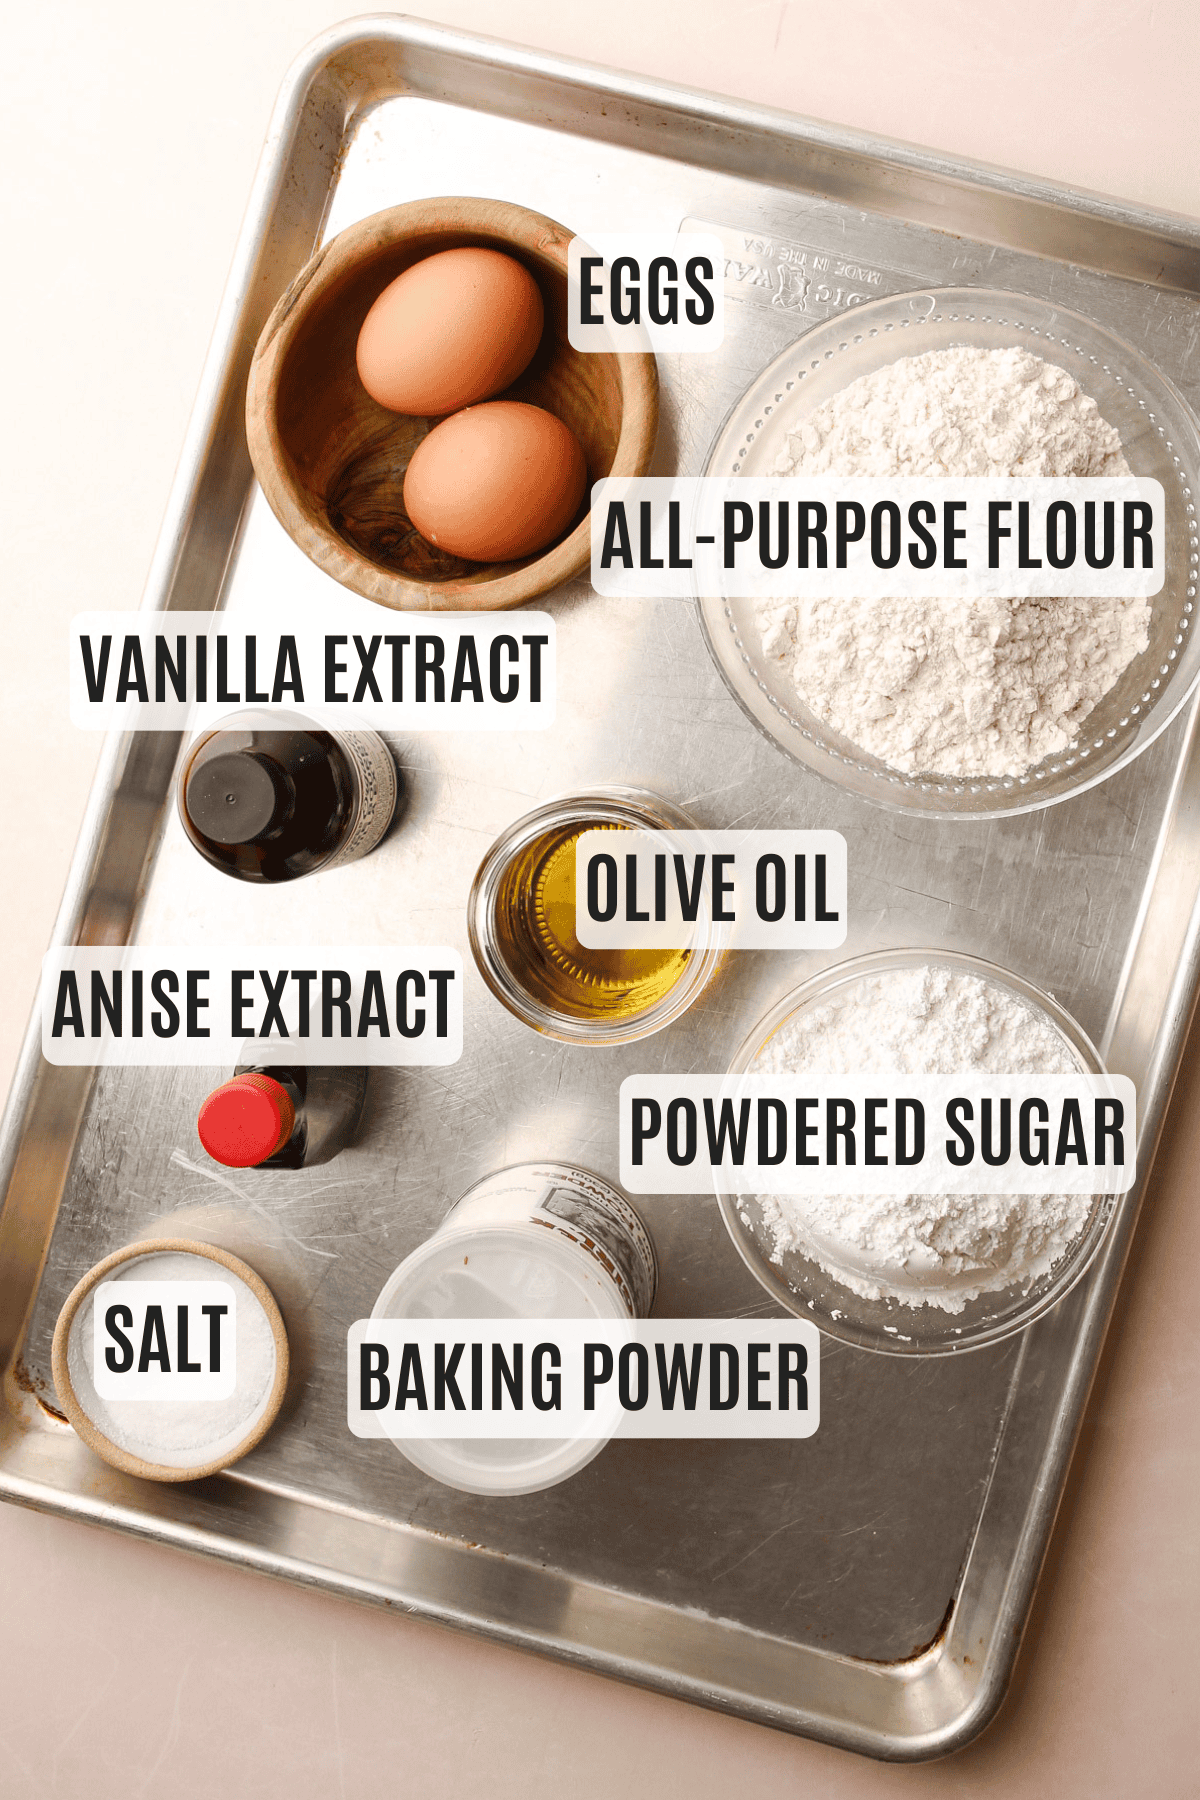
- powdered sugar (this is used instead of granulated sugar because it will dissolve faster into the batter)
- baking powder
- eggs
- olive oil (I love using olive oil instead of butter in Italian recipes...for this cookie, I recommend a lighter-tasting olive oil...if you prefer butter, substitute with 6 tablespoons of melted butter)
- orange zest (just the tiniest hint of orange zest adds a rounded depth to this cookie, but truly it’s a smidge, so don’t go overboard here)
- all-purpose flour
- salt (I use Diamond Crystal kosher salt in my recipe tests; see note in recipe if you use other salt to ensure the correct quantity)
- vanilla extract + anise extract (use any combination of extract that you like)
- Non-aerosol cooking spray (such as avocado oil spray, for coating the pizzelle iron)
Is a Pizzelle Iron Necessary?
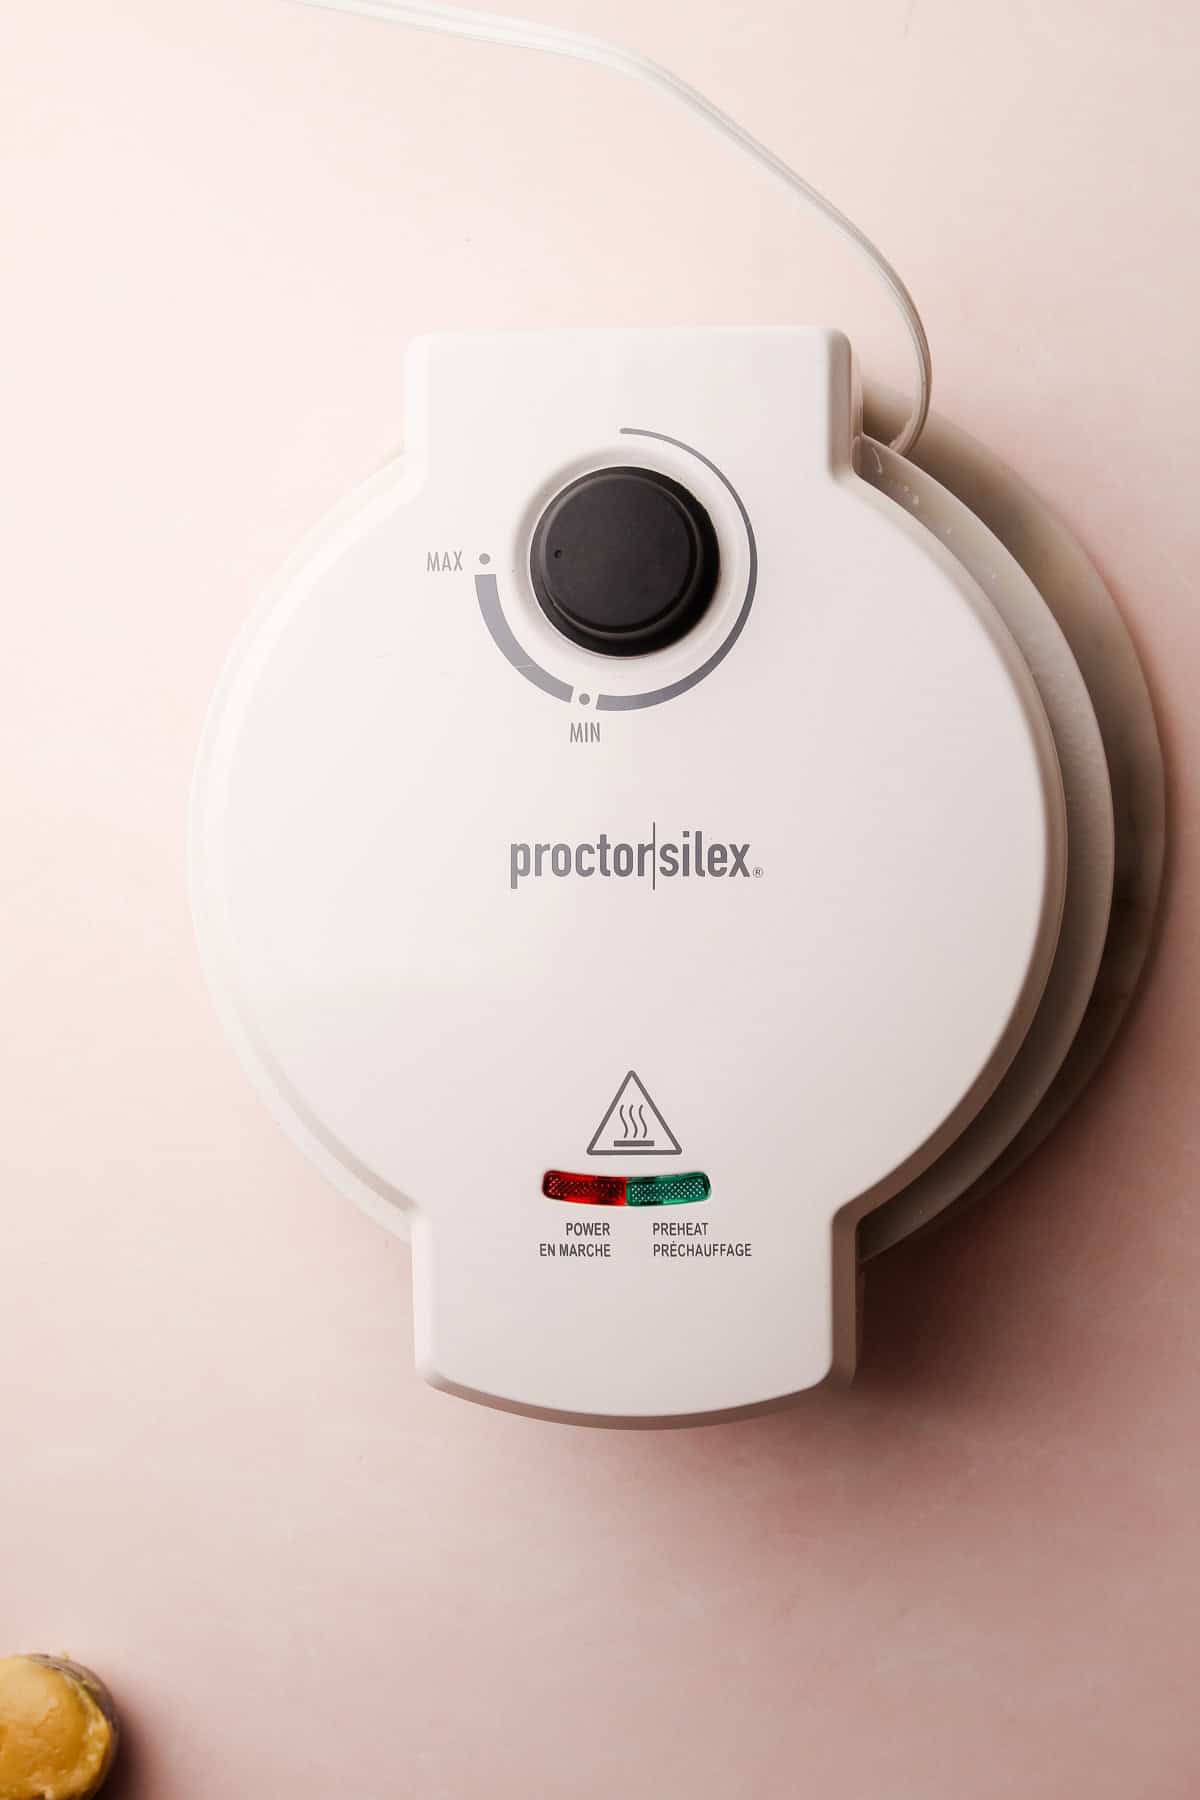
Pizzelles are traditionally cooked in two main ways: on the stovetop using a cast iron or aluminum press (which is more rare) or with a modern electric stand-alone appliance. Both methods have two metal plates with an intricate pattern that imprints a design onto the cookies.
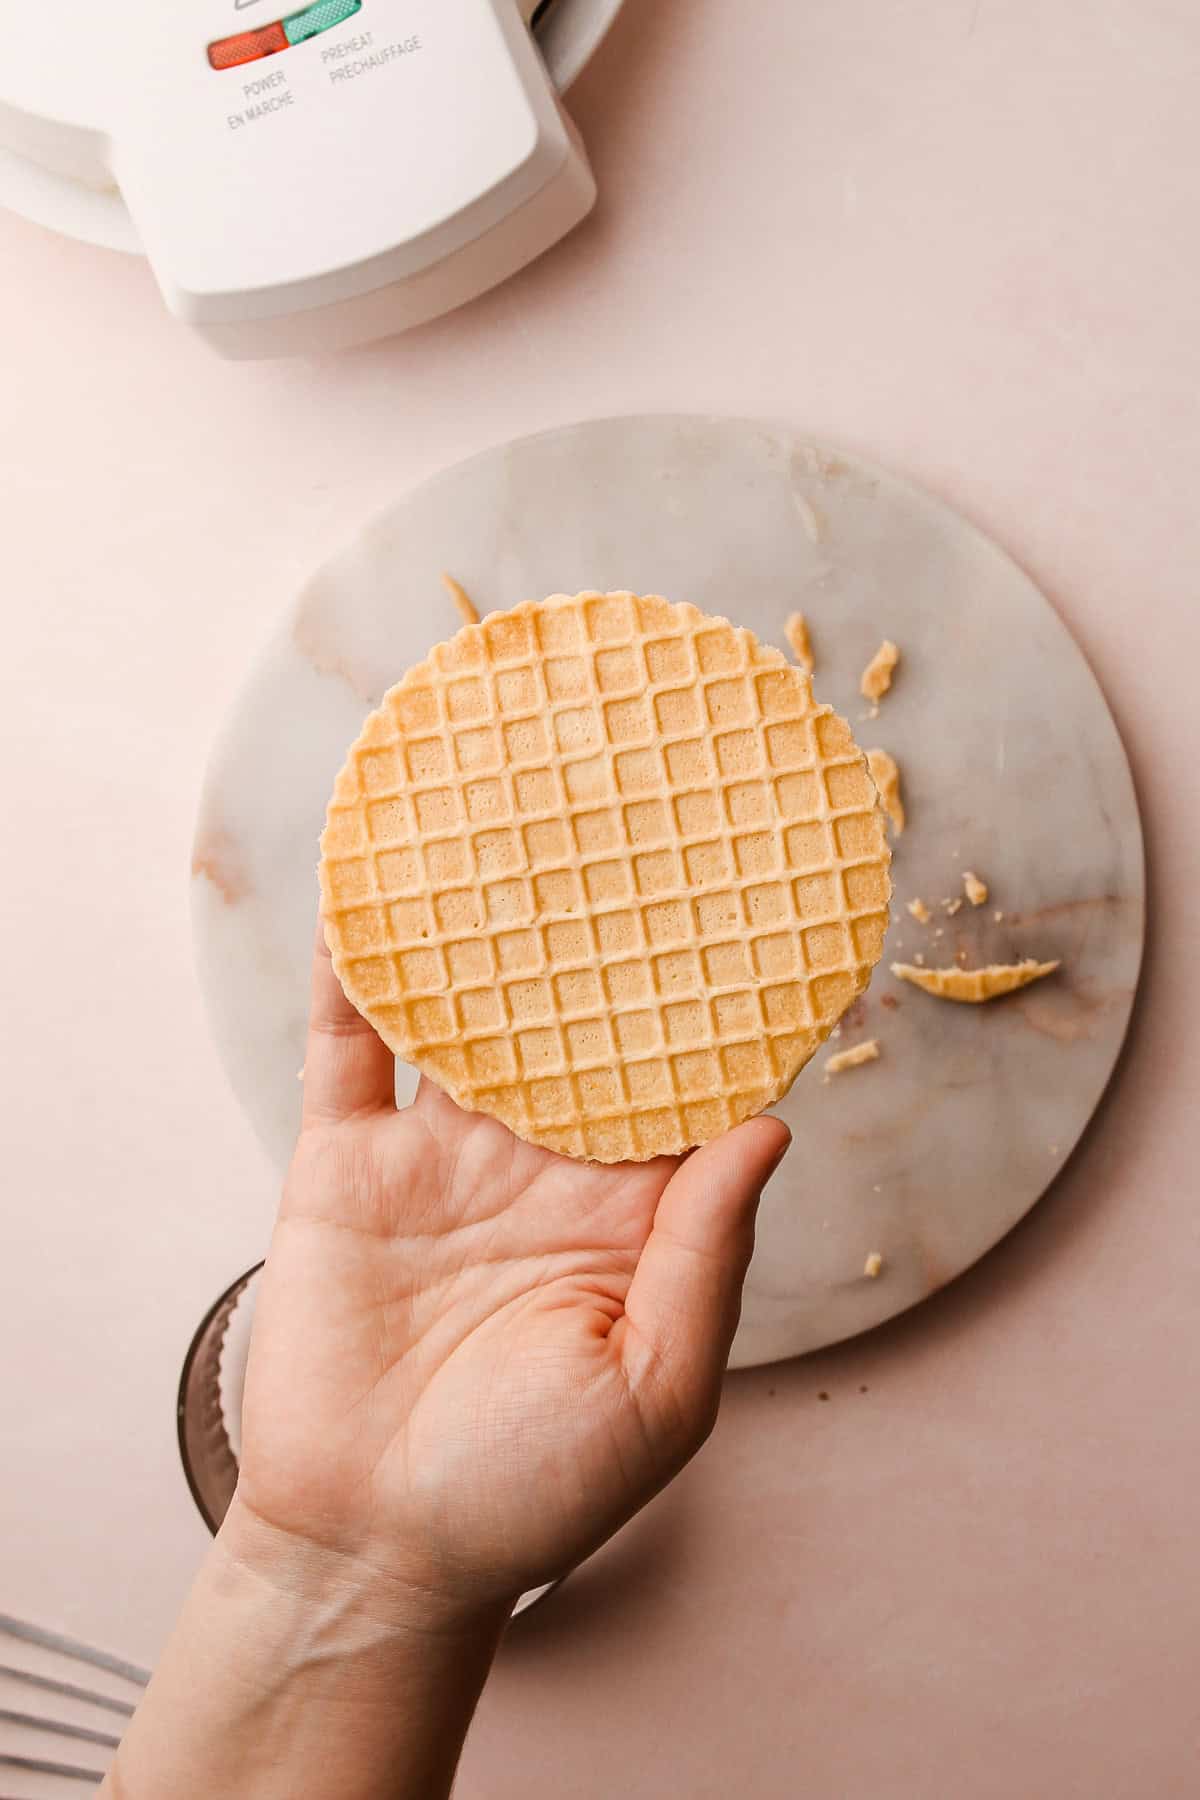
An iron is necessary to make pizzelles, but it doesn’t have to be a traditional pizzelle iron. A thin electric waffle iron, typically used for waffle cones, works just as well—that’s what I used here. The main drawbacks are that it usually makes only one at a time (depending on the model), which slows down production, and it lacks the classic pizzelle pattern, leaving only a waffle grid. While testing this recipe, I was tempted to buy a dedicated pizzelle iron, but I couldn’t justify the space when my waffle cone iron worked just as well. Avoiding an extra single-use appliance felt like the better choice.
Of course, the opposite is also true—a pizzelle iron can be used to make waffle cones, as long as it has a large enough diameter.
Making the Batter
Before you begin making the batter, it's important to preheat the pizzelle iron so it heats as evenly as possible. These at-home appliances often aren’t the best quality compared to commercial ones, and fully preheating the iron gives the cookies the best chance of browning evenly. Plus, it makes the most sense to do this before making the batter.
Making the batter for the cookies is a simple process that only requires a bowl and a whisk.
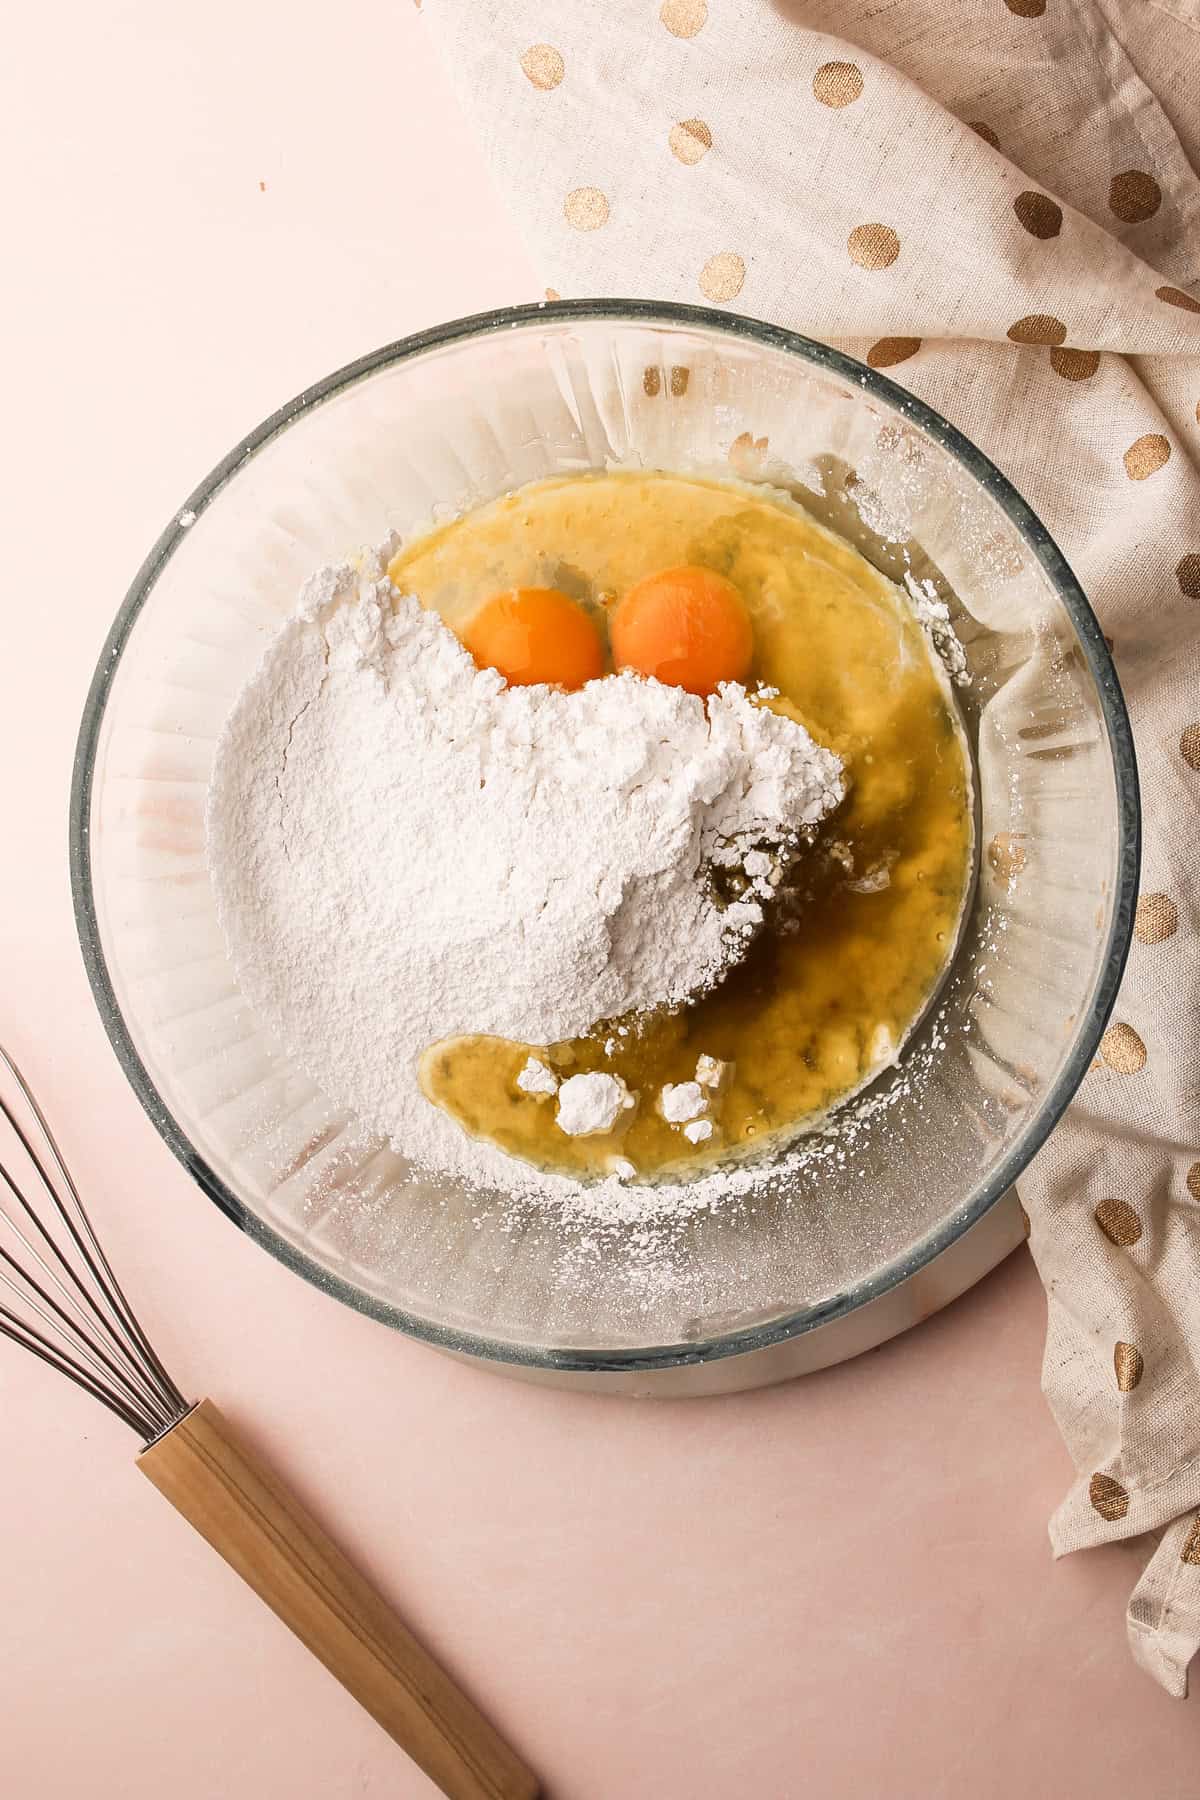
Step 1: Add all the ingredients, except the flour, to a medium bowl.
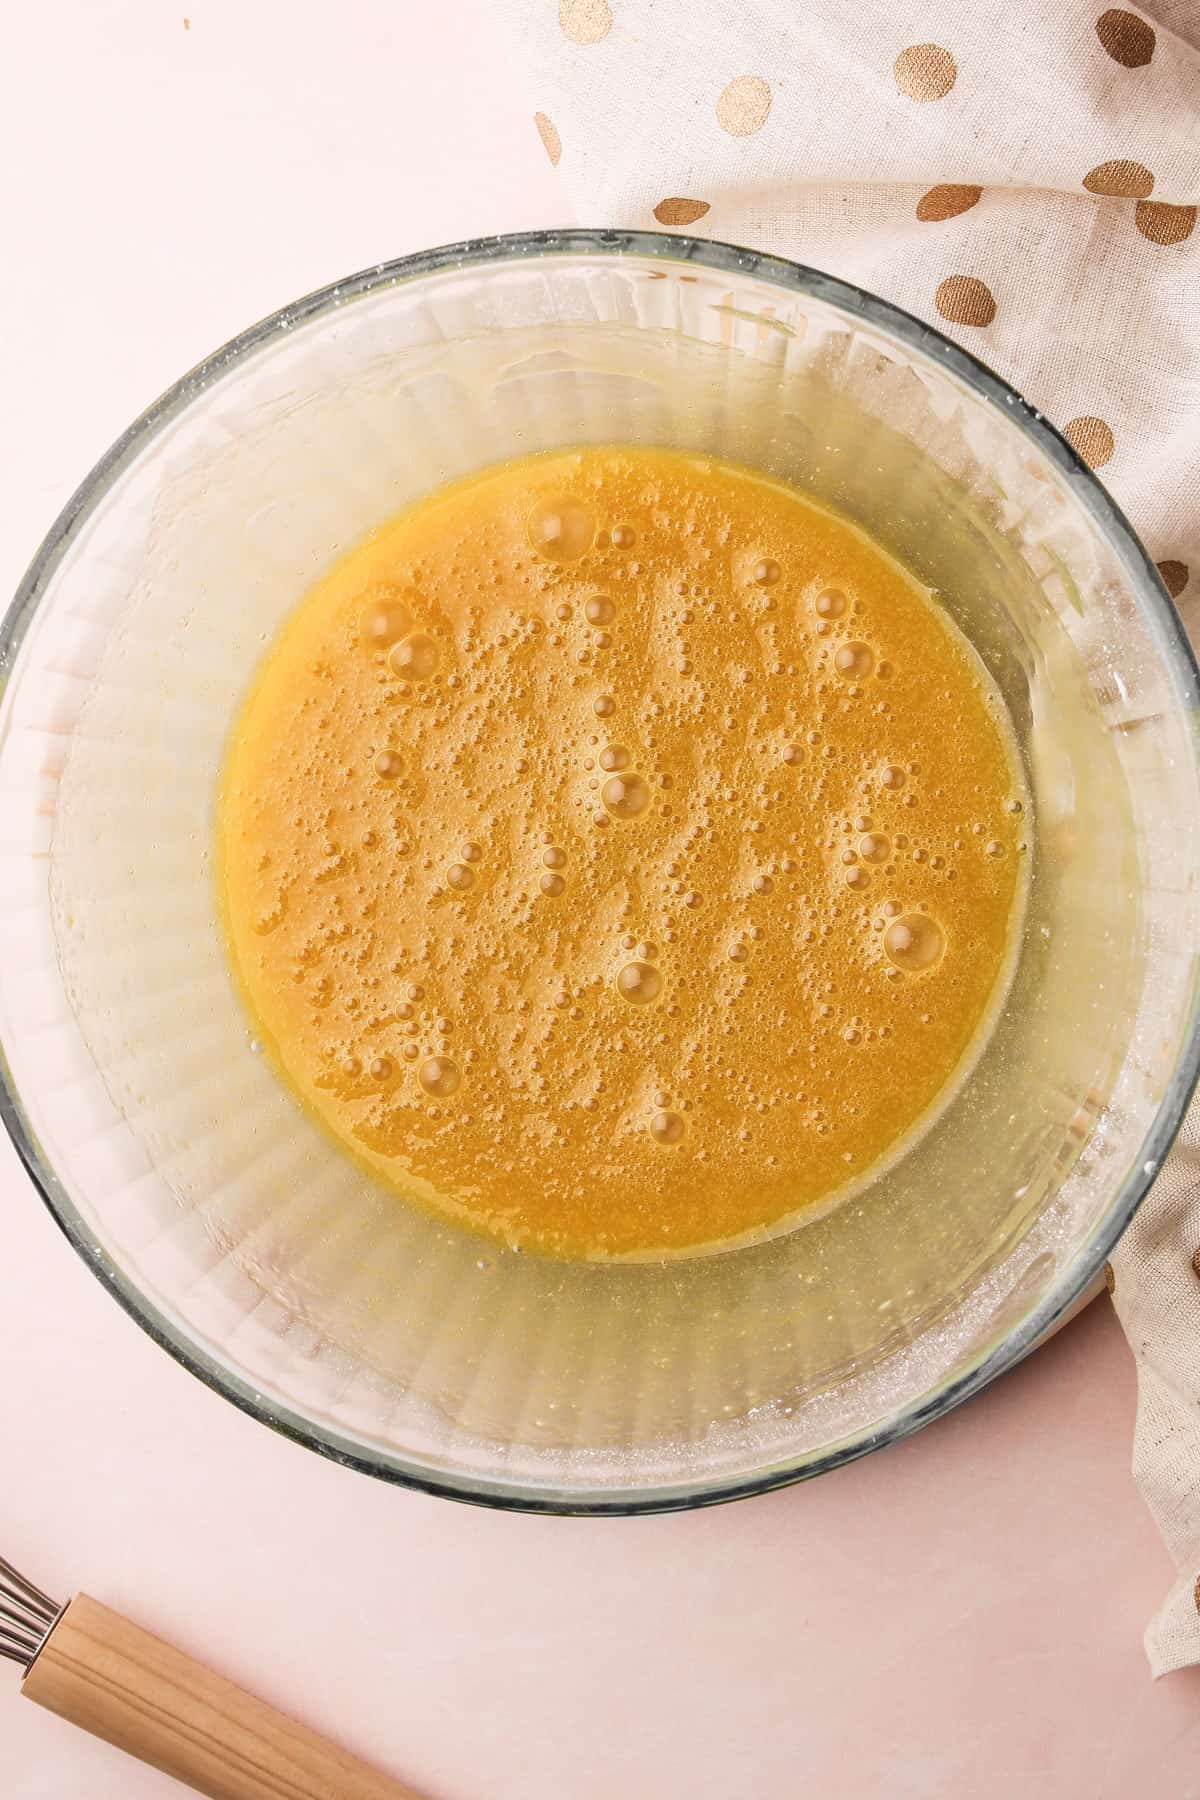
Step 2: Whisk together until completely combined.
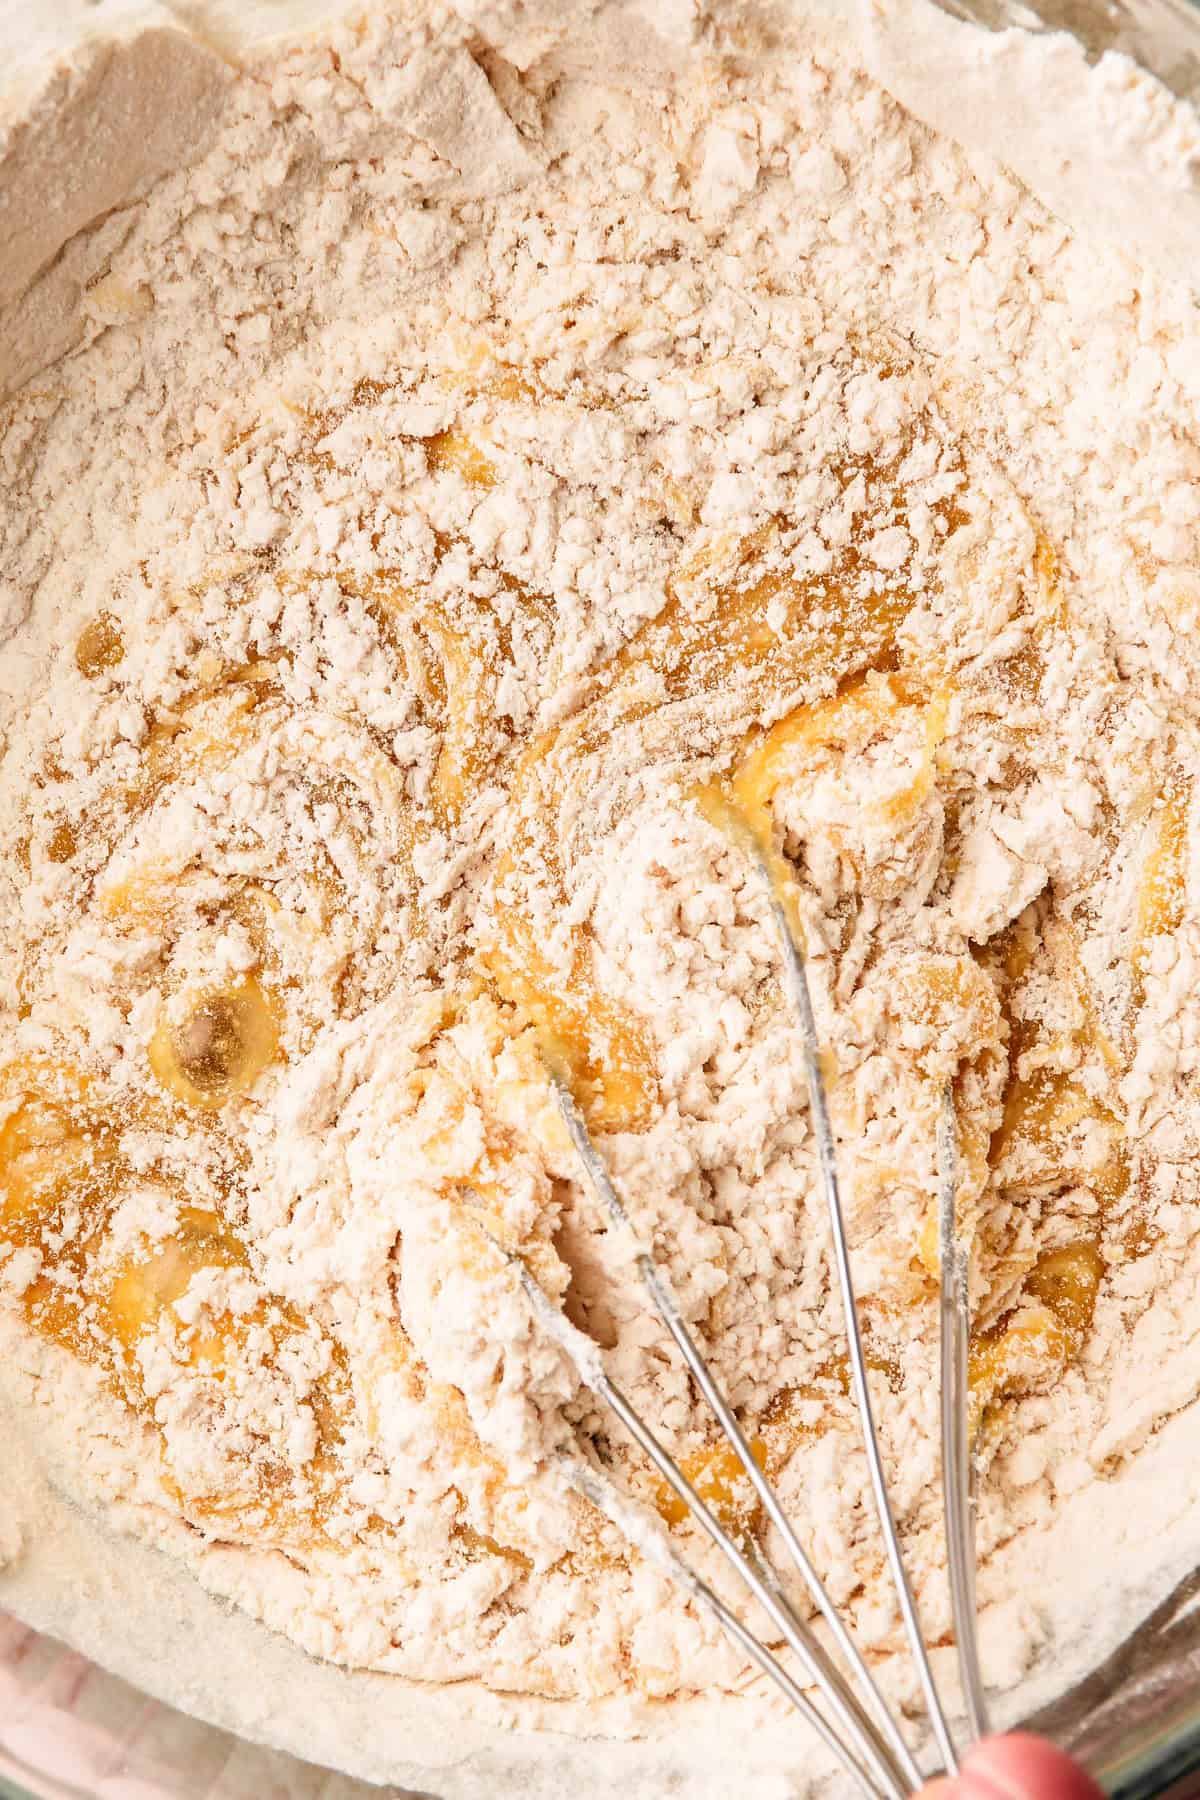
Step 3: Stir in the flour.
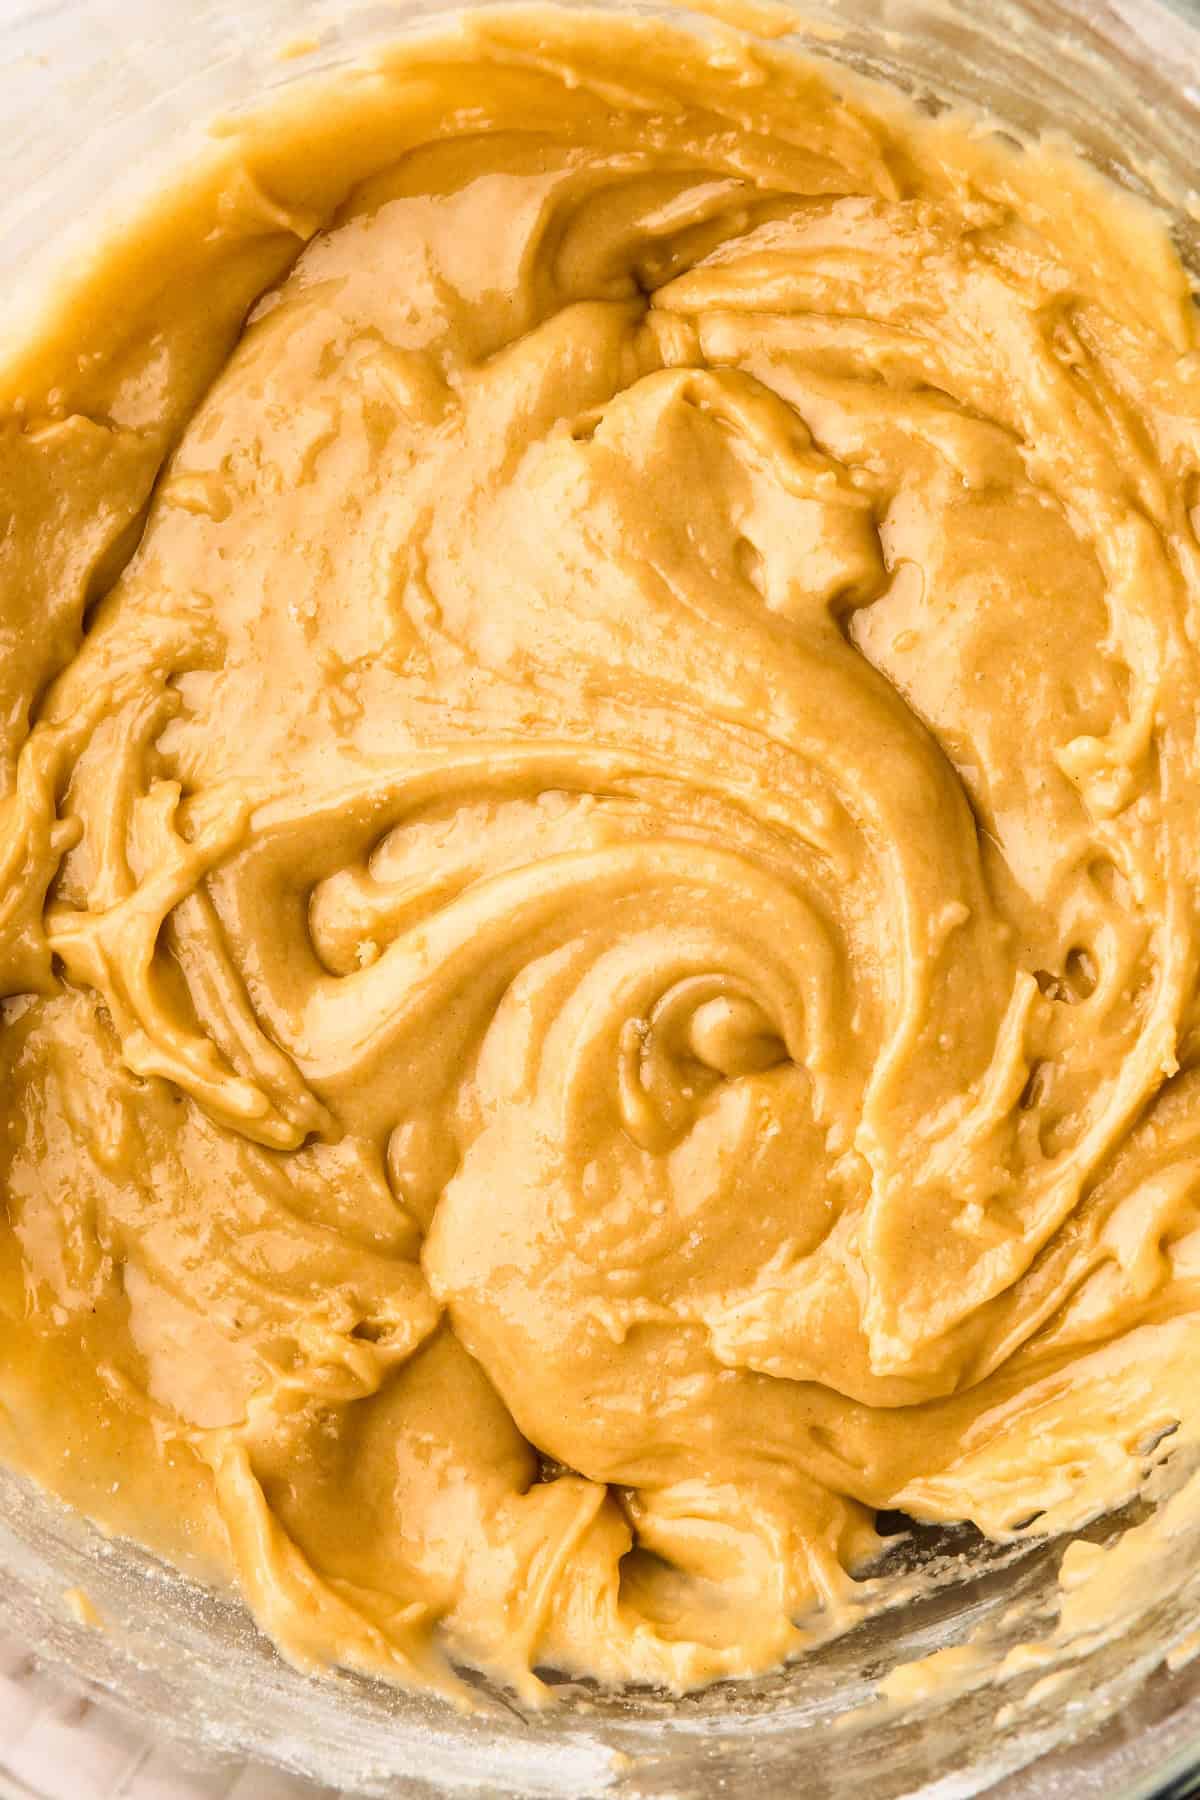
Step 4: The batter should have no clumps of flour remaining. It can be cooked right away, or stored for a few hours.
Cooking the Pizzelles
Once the batter is mixed it can be cooked immediately! Alternatively the batter can be made ahead of time, up to 24 hours. Store it in the refrigerator, and then let it sit at room temperature for an hour or so before cooking.
As mentioned above, the pizzelle maker should be preheated for at least 15 minutes, but I’ve found that letting it heat even longer—sometimes up to 60 minutes—yields the best results.
Follow the instructions that come with your pizzelle iron for exact cooking times and procedures. However, here’s what I do:
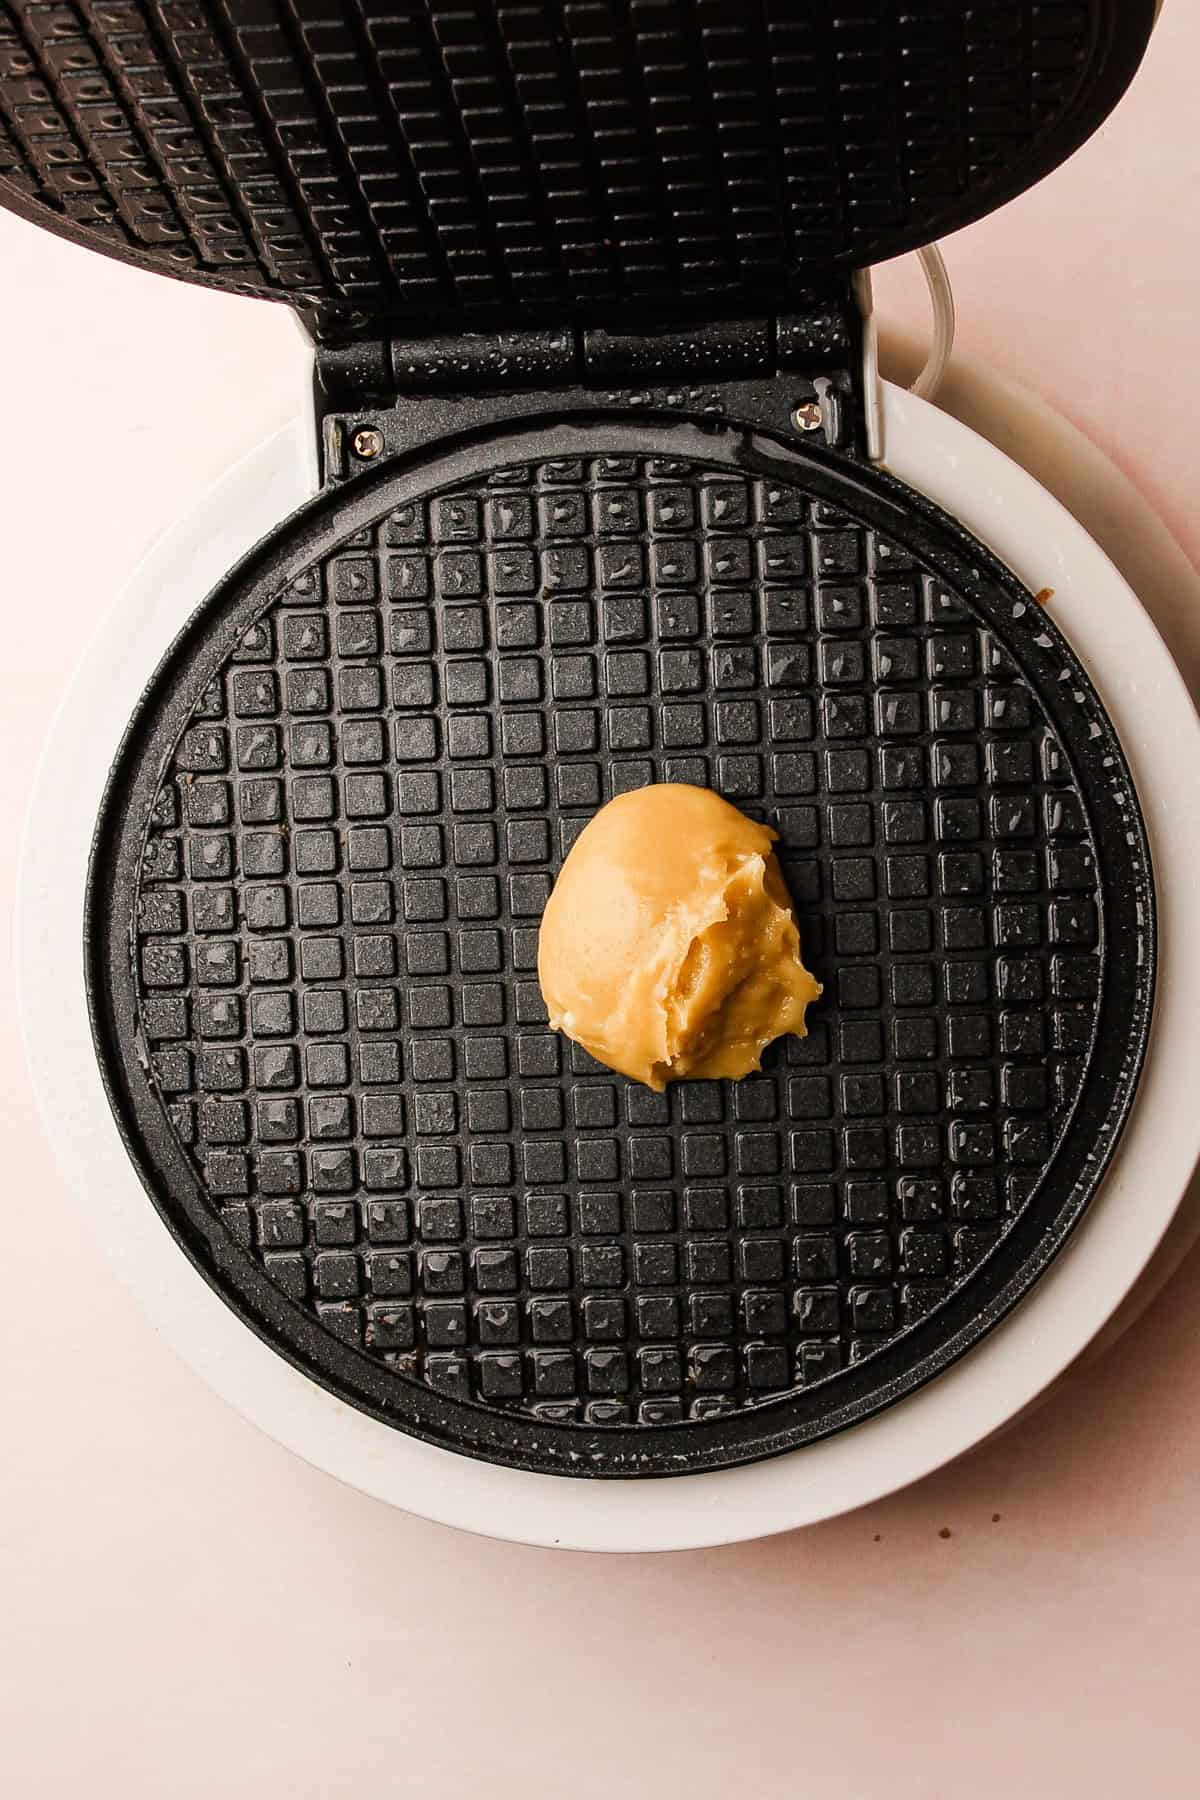
Step 1: Lightly grease the preheated pizzelle iron, then add about 1 tablespoon of batter to the center and close the cover.
Step 2: Cook until the cookie is cooked through and very lightly golden, about 2 minutes.
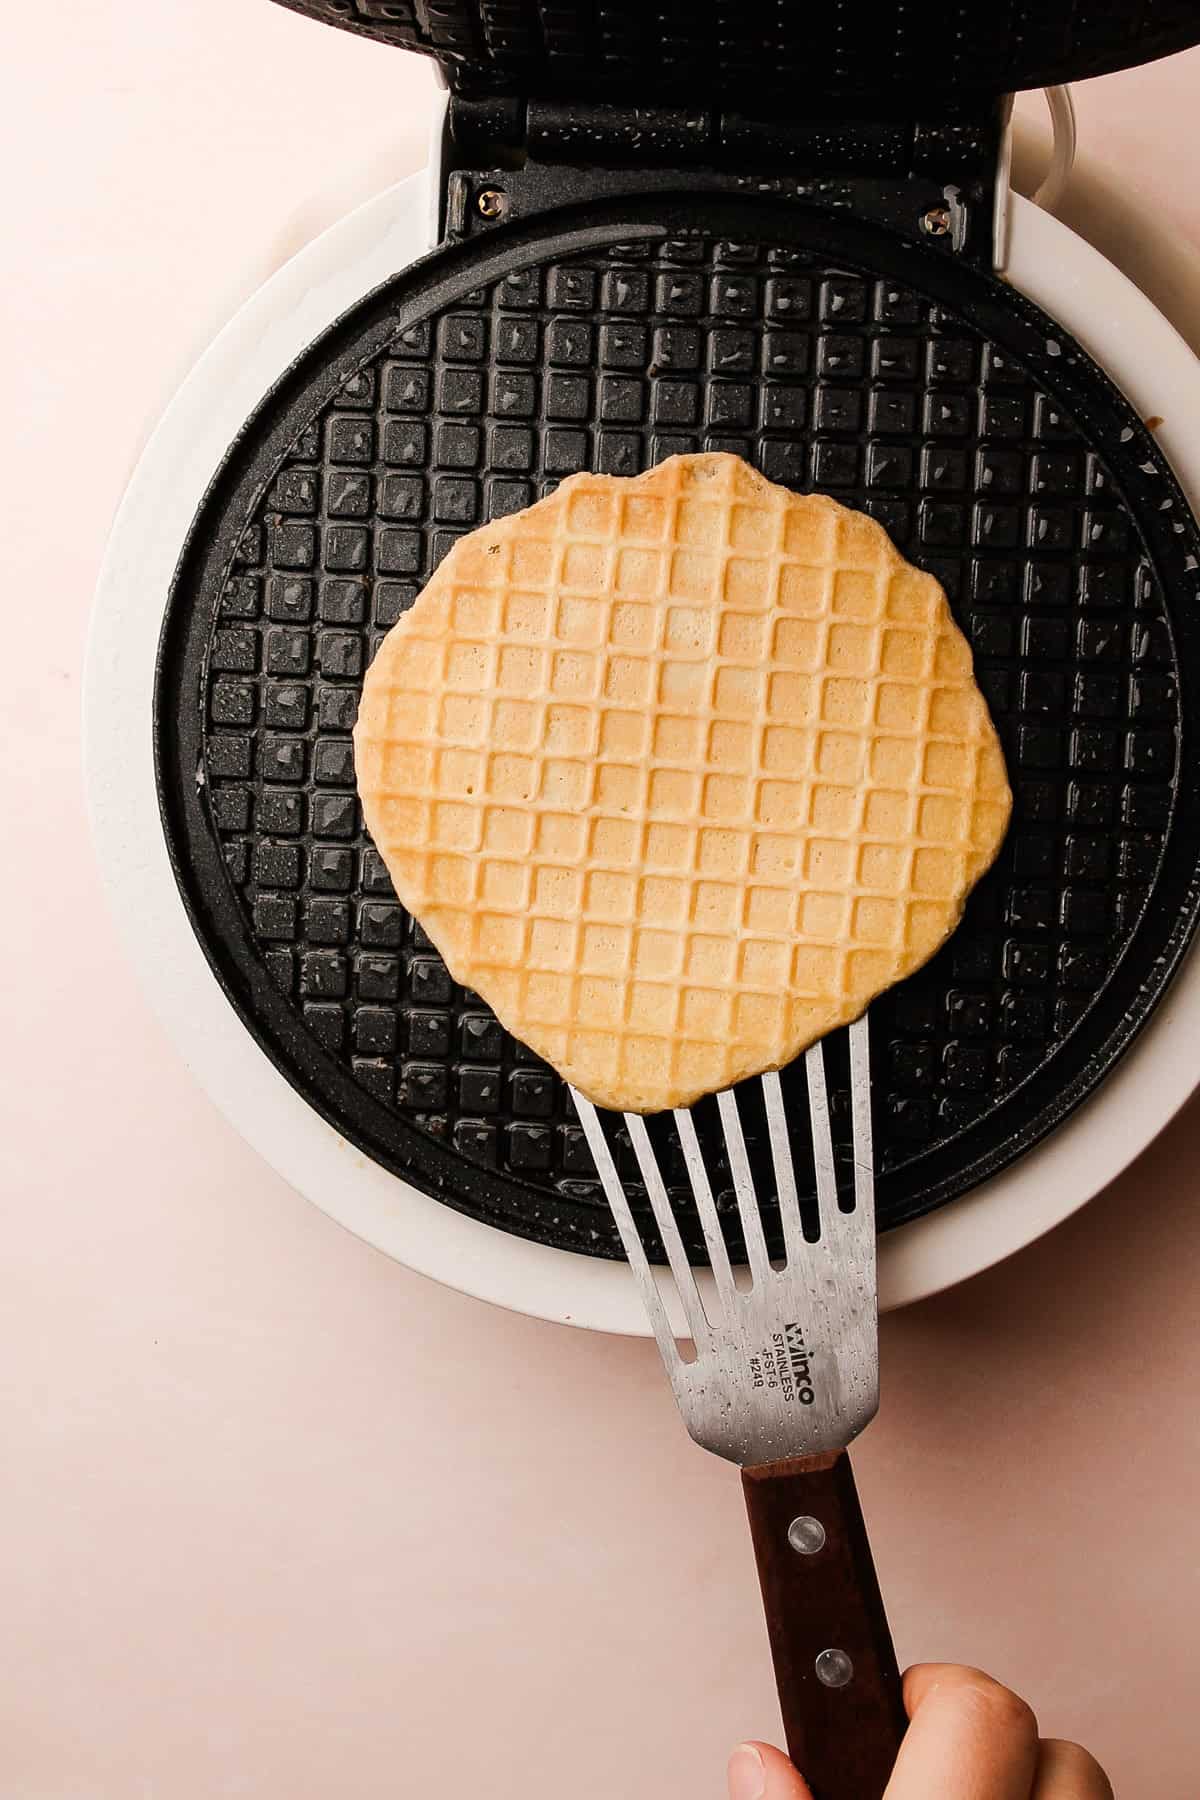
Step 3: Transfer the cooked pizzelle to a wire rack to cool (make sure not to scrap the non-stick coating on the iron).
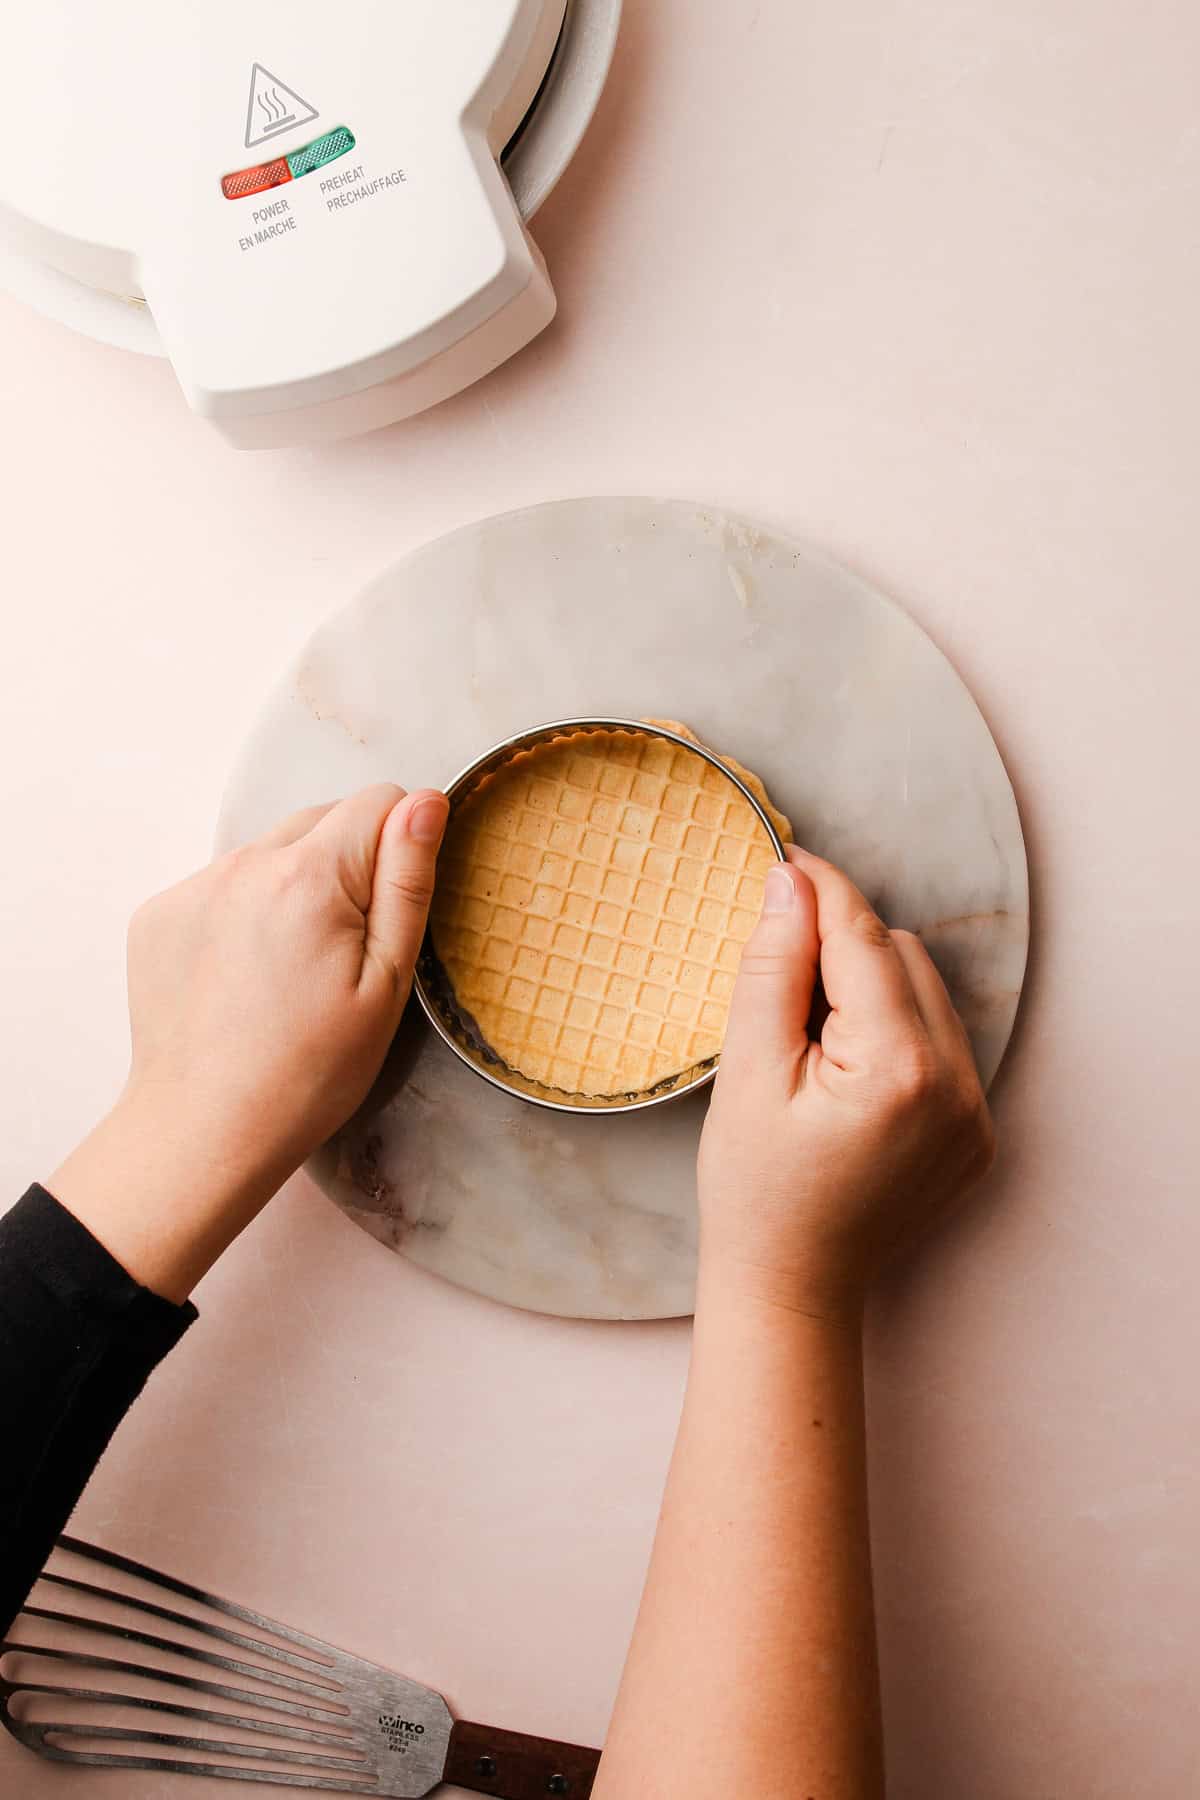
Step 4: Or, transfer the cookie to a heatproof surface to trim the edges. Use a round cookie cutter to neaten the edges of the pizzelle.
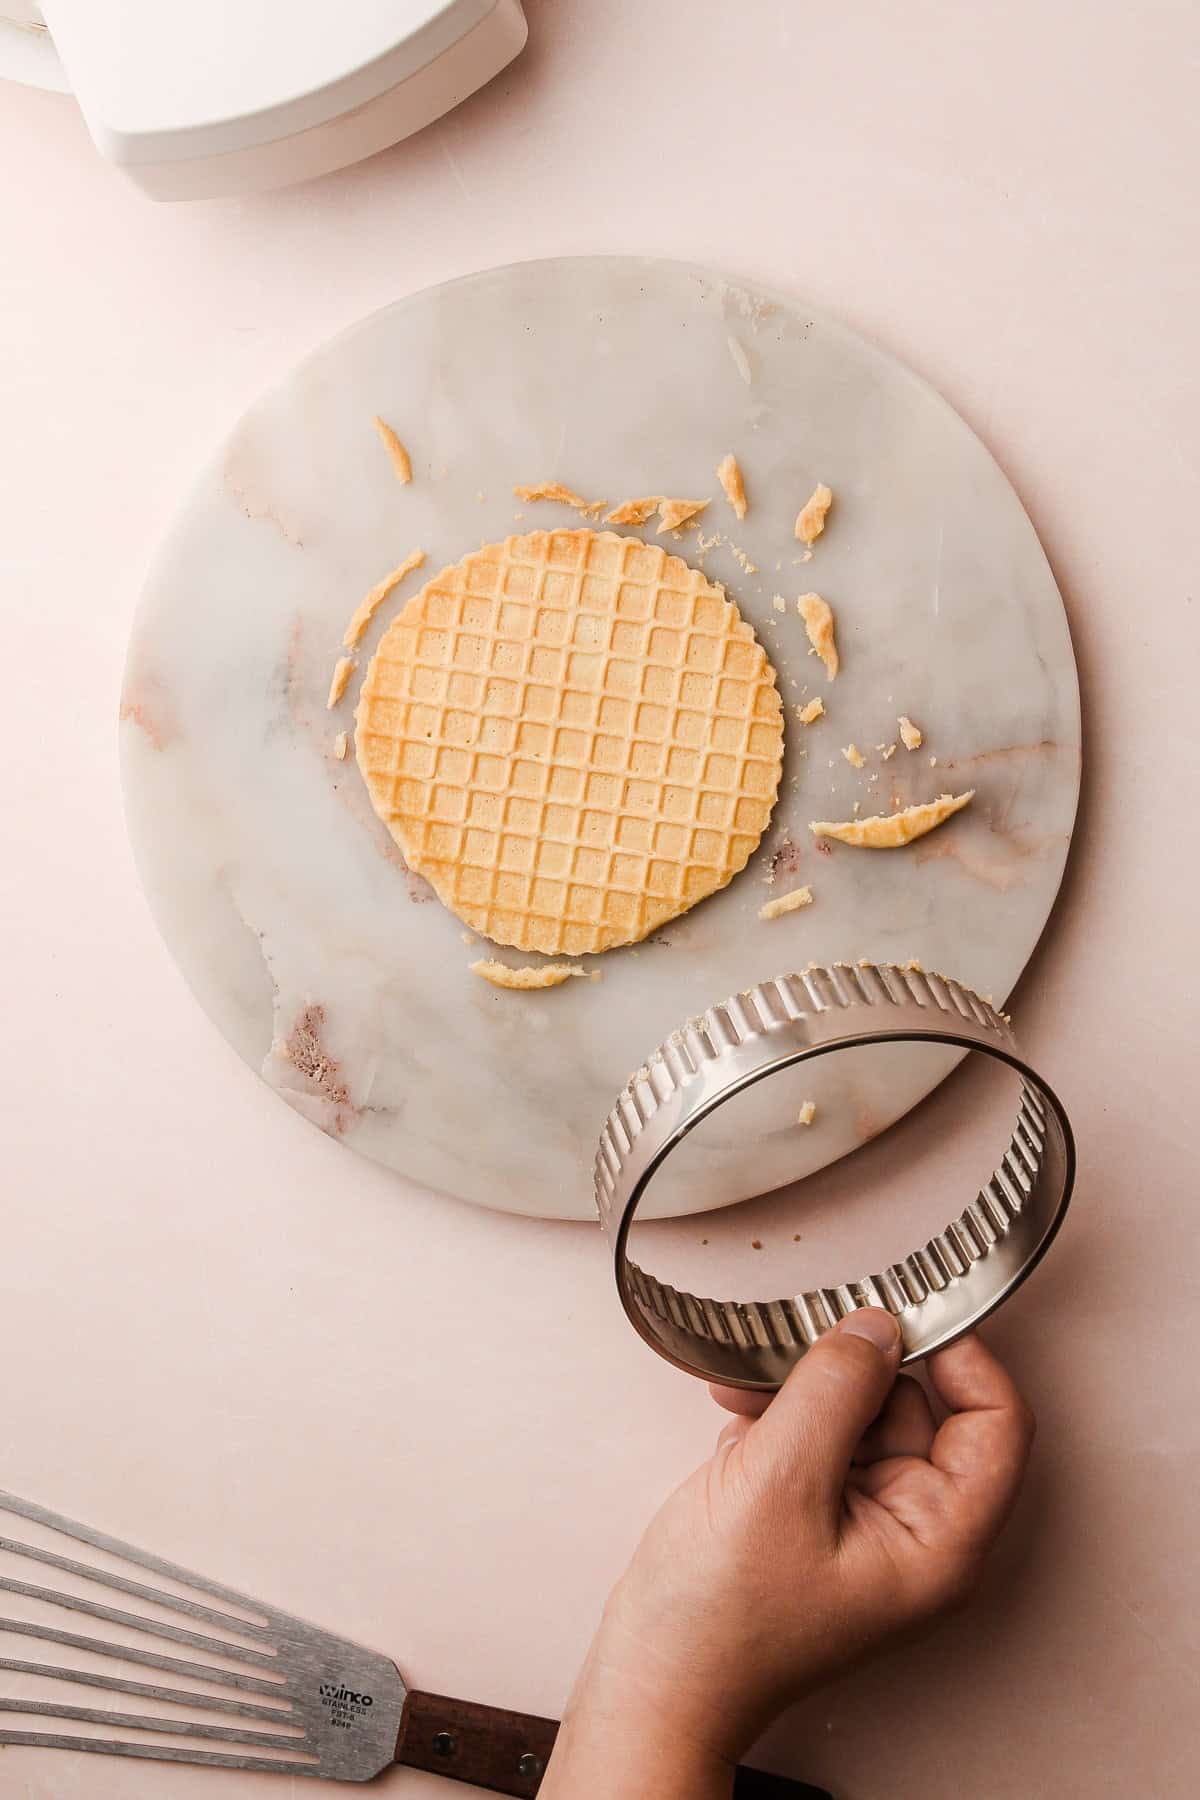
Step 5: This must be done while the pizzelle is still warm. Center the cookie cutter, press down, and brush away the trimmed edges.
Step 6: Now transfer the cookie to a wire rack to cool.
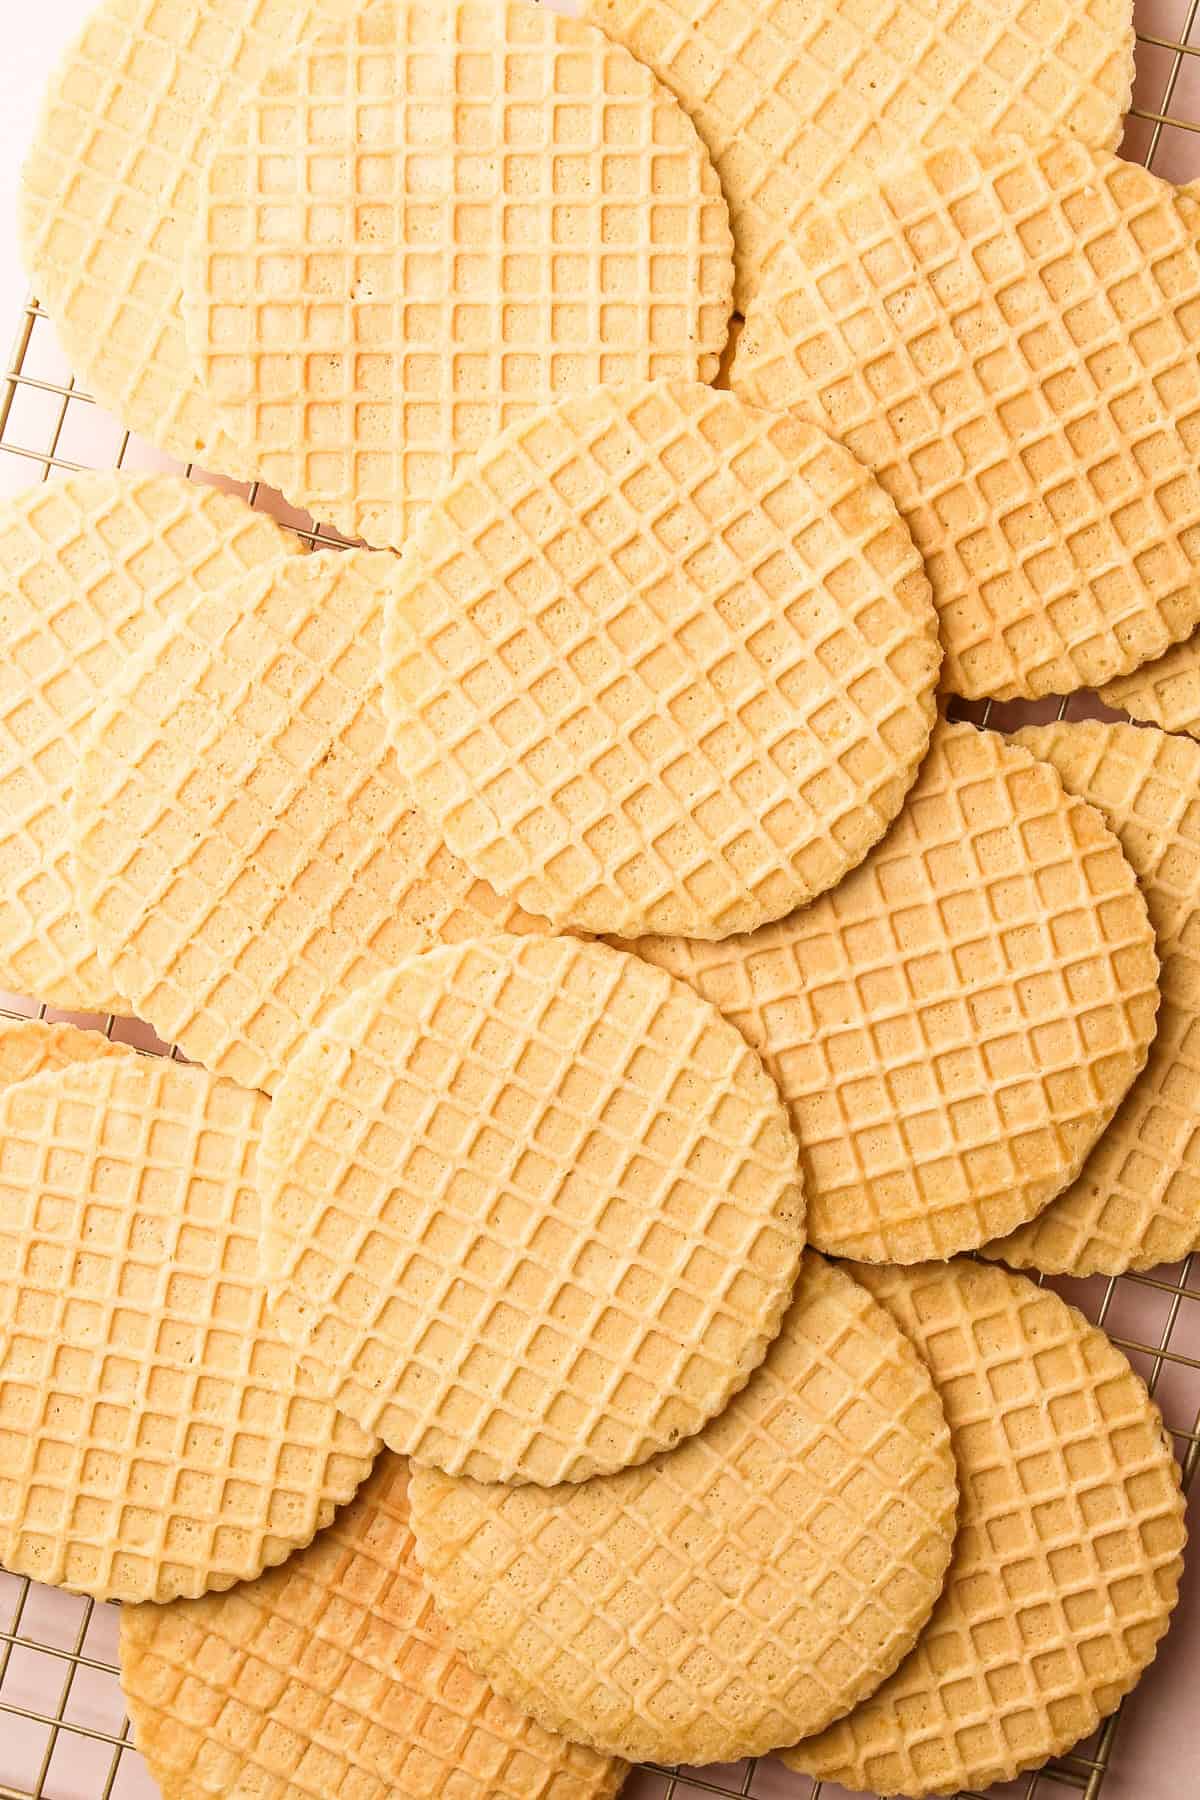
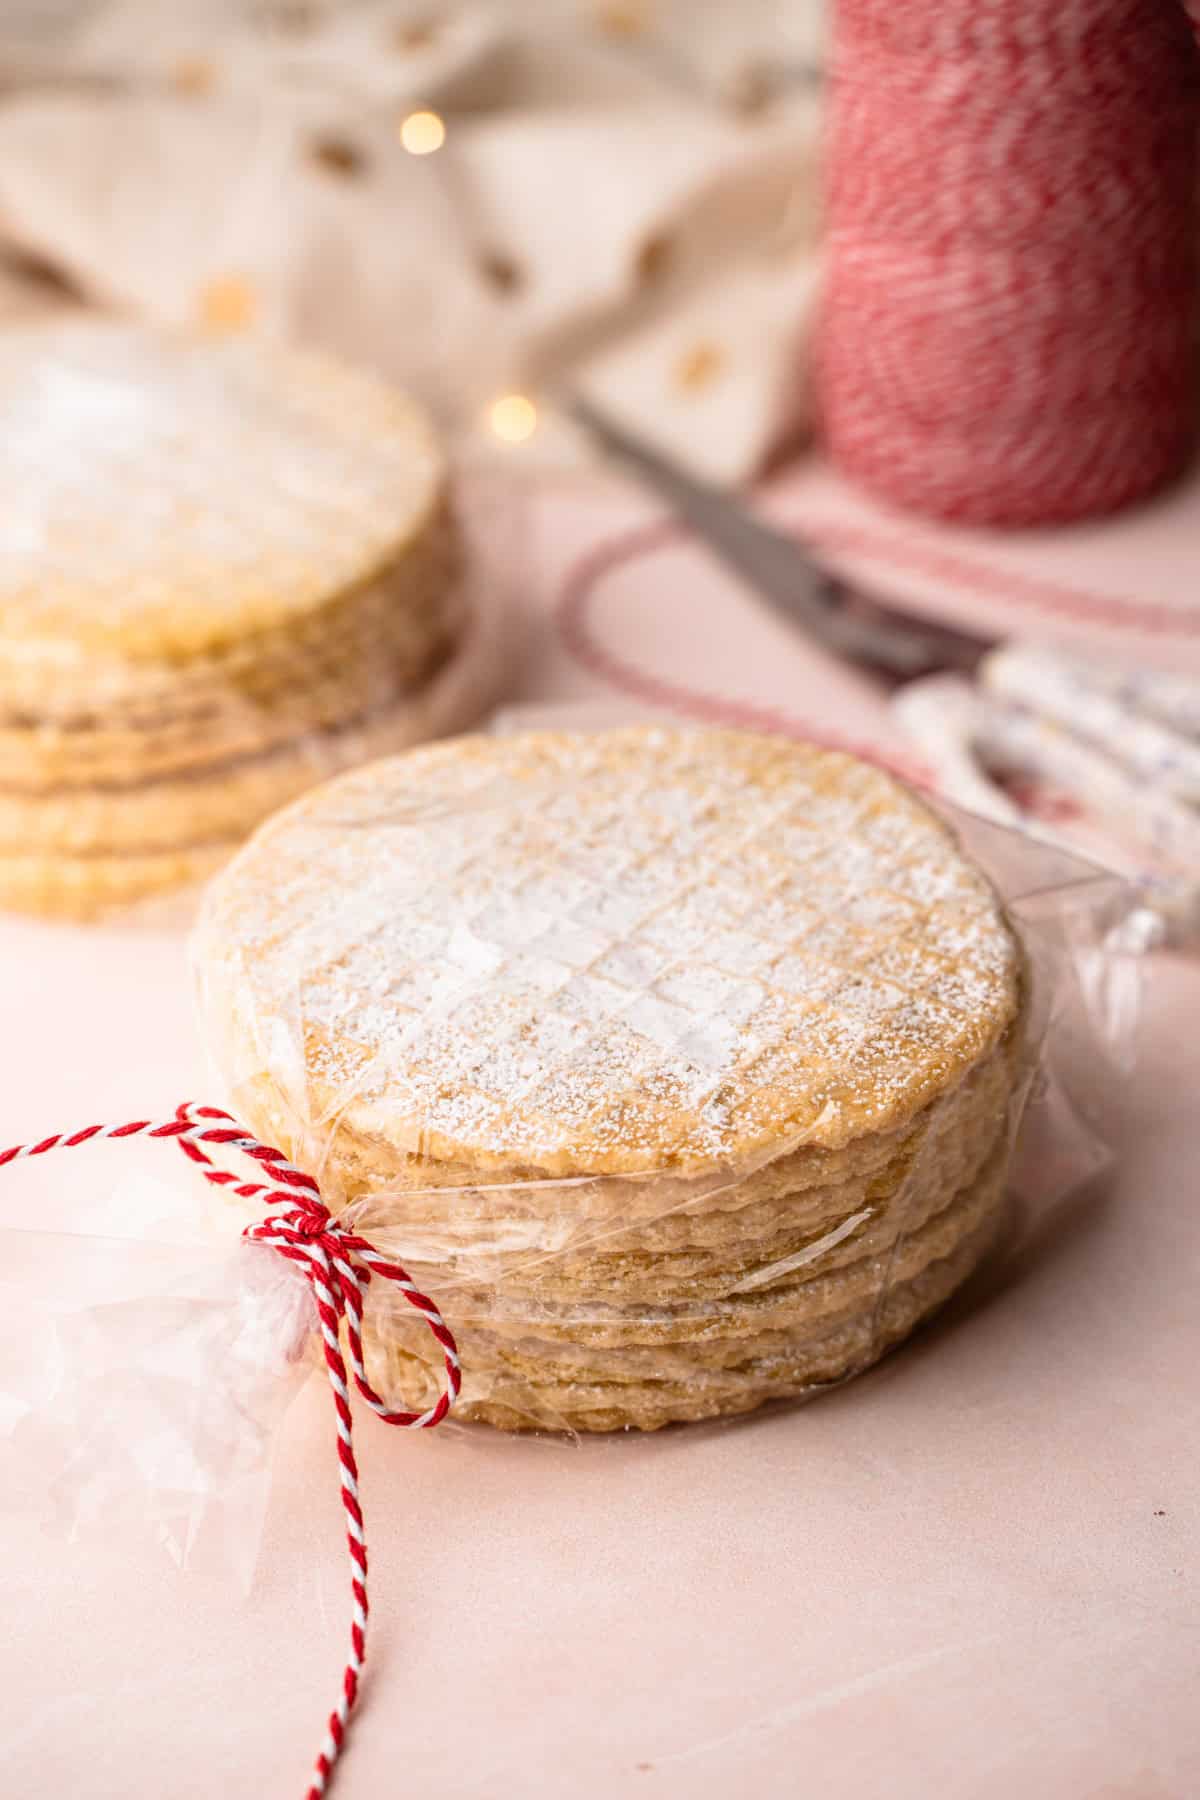
Step 7: Let the cookies cool completely and package up.
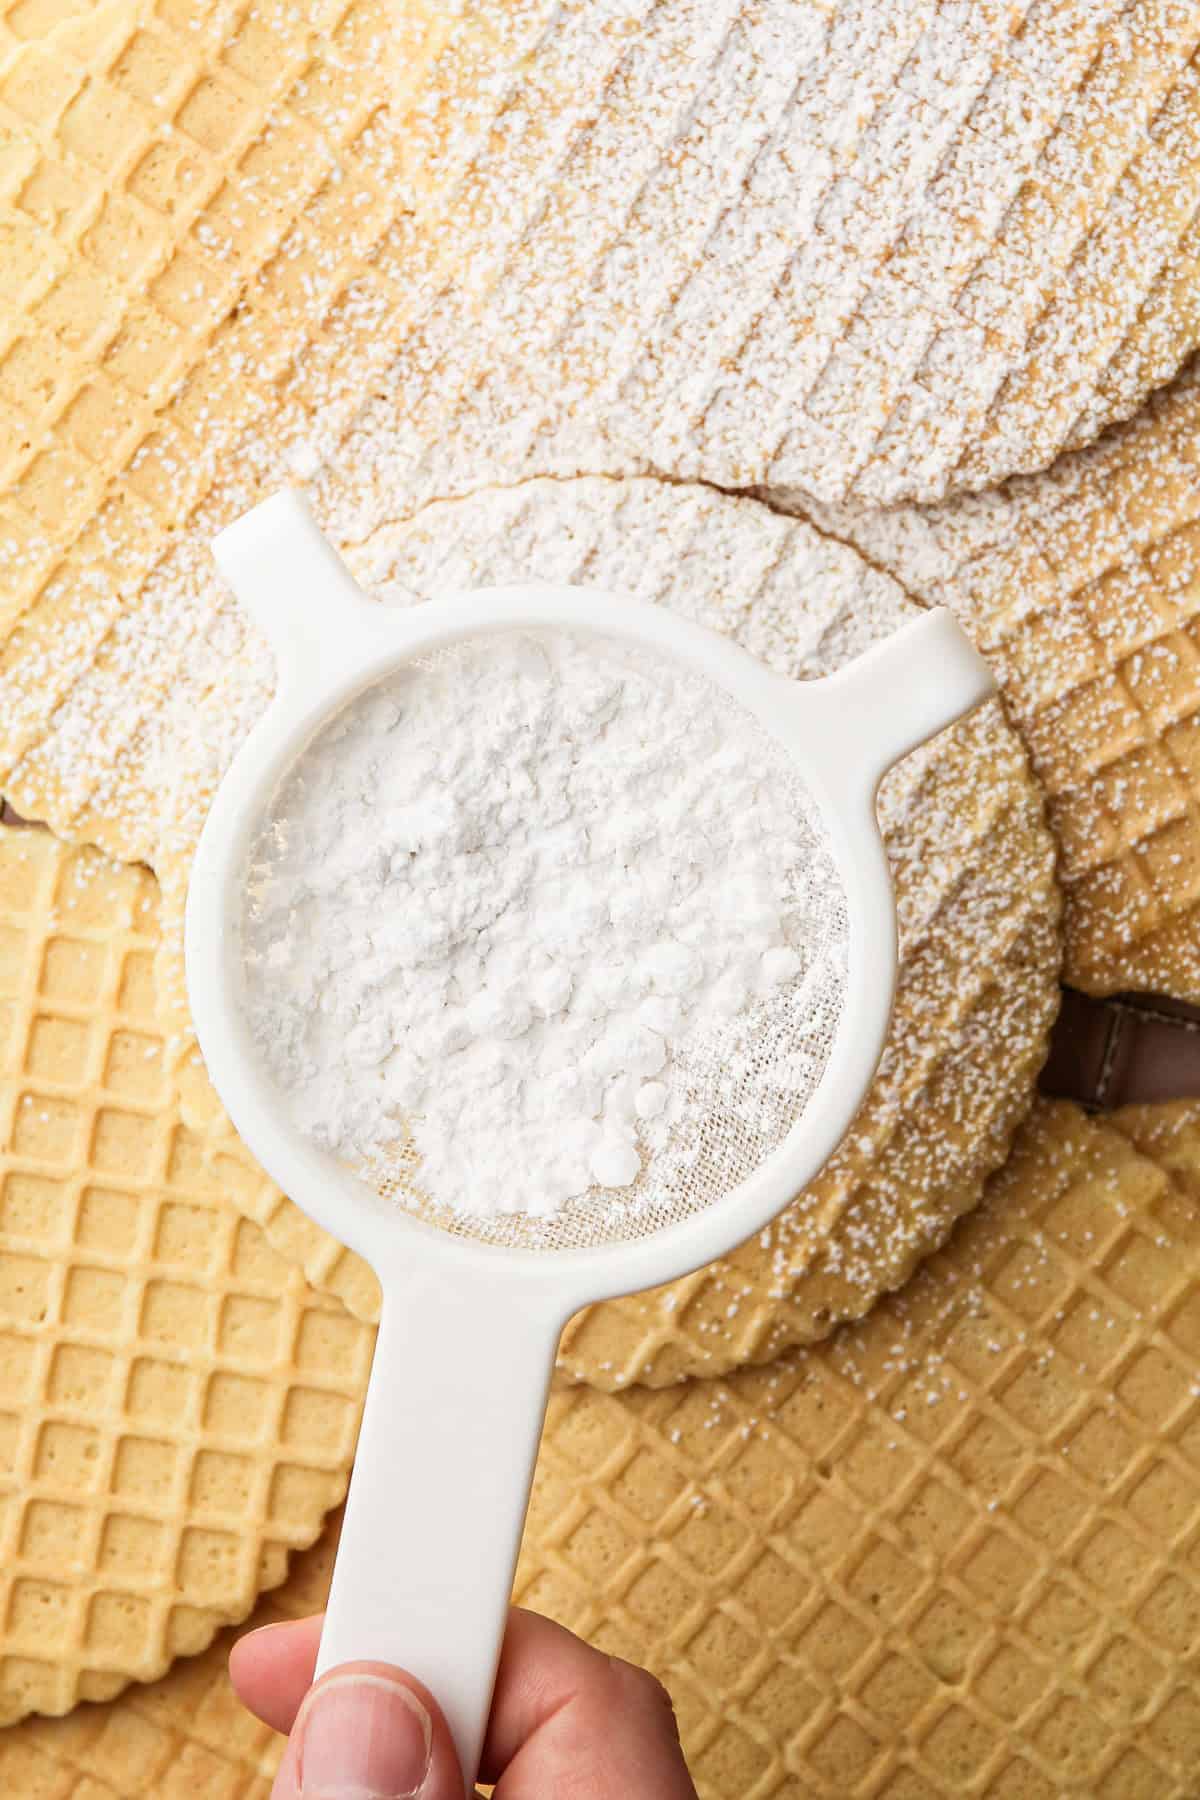
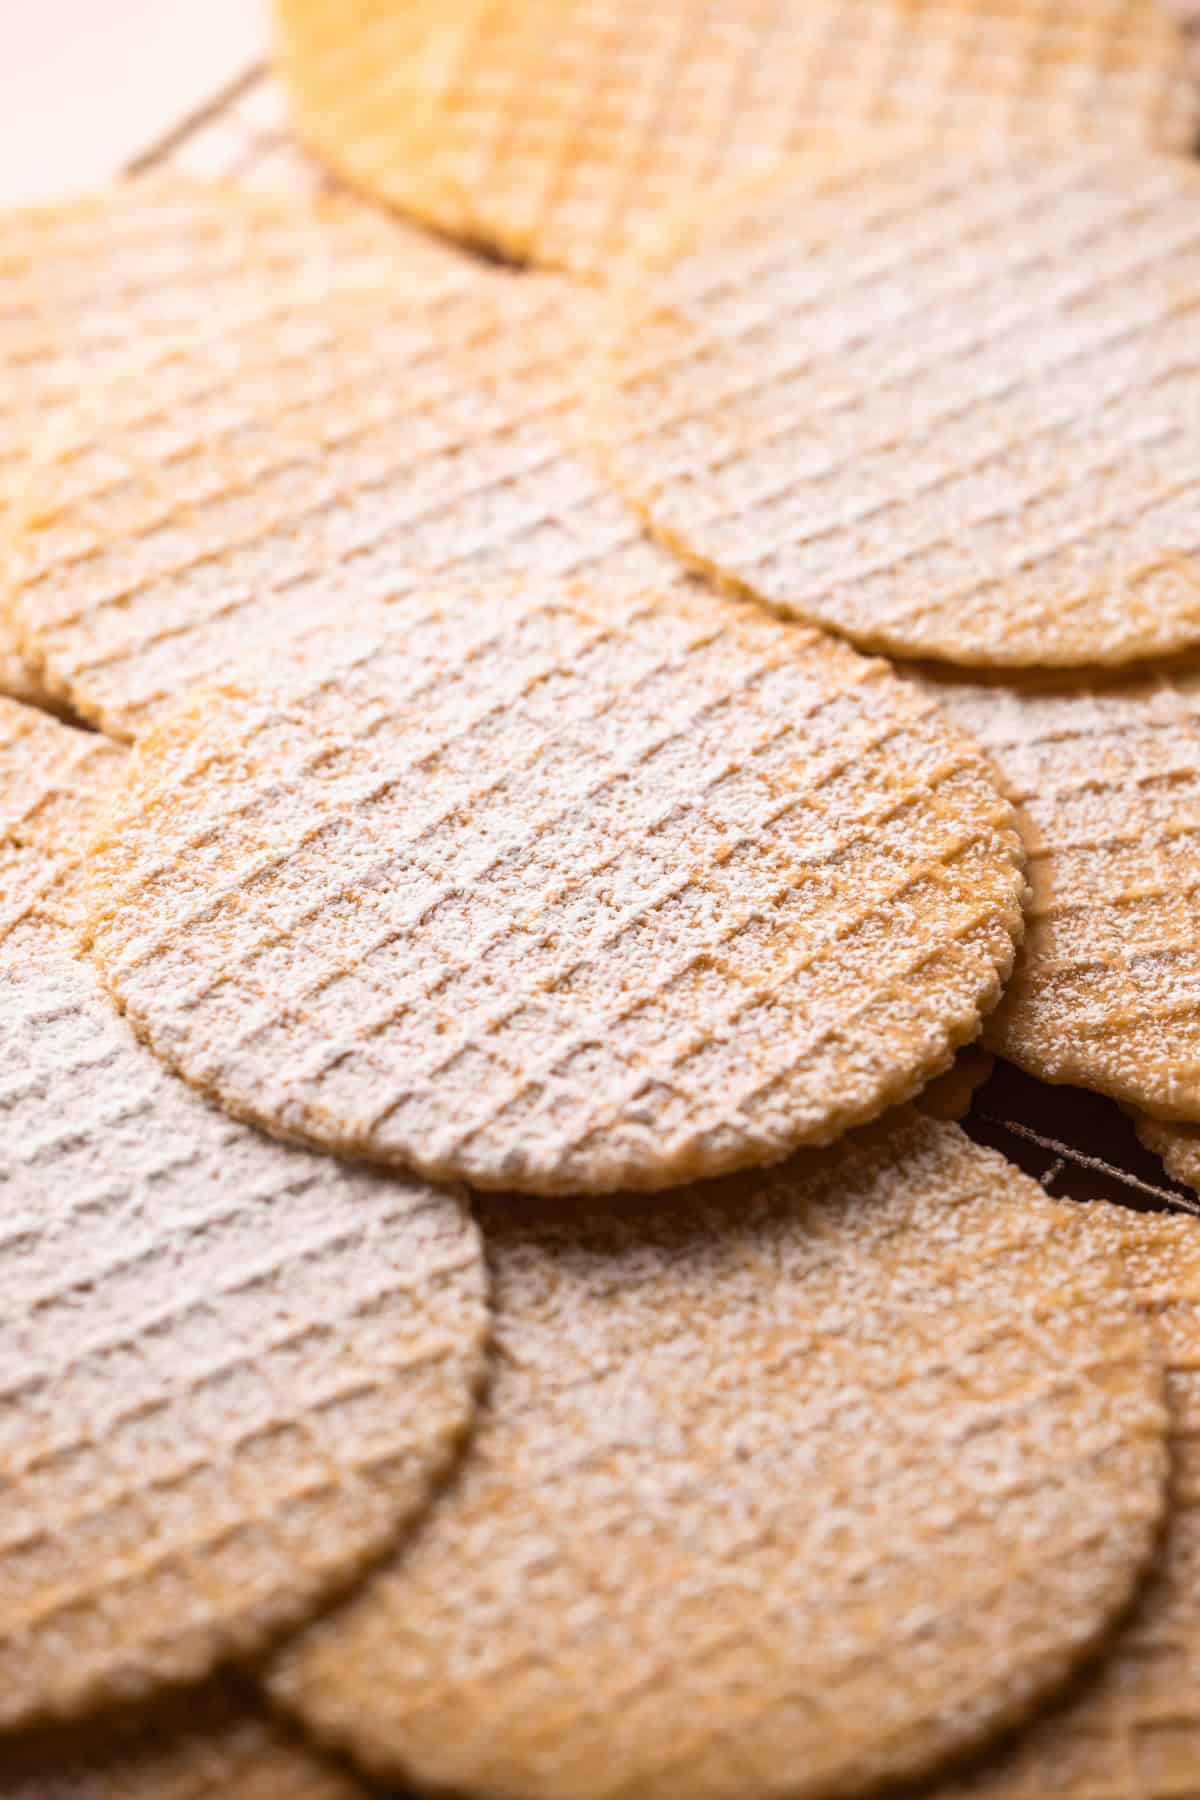
Step 8: Or dust with powdered sugar, and enjoy.
Storing Them
Homemade pizzelles are prone to softening quickly, so it's important to store them properly. Once they’ve cooled, either enjoy them right away or store them to maintain their crispness.
Store pizzelles at cool room temperature in an airtight container. I like to stack them in a plastic storage bag to keep them from absorbing moisture.
Pizzelles stay crisp for at least a week, often longer, as long as they are kept dry. Avoid exposing them to warmth or humidity, as this can cause them to soften and lose their texture.
More Italian Dessert Recipes
I am so honored when you make a recipe from my site! If you make these Italian Pizzelles, please leave a star ⭐️⭐️⭐️⭐️⭐️ rating with your experience! If you have any questions about this recipe outside of what is covered in the article, please comment below and I'll respond as soon as I'm able.
Full Recipe
Perfect Italian Pizzelles

Make Perfect Italian Pizzelles at home with this easy-to-make recipe, flavored with vanilla, anise and a touch of citrus. These crisp cookies are perfect for the everydays and the holidays.
- Prep Time: 00:15
- Cook Time: 00:20
- Total Time: 00:35, plus time for the iron to pre-heat
- Yield: 1-2 dozen pizzelles
- Category: Cookies
- Cuisine: Italian
Ingredients
- 1 cup (135 grams) powdered sugar, plus more for dusting (optional)
- 1 teaspoon baking powder
- ½ teaspoon Diamond Crystal kosher salt (see note)
- 2 large eggs
- ⅓ cup light-tasting olive oil (see note)
- 1-½ teaspoons vanilla extract
- 1 teaspoon anise extract
- ¼ teaspoon orange zest (optional)
- 1-¾ cups (210 grams) all-purpose flour
- Cooking spray (such as avocado oil spray) or neutral oil (for brushing)
Instructions
- Preheat an electric pizzelle iron to its highest setting for 15 minutes before you plan to make the cookies.
- In a medium bowl, sift together the powdered sugar, baking powder, and salt. Add in the eggs, olive oil, vanilla extract, anise extract, and orange zest (if using) and whisk until well combined. Whisk in the flour until completely combined.
- Lightly spray or brush neutral oil onto the preheated pizzelle iron.
- Scoop about 1 tablespoon of the batter into the center of the pizzelle iron and close the cover.
- Cook until the cookie is cooked through and very lightly golden, about 2 minutes. The exact size, temperature, and cooking time for each pizzelle will vary, depending on your specific iron. Adjust the amount of batter added, the heat of the iron, and the cooking time as needed.
- Transfer the cooked pizzelle to a wire rack to cool.
- Repeat the process with all of the remaining batter.
- Cool the cookies completely.
- Serve, or transfer to an airtight storage container and store in a cool, dry place for up to 1 week.
- Dust with powdered sugar just before serving, if desired.
Notes
Use an olive oil you like the taste of. Alternatively, you can use any other oil with a neutral flavor profile, such as avocado oil, if you do not want a slight olive oil taste.
Just a small amount of orange zest will help brighten up the flavor of the cookie, but it should not be a noticeable flavor, so just add a small amount. It is optional.
Weighing your flour is the most accurate way to measure. If you aren't going to weigh it, make sure to spoon it into the measuring cup, then level it off. If you scoop the flour out with the measuring cup and then level, it could change the outcome of the final product.
This recipe was tested using Diamond Crystal coarse kosher salt. If you use Morton's kosher salt or fine salt, decrease the volume by half. See this Salt Guide for more information about how salt affects your cooking and baking.
The yield of this recipe will depend on the size of your pizzelle maker.
Some of the links on this page may be affiliate links. Everyday Pie is a participant in the Amazon Associates Program. As an Amazon Associate I earn from qualifying purchases, at no extra cost to you.
Leave a Reply