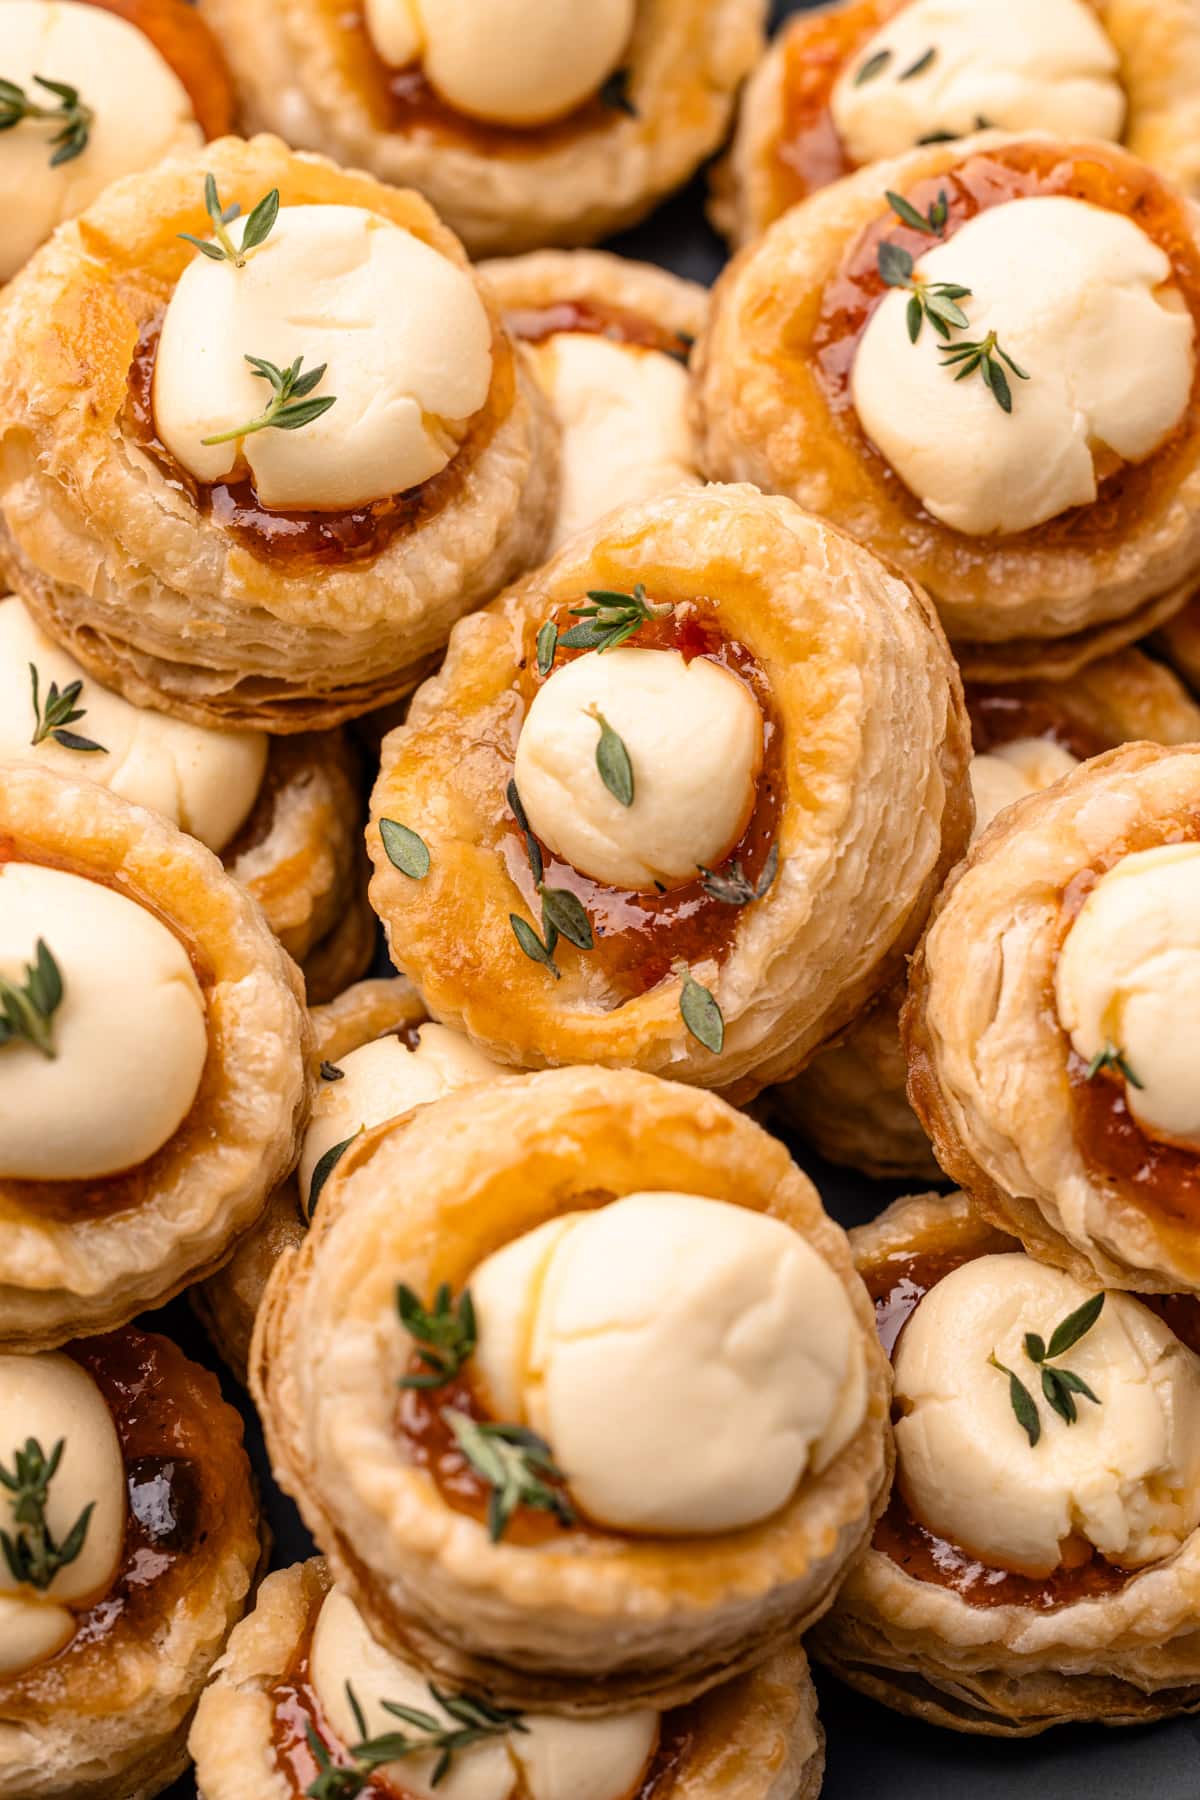
Flaky, sweet, spicy, and so delicious, these Cream Cheese and Pepper Jelly Puff Pastry Bites are made with minimal ingredients for the perfect holiday or party appetizer!
Want to save this recipe?
Enter your email & I'll send it to your inbox. Plus, get weekly updates from me!
My husband and I could binge on pepper jelly anything--it's a must whenever we have a cheese board. In this recipe, that combination of sweet and spicy (and salty--a little like these Caramelized Onion Tarts) fits the bill perfectly. The creaminess from the cream cheese and the flakiness of the pastry will be the talk of the appetizer table with these little bites. And the bonus is that they are simple to put together!
The biggest question you'll need to ask yourself is whether or not you are willing to make the puff pastry from scratch. I highly recommend it because it will be better quality, more delicious, and cheaper, but if you prefer, you can also use store-bought puff pastry with similar success.
So, let's get to making it, shall we? The article below is jam-packed full of useful information. You can jump around using the menu below or skip to the end of the article for the full recipe.
Jump to:
Ingredients Needed and Substitutions
Here is a brief overview of the ingredients needed for this recipe. See the recipe card that lists the full recipe with quantities below this text.
- puff pastry (if you are going for simple, store-bought puff pastry is the way to go--however, I also have a recipe for a simple rough puff pastry which is amazing, as well as a traditional puff pastry recipe if you're feeling ambitious; see more info below)
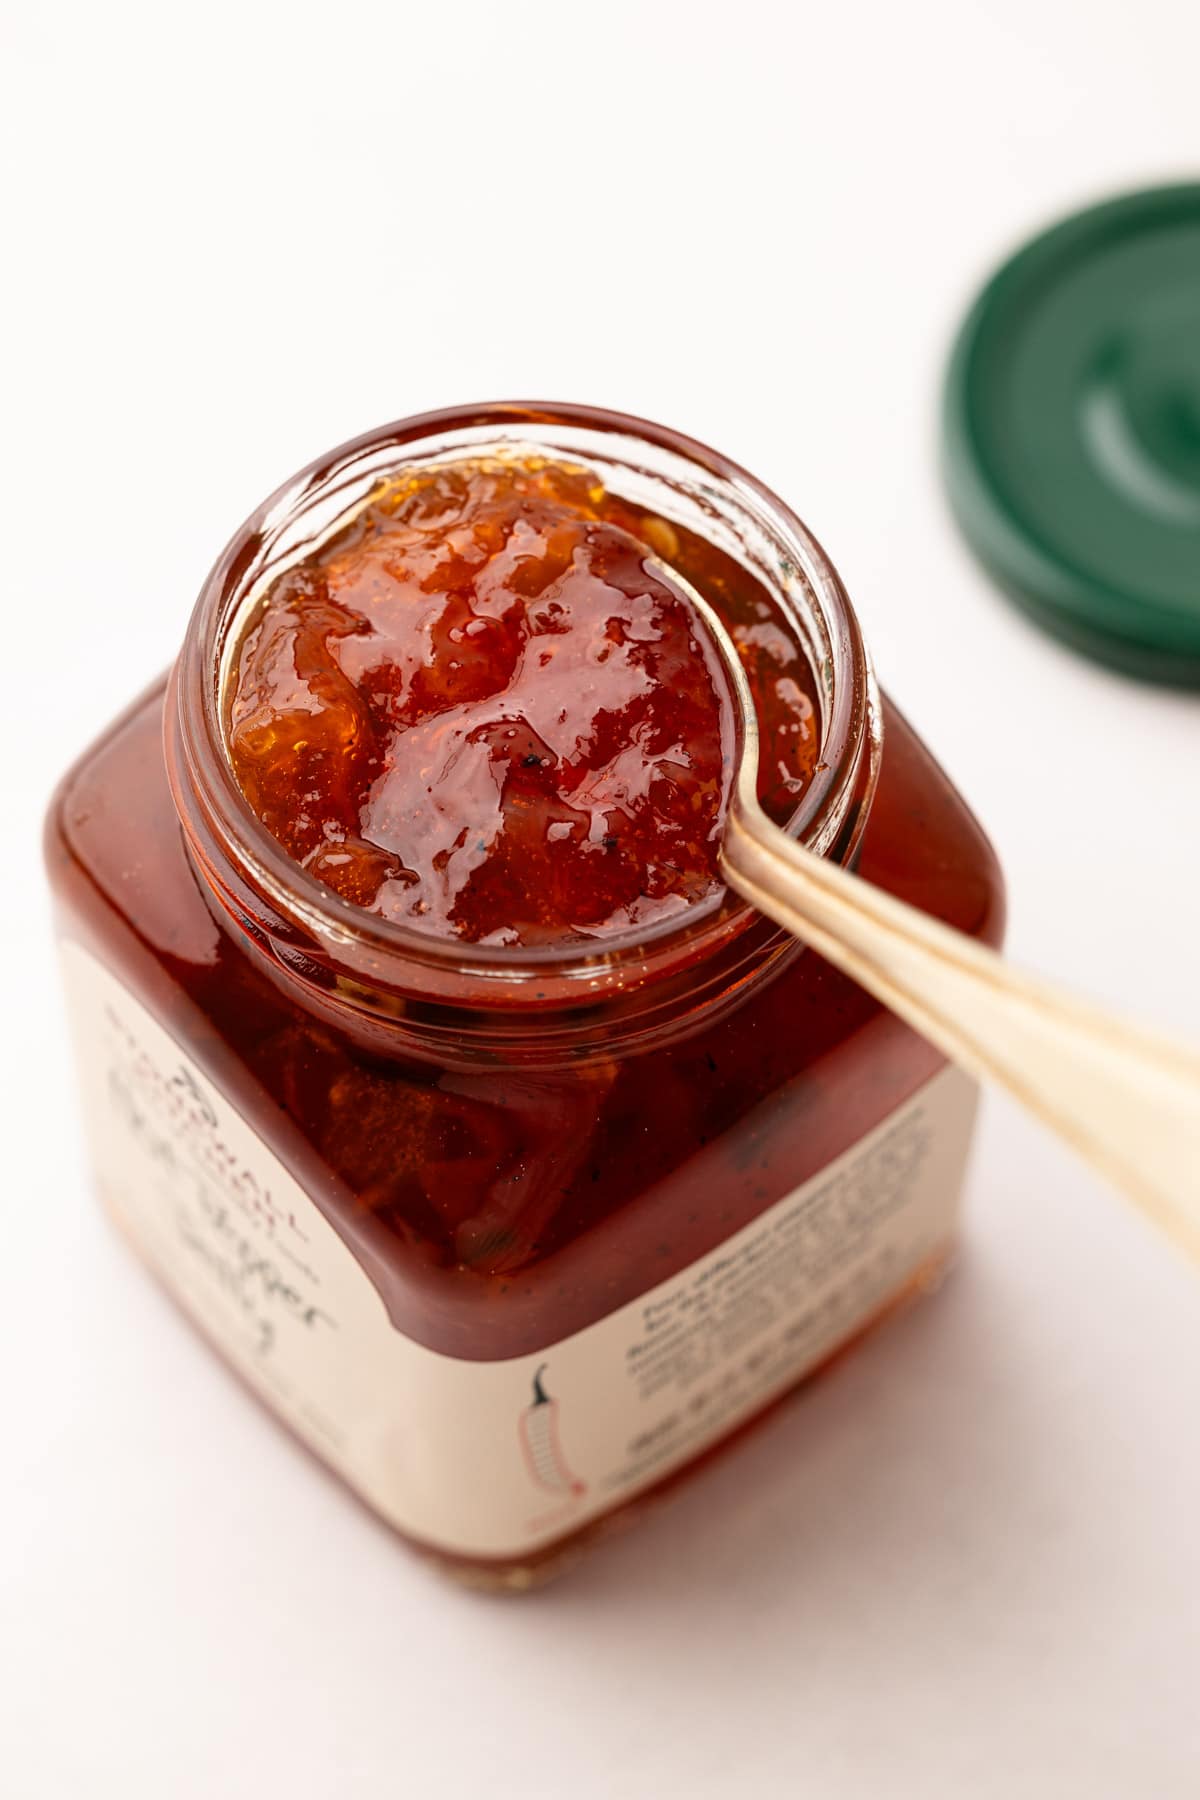
- hot pepper jelly (I love love love Stonewall Kitchen Hot Pepper Jelly, but use whatever is your favorite)
- cream cheese (make sure to use full-fat brick cream cheese; I'm an unapologetic Philly Cream Cheese Fan)
- fresh thyme (though fresh chives would also be a good choice here too!)
- egg wash (which is just egg and water!)
What Type of Puff Pastry to Use
For this recipe, you can use either my homemade rough puff recipe (it's easier than you think!) or frozen store-bought. If you really want to do the thing, you can also try my Traditional Puff Pastry Recipe.
If you do choose to make the puff pastry, this recipe only requires half the batch (about 18 ounces). So, you can save the other half for another recipe like these Puff Pastry Cheese Straws or something sweet like these Puff Pastry Cinnamon Rolls, or you can make a double batch of this recipe.
Is store-bought puff pastry good?
Yes, it's totally fine to use! Just note: depending on the type of puff pastry you buy, the exact quantity of puff pastry bites you get may vary.
Purchased puff pastry typically either comes in one folded 14-ounce sheet or in two folded 8-ounce sheets. But I haven't tried all brands, so your store-bought puff pastry may be different than this.
A Quick Note about the Steps
There are many different ways to make this type of puff pastry appetizer. Lots of recipes call for baking the bites in a muffin tin to avoid more complicated shaping steps. However, I found that while that shortcut certainly reduces the effort required, the tradeoff in the final product wasn't worth it.
This recipe calls for baking cut-and-docked puff pastry that has been made into a mini tart (more on this below in the step-by-step section), then, after the pastry has partially baked, knocking down the middle and filling it with the jelly and cream cheese, before going back into the oven to finish baking.
I chose this method for two big reasons:
- Adding the cream cheese and the jelly directly to the unbaked puff pastry resulted in both of those elements getting over-baked.
- Using a muffin tin results in a less-than-ideal puff pastry bake.
So, while this recipe has a few extra steps compared to other similar recipes, please trust that it's worth the effort. Not only are these appetizers actually very stunning, but the taste and texture of the final result make up for the extra 15 minutes of prep work.
Want to Use the Shortcut?
Fine! Bake these in a mini muffin tin with the pepper jelly and cream cheese all together. I just don't think the final result is as good as following the steps called for in this recipe.
To stamp out the tarts, I suggest using a 3-inch circle cutter. If you don't have that exact size, something similar will work, though it will yield different quantities depending on the size.
You'll need a smaller circle cutter to "dock" the puff pastry. This will help it puff up around the filling to create a crust. Please reference the photos below for a visual guide for how to dock the crust.
To dock it, press the smaller cutter into the middle of the circle pastry until it makes an indentation. Just be sure not to press it all the way in. If you don't have a smaller cutter, then you could use a knife to draw the circle in the middle. Then, use a fork to stamp into the center of pastry to create steam holes. Both of these steps direct the pastry where to puff up.
Once the pastry is ready, place it on a sheet pan, brush the edges with egg wash, and bake!
Step-By-Step Recipe Overview
This is a quick visual overview of the steps needed to make this recipe. This is not the actual recipe, which is located at the end of this article and has much greater detail to ensure success.
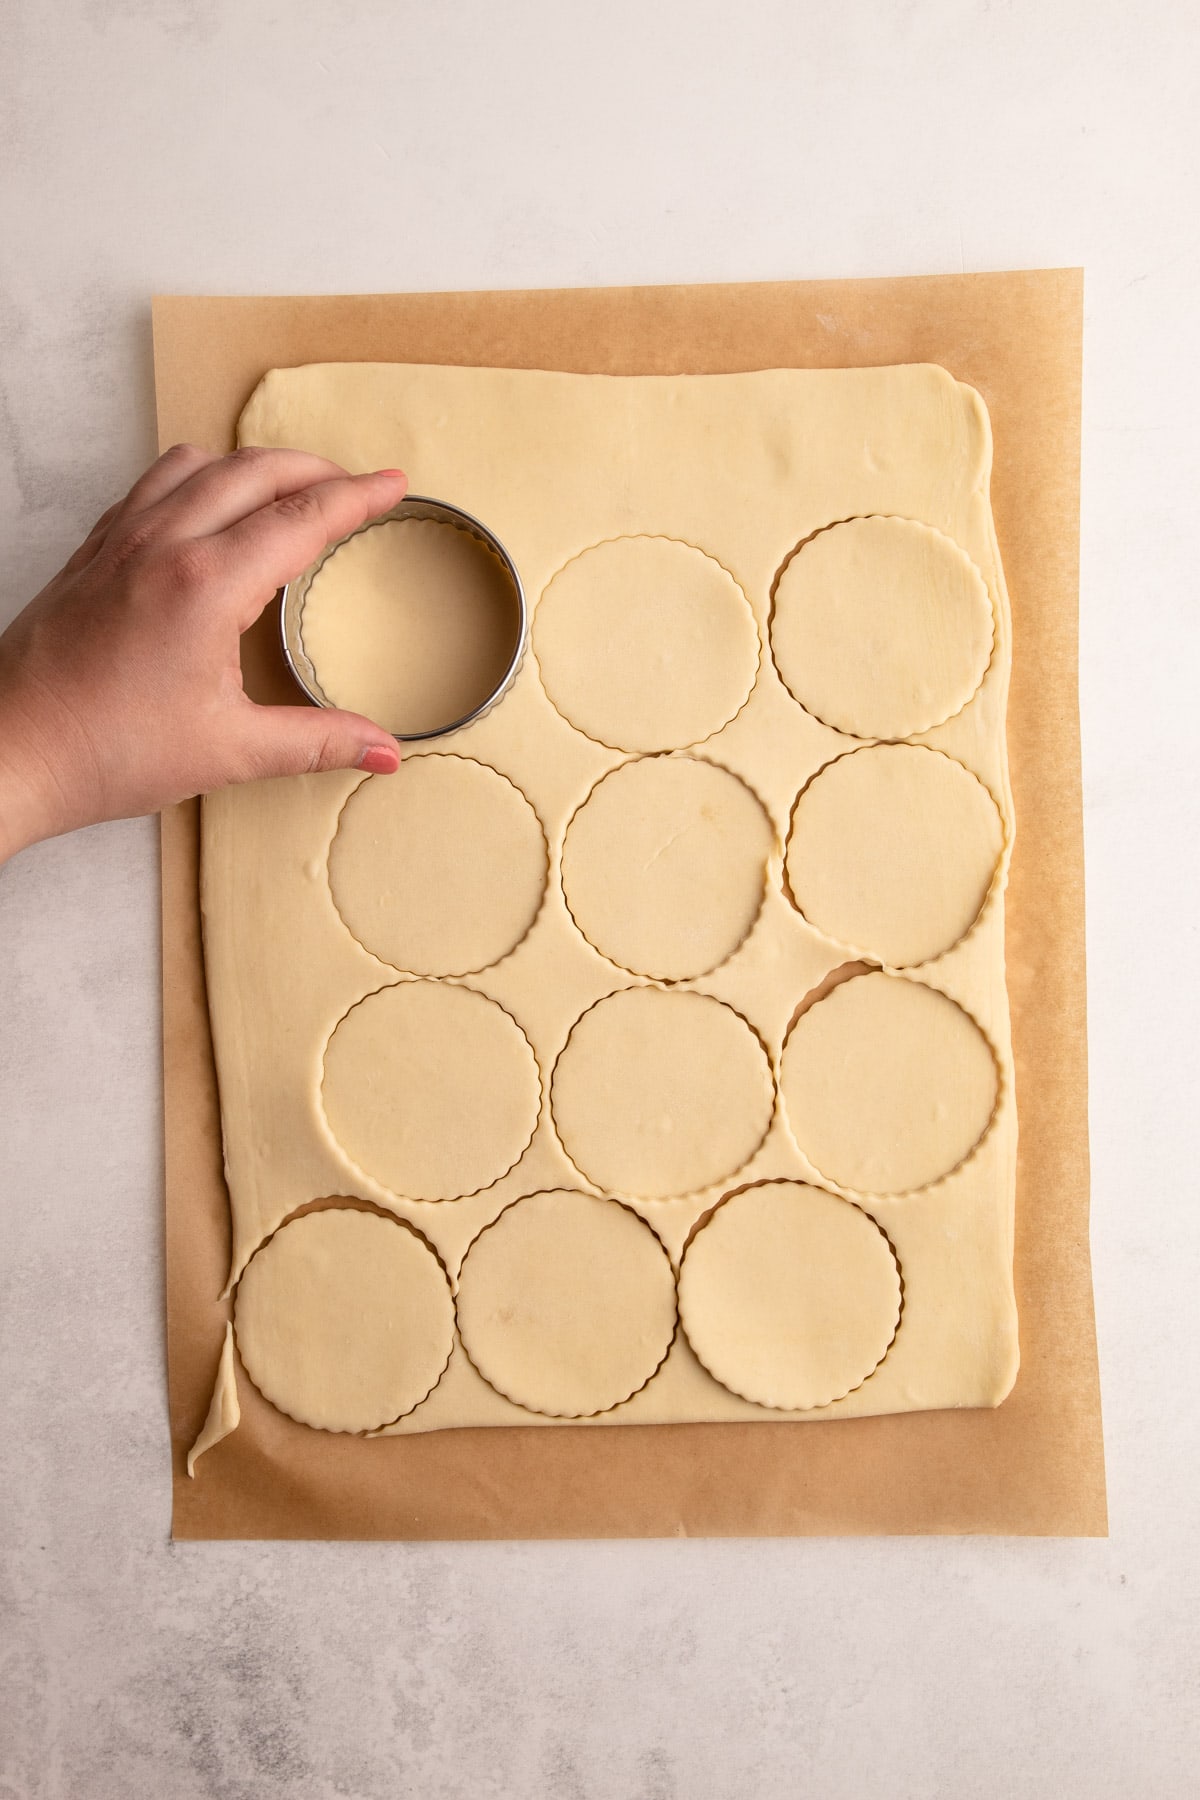
Step 1: Prepare the puff pastry and stamp out circles.
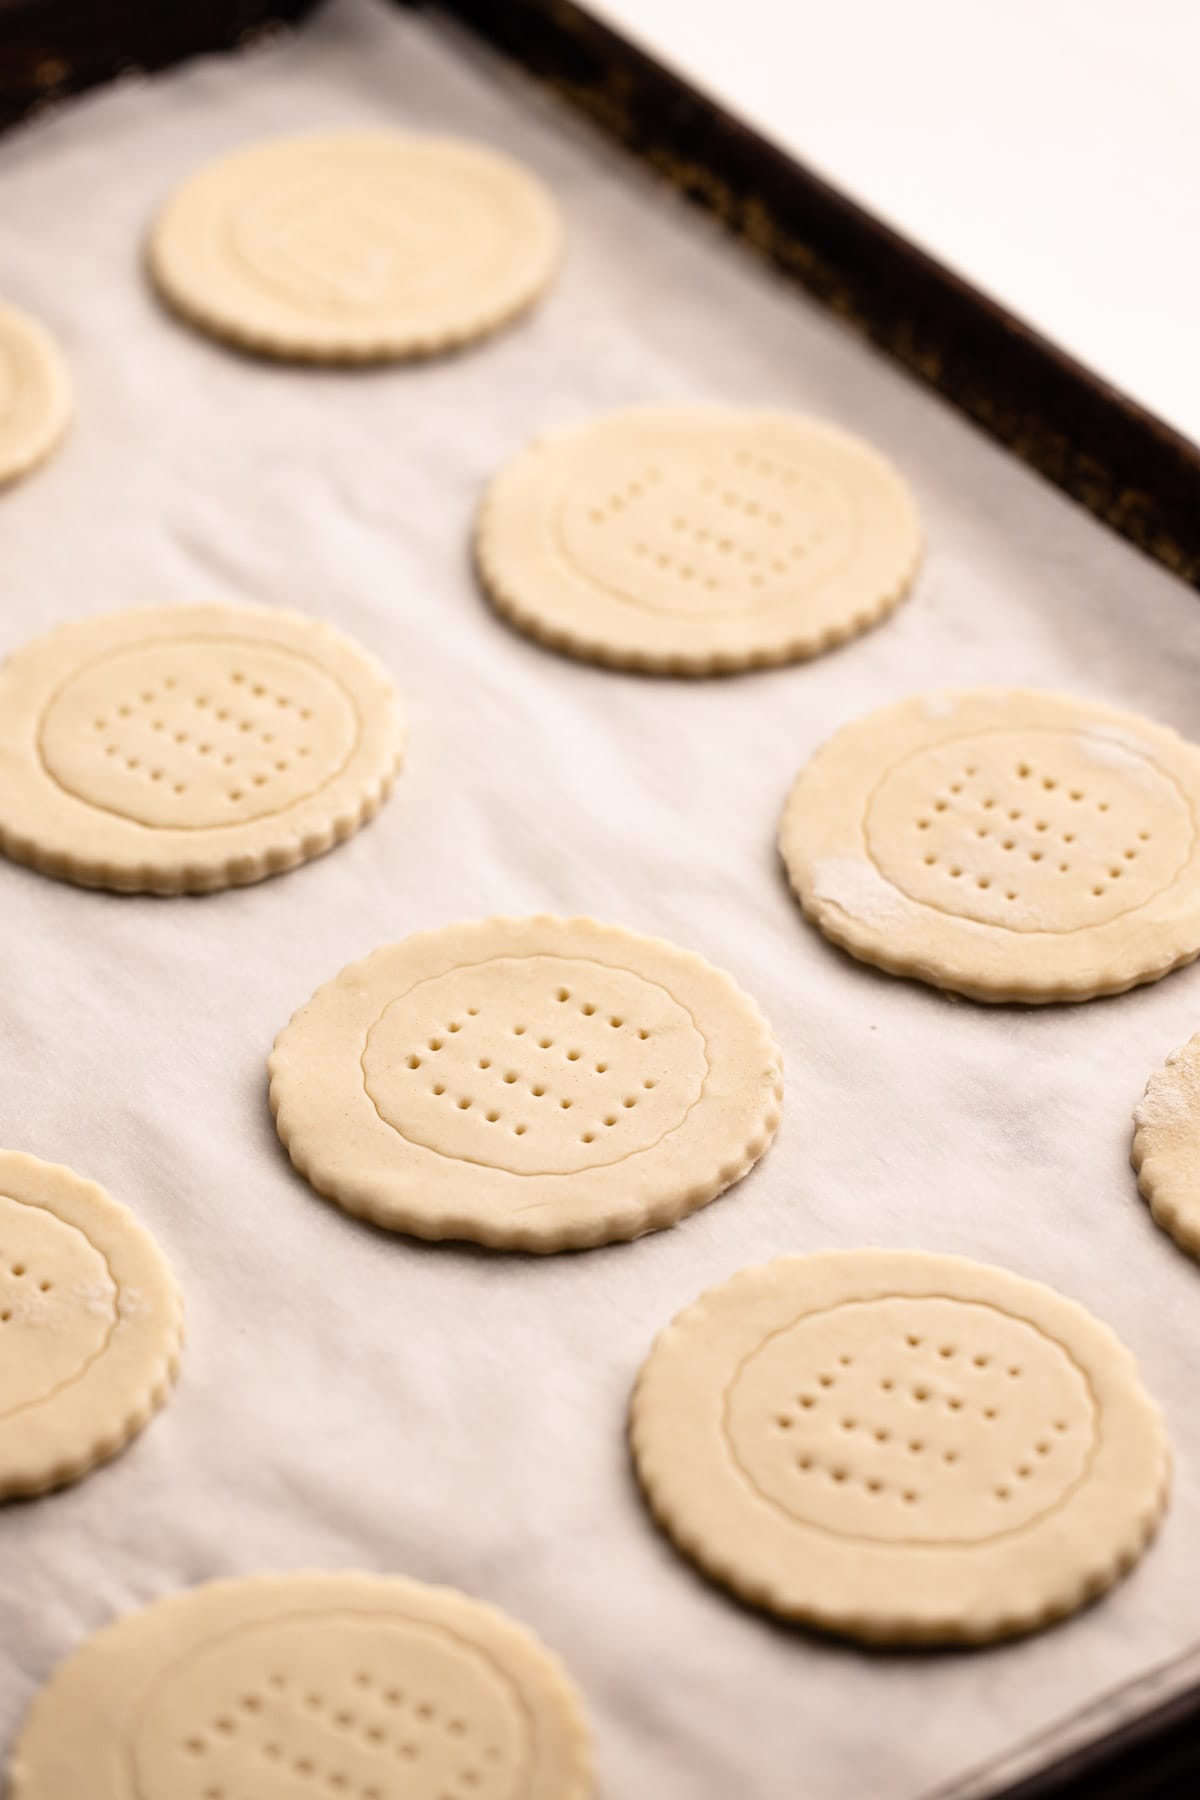
Step 2: Press a smaller cutter in the center of the pastry, but avoid going all the way through it. Use a fork to create steam holes in the center. This helps pastry puff in the right places.
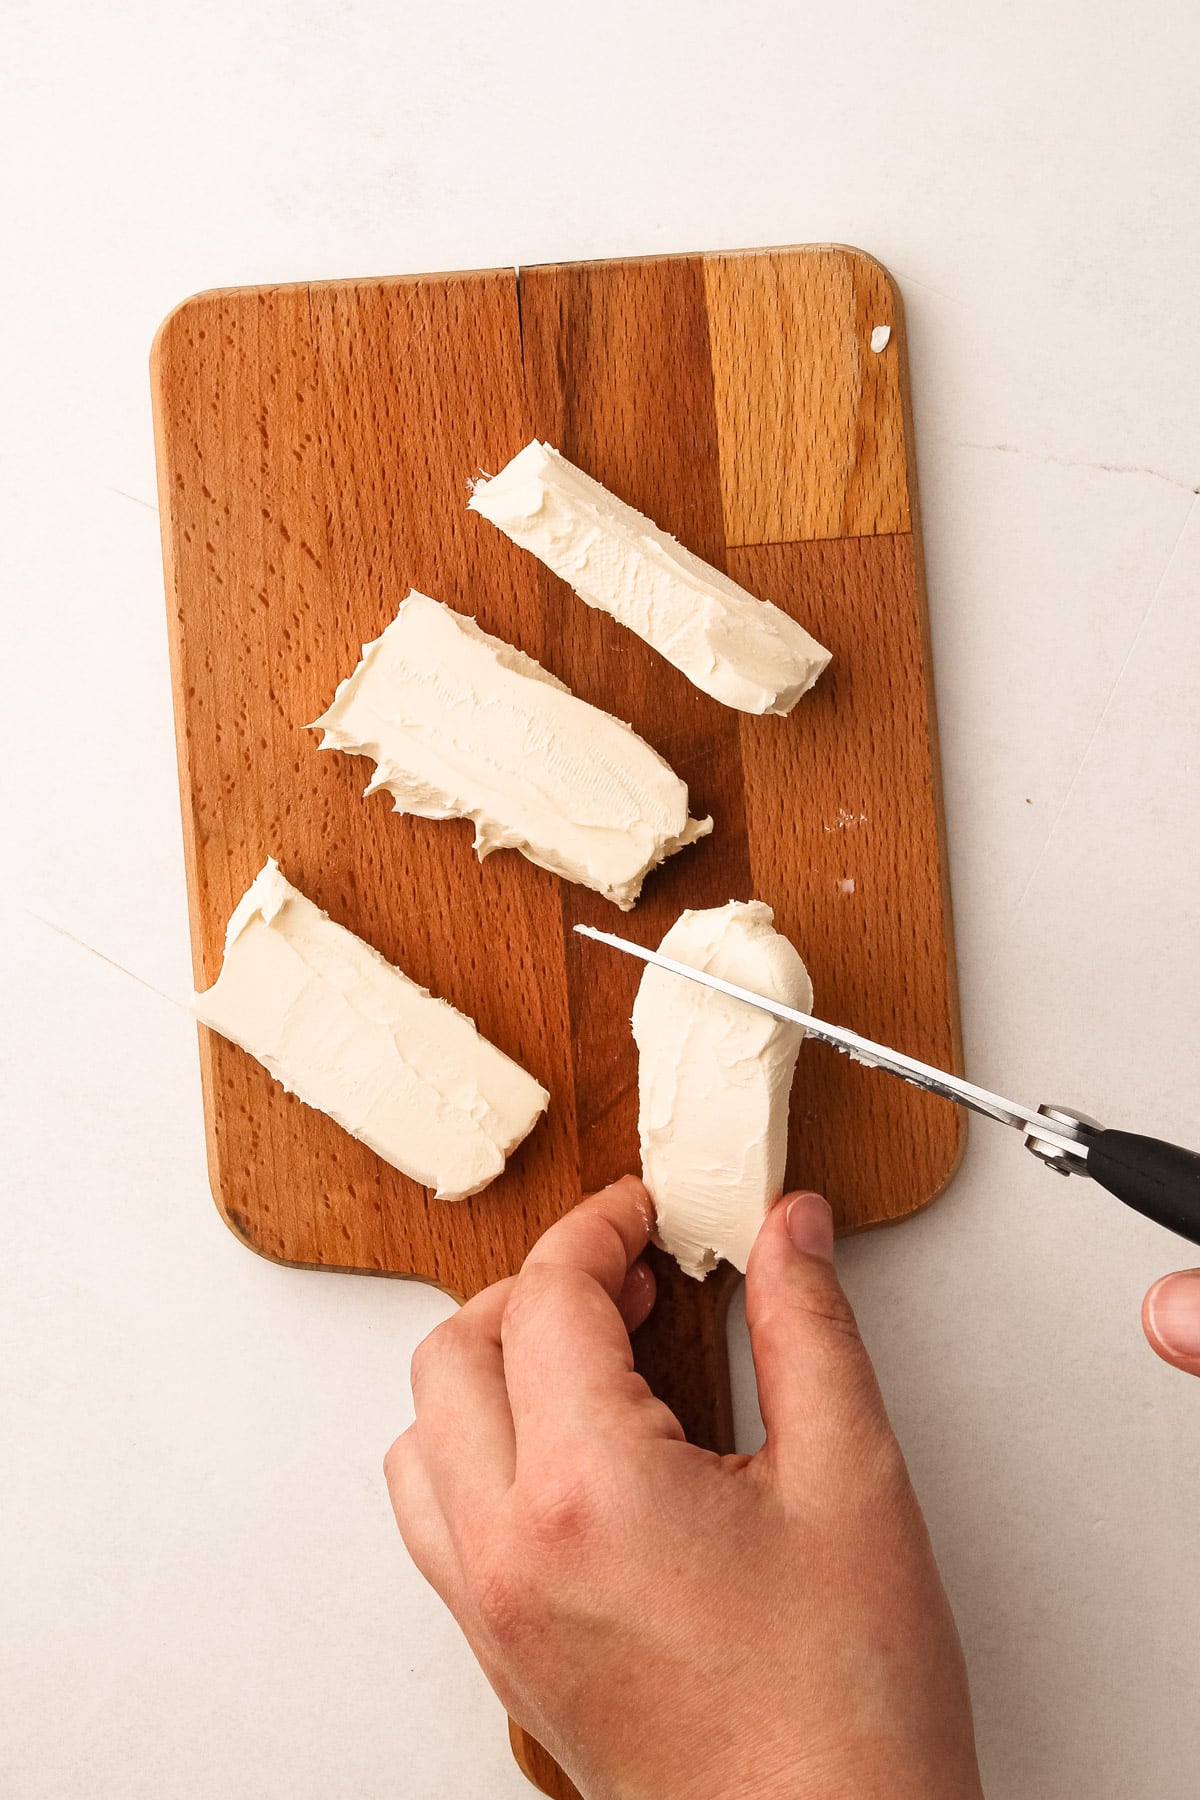
Step 3: Cut up the cream cheese into pieces.
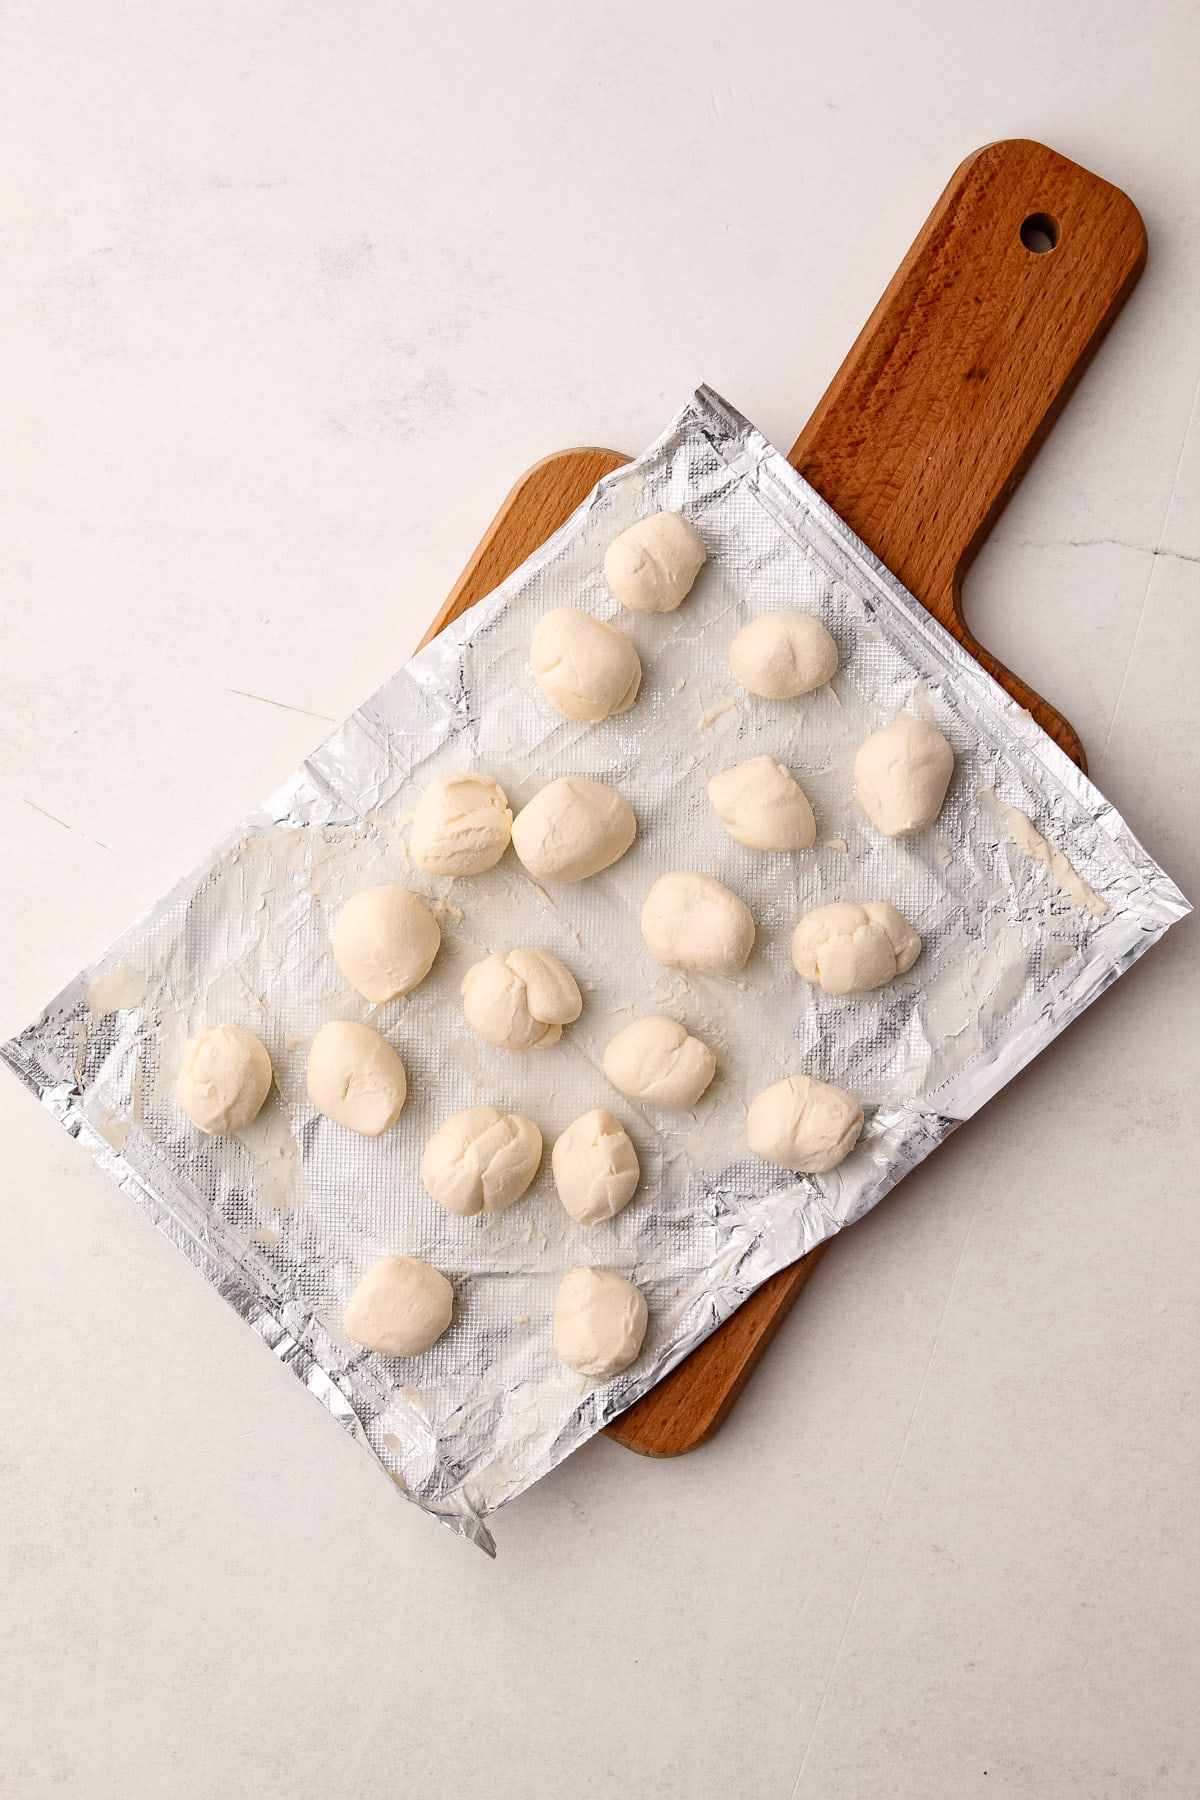
Step 4: Either leave the cream cheese as-is or roll it into balls for a neater final product.
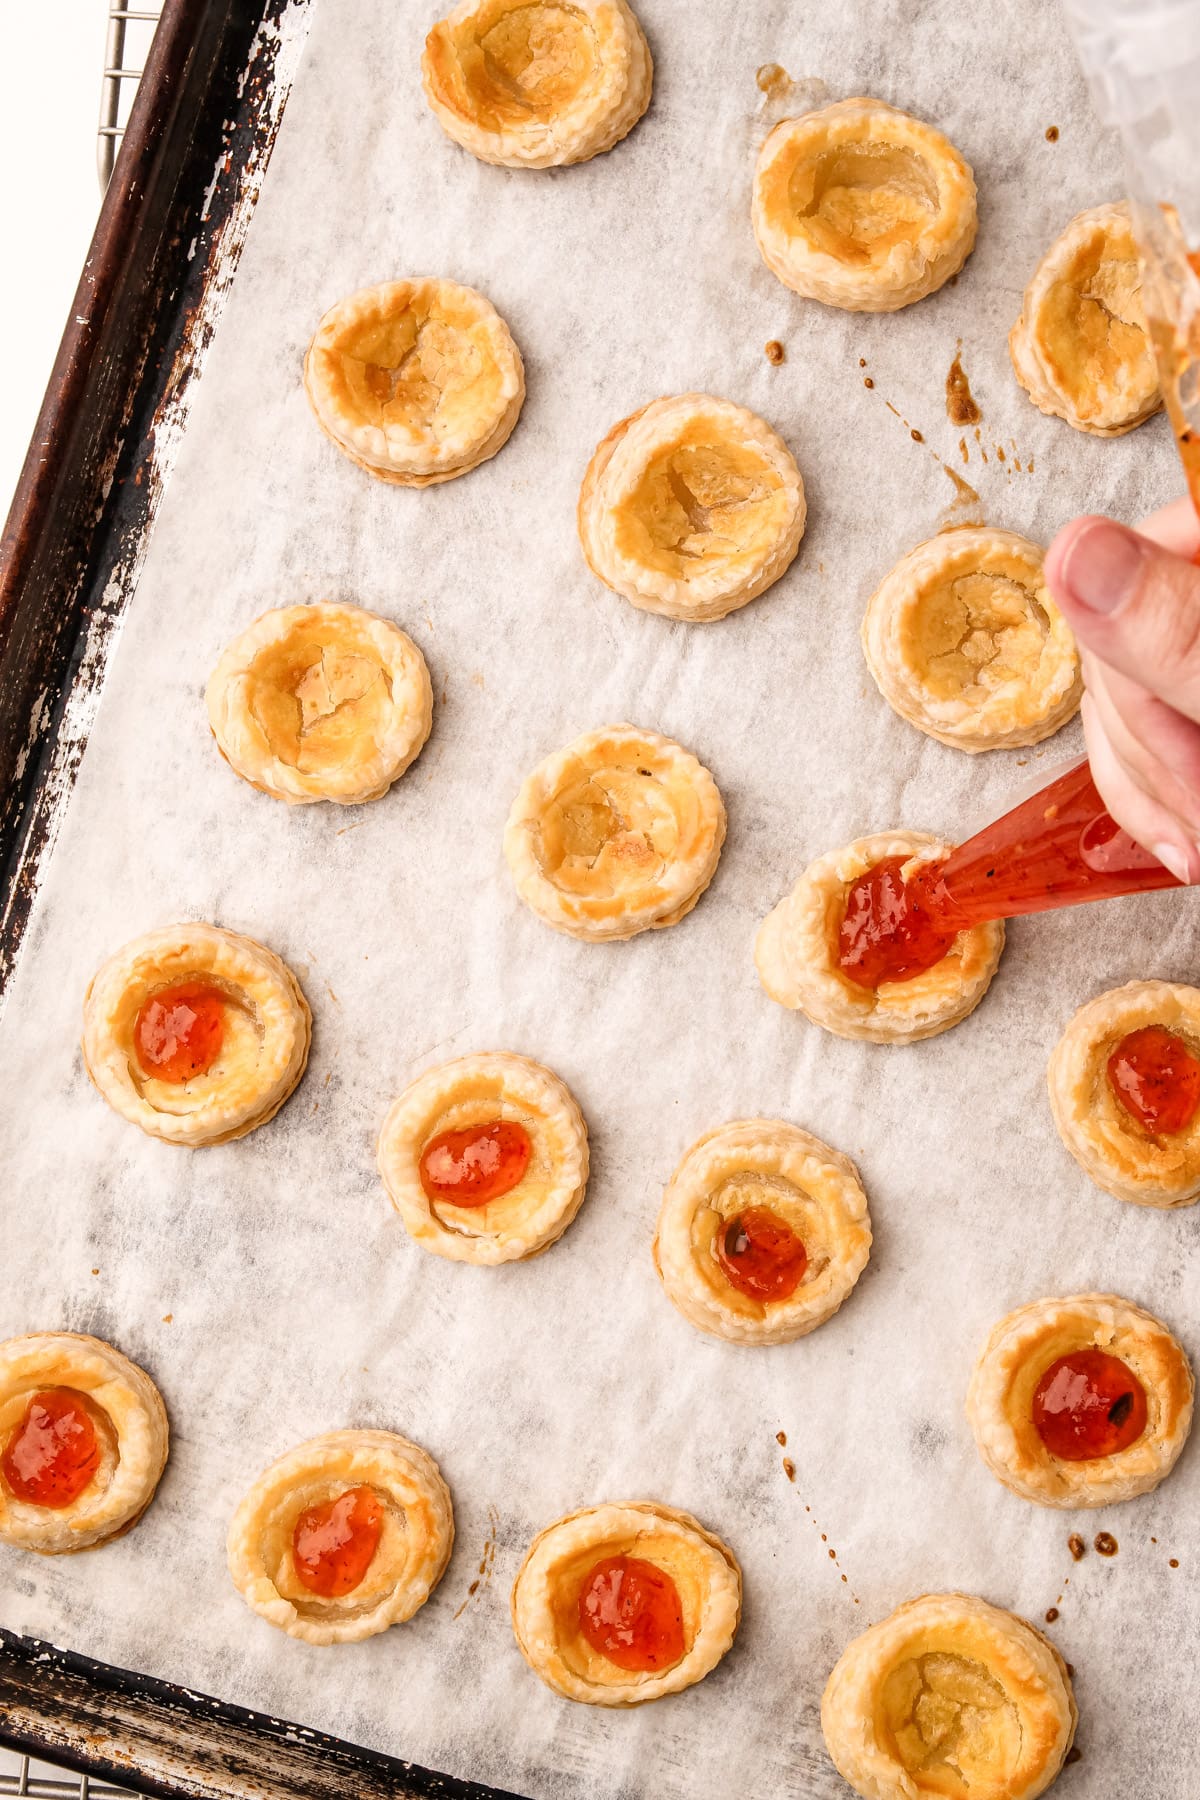
Step 5: Blind bake the puff pastry, push down the puffed-up middles, and fill with pepper jelly.

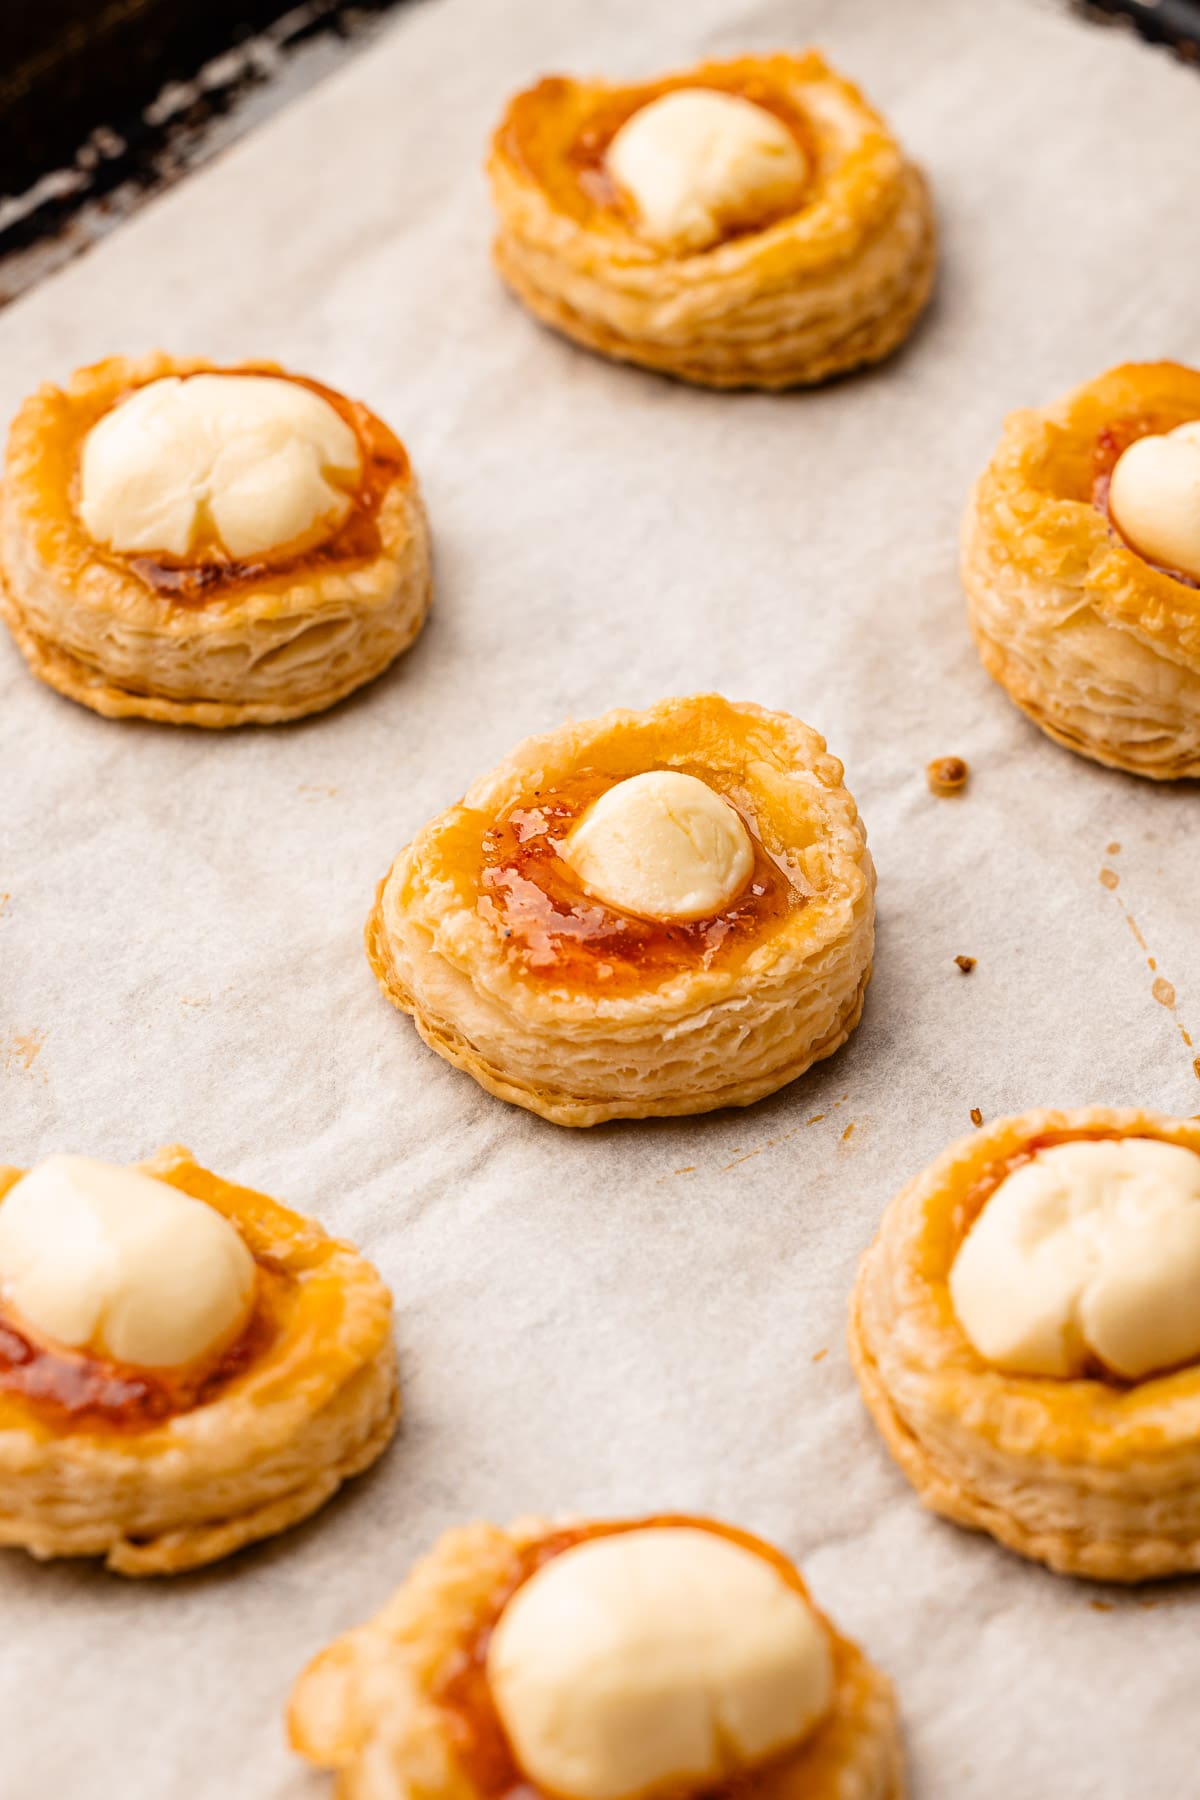
Step 4: Place the cream cheese pieces on top, then return to the oven to finish baking.
You can tell the puff pastry bites are done when the pastry is evenly golden and the cream cheese is starting to puff up.
Baking Tips
Let me start this off by sharing the golden rule for working with puff pastry: if at any point your pastry is getting too warm, simply place it in the refrigerator or freezer to chill. Warm puff pastry is not only sticky and tricky to work with, but it won't bake up well either.
A few more tips:
- Chill the puff pastry before baking! Chilling the pastry before baking makes the puff pastry bake up higher.
- Bake on the middle rack: this ensures the puff pastry bakes throughout but doesn't brown too much on the bottom.
- This recipe requires taking the puff pastry out to add the filling before it is actually done baking. To ensure the best results, work quickly when filling the par-baked puff pastry shells and put it right back in the oven as soon as possible. Making sure all your mise en place is ready before you put the pastry in the oven to par-bake is important.
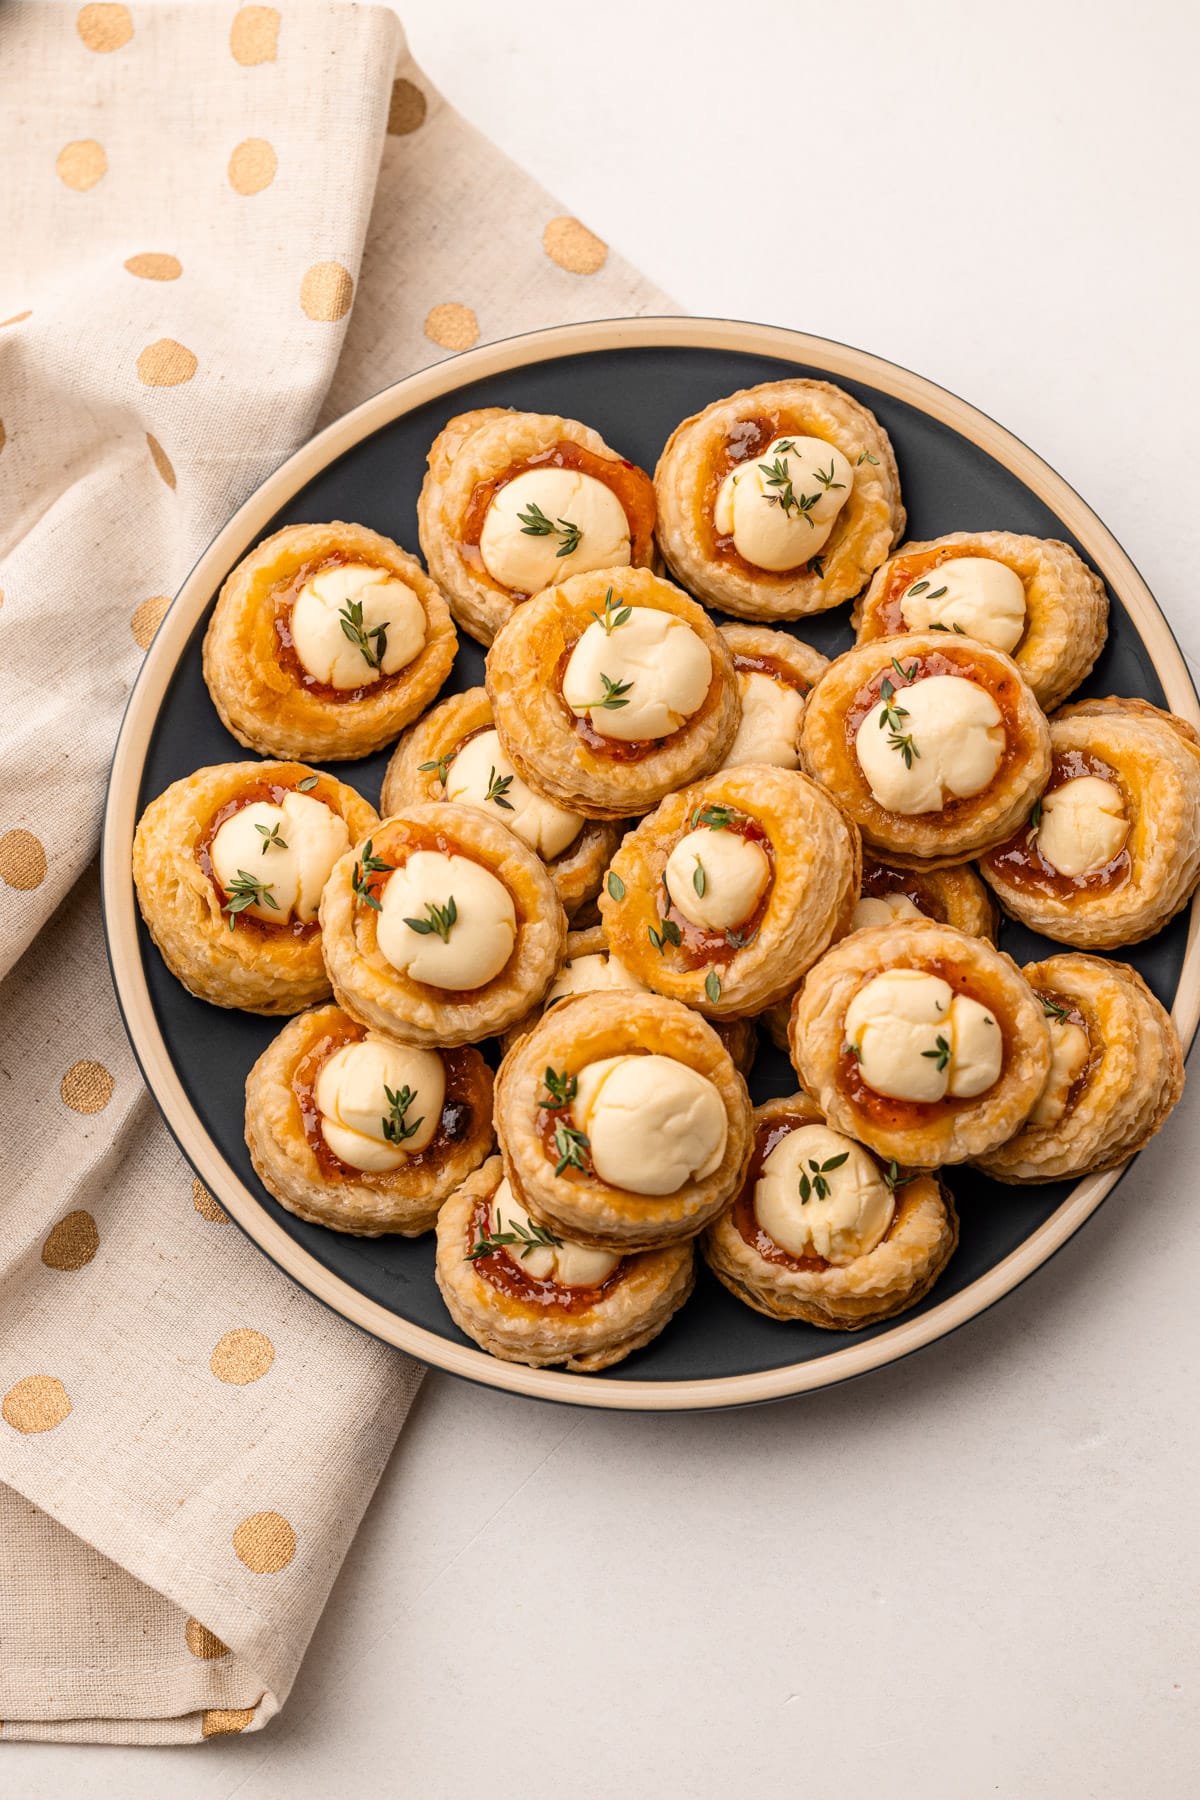
Serving!
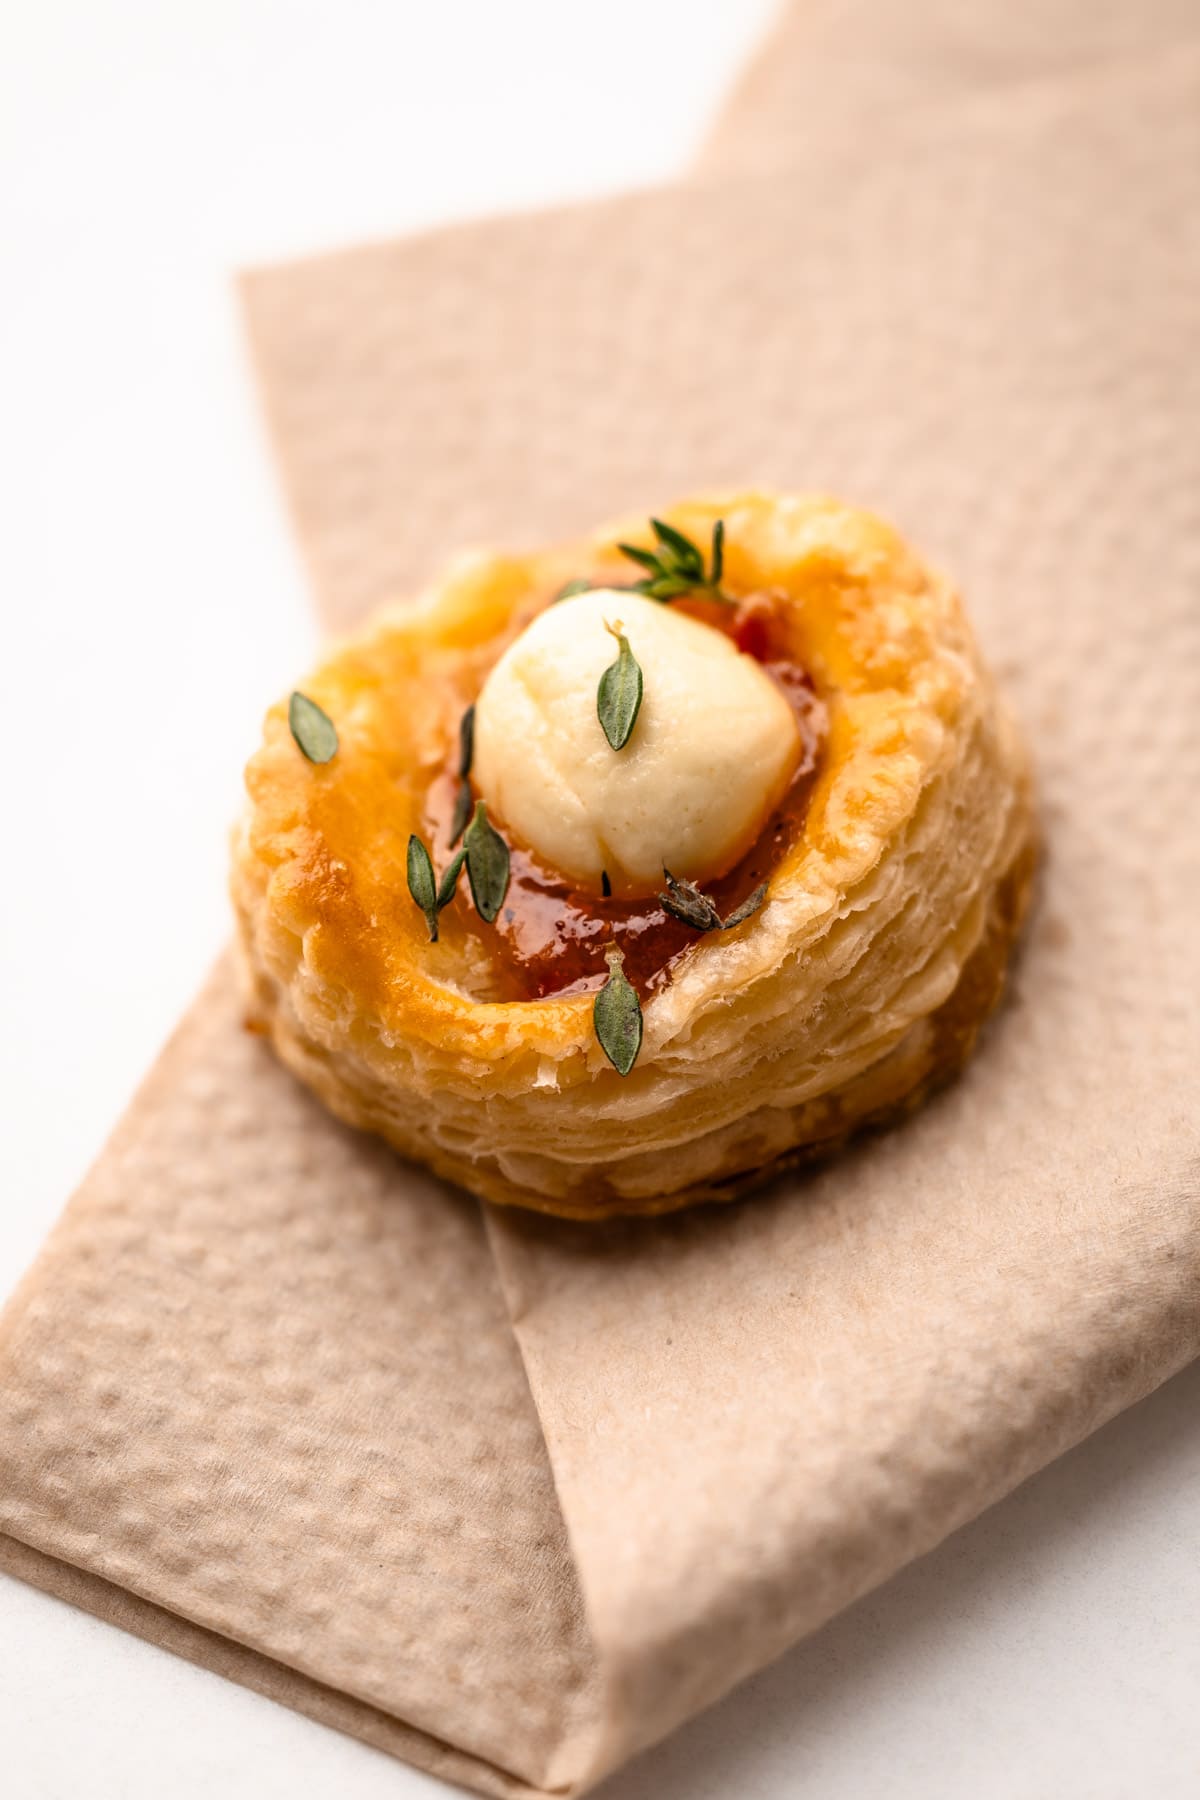
Once the tarts come out of the oven, let them cool briefly. Then, sprinkle them liberally with fresh picked thyme leaves (or minced chives!). These taste best when still warm, but are good at room temperature, too.
These puff pastry bites are at their best when consumed on the day they are made. However, I have stored them in both the refrigerator and freezer. Although they don't taste as good as the fresh ones, once defrosted and reheated, they still taste pretty good! I have had success toasting them from frozen as well as defrosting and then toasting.
More Appetizer Recipes
More Puff Pastry Recipes
I am so honored when you make a recipe from my site! If you make this Cream Cheese + Pepper Jelly Appetizer, please leave a star ⭐️⭐️⭐️⭐️⭐️ rating with your experience! If you have any questions about this recipe, feel free to comment here, and tag me on Instagram!
Full Recipe
Cream Cheese and Pepper Jelly Puff Pastry Bites
Flaky, sweet, spicy, and so delicious, these Cream Cheese and Pepper Jelly Puff Pastry Bites are made with minimal ingredients for the perfect holiday or party appetizer!
- Prep Time: 00:25
- Cook Time: 00:18
- Total Time: 43 minutes
- Yield: 20
- Category: Appetizer
- Method: Bake
- Cuisine: American
Ingredients
- about 16 ounces store-bought puff pastry (or ½ batch rough puff pastry, prepared)
- All-purpose flour (for work surface)
- Egg wash (1 egg whisked with 1 teaspoon of water or cream)
- 1 cup hot pepper jelly
- 4 ounces brick full-fat cream cheese, cold
- 6-10 sprigs of fresh thyme
Instructions
- Prepare rough puff pastry or defrost frozen puff pastry. If you make it, you will only need half a batch. The remaining half can be frozen, or you can double the filling for this recipe and make about 32 bite-sized tarts.
- Preheat the oven to 400ºF and place an oven rack in the middle part of the oven. Line a baking sheet with a piece of parchment paper.
- Roll out the puff pastry on a floured surface (remember, you are only using half of the batch if you've made my rough puff recipe) to about ⅛-inch thickness, or about a 10-by 14-inch rectangle. Or, if you are using store-bought puff pastry, simply remove it from the package according to the instructions and lay it out on a lightly-floured surface so the puff doesn’t stick to the counter.
- Using a 2-¾-inch circle cutter (or similar), stamp out the pastry. You should be able to stamp out at least 16 circles. I don't recommend re-rolling the scraps for this purpose, so place your stamps as closely together as possible and save the scraps for something else.
- Now dock the pastry: Using a 2-inch cutter (or similar), make an indentation in the center of each circle of pastry, but make sure not to press all the way through. Then, take a fork and dock the middle of the pastry to prevent the dough from rising too much during baking.
- Place the pastry on the prepared baking sheet spaced evenly apart. Brush each pastry with a thin layer of egg wash.
- Set aside in the freezer or refrigerator while you prepare the remaining ingredients.
- Using a bench scraper, a knife, or kitchen shears, cut up the cream cheese into ½-inch pieces. Either leave as-is, or for neater looking pastry, roll each piece of cream cheese into a ball. Set aside in the refrigerator until ready to use.
- Place the pepper jelly in a pastry bag or a ziploc bag.
- Remove the puff pastry rounds from the freezer and bake them for 12 minutes, or until the pastry is puffed, but not yet golden.
- Working quickly, using a small cookie cutter or a small spoon, press into the center of the par-baked puff pastry, pushing down the middle if it has puffed up. Pipe about 2 teaspoons of pepper jelly into the center of each puff. Then, place a piece of cream cheese in the middle.
- Return to the oven and bake for an additional 5-8 minutes, or until the pastry is golden and the cream cheese is puffed up.
- Remove the tarts from the oven and let them cool slightly on the baking sheet before transferring to a cooling rack.
- Pick the thyme and sprinkle the leaves over the tarts. Serve warm or at room temperature.
Notes
As a baking site, I will always say homemade puff pastry is better than store-bought. But it's also ok to use store-bought too! Different brands come in various quantities, so you may have more or fewer tarts depending on your brand and your size cutter. But the spirit of the recipe is the same no matter what.
The size of the puff pastry bites can vary, depending on the quantities you wish to bake up. If you want more, use a smaller cutter. During testing, I made as few as 12, and as many as 24 in a single recipe by using a smaller cutter. The baking time will vary slightly, though not by a lot.
These bites are best eaten on the day they are made. Leftovers can be stored in an airtight container in the fridge or freezer and reheated in a toaster oven.
The total time to make this recipe depends on whether or not you make your own puff pastry, so keep that in mind.
Have a question that wasn't answered here or looking for tips? The article above the recipe is always a great first place to start! This Cream Cheese and Pepper Jelly Bites recipe was developed with love, and I always include loads of explanations, tips, step-by-step photos and technical advice shared before the recipe.
Some of the links on this page may be affiliate links. Everyday Pie is a participant in the Amazon Associates Program. As an Amazon Associate I earn from qualifying purchases, at no extra cost to you.



Betty
Sorry about my last comment. I meant video
Betty
TY 4 the recipe & the step-by-step photos. I didnt know what u meant by docking w/fork. So photo was very helpful. Wish u had a bideo, but glad photos R there. Would like 2 make. Have 2 order some of the jelly. Thnx again
C Faulkner
Made this and my alternative version. Brie and my homemade jelly. Brie version won with my guests, however they all liked cream cheese and store bought jelly)