

Create crispy, golden waffle cones at home that add a touch of magic to your ice cream. This Waffle Cone Recipe Guide will walk you through the simple process, including the equipment you need, tips for success, and how to store them.

Want to save this recipe?
Enter your email & I'll send it to your inbox. Plus, get weekly updates from me!
Jump to:
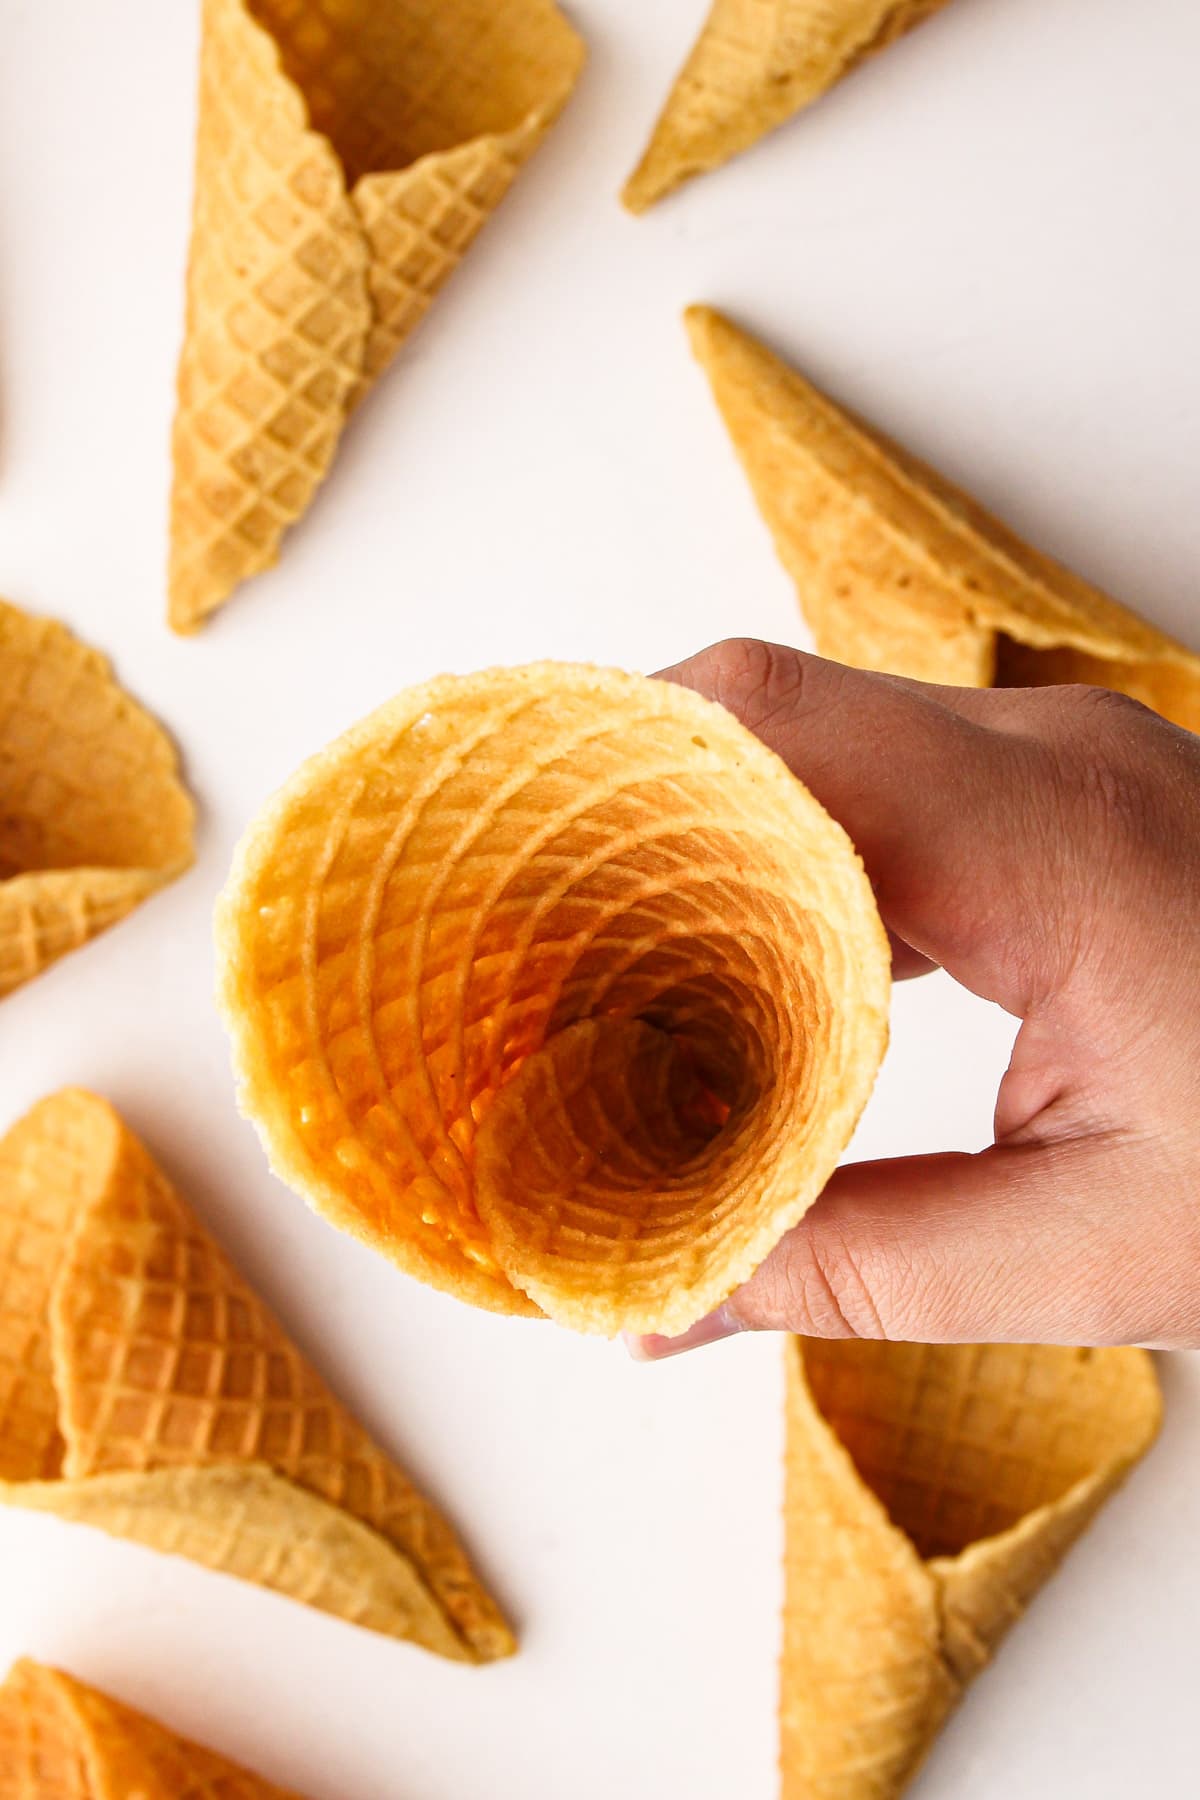
You know that amazing smell when you walk into an ice cream shop that makes its own waffle cones? Well, with this Waffle Cone recipe, you can make your house smell just like that. It's so magical. And even better: you get two treats in one when you eat them with ice cream, too!
These Waffle Cones are simple to make, with a sweet vanilla flavor and a wonderful crispness. The shell is sturdy enough to hold your ice cream, but still tender enough to taste great after the ice cream is all gone.
While this Waffle Cone Tutorial teaches you how to shape the cookies into classic cylindrical edible ice cream holders, you can also use the same recipe to make other shapes, such as "waffle bowls" and "waffle tacos" to make other ice cream treats.
So, let's get to making it, shall we? The text below offers tons of tips and helpful notes, or you can scroll to the bottom to grab the recipe and get started!

Behind the Scenes of the Development Process
This recipe ended up way trickier than I had anticipated. Ultimately, I think it took about 12 rounds of testing to get the correct consistency, strength, and taste I was looking for.
I tested different sugars, numerous quantities of flour and fat, and of course, various ways to enhance the strength of the cone (so it doesn't break as you are scooping the ice cream into it).
This was also my first time using an at-home waffle cone maker, and there is a whole slew of advice I have to share with you on that front because there is definitely a learning curve.
Luckily for you, though, I went through all the trials, and all you have to do is read through this article to have an easy-breezy time making waffle cones at home.
Ingredients Needed
Here is an overview of the ingredients needed for this recipe. The full recipe is listed below in greater detail.
- flour
- eggs
- granulated sugar
- brown sugar (light or dark is fine)
- butter
- salt (I use Diamond Crystal kosher salt in my recipe tests; see note in recipe if you use other salt to ensure the correct quantity)
- vanilla extract
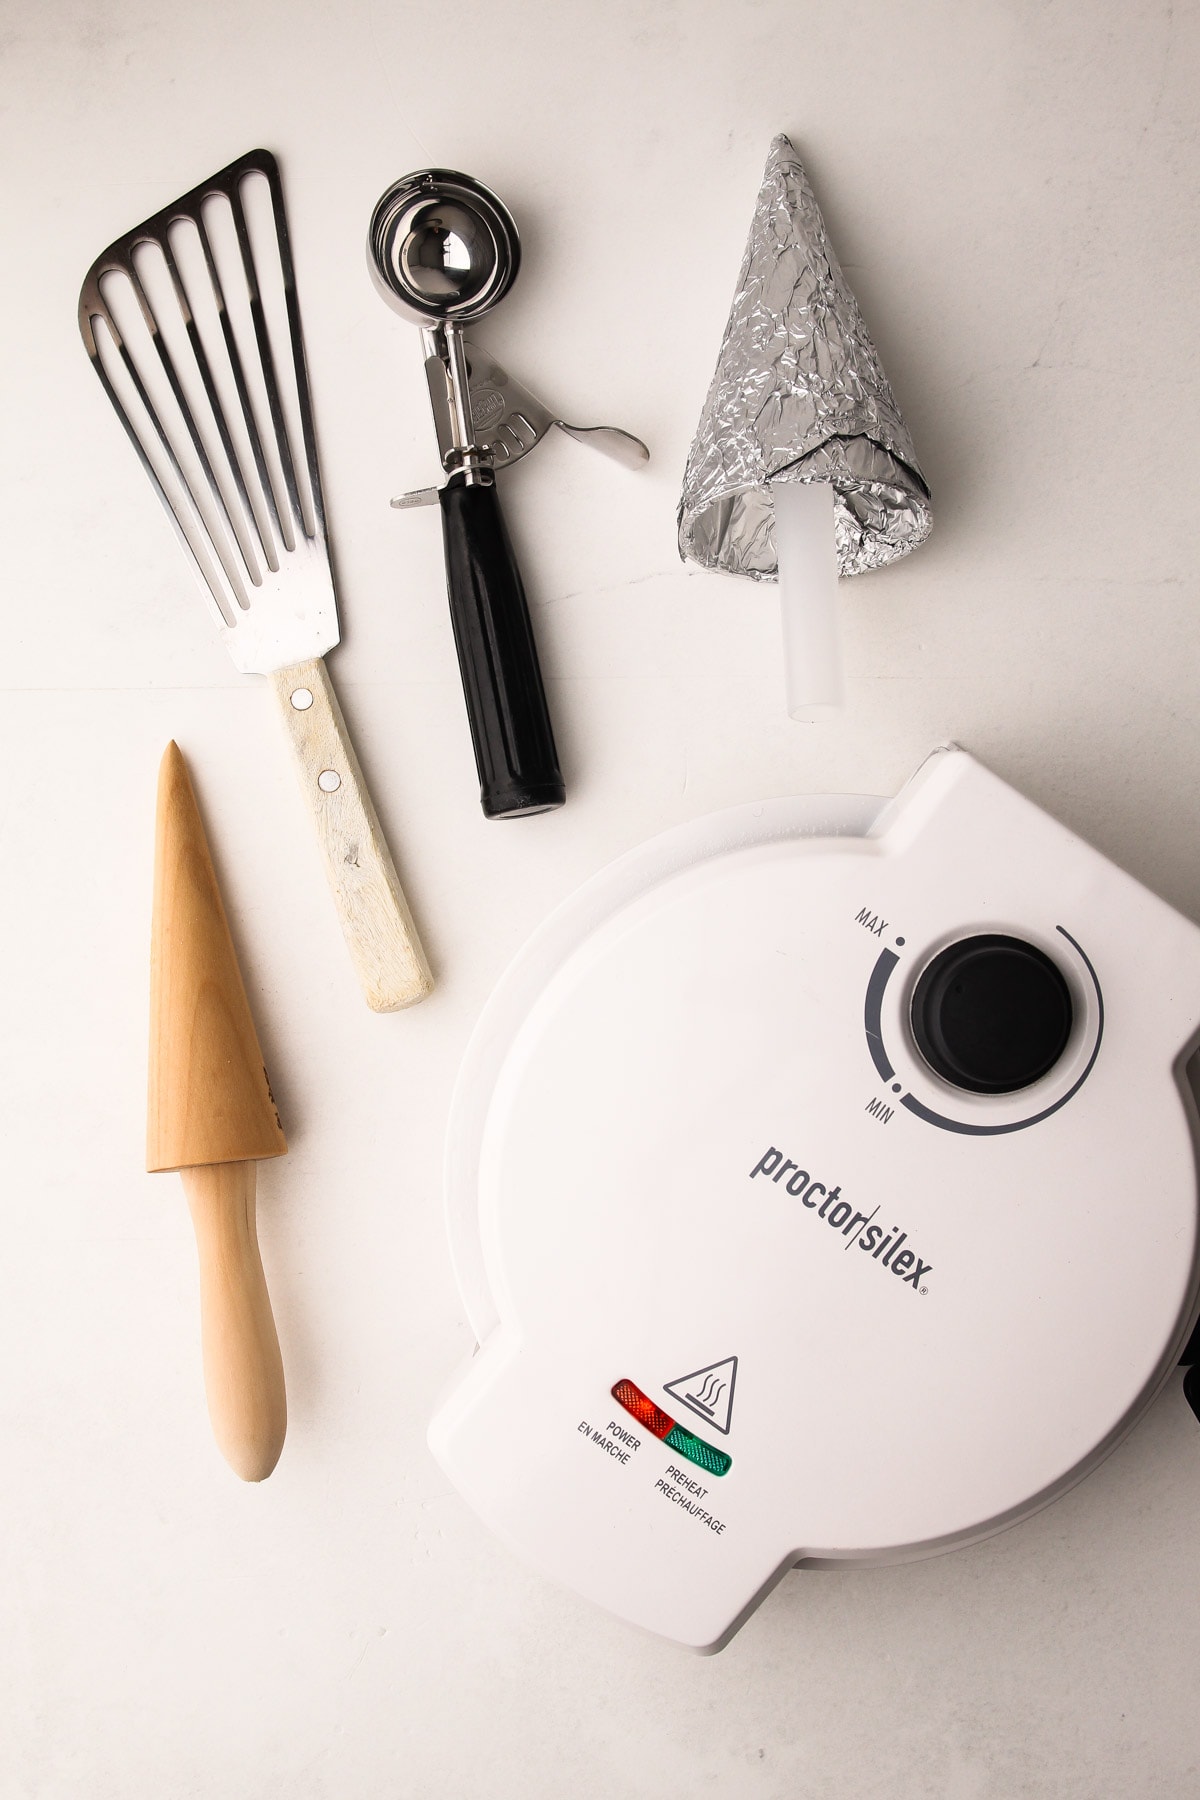
Useful Tools to Make This Recipe
Here is a list of some of the primary tools I use in this recipe. You won't necessarily choose to use them all, but they are exactly what I used. Any links may contain affiliate links.
- waffle cone maker (check out the dedicated section below to learn more about this piece of equipment)
- waffle cone form (this should come with your waffle cone maker)
- thin spatula (to lift the waffle off the iron, I used a metal fish spatula)
- 2 pairs of kitchen-safe gloves (these are useful to protect your hands from getting burned when rolling the waffle cone)
- 1-ounce cookie scoop (I use the size #30 black disher from Winco)
- parchment paper
- heat-safe cutting board
- cooling rack
- kitchen essentials: scale, whisk, bowl, measuring cups/spoons
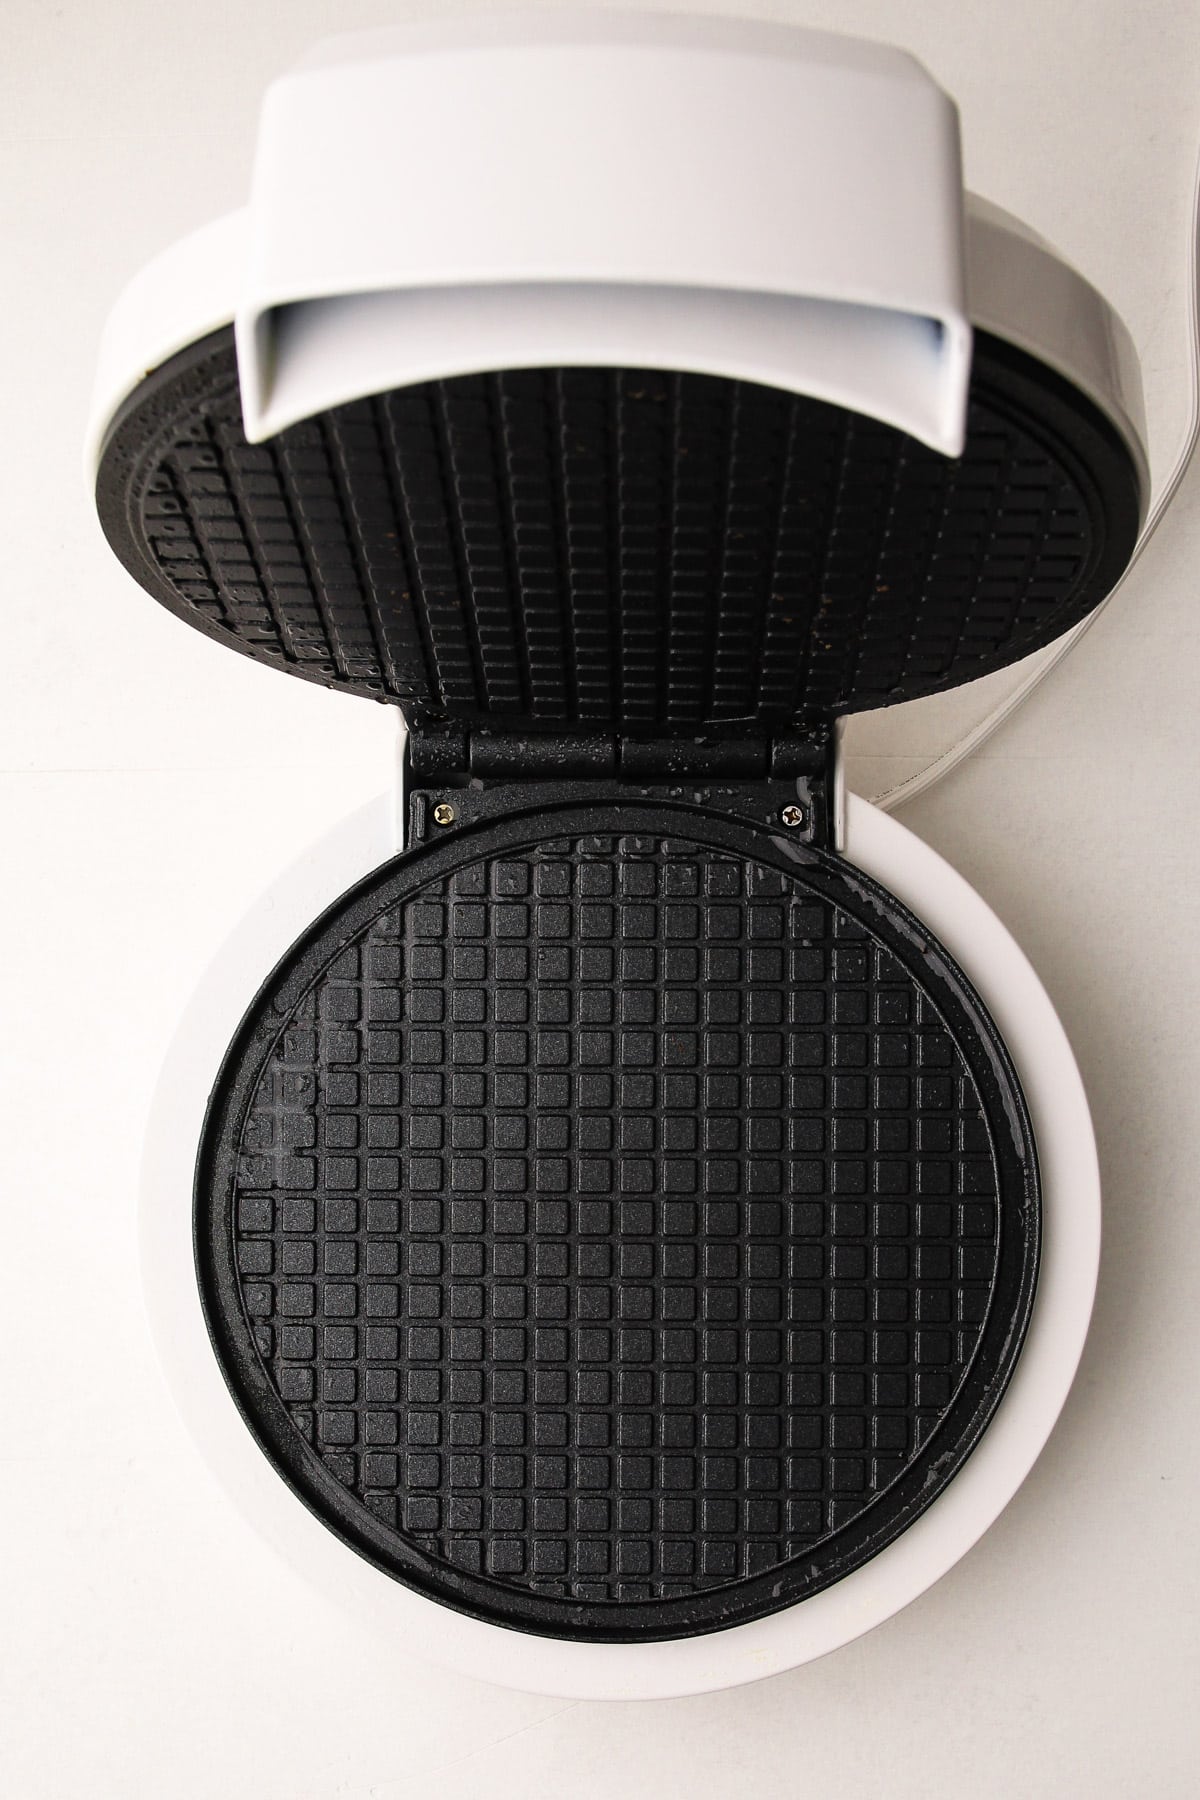
Is a Waffle Cone Maker Necessary?
Yes! At least with this recipe. If I'm going to go through the trouble of making waffle cones from scratch, I actually want them to look and feel like waffle cones, and not some hacked version. Plus, I want to try making other recipes on it in the future, such as pizzelle, no-fry cannoli shells, stroopwafel and hopefully other treats, too.
What I found is that the at-home waffle cone makers are relatively inexpensive when compared to the commercial ones, which can only mean one thing: they aren't going to be of great quality. I've only ever used the one at-home waffle cone maker that I purchased, so I can't speak to others and can't really say whether mine is a good one or not because I have nothing to compare it to.
But my waffle cone maker was good enough to get the job done, especially after getting the hang of how to use the machine.


Recipe Overview
Here are is a brief overview of the recipe (the full recipe is at the bottom of the article):
- Preheat the waffle cone maker
- Mix together the batter and let it rest 10 minutes
- Cook the waffles
- Immediately shape into cones
- Cool in the cone form until they're stable
- Let cool, then either use immediately or transfer to airtight storage
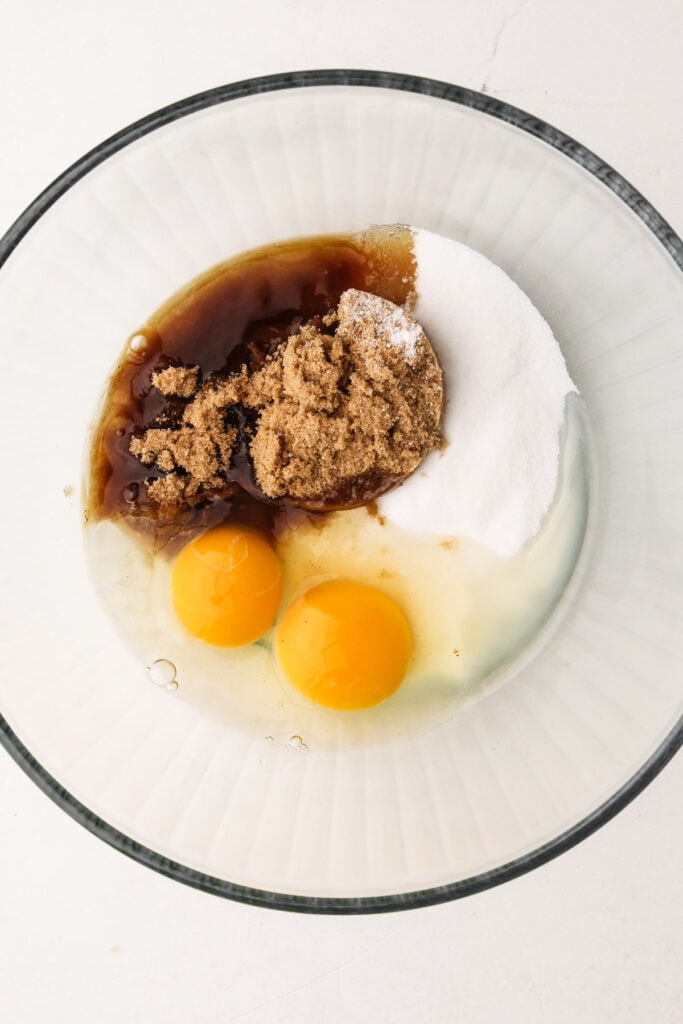

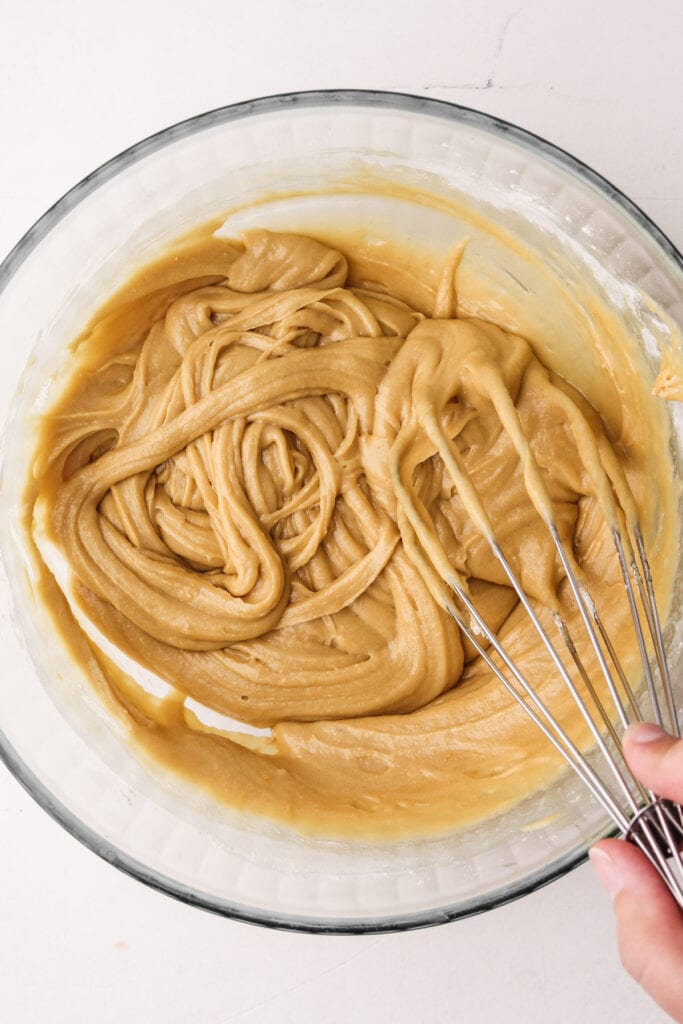
Making the Batter
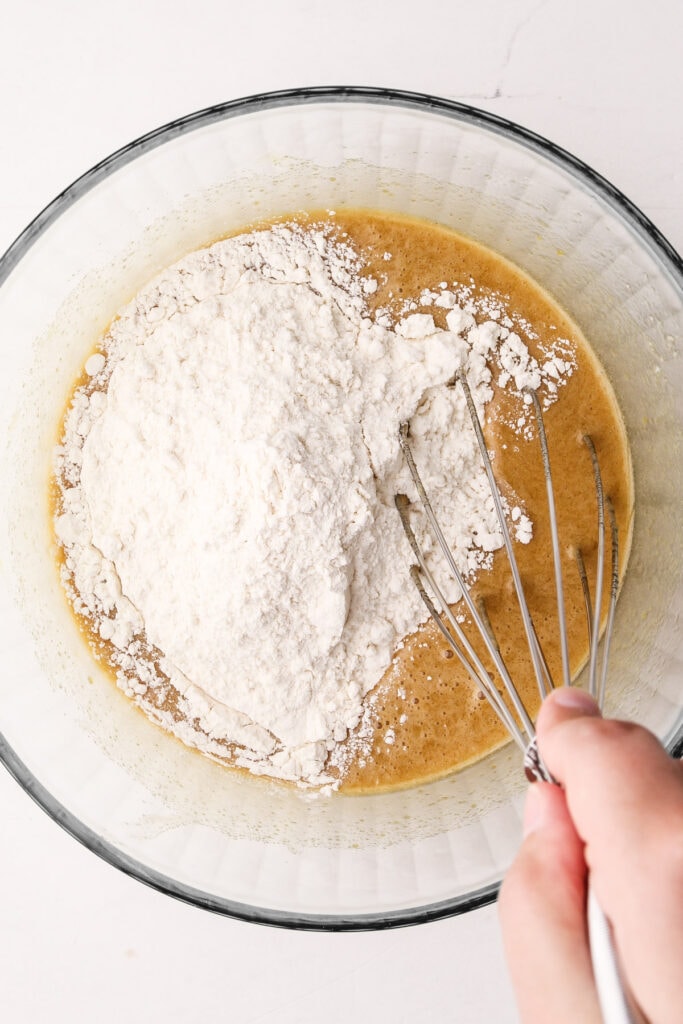
Making the batter for these cones is a simple process that only requires a bowl and a whisk. It's crucial to ensure that the batter is thoroughly mixed to build up gluten strength, which will allow the cones to hold ice cream without collapsing. Don't worry about overmixing, as it's necessary here to achieve the desired outcome. So feel free to use the whisk throughout the entire process.
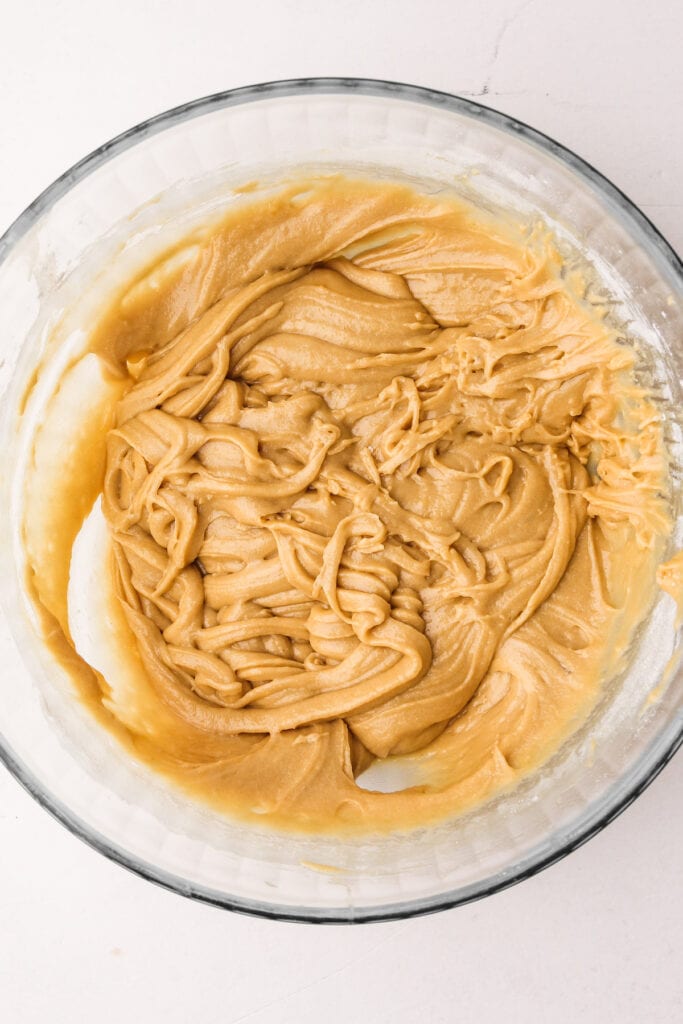
The batter should rest for about 10 minutes at room temperature. This allows the flour to fully hydrate and the sugar to liquefy, resulting in waffles that cook up nicely and have some flexibility for shaping.
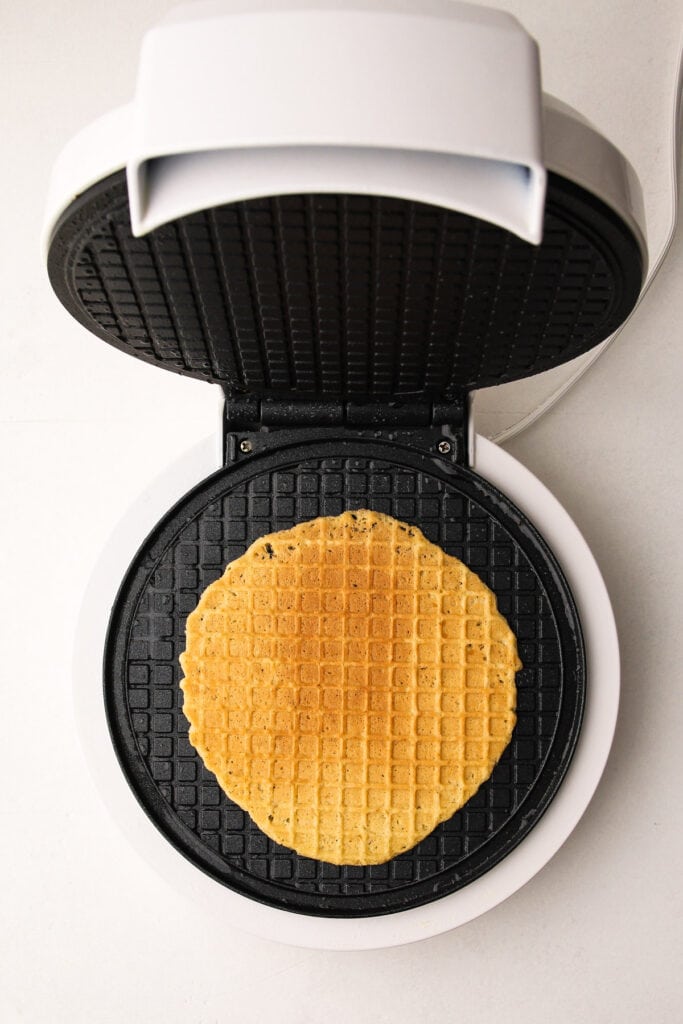
Cooking the Waffle Cones
Once the batter is mixed and rested it's time to cook! At this point the waffle cone maker should have been preheated for a minimum for 30 minutes, but I find the most success with my waffle iron if it's been preheated for closer to 60 minutes.
Follow the instructions that come with your waffle cone iron in regard to exact cooking time and procedure. However, here is what I do:
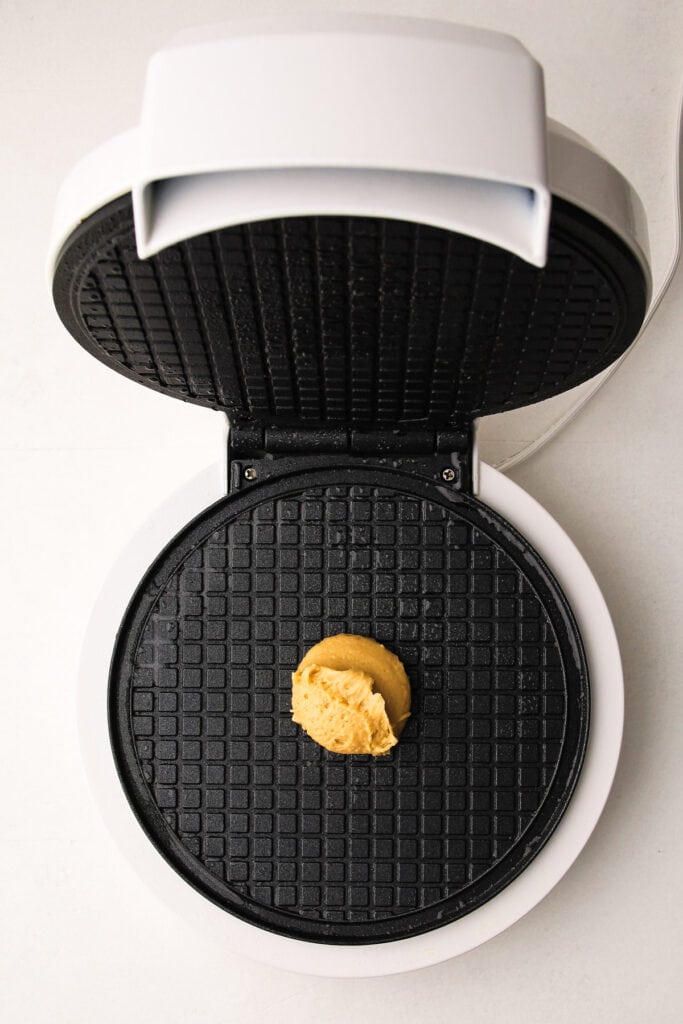
- Lightly spray the waffle iron (I used and recommend 100% avocado oil spray).
- Use a 1-ounce cookie scoop (I use the size #30 black disher from Winco) and place it in the center of the waffle iron
- Close the waffle cone iron and gently press down to ensure the batter spreads out
- Cook for about 2 minutes. Cooking it too little with result in a soft / light waffle and cooking it too long will result in a burnt waffle that's hard to form (it will crack). So aim for somewhere in the middle.
- Immediately remove the waffle to shape.
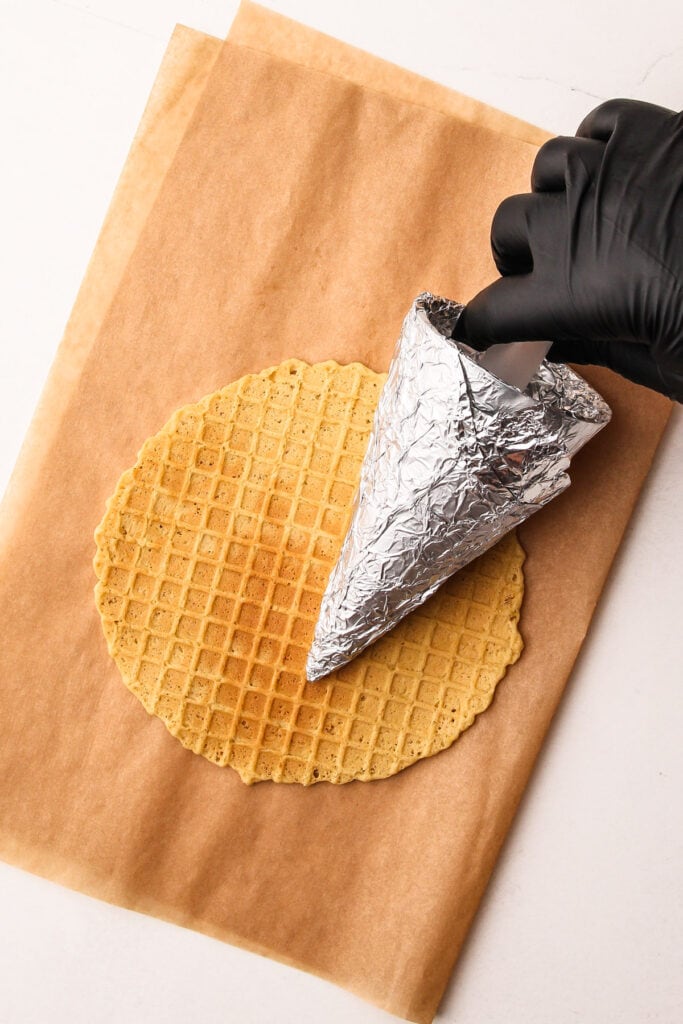


Shaping the Cones
There is no denying that shaping the waffle cones with a cone form by hand is a skill. Like anything, practice makes progress.
Here are some tips to have success as soon as possible:
- The plastic cone form that comes with the waffle maker can be quite slippery and challenging to shape the waffle on. A solution that worked for me was wrapping the form in aluminum foil to create a less slippery surface. Wooden cone forms are much easier to work with, but they are a lot smaller than a traditional waffle cone size.
- Move quickly, the waffle is only malleable when it's hot. Once the sugar starts to set, it will crack instead of bending.
- Many restaurant cooks talk about people having "asbestos hands" and being able to touch very hot things without getting burned. Unfortunately, I am not one of those people and am quite sensitive to heat. When dealing with waffle cones, I found it especially difficult to touch them with my bare hands. To avoid discomfort, I started using kitchen-safe gloves and even doubled up on them for extra protection. This allowed me to handle the freshly made waffles right off the griddle without any issues.
- Put the cone form off center and slightly off the edge of the waffle, and then roll. Take care to pinch the end well at the bottom. It matters less what the top of the cone looks like and it's more important to focus on making sure the tip of the cone is closed.
- Let the cone set on the form until it's hardened. This happens quickly, within a minute or two.
- For any cones that do end up with a gap at the bottom, toss a chocolate chip inside of it when it's still warm. It will melt and "block" up the bottom so no ice cream drips through prematurely when using the cone.

Storing Them
Homemade waffle cones are susceptible to getting soft, and it happens quickly. Once they are cooled down, either use them immediately for ice cream or store them.
Ice cream cones should be stored at cool room temperature in an airtight container. I store them stacked together in a plastic storage bag.
Waffle cones will last for quite a while, at least a week, but likely much longer. Just be careful to make sure they don't get too warm or take on moisture (if they do, they will become misshapen and soft).
What to Do with Leftover / Broken Waffle Cones
Waffle cones are honestly just cookies. Which means there are lots of uses for leftover/broken/not-perfect waffle cones. They can be used as a garnish on ice cream. They can be ground up and used as a pie crust (bet it would be delicious in this Creamsicle Pie). They can be coated in chocolate for a chocolate cookie! Or, just snack on them.

Ice Cream Recipes to Pair with Waffle Cones
- Best Ever Chocolate Ice Cream
- Blueberry Ice Cream
- Peach Ice Cream
- Strawberry Ice Cream
- Vanilla Bean Ice Cream
I am so honored when you make a recipe from my site! If you make these Homemade Waffle Cones, please leave a comment and a star rating with your experience! If you have any questions about this recipe, feel free to comment here, too!
PrintFull Recipe
How to Make Waffle Cones

Create crispy, golden waffle cones at home that add a touch of magic to your ice cream.
- Prep Time: 00:10
- Pre-heat Time: 00:30
- Cook Time: 00:24
- Total Time: 1 hour 4 minutes
- Yield: About 12
Ingredients
- 2 large eggs
- ½ cup (100 grams) granulated sugar
- ⅓ cup (70 grams) brown sugar, packed
- 1 teaspoon (3 grams) Diamond Crystal kosher salt (see note)
- 1 teaspoon vanilla extract
- 4 tablespoons unsalted butter, melted
- 1-½ cups (180 grams) all-purpose flour
Instructions
- Preheat the waffle cone iron to the highest setting 30-60 minutes before you plan to make the waffle cones.
- Set up a shaping station with kitchen-safe gloves, a heat-safe surface such as a cutting board with a piece of parchment paper on top, and the waffle cone form.
- In a medium bowl, vigorously whisk together the eggs, granulated sugar, brown sugar, and salt for about 1 minute. Whisk in the vanilla extract and melted butter, then the flour. Do not be afraid of overmixing, because it is necessary to build up some gluten for strength in the cones.
- Once fully mixed together, let the batter sit for about 10 minutes.
- Put on gloves, if using, as the waffle needs to be shaped immediately after it is cooked.
- Lightly spray or brush neutral oil onto the preheated waffle iron.
- Using a 1-ounce portion scoop (about 2 tablespoons in size), add the batter to the center of the waffle iron and firmly close the cover.
- Cook for about 2 minutes, until the waffle is lightly golden. Cooking and heating temperature will vary, depending on your specific machine. Adjust the heat of the iron and the cooking time as needed.
- Open the cover, pick up the waffle with a heat-safe spatula, and immediately place it on the prepared work surface. Working quickly, set the waffle cone form off-center of the waffle with the tip about ½-inch from the bottom edge. Grab the outer edge of the waffle and roll it over the form. Once the bottom tip forms, press it firmly to create a seal. Continue rolling the waffle around the form, keeping it as tight as possible until the cone has been formed. Hold it in place, seam side down, for about 30 seconds, or until it is able to maintain it’s own shape.
- Keep the form inside the cone for at least 2 minutes. Once cool, pull the cone form out. Shaping the cone is a skill that will come with time, so keep practicing and improvising with the technique.
- Repeat the shaping process with all of the remaining batter.
- Cool the waffle cones on a rack at room temperature.
- Once cool, they are highly susceptible to humidity. Transfer them to an airtight storage bag, stacking the waffle cones inside of each other for stability. Store in a cool, dry place for 1-2 weeks.
Notes
Have a question or looking for tips? The text written above the recipe is always a great first place to start! This Waffle Cone Recipe was developed with love, and I always include loads of explanations, tips, step-by-step photos and technical advice shared before the recipe.
Weighing your flour is the most accurate way to measure. If you aren't going to weigh it, make sure to spoon it into the cup, and then level it off. If you scoop the flour out with the measuring cup and then level, it could change the outcome of the final product.
This recipe was tested using Diamond Crystal coarse kosher salt. If you use Morton's kosher salt or fine salt, decrease by about half for volume, or use the same amount by weight.
Get to know your waffle cone maker. The time it takes to cook the waffle will vary, as will the heat setting. For my waffle cone maker, I cooked it on the highest setting for 2 minutes. It was also essential to preheat my waffle cone maker at least an hour before using. I know it feels excessive, but it resulted in the most even waffle cones.
Got broken or not perfect cones? Check out the post above for some ideas on how to use them!
Some of the links on this page may be affiliate links. Everyday Pie is a participant in the Amazon Associates Program. As an Amazon Associate I earn from qualifying purchases, at no extra cost to you.
Enid
Loved it! We're hooked